

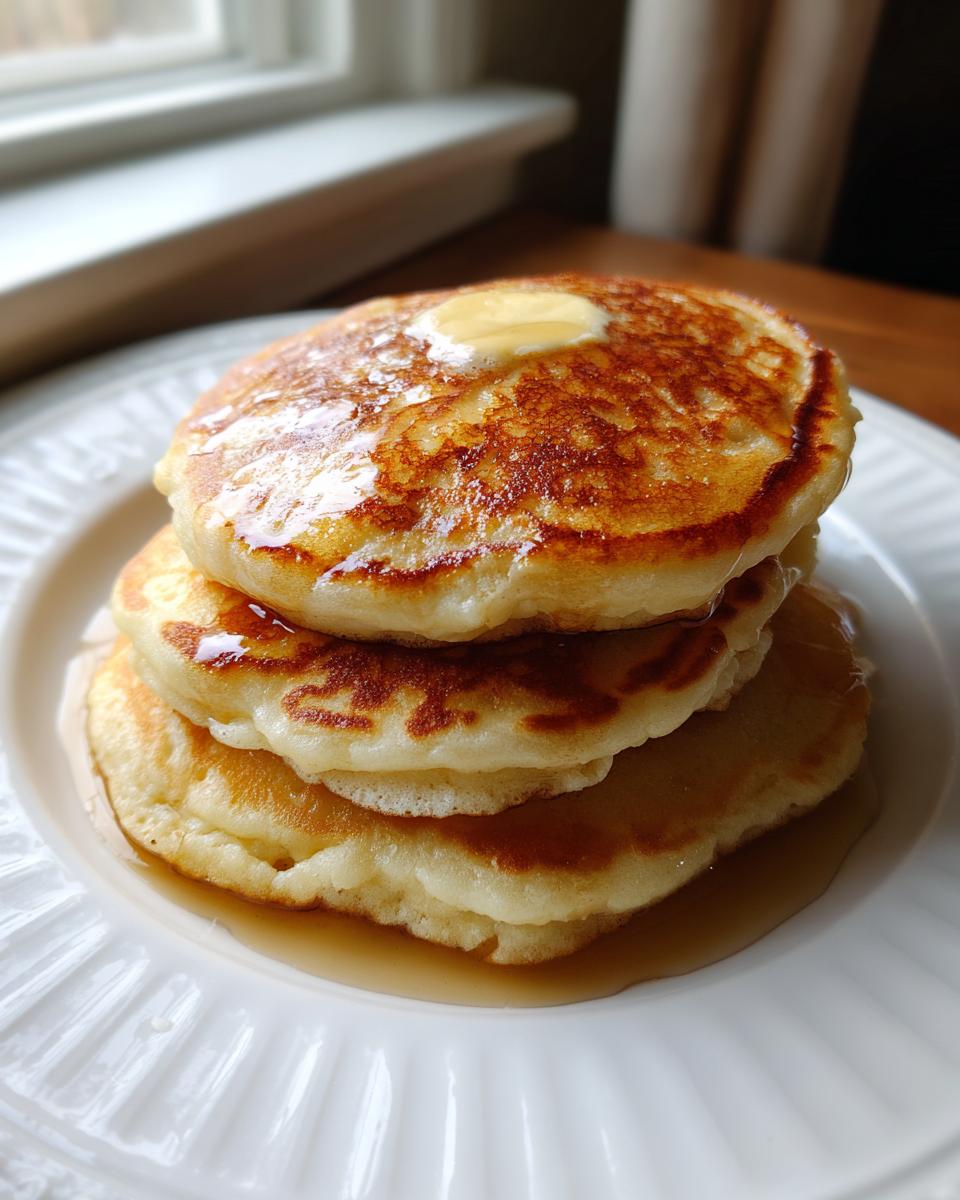
That glorious slow Saturday morning feeling? There’s nothing better than when it smells like warm butter and maple syrup floating from the kitchen. I know life gets busy fast, and sometimes those big, towering stacks of truly fluffy pancakes seem like something reserved only for diners or vacation. Well, I’m here to tell you that’s simply not true! This recipe for old fashioned pancakes is my go-to, mixing simple pantry staples to nail that perfect, cozy, childhood texture. My background, coming from a busy marketing career, was all about finding joy without wasting time, and this recipe honors that tradition perfectly. If you want to know more about why I focus on simple, delicious meals, you can check out my mission on the About page.
If you’re ready to reclaim your weekend breakfast and serve up something genuinely delicious without too much fuss, you’re in the right spot. We’re keeping it classic, keeping it simple, and making sure you get that perfect lift every single time.
- Why You Will Make These Old Fashioned Pancakes Every Weekend
- Ingredients for Perfect Old Fashioned Pancakes
- The Secret to Fluffy Pancake Recipe: Mixing the Easy Pancake Batter
- Step-by-Step Instructions for Griddling Old Fashioned Pancakes
- Serving Suggestions for Your Homemade Pancakes
- Make-Ahead and Storage Tips for Old Fashioned Pancakes
- Frequently Asked Questions About Classic Pancakes
- Estimated Nutrition for Your Classic Pancakes
- Share Your Weekend Breakfast Success
- Estimated Nutrition for Your Classic Pancakes
- Share Your Weekend Breakfast Success
Why You Will Make These Old Fashioned Pancakes Every Weekend
Seriously, if you try this recipe just once, you’ll probably stop buying the box mix for good. These aren’t just pancakes; they are the real deal. Here is why this fluffy pancake recipe keeps showing up on my weekend menu:
- They are incredibly thick and fluffy—we are talking serious height here!
- You probably already have every single ingredient in your pantry right now, no special shopping trip required.
- The mixing process is so fast, you can have a stack coming off the griddle in under 25 minutes total.
- They achieve that perfect golden exterior that reminds you of the best diner style pancakes.
- This is a fool-proof method that minimizes scrambling, even when you are half-asleep.
- It creates classic pancakes that taste exactly like they should—comfort food perfection.
Ingredients for Perfect Old Fashioned Pancakes
The beauty of these classic pancakes is that they rely 100% on pantry staples—no strange sourcing required! I’ve written out the exact amounts I use every time to get that perfect fluffy structure. You’ll notice I specified melted butter; that little bit of extra liquid fat helps keep the final product tender.
Here is the lineup you need for about eight servings of amazing homemade pancakes:
- 1 1/2 cups all-purpose flour (make sure it’s fresh!)
- 3 1/2 teaspoons baking powder (this is key for the lift!)
- 1 teaspoon salt, just a regular teaspoon
- 1 tablespoon white sugar, for just a hint of sweetness
- 1 1/4 cups milk (or our special substitute, see below)
- 1 large egg, room temperature is definitely best if you remember
- 3 tablespoons butter, melted (don’t substitute this)
Ingredient Notes and Buttermilk Swaps for Your Easy Pancake Batter
Now, let’s talk about the milk. Sometimes I have buttermilk on hand, and sometimes I don’t. Honestly, you don’t need a special trip!
If you are fresh out of buttermilk, don’t stress. We can whip up an instant replacement for your easy pancake batter right in the measuring cup. Simply take your 1 1/4 cups of regular milk, stir in 1 tablespoon of white vinegar or fresh lemon juice. Let that sit quietly for about five minutes.
When you come back, it will look slightly curdled—that’s perfect! This process mimics the sour tang of buttermilk. The acidity in that mix reacts with our baking powder, which is why we get such amazing results even when making no buttermilk pancakes. It’s an old trick that just works beautifully.
The Secret to Fluffy Pancake Recipe: Mixing the Easy Pancake Batter
This is, hands down, the single most important part of making our old fashioned pancakes. Forget the ingredients for a second; it’s all about how you combine them to get that truly satisfying lift in your fluffy pancake recipe. We are aiming for easy pancake batter that looks a little messy!
When you add the wet ingredients to the dry, you need patience. Mix only until the flour streaks disappear. I mean it—stop mixing! If you look closely, you should still see little pockets of dry flour and plenty of lumps. Those lumps are the secret ingredient to a light, billowy structure.
Expert Tips for Mixing Classic Pancakes
Oh, I learned this the hard way a long time ago! Back when I was first trying to make pancakes that tasted like the ones from my childhood, I decided to whisk the batter until it was perfectly smooth and glossy in the bowl. Talk about disappointing! What came out on the griddle was flat, rubbery, and honestly, kind of sad. They were tough!
That shiny smoothness I achieved? That’s gluten developing. Gluten is wonderful for bread, but it’s the enemy of soft, airy pancakes. When you overmix, you build those thick, chewy strands, and that’s why those flat pancakes weren’t fun to eat. Trust me on this one: stop stirring when it looks lumpy. Those lumps will bake right out!
Step-by-Step Instructions for Griddling Old Fashioned Pancakes
Once you’ve made your slightly lumpy, beautiful batter, it’s time for the fun part: watching them puff up on the griddle! Getting these old fashioned pancakes right means paying attention to heat more than anything else. You want medium-high heat for your pan, whether that’s a big non-stick skillet or a cast-iron griddle—don’t be shy with the heat!
Once you’re ready, pour about 1/4 cup of batter for each pancake. Don’t try to spread it out, just let it settle. Now, sit tight! Cooking time is crucial here. You are waiting for two clear visual cues before you even think about reaching for the spatula. The first is when surface bubbles start popping and holding their shape. The second is when the edges of the pancake look decidedly dry and matte, not wet.
Once those signs appear, flip quickly and watch the magic happen. The second side cooks much faster, usually just a minute or two until it’s gorgeously golden brown. If you’re making a huge batch for the family, slide the finished ones onto a baking sheet and keep them warm in a low oven while you finish the rest.
Achieving Diner Style Pancakes: Griddle Temperature Control
Temperature control is the maker or breaker for beautiful diner style pancakes. If your griddle isn’t hot enough—if it’s too cold—the batter just spreads thinly, soaks up the fat, and you end up with pale, sad, flat discs. You want the heat to cook the inside quickly while creating that gorgeous crust outside.
So, how do you check if it’s ready when you don’t have a fancy thermometer? Simple: the water test! Flick a few drops of water onto the hot cooking surface. If the drops immediately sizzle and evaporate, maybe even dance around a little before disappearing, you’re perfect!
If the water just sits there, waiting for you to pour the batter, the pan is cold. If the water vanishes instantly with a sharp hiss that makes you jump, the pan is way too hot, and you’ll burn the outside before the fluffy interior even dares to set. Adjust that dial to medium-high and wait for that happy sizzle before pouring your first batch of homemade pancakes.
Serving Suggestions for Your Homemade Pancakes
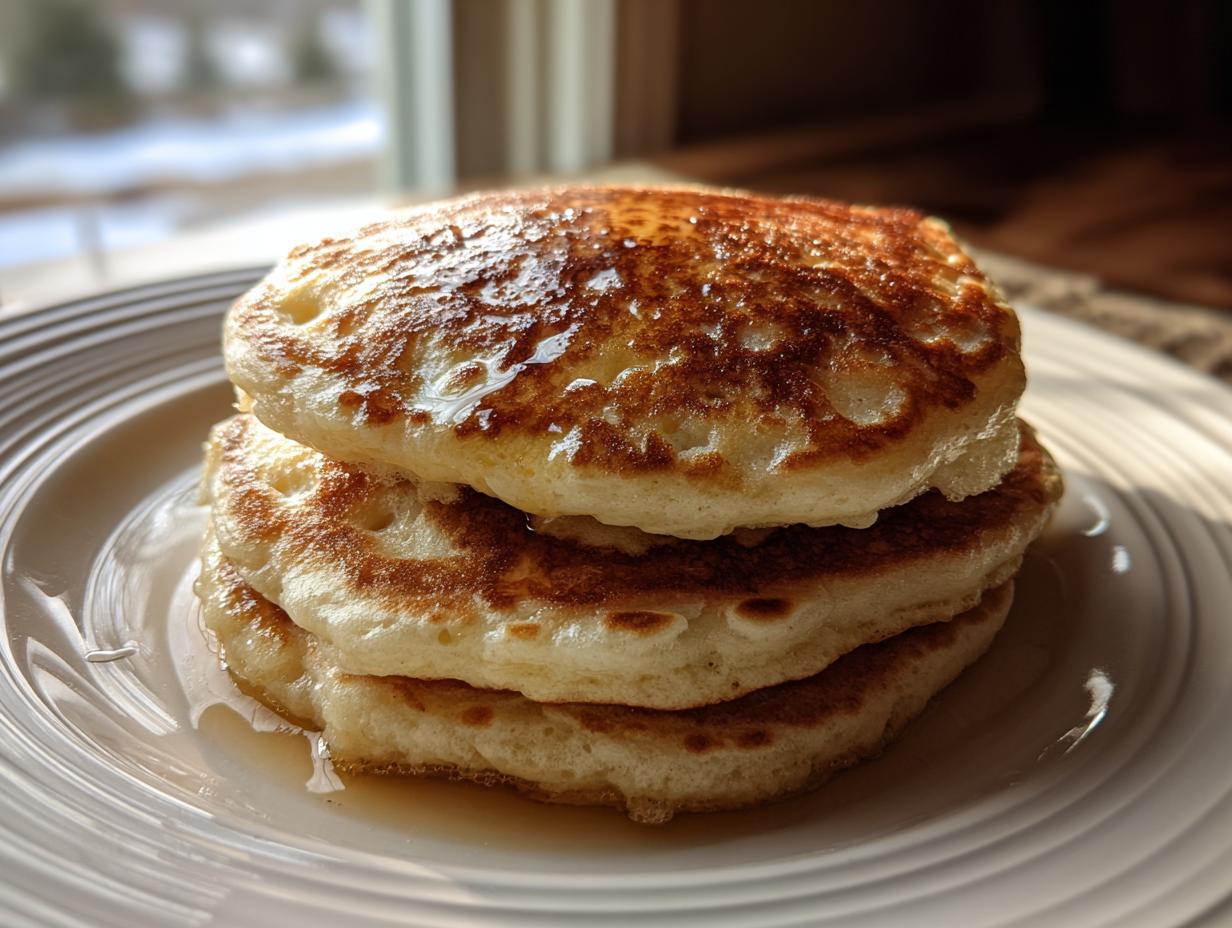
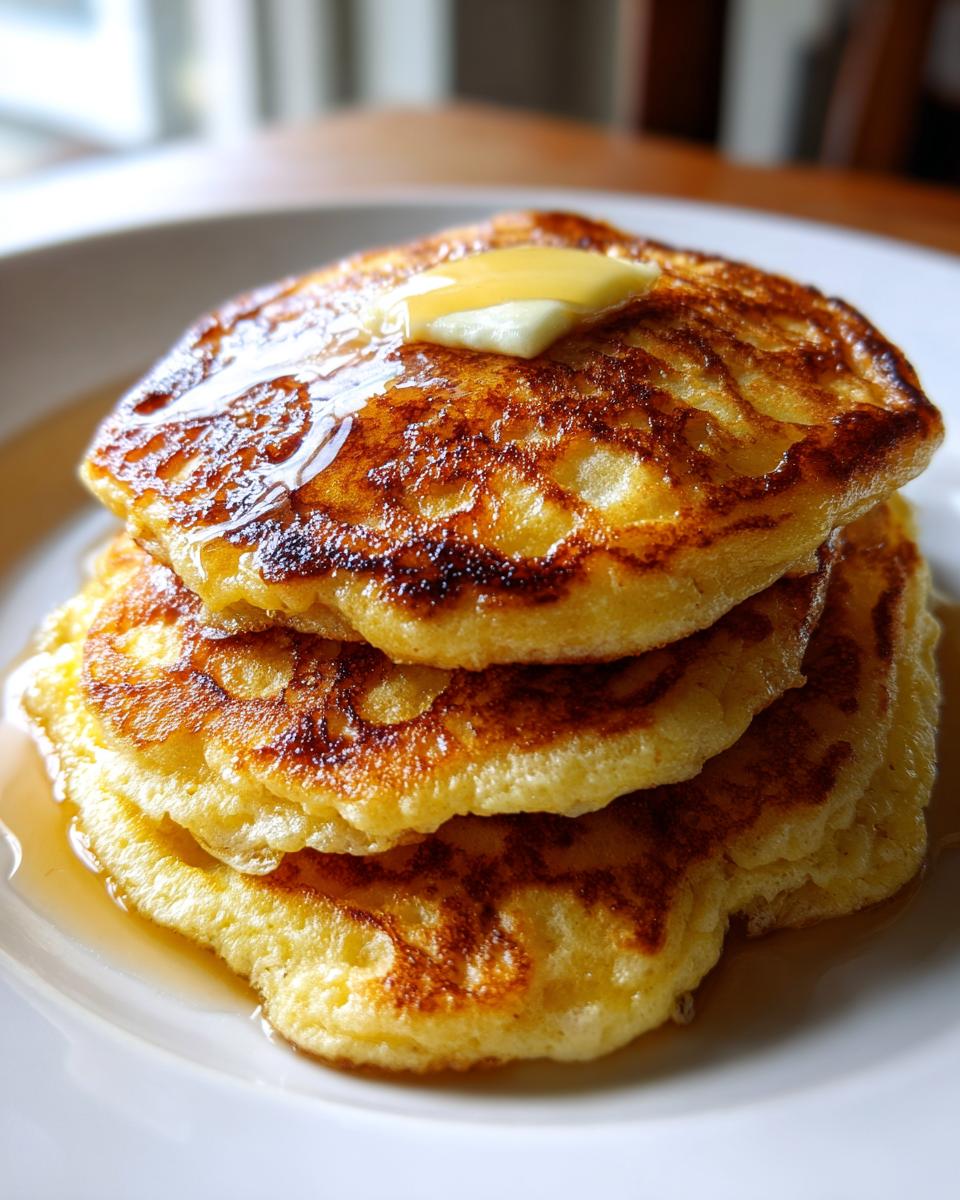
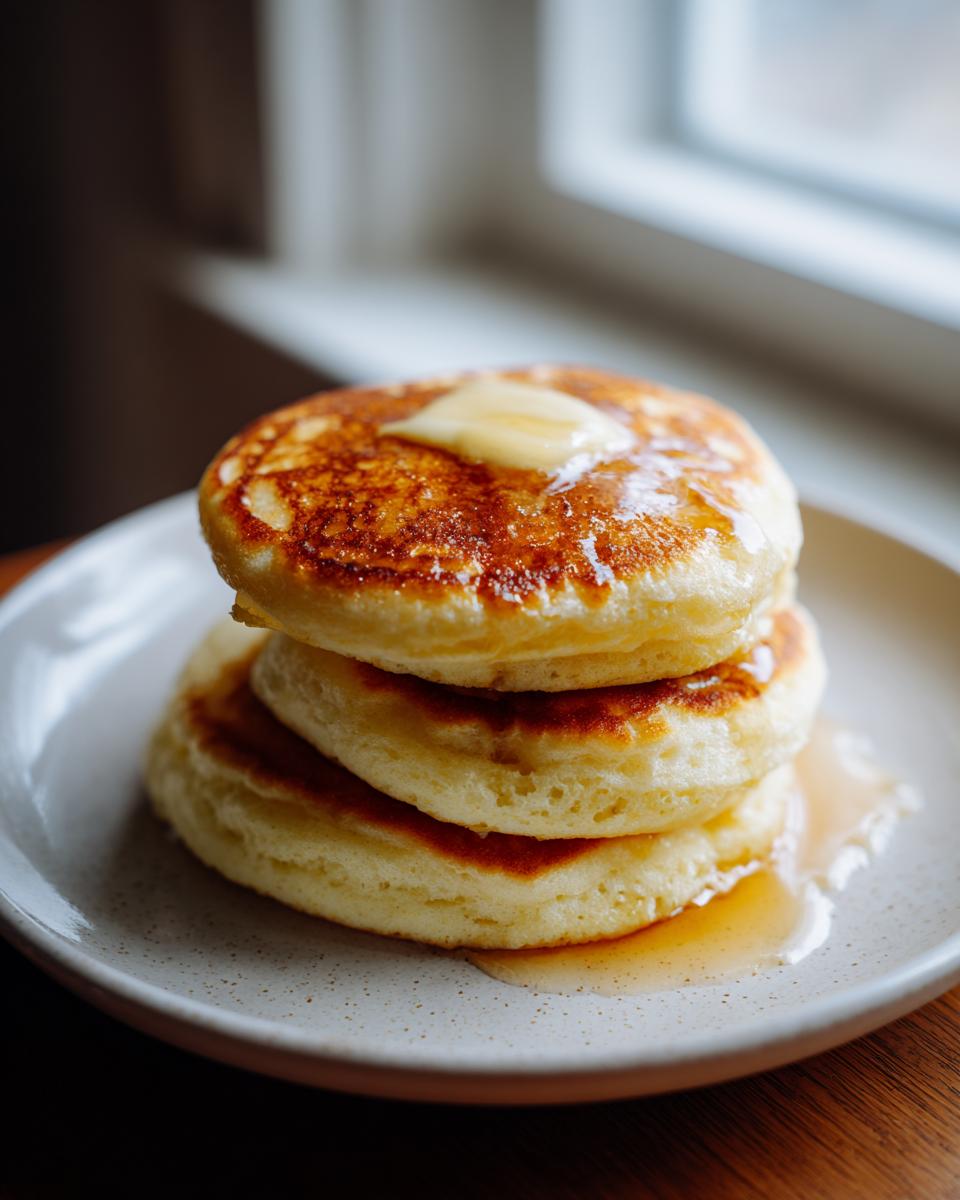
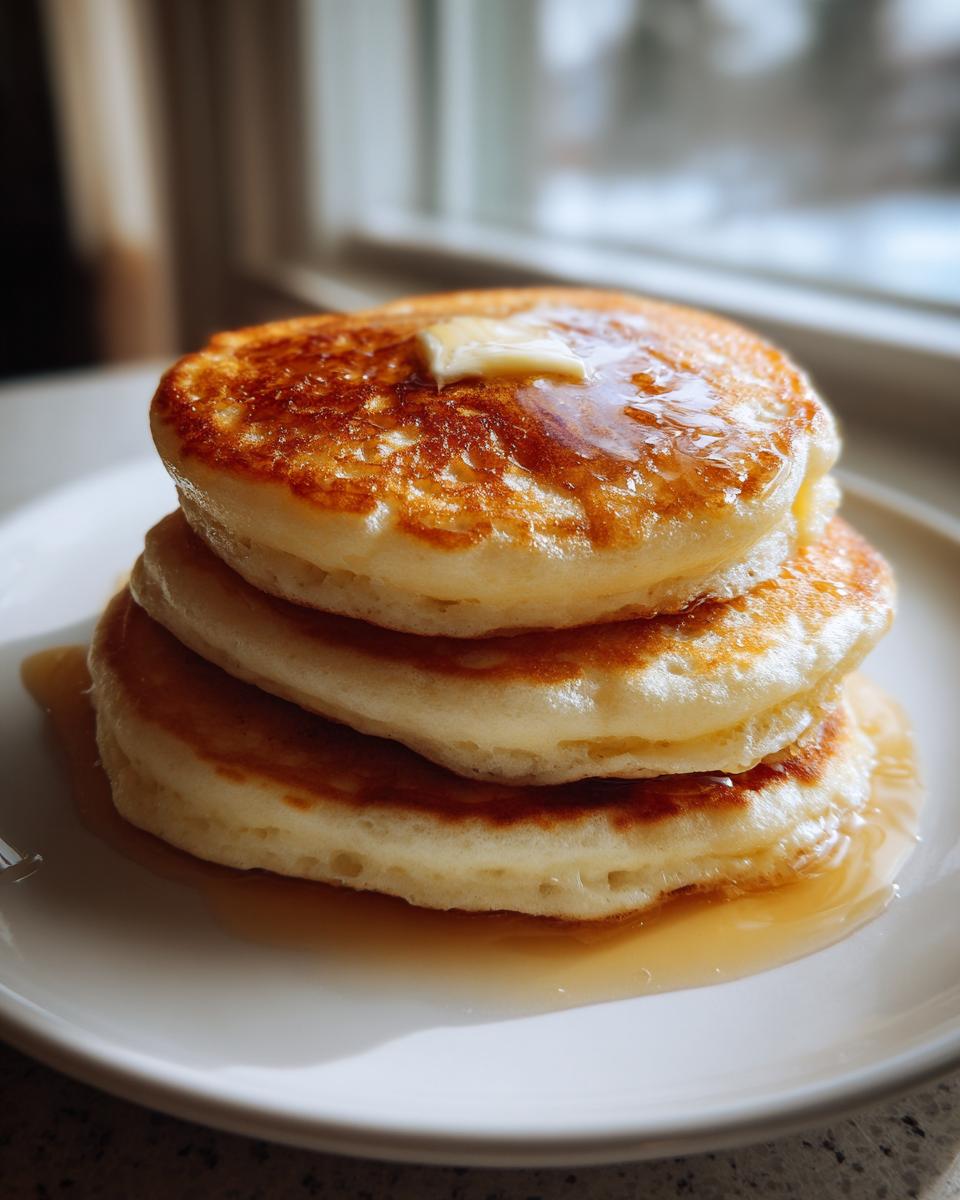
Look, once you’ve got these towering, glorious homemade pancakes on the plate, you can’t skimp on the toppings! Since this is an old fashioned pancakes base, we have to keep the classic approach. Forget powdered sugar and sprinkles; we’re going for rich, simple flavors that let the pancake itself shine.
My absolute must-have starts with a generous pat of genuine, cold butter melting slowly right into the center. Then, you need the good stuff—real maple syrup, warmed up a little bit so it flows like the Mississippi River down the sides of the stack. Don’t apologize for dousing them!
If you want to add a little color and tartness, fresh berries are always my second choice. Blueberries work wonderfully cooked right into the batter (remember that lumpy batter rule?), but sliced strawberries or raspberries sprinkled on top are just as good. I love serving these with a side of crispy bacon—that salty crunch next to the soft, sweet cake? That’s what a proper weekend breakfast is all about.
For a slightly different texture, try using slightly melted fruit preserves instead of syrup sometimes. A good tart cherry or apricot jam spreads beautifully over the hot surface.
Make-Ahead and Storage Tips for Old Fashioned Pancakes
I know, I know. The dream is that we all have time to stand over the griddle every morning making fresh stacks, but for real life? That’s not always our reality. The amazing news about this old fashioned pancakes recipe is that they reheat beautifully, which means you can knock out a massive batch one morning and save yourself stress later in the week.
Once your classic pancakes are fully cooked, let them cool completely on a wire rack for about 15 minutes. If you stack them while they are still warm, they’ll just steam themselves into a weird pile of goo—and we certainly don’t want that greasy situation!
When they are totally cool, line up your pancakes and slip a small square of wax paper or parchment between each one. Then, stack them neatly into a freezer-safe bag or an airtight container. They will keep perfectly fine in the freezer for up to two months. When you want to eat them, just toss them straight into the toaster or microwave for a quick blast, and boom—instant weekend breakfast.
Now, if you’re cooking for a crowd right now and they are all demanding stacks simultaneously, you need a holding zone! Do not stack them right on top of each other on a plate, or they will get soggy fast! Instead, set up a baking sheet and line your finished pancakes in a single layer. Pop that sheet into a very low oven, set to about 200°F.
This low, gentle heat keeps them warm and ready to serve without drying them out while you finish up the last of the batter. It’s a simple method that makes feeding a big family so much less frantic when you’re churning out these fluffy pancake recipe beauties.
Frequently Asked Questions About Classic Pancakes
I know you might still have a few lingering questions after looking over the recipe. We all started somewhere, and often the difference between a good pancake and a truly great one is just one tiny tip! Here are the most common things people ask me about making these rich, classic pancakes.
If you are a new reader, you might want to quickly review my privacy policy while you’re here, but let’s get straight to the pancake talk!
Can I use whole wheat flour instead of all-purpose?
You absolutely can swap some of the flour out for whole wheat, but you need to be careful! Whole wheat flour is heavier than white flour because it contains the bran and germ. If you swap it 1:1, your old fashioned pancakes will end up denser, more like little wheat biscuits rather than fluffy clouds.
I always suggest replacing only one-third of the all-purpose flour with whole wheat flour. If you use just a bit, you get the nutrition boost without sacrificing that light, airy texture we are aiming for in this fluffy pancake recipe. You might need to add just a tiny splash of extra milk too, since whole wheat absorbs liquid differently.
How thick should the batter for these homemade pancakes be?
This is a question I get constantly! Remember how I stressed keeping those lumps? If you want that satisfying height for your stack of homemade pancakes, the batter should be quite thick—think of slightly thinner cake batter, not runny soup! It should barely pour off a spoon.
If you look at the recipe, we use a specific ratio of dry goods to liquid designed to hold pockets of air. If your batter looks thin after you stir in the butter, it means you either mistyped an measurement, or perhaps your baking powder has lost its fizz. A thick, slightly reluctant batter is exactly what you want for these classic pancakes sitting on the side, ready to hit the griddle.
I’m out of eggs! Can I make these vegan or egg-free?
If you need no buttermilk pancakes *and* no eggs, that definitely requires a substitution, but it’s doable! Eggs provide structure and richness, so we need to replace both. For one egg, I suggest using a ‘flax egg’—mix one tablespoon of ground flaxseed with three tablespoons of water and let it sit until it gels up (about five minutes).
If you use the flax egg, however, your pancakes will be slightly chewier than this classic base. If you are just aiming for the weekend breakfast and don’t have flax, sometimes just omitting the egg and adding an extra splash of that vinegar-milk mixture works in a pinch, though the rise won’t be quite as dramatic.
Troubleshooting Flat Old Fashioned Pancakes
Did your old fashioned pancakes come out flat and disappointing? Don’t throw out the rest of the batter! Nine times out of ten, flatness comes down to two culprits that are easy to fix next time.
First suspect: Your baking powder is old. Baking powder is what provides the necessary lift that makes this recipe so special. If it’s been sitting in the back of your pantry since the previous administration, it’s lost its power. Test it by dropping a teaspoonful into hot water; if it doesn’t fizz vigorously right away, toss it and grab a fresh container. This is a massive game-changer for any fluffy pancake recipe.
The second culprit is the technique we talked about: overmixing. If you stir it until it’s totally smooth, you’ve beaten the air out and created gluten, sealing the pancake flat before it even hits the heat. Next time, just stir until you see the flour disappear and leave those lumps alone! Patience during mixing guarantees you a beautiful, high final product.
How do I keep a big batch warm for a full family breakfast?
When you are making a huge batch—enough for everyone to have seconds—you can’t just stack them on a cold plate! They will steam and slump into one giant, soggy pancake pile. For the best results while you finish every last bit of your easy pancake batter, you need that low-temperature oven trick I mentioned.
Place a wire rack on top of a sturdy baking sheet. As each pancake is done, gently lay it directly on the wire rack in a single layer. Pop that sheet into an oven set to just 200°F. The gentle heat keeps them piping hot and slightly crisp on the edges without continuing to cook or dry them out. It’s my secret weapon for feeding a crowd!
Estimated Nutrition for Your Classic Pancakes
I always like to give you a rough idea of what you’re digging into, especially when it comes to fueling up for a great weekend breakfast. Keep in mind that these numbers are just estimates based on my calculations for two average-sized pancakes—what you serve them with (looking at you, butter and syrup!) will change these numbers significantly! This information is provided transparently to help you plan.
- Serving Size: 2 pancakes
- Calories: About 200
- Total Fat: 8g
- Carbohydrates: 28g
- Protein: 6g
This data is purely an estimate based on the recipe’s core ingredients. If you happen to visit our policy page, you can review how we approach data transparency in general.
Share Your Weekend Breakfast Success
I truly hope these help you slow down and enjoy a perfect morning moment, whether you’re whipping them up for yourself or a whole crew! Please let me know how they turned out for you! Did you manage to keep that batter lumpy? Did they achieve maximum fluff?
Leave me a rating below—the stars tell me what works best for you! And if you snap a picture of that beautiful stack of old fashioned pancakes, tag me on social media so I can see your success! If you need to get in touch about anything else, my contact page is always open.
Estimated Nutrition for Your Classic Pancakes
I always like to give you a rough idea of what you’re digging into, especially when it comes to fueling up for a great weekend breakfast. Keep in mind that these numbers are just estimates based on my calculations for two average-sized pancakes—what you serve them with (looking at you, butter and syrup!) will change these numbers significantly! This information is provided transparently to help you plan.
- Serving Size: 2 pancakes
- Calories: About 200
- Total Fat: 8g
- Carbohydrates: 28g
- Protein: 6g
This data is purely an estimate based on the recipe’s core ingredients. If you happen to visit our policy page, you can review how we approach data transparency in general.
Share Your Weekend Breakfast Success
I truly hope these help you slow down and enjoy a perfect morning moment, whether you’re whipping them up for yourself or a whole crew! Please let me know how they turned out for you! Did you manage to keep that batter lumpy? Did they achieve maximum fluff? I love hearing about your results because that’s why I share these family secrets!
If you found success with this fluffy pancake recipe, please do me a favor and drop a quick rating below—the stars tell me what’s working best for everyone!
And honestly, if you took a gorgeous picture of that towering stack of old fashioned pancakes, tag me on social media! I live for seeing your kitchen success stories. If you have any questions that weren’t covered here, don’t hesitate to reach out through my contact page. Happy flipping!
PrintOld Fashioned Fluffy Pancakes
Make classic, diner-style pancakes using simple pantry ingredients. This recipe delivers fluffy results every time.
- Prep Time: 10 min
- Cook Time: 15 min
- Total Time: 25 min
- Yield: 8 servings 1x
- Category: Breakfast
- Method: Griddling
- Cuisine: American
- Diet: Vegetarian
Ingredients
- 1 1/2 cups all-purpose flour
- 3 1/2 teaspoons baking powder
- 1 teaspoon salt
- 1 tablespoon white sugar
- 1 1/4 cups milk (or buttermilk substitute)
- 1 egg
- 3 tablespoons butter, melted
Instructions
- Combine the flour, baking powder, salt, and sugar in a large bowl. Whisk these dry ingredients together.
- In a separate bowl, whisk together the milk and egg.
- Pour the wet ingredients into the dry ingredients. Mix gently until just combined. Do not overmix; a few lumps are fine.
- Stir in the melted butter.
- Heat a lightly oiled griddle or large skillet over medium-high heat. The griddle is ready when a drop of water sizzles immediately.
- Pour 1/4 cup of batter onto the hot griddle for each pancake.
- Cook for 2 to 3 minutes per side. You know it is time to flip when bubbles appear on the surface and the edges look set.
- Flip and cook the second side until golden brown, about 1 to 2 minutes more.
- Serve immediately with your preferred toppings.
Notes
- For buttermilk pancakes without buttermilk, mix 1 1/4 cups of regular milk with 1 tablespoon of white vinegar or lemon juice. Let it sit for 5 minutes before using.
- To keep pancakes warm while you cook the rest, place them in a single layer on a baking sheet in a 200°F oven.
- You can freeze cooked pancakes. Place cooled pancakes in a freezer bag, separating layers with wax paper. Reheat in a toaster or microwave.
Nutrition
- Serving Size: 2 pancakes
- Calories: 200
- Sugar: 4
- Sodium: 350
- Fat: 8
- Saturated Fat: 4
- Unsaturated Fat: 4
- Trans Fat: 0
- Carbohydrates: 28
- Fiber: 1
- Protein: 6
- Cholesterol: 45