

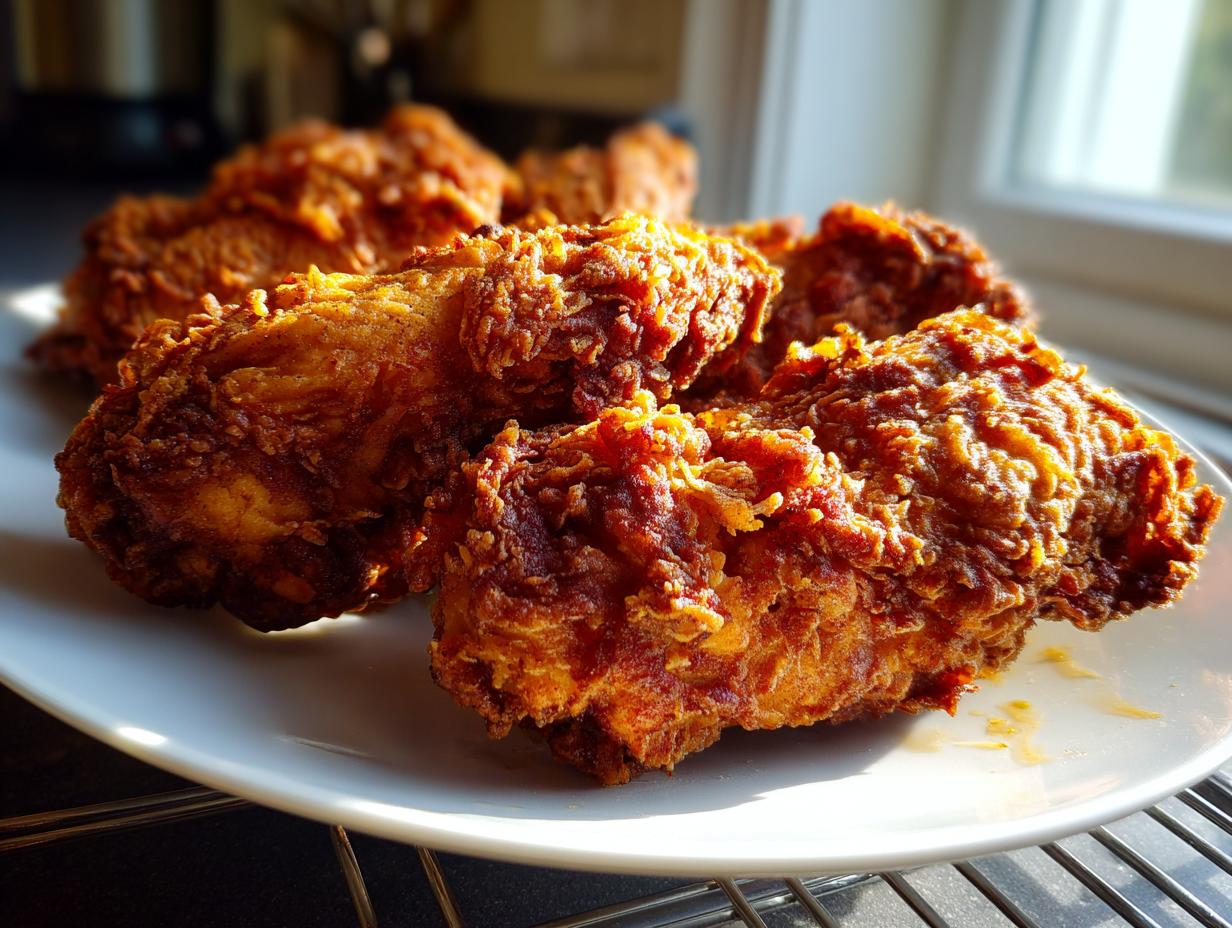
I think we all have that one dish we crave when we need pure, soulful comfort. For me, that’s absolutely golden, impossibly crispy **fried chicken**. It’s the ultimate classic, right? But making that perfectly crunchy exterior that seals in outrageously juicy meat often feels impossible at home. That’s why I spent years tinkering, taking inspiration from my family’s tradition of turning simple ingredients into something spectacular. As you can read more about my journey here, I built Cooking by Felix because I know how hard it is to balance a busy life with the desire to cook exceptional food. This Crispy Southern Buttermilk Fried Chicken recipe isn’t about fuss; it’s about a foolproof method that gets you that deep-fried satisfaction without the kitchen headache. Trust me, this is the only recipe you’re going to need for incredible, tender, crunchy chicken.

- Why This Crispy Southern Buttermilk Fried Chicken Recipe Works
- Gathering Ingredients for Incredible Fried Chicken
- Step-by-Step Instructions for Classic Comfort Food Chicken
- Tips for Fail Proof Fried Chicken Success
- Variations on Your Southern Fried Chicken
- Serving Suggestions for Your Easy Fried Chicken Dinner
- Storage and Reheating Instructions for Leftover Fried Chicken
- Frequently Asked Questions About Perfect Fried Chicken
- Share Your Incredible Fried Chicken Experience
Why This Crispy Southern Buttermilk Fried Chicken Recipe Works
When you’re looking for the very best Crispy Fried Chicken Recipe, you need reliability—a guarantee that the skin will shatter and the meat inside will be swimming in juices. That’s precisely what this method delivers. It’s all about balance: the acidity of the buttermilk tenderizes the meat while the coating mixture creates those deep, craggy peaks that catch the oil just right.
If you’ve ever struggled to get **Juicy Fried Chicken** that doesn’t taste bland, this combination of technique and simple seasoning is what makes the difference. It’s a Southern staple for a reason, and I promise it’s repeatable, even on a busy weeknight! Speaking of buttermilk, if you ever need a great use for leftovers, my fluffy pancake recipe is divine; you can check that one out here.
The Buttermilk Marinade Secrets for Tender Fried Chicken
Listen, the buttermilk isn’t just for soaking; it’s crucial magic. The slight acidity in the buttermilk works on a microscopic level to gently break down the tough muscle fibers. This is one of my biggest **Chicken Marinade Secrets**!
When you use this technique, the chicken stays incredibly tender, even when fried hot and fast. You absolutely need to let it bathe for at least four hours, but honestly, overnight marinating makes the meat practically fall off the bone. It sets you up for success!
Achieving the Ultimate Crunchy Chicken Coating
We aren’t just tossing this chicken in flour; we are building armor! The secret to that **Crunchy Chicken Coating** is the double-dip method detailed in the steps. After you coat it once, you dip it back into that milky marinade for just a second.
When you dip it a second time and press that flour mixture on firmly—really press it in there!—you create those signature ridges and shaggy bits that crisp up beautifully. That’s where the crunch lives, folks.
Gathering Ingredients for Incredible Fried Chicken
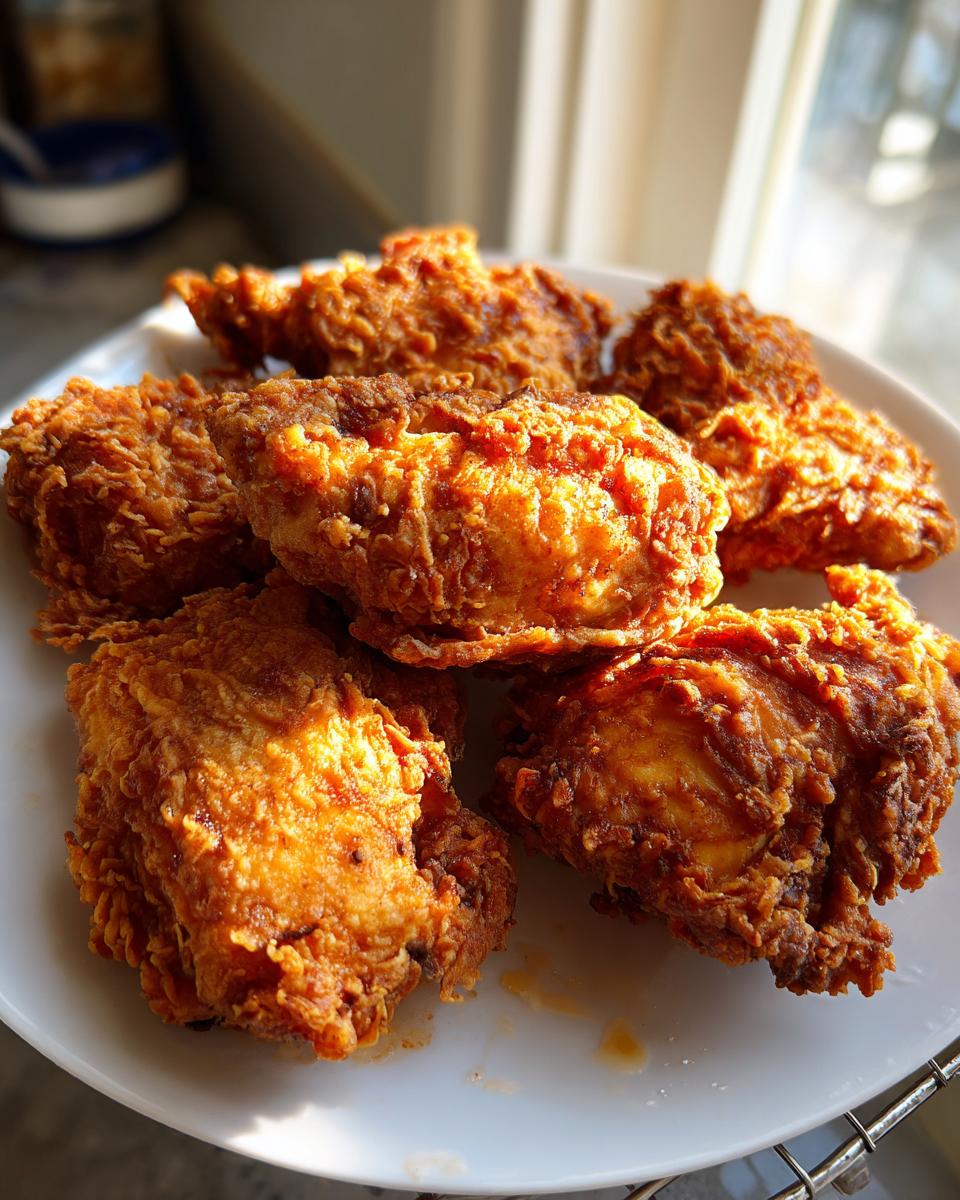
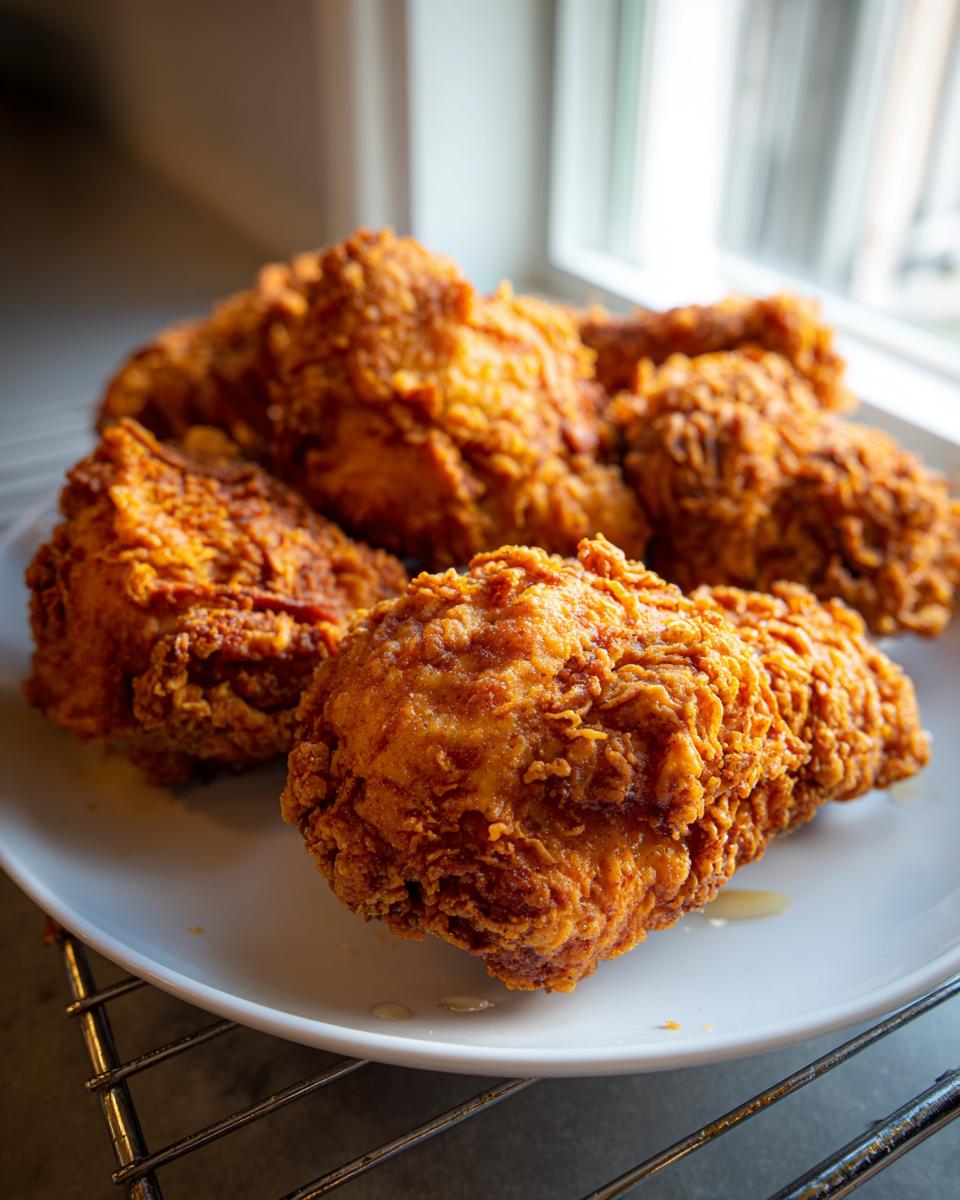
Okay, now that we’ve talked technique, let’s look at the stars of the show. For our **Incredible Fried Chicken**, the quality and exact amounts matter! I stick strictly to the list—especially the bone-in, skin-on cuts. That skin is non-negotiable for the best flavor and texture when we start frying.
The Chicken and Marinade Components
For the chicken itself, you’ll need about 4 lbs of those lovely bone-in pieces—thighs are my favorite, but use what you love! For the marinade, you want 4 cups of creamy buttermilk, which is the hero here. Make sure you mix in 2 tablespoons of kosher salt, 1 tablespoon of black pepper, 1 tablespoon of paprika, and just 1 teaspoon of cayenne pepper. That’s your flavor foundation!
Dry Coating Mix for Perfect Fried Chicken
This is what’s going to give you that amazing exterior armor. You need 4 cups of all-purpose flour for structure, but here’s the kicker: mix in 1/2 cup of cornstarch. That cornstarch is my little secret for maximum crunch—it keeps the coating from getting soggy! Then, we add flavor back in with 1 tablespoon each of garlic powder and onion powder. Don’t skip those!
Step-by-Step Instructions for Classic Comfort Food Chicken
Alright, deep breath! This is where the magic happens. Following these instructions precisely is the difference between a standard dinner and true **Classic Comfort Food Chicken**. Remember, patience is your best seasoning, especially during the marinating and frying stages. We’re building layers of flavor and texture, so don’t rush the chill time or the oil heat!
Marinating the Chicken Pieces
First things first: take your bowl with the buttermilk mixture—that’s the buttermilk, salt, pepper, paprika, and cayenne all tossed together—and get that chicken submerged. Every single piece needs to take a long, luxurious bath in that spice-infused bath. Cover it up tightly and pop it in the fridge. Seriously, I know you’re eager, but you need a minimum of four hours here. If you can swing it and leave it overnight, that flavor penetration is unbeatable, giving you the juiciest outcome possible.
Preparing the Coating and Dredging Technique
While the chicken chills, whisk your dry coating mix—that’s the flour, cornstarch, onion powder, and garlic powder—in a separate shallow dish. Once the chicken is ready, pull it out, let the excess buttermilk drip off, but don’t rinse it! Now, dredge each piece hard into the flour mixture, pressing to make sure that coating sticks everywhere. Then—and this is key—give it one quick dip back into the leftover buttermilk, and dredge it through the flour again. Press that second layer on firmly! This creates those beautiful, craggy crusts.
Frying the Fried Chicken to Golden Brown Perfection
Now for the heat! Heat about three inches of oil in your heavy pot up to exactly 325°F (160°C). You really need a thermometer for this, so please check that temperature. Carefully add your chicken in batches; do not overcrowd the pot, or the oil temperature will plummet! Fry each batch for about 6 to 8 minutes on each side until you hit that beautiful **Golden Brown Chicken** color. Before you pull it out, always check the thickest part with a thermometer—you want 165°F (74°C) internally. If you’d like to see another delicious baked option, check out my recipe for amazing cornbread here.
Tips for Fail Proof Fried Chicken Success
I know the frying process can feel a little intimidating, but if you master just two things, this recipe becomes totally **Fail Proof Fried Chicken**! We aren’t just looking for ‘cooked chicken’; we want that picture-perfect result every single time we pull out the pot. Pay close attention to the oil temperature—it’s truly the gatekeeper to crispiness—and how you handle that chicken once it’s done.
Maintaining the Correct Oil Temperature for Juicy Fried Chicken
This is where so many home cooks go wrong! Remember, we want the oil hovering between 315°F and 330°F. If your oil is too cool, the crust soaks up that fat like a sponge, and you end up with greasy, soggy chicken. Nobody wants that texture!
On the flip side, if the temperature spikes up past 340°F, the coating burns to a dark brown way too fast, leaving you with raw or undercooked meat inside. We’re aiming for that sweet spot where the outside gets perfectly **golden brown chicken** while the inside slowly steams itself tender. Keep that thermometer handy and monitor it constantly!
Resting and Draining Your Homemade Fried Chicken
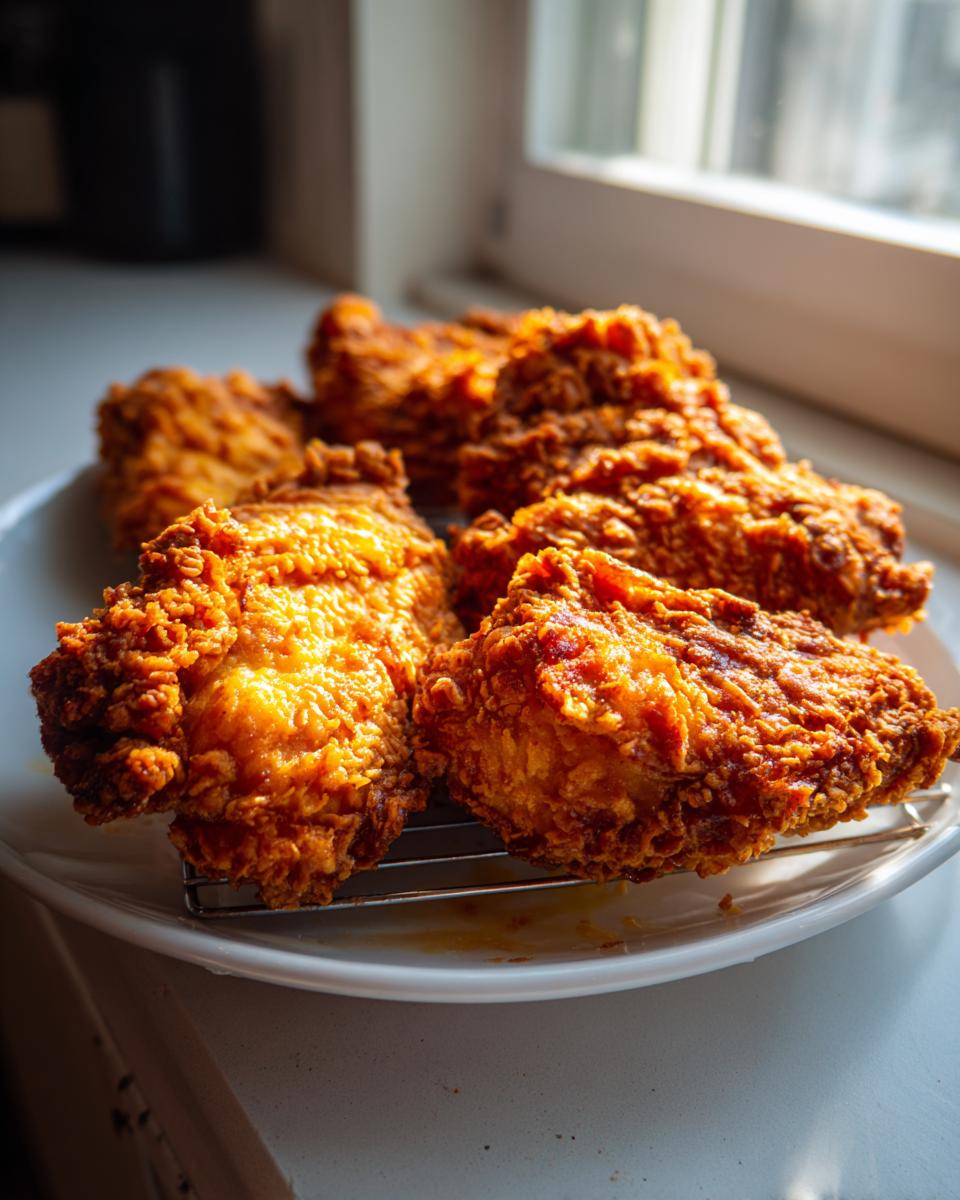
Once that beautiful, cooked chicken comes out of the hot oil, you might be tempted to stack it high on a plate lined with paper towels. Please, resist that urge! Paper towels trap steam right underneath your crust, making the bottom soggy. Instead, pull your pieces off the oil and place them immediately onto a wire rack set over a baking sheet.
This allows air to circulate all the way around, keeping that crunchy coating intact. And here’s something my dad always insisted on: immediately after it hits the rack, sprinkle the hot chicken with just a tiny pinch of extra salt. That little bit of seasoning sticks perfectly while the surface is still wet with hot oil, making your **Homemade Fried Chicken** taste even better.
Variations on Your Southern Fried Chicken
I love that this **fried chicken** method is so strong, it lets you play around with the spice and flavor profiles without risking a flop! Once you nail the buttermilk marinade and the double-dip, you can start experimenting easily. It’s fun to switch things up for the kids or for guests without starting from scratch. I really encourage you to try switching up the spice rub sometimes—you can find some great ideas for seasoning mixes on my dedicated post about spice rubs here!
Making Spicy Fried Chicken with an Extra Kick
If you like heat, you just need to amp up the dry mix. I sometimes double the cayenne pepper called for in the coating. For a deeper smoky heat, try adding a full teaspoon of smoked paprika or just a dash of chipotle powder to the flour blend. It mixes right in and gives you that slow, satisfying burn as you enjoy your crunchy chicken!
Trying a KFC Copycat Recipe Flavor Profile
Want to capture that classic fast-food taste? You can totally mimic that famous 11-herb blend right in your coating mix! For a real **KFC Copycat Recipe** vibe, try adding about 1/2 teaspoon each of dried crushed sage and dried thyme to your flour mixture. They blend seamlessly with the garlic and onion powder and give you that unmistakable savory perfume. It makes for fantastic leftover chicken, too!
Serving Suggestions for Your Easy Fried Chicken Dinner
You’ve done the hard work, you have the perfectly golden-brown chicken dripping with flavor—now, what are you going to serve with it? Making an Easy Fried Chicken Dinner means rounding it out with sides that hit that Southern comfort spot just right. If you skip the sides, you’re missing half the fun, frankly!
The best pairings are usually simple, creamy, or vinegary—things that cut through the richness of the fried coating. I always make sure I have something bright and something starchy on the table to balance out that incredible crunch.
If you’re looking for my favorite starchy accompaniment, you absolutely have to check out my recipe for perfect, creamy garlic mashed potatoes here. That smooth potato puree is the perfect bed for soaking up any leftover spices.
For something green and traditional, you can’t go wrong with greens. My braised collard greens recipe is amazing with this chicken. The slight smokiness and tang really complement the savory coating beautifully. Grab that recipe here!
Of course, no Southern spread is complete without the basics: hot biscuits, creamy coleslaw for that cool crunch, and maybe a side of sweet corn on the cob when it’s in season. It all comes together to make a meal that just feels like a hug.
Storage and Reheating Instructions for Leftover Fried Chicken
Nobody *plans* on having leftover fried chicken, but when you do, the goal is always to bring back that original golden crunch. Honestly, the absolute best scenario is just eating it cold the next day—it’s surprisingly good! But if you need it hot, skip the microwave entirely; it just turns that lovely crust chewy and sad. That’s a culinary sin!
For the crispiest reheat, you’ve got two shining options. First, use your oven! Slide the chicken onto a wire rack set over a baking sheet—just like when draining—and heat it at 375°F for about 10 to 15 minutes. The rack is the key to keeping the bottom crisp. Alternatively, the air fryer is fantastic for reviving individual pieces quickly!
Frequently Asked Questions About Perfect Fried Chicken
I get so many great questions about this recipe once folks give it a whirl! Honestly, I love hearing what you’re struggling with so I can make sure my instructions are super clear. We want everyone to achieve that crunchy, flavorful result we talked about. Here are a few of the most common concerns I hear about making incredible **fried chicken** at home.
Can I make this fried chicken in an air fryer?
This is such a popular question now! You absolutely can use an air fryer, but you have to adjust your expectations slightly. Because air frying relies on circulating hot air, that thick buttermilk coating doesn’t behave exactly the same way it does submerged in oil. You won’t get the exact same deep, craggy crust we worked so hard for with deep frying. If you want to try it, I suggest using the double-dredge method but lightly spraying the coated chicken with cooking spray before air frying. It’s a great option for reheating leftovers, though!
What is the best oil to use for deep fried chicken?
When you’re dealing with high-heat frying, you need an oil with a high smoke point, otherwise, the oil breaks down and creates off-flavors. For this recipe, I stick to what I use every time: basic vegetable oil or shortening. Peanut oil is also fantastic if you have it on hand and don’t have nut allergies in the house! These oils handle the 325°F temperature like champs and give you that beautiful, clean, **golden brown chicken** color without burning.
How long does the buttermilk marinade last?
We discussed the minimum of four hours, but if you can stretch it, let the chicken swim in that spicy buttermilk bath for up to 24 hours in the fridge. More time means deeper flavor penetration and even more tender meat inside. Anything over 24 hours, though, and you risk the meat getting a little too soft. You want it tender, not mushy! If you’re looking for some lighter, yet flavorful, dinner ideas that don’t involve frying at all, I have some great ones here, too!
Share Your Incredible Fried Chicken Experience
Now, you’ve got the recipe for what I truly believe is the best **fried chicken** you can make without opening a restaurant! But the final, and truly most important, step is what happens next. Cooking is a conversation, and I genuinely want to hear from you about how this turned out for your family dinner.
Did the double-dredge give you that satisfying shatter you were hoping for? Did the overnight marinade make your chicken unbelievably juicy? Please, don’t hesitate to come back and leave a star rating for this Crispy Southern Buttermilk Fried Chicken Recipe. Hearing about your success—maybe you even tried one of my seasoning variations—makes my entire week!
If you snapped a photo of that beautiful, **golden brown chicken** on your plate next to your sides, I’d be thrilled if you shared it! Tag me when you post it online, or feel free to reach out anytime through my contact page. Knowing that this recipe is helping you reclaim your kitchen and create amazing, delicious meals is exactly why I started Cooking by Felix in the first place. Happy frying, and enjoy that incredible comfort food!
PrintCrispy Southern Buttermilk Fried Chicken

Make ultra-crispy, juicy Southern Fried Chicken at home using a simple buttermilk marinade. This fail-proof recipe delivers a golden, crunchy crust and tender meat, perfect for your next family dinner.
- Prep Time: 20 min
- Cook Time: 30 min
- Total Time: 4 hours 50 min
- Yield: 6 servings 1x
- Category: Dinner
- Method: Deep Frying
- Cuisine: American
- Diet: None
Ingredients
- 4 lbs bone-in, skin-on chicken pieces (thighs, drumsticks, breasts)
- 4 cups buttermilk
- 2 tablespoons kosher salt
- 1 tablespoon black pepper
- 1 tablespoon paprika
- 1 teaspoon cayenne pepper
- 4 cups all-purpose flour
- 1/2 cup cornstarch
- 1 tablespoon garlic powder
- 1 tablespoon onion powder
- Vegetable oil or shortening, for frying
Instructions
- In a large bowl, combine the buttermilk, kosher salt, black pepper, paprika, and cayenne pepper. Add the chicken pieces, ensuring they are fully submerged. Cover and refrigerate for at least 4 hours, or preferably overnight.
- In a separate shallow dish, whisk together the flour, cornstarch, garlic powder, and onion powder to create the dry coating mix.
- Remove the chicken from the buttermilk marinade, allowing excess to drip off, but do not rinse. Dredge each piece thoroughly in the flour mixture, pressing firmly to make sure the coating adheres well. For extra crunch, dip the floured chicken back into the remaining buttermilk for a second, quick dip, and then coat again in the flour mixture.
- In a large, heavy-bottomed pot or deep fryer, heat about 2-3 inches of vegetable oil to 325°F (160°C). Use a thermometer to maintain this temperature.
- Carefully place the chicken pieces into the hot oil, ensuring you do not overcrowd the pot. Fry in batches. Start with the thicker pieces first.
- Fry chicken pieces for about 6-8 minutes per side, turning occasionally, until they reach an internal temperature of 165°F (74°C) and the crust is deep golden brown and crunchy. Smaller pieces like wings will cook faster.
- Remove the cooked chicken from the oil and place it on a wire rack set over a baking sheet to drain excess oil. Sprinkle lightly with a little extra salt immediately after removing from the oil.
- Serve your homemade fried chicken hot.
Notes
- For the best results and maximum tenderness, let the chicken marinate in the buttermilk for 12 to 24 hours.
- Maintain the oil temperature between 315°F and 330°F. If the oil is too cool, the chicken will absorb too much grease; if too hot, the outside will burn before the inside cooks.
- If you are using chicken breasts, you may want to pound them slightly to an even thickness before marinating for consistent cooking.
Nutrition
- Serving Size: 1 piece (thigh)
- Calories: 450
- Sugar: 1
- Sodium: 650
- Fat: 28
- Saturated Fat: 8
- Unsaturated Fat: 20
- Trans Fat: 0
- Carbohydrates: 15
- Fiber: 1
- Protein: 32
- Cholesterol: 110