

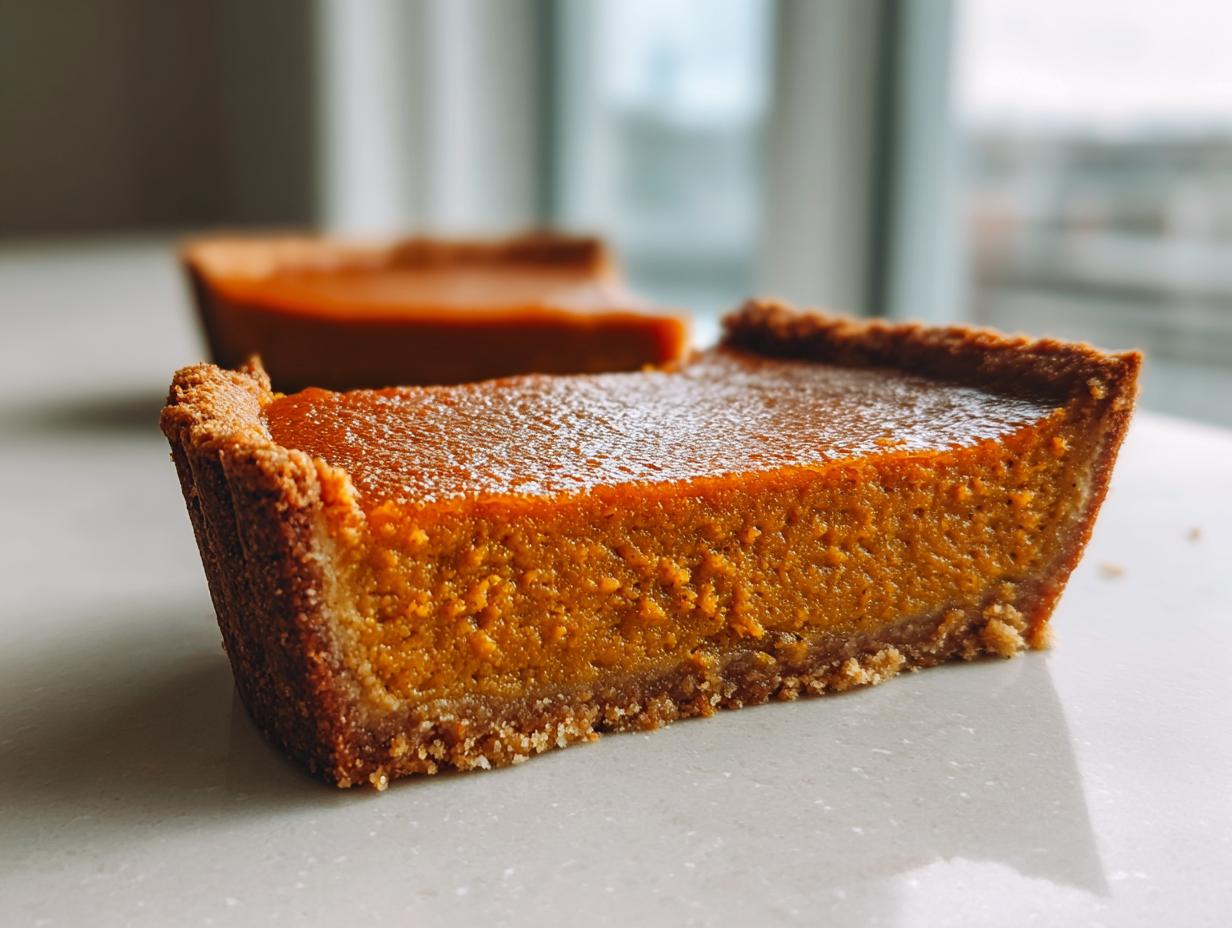
Oh, the holidays! Everyone gets so stressed about the turkey, the stuffing, and then—the dreaded pie marathon. If you’re anything like me, you want that gorgeous, creamy, classic pumpkin flavor without spending half of Thanksgiving Day wrestling with egg yolks and trying to temper custards. Trust me, I get it! That’s why Felix built this whole site, Cooking by Felix, to take the stress out of serving amazing food. This right here is my ultimate secret weapon: the **easy pumpkin pie** that truly works every single time. We only use five simple ingredients, and yes, it comes out perfectly rich and smooth. You won’t believe how simple it is to achieve that **best homemade pumpkin pie** flavor!
- Why This 5-Ingredient Easy Pumpkin Pie is Your New Holiday Staple
- Gathering Ingredients for Your Easy Pumpkin Pie
- Step-by-Step Instructions for a No Fail Pumpkin Pie
- Tips for the Best Homemade Pumpkin Pie Success
- Serving and Storing Your Quick Pumpkin Pie
- Variations on the Simple Fall Dessert
- Frequently Asked Questions About Easy Pumpkin Pie
- Estimated Nutritional Snapshot for This 5 Ingredient Dessert
- Share Your Easy Holiday Baking Results
Why This 5-Ingredient Easy Pumpkin Pie is Your New Holiday Staple
I know you’re juggling a million things when the holidays roll around. That’s why this pie is designed to be your superstar helper! It’s fast, it requires almost zero technique, and it gives you that incredibly satisfying flavor we all crave. Stop worrying about separating eggs or creating a perfect water bath—we’re skipping all that!
- It comes together in about ten minutes flat—seriously!
- You only need five core ingredients you probably already have on hand.
- It sets up beautifully every time, cutting down on holiday kitchen panic.
If you’re looking for fantastic, stress-free desserts, check out some other simple finds on my simple desserts page.
Minimal Effort, Maximum Flavor
The secret weapon here is that can of sweetened condensed milk. Forget trying to whisk up a delicate custard base; the milk does all the heavy lifting! It delivers sweetness and creaminess simultaneously, resulting in that luscious mouthfeel we expect from the **best homemade pumpkin pie**. Because the ratio of puree to milk is so stable, this really is a true **no fail pumpkin pie** method. It just works!
Perfect for Easy Holiday Baking
When the oven is already taken up by the bird or stuffing casseroles, oven space is gold. Since this pie fills up so quickly, you get it in and out fast. That two-stage baking process means the crust gets a nice head start. This quick turnaround makes it the perfect last-minute **quick pumpkin pie** solution when you realize you forgot a dessert!
Gathering Ingredients for Your Easy Pumpkin Pie
Okay, let’s get down to what you actually need. And by ‘what you need,’ I mean shockingly few things! Seriously, this is where the “easy pumpkin pie” magic starts—minimal shopping list! The beauty of this recipe is that it relies on pantry staples to make that **minimal ingredient pie** sing.
Here is the lineup for our creamy, perfectly spiced dream:
- One (15 ounce) can of pumpkin puree—make sure it’s just puree, not mixed pie filling!
- One (14 ounce) can of sweetened condensed milk—this is the key to creaminess!
- Two large eggs (I try to use room temperature ones if I remember, but honestly, it’s fine either way).
- One teaspoon of good quality pumpkin pie spice.
- And finally, one (9 inch) unbaked pie crust.
That’s it! Five things! If you’re looking for the absolute best flavor, always choose a brand of pumpkin puree that you love eating straight out of the can; that flavor is going right into the final slice.
Ingredient Notes and Substitutions
Because we are keeping this simple, we love options! If you don’t have a pre-mixed jar of pumpkin pie spice—no stress! You can totally whip up your own blend; I use 3/4 teaspoon cinnamon, about 1/4 teaspoon ginger, and a tiny dash of nutmeg. Mix those three together and you’re good to go for an equally tasty **classic spiced pumpkin pie**.
One more thing: If you’re low-carb or just hate making a crust, this filling is sturdy enough that you can pour it right into a greased pie plate and skip the crust entirely. It becomes a wonderful **crustless pumpkin pie**!
Step-by-Step Instructions for a No Fail Pumpkin Pie
Alright, time to put this amazing puzzle together! Honestly, the prep time is barely ten minutes, which is incredible for a dessert you want on your table for Thanksgiving. The total cook time is around 55 minutes, but trust me, the hands-on work is nothing. We are going to use a trick here with the oven temperature to make sure we get that perfectly golden bottom crust without overbaking the filling. This two-step bake is the key to making this an **easy pumpkin pie** that just *works*.
Mixing the Creamy Pumpkin Pie Recipe Filling
First things first, set your oven to 425 degrees F (which is about 220 degrees C). Grab a nice medium bowl for mixing. Now, you want to use a whisk here. A fork is fine, but a whisk really gets things smooth! Dump in your pumpkin puree, the can of sweetened condensed milk, your two eggs, and that teaspoon of pumpkin pie spice. Whisk it all together really well!
I keep preaching about how easy this is, and this whisking step proves it. You need to whisk until there are absolutely no streaks of egg or thick pumpkin clumps left—it should look like one uniform, beautiful, orange-tan mixture. Because we are using the condensed milk so heavily, the temperature of the eggs doesn’t stress me out as much as in a traditional custard, but smooth is the goal here so you don’t end up with little pockets of unmixed goo in your finished pie.
Once it’s silky smooth, pour that filling right into your unbaked pie crust. No need to pre-bake or anything fancy!
Baking Times and Temperature Adjustments for Easy Pumpkin Pie
This is the part where we trick the crust into being perfect. Into that 425°F oven it goes for just 15 minutes. This high blast sets the bottom crust quickly so it doesn’t get soggy when the wet filling hits it. Keep an eye on it, but don’t open the door!
After those 15 minutes are up, you need to knock the temperature down. Reduce the oven right away to 350 degrees F (that’s around 175 degrees C). Now, let it bake for another 35 to 40 minutes. You’ll know it’s done when a knife inserted close to the center comes out clean—not wet batter, just clean, or maybe with a few moist crumbs clinging to it. This lower temperature lets the creamy filling set up nicely without scrambling the edges. If you want to peek at some other great baking tips, check out how I manage soup textures over at this recipe post!
If you find you need a few more pointers on making any pie crust work, I wrote up some great advice here about handling dough. For some people, this two-stage bake still feels tricky, and some folks prefer to see how others tackle it, like the great people over at The Kitchn when they discuss simple pies.
Tips for the Best Homemade Pumpkin Pie Success
You’ve got the bake done, yay! But hold on, this is where so many people rush things, and I have to stop them! Getting that perfect slice—the one that doesn’t crack or slump sadly in the middle—comes down to what you do *after* it leaves the oven. This isn’t just about the baking; it’s about patience, which feels funny to say for an **easy pumpkin pie**, but it’s true!
The biggest rookie mistake? Trying to slice it when it’s still warm. Don’t do it! You absolutely must let this **creamy pumpkin pie recipe** cool completely on a wire rack. This allows the filling to firm up all the way through. If you cut early, you get soup, not slices. For a 9-inch pie like this one, give it at least two full hours at room temperature, but honestly? It’s even better if you let it chill in the fridge for four hours or even overnight. That chilling time is what makes it set into that sturdy, beautiful slice you want for your **Thanksgiving pie recipes** spread.
Easy Pie Crust Tips for Beginners
Since we are keeping things simple by using a store-bought crust, we still need to treat it nicely! You don’t want a soggy bottom disaster on your hands. If you are using a refrigerated crust that comes rolled up in a tin, gently unroll it and coax it into your pie plate. Don’t stretch it too much while fitting, or it will shrink too tight during baking.
When you are crimping the edges, use your thumb and forefinger to gently pinch the top edge against the bottom edge. Don’t press too hard; you just want a nice decorative seal. If your crust starts looking too soft or oily before it goes in the oven, pop the whole thing into the freezer for 15 minutes. That little chill tightens the butter in the dough, which helps prevent shrinkage and keeps the edges looking crimped and pretty. For more great advice on handling dough, check out my pie crust tips guide!
Serving and Storing Your Quick Pumpkin Pie
Okay, the pie is out of the oven, and it looks perfect! Now comes the hard part: waiting. Seriously, this is the biggest hurdle you’ll face when making this **easy pumpkin pie**. If you try to slice this creamy filling while it’s hot or even just warm, it will seriously just weep right out onto your plate. We worked so hard for that **creamy pumpkin pie recipe** texture, so we must honor the cooling process!
You need to let it cool completely on a wire rack first. Two hours, minimum, is my threshold when friends are lurking around waiting for dessert. But if you can manage it, chilling it for at least four hours, or even making it a day ahead of time—hello, **make ahead holiday dessert**—is the absolute best way to go. Chilling really solidifies that creamy texture and makes slicing a dream; you’ll get those beautiful, clean slices that showcase how perfectly you mastered this recipe.
When serving flaky-crust pies like this, a small, sharp knife works best. Slice gently, pulling the knife straight up rather than sawing back and forth. Most people top their slice with a big dollop of fresh whipped cream, and for good reason—it’s heavenly! If you’re looking for other amazing recipes to make ahead, you have to check out how I do my homemade eggnog for a perfect pairing.
Storage is really simple, which is a huge plus during busy Christmas week. This pie keeps wonderfully in the refrigerator. Just cover the whole pie loosely with plastic wrap or transfer slices to an airtight container. It stays perfect for about three to four days. Pillsbury even has some great storage advice if you happen to use their crusts, which you can check out right here. Freezing isn’t my favorite option for this particular recipe since the texture can change a bit upon thawing, but if you must stash leftovers, wrap it super tightly in plastic wrap and then foil, and try to eat it within a month.
Variations on the Simple Fall Dessert
Okay, even though this **easy pumpkin pie** recipe is pretty perfect as is—because, hello, five ingredients!—I always have people asking how they can tweak it for variety. It’s the same great flavor base, but we can certainly change up the format or add a little something extra for those extra special **Thanksgiving pie recipes** moments!
I love experimenting! If I’m making this pie for a crowd and I need something that travels really well, or if I just want an individual serving bite, I’ll often use mini pie tins. You just pour the filling into those little shells, and you usually need to shorten the baking time by about 10 minutes total. Keep checking it with a knife, though, because they bake faster!
For a richer flavor that pairs amazingly well with strong coffee, try whisking in about a half teaspoon of instant espresso powder right along with your pumpkin spice. It doesn’t make it taste like coffee, it just deepens that warm spice profile wonderfully. You can find ways to make even the simplest flavors shine on my pumpkin crunch recipe page if you’re looking for texture variation!
Exploring No Bake Pumpkin Dessert Options
I know the goal is speed, and sometimes even baking feels like too much work after the big meal is over! While this specific filling needs that heat blast to set up properly because of the eggs and condensed milk, you can sometimes use this *concept* for a **no bake pumpkin dessert** base.
A true no-bake version usually requires gelatin or whipped cream cheese to hold its structure, so you can’t just use this exact mixture uncooked. However, if you get a pre-made graham cracker crust, you *could* bake this filling for just 10 minutes at a lower temperature (say, 325°F) until just set, let it chill completely, and then top it with a thick layer of homemade whipped cream. It mimics the flavor profile beautifully without needing that long, traditional bake time. It’s a handy trick for making a **quick pumpkin pie** variation!
Frequently Asked Questions About Easy Pumpkin Pie
I always get tons of questions whenever I post this recipe because it seems almost *too* simple to be true! If you’re staring at the ingredients list wondering about a swap or stressing about that final jiggle in the center, chances are someone else has asked the same thing. Here are the major ones I hear about this **easy pumpkin pie**!
Can I use evaporated milk instead of sweetened condensed milk?
This is the number one question, and I have to be firm here: Please don’t substitute evaporated milk if you are aiming for this **5 ingredient dessert** outcome! Evaporated milk is thinner and completely unsweetened. If you swap it, you’ll end up with a runny, savory custard. Our recipe relies entirely on the thick sugar content in the condensed milk to provide sweetness and structure. If you only have evaporated milk, you’d have to switch to a much more traditional recipe that requires straight-up sugar and maybe even cornstarch to get the right density for a **creamy pumpkin pie recipe**.
How do I know for sure when my pie is done?
I know the two-stage baking process can make people nervous about timing! The best way to check is the knife test. Insert a thin, clean knife about an inch or two from the edge (not the very center, where it will always be a little softer). If that knife comes out totally clean—no wet batter sticking to it—you are golden. A slight wobble right in the center is perfectly fine and expected; it will firm up completely as it cools down. That wobble is actually what we want to achieve that **best homemade pumpkin pie** texture!
Can I substitute the canned pumpkin with fresh pumpkin puree?
You absolutely can make **pumpkin pie from scratch easy** if you want to roast your own sugar pumpkins, but you need to be careful with the liquid content! Freshly roasted pumpkin, even when blended smooth, tends to hold a lot more water than the canned stuff. If you use fresh puree, I suggest roasting it until it’s very dry, or even blotting it with paper towels after blending, so you don’t end up with a weak filling. For a **quick pumpkin pie**, the canned stuff is simply more reliable.
Can this easy pumpkin pie be made ahead of time?
Yes, this is one of the best parts about this **simple fall dessert**—it’s fantastic for making ahead! As I said before, this pie *needs* to chill completely to set properly, so making it the day before your event is actually ideal. If you’re aiming for a true **make ahead holiday dessert**, I recommend baking it, letting it cool completely on the counter, and then covering it and chilling it for up to 24 hours before serving. If you’re looking for even quicker weeknight meals while you’re busy setting up the holiday menu, take a peek at some of my favorite 30-minute dinner ideas!
Estimated Nutritional Snapshot for This 5 Ingredient Dessert
Now, I always feel a tiny bit awkward putting nutrition numbers next to something this delicious. Let’s be real, this is a holiday dessert, not health food! But since we keep the ingredients so wonderfully simple, the breakdown is usually pretty straightforward. It’s good to know what you’re working with, right?
These figures are based on using a standard store-bought crust and the ingredients listed above. Remember, since this is a **minimal ingredient pie**, the values tend to stick close to the source ingredients. This is an estimate, so don’t sue me if your cinnamon is extra spicy!
- Serving Size: 1 slice
- Calories: 320
- Sugar: 28g (mostly from that awesome condensed milk!)
- Fat: 15g
- Carbohydrates: 42g
- Protein: 6g
You can see it packs a sweet punch, but honestly, for how incredibly easy this **easy pumpkin pie** is, I think most of us agree it’s worth every single crumb, especially when you know exactly what went into it!
Share Your Easy Holiday Baking Results
Phew! If you made it through the oven temperatures and resisted slicing into that pie before it chilled completely, I am so incredibly proud of you! You’ve created an **easy pumpkin pie** masterpiece that tastes like you slaved away all day. But now the fun part begins: sharing the joy!
I genuinely want to know how your experience went! Did you make my suggested spice swap? Did you totally nail that two-stage temperature trick? Did you dust it with powdered sugar or go for whipped cream?
Please, leave me a comment below. Tell me your success story, or let me know if something puzzled you—we are all learning together here in the kitchen! Getting feedback on this **classic spiced pumpkin pie** helps me make sure the recipe is as clear and foolproof as possible for everyone who tackles **easy holiday baking**.
If you snapped a photo of your beautiful, perfectly set slice, I’d absolutely love to see it! Tag me on social media or send me an email via my contact page. Seeing your finished dishes—especially when they’re something quick and delicious like this—is seriously the highlight of my week. Now go enjoy that pie!
PrintEasy 5-Ingredient Pumpkin Pie

Make a creamy, no-fail pumpkin pie using only five simple ingredients. This quick recipe is perfect for Thanksgiving or any fall gathering when you need maximum flavor with minimal effort.
- Prep Time: 10 min
- Cook Time: 55 min
- Total Time: 65 min
- Yield: 8 servings 1x
- Category: Dessert
- Method: Baking
- Cuisine: American
- Diet: Vegetarian
Ingredients
- 1 (15 ounce) can pumpkin puree
- 1 (14 ounce) can sweetened condensed milk
- 2 large eggs
- 1 teaspoon pumpkin pie spice
- 1 (9 inch) unbaked pie crust
Instructions
- Preheat your oven to 425 degrees F (220 degrees C).
- In a medium bowl, whisk together the pumpkin puree, sweetened condensed milk, eggs, and pumpkin pie spice until the mixture is smooth.
- Pour the filling into the unbaked pie crust.
- Bake at 425 degrees F (220 degrees C) for 15 minutes.
- Reduce the oven temperature to 350 degrees F (175 degrees C). Continue baking for 35 to 40 minutes, or until a knife inserted near the center comes out clean.
- Let the pie cool completely on a wire rack before slicing and serving.
Notes
- If you want a crustless pie, pour the filling into a greased 9-inch pie plate and bake following the same temperature and time instructions.
- You can substitute the pumpkin pie spice with 3/4 teaspoon cinnamon, 1/4 teaspoon ginger, and 1/8 teaspoon nutmeg.
- This pie tastes best when chilled for at least two hours before serving.
Nutrition
- Serving Size: 1 slice
- Calories: 320
- Sugar: 28g
- Sodium: 350mg
- Fat: 15g
- Saturated Fat: 7g
- Unsaturated Fat: 8g
- Trans Fat: 0g
- Carbohydrates: 42g
- Fiber: 2g
- Protein: 6g
- Cholesterol: 65mg