

I know that feeling exactly—you get home after a long day, you want something delicious and good for you, but the thought of spending an hour wrestling with a complicated side dish? Forget it. Life is too short to eat boring vegetables just because you’re tired. That’s why I put all my effort into finding solutions for busy people who still want real flavor. This **Ultimate 15-Minute Garlic Lemon Roasted Broccolini** is one of my absolute lifesaver recipes. Seriously, it takes almost no effort, but it tastes like you spent way more time on it. It perfectly captures what I’m all about here at Cooking by Felix: achieving those incredibly satisfying, flavorful, home-cooked results without adding stress to your weeknight. If you need a quick fix for a sweet tooth after this veggie masterpiece, pop over and check out my recipe for quick, easy 5-minute Oreo fudge—because balance, right?
We’re taking that gorgeous, slender broccolini and giving it the fast treatment it deserves. Forget soggy greens! This method ensures you get that slightly charred, crisp-tender perfection every single time. This recipe is my promise to you that dinner doesn’t have to be a compromise!
- Why This Easy Broccolini Recipe Works Every Time
- Ingredients for The Ultimate 15-Minute Garlic Lemon Roasted Broccolini
- Step-by-Step Instructions for Perfect Oven Roasted Broccolini
- Tips for the Best Garlic Broccolini Experience
- Making Lemon Broccolini: Finishing Touches and Flavor Brightness
- How to Store and Reheat Your Roasted Broccolini
- Variations for Your Simple Vegetable Recipe
- Frequently Asked Questions About Cooking Broccolini
- Nutritional Snapshot of This Healthy Vegetable Side Dish
Why This Easy Broccolini Recipe Works Every Time
Look, I’ve been there. You need a healthy side dish, and you need it fast. That’s why this **easy broccolini recipe** became my benchmark for speed and flavor. We’re looking at maybe 5 minutes of prep time before this goes into the oven, and 15 minutes total cook time. That’s real talk for a **quick side dish vegetable** that actually tastes fantastic. I test everything rigorously because I hate wasting good ingredients, and this simple vegetable recipe passed every test—it turns out incredibly flavorful and texturally perfect without demanding your attention.
If you’re looking for more ways to streamline your midday meals, you should definitely check out my tips for healthy lunch recipes while you wait for this broccolini to roast!
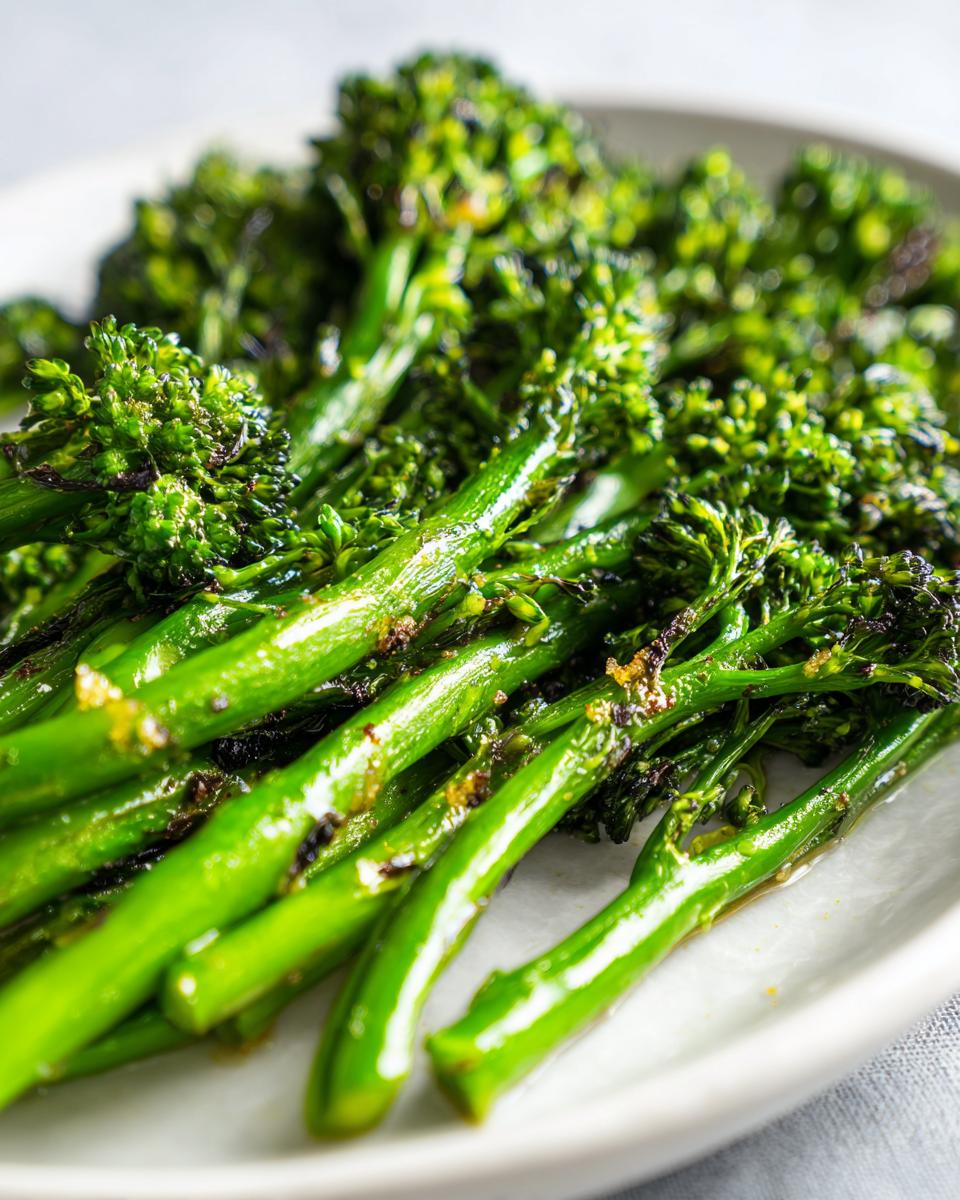
Achieving Crispy Broccolini Texture
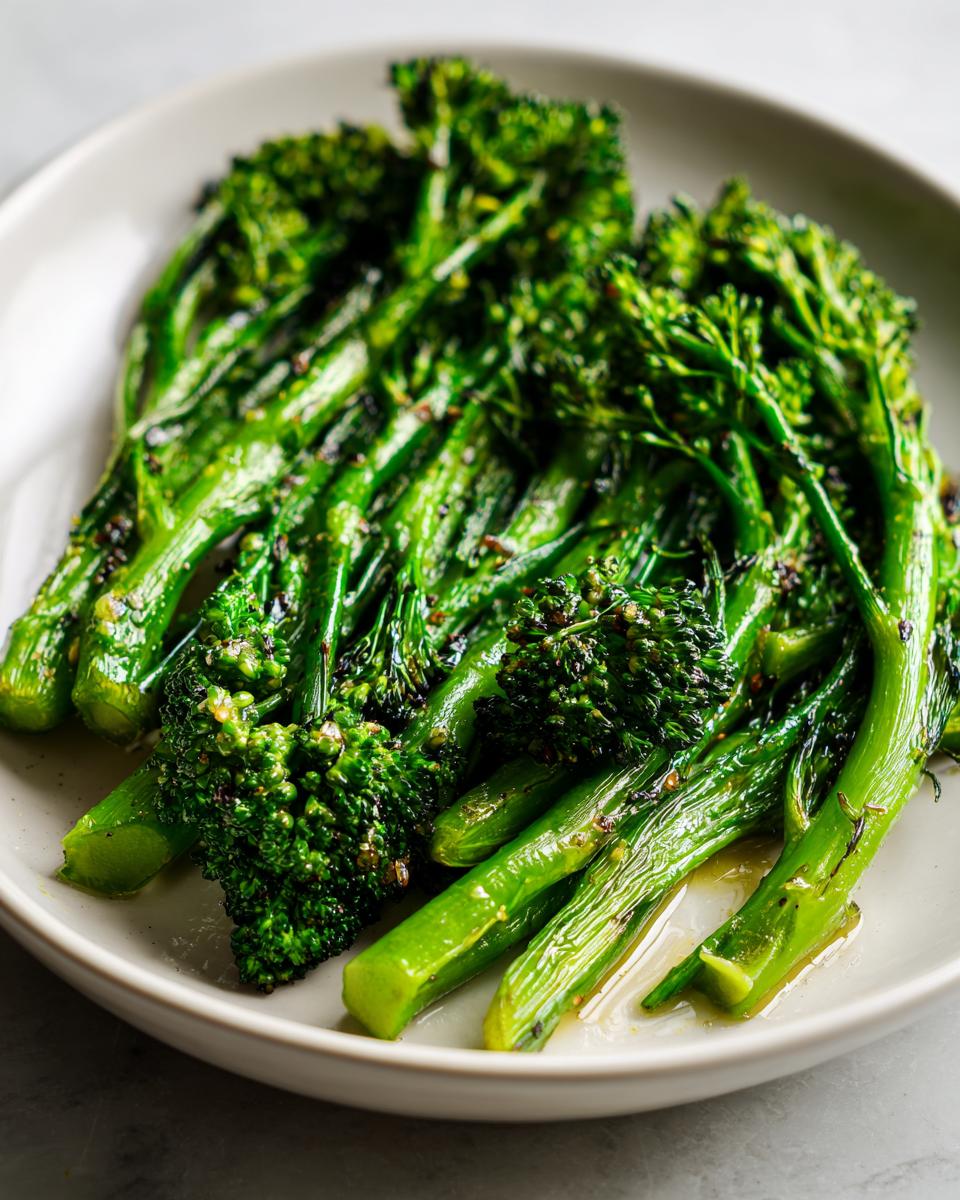
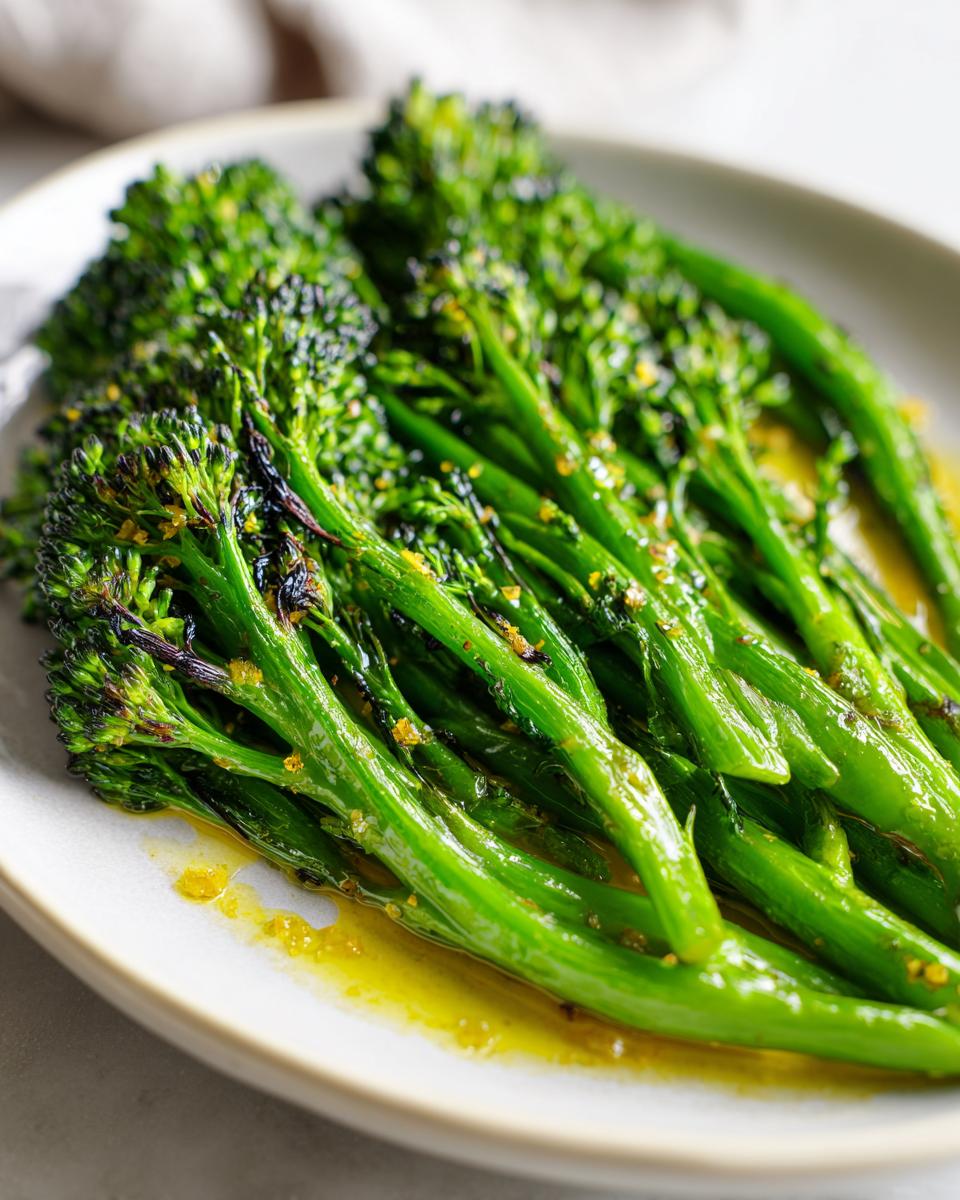
The secret to avoiding that sad, steamed green mess is simple: high heat and space! We blast this at 400 degrees Fahrenheit. When you spread the broccolini out on the sheet pan, you are giving every little stalk room to breathe and roast directly on the metal. If you pile them up, they steam instead of char. We want that gorgeous, slightly crispy, even charred look on the florets—that’s where the best flavor comes from. Don’t overcrowd that pan; that’s the number one rule for making excellent **oven roasted vegetables**!
Ingredients for The Ultimate 15-Minute Garlic Lemon Roasted Broccolini
When you’re aiming for a lightning-fast, super flavorful side, you want ingredients that pull their weight. This recipe doesn’t need a million things; it just needs the right things done correctly. For this **broccolini**, fresh is almost always best, but I’ve made sure to include notes so you can pivot if you need to.
Here’s what you absolutely need on hand to get this roasting:
- One pound of fresh **broccolini**, and make sure you’ve trimmed off the tough, woody ends of the stalks first. Don’t skip trimming!
- Two tablespoons of good quality olive oil. Use the best you have; you’ll taste it!
- Three cloves of garlic—and they need to be freshly minced, please! We want that real aromatic punch here.
- A half teaspoon of kosher salt. This helps draw out just enough moisture for that crispy texture.
- A quarter teaspoon of black pepper, freshly ground if you can manage it.
- One tablespoon of fresh lemon juice to finish things off bright.
- And finally, two tablespoons of grated Parmesan cheese if you want that extra salty, nutty coating. I often skip it if I’m making something else cheesy, but it’s delicious!
If you are looking for a main dish to go along with this incredible green side, you have to try my garlic Parmesan chicken skillet. It’s another weeknight hero!
Ingredient Notes and Substitutions for Broccolini
Let’s talk flexibility. Everyone’s pantry looks different, so here are my quick thoughts.
First, the Parmesan. I listed it as optional for a reason! If you are keeping things strict or simply don’t have any, feel free to skip it. Honestly, this recipe is fantastic as a **keto friendly side dish broccolini** even without it, relying just on the garlic and lemon.
Second, the lemon juice. Fresh is always the gold standard for that vibrant flavor, but if you’re in a pinch, go ahead and use bottled lemon juice. Just be mindful—bottled can sometimes have a sharper, less natural flavor, so maybe start with less and taste before you add the full tablespoon.
Finally, for the garlic, if you absolutely cannot mince three cloves, use half a teaspoon of garlic powder instead, but know that fresh garlic offers much more flavor explosion when actually roasting on the vegetable itself!
Step-by-Step Instructions for Perfect Oven Roasted Broccolini
Okay, this where the actual cooking happens, and I promise you, it moves fast! We’re using the oven here, which is often the easiest, most hands-off way to get that lovely char we’re aiming for in these **oven roasted vegetables**. Make sure your oven is nice and hot before the broccolini even touches its pan. Remember, 400 degrees Fahrenheit is our sweet spot!
- First things first, get that oven preheated to 400°F. Grab your sturdy sheet pan—you want one big enough that the veggies aren’t totally piled on top of each other. This is crucial, so don’t try to cram too much onto one pan!
- Toss your trimmed broccolini right onto that pan. Drizzle it generously with that olive oil. Then, use your hands (it’s better than tongs!) to make sure every stalk is slicked with oil.
- Now for the seasoning blast! Sprinkle that minced garlic, salt, and pepper evenly over everything. Give it one last good toss right there on the sheet pan until you see the seasoning sticking everywhere.
- This next part is vital for success: spread the seasoned broccolini out into a single, neat layer. You want space between the pieces—this is what prevents them from steaming. More space equals more crispy bits!
- Slide that pan into the hot oven and let it roast for between 12 and 15 minutes. Trust me, start checking around the 12-minute mark.
If you’re looking for an amazing complementary side that takes a little longer, you have to try my creamy roasted garlic mashed potatoes, but this green side is ready before those potatoes are even done!
Roasting Time and Checking for Doneness in Your Broccolini
Don’t just set a timer and walk away indefinitely! Since every oven is a little different, the 12–15 minute range is important. You are looking for that perfect texture we talk about: tender-crisp. What does that mean, exactly? Visually, you want to see the little tips of the florets looking nicely browned, almost blackened in a few spots—that’s the char we crave! Texturally, when you pierce a thicker stalk with a fork or a thin knife near the base, it should slide in fairly easily but still offer a bit of resistance. It shouldn’t feel mushy or limp. If it’s still too stiff or raw tasting, give it 2 or 3 more minutes. That’s how you nail the best way to cook broccolini!
Tips for the Best Garlic Broccolini Experience
You have the basic steps down, but to really move this from a good side dish to a *great* side dish that people ask you to make again and again, you need just a couple more tricks up your sleeve. Remember that single layer I kept hammering on? That’s honestly the most important part for achieving that signature char. Overcrowding equals steaming, and nobody wants watered-down flavor in their **garlic broccolini**!
Also, while we keep things simple, don’t skimp on the olive oil quality if you can help it. Since we are roasting at a relatively high heat, a decent quality extra virgin olive oil holds up well and coats the greens beautifully, helping that garlic stick instead of burn immediately. If you’re making this alongside my quick sticky honey garlic chicken, you’ll already have some of those savory flavors kicking around, so the broccolini finishes perfectly!
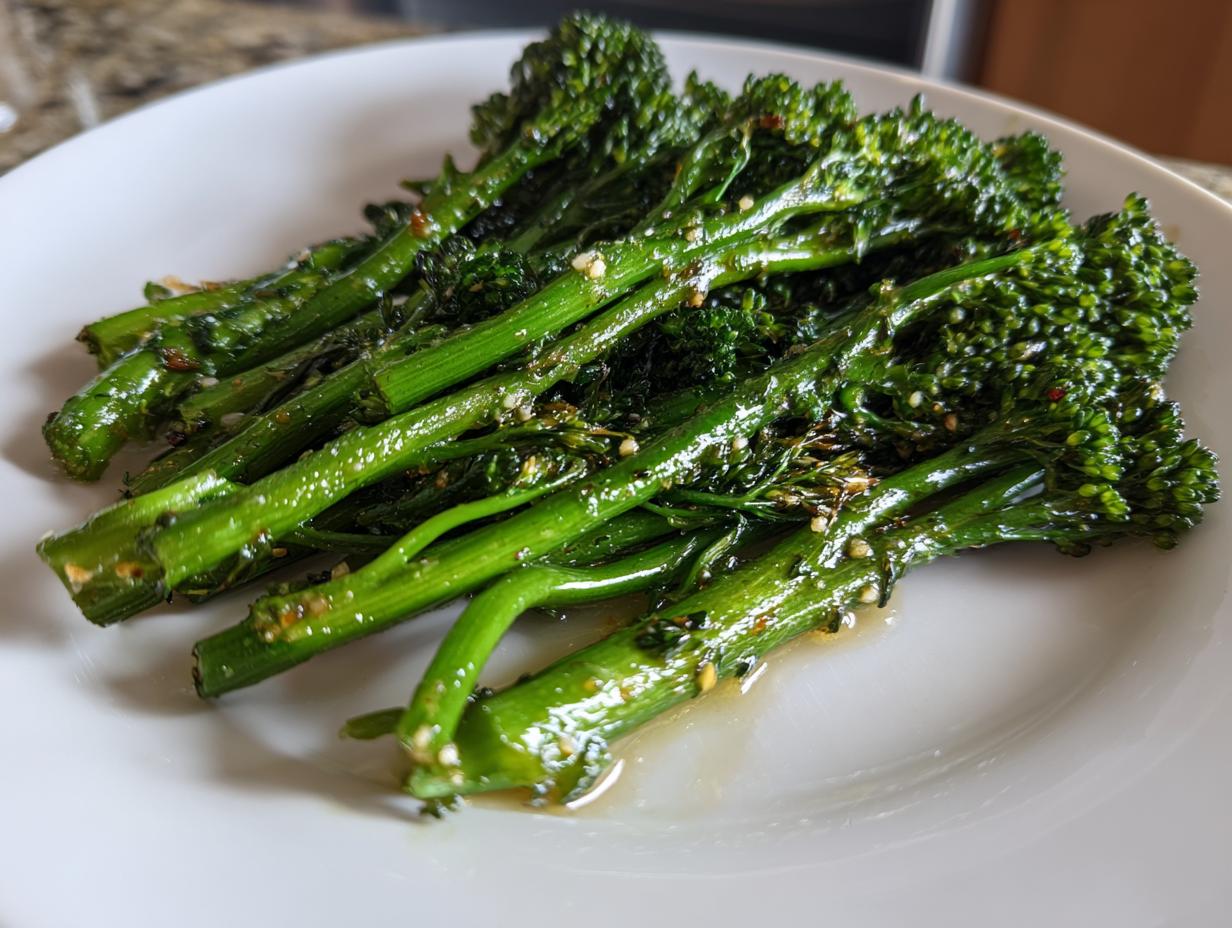
Making Lemon Broccolini: Finishing Touches and Flavor Brightness
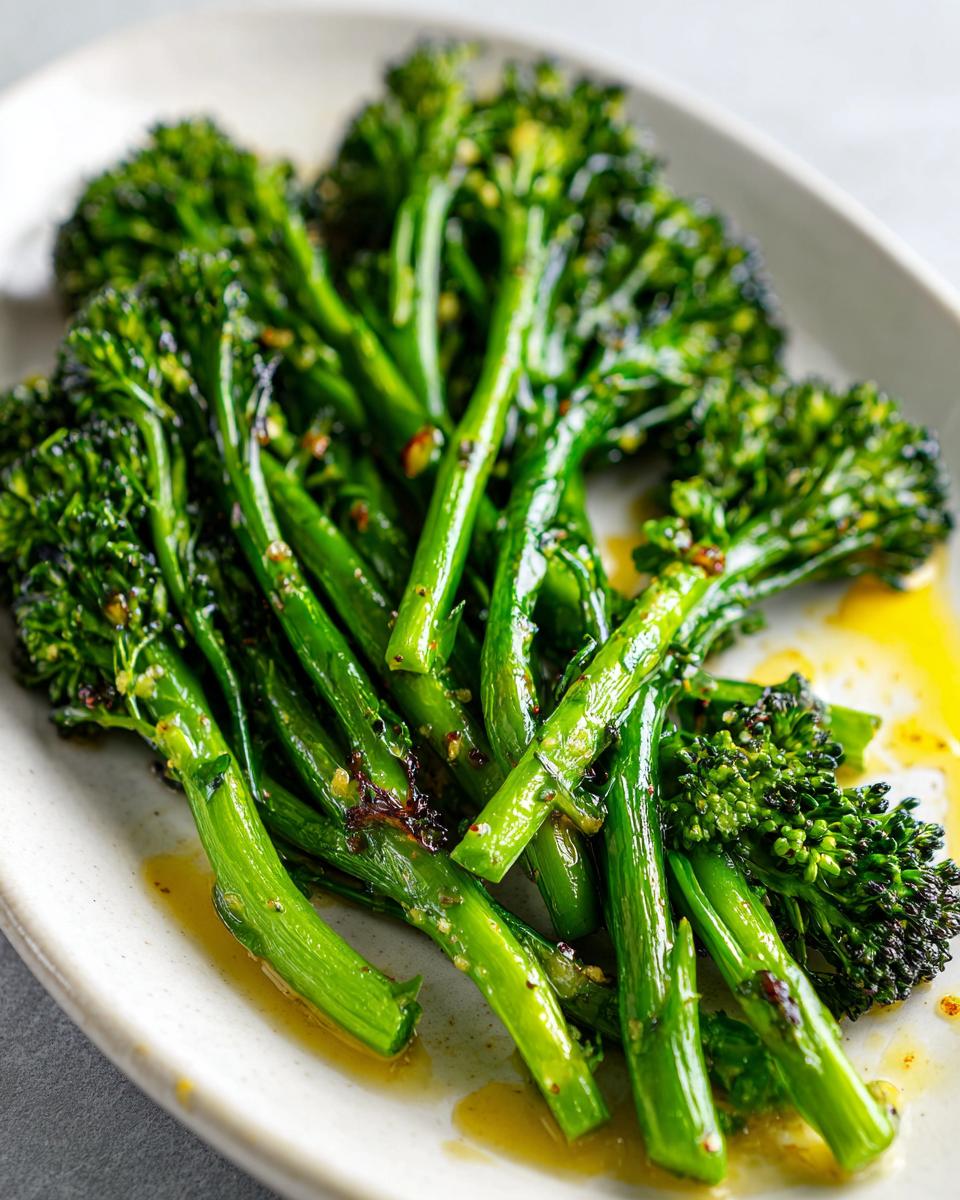
The roast is done! You pull that sheet pan out, and wow, the smell of toasted garlic is incredible. But we are not quite finished yet. If you just drop the lemon juice in at the beginning with the oil, all that wonderful, bright, zingy flavor cooks away and disappears into the oven heat. We want that fresh punch right at the end to make this **lemon broccolini** truly sing!
As soon as the **broccolini** comes out—while it’s still sizzling hot—that’s when you drizzle on the tablespoon of fresh lemon juice. Just a quick toss right there on the pan. This light acidity cuts through the richness of the olive oil and perfectly balances the savory garlic we roasted earlier. It wakes everything up! It’s magic, honestly. If you’re serving this alongside my favorite creamy lemon chicken recipe, the flavors just marry perfectly.
Next up is the Parmesan, if you are using it. I like to sprinkle it over the greens while they are still hot so it melts just slightly, clinging to the florets and the stalks. Don’t toss too vigorously here if you want that nice, slightly chunky coating. A gentle fold with a spatula is all you need.
If you’re using Parmesan, remember that it adds salt, so maybe hold off on adding extra salt until you taste it first! If you are looking for other ways to get incredible flavor into your meals quickly, you absolutely have to check out this garlic roasted broccolini inspiration while you plate this up. This is truly the easiest, fastest way to get sophisticated flavor on your table tonight.
How to Store and Reheat Your Roasted Broccolini
Even though this **broccolini** is so fast to make that you could honestly just whip up a fresh batch every night, sometimes life happens, and you end up with leftovers. It happens to the best of us! The good news is that roasted vegetables reheat much better than steamed ones, but you still need a strategy to keep that lovely texture we worked so hard for.
If you have any leftovers, just let them cool down completely first. Put them into any airtight container you have—a glass container or a sturdy zip-top bag works perfectly. You can generally keep this in the fridge for about three to four days. It’s a super handy **quick side dish vegetable** to have ready for lunch sides throughout the week!
Now, for reheating, this is serious business. Please, for the love of crispy vegetables, do not microwave this! Microwaving turns those beautiful, crisp-tender stalks rubbery and soft in seconds. That’s an instant texture disaster waiting to happen.
My absolute favorite way to bring this back to life is hitting it with dry, high heat again. If you have an air fryer, toss the cooled broccolini in there for about 3 to 4 minutes at 375°F. It revives that slight char beautifully! If you don’t have an air fryer, a skillet is your next best friend. Heat a dry, nonstick skillet over medium-high heat, toss the veggies in, and cook for maybe 3 minutes, shaking the pan every so often. You want to flash-heat them so they warm through but don’t sit in their own steam. It brings back a surprising amount of that original crispness!
If you end up with leftover broth from making my easy chicken tortilla soup, you can even use a tiny splash of that broth in the skillet instead of oil during the reheat, just to add an extra layer of flavor!
Variations for Your Simple Vegetable Recipe
I truly believe a great base recipe should be flexible, which is why this **simple vegetable recipe** is so adaptable throughout the week. You use the same 15 minutes of oven time, but you swap out that final drizzle for something totally different!
If you are feeling like you need a little warmth after eating something rich, try adding a generous pinch—maybe a quarter teaspoon—of red pepper flakes right in with the minced garlic before roasting. That pop of heat works wonders with the char we get from the high oven temperature. It cuts through the olive oil beautifully.
Another one of my favorite easy swaps involves the finish. Instead of that bright lemon, try drizzling about a tablespoon of good balsamic glaze over the hot **broccolini** immediately after it comes out of the oven. The sweet-tart nature of the glaze turns this into something almost elegant enough for a dinner party. If you go the balsamic route, you can definitely skip the Parmesan because you are getting enough complex flavor from the glaze itself.
For something totally different, if you happen to make my homemade teriyaki sauce ahead of time, toss the roasted **broccolini** in just a tablespoon of that thick sauce after it comes out of the oven. It gives it a nice sheen and deep, sweet funkiness. If you want some inspiration for other ways to jazz up quick green sides, this sautéed broccolini shows off a different technique entirely!
Frequently Asked Questions About Cooking Broccolini
You’ve got the ultimate 15-minute side dish recipe down, but I know questions always pop up once you start actually cooking! It’s totally normal. Here are the things I hear most often about handling this amazing vegetable.
Can I use regular broccoli instead of broccolini for this recipe?
You absolutely can, and that’s a great substitution when you can’t find the longer, more slender broccolini! Regular broccoli heads are usually denser and take a little longer to cook through than those thin broccolini stalks. If you swap, I would suggest cutting the larger broccoli into smaller, similarly sized florets so they cook evenly. Since they are thicker, you might need to add 5 more minutes to the roasting time, so check them around 17 or 18 minutes total.
Is this a keto friendly side dish broccolini?
Yes, this recipe is super naturally friendly for low-carb diets like keto! In fact, I mention in the notes that this works perfectly as a **keto friendly side dish broccolini**. The main components—broccolini, olive oil, garlic, salt, and pepper—are all low in net carbs. If you skip the Parmesan cheese, which is low-carb anyway, you are golden. If you need a sweet fix after dinner, check out my keto cheesecake recipe!
What is the best way to cook broccolini if I don’t have an oven?
If the oven is tied up or you just don’t want to heat the house up, sautéing is your next best bet for a quick result. To get that crisp-tender texture without roasting, use a large skillet over medium-high heat. Toss the oiled and seasoned **broccolini** in the hot pan. You’ll need to cook this for about 5 to 7 minutes total, stirring often. You won’t get the exact same deep char you get from the oven, but you’ll still get a fantastic **garlic broccolini** flavor profile very quickly!
Why is mine not crispy?
If your broccolini turned out mushy instead of having that lovely crispiness, nine times out of ten, it’s because the pan was too crowded! When the vegetable pieces are touching too much, they steam in the moisture that releases from the stalks instead of getting direct dry heat from the oven air. You need that single layer spread—remember what I said earlier about giving them space to breathe? If you need more tips on roasting, checking out the best way to cook broccolini elsewhere can offer some extra perspective, though my method usually nails it!
Nutritional Snapshot of This Healthy Vegetable Side Dish
Listen, I’m not a nutritionist, and I know that once you start adding extra olive oil or topping it heavily with Parmesan, those numbers are going to jump around a little bit. But for those of you tracking macros or just trying to keep things light and bright, this is a fantastic base! We’re talking about one of those truly guilt-free **healthy vegetable sides**.
Based on the ingredients listed in the recipe above—and assuming you use just the amounts specified, including the optional Parmesan—here is a general snapshot per serving:
- Calories: Roughly 75 per serving. That’s incredibly low; you could eat a huge helping and still feel great about it!
- Fat: Around 5 grams. Mostly good fats from that olive oil we used to roast everything.
- Protein: About 3 grams, boosted slightly by the Parmesan, if you include it.
- Carbohydrates: Only about 6 grams, with 2 grams of that being beneficial fiber.
Remember, these are estimates! Your exact measurements of salt or the specific brand of Parmesan you use can tweak things slightly. But the takeaway is this: you are getting a delicious, crunchy, garlicky, easy side dish that fits perfectly into almost any healthy eating plan you’re following. It’s a powerhouse of flavor without any heavy fillers. If you love turning veggies into incredibly satisfying meals, you should also check out my recipe for a veggie lentil salad—another winner!
PrintThe Ultimate 15-Minute Garlic Lemon Roasted Broccolini

Make this easy broccolini recipe in 15 minutes. Roasting brings out a crisp-tender texture with slight char, perfect for a quick, healthy side dish.
- Prep Time: 5 min
- Cook Time: 15 min
- Total Time: 20 min
- Yield: 4 servings 1x
- Category: Side Dish
- Method: Roasting
- Cuisine: American
- Diet: Low Fat
Ingredients
- 1 lb broccolini, trimmed
- 2 tablespoons olive oil
- 3 cloves garlic, minced
- 1/2 teaspoon kosher salt
- 1/4 teaspoon black pepper
- 1 tablespoon fresh lemon juice
- 2 tablespoons grated Parmesan cheese (optional)
Instructions
- Preheat your oven to 400 degrees Fahrenheit. You will need a sheet pan for this oven roasted vegetables recipe.
- Place the trimmed broccolini on the sheet pan. Drizzle with olive oil and toss to coat evenly.
- Scatter the minced garlic, salt, and pepper over the broccolini. Toss again to distribute the seasoning.
- Spread the broccolini in a single layer on the sheet pan to promote charring.
- Roast for 12 to 15 minutes, until the stems are tender-crisp and the florets have browned slightly.
- Remove from the oven. Immediately drizzle with fresh lemon juice.
- Toss with Parmesan cheese, if using, before serving this simple vegetable recipe.
Notes
- For extra crispy broccolini, ensure the pieces are not crowded on the sheet pan.
- This recipe works well as a keto friendly side dish broccolini or paleo vegetable recipe.
- If you prefer a sautéed greens method, cook over medium-high heat for 5-7 minutes instead of roasting.
Nutrition
- Serving Size: 1/4 of recipe
- Calories: 75
- Sugar: 1
- Sodium: 300
- Fat: 5
- Saturated Fat: 1
- Unsaturated Fat: 4
- Trans Fat: 0
- Carbohydrates: 6
- Fiber: 2
- Protein: 3
- Cholesterol: 2