

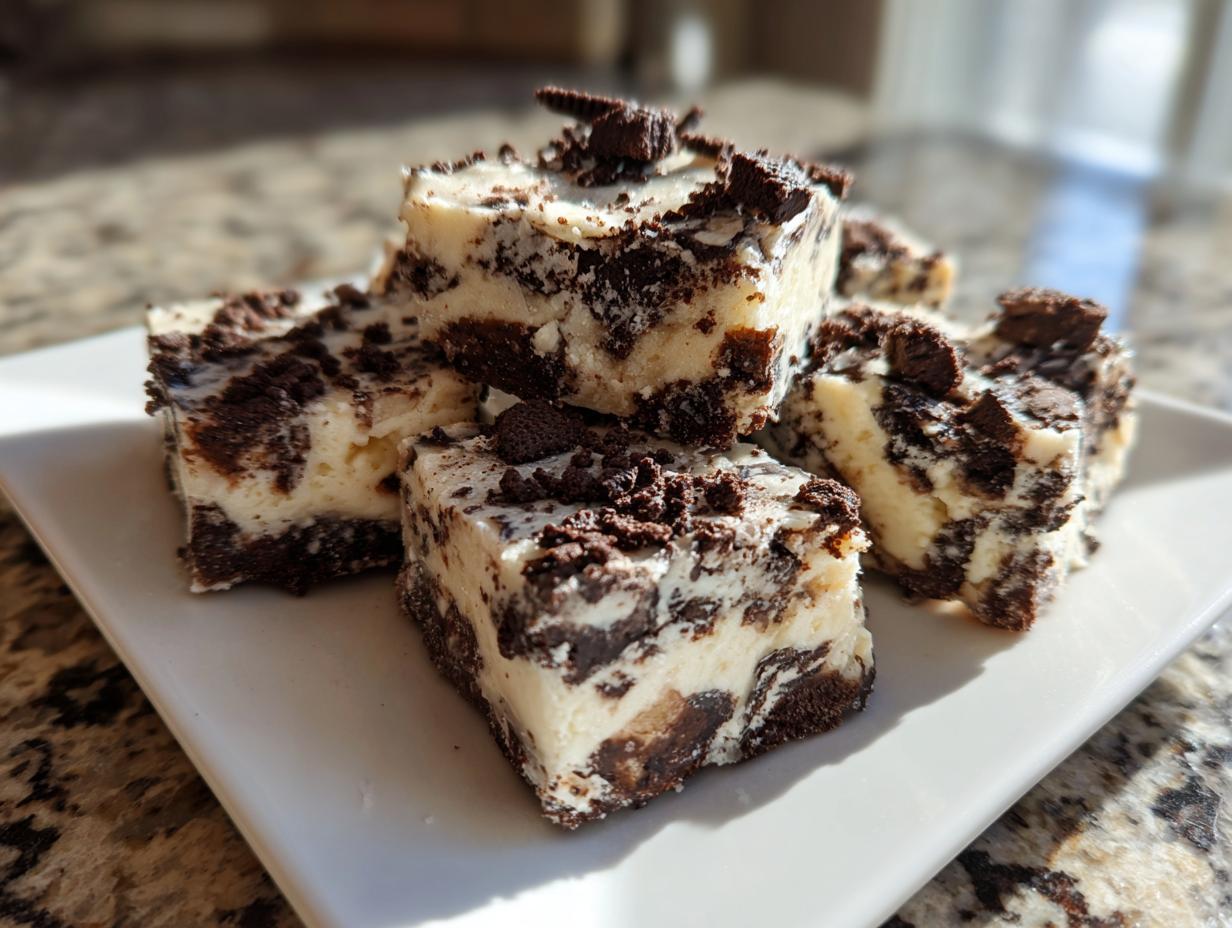
Okay, stop whatever you’re doing right now because if you have that sudden, desperate craving for something intensely sweet, creamy, and full of that glorious cookies and cream flavor, I have the absolute fastest fix imaginable. Seriously, forget complicated baking projects. We are talking about my **Quick & Easy 5-Ingredient No-Bake White Chocolate Oreo Fudge**.
This recipe is the epitome of what I try to bring to Cooking by Felix—taking classic, comforting flavors and packaging them into something utterly achievable, even when you only have five minutes to spare. This **oreo fudge** sets up perfectly, giving you decadent squares that just melt in your mouth. It’s no-bake, it requires minimal fuss, and it truly honors my belief that good food shouldn’t cause stress, even dessert!
It’s made with white chocolate, and it is just the perfect, simple way to bring some serious joy into your afternoon. You’ll love how quickly this comes together—we’re talking five minutes of hands-on prep before it heads to the fridge to work its magic. Trust me, keep this one bookmarked; it’s a lifesaver for last-minute sweet attacks or unexpected guests. If you loved how simple the no-bake peanut butter bars were, you are going to go wild for this fudge.
- Why This Easy Oreo Fudge is Your New Favorite No Bake Fudge Recipe
- Gathering Ingredients for Perfect Oreo Fudge
- Step-by-Step Instructions for Quick Fudge Treats
- Expert Tips for the Best Oreo Fudge Recipe
- Creative Variations for Your Oreo Fudge
- Serving Suggestions for Party Fudge Squares
- Storage and Keeping Your Creamy Oreo Dessert Fresh
- Frequently Asked Questions About Oreo Fudge
- Estimated Nutritional Data for This Cookies and Cream Dessert
Why This Easy Oreo Fudge is Your New Favorite No Bake Fudge Recipe
If you’ve ever scrolled through recipes feeling defeated by long ingredient lists or complicated baking steps, this is the answer you’ve been looking for. This isn’t just another dessert; it’s instant gratification, guaranteed. We’re talking about five minutes of effort—seriously, five minutes—before you’re done prepping. That’s why this is my go-to **Easy Oreo Fudge**.
The magic here is how little we need to work. Because it’s a **No Bake Fudge Recipe**, there’s zero preheating, zero worrying about over-baking, and zero stress. You melt, stir, and chill. That’s the whole ballgame! It hits that sweet spot everyone wants: that irresistible **Cookies and Cream Dessert** flavor without requiring an oven or a candy thermometer. It’s exactly the kind of simple, successful treat I aim to share with busy cooks like you. If you’re looking for more quick wins in the kitchen, check out my guide on simple delicious desserts—this fudge is certainly at the top of that list!
Gathering Ingredients for Perfect Oreo Fudge
The beauty of this recipe is how little you need to gather. It’s so simple, but I want to be super clear on the components so you get that signature creamy texture everyone raves about. You might see other recipes out there floating around promising a 3 Ingredient Fudge, and those are fine in a pinch, but trust me, adding these two extras—the vanilla and the topping Oreos—makes all the difference between good fudge and *amazing* fudge.
We are sticking to five core items, and they all play a crucial role in making this the **Best Oreo Fudge Recipe** you’ll ever try.
Essential Components for Creamy Oreo Fudge
You need to have these items measured out and ready before you even think about melting anything. Because this is a no-bake situation, mise en place is your best friend!
- First up, get your backbone: 14 ounces of **sweetened condensed milk**. That’s usually one standard can, and that’s what gives this fudge its incredible, pull-apart quality.
- Next, the star flavor carrier: 24 ounces of **white chocolate chips**. I strongly recommend good quality chips because they melt the smoothest. Don’t use white chocolate baking bars unless you really know how to temper it—chips are safer for beginners!
- Just a tiny bit of magic: 1 teaspoon of pure **vanilla extract**. This deepens the flavor so it doesn’t taste one-note sweet.
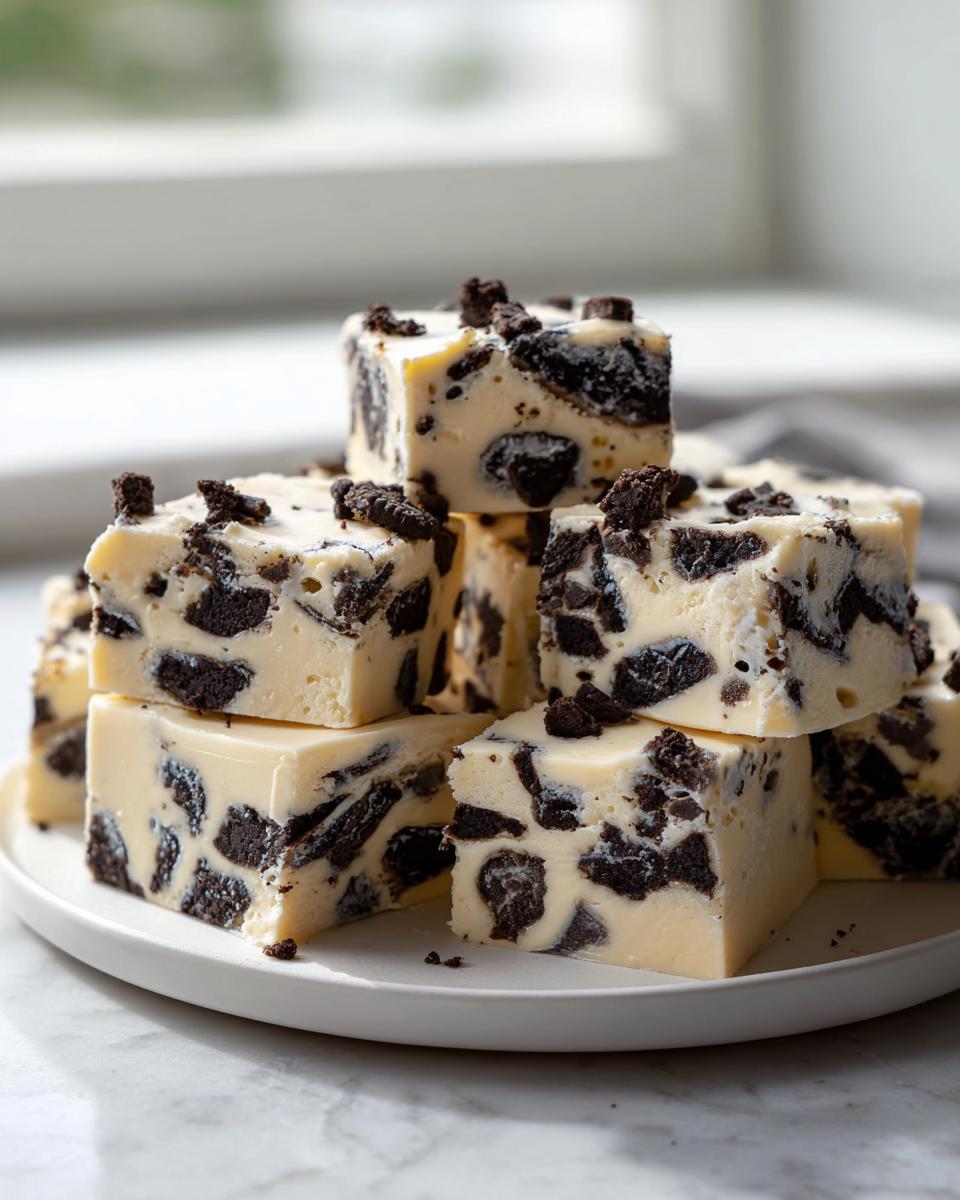
- Now for the crunch! You’ll need one full package of **Oreo cookies**, which is usually about 14.3 ounces. These need to be coarsely crushed—I mean, you want chunks, not sand! We are mixing most of these into the fudge base.
- Finally, the optional but highly recommended decorative touch: about 1/2 cup of extra **crushed Oreos for topping**. This gives you that gorgeous speckle on top that signals exactly what delicious treat people are about to eat.
Step-by-Step Instructions for Quick Fudge Treats
If you can melt chocolate and stir, then you can absolutely master this **oreo fudge**. That’s the promise of this recipe! We’re aiming to get this all mixed together in under five minutes flat, which is why getting your pan ready before you start melting is critical. Remember, this is all about speed and success for the busy home cook.
Preparing the Pan and Melting the Base for Oreo Fudge
First things first: grab an 8×8 inch baking pan. You absolutely need to line this with parchment paper, making sure you leave an overhang on two opposite sides. This overhang is your handle later for lifting the whole slab out—don’t skip it! Give the paper a quick little grease too, just to be safe.
Next, the white chocolate. Place your 24 ounces of white chocolate chips into a microwave-safe bowl. This is where a lot of **Fudge Making for Beginners** goes wrong. You want it smooth, not scorched! Heat it in 30-second blasts in the microwave. After every 30 seconds, pull it out and stir it vigorously, even if it still looks chunky. Stirring redistributes the heat and keeps you from burning those sensitive chips. Keep zapping and stirring until it’s liquid silk.
Mixing and Setting Your Simple Oreo Candy
Once that white chocolate is perfectly smooth and gorgeous, it’s time to move fast! Pour in the entire can of sweetened condensed milk and that teaspoon of vanilla extract. Use a rubber spatula to fold everything together until it’s totally uniform. It will be thick, almost like pancake batter, but super glossy.
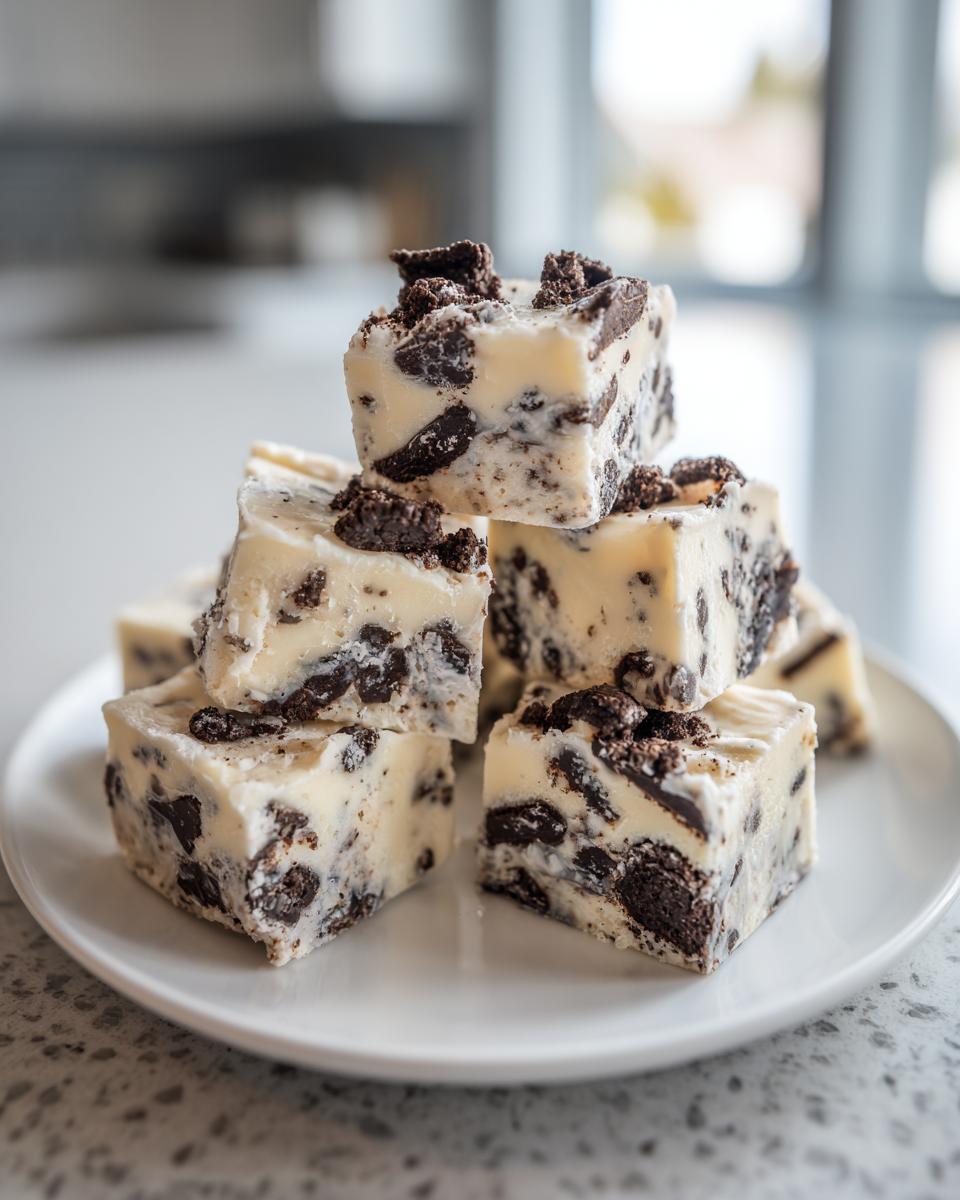
Now, toss in the bulk of your crushed Oreos—make sure you’re using the cookies *and* the cream filling from the inside! Fold them in gently, just until you don’t see much white mixture anymore. Pour this glorious **Simple Oreo Candy** batter into your prepared pan and smooth out the top. If you saved any crushed Oreos, sprinkle them over the top now for a beautiful finish.
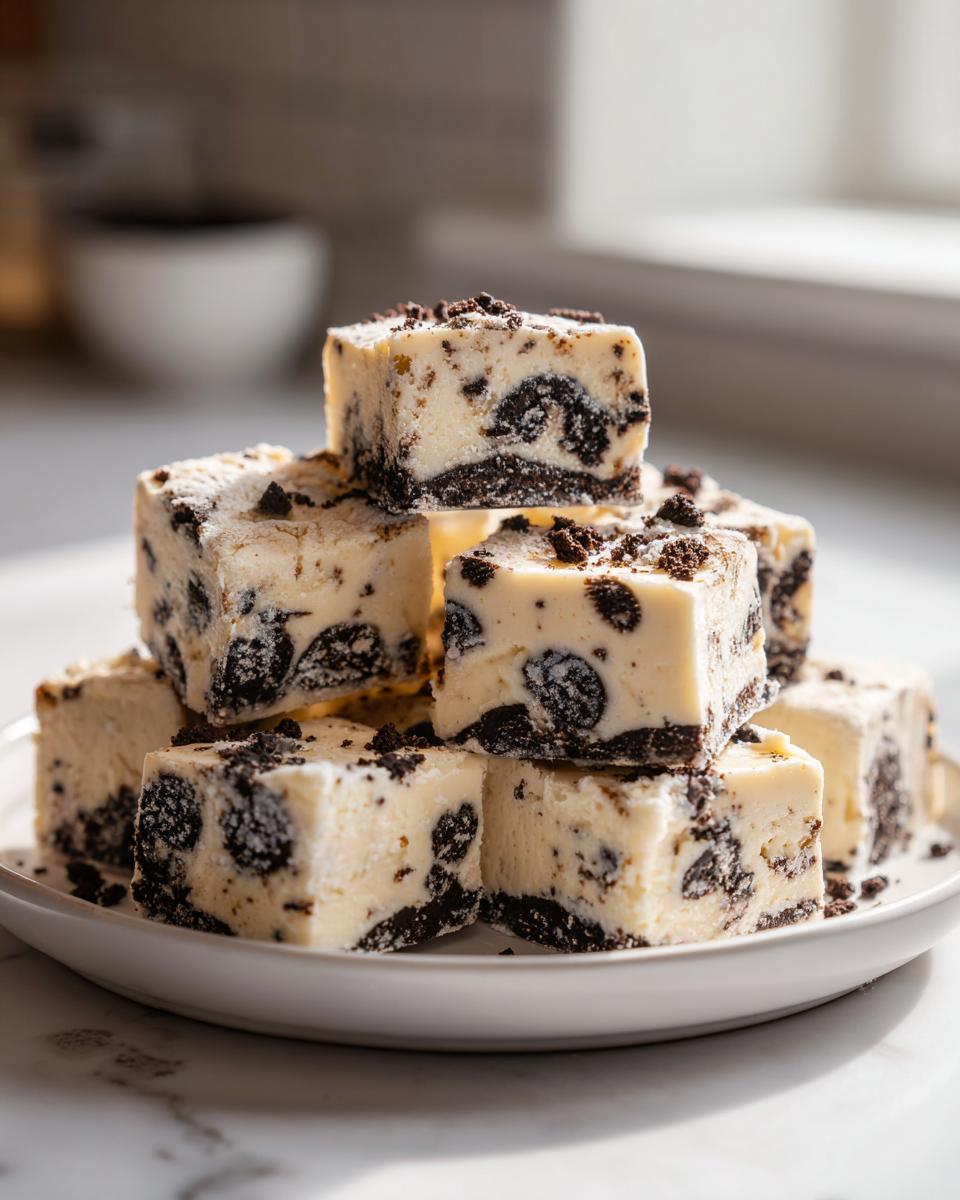
Step six is the hardest part: waiting! Place that pan right into the refrigerator. It needs a minimum of two hours to firm up properly before you can cut it. If you rush this, the fudge will smear everywhere, and you won’t get those nice clean squares. We want perfect slices!
If you need a quick dinner idea while you wait for your fudge to set, check out some of my weeknight favorites!
Expert Tips for the Best Oreo Fudge Recipe
Getting that perfect, creamy melt consistently is what separates my go-to **Best Oreo Fudge Recipe** from the hit-or-miss batches I used to make. Remember, since we aren’t baking, the texture is entirely dependent on how well you manipulate our melted ingredients.
When you’re warming that white chocolate and condensed milk—if it looks a little reluctant to blend or feels grainy—give the bowl a gentle rest over simmering water (a double boiler setup) for just a minute or two before mixing again. That little bit of gentle, moist heat smooths everything out, promising you that impossibly rich **Homemade Fudge Recipe** consistency every single time. Don’t let the white chocolate seize up on you!
Also, when folding in those Oreo chunks, be patient! Fold them in just until they disappear into the mix. Over-mixing at that stage can actually grind the cookies down too finely, ruining that delightful, crunchy contrast that makes this **oreo fudge** so addictive. If you want to practice your technique on something else first, my French Apple Tart recipe gives you great practice with careful batter handling!
Creative Variations for Your Oreo Fudge
This basic **oreo fudge** is fantastic just as it is, but you know me—I love experimenting, especially when holidays roll around! If you’re making this for a festive party or need something special for gifting, switching up the flavor profile is super easy since the base is so reliable. People are always searching for great **Holiday Fudge Recipes**, and this fits the bill perfectly for an **Easy Christmas Candy** alternative to cookies.
The secret is the extract! Since we’re using white chocolate, it’s like a blank canvas ready for seasonal fun. I’ve seen people add espresso powder for a mocha swirl, or even a little bit of citrus zest if you’re feeling adventurous. But my favorite, hands-down, is the cooling, minty version.
Making Peppermint Oreo Fudge Variation
If you want to turn this into **Peppermint Oreo Fudge Variation** during the winter months, you don’t need to change a thing about the white chocolate or condensed milk ratio. Just look back at Step 3 in the instructions where we mixed in the vanilla extract.
Right there, when you are adding that teaspoon of vanilla, you are going to swap it out or supplement it with peppermint extract. I suggest using 1/4 teaspoon of peppermint extract. A little goes a long way with extracts, so start small! Smell it; if it smells strongly minty, you’re good to go. You can even crush up a few candy canes to sprinkle on top instead of, or in addition to, the reserved Oreos. It looks so festive and tastes absolutely divine. If you’re already in the holiday baking mood, you might want to check out my recipe for Christmas Sprinkle Sugar Cookies for another non-fudge treat!
Serving Suggestions for Party Fudge Squares
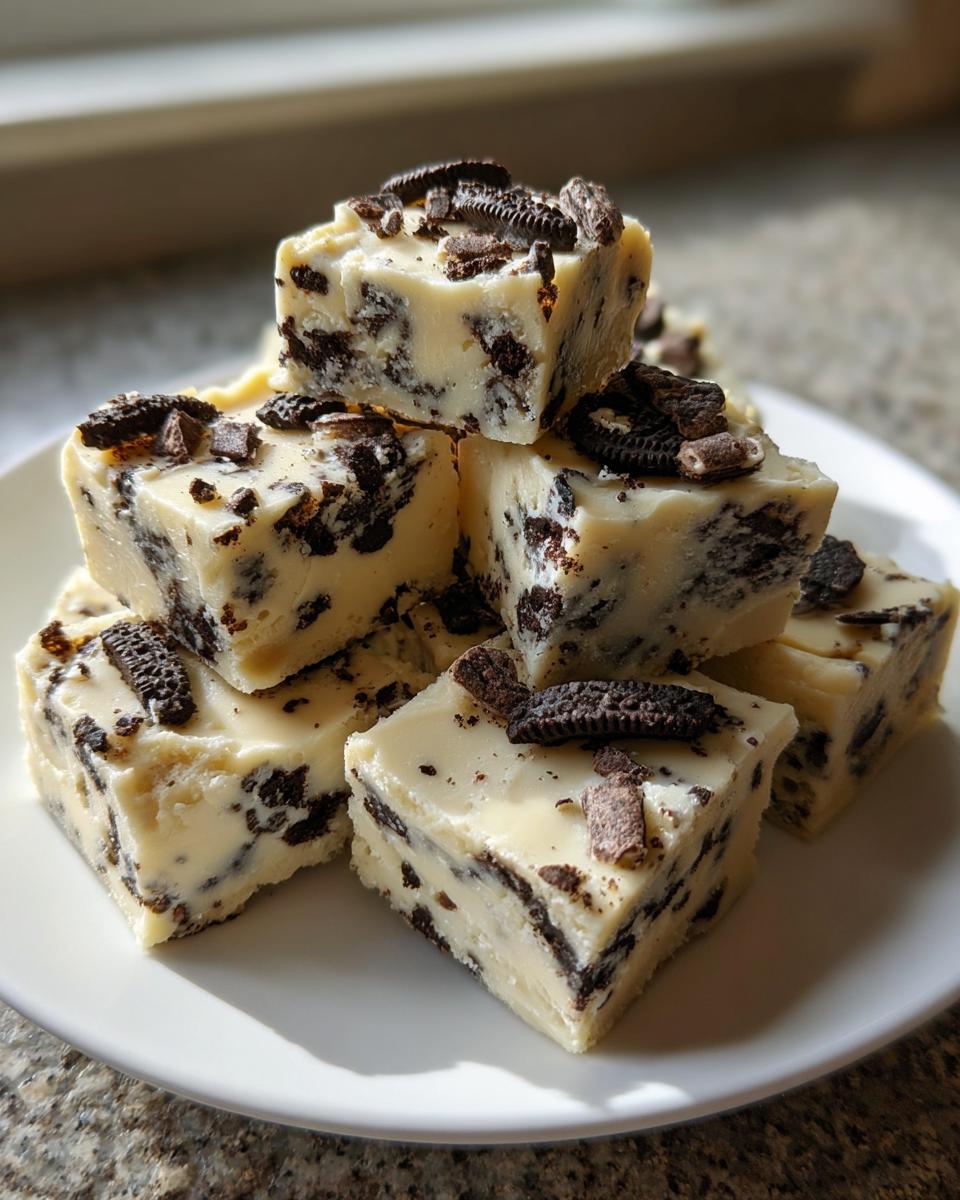
Now that you’ve got this perfectly set, **Decadent Cookie Fudge**, you have to decide where it’s going! These squares are honestly just as good for a casual Tuesday night treat as they are for a big holiday platter. Since they come together so fast, they are the ultimate **Last Minute Dessert Idea**.
When I make a big batch for a party, I try to present them beautifully. We’re talking **Party Fudge Squares** that look like you spent hours on them, not five minutes melting chocolate! Cutting them small is key; these are super rich, so small one-inch bites are plenty. I place them in little white cupcake liners on a tiered tray—that instant lift makes them look super professional.
They pair wonderfully with coffee, of course, but if you’re serving them during the holidays, try placing a single piece next to a small glass of cold milk or maybe a warm mug of cocoa. If you’re looking for another easy-but-impressive holiday treat that you can set and forget, you absolutely have to try my recipe for the Crockpot Christmas Crack!
Storage and Keeping Your Creamy Oreo Dessert Fresh
Okay, so the hard part is over—you’ve resisted eating the entire pan and now you have gorgeous squares of **Creamy Oreo Dessert**! How do you keep them delicious for the next few days or even the next week? This fudge is surprisingly resilient, but storing it right keeps that white chocolate smooth and prevents the Oreos from going soft.
The good news is that since this recipe is so dense and has so much sugar from the condensed milk, it’s very stable. You actually have two great options for storage, depending on how quickly you plan to devour them. If you only need to keep them around for a couple of days, or if your house is generally cool, leaving them out on the counter is totally fine!
Store the cut fudge squares in an airtight container right at room temperature for up to one week. The high sugar content acts as a natural preservative, so you don’t need to worry about them spoiling quickly. Just make sure the container is truly sealed so they don’t absorb any weird kitchen smells!
Now, if you made a massive batch for holiday gifting or if your kitchen tends to run warm, the refrigerator is your friend. Chilling it will keep the fudge extra firm, which is great if you like a chewier bite. Just layer the squares between pieces of parchment paper inside that airtight container so they don’t stick together while resting in the cold. Either way, this **oreo fudge** holds up beautifully, which is perfect because you definitely want leftovers!
Frequently Asked Questions About Oreo Fudge
It’s funny, even with the clearest instructions, people always have specific questions when it comes to making candy at home—especially when it’s something as deliciously addictive as this **oreo fudge**! I’ve gathered the most common things folks ask me when they’re about to dive in. Hopefully, this helps clear up any last-minute doubts so you can get your perfect batch chilling!
The biggest worry I hear from folks making **No Bake Fudge Recipe** for the first time is usually about texture, and that’s totally fair! But don’t you stress; these answers should set you up for success. If you’re looking for other quick, no-fuss recipes, my pumpkin fluff dip is another great one to keep in your back pocket.
Can I make this Oreo Fudge without white chocolate?
Oh, this is a question I get a lot, especially when people are looking to make a purely chocolate version! For this specific recipe, I really, really suggest sticking with the white chocolate chips. Why? Because the structure of this whole treat relies on the specific melt point and high cocoa butter content found in good quality white chocolate chips when combined with the **Sweetened Condensed Milk Fudge** base.
If you tried to skip the white chocolate and just use milk chocolate or dark chocolate chips, you’d end up with a very different outcome. It might not set firmly enough, or it could become overly oily because those chocolates behave differently when melted down with condensed milk. If you absolutely must avoid white chocolate, you’d need an entirely different base recipe that uses melted marshmallows or butter, but this five-ingredient wonder relies on that sweet, creamy white foundation to hold everything together!
How do I get perfectly clean cuts when slicing the fudge?
This is the key to making beautiful **Party Fudge Squares**! Nobody wants a messy slab of fudge that smears every time you try to move it. The answer here is heat and a very sharp knife. Once your fudge is fully set—and I mean *firm*—line up your cutting board.
Next, grab a large, sharp chef’s knife and run it under very hot water. Don’t just dip it; you want that blade warm to the touch. Dry the knife quickly, and then make your first cut. Repeat this process for every single cut you make—hot water, quick dry, slice. Wiping the blade clean between each slice removes the melted fudge residue, which is what causes the dragging and smearing. It takes an extra minute, but the results are picture-perfect **oreo fudge** pieces!
Estimated Nutritional Data for This Cookies and Cream Dessert
I always get asked about the numbers, and while I focus mainly on taste and ease here at the blog, I know some of you track things closely! So, here is the breakdown for this fantastic **Cookies and Cream Dessert** based on standard ingredient usage when divided into 36 squares, as noted in the recipe details.
Please remember, Felix is not a nutritionist, so these are just estimates! The final numbers might shift a bit depending on the exact brand of white chocolate chips you splurge on or the type of Oreos you crush up. But this gives you a good baseline for this rich treat!
- Serving Size: 1 square
- Calories: 180
- Total Fat: 11g (This includes about 7g of Saturated Fat, which is normal for fudge made with real chocolate and condensed milk!)
- Carbohydrates: 19g
- Sugars: 18g (Yes, it’s a treat, but wow is it worth every single gram!)
- Protein: 2g
Eating fudge isn’t about health food, right? It’s about indulgence! But knowing that one small square gives you that massive chocolate hit is great planning for parties or gifting occasions. If you’re looking for lighter fare earlier in the day, make sure you check out some of my balanced options over in my healthy lunch recipes section. But for now? Enjoy this decadent fudge guilt-free; it’s made simply and with love!
PrintQuick 5-Ingredient White Chocolate Oreo Fudge

Make this easy, no-bake Oreo fudge using only five simple ingredients. It requires just 5 minutes of prep time and results in creamy, decadent cookies and cream squares perfect for gifting or snacking.
- Prep Time: 5 min
- Cook Time: 0 min
- Total Time: 2 hr 5 min
- Yield: 36 squares 1x
- Category: Dessert
- Method: No Bake
- Cuisine: American
- Diet: Vegetarian
Ingredients
- 14 ounces sweetened condensed milk
- 24 ounces white chocolate chips
- 1 teaspoon vanilla extract
- 1 package (about 14.3 ounces) Oreo cookies, crushed
- 1/2 cup crushed Oreo cookies for topping (optional)
Instructions
- Line an 8×8 inch baking pan with parchment paper, leaving an overhang on the sides for easy removal. Lightly grease the paper.
- Place the white chocolate chips in a microwave-safe bowl. Microwave in 30-second intervals, stirring well after each interval, until the chocolate is completely smooth.
- Stir the sweetened condensed milk and vanilla extract into the melted white chocolate until fully combined.
- Fold in the 1 cup of crushed Oreo cookies until they are evenly distributed throughout the fudge mixture.
- Pour the fudge mixture into the prepared pan and spread it evenly. Sprinkle the reserved crushed Oreos over the top, if using.
- Refrigerate the fudge for at least 2 hours, or until firm enough to cut.
- Use the parchment paper overhang to lift the fudge from the pan. Cut into small squares before serving.
Notes
- For a smoother melt, you can melt the white chocolate and condensed milk in a double boiler instead of the microwave.
- If you want a peppermint flavor for the holidays, add 1/4 teaspoon of peppermint extract with the vanilla extract.
- Store the finished fudge in an airtight container at room temperature or in the refrigerator for up to one week.
Nutrition
- Serving Size: 1 square
- Calories: 180
- Sugar: 18
- Sodium: 95
- Fat: 11
- Saturated Fat: 7
- Unsaturated Fat: 4
- Trans Fat: 0.1
- Carbohydrates: 19
- Fiber: 0.5
- Protein: 2
- Cholesterol: 10