

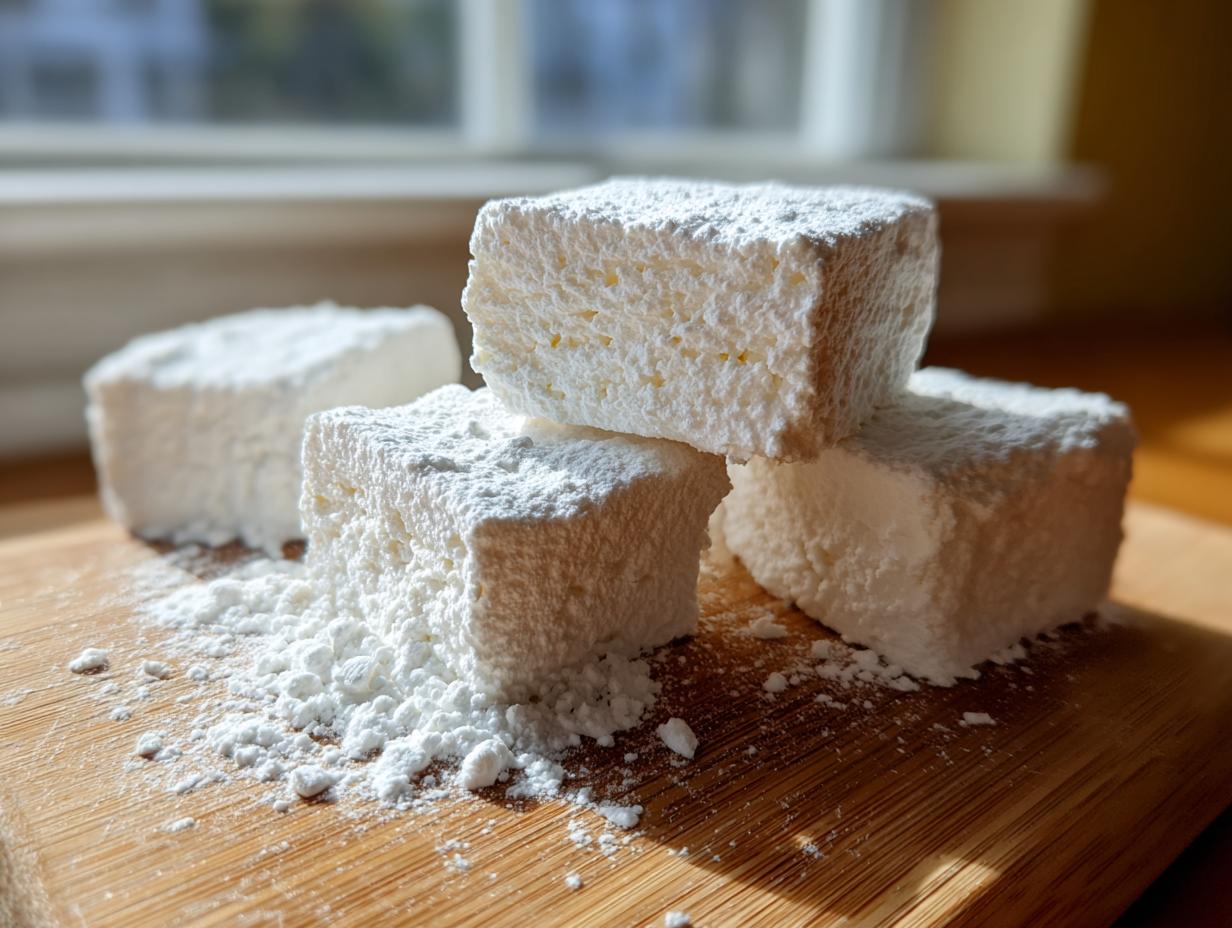
When you pull those squishy, perfectly soft squares out of the pan, you’ll instantly know you can never go back to the stuff in the plastic bag again. I mean, store-bought candy just tastes like something nostalgic that hasn’t quite been paid for, right? We’re aiming for better than nostalgia here; we’re aiming for cloud-like perfection. This is my absolute favorite recipe for **homemade marshmallows** because it cuts through the intimidation factor of candy making. Cooking by Felix is all about bringing real joy back into the kitchen, even when life is moving at lightning speed. And honestly, taking a little time to create something this fluffy and delicious? It’s the kind of simple, soul-satisfying success we all need, especially if you’re looking to top those hot chocolate cookies. That’s what reclaiming the kitchen feels like!
- Why This Is The Best Homemade Marshmallows Recipe From Scratch
- Gathering Ingredients for Your Fluffy Homemade Marshmallows
- Simple Marshmallow Recipe From Scratch Steps
- Tips for Perfect Homemade Marshmallows Every Time
- Storage and Enjoying Your Soft Candy Treats
- Flavor Variations for Your Gourmet Marshmallow Recipe
- Frequently Asked Questions About Making Marshmallows At Home
- Estimated Nutritional Data for Homemade Vanilla Extract Desserts
- Share Your Homemade Marshmallows Creations
Why This Is The Best Homemade Marshmallows Recipe From Scratch
I know candy making sounds fancy, but honestly, this is the Easy Marshmallow Recipe you’ve been searching for. I trust this recipe completely because it consistently delivers that perfect, pillowy texture that store brands just can’t touch. It’s a game-changer for s’mores, I promise!
When you look at other methods, they can involve all sorts of complicated boiling or risky techniques. Not this one! Here’s why I swear by this method for making truly superior homemade marshmallows:
- You get that unbelievable, light, cloud-like texture every single time.
- The flavor from the pure vanilla is so much cleaner and richer.
- It uses straightforward steps that build confidence, even if you’ve never done Kitchen Candy Making before.
If you nail this, you certainly won’t stick to those grocery aisle versions again. This is the foundation you need before trying some more elaborate recipes, like this easy slow cooker pozole, which is also something you can rely on!
Gathering Ingredients for Your Fluffy Homemade Marshmallows
Okay, let’s talk ingredients! Making these fluffy homemade marshmallows really only requires pantry staples, but the quality matters, especially for the flavor boost in our Vanilla Mallows Tutorial. You’ll need the gelatin—make sure it’s unflavored!—sugar, salt, water, and the star binder: light corn syrup. Remember, the powdered sugar and cornstarch are used *only* for the dusting mixture later; don’t mix those into the main batter!
Don’t skimp on your vanilla extract either. Since this is where most of the final flavor comes from, using a good, rich vanilla makes such a difference in this homemade marshmallow experience. Check out my notes on making your own vanilla extract if you’re feeling ambitious!
Ingredient Notes and No Corn Syrup Marshmallows Alternatives
I get asked all the time if you can skip the corn syrup, and the short answer is yes, but with a tiny asterisk. You can swap it out for equal parts honey or maple syrup if you’re avoiding corn products. However, just know that those alternatives have slightly different sugar structures! That means your finished homemade marshmallows might be a touch stickier or have a slightly different set, but they will still taste amazing. It’s worth trying either way!
Simple Marshmallow Recipe From Scratch Steps
Now for the fun part: actually making these wonderful little clouds! I know the idea of cooking sugar to 240 degrees sounds intense, but trust me, with a simple candy thermometer, you’ve got this. Remember, candy making requires focus, but this process is very systematic. Let’s get your stand mixer ready!
Preparing the Gelatin and Syrup Base
First things first, we need the gelatin to bloom. That’s just a fancy way of saying we sprinkle the gelatin powder over 1/2 cup of cold water and let it sit for 10 minutes to get happy and soft. While that’s happening, let’s get the syrup going. Toss the sugar, corn syrup, 1/4 cup of water, and salt into a saucepan. Heat it slowly, stirring just until the sugar dissolves. Once it starts boiling, stop stirring! Attach that candy thermometer—we are cooking this syrup until it hits exactly 240 degrees Fahrenheit, which is that perfect soft-ball stage. That temperature ensures your final treats are those gorgeous, firm but yielding **Pillowy Sweet Treats**.
Whipping Marshmallow Meringue to Stiff Peaks
While the syrup is climbing to temperature, melt that bloomed gelatin in the microwave for about 15 seconds until it’s fully liquid again. Now, this next part needs care! With your stand mixer running on low—and I mean slow!—you need to pour that very hot syrup down the side of the bowl, avoiding the whisk itself. If you dump it too fast, you’ll just end up with a sticky mess, not fluffy peaks! If you want to see more about the mechanics of mixing the meringue, check out my tips on whipping marshmallow meringue.
Once it’s all in, crank that mixer to high and set a timer for 12 to 15 minutes. This is non-negotiable whipping time! The mixture will transform from a glossy liquid into a thick, shiny, white mass. Right at the end, add your vanilla extract—you don’t want the heat killing its lovely aroma—and let it incorporate for that final minute. Wow, doesn’t that look incredible?
Setting and Cutting Your DIY Marshmallows
Time to stop the mixer because this stuff sets up fast! Mix your powdered sugar and cornstarch—this is your anti-stick shield. Pour the warm marshmallow into your prepared pan and spread it out quickly with an oiled spatula. Be generous dousing the top with your coating mix!

Now, the hardest part: waiting! You absolutely must let these set for a minimum of four hours, but honestly, overnight is best for the cleanest results. When you’re ready to cut, dust the top again. Flip the whole thing onto your heavily dusted cutting board. Here’s my secret for those perfect squares: lightly oil your sharp knife or pizza cutter before *every* cut. Go ahead and slice them up, then toss the edges of your fresh **DIY Marshmallows** into any remaining coating mix. Boom! Perfect.
Tips for Perfect Homemade Marshmallows Every Time
If you are worried about running into sticky patches or just not getting that signature fluff, let me ease your mind! The biggest secret to successful **homemade marshmallows** isn’t really a secret; it’s using a powerful mixer. You really need that stand mixer or a heavy-duty hand mixer for the 12 to 15 minutes needed to whip this meringue. Hand mixing just won’t give you those stiff peaks—you’ll get tired long before the marshmallow magic happens!
Also, temperature is your friend when introducing the hot syrup. Always pour it slowly down the side of the bowl while the mixer is on low speed. If you dump it in hot and fast, you risk cooking the gelatin instantly instead of creating that airy structure.
If your final slab is tacky after setting, it just means it needed more time or maybe needed a slightly higher temperature on the syrup next time. Don’t stress! Just toss those slightly sticky edges liberally in the coating mix, and they’ll be perfect for dunking in easy homemade salad dressing—just kidding! Use them in something amazing!
Storage and Enjoying Your Soft Candy Treats
Now that you’ve mastered the *how*, let’s talk about keeping these beautiful **soft candy treats** perfect and enjoying them! This is where most **From Scratch Confectionery** projects go wrong—storage!
The good news is that because the sugar content is so high, these **homemade marshmallows** are quite shelf-stable. Store them in an airtight container at room temperature—never the fridge, please! The fridge tends to make them sweat and get sticky, which defeats the whole purpose of all that dusting we did. If you’ve used the cornstarch/powdered sugar mix correctly, they should stay perfectly soft for about two weeks.
What should you do with them? Oh, my favorite part! If you make these for holiday gifting, they look absolutely gorgeous stacked in little cellophane bags. But for eating? You *have* to make proper hot chocolate. Nothing beats dropping one of these giant vanilla clouds into a mug of rich, dark hot cocoa and watching it melt—it’s pure comfort, which is why I love linking them to my hot chocolate cookies sometimes!
And of course, **Making Marshmallows for Smores** deserves its own category. They toast up in a way that the standard ones just don’t. They get that perfect, caramelized crust on the outside while staying gooey all the way through. Speaking of gooey, I even use leftover, slightly stale ones broken up over my famous chocolate chess pie when I want an extra layer of texture. It’s decadent, but hey, you earned it after making marshmallows from scratch!
Flavor Variations for Your Gourmet Marshmallow Recipe
Once you master the basic vanilla flavor, you’ll realize these are the perfect base for getting creative! Think of this as the jumping-off point for your own Gourmet Marshmallow Recipe creations. You don’t need a whole new recipe; you just need to tweak when you add the flavoring. That’s the beauty of being in charge of your own **DIY Marshmallows**!
I love experimenting, especially around the holidays. Here are the two easiest ways to transform your batch!
For Peppermint Mallows: Wait until the absolute last minute of whipping—that final 30 seconds—to add about a teaspoon of pure peppermint extract. Don’t add too much, or it gets that weird, soapy taste! You want a cool, clean mint vibe. These are incredible around Christmas, especially next to my fudgy peppermint brownies.
For Chocolate Mallows (The Rich Ones): This one requires a little more finesse. You’ll need about 1/4 cup of high-quality unsweetened cocoa powder. Sift it first! Then, gently whisk that sifted cocoa powder into your powdered sugar and cornstarch dusting mixture. When you cut the marshmallows, the edges will get coated, giving you that gorgeous two-tone effect. It’s an amazing way to step up your Soft Candy Treats game.
Citrus Zest Delight: If you want something bright, zest one large orange or two lemons right before you add the vanilla extract during the last minute of whipping. That essential oil lifts the whole flavor profile beautifully. It’s subtle but totally worth it for a brighter, chewier result!
Frequently Asked Questions About Making Marshmallows At Home
Why are my homemade marshmallows sticky after setting?
This is usually caused by one of two things! If they feel tacky on top, you just didn’t use enough dusting powder—go ahead and toss them liberally in that extra cornstarch/powdered sugar mix we made. If the whole slab is sticky and won’t release well, it often means the syrup didn’t quite reach 240°F, or you didn’t whip it long enough for those stiff peaks. Patience during the whipping stage is key to avoiding sticky bottoms!
Can I skip the corn syrup in this Easy Marshmallow Recipe?
Yes, you absolutely can, as I mentioned earlier! For No Corn Syrup Marshmallows, substitute the corn syrup with an equal amount of honey or maple syrup. Just be aware that these alternatives hold more water content, so your finished **soft candy treats** might be slightly softer or require an extra hour of setting time. The flavor will also shift slightly due to the honey/maple notes.
How long do these DIY Marshmallows last?
I recommend storing your finished homemade marshmallows in a truly airtight container at cool room temperature—never the fridge! If they were cut cleanly and tossed well in the dusting mixture, they keep great for about two weeks. If you’re looking for an extra-long storage life for these **from scratch confectionery** delights, you can actually freeze them! Just make sure they are very well coated first.
Is a stand mixer absolutely mandatory for this Vanilla Mallows Tutorial?
While I highly recommend a stand mixer for the best, fluffiest result—you need high speed for 12+ minutes—you *can* do it with a strong hand mixer. Just be prepared to rotate the bowl often and you might need to whip for closer to 18 minutes! If you are interested in other light and chewy treats that are easier on the arms, check out my lemon crinkle cookies recipe!
Estimated Nutritional Data for Homemade Vanilla Extract Desserts
When we talk about making things from scratch, people often want to know where they stand nutritionally, and I totally get that! Since these are homemade marshmallows, remember the counts can fluctuate slightly based on exactly how much you use of the coating powder, but this gives you a fantastic benchmark for your planning.
This information is an estimate based on making approximately 4 dozen squares. It’s important to know that while these are incredible **soft candy treats**, they are still a confection!
- Serving Size: 4 squares
- Calories: 140
- Sugar: 28g (Yes, it’s sugar, but it’s homemade sugar!)
- Protein: 2g
- Fat: 0g
- Sodium: 15mg
- Carbohydrates: 35g
Enjoying treats like this is part of the joy of reclaiming your kitchen. Knowing what you’re eating is just part of the process. You’re trading out all those mysterious stabilizers from the store for simple gelatin, sugar, and pure vanilla—that, my friends, is a win in my book!
Share Your Homemade Marshmallows Creations
Now that you’ve conquered the art of kitchen candy making and successfully crafted these incredible **homemade marshmallows**, I really want to see what you made! Honestly, the best part of sharing these recipes is seeing your kitchen successes.
When you make something this fun—a true **from scratch confectionery** project—you have to show it off! Did you cut perfect cubes? Did you use the strawberry variation? Let me know!
Please, if you followed these simple marshmallow steps and loved the results, take a quick second to leave a rating right below this post. Five stars is always lovely, but even a quick comment saying, “My kids loved these *marshmallows for hot cocoa*!” makes my day.
If you snapped a photo, tag me on social media! I live for seeing your beautiful, fluffy squares. Comparing your results to when I make my famous coffee cake with sour cream streusel is always a joy. Happy baking, everyone, and thank you for trusting my process!
PrintEasy Fluffy Vanilla Homemade Marshmallows

Make soft, pillowy homemade marshmallows from scratch. This simple recipe delivers cloud-like texture, perfect for topping hot cocoa or making s’mores.
- Prep Time: 20 min
- Cook Time: 15 min
- Total Time: 4 hr 35 min
- Yield: About 4 dozen 1x
- Category: Dessert
- Method: Candy Making
- Cuisine: American
- Diet: Vegetarian
Ingredients
- 3 tablespoons unflavored gelatin powder
- 1 cup cold water, divided
- 1 cup granulated sugar
- 1 cup light corn syrup
- 1/4 cup water
- 1/4 teaspoon salt
- 1 tablespoon pure vanilla extract
- 1/2 cup powdered sugar, for dusting
- 1/2 cup cornstarch, for dusting
Instructions
- Lightly grease a 9×13 inch baking pan. In a small bowl, sprinkle the gelatin over 1/2 cup of the cold water. Let it bloom for 10 minutes.
- In a medium saucepan, combine the granulated sugar, corn syrup, 1/4 cup water, and salt. Heat over medium heat, stirring until the sugar dissolves. Stop stirring once it boils.
- Attach a candy thermometer to the pan. Cook the syrup without stirring until it reaches 240 degrees Fahrenheit (soft-ball stage).
- While the syrup heats, pour the remaining 1/2 cup cold water into the bowl with the bloomed gelatin. Heat the gelatin mixture in the microwave for about 15 seconds until it liquefies.
- Once the syrup reaches 240 degrees F, remove it from the heat. With your stand mixer running on low speed, slowly pour the hot syrup down the side of the bowl into the gelatin mixture.
- Increase the mixer speed to high. Beat for 12 to 15 minutes until the mixture is very thick, glossy, and holds stiff peaks. Beat in the vanilla extract during the last minute.
- Mix the powdered sugar and cornstarch together in a separate small bowl. This is your dusting mixture.
- Pour the marshmallow mixture immediately into the prepared pan. Use a lightly oiled spatula to spread it evenly.
- Generously dust the top surface with some of the reserved dusting mixture. Let the marshmallows set, uncovered, at room temperature for at least 4 hours, or preferably overnight.
- Once set, dust the top again. Invert the pan onto a cutting board dusted with more mixture. Peel off the parchment paper, if used.
- Use a large, sharp, oiled knife or pizza cutter to cut the slab into squares. Toss the cut edges in the remaining dusting mixture to prevent sticking.
Notes
- For clean cuts, lightly oil your knife blade before each slice.
- You can substitute the corn syrup with an equal amount of honey or maple syrup for a different flavor profile, though the texture may change slightly.
- These homemade marshmallows are excellent for topping hot cocoa or making s’mores.
- Store the finished marshmallows in an airtight container at room temperature for up to two weeks.
Nutrition
- Serving Size: 4 squares
- Calories: 140
- Sugar: 28
- Sodium: 15
- Fat: 0
- Saturated Fat: 0
- Unsaturated Fat: 0
- Trans Fat: 0
- Carbohydrates: 35
- Fiber: 0
- Protein: 2
- Cholesterol: 0