

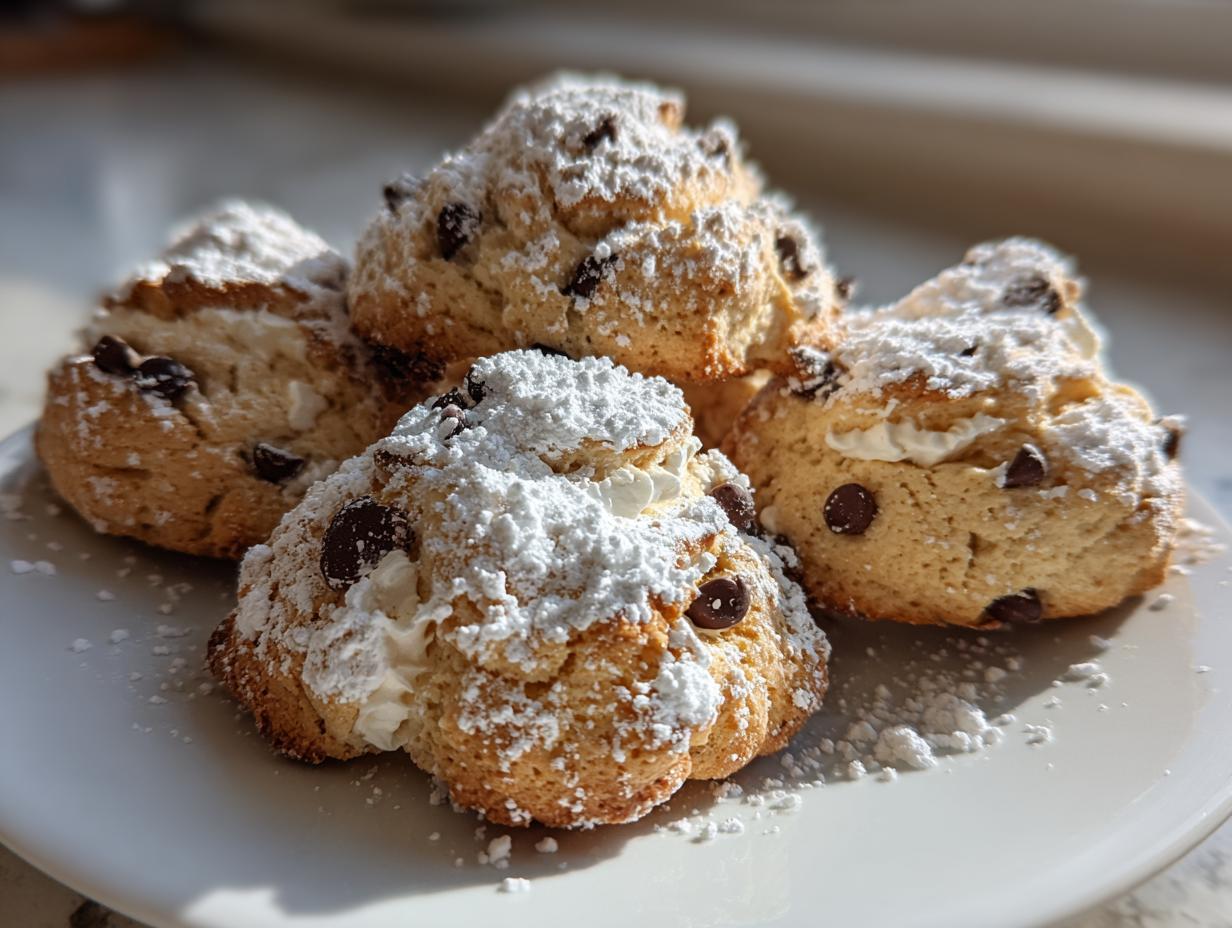
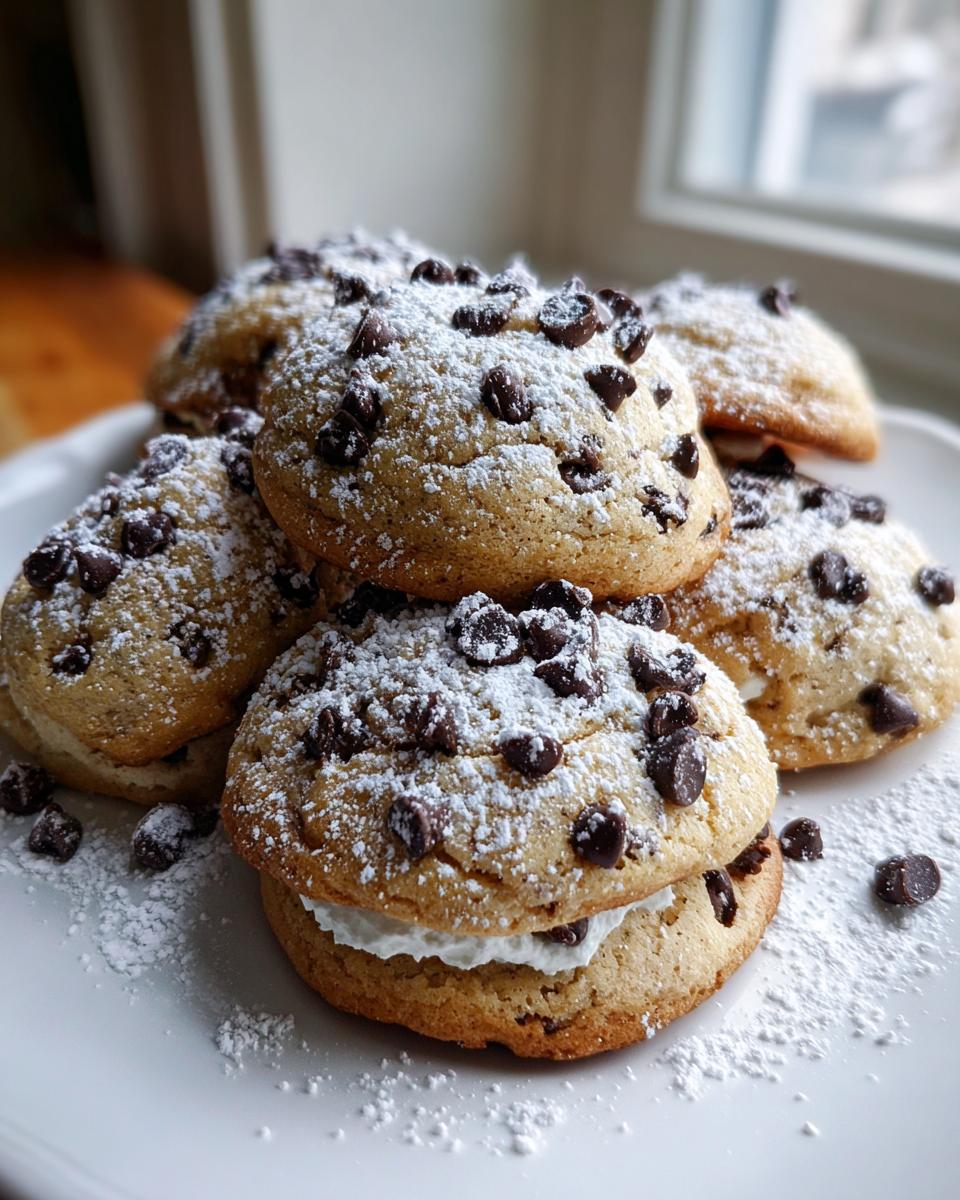
You ever crave that perfect crunch and creamy ricotta filling of a true, authentic cannoli, but then you look at the time it takes to roll and fry those little shells? Ugh, I know that feeling! That’s why I spent ages figuring out how to bottle that amazing moment into something you can whip up in one bowl. These are my ultimate **cannoli cookies**—they’re soft, rich, and you get that signature Italian flavor without needing a deep fryer in sight. This recipe is exactly what I created for my own hectic life: simple, absolutely delicious, and ready before you know it, which is why I often lump them in with my collection of simple, delicious desserts. We’re bringing bakery flavor to your weeknight dessert tray!
- Why You Will Love These Easy Cannoli Cookies
- Gathering Ingredients for Your Cannoli Cookies
- Expert Tips for Perfect Cannoli Cookies Dough
- Step-by-Step Instructions for Making Cannoli Cookies
- Ingredient Notes and Substitutions for Cannoli Cookies
- Serving Suggestions for Your Homemade Cannoli Flavor Treats
- Storage and Make-Ahead Tips for Cannoli Cookies
- Frequently Asked Questions About Cannoli Cookies
- Nutritional Snapshot of These Creamy Filled Cookies
- Nutritional Snapshot of These Creamy Filled Cookies
Why You Will Love These Easy Cannoli Cookies
Honestly, I don’t know why anyone bothers with the frying part of a traditional cannoli anymore! These are the best introduction to that flavor profile. They check every box a busy person needs, trust me.
- They deliver that incredible, **homemade cannoli flavor**—creamy ricotta and bright citrus—in a simple cookie form.
- Super quick to mix! You can have these ready for the oven in under 20 minutes, making them truly **easy dessert recipes**.
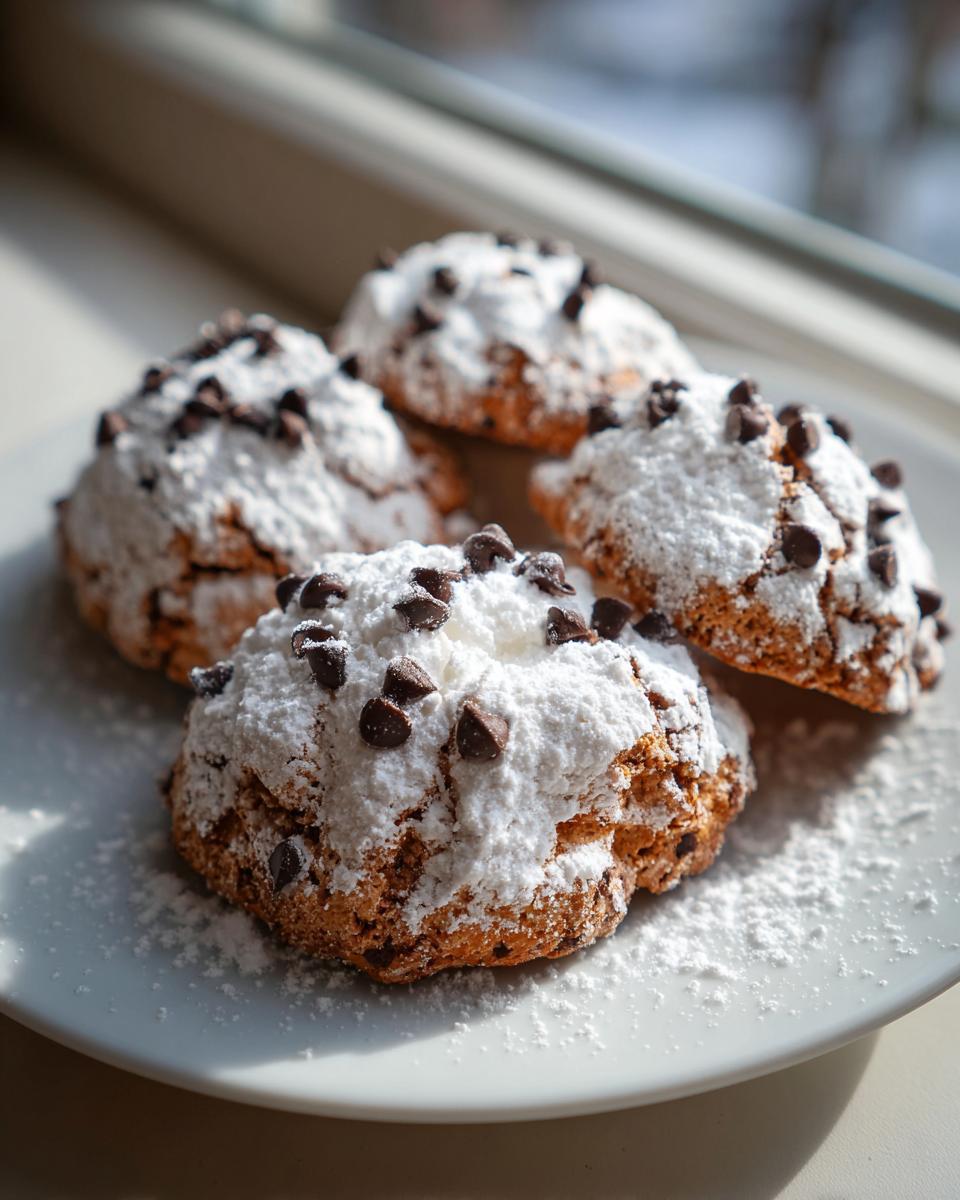
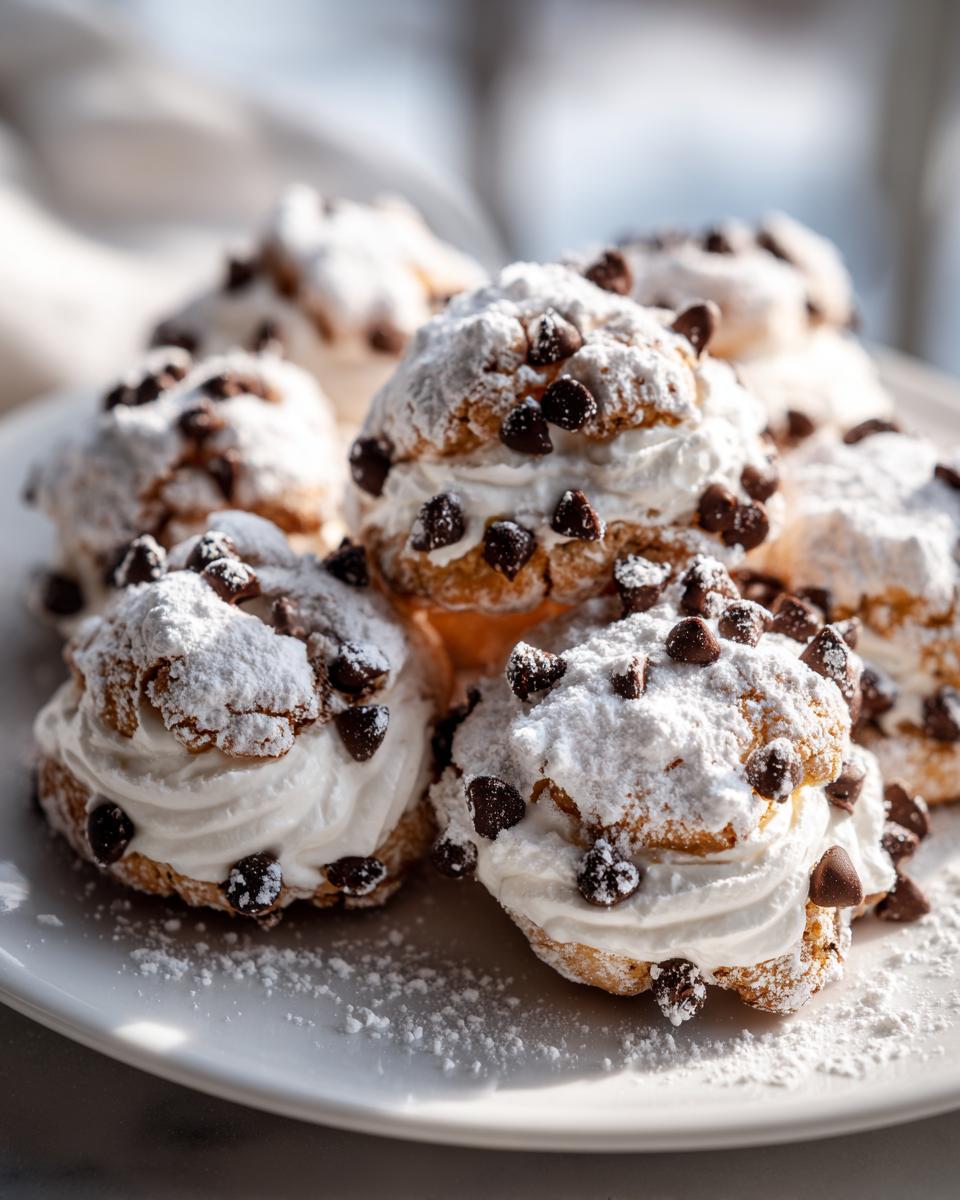
- They bake up wonderfully **soft Italian cookies**, completely different from a crispy shell. Hello, **creamy filled cookies**!
- Perfect for big spreads! These **Italian cookie recipes** are sturdy enough for your **dessert platters** and still taste amazing the next day.
Gathering Ingredients for Your Cannoli Cookies
Okay, pulling these babies together is ridiculously straightforward, which is the whole point, right? While these are definitely one of my favorites for a quick bake—maybe right after I whip up my lemon crinkle cookies—you do need a few key players to nail that classic Italian taste. Don’t skip draining that ricotta; it’s non-negotiable for cookies that hold their shape!
Here’s what you need for about three dozen of these glorious treats:
- 1 cup (that’s two sticks!) of unsalted butter, soft enough to really blend
- 1 cup of granulated sugar
- 1 large egg
- 1 teaspoon vanilla extract
- 1 teaspoon of orange zest—this is key for that signature bright flavor!
- 1 cup of whole milk ricotta cheese, remember, it needs to be drained really, really well.
- 3 cups all-purpose flour
- 1 teaspoon baking powder
- 1/2 teaspoon salt
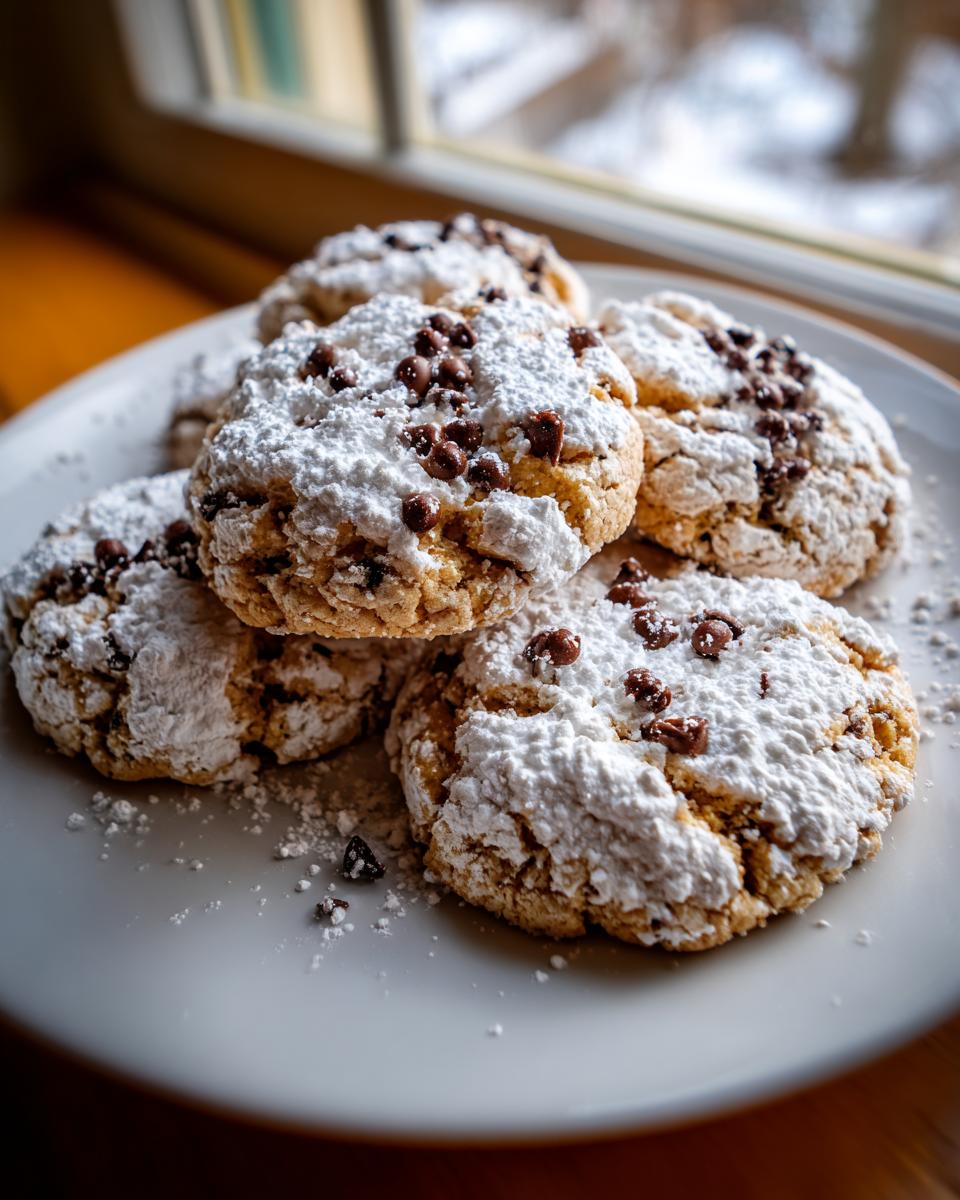
- 1 cup mini semi-sweet chocolate chips
- And finally, about 1/2 cup of powdered sugar for that beautiful dusting finish.
Expert Tips for Perfect Cannoli Cookies Dough
I’m going to let you in on a little secret right away, because this is where most people—even seasoned bakers—mess up their glorious **cannoli cookies**. If you just scoop that ricotta right out of the container and toss it in, you’re setting yourself up for flat, greasy cookies that spread right across the pan. We want soft, puffy, flavorful bites, not sad puddles!
Draining Ricotta for the Best Cannoli Cookies Texture
It’s all about removing that extra liquid. Ricotta is wet cheese, period. I always line a fine-mesh sieve with a couple of layers of cheesecloth or even a strong coffee filter, dump the cup of ricotta in there, and let it sit over a bowl in the fridge for at least 30 minutes—sometimes I even do it overnight if I’m planning ahead! This step pulls out the moisture so your dough stays thick. When you add it to the creamed butter and sugar, it just blends perfectly, giving you that unmistakable creamy interior without sacrificing cookie structure.
And here’s my personal Felix tip for mixing: when you get to the flour stage, stop using the electric mixer once it’s almost combined. Switch to folding everything gently by hand, maybe with a spatula, or use my favorite wooden spoon. Overmixing that flour is what develops gluten and makes things tough. We want tender cookies, not bread!
Step-by-Step Instructions for Making Cannoli Cookies
Alright, now that we’ve got our perfectly drained ricotta and softened butter sitting on the counter, let’s get this dough coming together! Since these are some of the fastest **Italian cookie recipes** you’ll ever make, we want to move with confidence. First things first: crank that oven up to 350°F (175°C) and get those baking sheets ready with parchment paper. Trust me, parchment paper is the modern baker’s best friend; it saves you scrubbing time later!
Creaming Butter and Sugar for Soft Italian Cookies
This is where the magic starts for any great cookie, especially when we are aiming for that soft, almost cake-like texture you find in great **soft Italian cookies**. Take that softened butter and measure out your cup of sugar. Beat them together in your mixer—start slow so the sugar doesn’t fly out and coat your kitchen! Keep going until it looks genuinely light and fluffy, almost pale yellow. It should have volume! Then, we introduce the egg, vanilla, and that crucial orange zest. Mix that in until it’s barely combined. Don’t worry if it looks a little weird when you add the ricotta next; just mix until it’s smooth.
Baking and Cooling Your Cannoli Cookies
Once the dry ingredients are folded in and those chocolate chips are scattered throughout, grab a rounded tablespoon of dough for each cookie. Drop them onto your prepared sheets, leaving about two inches between each mound because they will spread just a tiny bit. Pop these into your preheated oven for about 10 to 12 minutes. You’re looking for edges that are just turning a teeny bit golden brown. If they look fully baked through, they’ll be dry, so pull them when the centers still look soft! Let them chill out on the pan for about five minutes—this helps them firm up before you transfer them to a wire rack to cool completely. Seriously, resist the urge to dust them with powdered sugar until they are totally cool, or you just get sticky melted sugar!
For more tips on getting quick but amazing results, check out my guide to easy dessert recipes!
Ingredient Notes and Substitutions for Cannoli Cookies
Listen, I know sometimes you need to riff on a recipe based on what you have, and that’s okay—but certain things are sacred here, especially that ricotta! Remember how I stressed draining it? If you skip that, you’re risking a spread disaster when making these **cannoli cookies**. You truly need to let that moisture drip away for at least 30 minutes, ideally using cheesecloth or a paper towel in a sieve.
For example, the best flavor boost, besides that tiny bit of orange zest, comes from swapping out some of those chocolate chips. If you want something truly special and a little closer to classic pastry fillings, try replacing about a quarter cup of those mini semi-sweet chips with finely chopped pistachios. Oh my gosh, they add such a wonderful little crunch and nutty depth! I love finding ways like this to nod to traditional Sicilian sweet snacks right here in a simple cookie.
Also, just a quick heads-up on storage, which is great for making ahead for parties or when you need quick **party desserts**. You can absolutely freeze the cookie dough balls—just pop them on a sheet until solid, then bag ’em up. Bake them straight from frozen, but you’ll need to add maybe two extra minutes to the baking time. Since these are **no-fry cannoli** goodness, easy storage is a huge win!
Serving Suggestions for Your Homemade Cannoli Flavor Treats
Once these beauties are dusted with that snowy powdered sugar, what do you serve them with? Because they hold up so well, they are amazing stars on any platter. For holidays or big events, place them right next to some biscotti or maybe something tart like lemon bars. The marriage of the creamy, citrus-kissed cookie with something crunchy is just divine.
If you’re using them as after-dinner treats, a little cup of strong espresso wakes up that citrus zest perfectly. Or, if the little ones are around, a tall glass of cold milk is always the answer! These **cannoli cookies** make any casual gathering feel a little more special, which is why I love having easy party desserts like this ready to go.
Storage and Make-Ahead Tips for Cannoli Cookies
These **cannoli cookies** are honestly fantastic because they are so low-maintenance after baking, which is a huge benefit when you’re dealing with a busy schedule. Since they aren’t filled with a loose, separate cream like a traditional cannoli, they stay fresh beautifully! Keep them stored in an airtight container at room temperature. Honestly, they taste even better on day two once the flavors have really settled into that soft, cake-like texture.
If you’re baking for a crowd or just want to be prepared, you can absolutely get ahead of the game here. Like I mentioned before, the dough freezes like a dream—this makes them one of my top freezer-friendly recipes! Just scoop your balls of dough, freeze them solid on a baking sheet, and then toss them into a freezer bag. You bake them straight from frozen, just add a couple of extra minutes to the bake time until they look perfect. It’s such a relief knowing I have these amazing **no-fry cannoli** treats ready whenever company pops by! For more helpful make-ahead guides, take a peek at my easy 30-minute recipes section.
Frequently Asked Questions About Cannoli Cookies
I know you might still have questions before you dive in, because getting those **ricotta cookies** just right is important! It’s all about mimicking that classic pastry feel in a simple cookie format. Here are a few things people usually ask when they try this recipe for the first time.
Why do my cookies spread too much when baking?
Nine times out of ten, this comes down to moisture management! If you skip draining the ricotta, that extra water turns to steam in the oven and forces your cookies to flatten out. Also, make sure your butter isn’t melted when you start; it needs to be soft but still cool for the creaming process to work its magic and create those stable air pockets for your **creamy filled cookies**.
Can I skip the orange zest?
You can, but I really wouldn’t recommend it if you’re aiming for that true **homemade cannoli flavor**! The orange zest isn’t just for show; it cuts through the richness of the ricotta and butter, providing that essential brightness that defines the pastry. If you absolutely have to skip it, maybe add a tiny splash of lemon extract along with the vanilla instead, just to keep that citrus note alive in these **Italian cookie recipes**.
Can I use regular chocolate chips instead of mini ones?
You totally can use regular semi-sweet chocolate chips! However, I prefer the mini ones when I’m making these, especially for **holiday cookie baking**. The mini chips distribute more evenly throughout the dough, meaning you get chocolate in almost every bite of your **cannoli cookies** rather than one giant chunk that sinks to the bottom. If you use full-sized chips, just stir them in extra gently so you don’t deflate all that lovely air we whipped into the batter!
What makes these cookies soft instead of crunchy?
That softness is all thanks to the ricotta! Unlike a typical buttery sugar cookie, the ricotta cheese adds moisture and fat that keeps the texture tender, almost like a tiny, portable piece of soft cake. That’s why these are such a satisfying alternative to the hard shell of true cannolis—these are perfect **soft Italian cookies**!
If you’d like more guidance on handling ricotta in baking, check out my comprehensive guide on my best ricotta cookies post!
Nutritional Snapshot of These Creamy Filled Cookies
I always believe in transparency when it comes to what we’re putting into our bodies, even when we’re enjoying treats! While every kitchen uses ingredients a little differently, here is a general nutritional estimate for one of these delicious **creamy filled cookies** based on the recipe measurements. Remember, these figures are just estimates because we’re using real food, not lab components!
- Serving Size: 1 cookie (Out of about 3 dozen)
- Calories: 180
- Sugar: 15g
- Fat: 10g (with about 6g being saturated fat)
- Carbohydrates: 21g
- Protein: 3g
They are a wonderful little indulgence for your next gathering!
PrintThe Ultimate Easy Cannoli Cookies with Creamy Ricotta Filling

Make these easy Cannoli Cookies that capture the classic Italian dessert flavor using ricotta cheese and chocolate chips in a simple, soft cookie format.
- Prep Time: 20 min
- Cook Time: 12 min
- Total Time: 32 min
- Yield: 3 dozen cookies 1x
- Category: Dessert
- Method: Baking
- Cuisine: Italian
- Diet: Vegetarian
Ingredients
- 1 cup (2 sticks) unsalted butter, softened
- 1 cup granulated sugar
- 1 large egg
- 1 teaspoon vanilla extract
- 1 teaspoon orange zest
- 1 cup whole milk ricotta cheese, drained well
- 3 cups all-purpose flour
- 1 teaspoon baking powder
- 1/2 teaspoon salt
- 1 cup mini semi-sweet chocolate chips
- 1/2 cup powdered sugar, for dusting
Instructions
- Preheat your oven to 350°F (175°C). Line baking sheets with parchment paper.
- In a large bowl, cream together the softened butter and granulated sugar until light and fluffy.
- Beat in the egg, vanilla extract, and orange zest until combined.
- Mix in the well-drained ricotta cheese until the mixture is smooth.
- In a separate bowl, whisk together the flour, baking powder, and salt.
- Gradually add the dry ingredients to the wet ingredients, mixing on low speed until just combined. Do not overmix.
- Gently fold in the mini chocolate chips.
- Drop rounded tablespoons of dough onto the prepared baking sheets, spacing them about 2 inches apart.
- Bake for 10 to 12 minutes, or until the edges are lightly golden. The centers should remain soft.
- Let the cookies cool on the baking sheets for 5 minutes before transferring them to a wire rack to cool completely.
- Once cool, dust the cookies generously with powdered sugar before serving.
Notes
- Drain your ricotta cheese for at least 30 minutes in a fine-mesh sieve lined with cheesecloth to prevent the cookies from spreading too much.
- For a more authentic Sicilian flavor, substitute 1/4 cup of the mini chocolate chips with finely chopped pistachios.
- You can freeze the cookie dough balls for up to three months; bake directly from frozen, adding 2-3 minutes to the baking time.
Nutrition
- Serving Size: 1 cookie
- Calories: 180
- Sugar: 15g
- Sodium: 95mg
- Fat: 10g
- Saturated Fat: 6g
- Unsaturated Fat: 4g
- Trans Fat: 0g
- Carbohydrates: 21g
- Fiber: 1g
- Protein: 3g
- Cholesterol: 35mg