


Oh, deviled eggs. Just thinking about them takes me right back to my aunt’s kitchen during every single holiday growing up. They are the ultimate return-to-joy food, aren’t they? But let’s be real, not all deviled eggs are created equal. I’ve spent ages streamlining my family’s method to give you the absolute best—this is my no-fail recipe for classic deviled eggs that guarantees that smooth, unbelievably creamy filling every single time. After watching how busy life gets, I’ve fine-tuned this so you get a traditional, perfect party appetizer without losing your weekend!
- Why This Is Your Go-To Classic Deviled Eggs Recipe
- Ingredients for Perfect Classic Deviled Eggs
- The Secret to Perfectly Hard-Boiled Eggs for Classic Deviled Eggs
- How to Prepare the Creamy Filling for Classic Deviled Eggs
- Assembling and Garnishing Your Classic Deviled Eggs
- Tips for Making Ahead and Storing Classic Deviled Eggs
- Variations on Traditional Deviled Eggs
- Frequently Asked Questions About Classic Deviled Eggs
- Nutritional Snapshot for Classic Deviled Eggs
- Nutritional Snapshot for Classic Deviled Eggs
Why This Is Your Go-To Classic Deviled Eggs Recipe
Look, I get it. You need party food that lands every time, and that’s exactly what we’re making here. These aren’t the fussy, overly complicated eggs you see sometimes. These are pure, nostalgic comfort, elevated just enough to be the first thing gone at the party. If you’re tired of runny fillings or yolks that taste too sharp, you’re in the right place. We focus on the tried-and-true methods that chefs who specialize in classic deviled eggs rely on!
- Ultra-Creamy Filling: We focus intensely on getting that silky texture. You’ll never serve a grainy filling again!
- Simple & True to Form: We stick to the ingredients you already have—mayonnaise, mustard, vinegar—no weird additions needed to make these classic deviled eggs shine.
- Fast Appetizer: Once your eggs are boiled and cooled, you’re looking at a 15-minute assembly that makes you look like a catering genius.
- Foolproof Success: I’ve mapped out the exact method to ensure perfect results, especially when it comes to achieving that ideal creamy deviled egg filling.
If you love a good, simple spread, you might also want to check out my recipe for the best classic creamy egg salad—it uses some similar principles for achieving peak creaminess!
Ingredients for Perfect Classic Deviled Eggs
When you are aiming for the *best* classic deviled eggs, you can’t skimp on the basics. This list is short, sweet, and traditional. I promise you, the quality of these few items is what makes all the difference between a good egg and a spectacular one!
- 12 large eggs
- 1/2 cup mayonnaise (use a good full-fat one for the best texture!)
- 2 teaspoons Dijon mustard
- 1 teaspoon white vinegar
- 1/4 teaspoon salt
- 1/8 teaspoon black pepper
- Paprika, for garnish
- Optional: 1 teaspoon sweet pickle juice
Ingredient Notes and Substitutions
That optional teaspoon of sweet pickle juice? That’s my little secret for adding a nice, bright tang that cuts through the richness of the yolk and mayo. If you don’t have it, don’t panic! Just use the full teaspoon of white vinegar instead, or maybe even add a tiny dash more. The vinegar is essential for balancing the flavor profile.
Now, about that mayonnaise. Because eggs are such a simple appetizer, the mayo really shines through. I stick to a standard, full-fat brand because it gives the filling that luxurious mouthfeel we’re aiming for. If you absolutely must lighten it up, you can try using half mayo and half plain Greek yogurt, but understand that the texture will change slightly. We want *creamy*, not airy, so be cautious with non-traditional swaps!
The Secret to Perfectly Hard-Boiled Eggs for Classic Deviled Eggs
You know how sometimes when you cut into a hard-boiled egg, there’s that gross greenish-grey ring around the yolk? Ugh, no thank you! That’s the first thing we tackle because if your cooked egg isn’t perfect, the whole batch of classic deviled eggs suffers. My method is foolproof for easy peeling and vibrant yellow yolks, which is essential for a beautiful appetizer.
It all starts with bringing the water to a rolling boil *before* you add the eggs. I drop them in gently, let the water come back up to a serious boil, and then—this is key—I immediately kill the heat, cover the pan, and just let them sit for exactly 12 minutes. Don’t peek! Those 12 minutes cook them perfectly.
But the real magic that stops that dreadful grey ring? The ice bath, hands down. As soon as those 12 minutes are up, you plunge those hot eggs into a bowl packed with ice water. Making sure they cool down *fast* stops the residual heat from overcooking the yolk. It’s non-negotiable for these classic deviled eggs, trust me. Plus, the sudden temperature shock is what makes the shell practically fall right off. Easy peeling equals less stress when assembling your perfectly hard-boiled eggs.
If you want to see what other perfect boiling methods chefs use, check out this guide for their insights on chef-approved techniques!
How to Prepare the Creamy Filling for Classic Deviled Eggs
Okay, we have our perfect, un-green-ringed yolks ready to go. This step is where we build the flavor and texture that makes these Traditional Deviled Eggs so addictive. You want to separate those yolks into a medium bowl. Once they are isolated, grab a fork—yes, a good old-fashioned fork! I know some people jump straight to a hand mixer, but using a fork allows me to control the process better and avoid incorporating too much air, which can make the filling foamy instead of rich. I actually adapted a similar technique when making my best classic creamy egg salad recipe, and it works wonders here too!
Mash those yolks until they are just fine crumbs. Seriously, get in there and break them down completely before you add anything else liquid. If you add the mayo while the yolks are still chunky, you’ll end up with a lumpy situation, and we are aiming for smooth elegance here, not kitchen chaos!
Once they look like fine, yellow sand, that’s when you bring in the flavor team: the mayonnaise, the Dijon mustard, your vinegar, salt, and pepper. Mix carefully, scraping the bottom of the bowl, until everything is beautifully incorporated. If you are using my optional pickle juice secret, add that in now too. Keep mixing until you have that gorgeous, uniform, creamy deviled egg filling texture.
Expert Tip for Ultra-Smooth Creamy Deviled Egg Filling
If you want texture that rivals what you see in fancy catering spreads—the kind that melts in your mouth—I have one big piece of advice. After you’ve mashed them with the fork, take those yolks and press them through a fine-mesh sieve right back into the main bowl, or press them into the egg white halves if you’re using a small sieve right over the platter. Yes, it’s one extra step, but when you are making classic deviled eggs for important guests, this little action eliminates any hard bits and guarantees an unbelievably smooth finish.
It makes a huge difference! It’s like velvet versus sand on your tongue. This technique, passed down from my mom, is honestly the difference between a standard appetizer and the one everyone demands the recipe for.
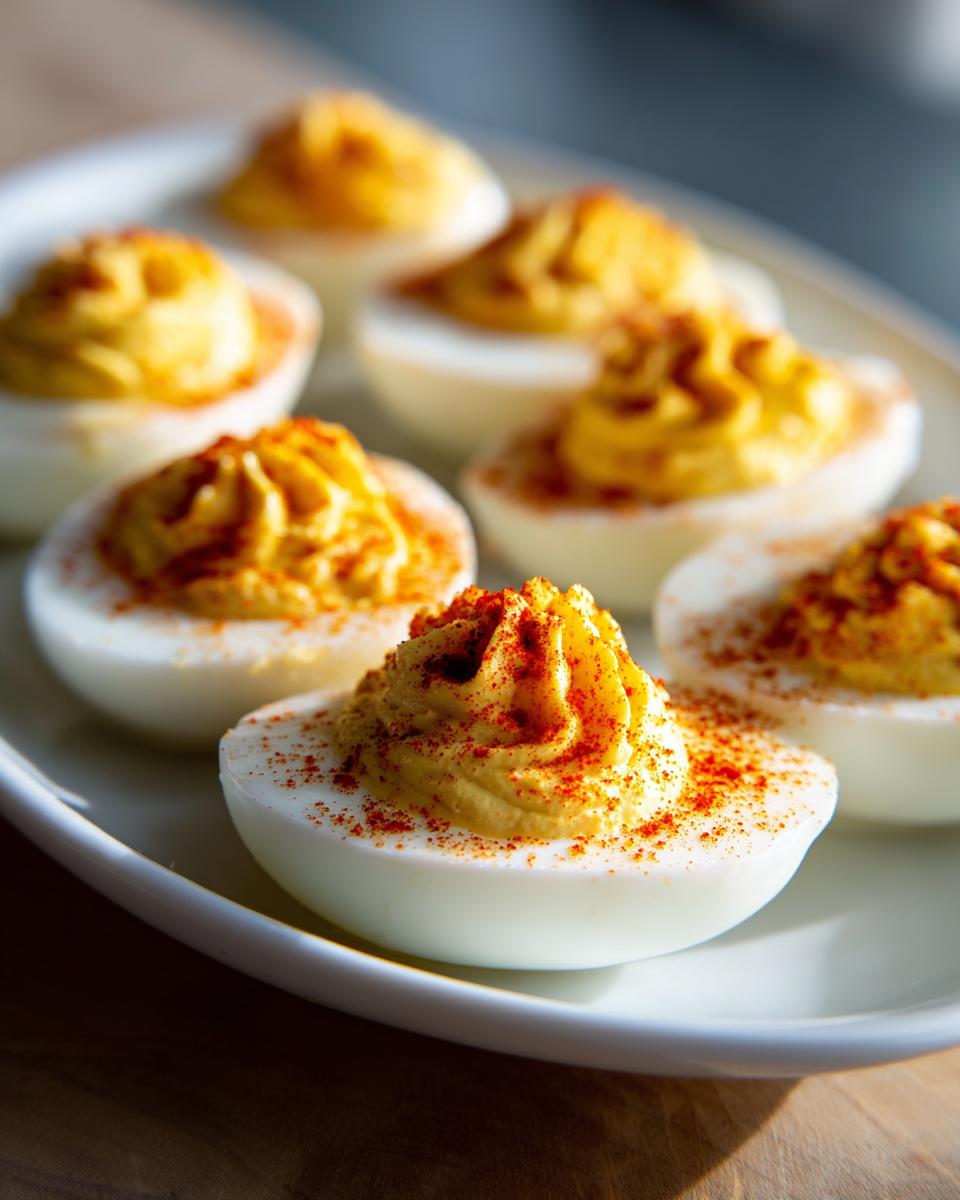
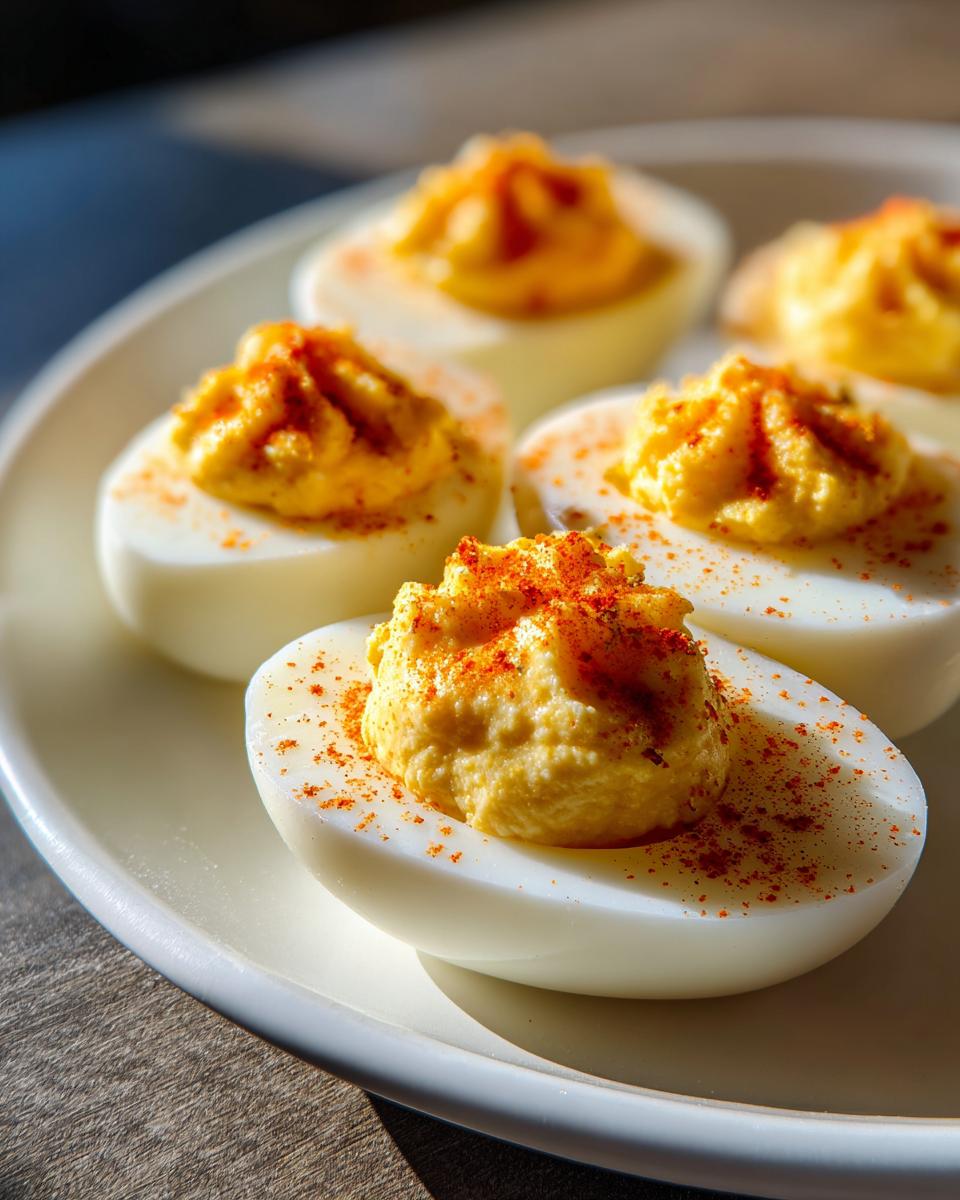
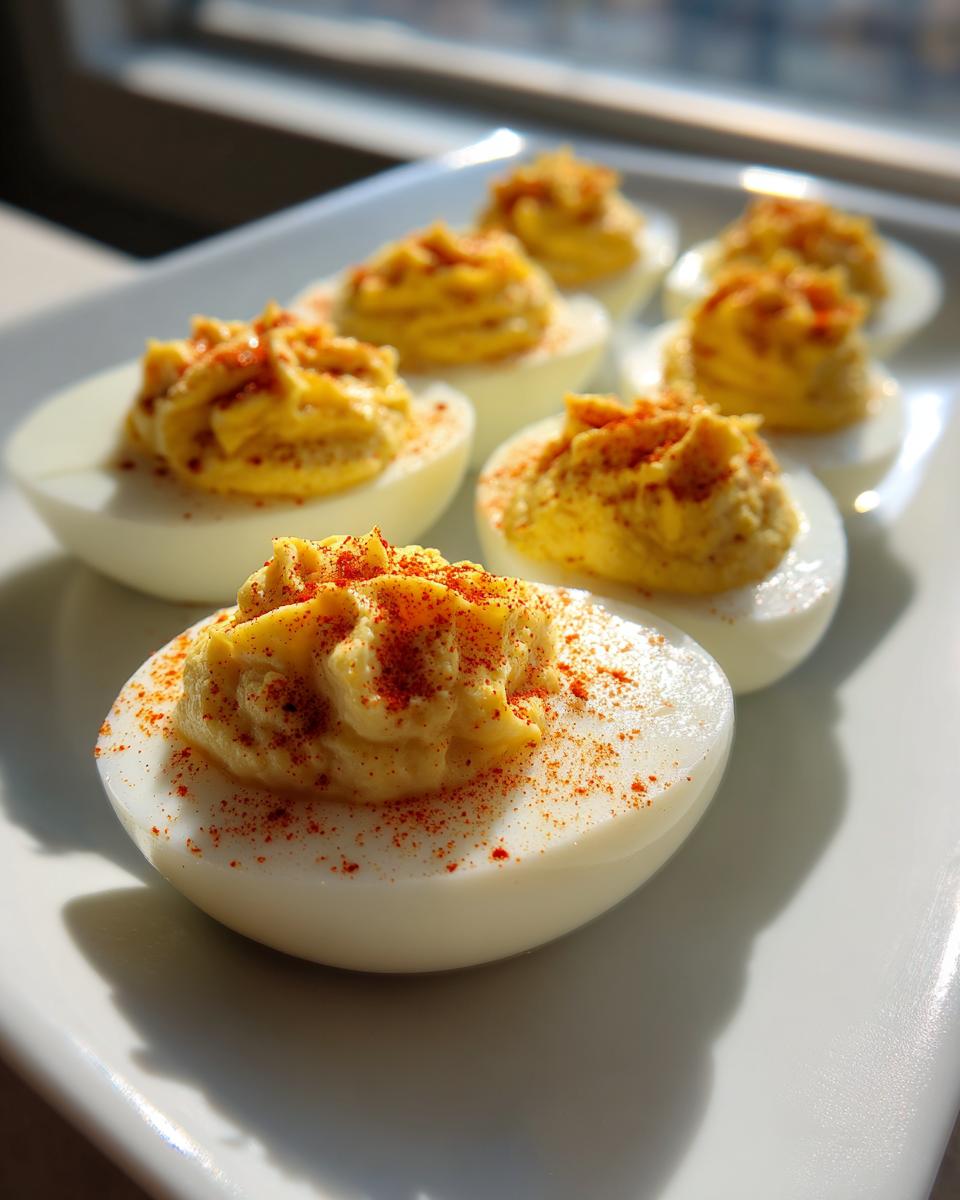
Assembling and Garnishing Your Classic Deviled Eggs
Now for the fun part—making them look as good as they taste! You have your beautiful, smooth, creamy deviled egg filling ready to return to those perfectly hollowed-out whites. You have two main options for getting that filling back in there. You can be a purist and use a small spoon or butter knife to just gently mound the filling into the hollows. That method feels very homemade and rustic, which is perfectly authentic for classic deviled eggs.
However, if you want that professional, swirly look that truly screams ‘party centerpiece,’ you absolutely need a piping bag. Don’t worry; you don’t need fancy pastry tips! I just use a Ziploc bag. Snip a little corner off the bottom—just big enough to let the filling come out in a nice star shape—and pipe them high. Piping helps them look more substantial, and honestly, it’s quicker than trying to be neat with a spoon when you have a giant platter to fill.
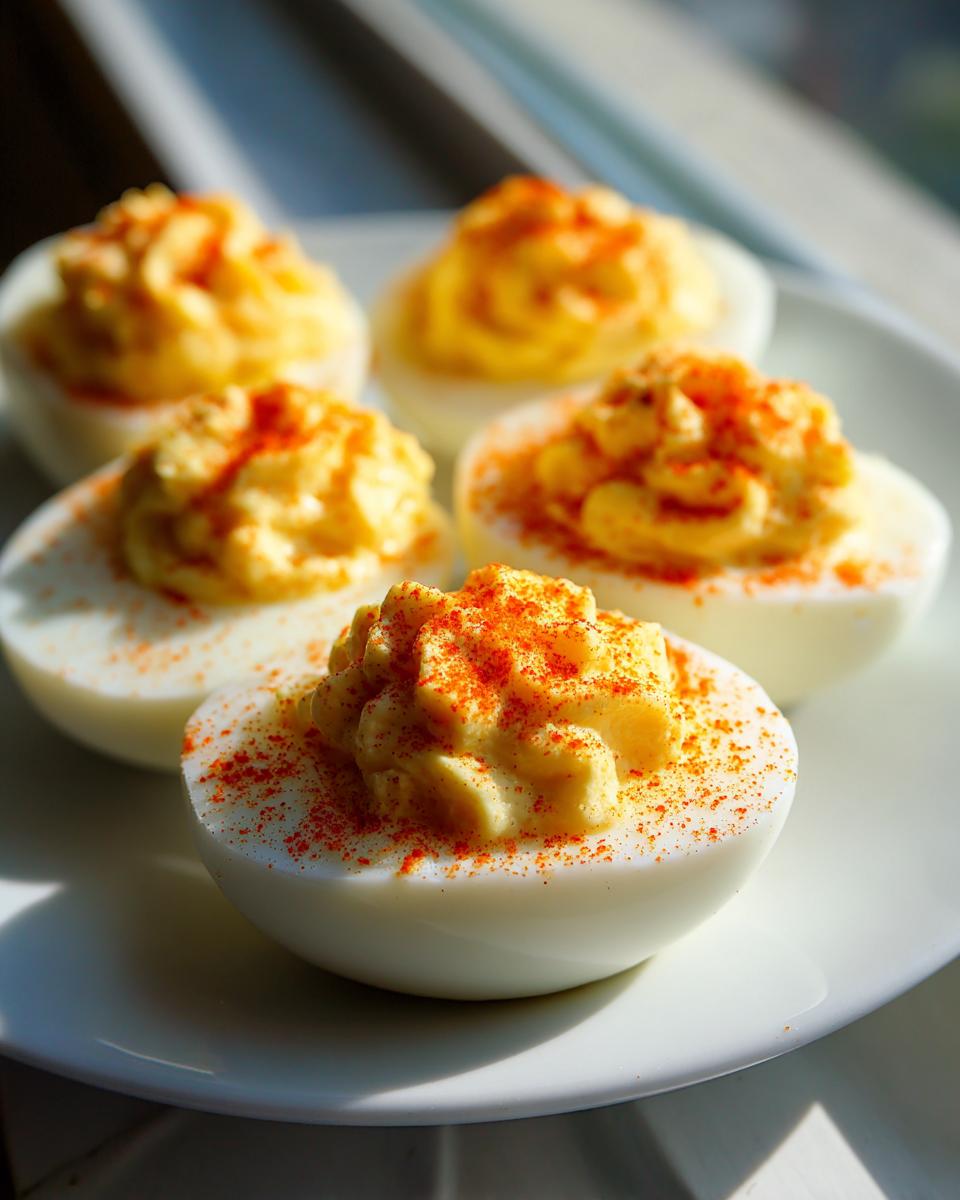
Once they are all filled up, it’s garnish time. For classic deviled eggs, the garnish has to be paprika. It’s tradition! I use a fine-mesh shaker or just pinch a little paprika between my thumb and forefinger and sprinkle it gently over the top of each one. You want a light dusting of that pretty color contrast, not a thick, choking layer. A heavier hand on the paprika can actually make them taste bitter, so remember: lightness is key!
The finished product should look bright, tangy, and utterly irresistible. It’s the ultimate simple egg appetizer, and you’ll find they disappear fast off the platter at any event you bring them to. For more inspiration on beautiful presentations, take a peek at these ideas from The Wooden Skillet!
Tips for Making Ahead and Storing Classic Deviled Eggs
Planning a big gathering means wanting to get as much done ahead of time as possible, right? I totally get that. These classic deviled eggs are fantastic because they are excellent make ahead appetizers, which takes so much pressure off me right before guests arrive. But how you store them matters if you want that filling to stay perfectly creamy.
Here’s my rule: You can boil and peel your eggs a full day in advance, no problem. Just keep those peeled halves stored snugly in an airtight container in the fridge. They stay fresh and ready to go.
When it comes to the filling, you need to decide how far ahead you’re going. For the absolute best flavor and texture? Mix the filling up maybe 2 to 4 hours before you plan to serve them. Why so short? Because the mayo and vinegar mixture starts to weep just slightly if it sits too long, and we want zero chance of a watery puddle forming underneath your perfectly piped mounds.
If you’re hauling these to a potluck deviled eggs situation or taking them across town, you have to protect them! Once you’ve filled the whites, cover the entire serving platter tightly with plastic wrap. You want that wrap to almost touch the top of the filling, or better yet, use one of those clear plastic carriers specifically designed for deviled eggs if you have one. If you don’t, you can gently place small pieces of plastic wrap directly over the filling of each egg before covering the whole platter—that’s a trick I use if I’m stacking them!
They are best eaten the day they are assembled, but keeping them refrigerated tightly covered means they’ll hold up beautifully for up to 24 hours. If you’re prepping yours the day before, just leave the filling separate until about an hour before you serve, then fill them and garnish. Simple steps to keep your favorite party food fresh!
If you’re looking for other amazing dishes to bring to the same party that you can prep early, you should definitely check out my recipe for easy cranberry brie bites!
Variations on Traditional Deviled Eggs
Part of the fun of making classic deviled eggs is knowing you can tweak them just a little bit to make them *yours* without totally abandoning the nostalgic flavor everyone craves. I’m usually pretty strict about keeping things traditional, but I have absolutely developed a few small additions that really elevate these without making them feel like a totally different appetizer.
When I’m looking to introduce something new, I keep it simple. You don’t need to go down the rabbit hole of bacon jam or smoked paprika blends right out of the gate. Stick with the base recipe from above, and try one of these quick upgrades the next time you need a little boost.
First up for texture: Finely Minced Celery. If you look at some of the great Southern Style Deviled Eggs recipes out there, they almost always include a little crunch. I mince celery so finely—almost to the size of tiny grains of rice—and mix about one tablespoon into the yolk mixture right before I pipe them. It adds this wonderful fresh snap that prevents the filling from feeling too monotonous, even though it keeps the flavor profile squarely in the classic camp.
Next, if you like a little kick, try creating seriously tangy deviled eggs by adding a small shake of your favorite hot sauce. I’m talking maybe a quarter teaspoon into the entire batch. It just brightens everything up without making the eggs spicy. It plays really nicely with the vinegar we already added!
Finally, for color and freshness, I sometimes chop up just a tiny bit of fresh dill or chives. Chives are milder and look so pretty sprinkled on top, almost like delicate green confetti alongside that traditional paprika dusting. Just remember, these variations are bonuses. The core recipe using mayo, mustard, and vinegar is what creates the best, most reliable classic deviled eggs experience every single time you make them!
Frequently Asked Questions About Classic Deviled Eggs
Since these classic deviled eggs are such a staple, people always have a few burning questions about timing and technique. I tried to keep the main recipe super clear, but here are the answers to the things I get asked most often when people try to make them for the first time. Hope this helps you nail them!
How do I stop those ugly green-grey rings from forming around the yolk?
This is the number one complaint about hard-boiled eggs, and it’s purely a timing issue! That grey-green color happens when the sulfur in the white reacts with the iron in the yolk because the egg was cooked too long or cooled too slowly. The absolute best way to avoid this in your classic deviled eggs is what I taught you in the boiling section: bring the water to a full boil, immediately kill the heat, cover, and stand for exactly 12 minutes. Then, immediately shock them in an ice bath. If you follow those steps, your yolks will stay a beautiful, bright yellow, making them the perfect centerpiece for any best deviled eggs appetizer platter.
Can I use pre-cooked or refrigerated hard-boiled eggs?
Honestly? You *can*, but I strongly advise against it if you’re trying to achieve the absolute best, creamiest filling. Pre-cooked eggs are often older, which can make them chalky when mashed. More importantly, they tend to dry out easily, which makes getting that smooth, luxurious texture for your easy deviled eggs filling much harder. If you absolutely have to, let them sit in warm water for a minute or two before peeling, and be prepared to add an extra teaspoon of mayonnaise to compensate for the dryness.
How long can I store assembled deviled eggs?
While they are best eaten within a few hours of assembly, they will last safely in the refrigerator up to 24 hours if they are properly covered to prevent drying out. Remember what I said about making them ahead: if you mix the filling the day before, store it in an airtight container, and only fill the whites an hour or two before serving. But if they are fully assembled and covered tightly, they should be fine overnight! I definitely wouldn’t push it past two days, though.
What’s the best way to get a nice, fancy swirl in the filling?
Like I mentioned, that professional look is all about the piping bag! You don’t need a fancy pastry tip (though those look great if you have them). Just grab a standard Ziploc bag, put your super smooth filling inside, and snip off one corner—make the hole about the size of your pinky nail if you want a good star shape. Squeeze the filling gently back into the egg white hollows. It’s fast, it looks elegant, and it really completes the presentation for these easy deviled eggs!
Nutritional Snapshot for Classic Deviled Eggs
I know when we’re making party food, we aren’t usually counting every last gram of fat, but I like to give you a general idea of what you’re serving! Remember, these numbers are estimates, and they can change based on what brand of mayonnaise you use. This is generally what you’ll find in a couple of halves of the classic deviled eggs made with this recipe.
- Serving Size: 2 halves
- Calories: About 90
- Fat: Roughly 8g
- Protein: Around 3g
- Carbohydrates: Less than 1g
They are proof that a small appetizer based on simple ingredients can still be rich and satisfying! Enjoy every bite!
Nutritional Snapshot for Classic Deviled Eggs
I know when we’re making party food, we aren’t usually counting every last gram of fat, but I like to give you a general idea of what you’re serving! Remember, these numbers are estimates, and they can change based on what brand of mayonnaise you use. This is generally what you’ll find in a couple of halves of the classic deviled eggs made with this recipe.
- Serving Size: 2 halves
- Calories: About 90
- Fat: Roughly 8g
-
Saturated Fat: 2.5g
- Protein: Around 3g
- Carbohydrates: Less than 1g
- Sodium: About 120mg
They are proof that a small appetizer based on simple ingredients can still be rich and satisfying! Enjoy every bite!
PrintThe Absolute Best Classic Deviled Eggs: Creamy, Tangy, No-Fail Recipe

Make the quintessential classic deviled eggs. This recipe delivers a wonderfully creamy yolk filling using simple, traditional ingredients, guaranteeing a crowd-pleasing appetizer for any party or holiday.
- Prep Time: 15 min
- Cook Time: 15 min
- Total Time: 42 min
- Yield: 24 halves 1x
- Category: Appetizer
- Method: Boiling and Mixing
- Cuisine: American
- Diet: Vegetarian
Ingredients
- 12 large eggs
- 1/2 cup mayonnaise
- 2 teaspoons Dijon mustard
- 1 teaspoon white vinegar
- 1/4 teaspoon salt
- 1/8 teaspoon black pepper
- Paprika, for garnish
- Optional: 1 teaspoon sweet pickle juice
Instructions
- Place the eggs in a saucepan and cover them completely with cold water. Bring the water to a rolling boil over high heat.
- Once boiling, immediately remove the pan from the heat, cover it, and let the eggs stand for 12 minutes.
- Transfer the eggs to an ice bath immediately and let them cool completely, about 10 minutes. This stops the cooking and helps prevent grey rings.
- Peel the cooled eggs. Slice each egg in half lengthwise. Gently scoop the yolks into a medium bowl. Place the egg white halves on a serving platter.
- Mash the egg yolks thoroughly with a fork until they are fine crumbs.
- Add the mayonnaise, Dijon mustard, white vinegar, salt, pepper, and optional pickle juice to the mashed yolks. Mix until the filling is completely smooth and creamy.
- Spoon or pipe the yolk mixture back into the hollows of the egg white halves.
- Garnish each deviled egg with a light sprinkle of paprika before serving.
Notes
- For the smoothest filling, press the mashed yolks through a fine-mesh sieve before mixing in the wet ingredients.
- To prevent the filling from drying out, cover the platter with plastic wrap and refrigerate for up to 2 hours before serving.
- If you want a tangier flavor, increase the white vinegar or pickle juice by 1/2 teaspoon.
Nutrition
- Serving Size: 2 halves
- Calories: 90
- Sugar: 0.5
- Sodium: 120
- Fat: 8
- Saturated Fat: 2.5
- Unsaturated Fat: 5.5
- Trans Fat: 0
- Carbohydrates: 0.5
- Fiber: 0
- Protein: 3
- Cholesterol: 95