

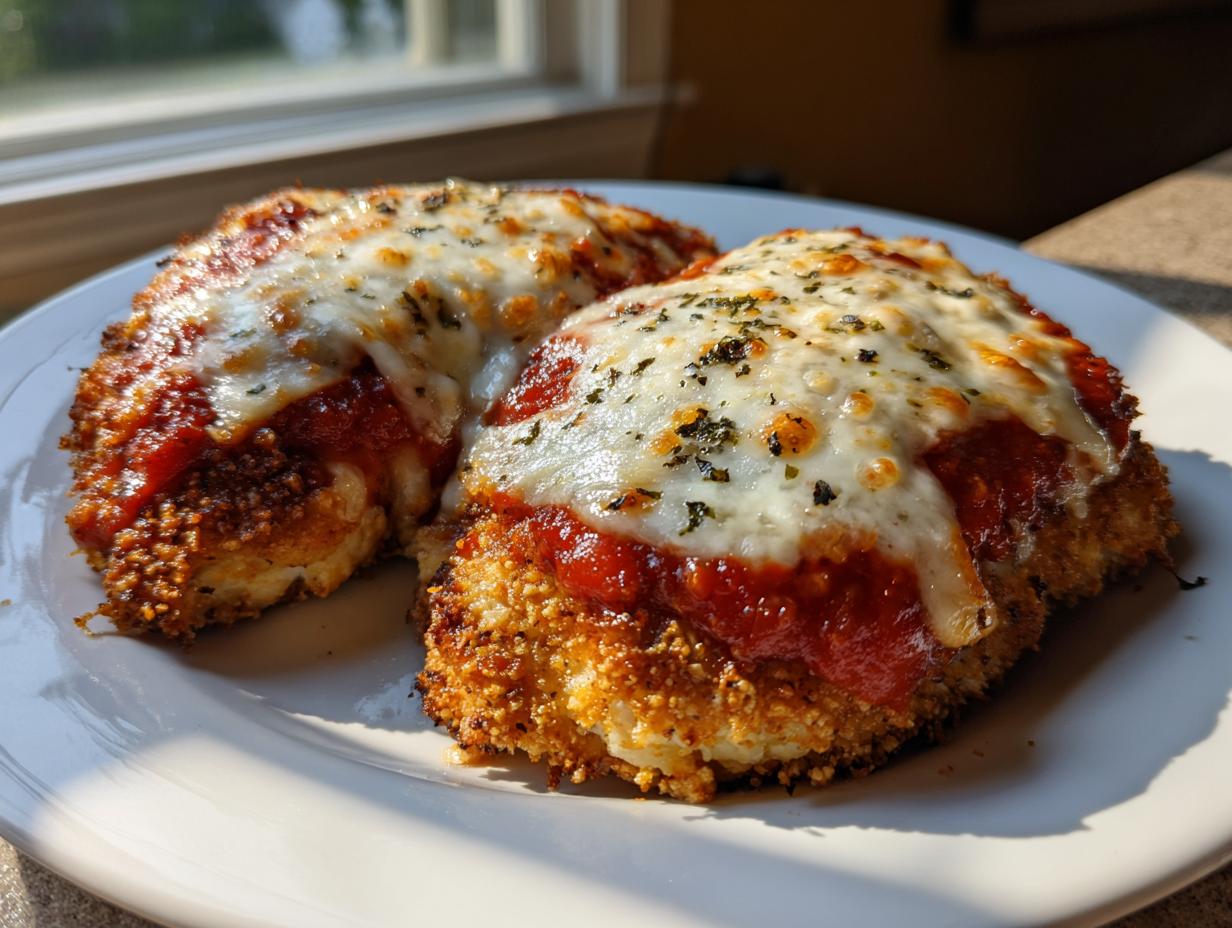
You know those nights, right? You’re craving that deep, rich, cheesy classic Italian comfort food, but the thought of standing over a hot pan of oil, dealing with splatters, and creating an extra heavy meal feels like too much work after a long day. I totally get it! That’s exactly why I spent time figuring out how to get that glorious crunch for an amazing baked chicken parmesan without ever turning on the deep fryer. My goal when I started Cooking by Felix was making sure these rich flavors weren’t just for the weekends. If we can bake it right, we can serve a truly crispy, satisfying meal like this baked chicken parmesan as an easy weeknight chicken dinner. Trust me, this oven method delivers that cheesy perfection you want, fast.
- Why This Crispy Baked Chicken Parmesan Recipe Works for Your Weeknight Chicken Dinner
- Ingredients for Your Easy Oven Baked Chicken
- How to Prepare Crispy Baked Chicken Parm
- Tips for Success with Your No Fry Chicken Parmesan
- Making This Baked Chicken Parmesan Recipe a Family Favorite Chicken Meal
- Storage and Reheating Instructions for Leftover baked chicken parmesan
- Serving Suggestions for Your Comfort Food Chicken Recipe
- Frequently Asked Questions About Baked Chicken Parmesan Recipe
- Estimated Nutritional Data for Baked Chicken Parmesan
Why This Crispy Baked Chicken Parmesan Recipe Works for Your Weeknight Chicken Dinner
When I first started streamlining my family recipes, the biggest failure point for me was always the texture. Nobody wants to wait forty minutes just to eat soggy chicken, right? That’s why this recipe focuses intensely on delivering a genuine Crispy Baked Chicken Parm experience, using the oven like magic. This method is built specifically for the busy cook who needs a reliable Weeknight Chicken Dinner that feels elevated without the fuss.
- It solves the soggy bottom problem immediately—that’s my biggest teaching moment when showing people how to bake Parmesan crusted food!
- It’s fast. We’re talking real-food flavor in less than 45 minutes, usually less if you prep while the oven heats up.
- It’s cleaner! No oil cleanup means you can actually relax after using my 30-minute weeknight dinners strategy.
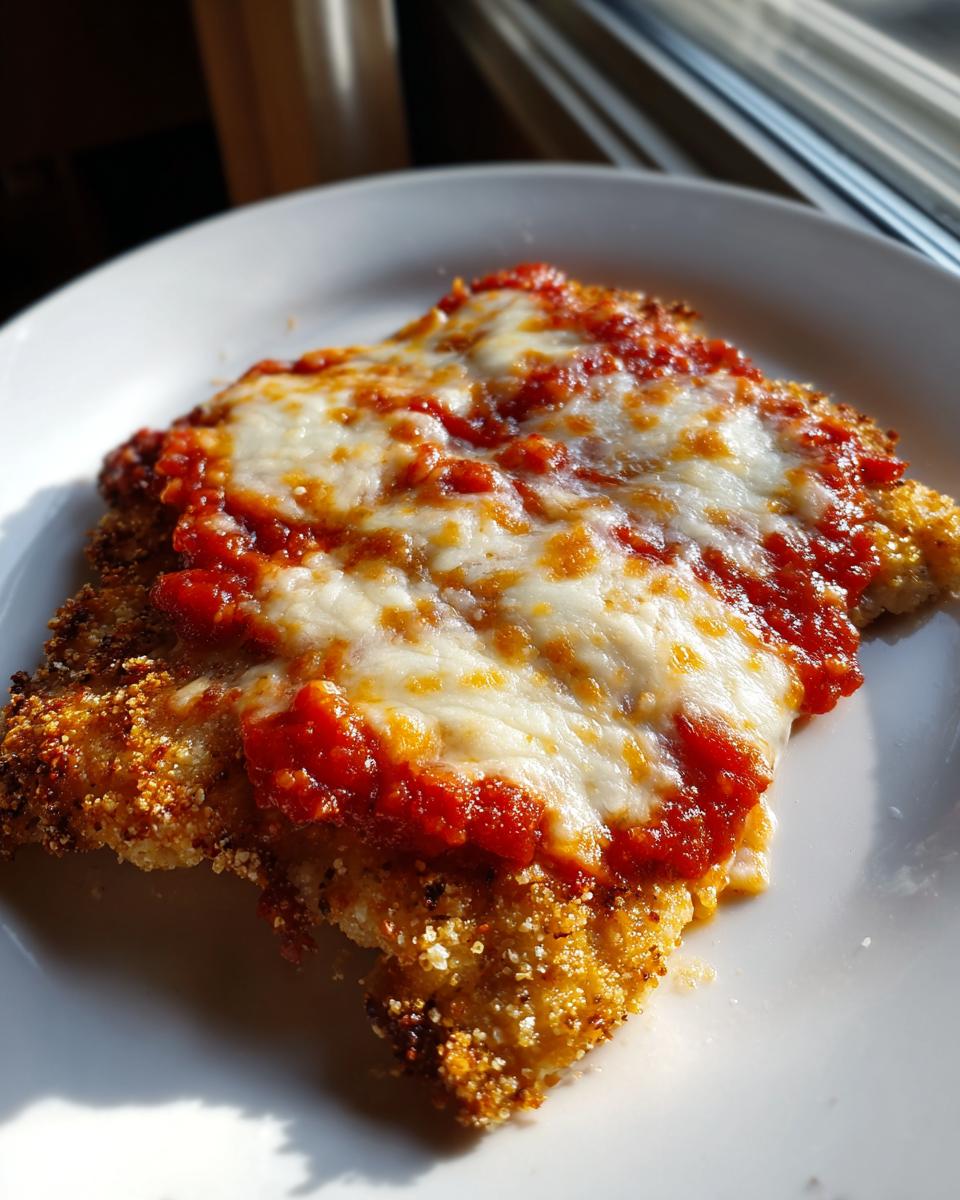
Achieving Golden Breading Chicken Bake Texture Without Frying
This is the non-negotiable step, folks. If you want that golden breading texture, you absolutely must lift the chicken off the baking sheet. We use a wire rack lightly sprayed with cooking spray, or even brushed with a little olive oil. This allows air to circulate underneath the cutlets. When the heat hits the bottom crust evenly, it dries out instead of steaming in its own juices. That’s what separates a good oven meal from a truly crispy one!
Quick Baked Italian Chicken Timing Breakdown
When you’re planning your evening, you need predictability. This recipe is perfect because the timing is straightforward. We hit the oven for a quick 15 minutes uncovered to set that crust, then we top it and return it for the final melt. Total active cook time is almost nothing! You get a beautiful, satisfying, Quick Baked Italian Chicken meal on the table when you need it most.
Ingredients for Your Easy Oven Baked Chicken
Okay, here’s what you need to pull off this magic trick. Honestly, the ingredient list is pretty simple, which is why this makes such a fantastic Easy Oven Baked Chicken dish when you’re pressed for time. Remember, we are relying on Panko here for that essential crispiness!
- You’ll need 3 boneless, skinless chicken breasts. Make sure you split them horizontally to get 6 nice, thin cutlets.
- For the breading station, grab 1/2 cup of flour, 2 whisked large eggs, and 1 cup of Panko breadcrumbs.
- The flavor comes from mixing 1/2 cup of grated Parmesan cheese (we split this up later!), 1 teaspoon of dried basil, 1/2 teaspoon of garlic powder, and just a pinch of black pepper.
- For the topping, keep 1 cup of good marinara sauce and 1 cup of shredded mozzarella cheese handy.
- And finally, don’t forget your cooking spray or just a tablespoon of olive oil to grease that essential wire rack. If you need a flavor boost before you start breading, check out my thoughts on a quick chicken marinade!
How to Prepare Crispy Baked Chicken Parm
Alright, this is where we turn great ingredients into the absolute best baked chicken parmesan your family has ever had—and all without deep frying! The process is all about setup. Once you have your three dishes ready, the actual coating goes lightning fast. I like to think of this as an assembly line; it keeps the mess manageable, which is key for a good garlic parmesan chicken bake. If you want to see how other folks nail this, check out a guide on this exact dish here: Why Everyone Loves This Baked Chicken Parmesan.
Setting Up for Perfect Baked Chicken Parmesan
First things first, we have to get that oven hot! Preheat it to 400°F (200°C) right away. While that heats up, grab your baking sheet and place a wire rack inside it. You need to spray that rack generously with cooking spray—or if you prefer a little extra richness, brush it with a tiny bit of olive oil. Seriously, this rack is the secret weapon against any sogginess. Don’t skip this setup step or you’ll miss out on that crucial crunch!
The Three-Step Breading Station for Oven Parmesan Chicken
Now for the breading station. I use three shallow dishes lined up. Dish one gets the flour. Dish two gets the two eggs, whisked up nicely. Dish three is the flavor powerhouse! That’s where you mix your Panko breadcrumbs with half of your Parmesan, plus the basil and garlic powder. Take your cutlet, dredge it lightly in the flour, shake off the excess—we don’t want clumps—then dip it in the egg, and finally, press it firmly into the Panko mix. I mean really press it on there so the coating sticks tight. This ensures a solid crust on your Oven Parmesan Chicken.
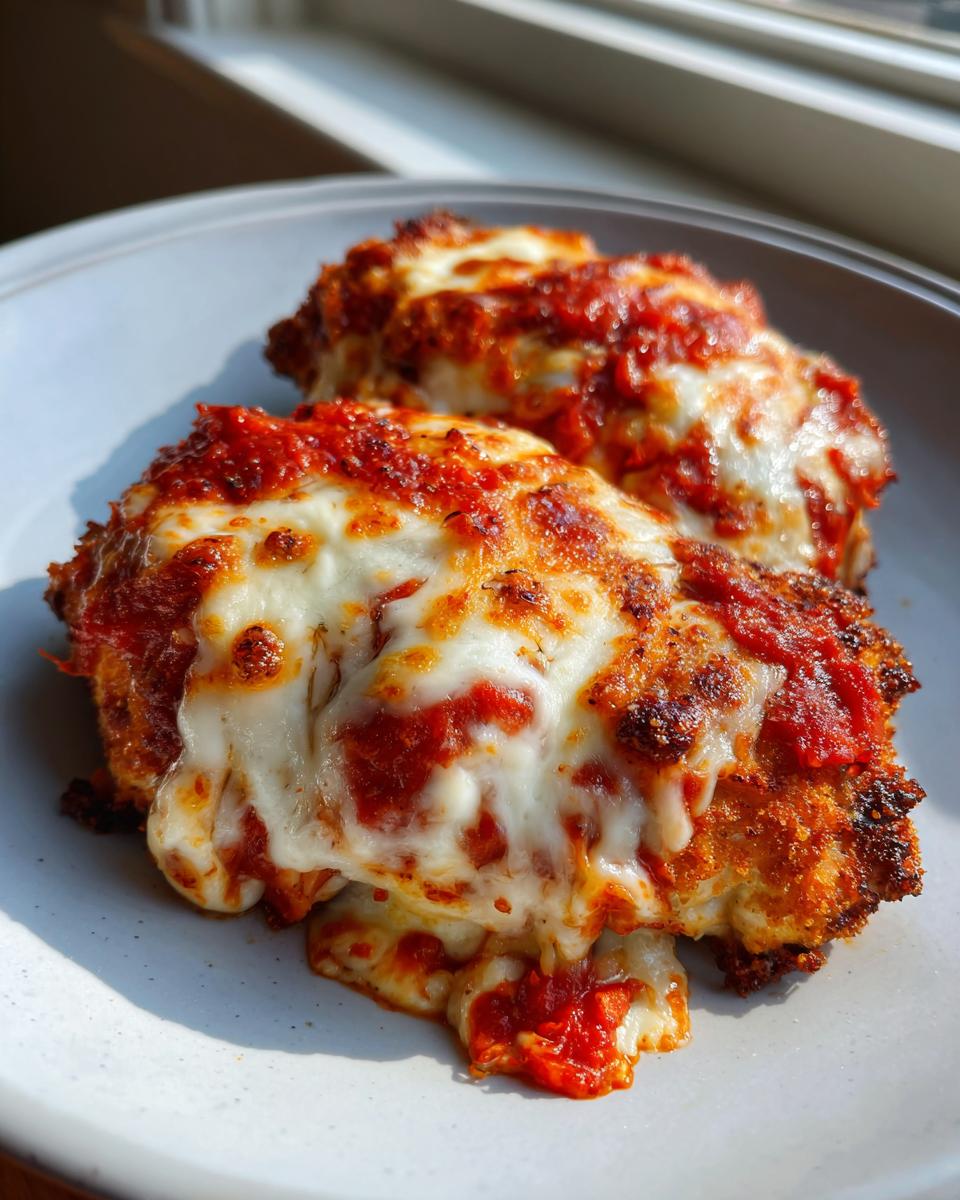
Baking and Adding the Cheesy Baked Chicken Breast Topping
Once all your cutlets are breaded and sitting nicely spaced out on that rack, pop them directly into the hot oven for about 15 minutes. This initial bake cooks the chicken partially and sets that crust. When they come out, quickly spoon on a good dollop of marinara sauce onto each piece. Then, pile on the mozzarella and sprinkle with that reserved Parmesan. Pop it back in the oven for another 5 to 8 minutes. You want that cheese bubbly and starting to brown a little. Always double-check with a thermometer that the center of your cheesy baked chicken breast has hit 165°F—that’s how we keep things safe and juicy!
Tips for Success with Your No Fry Chicken Parmesan
If you followed the initial baking instructions, you should have perfectly cooked, satisfyingly coated chicken. But hey, we are going for perfection here, especially when making a No Fry Chicken Parmesan! A little extra attention at the end makes all the difference between “good” and “must-make-again.” I always keep a close eye during that final phase. This is where we lock in that super crisp texture that beats takeout!
We’ve moved past the heavy oil, but we can borrow a trick from the broiler gods if the cheese isn’t browning quite fast enough. For the crispiest finish on your baked chicken parmesan, you can carefully finish it under the broiler. I only suggest doing this for 1 to 2 minutes, tops. Keep the oven door slightly ajar if you can, and just stand right there watching it like a hawk. If you walk away for a second, it goes from golden brown to burnt black super fast. My other secret for a guaranteed delicious crust is to look at how others nail the crunch—you can check out some great inspiration on this topic over at Crispy Healthy Baked Chicken Parmesan Perfection Under 30 Minutes.
Pro Tip: Achieving Extra Crispiness on Your baked chicken parmesan
Okay, this is for when you want that *restaurant-quality* shatter. After you pull the chicken out of the oven with the cheese melted, switch your oven setting to the broiler (High). Slide that rack pretty close to the top element—but not too close! You watch for the cheese to start bubbling up nicely and get those little hints of brown. This final blast of intense heat really sets the breading. Remember, the broiler is aggressive; this step is purely optional and requires your full attention!
If you want more ideas on getting crispy coatings without the messy oil, you should definitely check out my dedicated recipe on Parmesan Crusted Chicken—it uses similar science!
Making This Baked Chicken Parmesan Recipe a Family Favorite Chicken Meal
This is the section I love writing the most because, honestly, that’s why I do this! In my house, getting everyone excited about dinner without spending two hours cooking used to feel impossible. I remember one Tuesday night, I was deep in a marketing project, and I needed something comforting that my partner and I would actually look forward to eating. I started tweaking the traditional recipe, slashing the dredging time and insisting on those thin cutlets so they cooked fast. That day, this version was born, and it immediately became one of our absolute Family Favorite Chicken Meals.
The best part about this baked chicken parmesan is that it travels really well, flavor-wise. It doesn’t get sad and limp like some baked breaded items do when packed up for lunch the next day. It’s just as good the next day! I often pair a leftover cutlet with some roasted vegetables or even turn it into a quick sandwich later in the week. It’s built for real life, you know?
If you are planning meals around feeding a crowd or just want to see how others make chicken favorites easy, take a peek at this great little resource on similar dishes Easy Baked Chicken Parmesan Recipe. But honestly, the secret sauce here is the speed paired with the quality crunch. We’ve proven that you don’t need heavy techniques to get big results. If you’re looking for other ways to make chicken a weeknight win, my Chicken Cauliflower Rice Casserole brings the cozy factor too!
Storage and Reheating Instructions for Leftover baked chicken parmesan
The one thing I love most about making a big batch of this baked chicken parmesan is having leftovers for lunch the next day! It’s so satisfying to pull out a serving on a busy afternoon. But here’s the catch with anything breaded: moisture is the enemy of crispiness!
When it comes to storage, keeping things dry is your mission. Don’t try storing the chicken nestled right on top of a heap of marinara sauce and pasta. When you put leftovers away, make sure you let the chicken cool down completely first. Once it’s cooled, pop the cutlets into an airtight container—separate from your pasta or salad toppings if you can. I find they last really well in the fridge for about three days. Any longer than that, and the texture starts to change too much, even when stored perfectly.
Now, for reheating. I’m going to be blunt: the microwave is your crispy crust’s absolute worst enemy. It turns that beautiful Panko coating into sad, soft mush instantly. If you want to bring back even a hint of that initial crunch on your baked chicken parmesan, you have two main options. First, use a toaster oven or a conventional oven set to about 350°F (175°C). Just give it 8 to 10 minutes on a clean, dry piece of foil until it’s heated through. That gentle, dry heat helps re-crisp the surface.
If you happen to have an air fryer, that’s even better! Pop the cutlet in at 375°F (190°C) for about 5 minutes. That blast of circulating hot air is totally magnificent for reviving breading. It really helps perk up that cheese topping, too. You’ll be amazed at how close it gets back to that fresh-out-of-the-oven feeling!
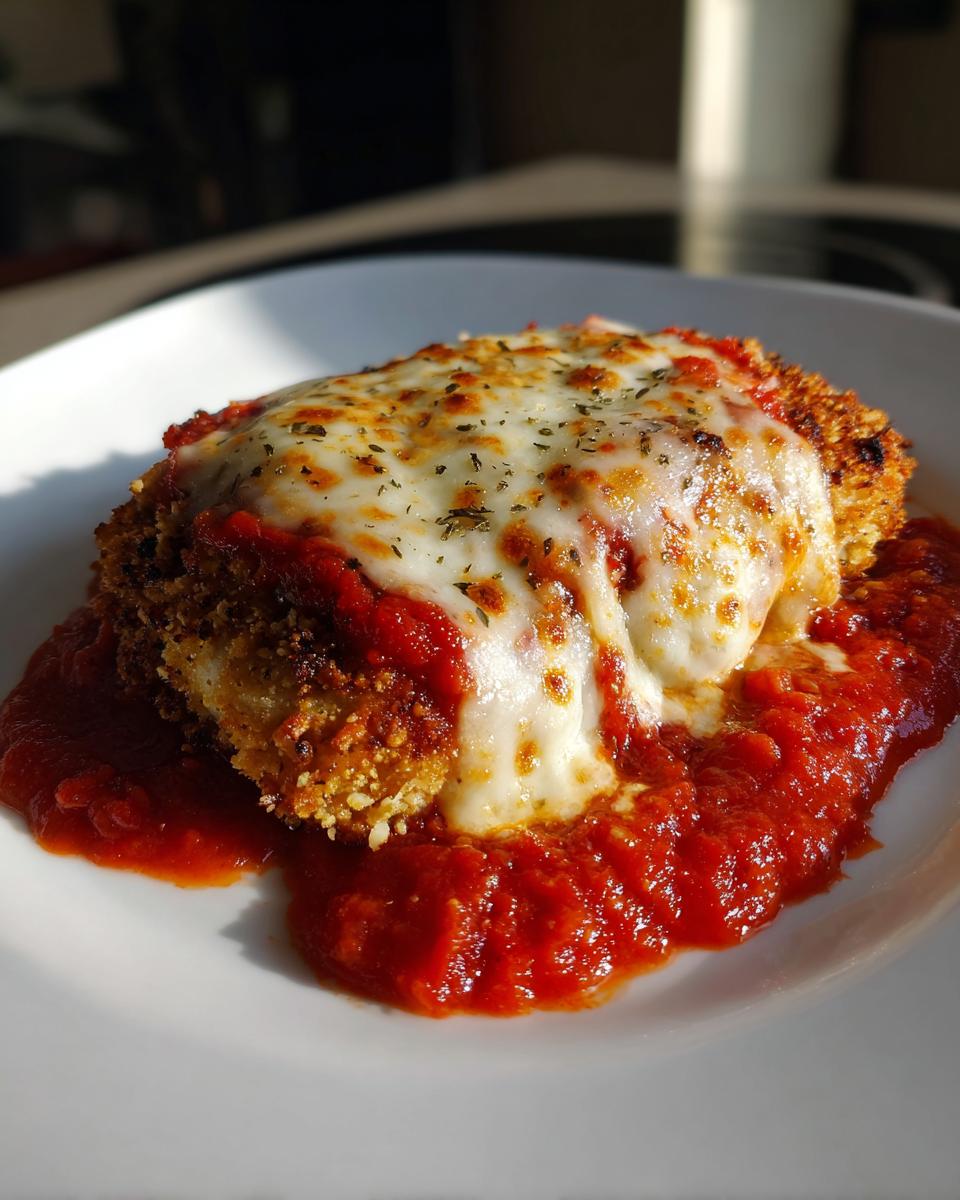
Serving Suggestions for Your Comfort Food Chicken Recipe
When you’ve put the effort into making a perfect Comfort Food Chicken Recipe like this, you want the sides to shine too! Naturally, this baked chicken parmesan begs for a bed of pasta—spaghetti or maybe some fettuccine—to soak up all that extra marinara sauce. But if you’re trying to keep it a little lighter after loading up on that cheesy topping, I highly recommend pairing it with a vibrant side of greens. Try making my Crispy Smashed Broccoli; the bright, slightly bitter edge cuts through the richness beautifully. It’s genius, I promise! You can see some other great topping ideas here too: Easy Oven Baked Chicken Parmesan Recipe.
Frequently Asked Questions About Baked Chicken Parmesan Recipe
I know you lovely cooks out there always have fantastic questions bubbling up once you start preparing a recipe. That’s the sign of a great cook—always testing the boundaries! I’ve pulled together some of the things I hear most often about making this Baked Chicken Parmesan Recipe so you can nail that cozy Italian flavor with confidence every single time.
Can I skip the flour step in this Baked Chicken Parmesan Recipe?
Technically, yes, you *could* skip the flour dredge, but honestly, why would you want to? Think of the flour as the binder, the sticky underlayer that makes everything else stick. If you go straight from the egg wash to the seasoned Panko, your breading is going to shed like crazy in the oven or when you go to move it. It’s the first handshake between the chicken and the crunchy coating. Keep that flour step in for maximum adhesion on your cheesy baked chicken breast!
What is the best way to make this Cheesy Baked Chicken Breast extra healthy?
That’s a great question, especially when we talk about making this a routinely enjoyed weeknight chicken dinner. The biggest flavor hit is the cheese, right? You can definitely reduce the amount of mozzarella you pile on top—even shaving it to 3/4 cup instead of a full cup makes a difference in richness without losing that gooey factor. Another trick I love? Swap out regular Panko for whole wheat Panko. It adds a little more fiber and a nuttier flavor, but you still get that fantastic, airy crunch we worked so hard for. For deeper dives into healthier options, I’ve got some tips in my guide on Keto Chicken Parmesan Crispy Secrets that might inspire you!
Can I use chicken thighs instead of breasts for this baked chicken parmesan?
Absolutely! Chicken thighs are actually more forgiving because they have more fat, which means they stay super moist no matter what oven temperature you use. If you swap in boneless, skinless thighs for the cutlets, you just need to bump up that initial baking time by about 5 to 7 minutes since they are naturally a bit thicker. Keep those thighs pounded thin, though, so they cook fairly evenly with the rest of the batch for your baked chicken parmesan!
Estimated Nutritional Data for Baked Chicken Parmesan
I’ve been asked a lot about the numbers behind this dish, especially since we’re skipping the frying to keep things a bit lighter! Look, I always tell people that cooking from scratch means the exact nutrition can shift based on what brand of marinara you use or how much cheese you sneak onto your own plate (I won’t judge!).
However, based on the measurements in this baked chicken parmesan recipe, here is a good ballpark estimate for what one standard serving looks like. This helps you see that you don’t have to feel guilty about enjoying this comfort classic:
- Serving Size: 1 cutlet
- Calories: 420
- Fat: 18g (Saturated Fat: 7g)
- Carbohydrates: 25g
- Protein: 40g
- Sugar: 6g
- Sodium: 550mg (Remember, sauce plays a big role here!)
Please keep in mind that these figures are estimates based on the ingredients listed above and my specific preparation methods. If you add extra Parmesan or use a really sugary sauce, those numbers will change slightly! But generally, getting 40 grams of protein in a delicious, easy oven baked chicken meal like this is fantastic for a weeknight!
PrintEasy Oven-Baked Chicken Parmesan for Weeknight Dinner

Make this easy baked chicken parmesan for a comforting weeknight dinner. This recipe delivers crispy, cheesy chicken without the mess of frying, making it a family favorite.
- Prep Time: 15 min
- Cook Time: 25 min
- Total Time: 40 min
- Yield: 4 servings 1x
- Category: Dinner
- Method: Baking
- Cuisine: Italian-American
- Diet: Vegetarian
Ingredients
- 3 boneless, skinless chicken breasts, halved horizontally to make 6 thin cutlets
- 1/2 cup all-purpose flour
- 2 large eggs, whisked
- 1 cup Panko breadcrumbs
- 1/2 cup grated Parmesan cheese, divided
- 1 teaspoon dried basil
- 1/2 teaspoon garlic powder
- 1/4 teaspoon black pepper
- 1 cup marinara sauce
- 1 cup shredded mozzarella cheese
- Cooking spray or 1 tablespoon olive oil
Instructions
- Preheat your oven to 400°F (200°C). Lightly spray a wire rack set inside a baking sheet with cooking spray, or lightly brush the rack with olive oil. This helps achieve a crispy texture.
- Set up a standard breading station with three shallow dishes. Place the flour in the first dish. Whisk the eggs in the second dish. In the third dish, combine the Panko breadcrumbs, 1/4 cup of the grated Parmesan cheese, dried basil, garlic powder, and black pepper.
- Take one chicken cutlet and dredge it lightly in the flour, shaking off any excess. Dip the floured cutlet into the egg mixture, letting the excess drip off. Finally, press the cutlet firmly into the Panko mixture to coat both sides completely. Place the breaded cutlet on the prepared wire rack. Repeat with the remaining cutlets.
- Bake the chicken for 15 minutes.
- Remove the baking sheet from the oven. Spoon about 2 tablespoons of marinara sauce over the top of each chicken cutlet. Top each cutlet with about 2-3 tablespoons of mozzarella cheese and a sprinkle of the remaining 1/4 cup Parmesan cheese.
- Return the chicken to the oven and bake for another 5 to 8 minutes, or until the cheese is melted, bubbly, and lightly golden brown, and the chicken reaches an internal temperature of 165°F (74°C).
- Serve your crispy baked chicken parmesan immediately, perhaps over your favorite pasta or with a side salad.
Notes
- For extra crispiness, you can briefly place the coated chicken under the broiler for the last 1-2 minutes, watching closely to prevent burning.
- Use high-quality marinara sauce for the best flavor in this simple Italian dinner.
- This recipe works well for meal prep; store leftovers in an airtight container in the refrigerator for up to 3 days.
Nutrition
- Serving Size: 1 cutlet
- Calories: 420
- Sugar: 6
- Sodium: 550
- Fat: 18
- Saturated Fat: 7
- Unsaturated Fat: 11
- Trans Fat: 0
- Carbohydrates: 25
- Fiber: 2
- Protein: 40
- Cholesterol: 120