

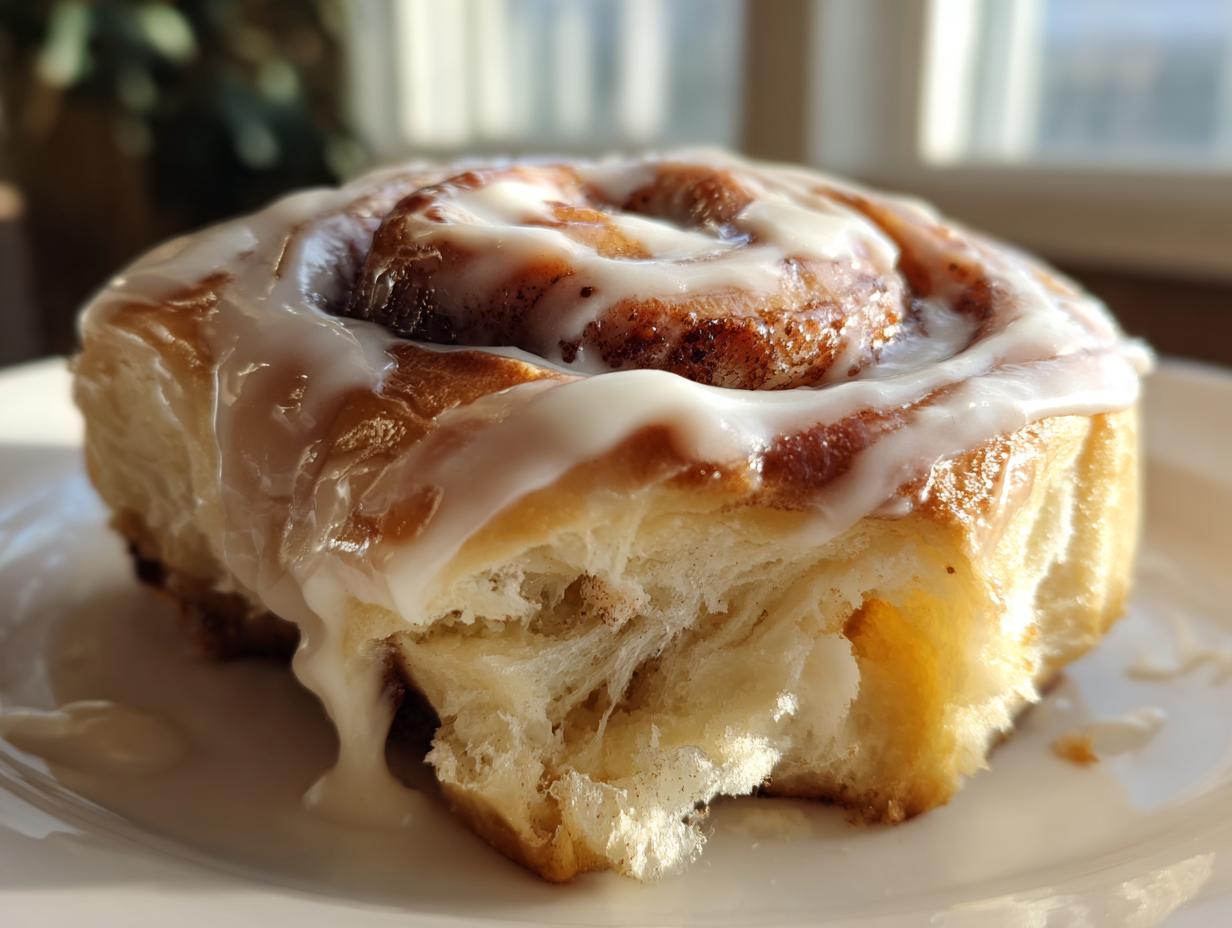
Oh, that smell! You know the one—it’s that deeply comforting aroma of cinnamon and warm sugar that means the weekend has officially started. Seriously, nothing beats pulling a batch of fresh, ridiculously soft homemade cinnamon rolls out of the oven. Forget those dry, sad tubes from the grocery store; this recipe is my holy grail for achieving perfect bakery-quality results right here in my own kitchen. I spent years perfecting the dough so you don’t have to worry about it—trust me, these are the best cinnamon rolls you’ll ever make, guaranteed to make any morning feel like a celebration.
- Why This Homemade Cinnamon Roll Recipe Delivers Bakery-Quality Results
- Gathering Ingredients for the Best Cinnamon Roll
- Step-by-Step Instructions for Soft Cinnamon Roll Dough Preparation
- Assembling and Rolling Your Gooey Cinnamon Roll Filling
- Baking the Perfect Cinnamon Roll and Making the Icing
- Storage and Reheating Instructions for Leftover Cinnamon Roll
- Serving Suggestions for This Sweet Breakfast Recipe
- Frequently Asked Questions About Making Homemade Pastry
- Estimated Nutritional Data for Your Cinnamon Roll
- Share Your Experience with This Cinnamon Roll Recipe
Why This Homemade Cinnamon Roll Recipe Delivers Bakery-Quality Results
There’s nothing worse than spending all that time mixing and kneading only to end up with stiff, disappointing rolls, right? That won’t happen here! My method for this amazing homemade cinnamon roll ensures you get that irresistible pull-apart texture every single time. I spent years perfecting the dough so you don’t have to worry about it—trust me, these are the best cinnamon rolls you’ll ever make, guaranteed to make any morning feel like a celebration. I focus on giving you simple, proven techniques that guarantee success, which is why I trust this recipe completely.
- It delivers that wonderfully gooey center we all dream about.
- The dough is genuinely foolproof, thanks to precise yeast handling.
- You get rich flavor and incredible softness because of the fat content in the dough.
The key is respecting the yeast and making sure both rises happen fully. When the dough is properly aerated, you get that light, fluffy final product that melts in your mouth.
Achieving the Perfect Soft Dough for Your Cinnamon Roll
It all starts with the milk temperature—this is where I really focus my expertise. If the milk is too cool, your yeast just naps, and your dough won’t bloom. Too hot, and you’ve killed your yeast! You need that sweet spot, 105°F to 115°F, so the yeast wakes up happy and ready to work. The generous amounts of softened butter and those two room-temperature eggs we add next are what give the dough its luxurious richness. This rich foundation is what separates a good cinnamon roll from a truly spectacular one.
Gathering Ingredients for the Best Cinnamon Roll
When you’re aiming for the best cinnamon roll experience, you can’t skimp on quality—but you also don’t need a million fancy things! This list is straightforward, but attention to detail here is what makes the result so delicious. We’re using standard pantry staples, but the way we treat them matters. Remember, everything needs to be ready before you start activating that yeast, so have your butter softened and your eggs sitting out to come to room temperature. This simple prep makes mixing go so much smoother!
Ingredient Notes and Simple Substitutions
Let’s talk yeast first! I specified active dry yeast because it’s what I always have on hand. If you happen to be using instant yeast, don’t worry—you can skip the step where you wait for it to foam up in the milk; just mix it right in with your dry ingredients. Also, while the recipe calls for whole milk, don’t panic if you only have 2%. It works just fine, but you’ll notice the dough isn’t quite as rich. The fat content is what keeps these rolls soft for days, so whole milk is definitely my preference here.
Step-by-Step Instructions for Soft Cinnamon Roll Dough Preparation
Okay, now the fun—and slightly physical—part begins! Once your yeast is nice and foamy (that means it’s alive and ready!), you’ll stir in the sugar, softened butter, eggs, flour, and salt right into that bowl. Mix it just until it starts to come together into a shaggy dough. Don’t over-mix it in the bowl; we’re saving the real work for the countertop. This is how we ensure we get those unbelievably fluffy rolls.
Now turn that shaggy mess out onto your lightly floured surface. Kneading is what develops the gluten, which is what gives your cinnamon roll that essential chewiness and structure. You need to really work it for a solid 8 to 10 minutes. I know, it feels like forever when your arms get tired! Keep going until the dough looks visibly smooth and feels resilient—kind of elastic when you poke it lightly. Once it passes that test, pop it into an oiled bowl, cover it tightly, and let it rest. This first rise is important: we need it to double in size, which usually takes about 90 minutes to an hour and a half.
Tips for the First Rise of Your Cinnamon Roll Dough
Where you let your dough rise matters a ton, especially if your kitchen is chilly! I look for the warmest, draft-free spot in my house. If you have an oven that’s turned OFF but has the light on, that little bit of warmth is perfect. If you have a home with old windows, maybe avoid the counter right next to them! You are waiting for that dough to double completely—if it only gets bigger by half, it means your yeast might have been sluggish, or your kitchen wasn’t warm enough. Don’t rush this step for a successful yeast roll recipe; patience now means fluffy rolls later!
Assembling and Rolling Your Gooey Cinnamon Roll Filling
Your dough has risen beautifully, and now we get to the best part: the lush, aromatic filling! Once you punch down that puffy dough, turn it out onto a lightly floured surface. You need to roll it into a big, even rectangle, aiming for about 12 by 18 inches—don’t stress if it’s not exact, but try to get it pretty thin so you get lots of layers in your final cinnamon roll.
While the dough rests, you’ll mix up that simple filling of butter, cinnamon, and sugar until it’s spreadable. Now, slather that mixture all over the dough. Here’s a technique tip that I learned the hard way: leave about a one-inch border bare along one of the long edges. If you cover that whole edge, the filling will squeeze right out the seam when you roll it up, and nobody wants a messy pan of leaks!
Techniques for Cutting and Placing the Cinnamon Roll Log
Once it’s spread, roll that log up super tight, starting from the edge that is completely covered in filling. Pinch that empty border seam closed firmly to seal in all the goodness. Now, grab a sharp, un-serrated knife or even some unflavored dental floss—floss is amazing for clean cuts!—and slice the log into 12 equal pieces. You want them snugly next to each other in your greased 9×13 pan. Do not skip the second rise! Cover the pan, let them hang out for just 30 more minutes. This final proofing step puffs them up perfectly before they hit the oven, guaranteeing those super soft results.
Baking the Perfect Cinnamon Roll and Making the Icing
They’ve had their second rise, they look beautifully puffed up, and now it’s time for the oven! Preheat your oven to 375°F. Trust me, getting the temperature right is essential for that golden crust without cooking out all the moisture inside. Slide that pan in and set your timer for 20 minutes. You’re looking for them to be a gorgeous golden brown on top. If the edges look done but the very center droops a tiny bit, give them another 5 minutes. While they are baking, we whip up the crowning glory: the cream cheese glaze!
For the icing, just take that softened cream cheese, the powdered sugar, and the vanilla extract, and beat it together. Do not rush this part; you need to beat it until it is completely silky smooth. If it seems too stiff to drip nicely like a glaze should, add milk just one tablespoon at a time until it flows perfectly. Pull those soft cinnamon rolls out of the oven while they are still piping hot, and slather that creamy frosting right over the top. Watching it melt down into all those swirls is the best part of baking these homemade pastries!

Storage and Reheating Instructions for Leftover Cinnamon Roll
Look, if you’re anything like me, there usually aren’t any leftovers of this soft cinnamon roll recipe. But just in case you manage to hide a couple, keeping them fresh is easy! Store any uneaten rolls, covered tightly, right on the counter at room temperature for up to three days—no need to refrigerate them, that just dries them out. When you get a craving later, I have two reheating tricks. For one roll, just microwave it for about 15 to 20 seconds until it’s warm and soft again. If you’re saving a whole pan, wrap them loosely in foil and warm them in a 300°F oven for about 10 minutes.
Serving Suggestions for This Sweet Breakfast Recipe
Now that you have these incredible, decadent rolls cooling (or maybe you just can’t wait and you’re grabbing one while it’s still hot!), you need the perfect accompaniment. These aren’t just any pastries; they are rich and filling, so you don’t need much else!
For me, the absolute must-have pairing is a strong, freshly brewed cup of coffee. The slight bitterness and the heat cut through the richness of the cream cheese icing perfectly. If I’m serving these for a big family brunch, I always make sure to have a huge bowl of sliced, fresh fruit nearby—things like strawberries or crisp green apples offer a wonderful, necessary freshness that balances the sweetness of this wonderful homemade pastry.
Don’t overthink it, though. Sometimes the best way to enjoy these is just standing over the sink, letting the icing drip down your wrist while you try to eat it too fast. That’s always my favorite way!
Frequently Asked Questions About Making Homemade Pastry
I know coming up with a perfect batch of yeast rolls can feel intimidating, especially the first time you try a new recipe. People have asked me tons of questions about getting these rolls right, so I wanted to collect the big ones here. Don’t worry if you’ve had baking disasters before; most problems in an easy cinnamon rolls recipe are easily fixed once you know what to look for!
Can I make the cinnamon roll dough ahead of time?
Yes, absolutely! This is one of my favorite time-savers, especially when I want to serve these for a special weekend breakfast. After you knead the dough (Step 3), you can place it in a lightly oiled bowl, cover it tightly with plastic wrap, and stick it right in the refrigerator overnight. This is called a cold proof. When you slow down the first rise, the dough develops even deeper flavor! Just take it out the next morning, let it warm up on the counter for about an hour while you prep the filling, and then proceed with rolling and the second 30-minute rise just as the recipe says. It works like a dream!
Why are my rolls not fluffy?
This is the saddest thing that can happen to a batch of beautiful dough, isn’t it? If your rolls aren’t puffing up light and airy, there are usually three culprits. First, check your yeast—if it’s old, it might not have activated properly in Step 1. Second, think back to kneading; if you didn’t hit that full 8 to 10 minutes, the gluten structure isn’t strong enough to trap all those lovely bubbles during the rise. Finally, and this is crucial for a great yeast roll recipe, you absolutely cannot skip that second 30-minute rise after you cut and place them in the pan. That final proof is what gives you that cloud-like texture when baking!
I’ve gathered some more great tips over on our terms page, where we cover how to handle different ingredients. You can read more about our policies here.
Estimated Nutritional Data for Your Cinnamon Roll
I always feel a tiny bit guilty even looking at the numbers for these glorious sweet breakfast recipes, but knowledge is power, right? I pulled these figures straight from the tests we ran, but remember, this data is just an estimate based on what we used in the recipe.
- Serving Size: 1 roll
- Calories: 450
- Fat: 22g (Be honest, most of that is the glorious filling butter!)
- Carbohydrates: 58g
- Protein: 7g
Now, before you panic about that sugar content—remember, these are a treat! They are meant to be decadent and satisfying. This isn’t an everyday breakfast staple; this is your special Saturday morning indulgence. If you want to lower the fat slightly, you could try using 1/4 cup of milk instead of whole milk, but honestly, it truly changes the texture.
Because we are dealing with yeast dough and homemade cream cheese icing, these figures can change based on how thick you spread the batter or how much glaze you pile on top. So, take these numbers as a general guide, not a scientific guarantee! We believe in celebrating food, not agonizing over every tiny gram, especially when it comes to amazing homemade pastry like this. Just enjoy the process!
Share Your Experience with This Cinnamon Roll Recipe
Alright, now that you’ve inhaled the entire pan (and I don’t blame you if you did!), I would absolutely love to hear how your beautiful batch of homemade cinnamon rolls turned out! Seeing your successes is truly the best part of sharing these recipes.
Please, take a moment an leave a star rating right below this article. Tell me if you had to adjust the kneading time, or if you tried adding a different spice blend to the cinnamon filling. Every bit of feedback helps the next person who tries this recipe succeed with their own yeast roll adventure.
If you ran into any hiccups, or if you have a question about how to get that icing absolutely perfect, drop it in the comments section! I read every single one, and I’m here to help troubleshoot any issue you might have run into while making this classic sweet breakfast recipe.
If you snapped a picture of your gooey, glorious results, tag us! You can reach out to me directly if you have specific questions or just want to share a success story through our contact page here: I’d love to hear from you!
PrintSoft and Gooey Homemade Cinnamon Rolls

Follow this recipe for rich, yeasted cinnamon rolls that are soft, fluffy, and topped with a sweet cream cheese glaze. This recipe yields bakery-quality results.
- Prep Time: 30 min
- Cook Time: 25 min
- Total Time: 2 hr 25 min
- Yield: 12 servings 1x
- Category: Breakfast
- Method: Baking
- Cuisine: American
- Diet: Vegetarian
Ingredients
- 1 cup whole milk, warmed to 105-115°F
- 2 1/4 teaspoons active dry yeast
- 1/2 cup granulated sugar, plus 1/4 cup for filling
- 1/2 cup unsalted butter, softened, plus 1/2 cup for filling
- 2 large eggs, room temperature
- 4 cups all-purpose flour, plus more for dusting
- 1 teaspoon salt
- 2 tablespoons ground cinnamon
- 8 ounces cream cheese, softened
- 1 teaspoon vanilla extract
- 2 cups powdered sugar
Instructions
- Combine the warm milk and yeast in a large bowl. Let stand for 5 minutes until foamy.
- Stir in the 1/2 cup granulated sugar, 1/2 cup softened butter, eggs, flour, and salt into the yeast mixture. Mix until a soft dough forms.
- Knead the dough on a lightly floured surface for 8 to 10 minutes until smooth and elastic.
- Place the dough in a lightly oiled bowl, turning to coat. Cover the bowl with plastic wrap and let it rise in a warm place for 1 to 1 1/2 hours, or until doubled in size.
- While the dough rises, prepare the filling: In a small bowl, mix the remaining 1/4 cup granulated sugar, 2 tablespoons ground cinnamon, and 1/2 cup softened butter until well combined.
- Punch down the risen dough. On a floured surface, roll the dough into a large rectangle, about 12 by 18 inches.
- Spread the cinnamon-butter filling evenly over the dough, leaving a small border on one long edge.
- Tightly roll the dough up starting from the long edge opposite the border. Pinch the seam closed.
- Cut the log into 12 equal rolls. Place the rolls cut-side up in a greased 9×13 inch baking pan.
- Cover the pan and let the rolls rise again for 30 minutes.
- Preheat your oven to 375°F. Bake for 20 to 25 minutes, or until golden brown.
- While the rolls bake, prepare the glaze: Beat the softened cream cheese, powdered sugar, and vanilla extract together until smooth. Add 1-2 tablespoons of milk if the glaze is too thick.
- Remove the rolls from the oven and immediately spread the cream cheese glaze over the warm rolls. Serve warm.
Notes
- For the softest rolls, make sure your milk is warm enough to activate the yeast but not so hot that it kills it.
- Do not skip the second rise; this step creates the light, airy texture you want.
- If you want a thinner glaze, add a little more milk to the mixture.
Nutrition
- Serving Size: 1 roll
- Calories: 450
- Sugar: 35g
- Sodium: 300mg
- Fat: 22g
- Saturated Fat: 14g
- Unsaturated Fat: 8g
- Trans Fat: 0.5g
- Carbohydrates: 58g
- Fiber: 2g
- Protein: 7g
- Cholesterol: 65mg