

We all love a classic chocolate chip cookie, right? But sometimes, you just need to take that nostalgic comfort and push it into the realm of truly *gourmet*. That’s exactly what moving from regular butter to browned butter does! Trust me, making these **brown butter chocolate chip cookies** is the simplest cookie twist you’ll ever make, but the payoff in deep, nutty flavor is astonishing. It’s all about taking simple, accessible ingredients and treating them with just a little extra care to make them exceptional—that’s the whole point of Cooking by Felix, as you can read more about on our philosophy page. Get ready because these are hands-down the ultimate chewy cookies, packing that incredible toffee note into every single bite.
- Why These Are the Ultimate Brown Butter Chocolate Chip Cookies
- Gathering Ingredients for Brown Butter Chocolate Chip Cookies
- Step-by-Step Guide to Making Brown Butter Chocolate Chip Cookies
- Tips for Bakery Style Cookies at Home
- Troubleshooting Common Brown Butter Chocolate Chip Cookies Issues
- Storage and Reheating Instructions for Homemade Cookies Recipe
- Frequently Asked Questions About Brown Butter Cookies
- Estimated Nutrition for Ultimate Brown Butter Chocolate Chip Cookies
- Share Your Brown Butter Chocolate Chip Cookies Creations
Why These Are the Ultimate Brown Butter Chocolate Chip Cookies
Stop what you’re doing—this isn’t just another chocolate chip cookie recipe. This batch becomes the absolute standard because it delivers on texture and flavor complexity every single time. They’re the cookies everyone asks you for next time, trust me!
- You immediately get those rich, deep, nutty brown butter cookies flavor right from the start.
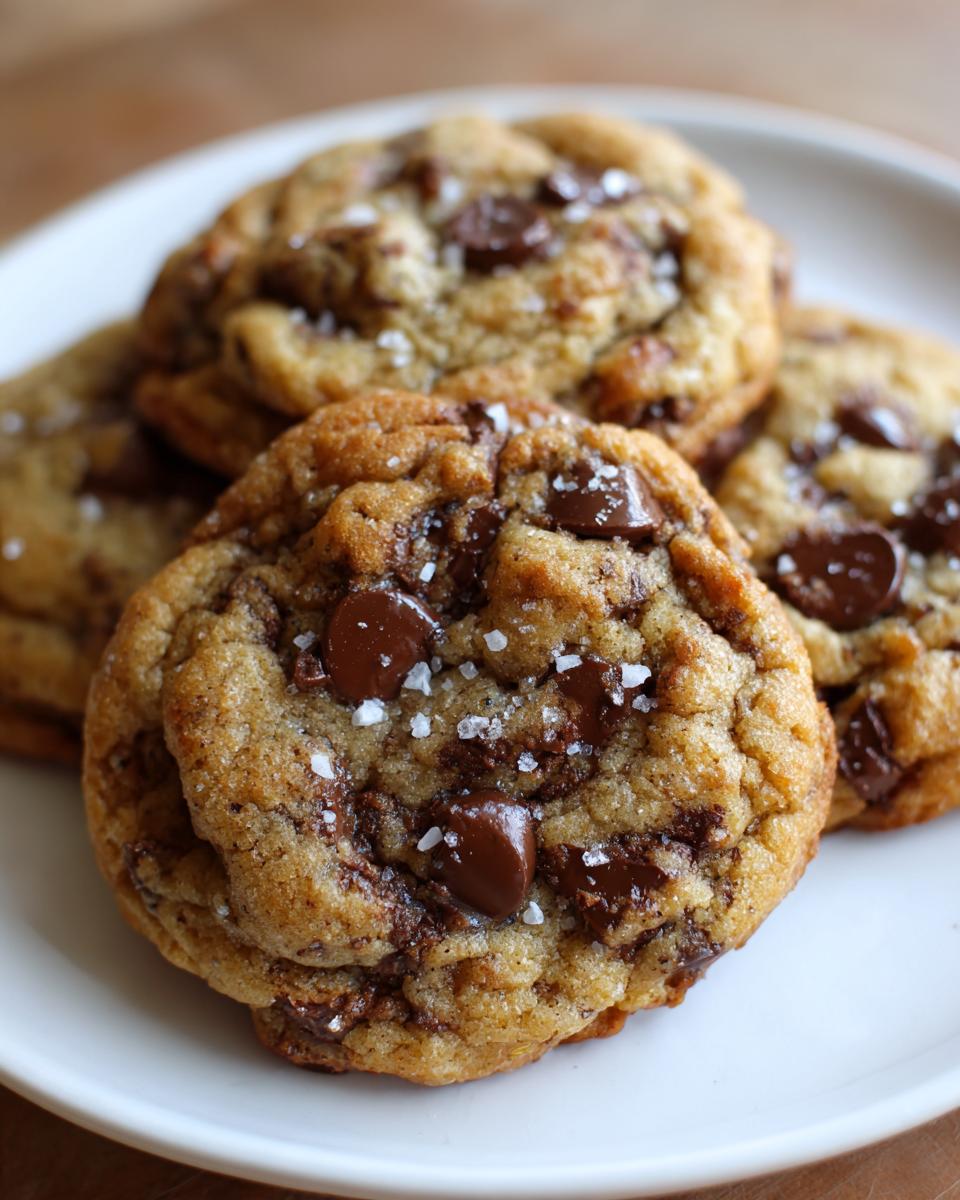
- We nail that highly coveted texture: perfect crispy edge soft center cookies.
- The recipe is foolproof once you nail the butter step, yet the results feel totally gourmet chocolate chip cookies worthy.
The Secret to Toffee Flavored Cookies
Well, the secret is literally in the name: brown butter! When you cook the butter down, the milk solids toast, creating these tiny, deep amber bits at the bottom of the pan. Those bits aren’t burnt; they are pure concentrated caramel and toffee flavor. It’s why these taste so much more complex and sophisticated than cookies made with room-temperature butter.
Achieving Chewy Chocolate Chip Cookies Recipe Texture
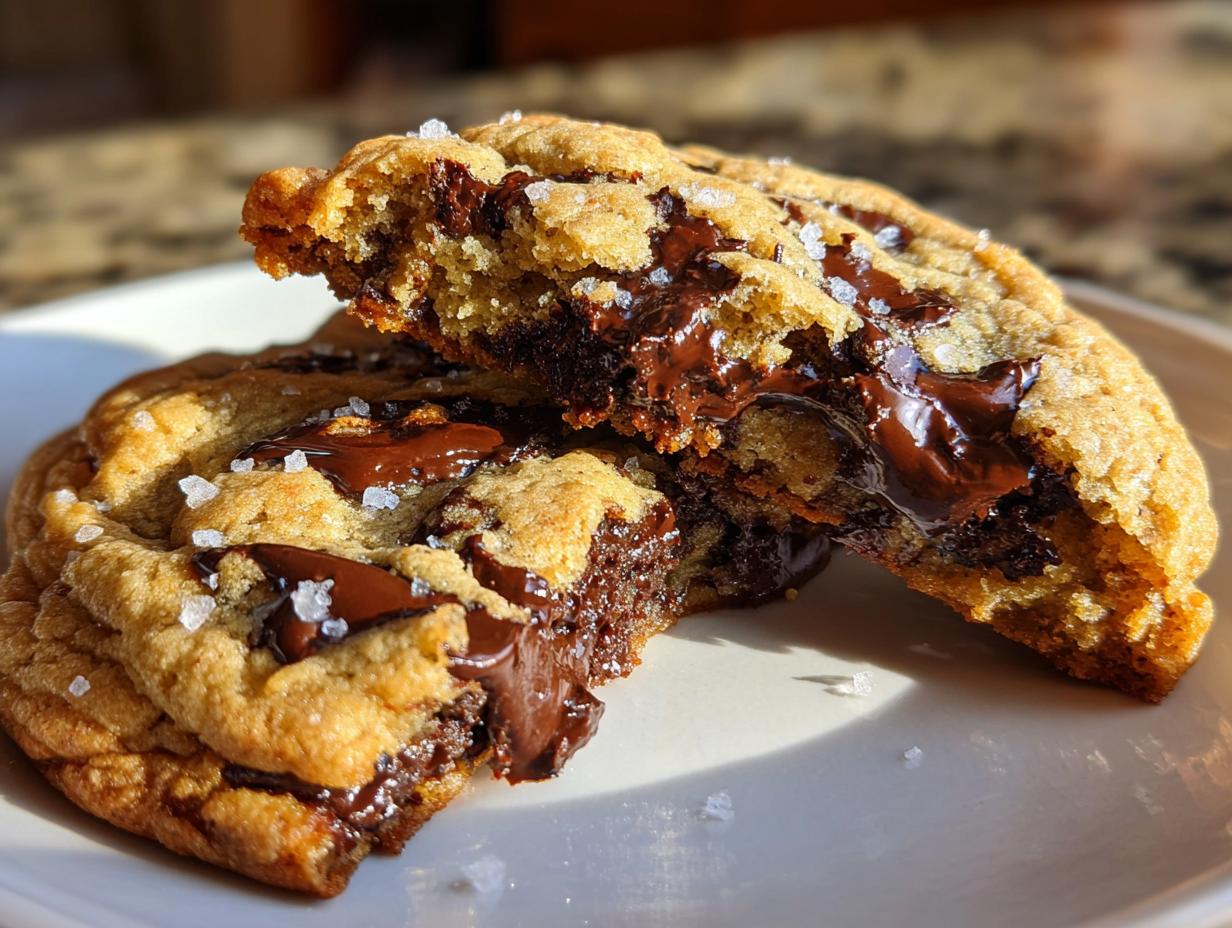
Texture is everything in a cookie, and we aren’t messing around here. We want thin, crackly edges that snap just a little bit, but the middle has to stay soft and gooey, almost under-baked when it comes out. We achieve that perfect chewy chocolate chip cookies recipe outcome by using an extra egg yolk. That extra fat adds richness and moisture, leading to that wonderful, dense chewiness instead of a cakey result.
Gathering Ingredients for Brown Butter Chocolate Chip Cookies
Even though the star here is that toasted butter, the supporting cast needs to be just as excellent for the final result to shine. Whenever I bake, I always lay out everything first. It makes the whole process flow so smoothly, especially since the butter needs time to cool down after browning. You’ll need precise measurements here, my friend; this isn’t the time to eyeball your flour!
| Ingredient | Amount | Notes |
|---|---|---|
| Unsalted Butter | 3/4 cup (168 g) | This will be browned first! |
| Light Brown Sugar | 1 cup (200 g), packed | Don’t skimp on packing it into the measuring cup. |
| Granulated Sugar | 1/4 cup (50 g) | For those necessary crispy edges. |
| Large Egg | 1 | Room temperature is best, but don’t stress if it’s cold. |
| Large Egg Yolk | 1 | This is our secret weapon for chewiness! |
| Pure Vanilla Extract | 1 tablespoon | Don’t use the imitation stuff; good vanilla really pops here. |
| All-Purpose Flour | 1 3/4 cup (220 g) | Be sure to spoon and level this into your measuring cup. |
| Baking Soda | 3/4 teaspoon | Essential for lift. |
| Kosher Salt | 3/4 teaspoon | I prefer kosher for precise flavor layering in the dough. |
| Chocolate Chips or Chopped Chocolate | 1 1/2 cups (225 g) | See H3 note for my thoughts on texture! |
| Flaky Sea Salt | For sprinkling | This goes on right after they come out of the oven—pure magic. |
Ingredient Notes and Substitutions for Brown Butter Cookies
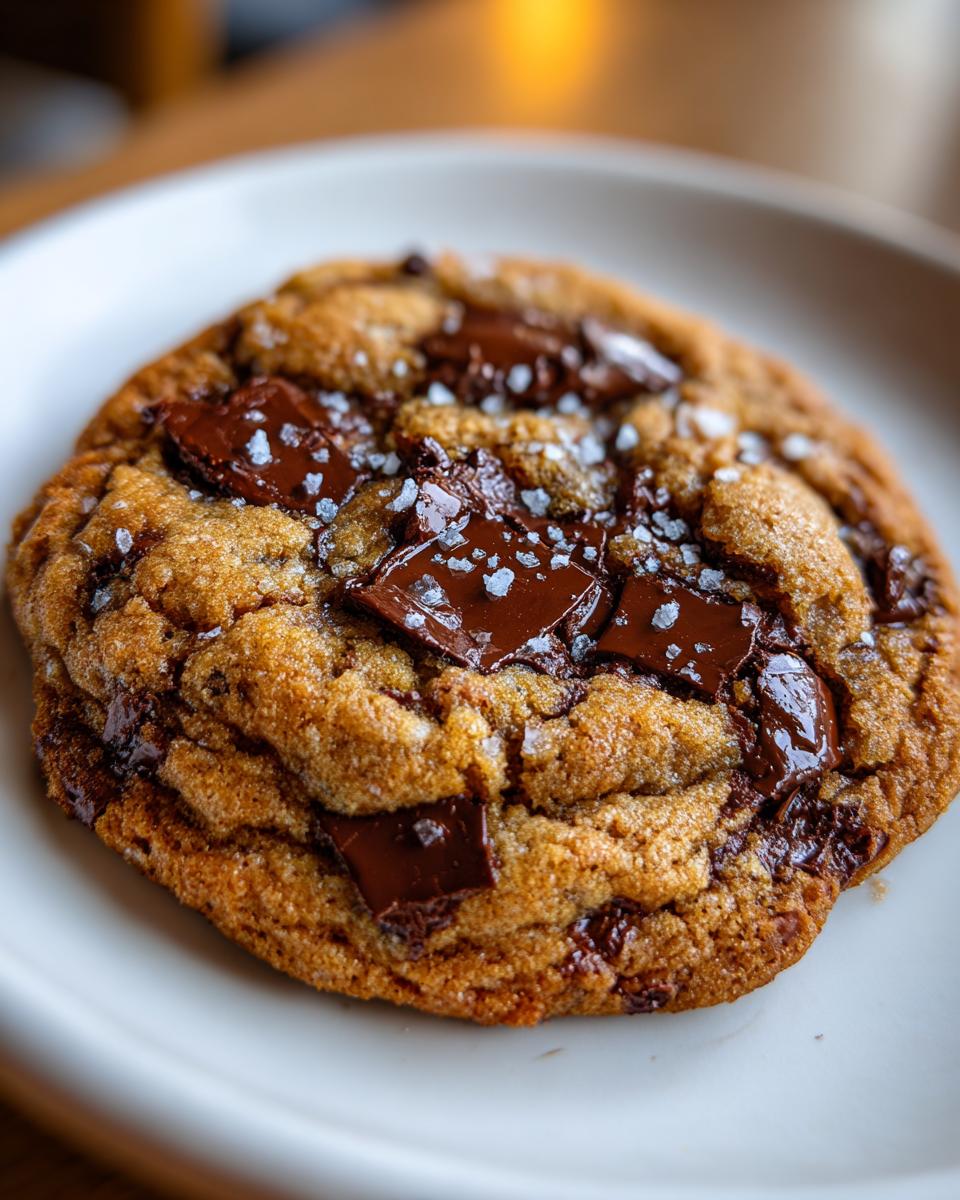
Okay, let’s talk quality control for these brown butter cookies. First, the chocolate! You see I called for chips *or* chopped chocolate. While chips are easy, chopping a good quality bar—I love a mix of semi-sweet and dark chocolate—creates those gorgeous puddles of slightly melted goo when they come out of the oven. It just elevates the whole experience into true gourmet chocolate chip cookies territory.
About the salt: I specified kosher salt in the dough because the larger, irregular flakes dissolve beautifully without making the dough taste overly salty immediately. Then, the flaky sea salt on top gives you that perfect salty pop right before you bite in. Please don’t skip the topping salt!
If, for some wild reason, you absolutely cannot brown butter and have to use regular melted butter, you *must* increase the brown sugar slightly and add maybe 1/4 teaspoon of toffee-flavored extract if you can find it. But honestly, it just won’t have the same robust, nutty character. Browning the butter is the whole point of this particular recipe!
Step-by-Step Guide to Making Brown Butter Chocolate Chip Cookies
Alright, this is where the magic happens! Don’t be intimidated by the browning part; once you see it happen, you’ll be hooked. Remember how I said this is the key to those amazing brown butter chocolate chip cookies? Pay close attention to the first stage. Then, we move quickly so the dough sets up perfectly for that amazing chew.
Mastering the Browning Process for Nutty Brown Butter Cookies
First things first, grab yourself a light-colored, small saucepan—helps you see the color development! Throw your butter in over medium heat. It’s going to melt, then it will bubble up like crazy and foam. Just keep swirling that pan slowly. After the foam subsides, you’re looking for tiny brown specks to start appearing on the bottom of the pan. You’ll know you’re there because the smell changes completely—it goes from buttery to this rich, deep, nutty, almost toffee aroma. That’s your cue!
As soon as you smell that sweet nuttiness, yank the saucepan right off the burner. Pour that gorgeous liquid, bits and all, immediately into a heatproof bowl. If you leave it in the hot pan, those milk solids will burn instantly, and we want toasting, not scorching! Let this cool for about 15 minutes so it doesn’t melt the sugars when you mix.
Mixing and Chilling Dough for Gooey Chocolate Chip Cookies
Once the butter has cooled slightly, whisk it vigorously with both sugars until everything is creamy. Now, beat in your egg, the extra yolk (remember our chewiness factor!), and vanilla. Whip it until it looks smooth—no separation allowed!
In another bowl, whisk your flour, baking soda, and salt together. Add the dry stuff to the wet stuff gradually, mixing just until you see the flour disappear. And I mean *just* until it vanishes! Overmixing here makes tough cookies, and we are chasing that gooey chocolate chip cookies center.
Fold in your chocolate chips, cover the bowl with plastic wrap, and pop it in the fridge. Seriously, don’t skip the chill! Thirty minutes is the minimum to firm things up, but honestly, chilling it overnight is what develops those incredible deep flavors. If you want the best flavor, chill it for 12 to 24 hours. This also keeps them from spreading into thin wafers when we bake them later.
Baking and Finishing Your Brown Butter Chocolate Chip Cookies
When you’re ready to bake, preheat your oven to 375°F (190°C) and line those baking sheets with parchment paper. Scoop out rounded tablespoons of that chilled dough and place them a couple of inches apart. They need room to breathe!
Bake for 10 to 12 minutes. This is key: You want the edges to look nicely golden brown, but the centers should still look a little soft, maybe even slightly undone. That slight underbake is your ticket to a soft middle. Don’t try to force them to bake longer! Pull them out immediately and, while they are still hot on the pan, sprinkle a tiny pinch of flaky sea salt over the top of each cookie. Let them sit on that hot pan for five full minutes; they’ll keep baking gently there before you transfer them to a cooling rack. For a deeper dive into making elevated cookie recipes, check out this great resource from Cookly Family on achieving perfection!
Tips for Bakery Style Cookies at Home
You’ve done the hard part—browning the butter and chilling the dough! Now, let’s talk presentation. If you want these brown butter chocolate chip cookies to look like they just came out of that fancy spot down the street, a few small tweaks make a huge difference. It’s these little authoritatively baked details that transform a batch of cookies into something truly special.
First, scoop size matters! I use a medium cookie scoop (about 1.5 tablespoons) for consistency. Putting uniform balls of dough down means uniform baking times. You don’t want tiny dry edges next to giant pale centers. Keep them consistent!
Next, think about your pan. Always, always use parchment paper. I know some people swear by silicone mats, but for these chewy cookies, parchment helps control the spread just enough without making the bottoms tough. This is crucial for getting that balance of crispy edges we love.
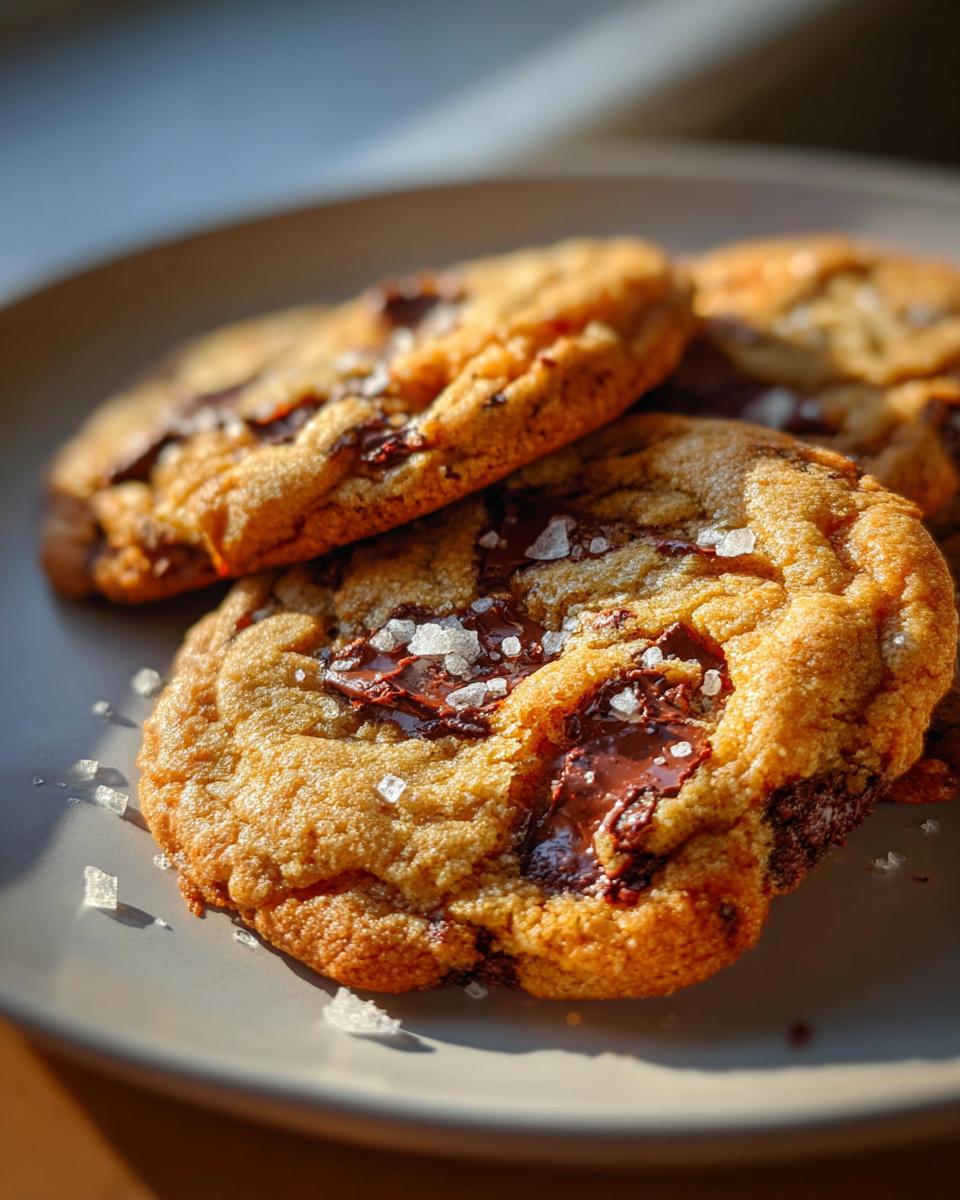
When it comes to getting that gorgeous top texture—the salty, slightly cracked look—you can try the “pan-banging” trick! Right around the 8-minute mark, gently lift the baking sheet an inch or two off the oven rack and just let it fall back down onto the rack. You do this two or three times. This forces the centers to deflate slightly, creating those wonderful wrinkles and guaranteeing that chewy interior. If you want more advanced tips specifically on brown butter applications, you can check out my brown butter sugar cookies recipe for another idea!
Finally, the cooling. Resist the urge to move them straight to the rack. As I mentioned before, letting them set on that warm baking sheet for a solid five minutes is non-negotiable. They firm up just enough during that rest so they don’t collapse into puddles when you pick them up. To see how another amazing baker handles her brown butter cookies, take a peek at the tips on Modern Honey; we all learn from each other!
Troubleshooting Common Brown Butter Chocolate Chip Cookies Issues
Look, even when you’re following the best recipes for brown butter chocolate chip cookies, sometimes things go sideways in the oven. It happens to me all the time when I try something new! But don’t worry, because most cookie catastrophes are completely fixable, or at least we can figure out why they happened so we can avoid it next time. Here are the things I hear about most often from people making these recipes.
My Cookies Spread Way Too Thin!
Ugh, the dreaded cookie puddle! This usually comes down to one of two things, trust me. Most often, it means your brown butter didn’t cool down enough before you mixed the sugars, or you didn’t chill your dough long enough. If the butter is too warm, it melts too fast in the oven before the structure sets, and poof, flat cookies.
If you forgot to chill the dough, that’s an easy fix for next time! If you’re baking them *right now* and they are already on the sheet, pop the whole tray into the freezer for 10 minutes. That brief chill can sometimes shock the butter just enough to halt the spread a bit before you bake them. It won’t fix major spreading, but it helps!
My Butter Burned Instead of Browning Nicely
This is the most heartbreaking mistake! We want those pretty little brown bits, not black smoke! If you burned it, it means your heat was too high or you weren’t swirling the pan frequently enough. See, those milk solids sink to the bottom where they hit the direct heat first. You have to keep them moving!
If you burned it, I’m sorry, but you have to toss it and start over. Browned butter is irreplaceable, and burnt butter just tastes bitter. Next batch, remember: medium heat and constant swirling, and have a heatproof bowl standing by to pour it into instantly.
My Cookies Taste Cakey, Not Chewy
When your cookies turn out more like soft little cakes than dense, chewy discs, we need to look at the ratios—specifically the flour and the leavening. You might have accidentally added too much flour, or maybe you overmixed after adding the flour, which builds too much gluten, giving you that cakey rise instead of the dense spread we want.
Also, check your baking soda. If it’s old, it won’t give you the right spread, sometimes leading to a puffier texture. For these nutty brown butter cookies, we rely on that extra egg yolk to keep things rich and dense. If you accidentally used two whole eggs instead of one egg plus one yolk, that extra liquid messes with the fat-to-flour balance, leading straight to a cake-like experience.
Storage and Reheating Instructions for Homemade Cookies Recipe
Listen, the biggest compliment you can give these brown butter chocolate chip cookies is that you have leftovers! But how do you keep that incredible, almost-still-warm texture when you inevitably save some for later? It’s all about keeping the air out and the moisture locked in. If you manage to save any of these beauties, here is how I keep them perfect.
For short term storage, say for the next couple of days, keep them in an airtight container right on the counter. Don’t worry about the fridge just yet. The fridge tends to dry out baked goods unless they are heavily frosted, and we want to preserve that gooey center we worked so hard for. Room temperature storage is perfect for about three to four days. If you stack them, put a small piece of parchment paper in between layers, just so the chocolate doesn’t melt and stick them all together overnight.
The Secret to Reheating for That Fresh-Baked Gooey Center
If your cookies have been sitting for a day or two, they might firm up a little bit. That’s totally normal! To bring back that glorious, melty chocolate and soft chewiness, you absolutely need a quick blast of heat. Microwave them—but be fast!
I place my homemade cookies recipe leftovers on a simple plate and microwave them for just 10 to 15 seconds. Seriously, start with 10! Watch them closely. That brief time warms the chocolate through and softens the dough right back up, making them taste like they just jumped out of the oven. If you want a little extra fancy touch after reheating, take another sprinkle of flaky sea salt and put it on top right away. For more ideas on keeping your treats fresh, check out the tips shared over at Eat A Snack!
Freezing Dough vs. Freezing Baked Cookies
If you know you made too much of this amazing dough, definitely freeze the dough balls themselves! Roll them out, put them on a small baking sheet, flash freeze them until hard, and then transfer them to a sealed freezer bag. Baked cookies freeze well too, but the dough holds its texture slightly better, in my opinion.
If you freeze the dough balls, you can bake them straight from frozen, but you’ll need to add an extra few minutes to the baking time, maybe 3 to 5 extra minutes, depending on your oven. Don’t thaw them first, or they might get too greasy before they bake. These are honestly so good, though, you might not even need to worry about storage!
Frequently Asked Questions About Brown Butter Cookies
I know you might have questions when you venture into something as special as these cookies! Everyone has a few little things they wonder about when trying out a new technique, especially with something that claims to be the ultimate chocolate chip cookie. Don’t be shy! I’ve collected the most common queries that pop up about these brown butter chocolate chip cookies.
Can I skip browning the butter in this recipe?
Oh, you *can*, I suppose, but then you wouldn’t really be making *these* cookies, would you? If you skip browning the butter, you lose everything that makes this recipe special! You’re missing out on those deep, nutty, toffee notes we worked so hard to build. If you’re new to this, don’t let the word ‘browned butter’ scare you; it’s the easiest part of the whole process once you get the hang of it! It’s the foundation of truly great brown butter cookies.
How long must the dough chill for the best flavor?
This is where patience pays off! For a decent result, you need at least 30 minutes of chilling time just to firm up the dough so it doesn’t spread into a pancake mess in the oven. But if you want that true, deep, rich flavor that turns these into spectacular gourmet chocolate chip cookies? You really ought to let it chill for 12 to 24 hours. That resting time lets all those wonderful brown butter molecules permeate the flour and sugars, leading to an unbelievable depth of flavor. It’s the quiet magic that happens overnight! If you are looking for quick success in other areas, like pie, check out my easy pumpkin pie recipe for quick wins.
Is this recipe considered easy brown butter baking?
Absolutely! Once you see the butter go from liquid to golden brown, you’ll realize just how simple this upgrade is. This really opens the door to easy brown butter baking across the board. Because we are using tried-and-true ratios for everything else, your main focus is just turning heat on and off at the right moment for the butter. It’s a simple one-step process that yields expert-level flavor. We make complicated-tasting things simple here at Cooking by Felix!
Can I use a different kind of sugar instead of brown sugar?
I highly advise against switching out the brown sugar, especially if you are aiming for those chewy chocolate chip cookies recipe centers. Brown sugar has molasses, which brings moisture and chewiness. If you swap it all for granulated white sugar, you’ll end up with a crisper, flatter cookie that lacks that toffee background note we get from the molasses reacting with the browned butter. If you must substitute, use half brown and half white, but never 100% white!
Do I absolutely need that extra egg yolk?
Yes, you really, really do! That extra yolk is the key difference between a great cookie and the best chocolate chip cookies you’ve ever had. It’s pure fat and emulsifier. It adds tenderness and richness without adding too much extra liquid, which is what causes spreading. Without that yolk, your cookies lean too far toward the cakey or dry side, and we’re aiming for gooey luxury!
Estimated Nutrition for Ultimate Brown Butter Chocolate Chip Cookies
Now, I try not to think about the nutrition when I’m baking something this decadent, because life is too short to worry over every bite! But since we are serious about knowing what’s in our food, I pulled together the estimated nutritional breakdown for one cookie based on the exact measurements in the recipe. Remember, these numbers are based on the provided ingredients list and serving size, so they are approximations, not guarantees!
When you’re enjoying one of these incredible brown butter chocolate chip cookies, here is what you can expect:
- Serving Size: 1 cookie
- Calories: 220
- Sugar: 18g (Thank you, glorious brown sugar!)
- Fat: 13g
- Saturated Fat: 8g
- Sodium: 150mg (That’s the kosher salt we added!)
- Carbohydrates: 25g
- Protein: 3g
I always say, never let the numbers stop you from enjoying a truly gourmet chocolate chip cookies experience. These are a splurge, a treat, and frankly, a necessary part of life when you bake something this good. Just know that every single calorie is absolutely worth it for that nutty, toffee flavor!
Disclaimer: Please keep in mind that these figures are estimates derived from the specified ingredients. If you substitute chocolate types or brands, your final nutrition facts will shift!
Share Your Brown Butter Chocolate Chip Cookies Creations
I’ve shared all my secrets, from the sputtering of the brown butter to the exact moment you should pull these cookies from the oven to guarantee that gooey center. Now, the kitchen is yours! I genuinely want to know how these turned out for you.
Did you nail that perfect toffee flavor? Are your edges crispy while the middle stayed perfectly chewy? Don’t be shy! Let me know in the comments below. Telling me about your results helps me know what kind of tips to share next time, and honestly, seeing your beautiful batches of brown butter chocolate chip cookies is the best part of sharing these recipes.
If you snap a photo while you’re enjoying these incredible treats, please tag me on social media! I love when you share your baking wins. If you have any burning last-minute questions or need advice on adapting the recipe for, say, spooky Halloween shapes, shoot me a message through the Contact Page. Happy baking, everyone, and enjoy that incredible nutty aroma!
Print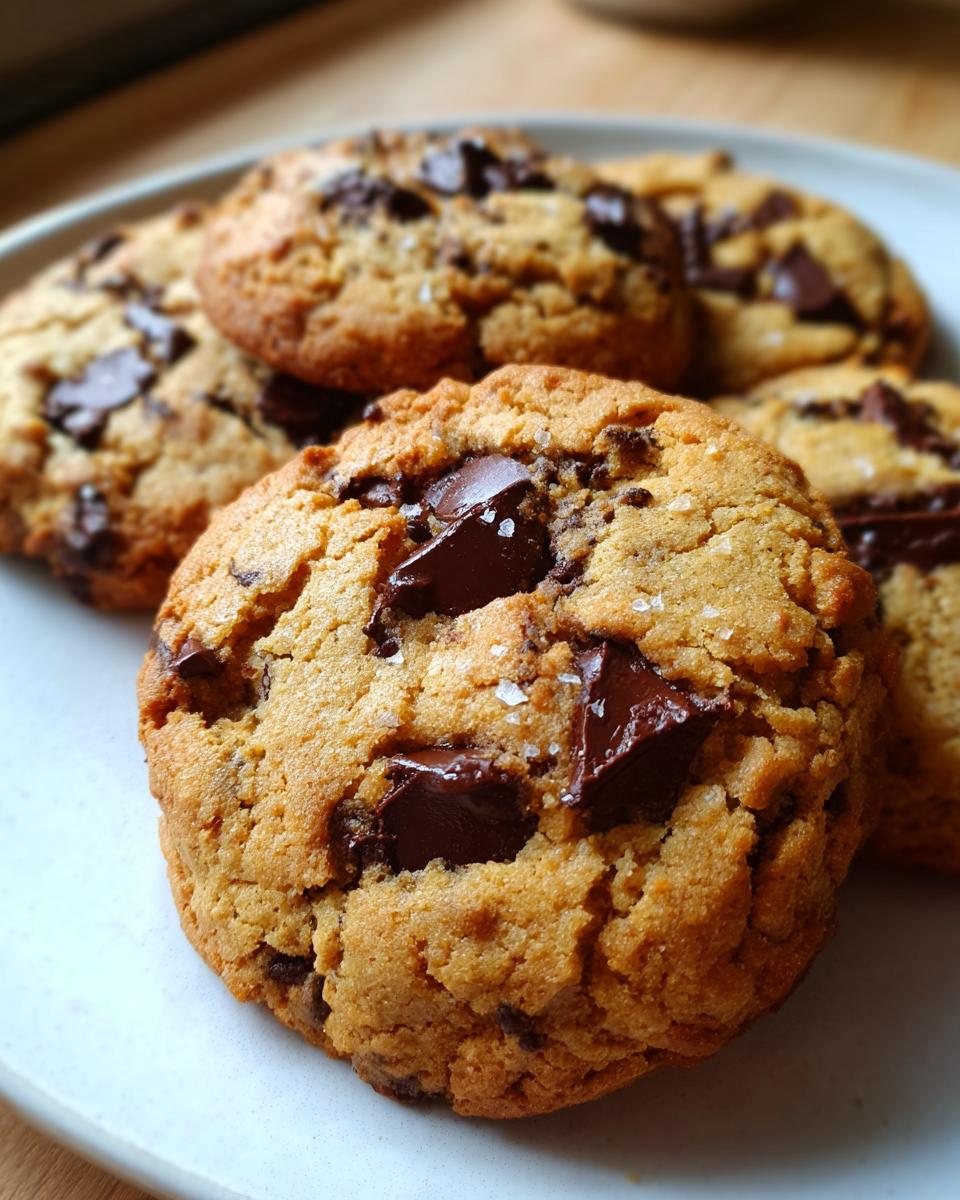
Ultimate Chewy Brown Butter Chocolate Chip Cookies
Make the best chocolate chip cookies with a rich, nutty flavor from browned butter. These cookies have crispy edges and soft, chewy centers.
- Prep Time: 20 min
- Cook Time: 12 min
- Total Time: 47 min
- Yield: About 18 cookies 1x
- Category: Dessert
- Method: Baking
- Cuisine: American
- Diet: Vegetarian
Ingredients
- 3/4 cup (168 g) unsalted butter
- 1 cup (200 g) light brown sugar, packed
- 1/4 cup (50 g) granulated sugar
- 1 large egg
- 1 large egg yolk
- 1 tablespoon pure vanilla extract
- 1 3/4 cup (220 g) all-purpose flour
- 3/4 teaspoon baking soda
- 3/4 teaspoon kosher salt
- 1 1/2 cups semi-sweet chocolate chips or chopped chocolate (225 g)
- Flaky sea salt for sprinkling
Instructions
- Place the butter in a light-colored saucepan over medium heat. Cook, swirling the pan often, until the butter melts, foams, and then brown bits form at the bottom, releasing a nutty aroma. This takes about 5 to 8 minutes. Immediately pour the browned butter into a heatproof bowl to stop cooking. Let it cool for 15 minutes.
- In a large bowl, whisk the cooled brown butter with the light brown sugar and granulated sugar until fully combined.
- Beat in the egg, egg yolk, and vanilla extract until the mixture is smooth and creamy.
- In a separate bowl, whisk together the flour, baking soda, and kosher salt.
- Gradually add the dry ingredients to the wet ingredients, mixing on low speed until just combined. Do not overmix.
- Fold in the chocolate chips.
- Cover the dough and chill in the refrigerator for at least 30 minutes, or up to 24 hours for deeper flavor.
- Preheat your oven to 375°F (190°C). Line baking sheets with parchment paper.
- Scoop rounded tablespoons of dough onto the prepared sheets, leaving space between them.
- Bake for 10 to 12 minutes, or until the edges are golden brown and the centers look slightly underbaked.
- Remove from the oven. Immediately sprinkle the tops of the cookies with flaky sea salt.
- Let the cookies cool on the baking sheet for 5 minutes before transferring them to a wire rack to cool completely.
Notes
- Browning the butter correctly is key; watch for the milk solids to turn deep brown and smell nutty.
- Chilling the dough develops the flavor and prevents the cookies from spreading too thin during baking.
- Use a mix of chocolate chips and chopped chocolate chunks for varied texture.
Nutrition
- Serving Size: 1 cookie
- Calories: 220
- Sugar: 18g
- Sodium: 150mg
- Fat: 13g
- Saturated Fat: 8g
- Unsaturated Fat: 5g
- Trans Fat: 0g
- Carbohydrates: 25g
- Fiber: 1g
- Protein: 3g
- Cholesterol: 45mg