

It feels like every evening hits the same wall, doesn’t it? You want something genuinely satisfying—something hearty, cheesy, and comforting—but you’ve only got minutes before everyone gets grumpy waiting for dinner. That’s exactly why I developed these amazing cheesy pocket tacos. This recipe is the perfect answer for those frantic nights when you need a handheld meal that tastes like you spent way more time on it than you actually did. I know that busy life because I lived it running my marketing career. My mission with Cooking by Felix is to bring that rich flavor back into your routine, proving that ‘quick’ doesn’t have to mean ‘boring.’ You can find even more ways to win dinner time over at my page for 30-minute weeknight dinners.
- Why You Will Love These Cheesy Pocket Tacos
- Essential Ingredients for Perfect Cheesy Pocket Tacos
- Step-by-Step Guide: How to Make Cheesy Pocket Tacos
- Tips for the Best Baked Cheesy Wraps
- Variations for Your Ground Beef Tortilla Pockets
- Serving Suggestions for Your Handheld Taco Dinner
- Storage and Reheating Cheesy Pocket Tacos
- Frequently Asked Questions About Cheesy Pocket Tacos
- Nutritional Estimate for These Comfort Food Taco Twists
- Share Your Experience Making These Cheesy Pocket Tacos
Why You Will Love These Cheesy Pocket Tacos
I’m so glad you asked! If you’re looking for a real dinner hero, these are it. They solve the weeknight dinner dilemma instantly. I promise you need these in your rotation.
- They are the definition of a handheld taco dinner! No plates, no mess—just pure, easy-to-eat goodness straight from your hand.
- The texture contrast is incredible: a perfectly golden, slightly crisp shell giving way to that ridiculously gooey, savory, cheesy filling.
- Total time is around 30 minutes! Seriously, this is a lifesaver when you need quick weeknight taco ideas that actually feel like a treat.
- They are unbelievably customizable, making them a guaranteed hit, especially when you’re trying to please picky eaters. This is the ultimate kid friendly cheesy dinner.
- We sneak in a creamy element using cream cheese, which locks in moisture and makes them feel far richer and more decadent than a typical taco.
- These look great for parties! Set them out with some dips, and watch how fast your crispy cheese pockets disappear.
Trust me, when these come out of the oven smelling like seasoned beef and melted cheddar, your whole house will cheer. They are just so satisfying!
Essential Ingredients for Perfect Cheesy Pocket Tacos
The beauty of these cheesy pocket tacos recipe is how accessible everything is. You probably have half this stuff in your pantry right now! We’re focused on making sure the filling is incredibly flavorful and, most importantly, super creamy. That creamy element comes from the softened cream cheese—don’t skip that step, it’s what makes these way better than any standard taco filling. Here’s what you’ll need to grab:
- 1 tablespoon olive oil
- 1 pound ground beef (I usually go for 85/15)
- 1 packet (1 ounce) taco seasoning mix
- 1/2 cup water
- 8 ounces cream cheese, softened (this is our secret weapon for meltiness!)
- 1/2 cup salsa, drained really well
- 1 cup shredded cheddar cheese, divided
- 8 medium flour tortillas (you absolutely need the burrito size for folding!)
- Cooking spray
See? Super simple ingredients, but the way they come together creates that amazing comfort food taco twist.
Step-by-Step Guide: How to Make Cheesy Pocket Tacos
Okay, getting these done in 30 minutes requires a little hustle, but since the filling cooks while you mix the cheese spread, everything flows perfectly. It’s all about timing! I always prep my baking sheet first so I’m ready to roll once the meat is done. If chicken is more your speed, you can use shredded chicken here instead, though these beef pockets are classic! For more quick Tex-Mex inspiration, check out my easy chicken tortilla soup recipe.
Preparing the Filling for Your Cheesy Pocket Tacos
First things first: get that oven preheated to 400 degrees Fahrenheit. You want a nice hot environment for baking these up golden. Now, grab your biggest skillet and heat that olive oil over medium heat. Throw in the pound of ground beef and get to work breaking it up with your spoon. We need this browned nicely! Once it looks ready, make sure you drain off every bit of excess grease—soggy bottoms are the enemy of a perfect pocket taco, trust me on that one!
Next, stir in the entire packet of taco seasoning and the half cup of water. Let that mix simmer for about 5 minutes, stirring occasionally. You want that liquid to reduce down just a bit so the flavor concentrates. Don’t let it cook dry, though; we need a tiny bit of moisture to keep things tender inside.
Assembling the Stuffed Tortilla Pockets
While that meat is simmering, whisk together your softened cream cheese, drained salsa, and half of your shredded cheddar in a small bowl until it’s smooth and dreamy. This creamy layer acts like glue and flavor booster!
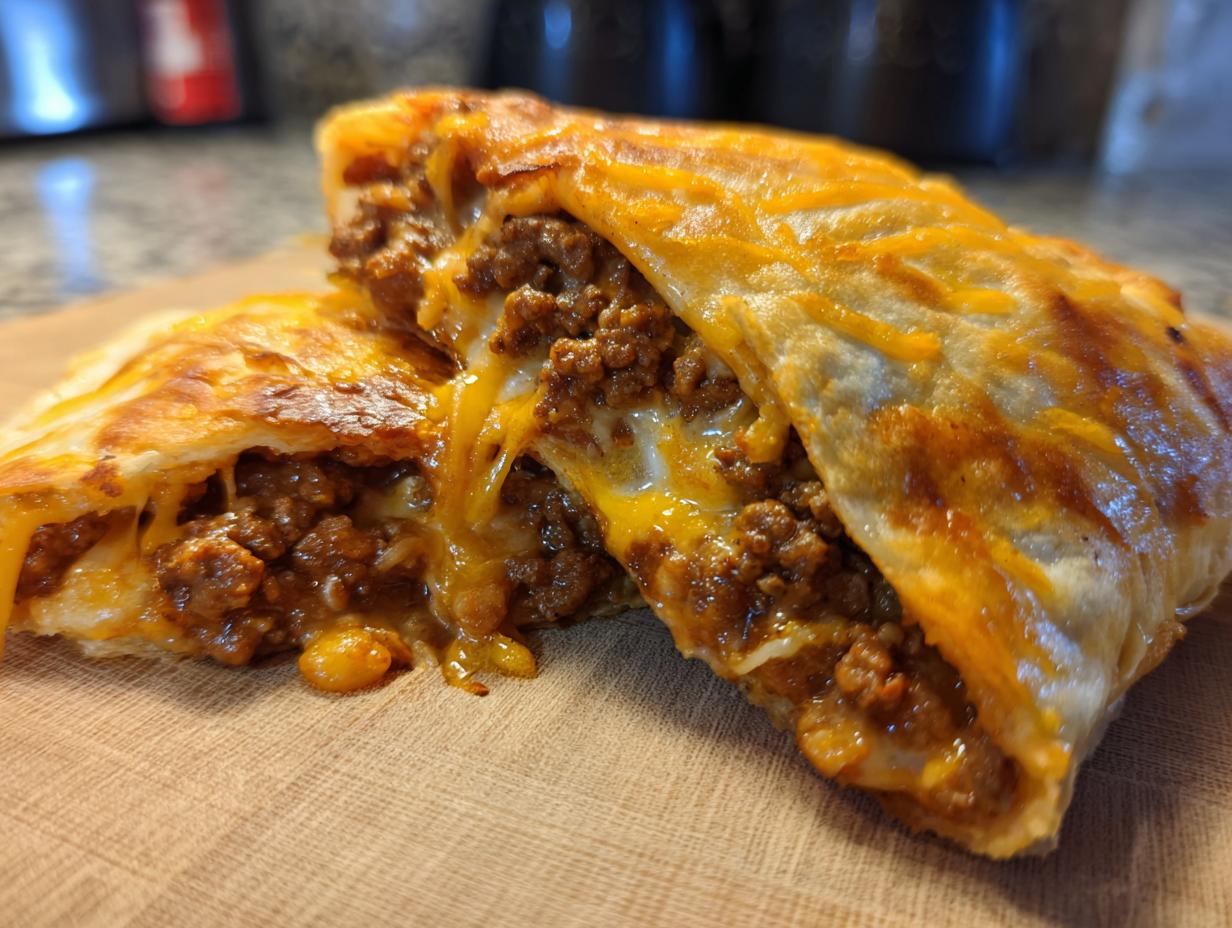
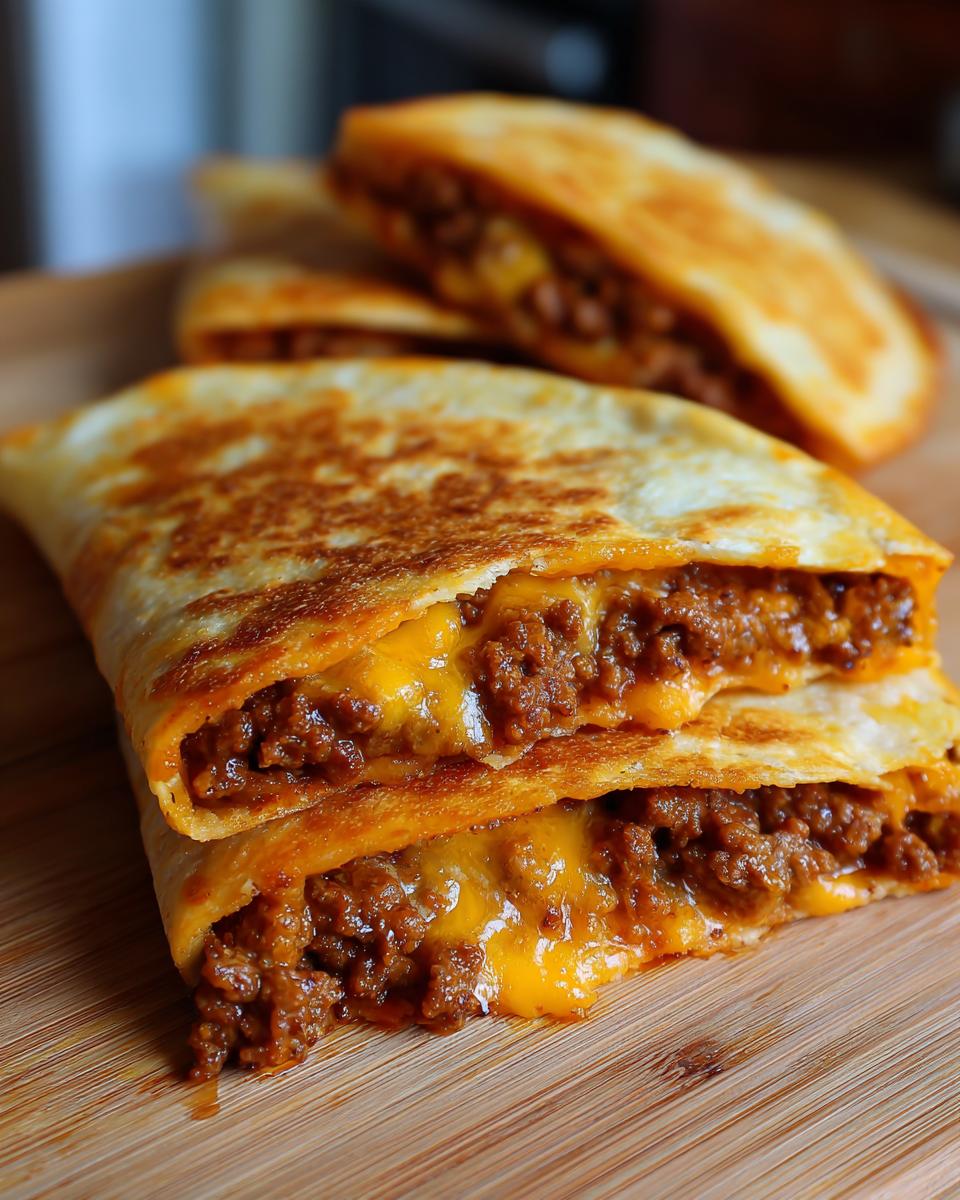
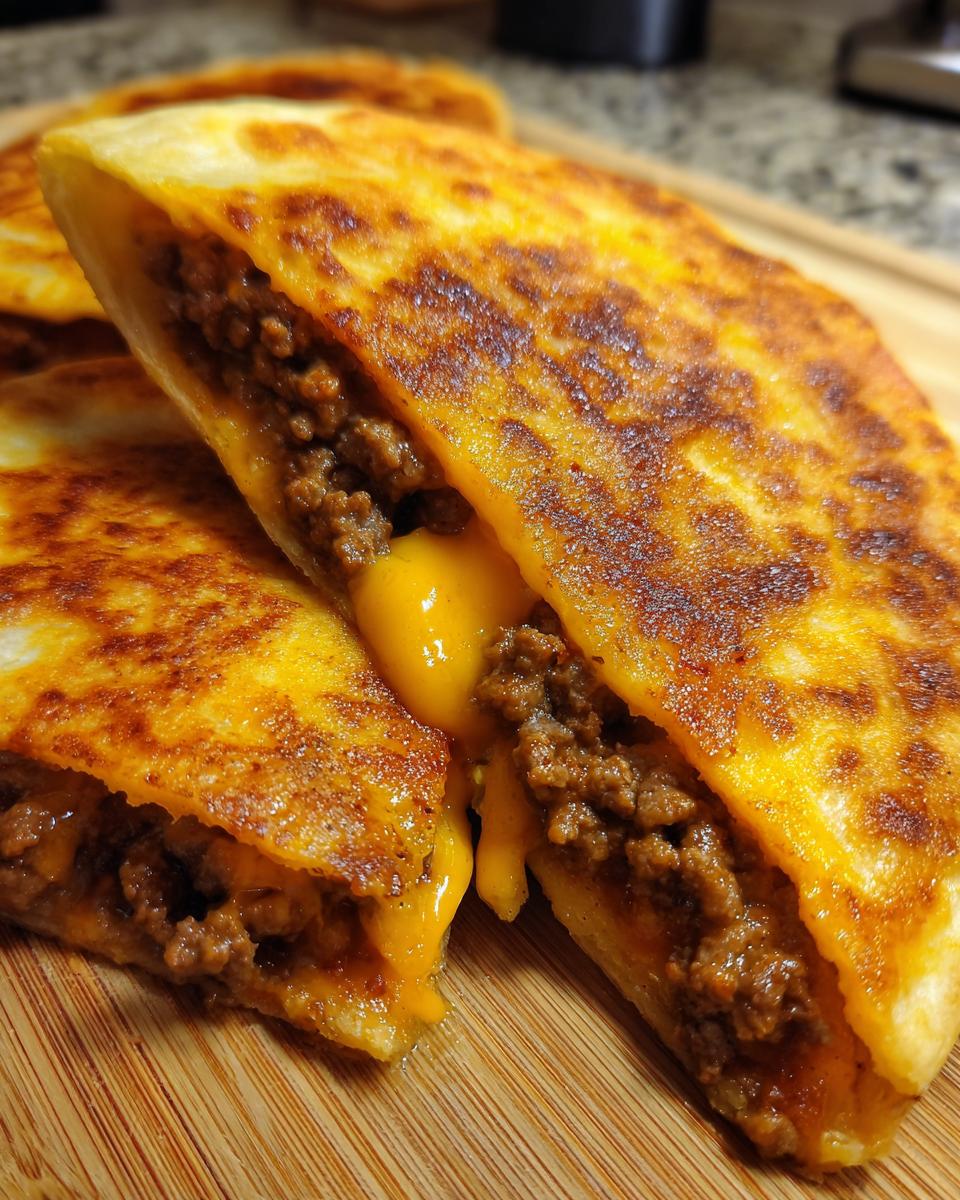
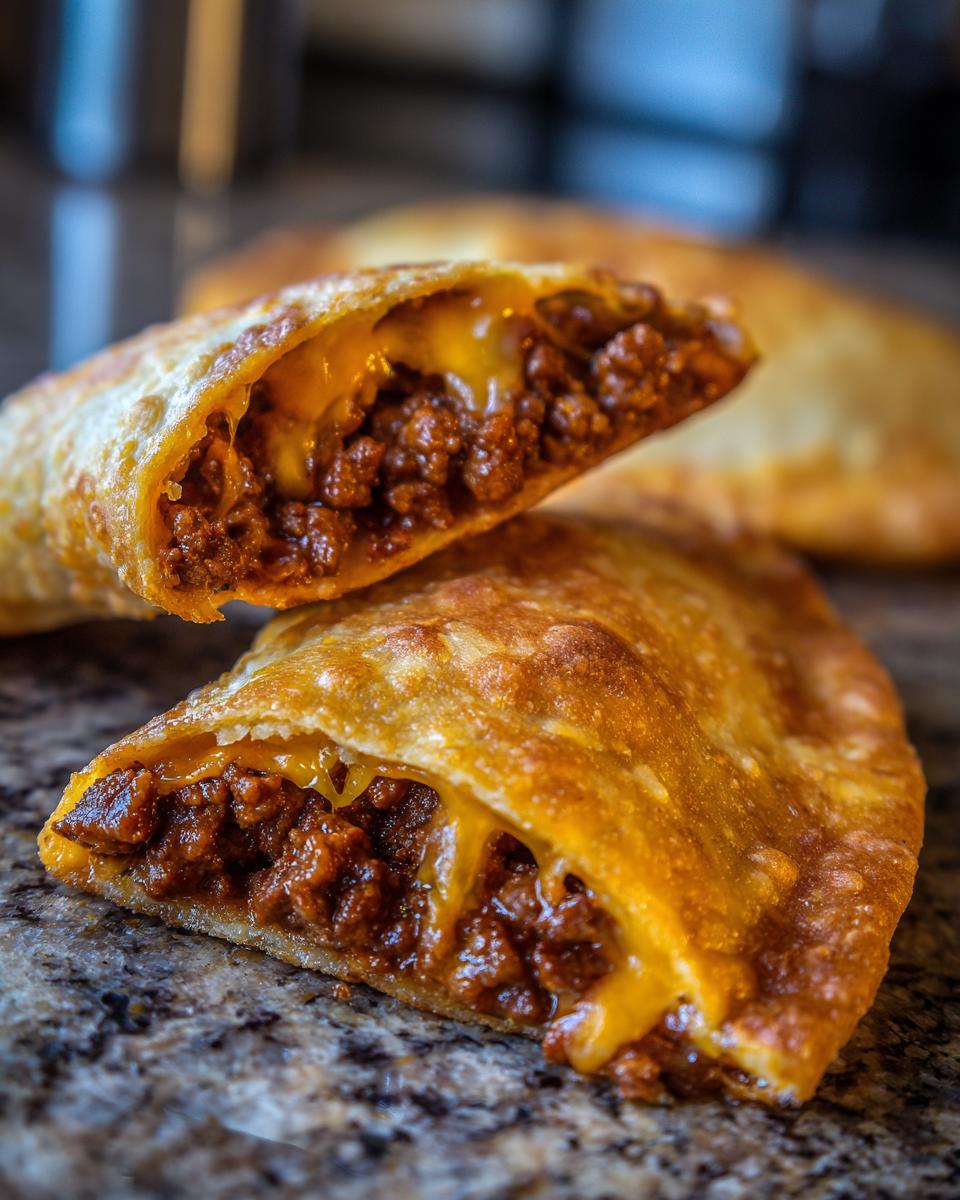
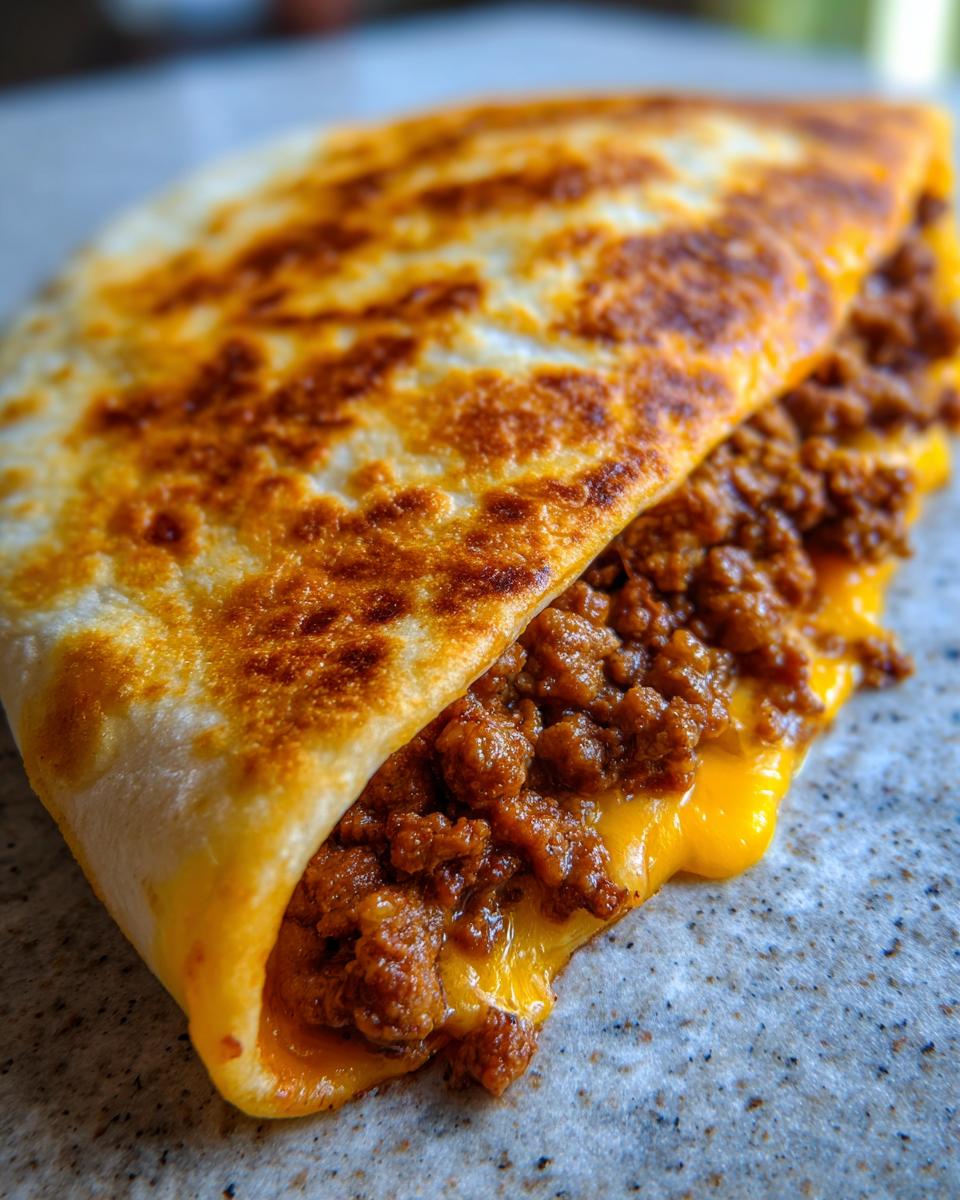
Time to assemble! Spoon a thin layer of that gorgeous cream cheese mix onto just one half of each burrito-sized tortilla. Then, dollop about a quarter cup of the seasoned ground beef right on top of the cream cheese layer. Sprinkle that remaining cheddar cheese right over the beef pile. Now, the most important part for a successful handheld taco dinner: fold that empty half of the tortilla over the filling to make a perfect half-moon. You have to press those edges together *firmly*. I usually go around once with my fingers, and then grab a fork and press the crimps down hard to really seal in all that cheesy filling.
Baking Your Crispy Cheese Pockets
Place those sealed beauties seam-side down right onto your sheet, which should be lightly greased or sprayed. Give the tops a quick, light spray of cooking spray—this helps them brown up beautifully without needing to fry them. Bake them for 12 to 15 minutes exactly. You’re looking for them to be perfectly golden brown everywhere. When they come out, the cheese inside will be bubbling and perfectly melted. Let them rest just for a minute before diving in!
Tips for the Best Baked Cheesy Wraps
Listen, the oven works great, but if you want that ultimate crunch factor for your best cheesy wrap recipe, you have to talk about the air fryer! It really makes a difference when you’re aiming for that deep golden, sealed crispiness.
If you’re using an air fryer, skip the banking sheet completely. Just place your sealed pockets in a single layer inside the basket—don’t overcrowd them! Cook them at 375 degrees Fahrenheit for about 8 to 10 minutes. Remember to flip them halfway through, just like in my guide for crispy garlic parmesan air fryer shrimp, so both sides get that perfect golden touch.
A quick tip for the oven version: make sure you spray the tops lightly with cooking spray! That little bit of fat is what helps the surface oxidize just right, turning it crisp instead of chewy. Also, make sure your meat filling isn’t too wet. If I feel like my beef simmered down too much, I just turn the heat off a minute early—a little less moisture equals a lot more crisp when baking!
Variations for Your Ground Beef Tortilla Pockets
Now that you’ve mastered the classic, it’s time to start playing around! That’s what I love about these cheesy pocket tacos recipe; they are such a perfect base for customization depending on what I have in the fridge or what mood strikes me. You don’t have to stick to just cheddar and ground beef for this to be amazing.
If you want to kick up the heat, which I totally recommend for a bit of a zing, try stirring in some finely minced jalapeños right along with the taco seasoning in Step 3. Don’t use the pickled ones from a jar unless you drain them aggressively first, or you’ll add too much unwanted liquid back into your beef!
Cheese swaps are easy and delicious too. If cheddar feels too familiar, try swapping it out for a sharp Monterey Jack—it melts like a dream! Or, mix half Monterey Jack with half Pepper Jack if you’re sneaking in that jalapeño heat and want an extra layer of warmth. For a richer, tangier flavor that mimics gourmet quesadillas, use a nice Mexican blend that usually contains Asadero or Oaxaca cheese. It just amps up the whole experience.
For something a little different than beef, remember that pre-cooked chicken works wonderfully. If you happen to have any leftover shredded chicken from a rotisserie bird, just toss that into the skillet with the seasoning and a splash of chicken broth instead of water. It turns these into fantastic supper ideas with tortillas that feel totally different but use the exact same amazing cream cheese base!
Serving Suggestions for Your Handheld Taco Dinner
Look, these cheesy pocket tacos are already a whole meal wrapped up nice and tight. They are hearty, they’ve got beef and cheese, so they don’t need a ton of fuss on the side, which is exactly what we want for robust quick weeknight taco ideas, right?
But if you’re like me and you feel like you need just one little green thing on the plate so you don’t feel guilty, I’ve got you covered with super easy pairings that don’t take any extra cooking time. The key here is dipping sauces and fresh, crisp texture to balance the richness of that melted cheese.
- Simple Sour Cream or Greek Yogurt: A dollop of cool sour cream right on the side is classic, and it cuts through the richness perfectly. If you’re watching calories or just want a tangier flavor, plain Greek yogurt works like a charm.
- Guacamole or Sliced Avocado: If you have an avocado that needs using up, mash it roughly with a little salt, lime juice, and maybe some fresh cilantro if you have it. The healthy fats blend so well with the savory filling.
- Quick Side Salad: You don’t need a complex salad. Just tear up some romaine, maybe toss in some pre-shredded carrots if you bought extra for the recipe, and drizzle it with a simple lime vinaigrette. It adds that fresh crunch we sometimes miss. For a great, fast option, check out my guidelines for a super easy taco salad recipe—you can adapt the dressing idea!
- Salsa or Pico de Gallo: Even though we put a little moisture in the filling, having extra salsa for dipping is always a winner. It adds that bright, acidic pop that makes the whole experience sing.
Honestly, most nights we just serve them straight up, maybe with a sprinkle of fresh cilantro if I’m feeling fancy. The beauty of these stuffed tortilla pockets is that the hard work is done inside that golden shell!
Storage and Reheating Cheesy Pocket Tacos
One of the best things about these cheesy pocket tacos? They make fantastic leftovers! I always try to sneak an extra two or three just for lunch the next day, though I’m not going to lie, they never taste quite as perfect cold. But we can fix that!
When it comes to storing them, keep them sealed up tight. You can store leftovers in an airtight container in the refrigerator for up to three or four days. Make sure they are completely cooled down before you seal them up—putting warm food into a sealed container is invitation for condensation, which means soggy pockets when you go to reheat them later, and nobody wants limp savory folded tortillas!
The goal when reheating is to bring back that golden crispiness we worked so hard for without totally melting out all the filling.
The Best Way to Reheat for Maximum Crisp
Forget the microwave entirely if you can! The microwave just steams the tortilla and ruins that beautiful exterior texture. If you have a little time, the oven or the air fryer are your superheroes here.
- Oven Method: Set your oven or toaster oven to about 350 degrees Fahrenheit. Lay the pockets directly on a baking sheet—no need to spray them again unless they look really dry. Heat them for about 8 to 10 minutes until they are warmed through and you see the cheese starting to look soft again. This keeps the outside dryer and crispier.
- Air Fryer Method (My Favorite): This is the fastest way to refresh them! Pop them in the air fryer basket at 350 degrees for just 4 minutes. It really re-crisps the outside so nicely, making them taste almost freshly made.
If you absolutely must use the microwave because you are in a huge rush, put the pocket onto a microwave-safe plate and cook it for about 30 seconds at a time until just warm. Then, quickly pop it in a toaster oven for 1 or 2 minutes just to try and firm up the shell again. It’s not the same, but it works in a true pinch!
Can These Pockets Be Frozen?
Yes, absolutely! These are fantastic for meal prep taco pockets. You need to bake them completely first, let them cool fully, and then wrap each individual pocket tightly in plastic wrap before popping them into a large freezer bag. They should keep well in the freezer for up to two months.
When you’re ready to eat them straight from the freezer, unwrap them first! Place them directly on a baking sheet and bake them at 375 degrees Fahrenheit for about 20 to 25 minutes. We increase the heat and time a bit since they start frozen, but the result is still a perfectly melty, cheesy center encased in a warm crust.
Frequently Asked Questions About Cheesy Pocket Tacos
I know you might have a few questions swirling around before you dive into making this cheesy pocket tacos recipe—it’s totally normal! These ground beef tortilla pockets are so customizable, but there are a few things that always come up when folks ask me for tips. You can learn a bit more about my general philosophy over on the About Me page, rooted in making real food achievable!
Can I make these cheesy pocket tacos ahead of time?
Oh yes, you can! This is one of my favorite meal prep taco pockets tricks. For the best results texture-wise, I strongly recommend you assemble the entire pocket—meat, cream cheese mix, and everything—but *do not* bake them yet. Lay them on a baking sheet, cover them well with plastic wrap, and keep them in the fridge for up to 24 hours. When you’re ready to eat, just spray the tops with cooking spray and bake them straight from the fridge, maybe adding 3 to 5 minutes extra to the baking time.
What is the best way to ensure my pockets seal completely?
Getting a perfect seal is the difference between a neat handheld taco dinner and a cheesy mess when you try to flip it! My number one trick, besides pressing firmly with your fingers, is using a fork. After you fold the tortilla over, take a regular dinner fork and press down along the outer edge where the edges meet, using a slight wiggling motion as you press. This crimps the dough beautifully and locks everything inside. A fork crimp is the key to getting that great, rustic look while guaranteeing no filling sneaks out!
Also, make sure your filling isn’t loaded too heavily right near the edge of the fold. Keep the meat and cheese about half an inch in from the seam, giving the tortilla dough something to grab onto when you press!
Can I vary the meat used here?
You absolutely can switch up the protein! This recipe is fantastic with ground turkey or even ground chicken for a slightly lighter take. If you’re trying to use up leftovers, shredded slow-cooker pork or even black beans mashed slightly can make excellent vegetarian stuffed tortilla pockets. Just make sure whatever meat you use is cooked and drained well before mixing it with the seasoning!
Are corn tortillas okay for these cheesy wraps?
That’s a common question! While the recipe specifically calls for medium flour tortillas because they are flexible and sturdy enough to fold, you *can* try using corn tortillas, but you need to take an extra step. Corn tortillas crack easily when dry. Before folding, quickly warm the corn tortillas in a damp paper towel inside the microwave for about 15-20 seconds until they are very pliable—this helps prevent breakage when you seal them up.
Nutritional Estimate for These Comfort Food Taco Twists
I always feel a little guilty when I talk about super flavorful comfort food, but I promised you the details, so here they are! Since these cheesy pocket tacos are packed with beef and cream cheese goodness, they definitely hit the spot, but it’s smart to know what you’re eating, right?
I ran these through a standard nutritional calculator based on the ingredients listed in the recipe card. As Felix always says, we’re focused on flavor first, but this information is super handy for tracking or just being generally aware!
Keep in mind these numbers are estimates based on 8 servings and using standard white flour tortillas. Your actual numbers might vary slightly depending on the fat content of your ground beef or the specific brand of taco seasoning you choose. These figures represent one perfectly stuffed pocket:
- Serving Size: 1 pocket
- Calories: 380
- Total Fat: 22g (This includes about 11g of Saturated Fat—that’s where that amazing creaminess comes from!)
- Carbohydrates: 28g
- Fiber: 2g
- Protein: 18g
- Sugar: 3g
- Sodium: 650mg
For a meal that comes together in 30 minutes, getting 18 grams of protein in one delicious, handheld package is a huge win for a quick weeknight taco idea. These delicious comfort food taco twists prove you don’t have to sacrifice substance for speed!
Share Your Experience Making These Cheesy Pocket Tacos
Wow, just making these words has me craving another batch of these golden, cheesy pockets! I truly hope that after trying this recipe, you feel a little spark of joy returning to your weeknight routine. That’s the whole point of Cooking by Felix—taking something stressful, like dinner time, and turning it into a moment of delicious success.
I poured all my energy into making sure these cheesy pocket tacos were simple enough for the busiest evenings but tasted like you spent hours perfecting the filling. They are one of my favorite go-to options when I need a fast handheld taco dinner.
I’d absolutely love to hear how they turned out for you! Did they become your new favorite Taco Tuesday alternative? Did the kids devour them? Don’t be shy—the best part of this whole process is connecting with you all.
Please take a moment to leave a rating right here on the recipe card. Star ratings really help other busy cooks find recipes that actually work! And if you snapped a picture of your perfectly crimped, beautifully baked pockets, send it my way via the Contact page, or tag me on social media! Seeing your results is the best reward for me.
Happy cooking, my friends. I can’t wait to see you enjoying these fantastic, easy, cheesy, wonderful wraps!
PrintLoaded Cheesy Pocket Tacos: Easy Weeknight Dinner

Make these loaded cheesy pocket tacos for a satisfying, handheld meal. Seasoned ground beef and melted cheese fill tortillas that bake to a golden crisp. This recipe offers a quick, comforting twist on taco night.
- Prep Time: 15 min
- Cook Time: 15 min
- Total Time: 30 min
- Yield: 8 servings 1x
- Category: Dinner
- Method: Baking
- Cuisine: Tex-Mex
- Diet: Vegetarian
Ingredients
- 1 tablespoon olive oil
- 1 pound ground beef
- 1 packet (1 ounce) taco seasoning mix
- 1/2 cup water
- 8 ounces cream cheese, softened
- 1/2 cup salsa, drained
- 1 cup shredded cheddar cheese, divided
- 8 medium flour tortillas (burrito size)
- Cooking spray
Instructions
- Preheat your oven to 400 degrees Fahrenheit. Lightly grease a baking sheet or coat it with cooking spray.
- Heat the olive oil in a large skillet over medium heat. Add the ground beef and cook until browned, breaking it up with a spoon. Drain any excess grease.
- Stir the taco seasoning mix and water into the cooked beef. Bring to a simmer and cook for 5 minutes, stirring occasionally, until the liquid reduces. Remove from heat.
- In a small bowl, combine the softened cream cheese, salsa, and half of the shredded cheddar cheese. Mix until smooth.
- Spread a thin layer of the cream cheese mixture onto one half of each flour tortilla.
- Spoon about 1/4 cup of the seasoned ground beef mixture over the cream cheese layer on each tortilla.
- Sprinkle the remaining shredded cheddar cheese over the beef filling.
- Fold the empty half of the tortilla over the filling to create a half-moon shape. Press the edges firmly to seal.
- Place the folded pockets seam-side down on the prepared baking sheet. Lightly spray the tops of the pockets with cooking spray.
- Bake for 12 to 15 minutes, or until the tortillas are golden brown and the cheese inside is melted. Serve immediately.
Notes
- For extra crispiness, you can air fry these pockets at 375 degrees Fahrenheit for 8 to 10 minutes, flipping halfway through.
- Use your favorite type of shredded cheese, such as Monterey Jack or a Mexican blend, for a different flavor profile.
- If you need a quick weeknight taco idea, prepare the ground beef mixture ahead of time and store it in the refrigerator for up to 3 days.
Nutrition
- Serving Size: 1 pocket
- Calories: 380
- Sugar: 3
- Sodium: 650
- Fat: 22
- Saturated Fat: 11
- Unsaturated Fat: 11
- Trans Fat: 0.5
- Carbohydrates: 28
- Fiber: 2
- Protein: 18
- Cholesterol: 55