

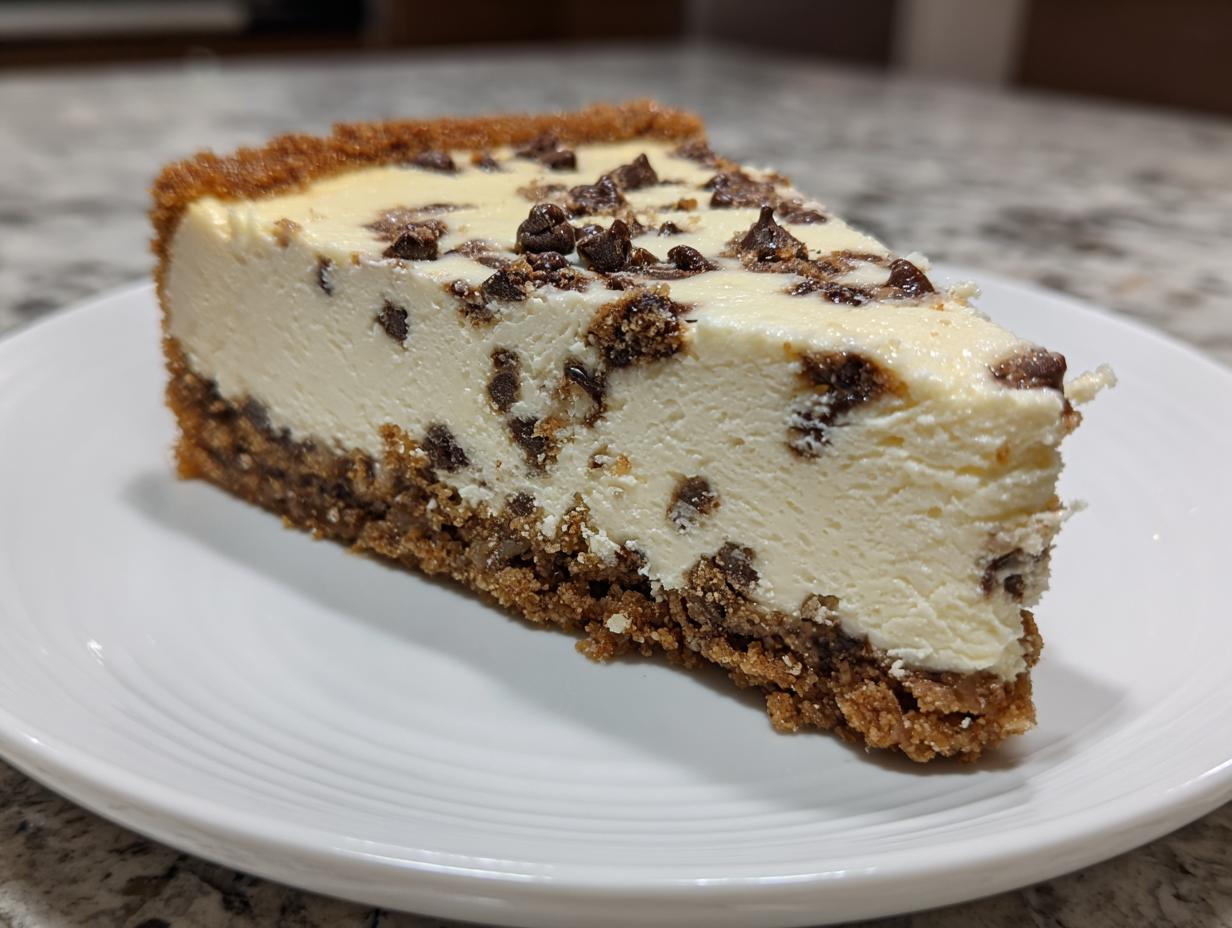
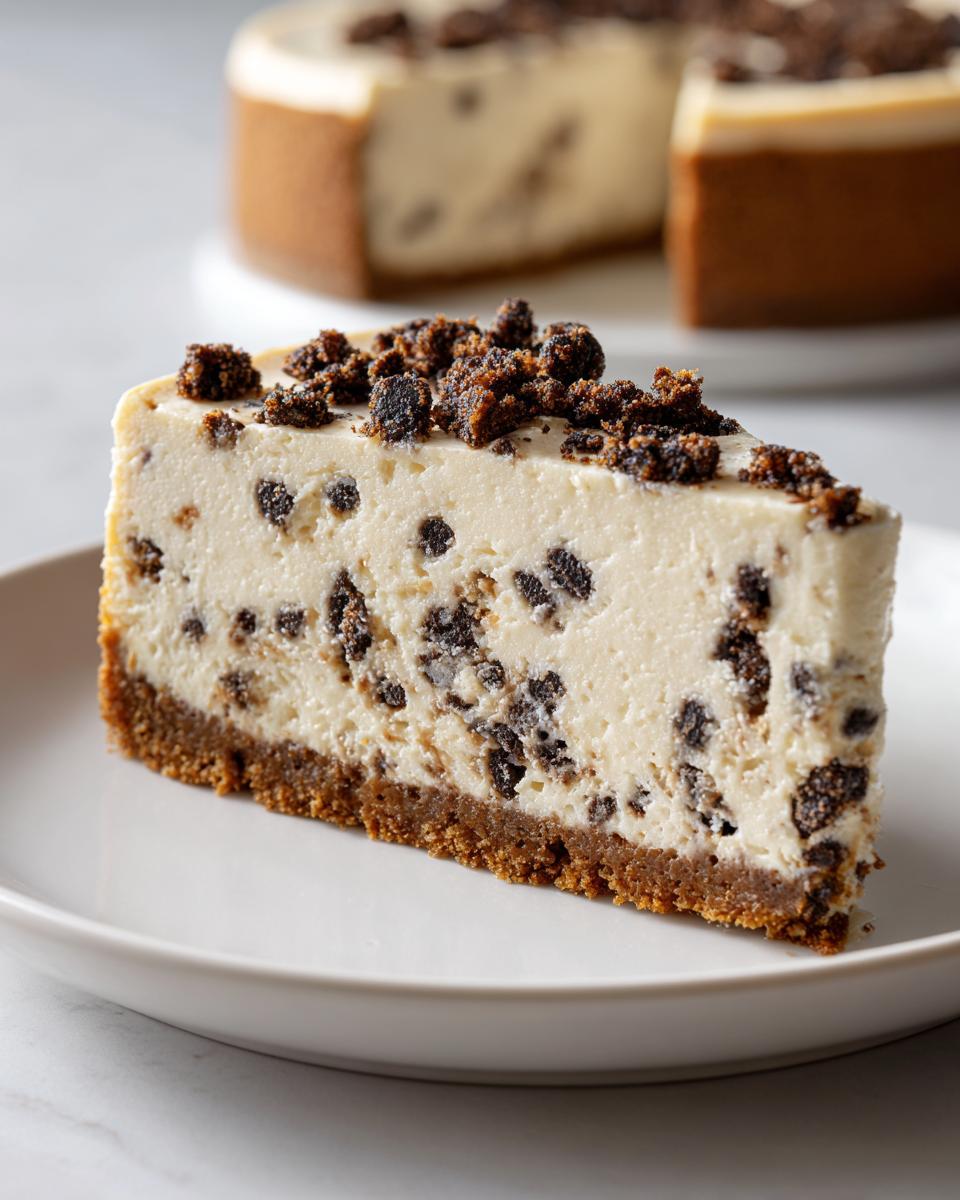
You know those moments when only something unbelievably rich and utterly classic will do? When you just need that perfect, velvety texture that screams indulgence? That’s what led me down the path to perfecting this chocolate chip cheesecake. Forget everything you think you know about finicky, crack-prone desserts! This recipe, the Classic Baked Chocolate Chip Cheesecake with Graham Cracker Crust, is designed to be your showstopper centerpiece for any gathering without demanding you spend all day locked away in the kitchen.
When I started Cooking by Felix, my whole mission was proving that these magnificent, bakery-style desserts were achievable for my friends with crazy schedules. We’re tackling that creamy center and those melty chocolate chips right here, and trust me, this is one of the easiest decadent desserts you’ll ever make.
- Why This Classic Baked Chocolate Chip Cheesecake Recipe Works (The Felix Way)
- Gathering Your Ingredients for Decadent Chocolate Chip Cheesecake
- Step-by-Step Instructions for Your Homemade Cheesecake
- Tips for the Best Chocolate Chip Cheesecake Results
- Ingredient Notes and Substitutions for Your Chocolate Chip Dessert
- Storage and Reheating Instructions for This Easy Cheesecake Dessert
- Frequently Asked Questions About Making Chocolate Chip Cheesecake
- Estimated Nutritional Data for Your Chocolate Chip Cheesecake Slice
- Share Your Success with This Chocolate Chip Cheesecake
Why This Classic Baked Chocolate Chip Cheesecake Recipe Works (The Felix Way)
There are a million cheesecake recipes out there, but this specific chocolate chip cheesecake is the one I always fall back on when I need guaranteed success. It’s all about honoring the structure while keeping the steps simple for you busy bees. We get that gorgeous, crumbly graham cracker crust without fuss, and the slow cooling process I detail later practically bans the dreaded crack!
- It delivers that incredible, rich flavor you expect from a quality, homemade cheesecake.
- The cooling method (don’t skip this!) ensures a beautiful, unblemished top.
- It transforms basic ingredients into something truly special for any party dessert idea.
Achieving the Perfect Creamy Cheesecake Texture
Okay, listen up, this is where you build trust with your ingredients. For a truly creamy cheesecake texture, you absolutely cannot rush bringing things to temperature. Your cream cheese and those three large eggs need to be fully softened—I mean room temperature, soft to the touch. If they start cold, you end up fighting lumps!
The second crucial magic trick? Don’t beat those eggs into submission! Mix them in one at a time, just until they disappear into the batter. Overmixing adds tons of air, and when that air cooks out, that’s when cracks form. We want dense, smooth, and utterly luxurious, not light and airy. That’s the Felix way for the best chocolate chip cheesecake!
Gathering Your Ingredients for Decadent Chocolate Chip Cheesecake
Alright, let’s talk supplies! Making this chocolate chip cheesecake relies on having everything measured out before we start whipping things up. You know me—I like things orderly so I can focus on the technique, not scrambling for spice jars.
Because we want that perfect, rich result, pay close attention to the state of your dairy. Remember what I said earlier? Room temperature is non-negotiable for a smooth batter. Don’t cheat on the cream cheese or those eggs!
For the Graham Cracker Crust Dessert Base
We’re keeping this base super classic and utterly reliable. It just needs three things:
- 1 1/2 cups graham cracker crumbs
- 1/4 cup granulated sugar (This helps it crisp up nicely!)
- 6 tablespoons unsalted butter, melted
For the Rich Chocolate Chip Cheesecake Filling
This is where the magic—and the namesake chips—come in. Make sure you have the full three blocks of cream cheese ready to go!
- 3 (8 ounce) packages cream cheese, softened
- 1 1/2 cups granulated sugar
- 1 teaspoon vanilla extract
- 1/4 cup sour cream (That’s the secret little tang!)
- 3 large eggs (Remember, room temperature is best!)
- 1 cup semi-sweet chocolate chips
Step-by-Step Instructions for Your Homemade Cheesecake
Now that everything is ready to rock, let’s get this classic homemade cheesecake assembled! I know baking might seem intimidating, but trust me when I say that following these steps exactly is your ticket to a perfect, creamy base every single time. The total active time is surprisingly quick!
Preparing and Pre-Baking the Graham Cracker Crust Dessert
We start with the foundation. Get your oven preheated to 350 degrees F (175 degrees C) and make sure that 9-inch springform pan is greased up well. In a bowl, mix those graham cracker crumbs, the crust sugar, and the melted butter until it looks like wet sand. Press this firmly—and I mean *firmly*—into the bottom of your pan. Pop that crust in to bake for just 8 minutes. Once it comes out, set it aside so it can cool down while we whip up the filling.
Mixing the Creamy Cheesecake Batter for the Chocolate Chip Cheesecake
Back to the mixer! Beat that room-temperature cream cheese until it’s beautifully smooth. Slowly mix in the 1 1/2 cups of sugar until it’s all incorporated. Now, gently add your vanilla and sour cream. Here’s the caution: add your three eggs one at a time, mixing only until each one disappears. Seriously, stop the mixer! Overmixing the eggs is defeat! Finally, fold in those semi-sweet chocolate chips by hand. Pour that gorgeous batter over your slightly cooled crust.
Baking and Slow Cooling the Baked Cheesecake
Drop the oven temperature down to 325 degrees F (160 degrees C). Bake this beauty for about 50 to 60 minutes. You’re looking for the edges to look firm, but give that center a little shake—it should still wobble slightly, like Jell-O. This wobble means you didn’t overbake it! Now for the secret technique that keeps it looking flawless: turn the oven off completely. Prop the door open a crack and let the baked cheesecake sit inside for a full hour while it adjusts slowly to the cooler air. That gradual cool-down prevents cracking, which is peak expert advice!
Tips for the Best Chocolate Chip Cheesecake Results
Listen, I know you want that perfectly smooth, rich result—the kind of decadent cheesecake that looks like it came straight from a fancy bakery. We’ve covered the mixing, but the results truly hinge on those little execution details. I remember my first attempt at a large cheesecake; it came out looking like the surface of the moon! That’s when I learned about the water bath trick.
Ingredient Temperature and Water Bath Secrets
You absolutely have to start with room-temperature cream cheese and eggs. If you ever doubt it, just touch them—they should feel decidedly *not* cold. This helps everything emulsify seamlessly.
Now, for the water bath—this is high-level stuff, but I promise it’s easy! It keeps the oven humid and cooks the sides gently. To do it, wrap the bottom of your springform pan tightly in a couple of layers of heavy-duty foil (we don’t want leaks!). Then, place that wrapped pan inside a larger roasting pan. Pour hot water into the roasting pan until it comes about halfway up the sides of your cheesecake pan. It sounds fussy, but it guarantees gentle heat and the smoothest finish possible for your **chocolate chip cheesecake**.
And finally, please, please let it chill. That minimum of six hours in the fridge isn’t just about flavor deepening; it’s when that texture sets up. Trying to slice it sooner just leads to a mushy mess. Patience, my friends, pays off!
Ingredient Notes and Substitutions for Your Chocolate Chip Dessert
I always get so many questions about whether you can swap things out in cheesecake recipes, and I totally get it! We all love flexibility, especially when time is tight. While I’m devoted to this specific graham cracker crust for my **chocolate chip cheesecake**, I know sometimes you just have something else on hand or a craving for a different base. Don’t sweat it! The integrity of that filling won’t change one bit if you adjust the crust.
If you happen to have leftover cookies or just love that dark chocolate crunch, feel free to swap out the graham crackers entirely. You can easily use crushed Oreo cookies instead—just skip the sugar in the crust ingredients, since Oreos are already sweet enough. That’s how you get yourself an incredible Oreo Crust Cheesecake!
Generally, for the filling, I stick rigidly to the three packages of cream cheese, the specific sugar amount, and those three eggs. Those ratios are what secure that signature creamy texture we’ve worked so hard for. However, if you want to play with the chips? Go for it! If dark chocolate is more your speed, a good quality chopped dark chocolate will be amazing, or use mini chips if you want more chips per bite. This recipe is built on simplicity, but flexibility on the add-ins is always welcome for your ultimate rich chocolate chip desserts.
Storage and Reheating Instructions for This Easy Cheesecake Dessert
One of the best parts about making a gorgeous **chocolate chip cheesecake** is that it’s secretly a fantastic make-ahead dessert. Honestly, for me, this is the key to stress-free entertaining. Remember how I kept yelling about chilling it for at least six hours? That’s when it really firms up into that dreamy, sliceable texture. If you can manage not to sneak a piece before then, you’ve got the willpower of a saint!
Since we baked this beauty, it’s quite stable, but we do need to treat it right to keep that creamy texture intact. Always store your cheesecake tightly covered in the refrigerator. I usually use plastic wrap pressed gently over the top, and sometimes I’ll cover the whole thing with foil just to be double sure it doesn’t pick up any strange fridge smells.
When properly stored and kept cold, this **easy cheesecake dessert** will taste just as stunning three to four days later. Seriously, sometimes I think it tastes even better on day two—that flavor just deepens!
Can You Freeze Chocolate Chip Cheesecake?
Yes, absolutely you can freeze it, which makes this an even better choice when you’re planning ahead for a big holiday spread. The trick here is to slice it *before* you freeze it. Trying to slice a frozen cheesecake is a recipe for disaster—or at least a very crumbly slice!
Once you have your slices cut, place them on a baking sheet lined with parchment paper and flash freeze them for about an hour until they are rock solid. Then, transfer those frozen slices into a zip-top freezer bag, squeezing out as much air as you can. It keeps wonderfully frozen for up to a month.
When you’re ready to eat it (no thawing needed if you’re impatient like me!), just pull a slice out of the freezer. It will thaw on the counter in about 30 to 45 minutes, and you’ll be back enjoying that perfect **creamy cheesecake** texture without ever having to turn the oven on!
Frequently Asked Questions About Making Chocolate Chip Cheesecake
I always hear from people who are excited to try this recipe but have little worries about technique or swaps. That’s totally normal! Making a successful **baked cheesecake** seems scary, but once you know these little tricks, you’ll be whipping them up like a pro. Here are some of the questions I get most often about achieving the **best chocolate chip cheesecake**!
Can I make this a no bake chocolate chip cheesecake?
That’s a great question! This particular recipe—the one with the graham cracker crust and the baked eggs—is specifically designed to achieve that incredibly rich, dense, **creamy cheesecake** texture that only comes from baking. If you’re really trying to skip the oven because of the heat or time constraints, you’ll need a recipe specifically formulated for a no-bake approach, usually relying on gelatin or whipped cream to set the filling. But for this particular decadent version, the oven is your friend!
What is the best way to serve this rich chocolate chip dessert?
The answer is cold! Always, always serve your **rich chocolate chip dessert** chilled. Remember that long overnight chill time I stress? That sets the structure so you get those beautiful, clean slices. I usually let it sit out on the counter for just about 20 minutes before serving so it’s not teeth-numbingly cold, but it needs to stay firm.
I made this for my neighbor’s retirement party last month, and it was the first thing gone! It truly shines as one of my favorite party dessert ideas because it’s impressive without needing any last-minute fussing once it’s out of the fridge.
My cheesecake cracked slightly despite the slow cooling—what should I do?
Oh, don’t panic! Cracks happen to everyone, even to me sometimes. If the crack is small, just cover it up! A sprinkle of leftover chocolate chips, a dusting of powdered sugar, or even a drizzle of chocolate syrup completely masks imperfections. This is your **homemade cheesecake**, not a museum piece! If the crack is large enough to bother you, just make sure you cover it with a beautiful topping before serving.
How much chocolate do I need for the best distribution?
I specify one cup of semi-sweet chips, and I really recommend sticking to that measurement for the best results in this recipe. Why? Because cheesecake batter is very dense, and too many add-ins—even delicious ones like chocolate chips—can mess with the density and cause the batter to act strangely while baking. The one cup gives you plenty of chocolate bursts throughout, but it keeps the structure of your **creamy cheesecake** safe! If you want even more chocolate flavor, use a mix of semi-sweet chips and some chopped dark chocolate.
Estimated Nutritional Data for Your Chocolate Chip Cheesecake Slice
Look, I’m a home cook, not a registered dietitian! I use this data here as a general guide for tracking what goes into our indulgences. Since we’re dealing with full fat and plenty of sugar because that’s what makes this **chocolate chip cheesecake** so wonderfully creamy, it’s definitely a treat, not an everyday snack!
These numbers are based strictly on the ingredients listed in the core recipe and how they divide into 12 generous servings. If you swap out the graham cracker crust for an Oreo Crust Cheesecake or use dark chocolate instead of semi-sweet, those values—especially the sugar and fat content—will shift a bit.
Here is the breakdown for one slice of this delicious **easy cheesecake dessert**:
- Serving Size: 1 slice
- Calories: 410
- Sugar: 35g
- Sodium: 280mg
- Fat: 26g
- Saturated Fat: 16g
- Unsaturated Fat: 10g
- Trans Fat: 0.5g
- Carbohydrates: 38g
- Fiber: 1g
- Protein: 7g
- Cholesterol: 95mg
Remember, this is one slice of pure, decadent happiness. Enjoy it responsibly, and don’t let the numbers stop you from making a **homemade cheesecake** that tastes this good. That’s my philosophy here at Cooking by Felix—balance is everything!
Share Your Success with This Chocolate Chip Cheesecake
Now that you’ve baked this gorgeous, **creamy cheesecake**, I truly hope it brought a little moment of peace and joy to your busy day. That’s the whole point of Cooking by Felix—finding the time for these little moments of delicious success, even when life is hectic!
I put my heart into making this chocolate chip cheesecake recipe as straightforward as possible so you could focus on enjoying the process and the incredible final taste. If you found this recipe helpful and you’re bragging about your non-cracked, perfectly rich cake, please let me know!
Your feedback genuinely helps me craft better recipes for the community. If you made it, could you hop down below and rate it? Even five stars for the beautiful slice you managed to keep long enough to photograph would make my day!
And yes, I fully expect to see pictures! Tag me on social media when you share your masterpiece. Seeing your family gather around this **decadent cheesecake** makes all the testing and tweaking worth it. Let’s keep bringing the soul back to the everyday kitchen, one amazing **homemade cheesecake** at a time!
PrintClassic Baked Chocolate Chip Cheesecake with Graham Cracker Crust
Make a rich, creamy, bakery-style chocolate chip cheesecake using a simple graham cracker crust. This recipe delivers a decadent dessert that is perfect for parties or special occasions.
- Prep Time: 20 min
- Cook Time: 60 min
- Total Time: 7 hours 20 min
- Yield: 12 servings 1x
- Category: Dessert
- Method: Baking
- Cuisine: American
- Diet: Vegetarian
Ingredients
- 1 1/2 cups graham cracker crumbs
- 1/4 cup granulated sugar (for crust)
- 6 tablespoons unsalted butter, melted
- 3 (8 ounce) packages cream cheese, softened
- 1 1/2 cups granulated sugar (for filling)
- 1 teaspoon vanilla extract
- 1/4 cup sour cream
- 3 large eggs
- 1 cup semi-sweet chocolate chips
Instructions
- Preheat your oven to 350 degrees F (175 degrees C). Lightly grease a 9-inch springform pan.
- Prepare the crust: Mix graham cracker crumbs, 1/4 cup sugar, and melted butter in a bowl until combined. Press the mixture firmly into the bottom of the prepared springform pan. Bake the crust for 8 minutes. Remove from the oven and let it cool slightly.
- Reduce the oven temperature to 325 degrees F (160 degrees C).
- Prepare the filling: In a large bowl, beat the softened cream cheese with an electric mixer until smooth. Gradually beat in the 1 1/2 cups of sugar until fully incorporated.
- Mix in the vanilla extract and sour cream until the mixture is creamy. Beat in the eggs one at a time, mixing just until combined after each addition. Do not overmix the batter.
- Gently fold in the chocolate chips. Pour the cheesecake batter over the cooled crust in the springform pan.
- Bake for 50 to 60 minutes. The edges should look set, but the center should still have a slight jiggle when gently shaken.
- Turn off the oven, prop the door open slightly, and let the cheesecake cool inside the oven for 1 hour. This slow cooling prevents cracking.
- Remove the cheesecake from the oven and let it cool completely on a wire rack. Once cool, cover and refrigerate for at least 6 hours, or preferably overnight, for the best creamy texture.
- Run a thin knife around the edge before releasing the springform side. Slice and serve this easy cheesecake dessert.
Notes
- For the creamiest texture, bring your cream cheese and eggs to room temperature before starting.
- To prevent cracking during baking, place the springform pan in a larger roasting pan and add hot water halfway up the sides of the springform pan to create a water bath.
- If you prefer a different base, substitute the graham cracker crust with an Oreo crust using crushed Oreo cookies instead of graham crackers.
Nutrition
- Serving Size: 1 slice
- Calories: 410
- Sugar: 35g
- Sodium: 280mg
- Fat: 26g
- Saturated Fat: 16g
- Unsaturated Fat: 10g
- Trans Fat: 0.5g
- Carbohydrates: 38g
- Fiber: 1g
- Protein: 7g
- Cholesterol: 95mg