

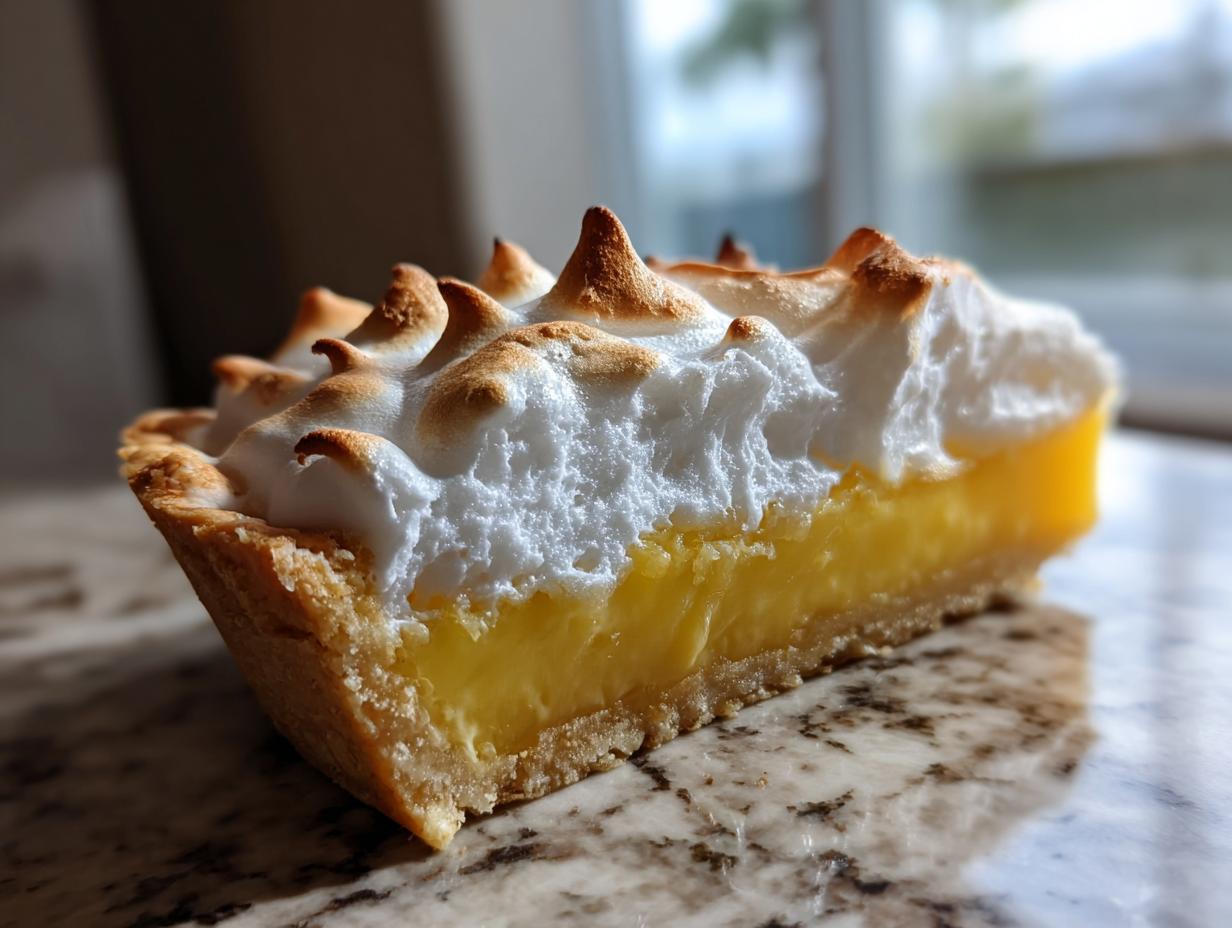
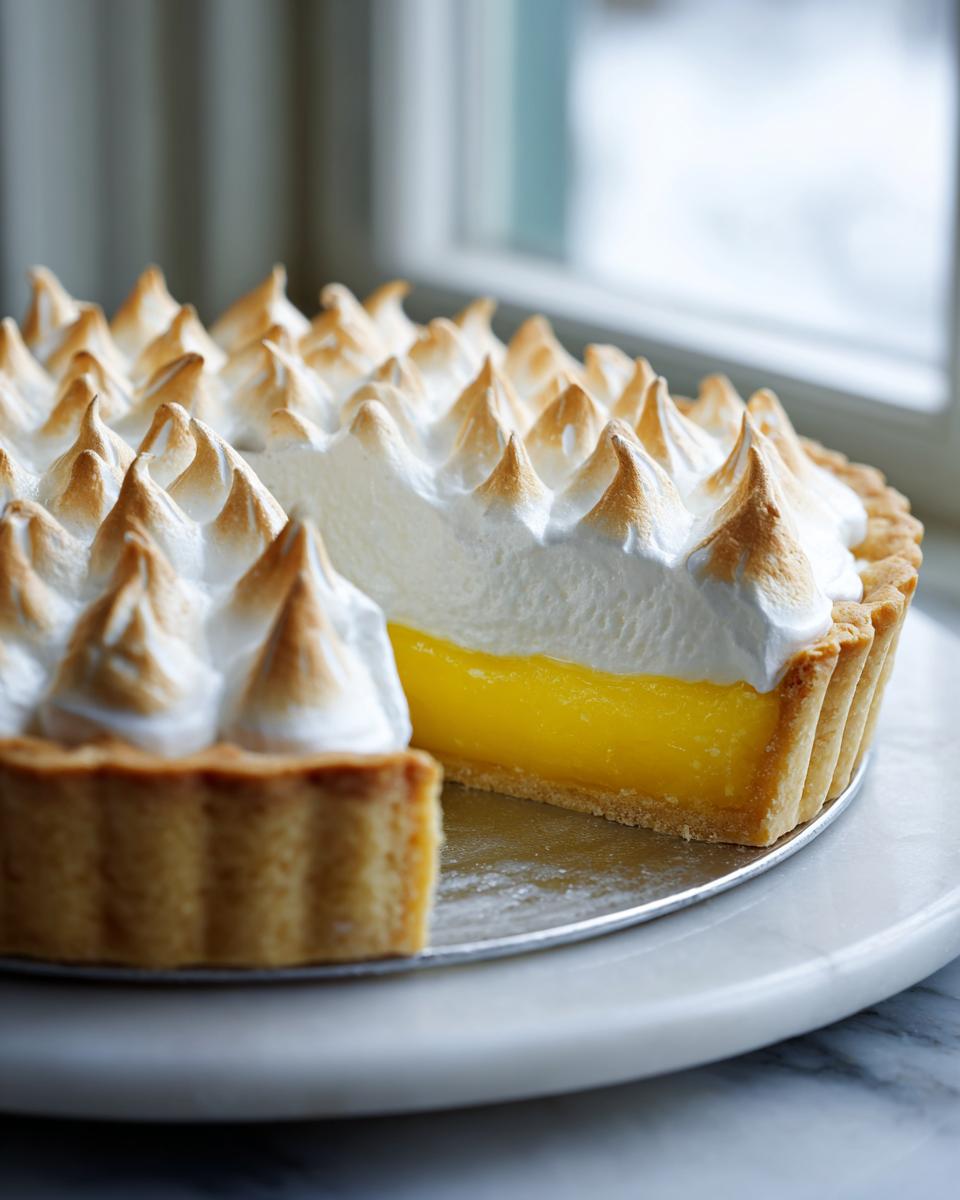
There is just something about pulling a perfect, towering **lemon meringue** pie out of the oven that makes you feel like a true kitchen hero, isn’t there? Forget those sad, watery fillings and flat, weepy toppings you might have wrestled with before. I developed this recipe drawing on those classic family food memories—the kind that taste like pure sunshine and effort—but I made sure it works perfectly even when you’re running late. If you want that zesty, tart kick balanced by sweet clouds, this is the one you need! As I share over on my About page, cooking well doesn’t mean having endless time; it means having the right system, and this homemade, from-scratch method delivers a true showstopper every single time.
- Why This Classic Lemon Meringue Recipe Is Your New Go-To
- Gathering Ingredients for Your Homemade Lemon Pie From Scratch
- Step-by-Step Instructions for the Classic Lemon Meringue
- No Weep Lemon Meringue Tips: Mastering the Bake and Cool
- Serving Suggestions for Your Zesty Lemon Dessert
- Storage and Reheating Instructions for Lemon Meringue Pie
- Frequently Asked Questions About This Lemon Meringue Recipe
- Nutritional Estimates for This Classic Lemon Pie
- Share Your Showstopper Dessert Experience
Why This Classic Lemon Meringue Recipe Is Your New Go-To
I know your time is precious, but trust me, this classic lemon meringue pie is worth every minute. This recipe isn’t fussy; it’s just smart! It’s designed to give you that incredible, restaurant-quality result without any of the usual kitchen drama. We talk about being homemade from scratch, but making it *easy* is the real secret sauce here.
- It’s genuinely made completely from scratch—no weird powders involved!
- The filling sets perfectly—thick, creamy, and never runny.
- It sets you up for the most stable, gorgeous topping you’ve ever made.
Achieving the Perfect Tart and Sweet Pie Balance
You want that bright, zesty punch, right? That’s the lemon telling you it’s fresh! But it can’t be a face-pucker experience. This recipe nails that tricky tightrope walk between the sharp lemon curd and the luxurious sweetness of the meringue. It truly delivers what I consider the absolute best lemon meringue experience possible.
Tips for a Fluffy Meringue Topping That Stays Put
We’re tackling the giant of all pie problems: the weeping meringue. My simple technique focuses on making sure those egg whites are perfectly clean and beaten right. Following these steps in the recipe instructions ensures you get a tall, fluffy meringue topping for your lemon meringue pie that stays beautifully set and golden.
Gathering Ingredients for Your Homemade Lemon Pie From Scratch
Alright, now that you’re committed to making this showstopper, we need to talk ingredients. Because this is a homemade lemon pie from scratch, we aren’t relying on any shortcuts—only the best components to guarantee that incredible flavor profile. Remember, my whole philosophy here at Cooking by Felix is that simple ingredients treated well make the best food!
Look at the list; everything needs to be ready and waiting before the action starts. That’s half the battle won, trust me. Getting the right texture and flavor starts right here, before the stove even gets turned on.
Buttery Pie Crust Tutorial Component
You absolutely need a sturdy, flaky base to hold all that glorious filling. The recipe calls for one 9-inch, unbaked crust. You can absolutely use your favorite tried-and-true buttery pie crust tutorial recipe, or if you’re feeling new to pastry, check out my guide for making a truly flaky base. Either way, make sure it’s blind-baked and completely cool before we even think about pouring in that filling. A warm crust equals a soggy mess!
Essential Components for the Zesty Lemon Dessert Filling
For the filling, fresh is non-negotiable, especially for that brightness. We need four egg yolks, sugar, cornstarch for that amazing thickness, and the stars: fresh lemon juice and zest. Don’t even try getting by with bottled juice here; the flavor difference in this zesty lemon dessert is huge. And don’t forget that last bit of butter stirred in at the end—it makes the filling incredibly smooth.
Step-by-Step Instructions for the Classic Lemon Meringue
Okay, deep breaths! We’re moving into the assembly phase, and this is where things get really exciting. I won’t lie; the filling part requires paying attention, especially when we handle those eggs. But if you follow these steps precisely, you avoid all the heartbreak. Remember, perfect temperature control is everything here to make sure your base sets up beautifully before we even think about that glorious topping.
Preparing the Crust and Lemon Curd Recipe Base
First things first: grab that cooled crust. I mean it—completely cool! Then, get your saucepan out. Whisk the sugar, cornstarch, and salt together before you add a single drop of water. Why? So there are no dry lumps hiding! Slowly whisk in the water until it looks like milky paint. Now, put it over medium heat and stir, stir, stir until it boils and thickens up nicely. Let it boil for that full minute you see in the instructions. This cooks out the starch and is key for a firm lemon curd recipe base.
Tempering Egg Yolks for Smooth Lemon Filling
This step is pure gold for preventing scrambled eggs in your filling, so pay close attention! Take your four lightly beaten yolks and put them in a separate bowl. Now, you need to gently introduce them to the heat. Slowly drizzle about one cup of that hot sugar mixture into the yolks while whisking constantly—this is tempering. It raises the yolks’ temperature slowly so they don’t seize up when you pour them back into the main pot. Then, pour that tempered mixture back into the saucepan and cook gently until it thickens again. It should look glossy and heavy!
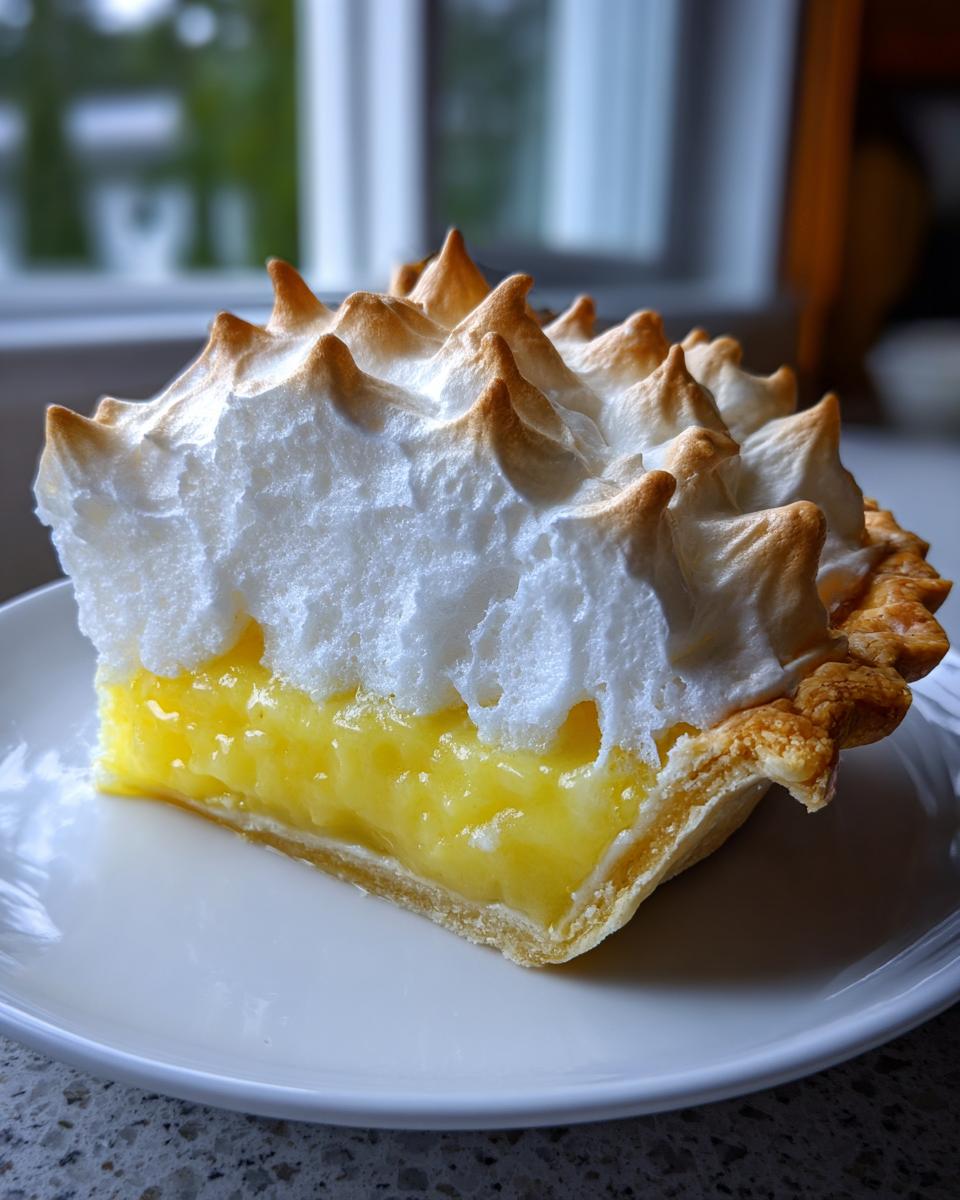
Creating the Fluffy Meringue Topping
Time for the grand finale! Make absolutely certain your bowl and whisk attachment are grease-free, or your meringue will collapse like a tired souffle. Whip those room-temperature egg whites until they hold soft peaks. Now, stream in that ½ cup of sugar slowly—don’t just dump it! Keep beating until those peaks are stiff and glossy. This is how you build the fluffy meringue topping for your **lemon meringue** pie. When you lift the whisk, the peak should stand straight up and curve just a tiny bit at the very tip. It should look like gorgeous, marshmallowy clouds ready for baking!

No Weep Lemon Meringue Tips: Mastering the Bake and Cool
If you’ve made it this far, you are practically a professional! But we need to lock in that success and avoid the dreaded weeping meringue. This is where technique really matters, especially for our stunning **lemon meringue** creation. The recipe notes I added aren’t just suggestions; they are crucial science steps designed by me to keep your pie looking picture-perfect for hours. Before we dive into cooling, remember that keeping things clean is important, which is why we also have a privacy policy we stand behind!
The Crucial Step: Sealing the Lemon Meringue Filling
When you finally get that beautiful meringue piled high, you have to seal the deal! Make sure every single bit of that fluffy topping touches the crust edge—all the way around. Seriously, don’t skimp on the edges. If there’s a gap, the filling underneath will shrink away from the crust as it cools, and that’s how we invite shrinkage and weeping. Think of it like putting a nice tight lid on your filling before it bakes.
Cooling the Showstopper Dessert Correctly
This is probably the hardest part because this pie smells so good when it comes out of the oven! But you cannot rush the cool down, especially for this **lemon meringue** pie. You must let it cool completely on the counter at room temperature for at least four hours. Seriously, put the fridge away for now! Putting the hot filling straight into a cold fridge shocks the meringue and causes that awful moisture release. Patience equals perfection here, my friend!
Serving Suggestions for Your Zesty Lemon Dessert
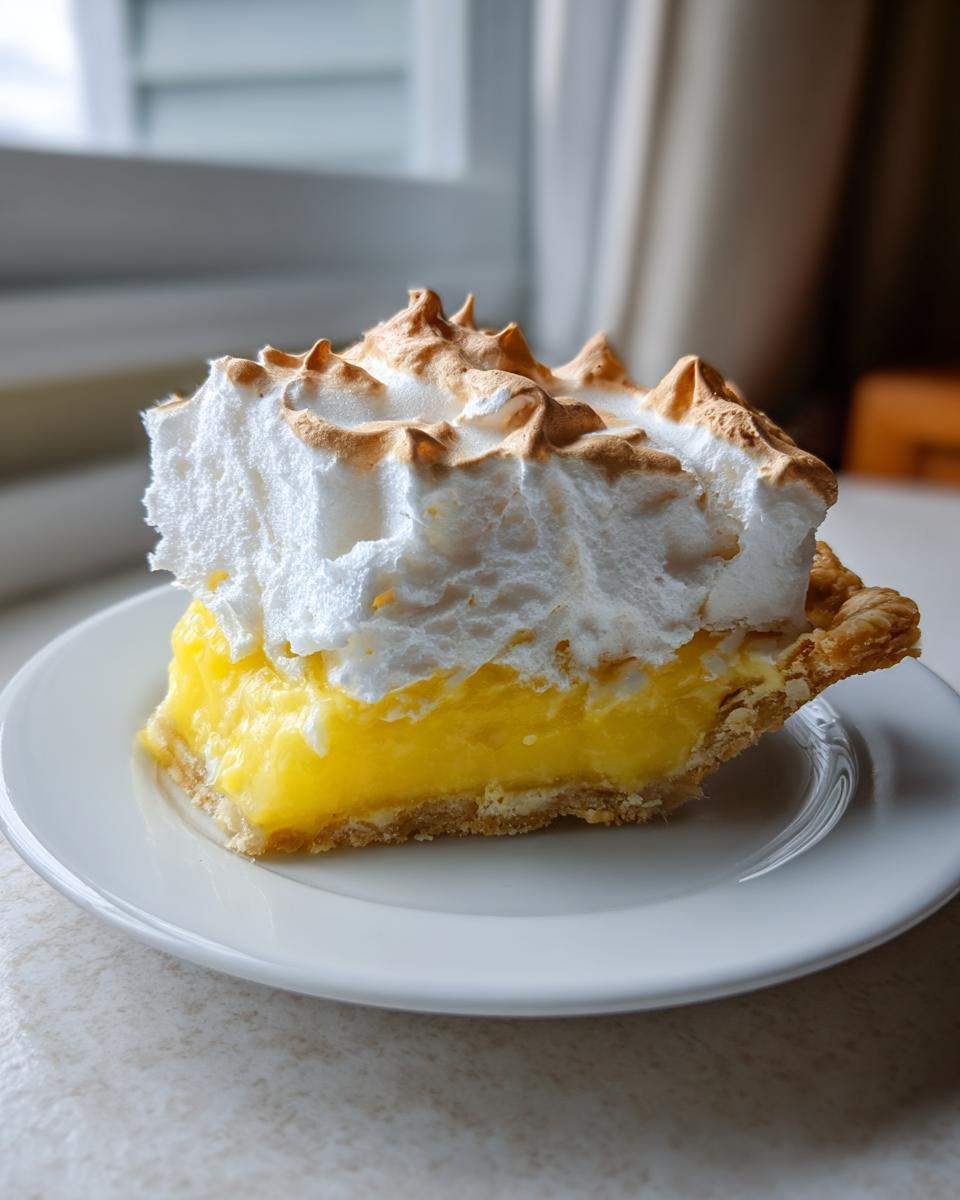
Once that beauty has set up properly after cooling, it’s time to serve this incredible **zesty lemon dessert**! Since this pie is so bright, it makes an absolutely perfect summer citrus dessert. Honestly, it feels too sunny and happy to be reserved just for one season, though. I love serving big, beautiful slices alongside simple fresh berries, like raspberries or blueberries—the little tartness really complements the pie.
For holidays, especially Easter or Mother’s Day brunch, this pie instantly becomes the star of the table. You can add a tiny sprig of mint right on top of the golden peaks for an extra pop of color before you bring it out. It really is a showstopper dessert, and watching people’s faces when they take that first bite? Priceless!
Storage and Reheating Instructions for Lemon Meringue Pie
I’ll be straight with you: this heavenly **lemon meringue** pie tastes its absolute best the moment it’s perfectly cooled down, usually the same day you bake it. That fluffy topping just doesn’t like hanging around too long! If you must store leftovers, cover the pie *loosely* with plastic wrap—don’t press it onto the meringue! Tuck it into the fridge only after it’s fully set, maybe for a day or two max. Reheating? Forget it! This pie is best served chilled or at room temperature, never warm.
Frequently Asked Questions About This Lemon Meringue Recipe
I always get tons of questions when people try making this pie for the first time! It’s totally normal; traditional baking sometimes feels like chemistry class! Don’t hesitate to reach out via my Contact page if you get stuck, but here are the big ones that pop up most often when tackling a truly classic pie.
Can I make mini lemon meringue tarts instead of a full pie?
Oh, I love that idea for a spring baking effort! Yes, this filling recipe is fantastic for individual portions. You can absolutely use it for mini lemon meringue tarts or little pastry shells. The main thing you need to watch is baking time. Those smaller desserts will cook much faster than the big deep-dish pie, so start checking them for doneness about 10 minutes earlier than the big one! Keep an eye on that curd!
How do I know when the egg whites are ready for stiff peaks in my lemon meringue?
Knowing the difference between soft, medium, and stiff peaks is fundamental to learning how to make perfect meringue. The key visual test for stiff peaks is this: when you stop the mixer and lift the whisk straight up, the peak should stand tall and proud and absolutely refuse to flop over. If it curls slightly at the tip, that’s perfect! If the whole thing slumps down, you need to beat it longer. This is key for a stable **lemon meringue** topping that won’t deflate on you.
Nutritional Estimates for This Classic Lemon Pie
Now, I have to be clear here: since this is a truly from-scratch, classic lemon pie recipe, the exact numbers can jump around depending on the butter you use or how much lemon juice you manage to squeeze out. These figures are the best estimates based on the ingredients listed for one slice. So, while it tastes like an absolute dream, keep in mind this gorgeous **classic lemon pie** is definitely a treat! Enjoy it!
- Serving Size: 1 slice
- Calories: 380
- Fat: 18g
- Carbohydrates: 52g
- Protein: 6g
Share Your Showstopper Dessert Experience
I put my whole heart into making sure you have success with this pie! Seriously, I want to see it! Once you pull that golden, towering **lemon meringue** pie out of the oven, snap a picture and tag me. Drop a rating below and let me know if you finally found that no-weep solution! It really helps others reading feel confident trying this vintage pie recipe for the first time.
PrintClassic Homemade Lemon Meringue Pie

Make a showstopping dessert with this classic recipe for Lemon Meringue Pie, featuring a buttery crust, zesty lemon filling, and a tall, fluffy meringue topping.
- Prep Time: 30 min
- Cook Time: 25 min
- Total Time: 55 min
- Yield: 8 servings 1x
- Category: Dessert
- Method: Baking
- Cuisine: American
- Diet: Vegetarian
Ingredients
- 1 recipe for Buttery Pie Crust (9-inch, unbaked)
- 1 1/2 cups granulated sugar
- 1/4 cup cornstarch
- 1/4 teaspoon salt
- 1 1/2 cups cold water
- 4 large egg yolks, lightly beaten
- 1/2 cup fresh lemon juice
- 1 tablespoon lemon zest
- 2 tablespoons unsalted butter
- 4 large egg whites, room temperature
- 1/2 teaspoon cream of tartar
- 1/2 cup granulated sugar (for meringue)
Instructions
- Prepare and blind-bake your 9-inch pie crust according to your preferred recipe. Let the crust cool completely.
- Prepare the Lemon Filling: In a medium saucepan, whisk together the 1 1/2 cups sugar, cornstarch, and salt. Gradually whisk in the cold water until smooth.
- Cook the mixture over medium heat, stirring constantly, until it thickens and boils. Boil for 1 minute, stirring constantly. Remove from heat.
- In a separate bowl, lightly beat the 4 egg yolks. Slowly temper the yolks by whisking about 1 cup of the hot sugar mixture into the yolks.
- Pour the tempered yolk mixture back into the saucepan with the remaining hot mixture. Cook over medium-low heat, stirring constantly, until the filling thickens again and just begins to bubble. Do not boil.
- Remove the filling from the heat. Stir in the lemon juice, lemon zest, and butter until the butter is melted and incorporated.
- Pour the hot lemon filling into the cooled, pre-baked pie crust.
- Prepare the Meringue: In a large, clean, grease-free bowl, beat the 4 room temperature egg whites with an electric mixer on medium speed until soft peaks form.
- Gradually add the 1/2 cup sugar, 1 tablespoon at a time, beating well after each addition. Add the cream of tartar. Continue beating until stiff, glossy peaks form.
- Spread the meringue over the hot lemon filling, making sure the meringue touches the crust edge all around to prevent shrinking. Create decorative swirls with the back of a spoon.
- Bake at 350°F (175°C) for 12 to 15 minutes, or until the meringue peaks are lightly golden brown.
- Cool the pie completely on a wire rack at room temperature for at least 4 hours before slicing. Avoid placing it in the refrigerator immediately to prevent weeping.
Notes
- To prevent weeping meringue, make sure your mixing bowl for the egg whites is completely free of any grease or yolk residue.
- For a stable filling, ensure you boil the cornstarch mixture for the full minute specified.
- Bake the pie immediately after topping the hot filling with the meringue for best results.
- If you prefer a toasted look without further baking, use a kitchen torch on the meringue peaks.
Nutrition
- Serving Size: 1 slice
- Calories: 380
- Sugar: 45g
- Sodium: 150mg
- Fat: 18g
- Saturated Fat: 7g
- Unsaturated Fat: 11g
- Trans Fat: 0.5g
- Carbohydrates: 52g
- Fiber: 1g
- Protein: 6g
- Cholesterol: 110mg