

When life gets crazy, and you just need something deeply satisfying without spending hours in the kitchen, we need to lean on those classic, nostalgic desserts, right? I get it—between work demands and everything else, sometimes you crave that ultimate comfort food treat, but you just don’t have the bandwidth. That’s why I’m sharing what I honestly think is The Best Classic Gooey magic cookie bars (Seven Layer Bars). They take maybe 15 minutes to assemble, and the results? Pure gold. My background, coming from a house where we cooked everything from scratch, taught me that simple ingredients, treated correctly, create magic. These bars don’t require fancy techniques; they just need the right layers piled high, bound by that sweet, sticky milk. It’s about reclaiming that joy, even when you’re speeding through your week. If you’re looking for incredibly easy bar cookies that disappear instantly at any gathering, this is your new go-to recipe. You can find more simple, delicious desserts over here at Simple Delicious Desserts.
- Why This magic cookie bars Recipe Works Every Time
- Gathering Ingredients for Classic magic cookie bars
- Step-by-Step Instructions for Gooey magic cookie bars
- Tips for Perfect Seven Layer magic cookie bars
- Variations for Your Easy Bar Cookies
- Storage and Reheating Instructions for Crowd Pleasing Dessert Bars
- Serving Suggestions for this Classic Layered Dessert
- Frequently Asked Questions About magic cookie bars
- Recipe Details and Nutritional Estimate for magic cookie bars
Why This magic cookie bars Recipe Works Every Time
Honestly, if there’s one dessert I trust to win over a crowd instantly, it’s these magic cookie bars. They are the definition of reliable, sweet comfort, and you just can’t mess them up! The reason they are so consistently fantastic comes down to structure. You get that sturdy, buttery graham cracker base, and then that glorious, thick blanket of sweetened condensed milk poured over everything.
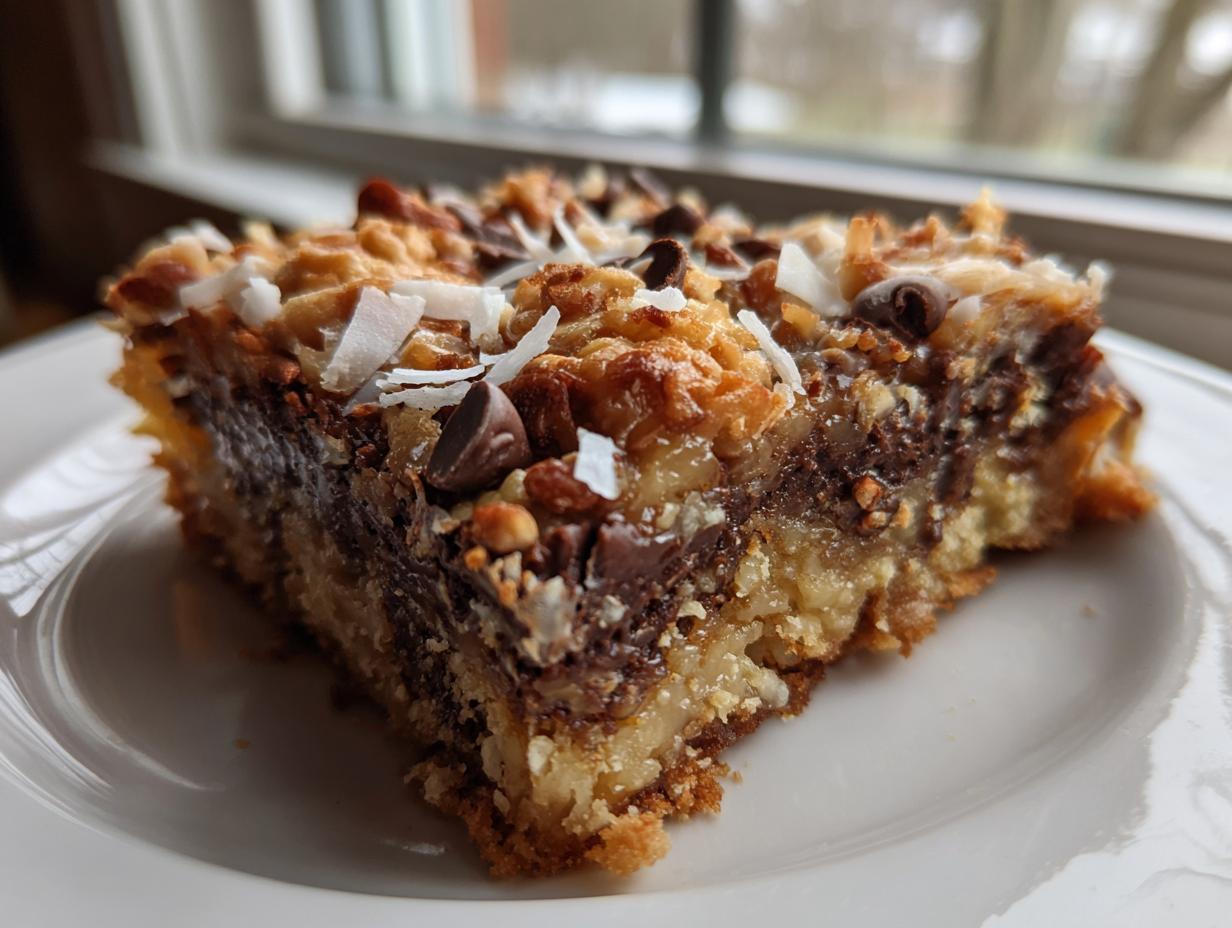
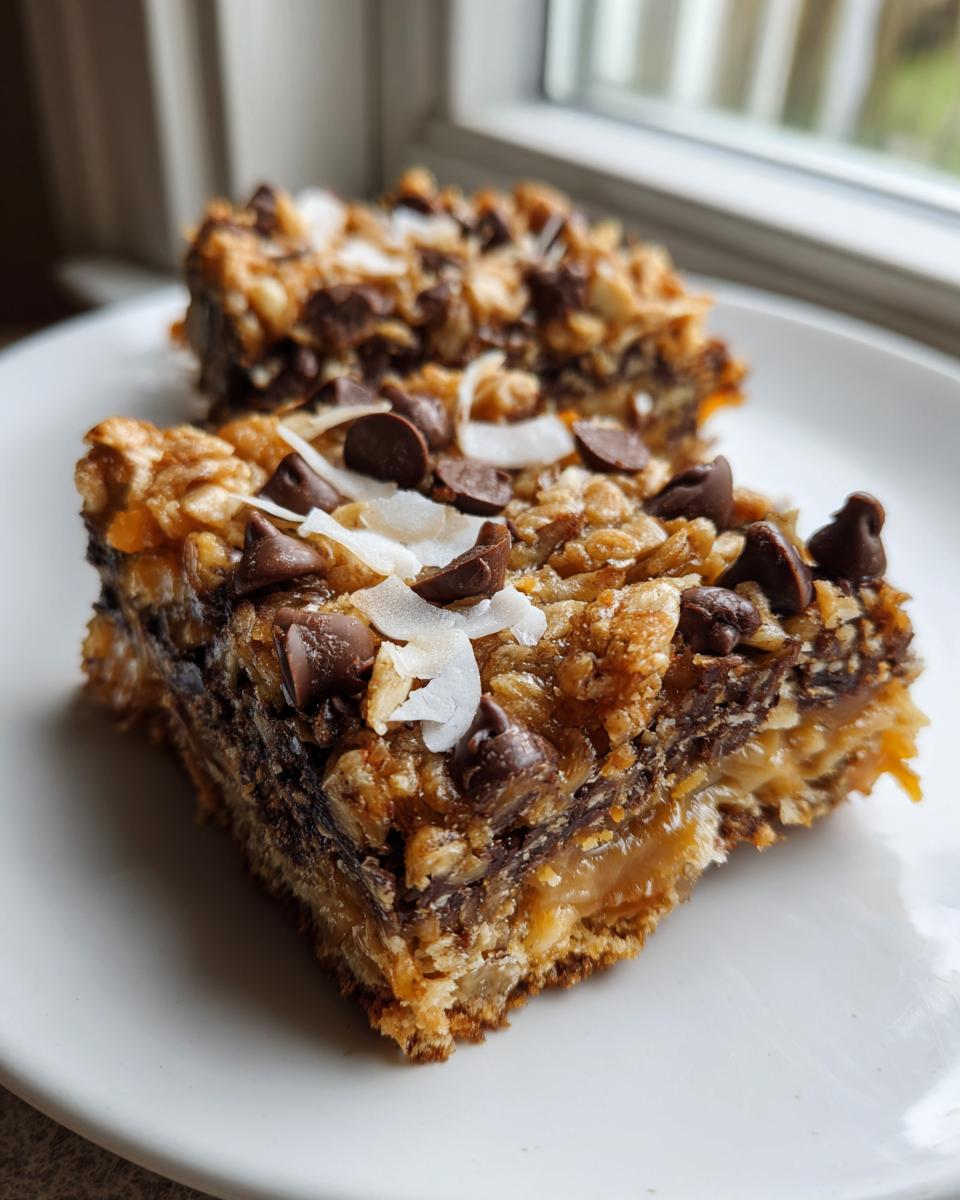
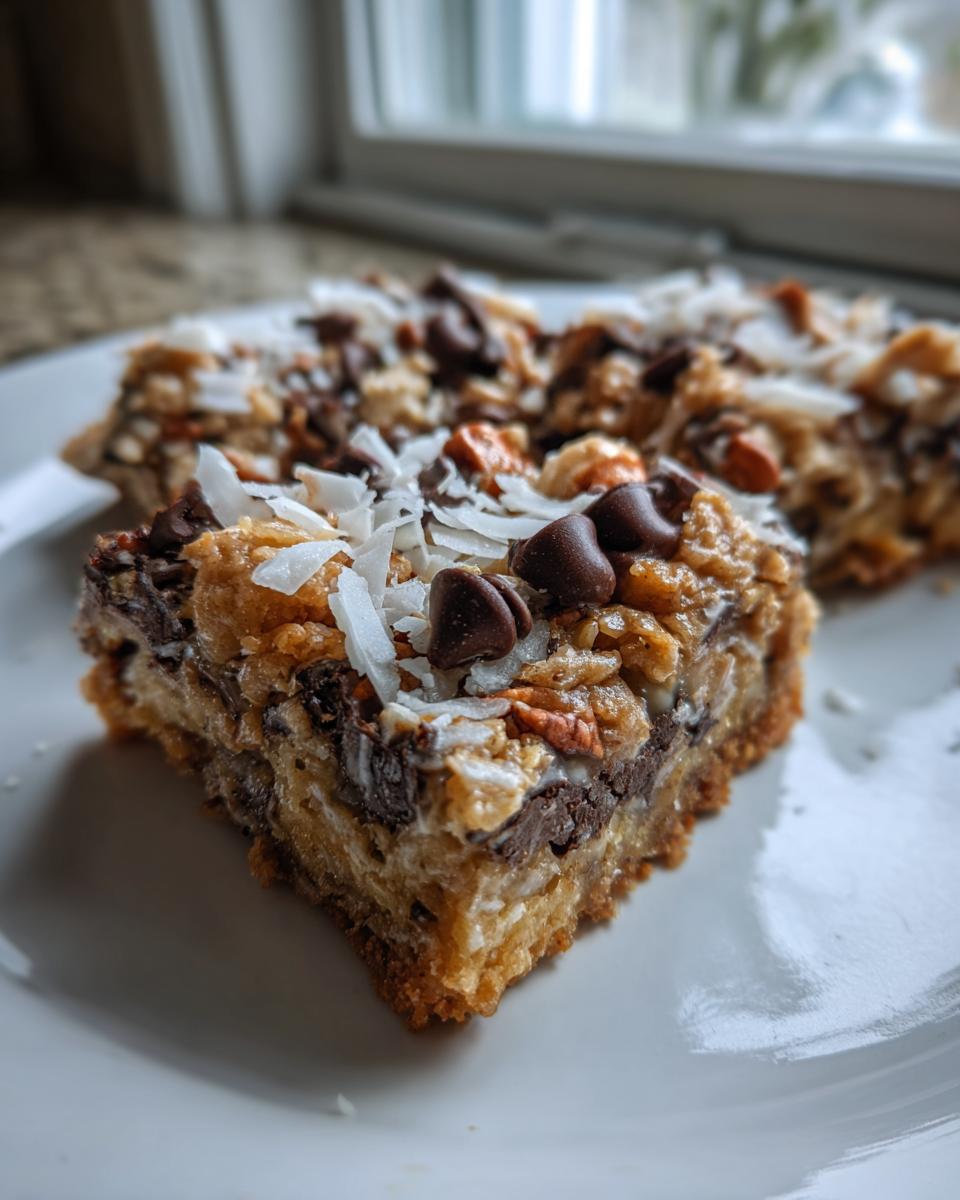
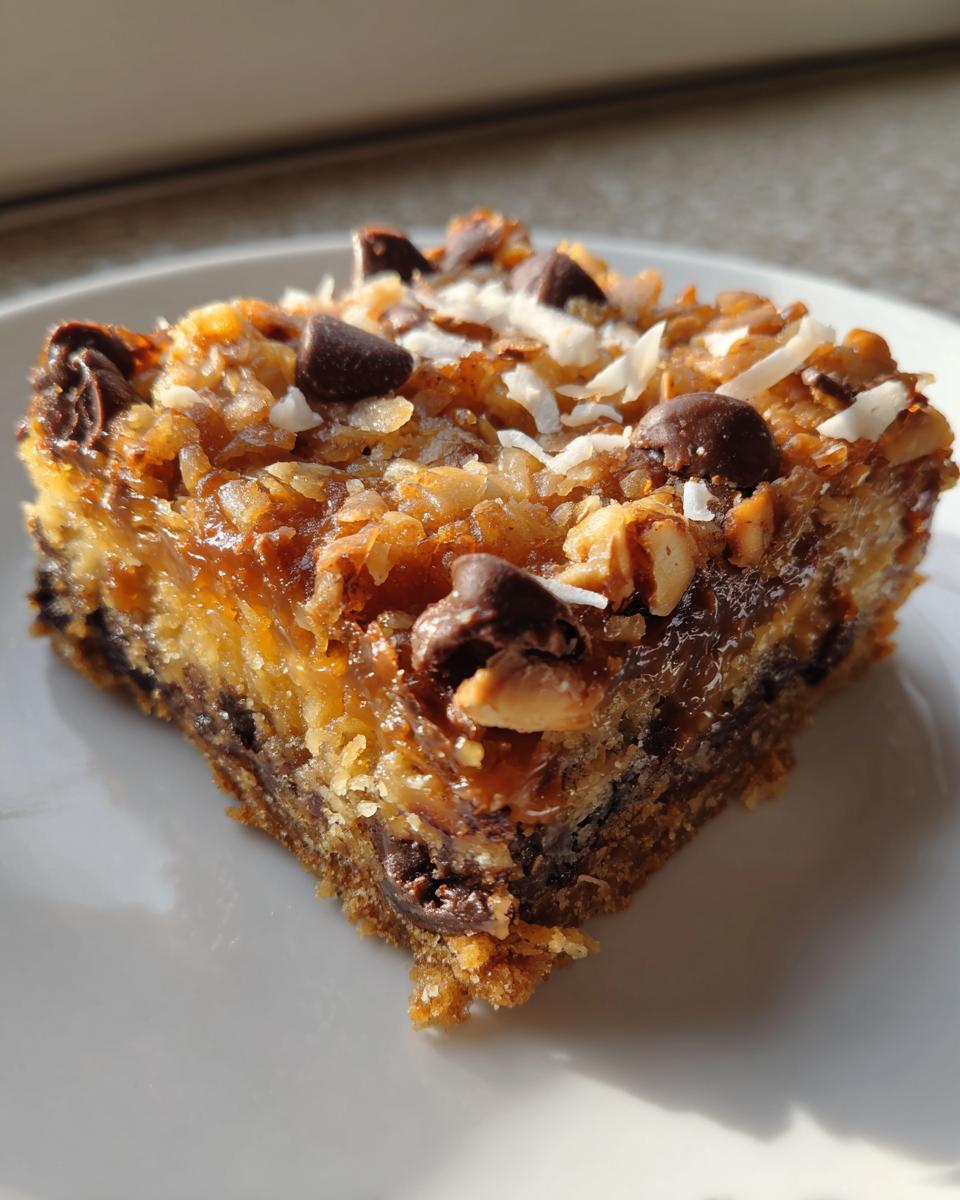
That milk is the secret glue! It melts down into all those layers as it bakes, locking in the chocolate, coconut, and nuts into the most unbelievably gooey dessert bars you can imagine. These are keepers, trust me.
- They are truly crowd-pleasing—everyone loves recognizing those classic flavors.
- They tap right into that wonderful feeling of nostalgic baking.
- The prep time is almost zero, which I love for busy evenings.
Quick Prep for Your magic cookie bars
Listen, I know you’re busy, which is why I obsessed over keeping the active cooking time down. We’re talking about 15 minutes of prep time, max. You literally just press a crust, sprinkle stuff on it, and pour. That’s it! You’ll never find an easier bar cookie recipe that delivers this much rich flavor. This is proof that quick dessert recipes can taste gourmet. For more tried-and-true quick bakes, check out my list of Simple Delicious Desserts.
Gathering Ingredients for Classic magic cookie bars
Okay, let’s talk about what makes these magic cookie bars such a classic. The best part is you probably have most of this stuff sitting in your pantry already. We’re keeping this super simple, relying on that perfect seven-layer combination. Remember, we’re looking for flaked coconut, not shredded, and if you can get pecans or walnuts, go ahead and get them chopped up before you start.
The star, of course, is that can of sweetened condensed milk—it’s the binding agent that turns this mix into the gooey dessert bars we dream about. Don’t skip measuring anything here; we need precision for this layered dessert to set right!
- 1 1/2 cups graham cracker crumbs
- 1/2 cup unsalted butter, melted
- 1 (14 ounce) can sweetened condensed milk
- 1 cup semi-sweet chocolate chips
- 1 cup flaked coconut
- 1 cup chopped pecans or walnuts
- 1/2 cup butterscotch chips (optional, if you’re feeling extra decadent!)
Step-by-Step Instructions for Gooey magic cookie bars
Alright, let’s get these wonders assembled. This is where the magic happens, and honestly, it’s like adult finger painting. First things first, get your oven humming along at 350 degrees Fahrenheit. I always use a 9×13 inch pan, but you absolutely must line it with parchment paper first. Leave an overhang on the sides—I’m talking maybe an inch or two sticking up—this acts as a sling later to lift the whole thing out in one glorious piece. Trust me, trying to scoop these out warm is a disaster.
Once baked, the most important thing for clean slices is letting them cool completely. I mean it! Patience is key for these crowd pleasing dessert bars. If you rush it, you’re going to squash that beautiful gooey caramel layer. For more quick recipes you can rely on, check out my favorites here.
Building the Graham Cracker Crust magic cookie bars Base
Grab your melted butter and your graham cracker crumbs. Mix them together really well until it smells like sweet, buttery sand. Then, press that mixture down into the bottom of your lined pan. You need to press it firmly! Use the bottom of a glass or just your flat knuckles. You want a solid, even base, otherwise, your magic cookie bars will crumble when you try to serve them.
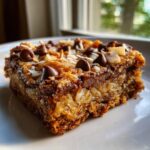
Layering the Seven Layers of Your magic cookie bars
This is the fun part! We build this like a tiny delicious skyscraper. First sprinkle goes the chocolate chips, evenly, don’t clump them up. Next, we follow that with the flaked coconut, making sure it spreads out nicely. Then, you scatter those chopped nuts (and if you bought the butterscotch chips—now is the time for them!). Finally, take your can of sweetened condensed milk and drizzle that beautiful, thick liquid evenly over every single layer. It should cover everything. That’s the seal!
Tips for Perfect Seven Layer magic cookie bars
Even though these magic cookie bars are simple, there are a few little things I’ve learned over the years—from my mom and then trying to bake them after a 10-hour workday—that make the difference between a good bar and a legendary one. The biggest mistake I see people make is getting impatient. You want gooey, right? Gooey means you can’t overbake them!
When testing for doneness, the edges should look golden brown, but the center should still look a little wet and super bubbly. If you wait until the center looks completely set like a brownie, you’ve gone too far and you’ll end up with a chewy bar that’s leaning toward hard. Nobody wants that in their easy bar cookies!
Also, I know I sound like a broken record, but cooling is non-negotiable. I usually try to keep them in the pan until they are totally room temperature, then I try to chill them for at least two hours before cutting. This keeps them locked together beautifully. If you need more quick inspirations for your dessert rotation, check out my latest finds for Simple Delicious Desserts.
Ingredient Spotlight: Sweetened Condensed Milk Bars Secret
We can’t talk about Sweetened Condensed Milk Bars without talking about the milk itself! It’s literally the heart of these classic layered dessert bars. This thick, sugary milk is what binds all seven layers together and creates that almost caramel-like texture when it bakes. It’s the magic glue!
If you really want that rich, comforting flavor that takes you right back to Grandma’s house, I always recommend reaching for the Eagle Brand if you can find it. They’ve perfected that formula over decades, and I noticed a subtle richness compared to generic brands when I first started baking these under pressure. That extra bit of flavor complexity makes a huge difference in these nostalgic baking recipes.
Variations for Your Easy Bar Cookies
Part of why I love these magic cookie bars so much is that they are such a forgiving recipe. They’re built on a sturdy foundation, so you can totally play around with the fillings without worrying about messing up the entire pan. If you’re baking for a crowd, you usually have a few picky eaters or people with allergies, so having swaps ready is a lifesaver!
Don’t feel limited to just the chocolate chips and walnuts, either. This is your chance to customize your easy bar cookies! If you want to lean into a richer, deeper flavor profile, toss in half semi-sweet chips and half dark chocolate chips. That little bit of bitter edge cuts through the sweetness of the condensed milk perfectly.
For the nuts, pecans and walnuts are classic, but sometimes I’ll use slivered almonds if I happen to have them on hand, or even toasted pepitas if I want something a little different. If nuts are out completely, you can bulk up the volume using crushed pretzels—just make sure to reduce the graham cracker crust slightly because the pretzels bring their own saltiness.
Also, think about your extract! A tiny splash of almond extract right into the sweetened condensed milk before you pour it can give these chocolate coconut bars a totally unexpected, marzipan-like twist. Keep experimenting; that’s how the best recipes get passed down!

Storage and Reheating Instructions for Crowd Pleasing Dessert Bars
Okay, we made it. We baked these amazing, gooey crowd pleasing dessert bars, and now we have to figure out how to keep them perfect until everyone has had a piece—which usually takes about five minutes in my house! Luckily, these are just as easy to store as they are to bake. They hold up really well, which is why they are fantastic for making ahead of time for parties or holidays.
The main thing to remember is that because of that beautiful, sticky layer of sweetened condensed milk, they are happiest when they are slightly cool. If you leave them sitting out on the counter in a warm room, they start wanting to ooze everywhere, and that defeats the purpose of those clean cuts we worked so hard for earlier!
For short-term storage, yes, you can keep them at room temperature, but only for a day or two, and make sure they are in an airtight container. I like using a nice glass dish with a tight-fitting lid. They’ll stay pretty soft this way.
But my absolute favorite game plan for these magic cookie bars is chilling them. If you pop that covered container into the refrigerator, they firm up beautifully. They usually last a solid week this way! Seriously, the chilled texture is divine—it makes them feel almost like fudge. You don’t need to reheat them at all; they are perfect straight from the fridge. If you *must* warm one up for some reason (maybe you just love them when they are extra melty?), zap an individual bar for just 10 seconds in the microwave. But honestly, don’t bother; they shine when served cool.
Serving Suggestions for this Classic Layered Dessert
Now that you’ve successfully navigated the seven layers and achieved that perfect gooey slice, we have to talk about how to serve these incredible magic cookie bars. Because let’s be real, they are rich! They are intense! And they deserve the perfect accompaniment, otherwise, you’ll just sit there in a sugar coma trying to figure out how to eat the rest of the pan.
My go-to way to enjoy these easy bar cookies is almost always with a hot cup of coffee. Seriously, the bitterness of a nice strong dark roast just cuts right through the intense sweetness of the condensed milk and the chocolate chips. It creates this amazing balance that makes you want to sit down and savor every bite rather than just inhaling them, which is what usually happens around here!
If you’re serving these up after dinner, especially if you’re making them for the holidays—and trust me, these are amazing Holiday Cookie Bars because they keep so well—you have to try them with vanilla ice cream. Not warm ice cream, though! Just a scoop of high-quality vanilla right next to the chilled bar. The temperature contrast between the cool, firm bar and the creamy cold ice cream is fantastic.
They are sturdy enough to be eaten right out of hand, which is great for potlucks, but plating them slightly elevates these simple bars. If you’re gathering more easy recipes for your next big spread, feel free to browse my picks for Simple Delicious Desserts. You won’t regret having these crowd pleasing dessert bars on your dessert table!
Frequently Asked Questions About magic cookie bars
I know sometimes you just have a quick question pop up, and you don’t want to sift through a whole novel to find the answer! These magic cookie bars are pretty straightforward, but readers often have a couple of queries about texture and storage. Here are the things I get asked most often after people try my recipe.
Why aren’t my Seven Layer Bars setting up properly?
Usually, if your Seven Layer Bars are too runny, it means one of two things: You didn’t bake them long enough, or you forgot that vital cooling step! Remember what I said—the center needs to look bubbly, not totally dry, when you pull them out. But the *real* key is patience afterwards. If you try to cut them warm, they will absolutely ooze everywhere. You have to let them cool completely, or even chill them, to let that sweetened condensed milk firm up properly.
Can I substitute the nuts in these easy bar cookies?
Oh yes, absolutely! If you or a guest has a nut allergy, or you just ran out of pecans, swapping is easy. You can leave them out entirely, and they still bake up beautifully as Chocolate Coconut Bars, though they won’t have that crunch. If you want to replace the volume, try using sunflower seeds, or even some crispy pretzel pieces mixed in with the chocolate chips. Just avoid anything too watery!
How long do these magic cookie bars last if I make them ahead?
These are perfect for making ahead, which is why they are such a fantastic idea for holiday gatherings or parties! If you store them tightly covered in the fridge, they stay deliciously fresh, gooey, and perfectly sliceable for about a week. That chill actually improves the texture! If you want a deeper dive into why these taste so good made with condensed milk, check out this recipe from our friends over at Eagle Brand who know a thing or two about making great layered desserts.
Can I freeze leftover magic cookie bars?
Yes, you totally can! Freezing works great for these simple seven layer dessert. Cut them into squares first, then layer them in an airtight container with parchment paper between the layers so they don’t stick together. They freeze beautifully for up to three months! When you want one, just let it thaw on the counter for about 30 minutes, or enjoy it straight from the freezer if you like them super firm.
For more tried-and-true simple bakes, you can always check out my rotating collection of Simple Delicious Desserts.
Recipe Details and Nutritional Estimate for magic cookie bars
I know sometimes after you’ve finished baking heaven, you want the quick stats for your notes or for sharing at the next potluck. Believe me, filing this information away is just as important as saving the recipe itself! These magic cookie bars are designed for maximum flavor with minimum fuss, making them perfect for last-minute dessert needs.
Details at a Glance
Here’s a quick rundown on the time commitment and yield for this batch of Seven Layer Bars.
- Prep Time: 15 min (Seriously, that’s it!)
- Cook Time: 30 min (Keep an eye out so they don’t overbake!)
- Total Time: 45 min (Not counting cooling time, which you need to be patient for!)
- Yield: 24 servings (These are rich, so squares are small, but they go fast!)
- Category: Dessert
- Method: Baking
- Cuisine: American
- Diet: Vegetarian
Estimated Nutrition for magic cookie bars (Per Serving)
Because these bars contain lots of chocolate, nuts, and that sweet condensed milk, they are definitely a treat! This nutritional breakdown is just an estimate, but it gives you a good idea of what you’re diving into when you enjoy one of these gooey dessert bars.
On average, one bar comes in around 210 calories. That sweetness comes mostly from the 18g of sugar, but you also get a decent boost of energy from the 13g of fat. They clock in with about 3g of protein, and the majority of the bulk comes from those delicious carbohydrates.
- Serving Size: 1 bar
- Calories: 210
- Sugar: 18g
- Fat: 13g
- Carbohydrates: 22g
- Protein: 3g
The Best Classic Gooey Magic Cookie Bars (Seven Layer Bars)
Make these easy bar cookies, also known as Seven Layer Bars, using sweetened condensed milk for a rich, chewy, crowd-pleasing dessert perfect for holidays or any gathering.
- Prep Time: 15 min
- Cook Time: 30 min
- Total Time: 45 min
- Yield: 24 servings 1x
- Category: Dessert
- Method: Baking
- Cuisine: American
- Diet: Vegetarian
Ingredients
- 1 1/2 cups graham cracker crumbs
- 1/2 cup unsalted butter, melted
- 1 (14 ounce) can sweetened condensed milk
- 1 cup semi-sweet chocolate chips
- 1 cup flaked coconut
- 1 cup chopped pecans or walnuts
- 1/2 cup butterscotch chips (optional, for extra flavor)
Instructions
- Preheat your oven to 350 degrees Fahrenheit. Line a 9×13 inch baking pan with parchment paper, leaving an overhang on the sides for easy removal.
- In a medium bowl, combine the graham cracker crumbs and melted butter. Press this mixture firmly and evenly into the bottom of the prepared baking pan to form the crust.
- Sprinkle the chocolate chips evenly over the graham cracker crust.
- Next, sprinkle the flaked coconut over the chocolate chips.
- Sprinkle the chopped nuts over the coconut layer. If using, sprinkle the butterscotch chips over the nuts.
- Slowly pour the entire can of sweetened condensed milk evenly over all the layers. This binds the bars together.
- Bake for 25 to 30 minutes, or until the edges are lightly golden brown and the condensed milk is bubbly.
- Remove the pan from the oven and let the bars cool completely in the pan on a wire rack. Cooling is important for clean cutting.
- Once fully cooled, use the parchment paper overhang to lift the bars from the pan. Cut into squares.
Notes
- For the best gooey texture, do not overbake. Watch for the edges to set, not the center.
- You can substitute graham cracker crumbs with crushed vanilla wafers for a different crust flavor.
- If you want a richer, more nostalgic flavor, use Eagle Brand sweetened condensed milk.
- Chill the bars for at least two hours before slicing for the cleanest cuts.
Nutrition
- Serving Size: 1 bar
- Calories: 210
- Sugar: 18g
- Sodium: 85mg
- Fat: 13g
- Saturated Fat: 7g
- Unsaturated Fat: 6g
- Trans Fat: 0.1g
- Carbohydrates: 22g
- Fiber: 1g
- Protein: 3g
- Cholesterol: 15mg