

It’s one of those days, right? You smashed your workout, you’re nailing your macros, but suddenly, your brain starts screaming for something rich, something creamy, something that tastes like you are totally cheating. I get it! Back when I was juggling my marketing career and trying to honor my family’s love for incredible food, I realized that “healthy” usually meant “sad” dessert. Not anymore! We’re done with sad food here at Cooking by Felix.
That’s why I am just so excited to hand over the secrets to my Ultimate No-Bake High-Protein Cheesecake Jars. That’s right—this is the creamy, low-sugar solution that sets up perfectly overnight and is custom-built for meal prep. Forget the baking time; we are going straight to ‘guilt-free indulgence.’ This Protein Cheesecake proves that you don’t have to sacrifice texture or flavor when you’re focused on your goals. Trust me, this recipe is going right into your weekly rotation!
- Why This No Bake Protein Cheesecake is Your New Favorite Macro Friendly Dessert
- Essential Ingredients for a High Protein Cheesecake Recipe
- How to Prepare the Best Protein Cheesecake Ever: Step-by-Step Jars
- Making Variations: Beyond the Basic Protein Cheesecake
- Storage and Meal Prep Dessert Success with Protein Cheesecake
- Frequently Asked Questions About This Healthy Cheesecake Dessert
- Nutritional Estimates for Your Macro Friendly Protein Cheesecake
- Share Your Creamy Protein Treat Creation
Why This No Bake Protein Cheesecake is Your New Favorite Macro Friendly Dessert
When you’re tracking things closely, every single dessert needs to earn its spot in your day, and this Protein Cheesecake does exactly that. Since it’s no-bake, we skip the fuss, which means no preheating and zero risk of over-baking! It’s all about convenience, right?
The real win here is how much goodness we pack in without reaching for the sugar. It’s genuinely a macro friendly dessert.
- Total convenience: You mix it, jar it, and chill it. Easy grab-and-go perfection!
- High-protein powerhouse: Packed with goodness to help you recover or just stay full longer.
- Portion controlled: Since it lives in a jar, you know exactly what serving you’re getting.
If you’re already planning your next week’s eats, you can check out my thoughts on fitting these kinds of recipes into a weekly structure over on my healthy lunch recipes post.
Achieving Creamy Protein Treat Texture Without Baking
Okay, the biggest question for any no-bake recipe is: will it actually taste like real cheesecake? Absolutely! The magic here isn’t complicated science; it’s about blending two high-protein heavy hitters—cottage cheese (or Greek yogurt) and your quality protein powder.
When you run those together in the blender until they are aggressively smooth, they whip up into this incredibly velvety mixture. The protein powder acts as a stabilizer, helping that creamy base firm up perfectly in the fridge. It sets beautifully so you get that satisfying mouthfeel without any gritty texture or the need for gelatin.
Essential Ingredients for a High Protein Cheesecake Recipe
To make this perfect Protein Cheesecake, you can’t just toss things in—we need quality ingredients to guarantee that texture holds up, especially since we aren’t using the oven to help us set things! I’ve broken down exactly what you need to get the crust just right and the filling unbelievably light and creamy. Remember, the crust is the foundation, so don’t rush that step!
Here’s the full lineup for four individual jars, but honestly, you can scale this up easily:
- 1 cup crushed graham crackers or gluten-free alternative
- 2 tablespoons melted light butter or coconut oil
- 1 scoop vanilla or unflavored protein powder (whey or casein recommended)
- 8 ounces light cream cheese, softened
- 1 cup low-fat cottage cheese or Greek yogurt
- 1/2 cup powdered erythritol or preferred sugar substitute
- 1 teaspoon vanilla extract
- 1/4 cup unsweetened almond milk (or milk of choice)
- 1/2 cup fresh or frozen mixed berries (for topping)
Ingredient Notes and Substitutions for Your Protein Cheesecake
Listen, the type of powder you use makes a difference here. If you want the creamiest result—the kind that truly feels indulgent—try grabbing some casein protein powder. It thickens up beautifully when chilled. Whey works fine, but you might need a tiny splash more milk to get it smooth.
On sweeteners, I highly recommend using a powdered (confectioners’) substitute like erythritol or monk fruit blend. Because we aren’t baking, if you use granulated sweeteners, you might end up with a slightly grainy crust or filling. Stick to powdered for the smoothest experience. And for the dairy choice? If you have cottage cheese on hand, use it; if you prefer a slightly tangier, thicker result, Greek yogurt is your best friend.
How to Prepare the Best Protein Cheesecake Ever: Step-by-Step Jars
Alright, making this incredible Protein Cheesecake is almost laughably simple, but the order of operations is key because we aren’t using the oven to save us! We need to layer everything perfectly so those jars look just as good as they taste. I always set out my ingredients first, kind of like a mini mise en place, to keep things moving fast.
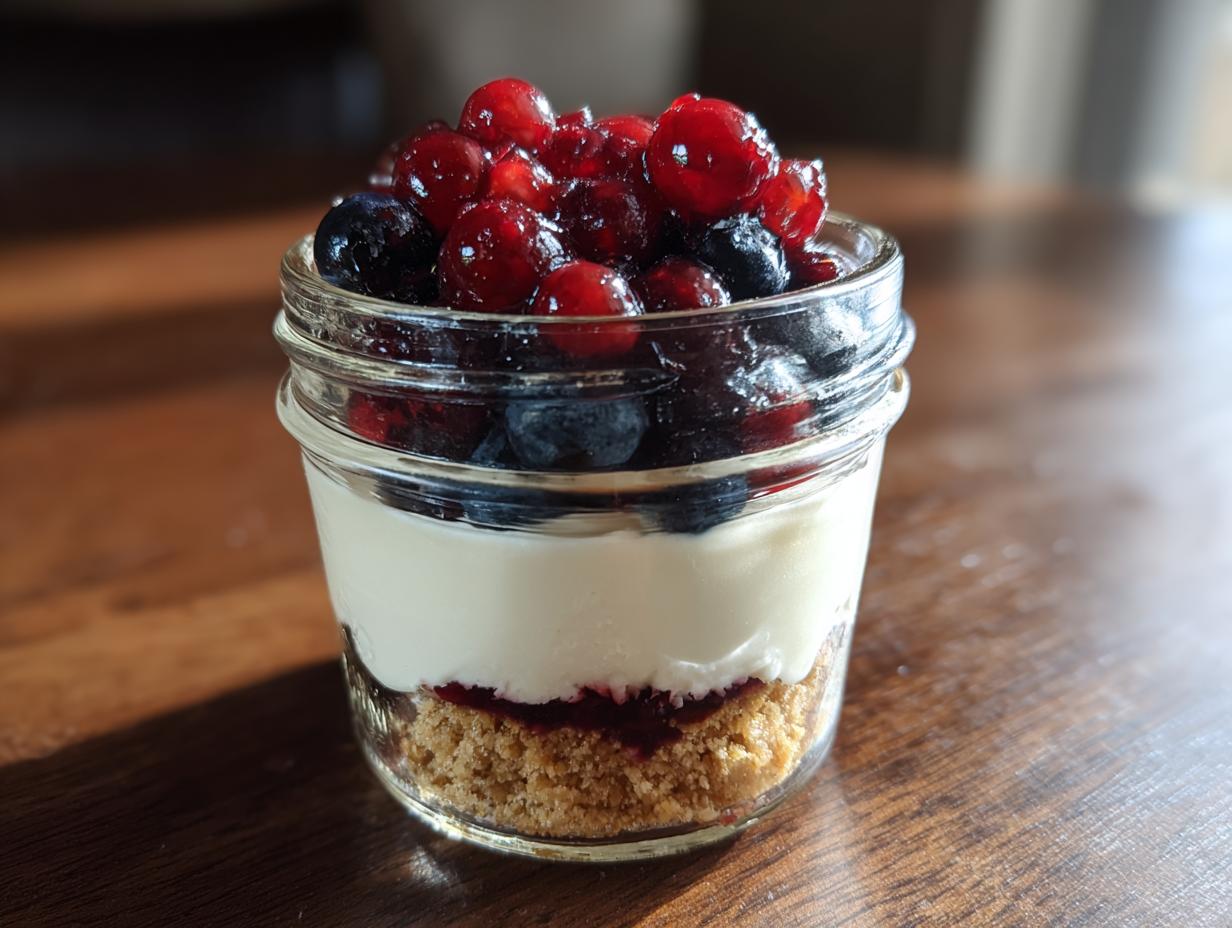
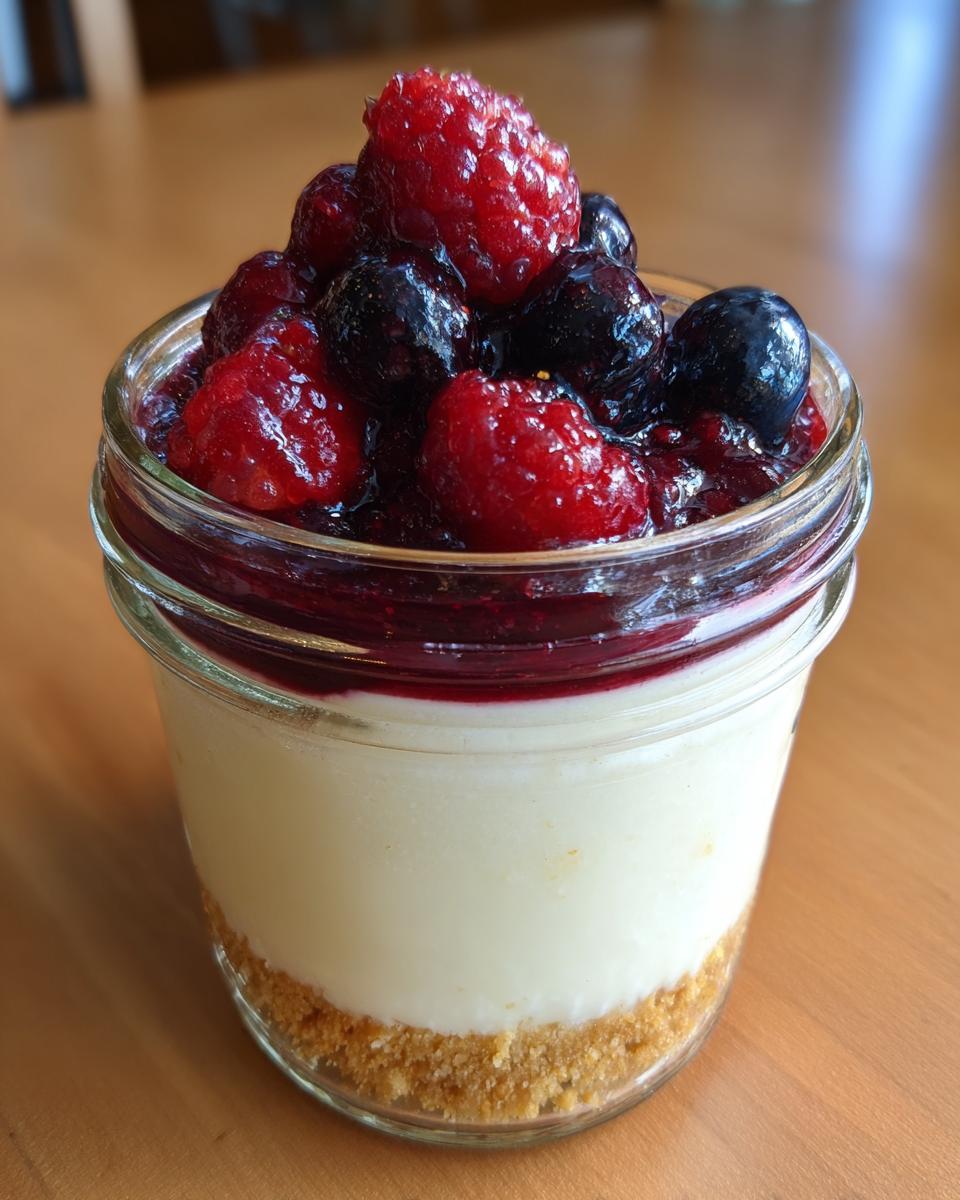
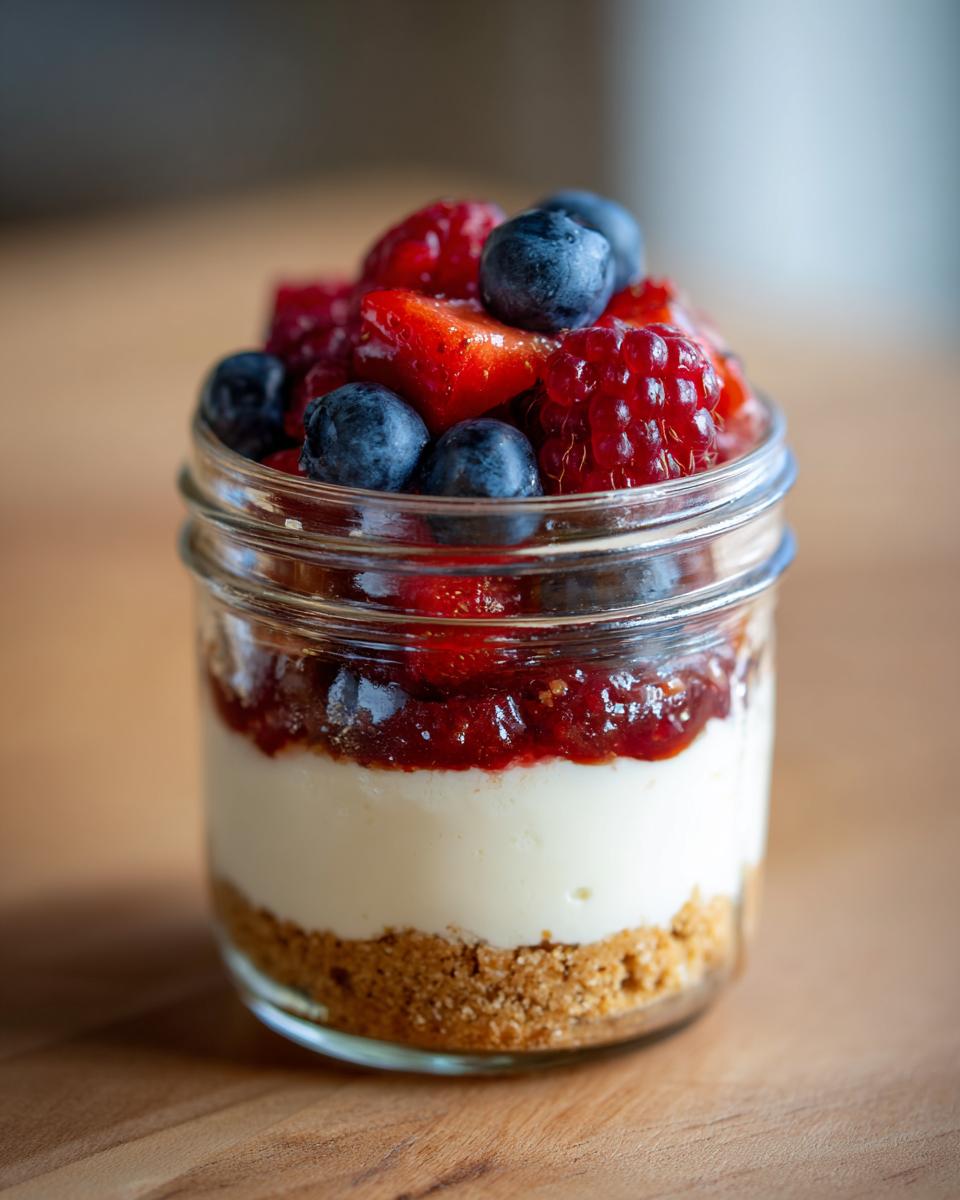
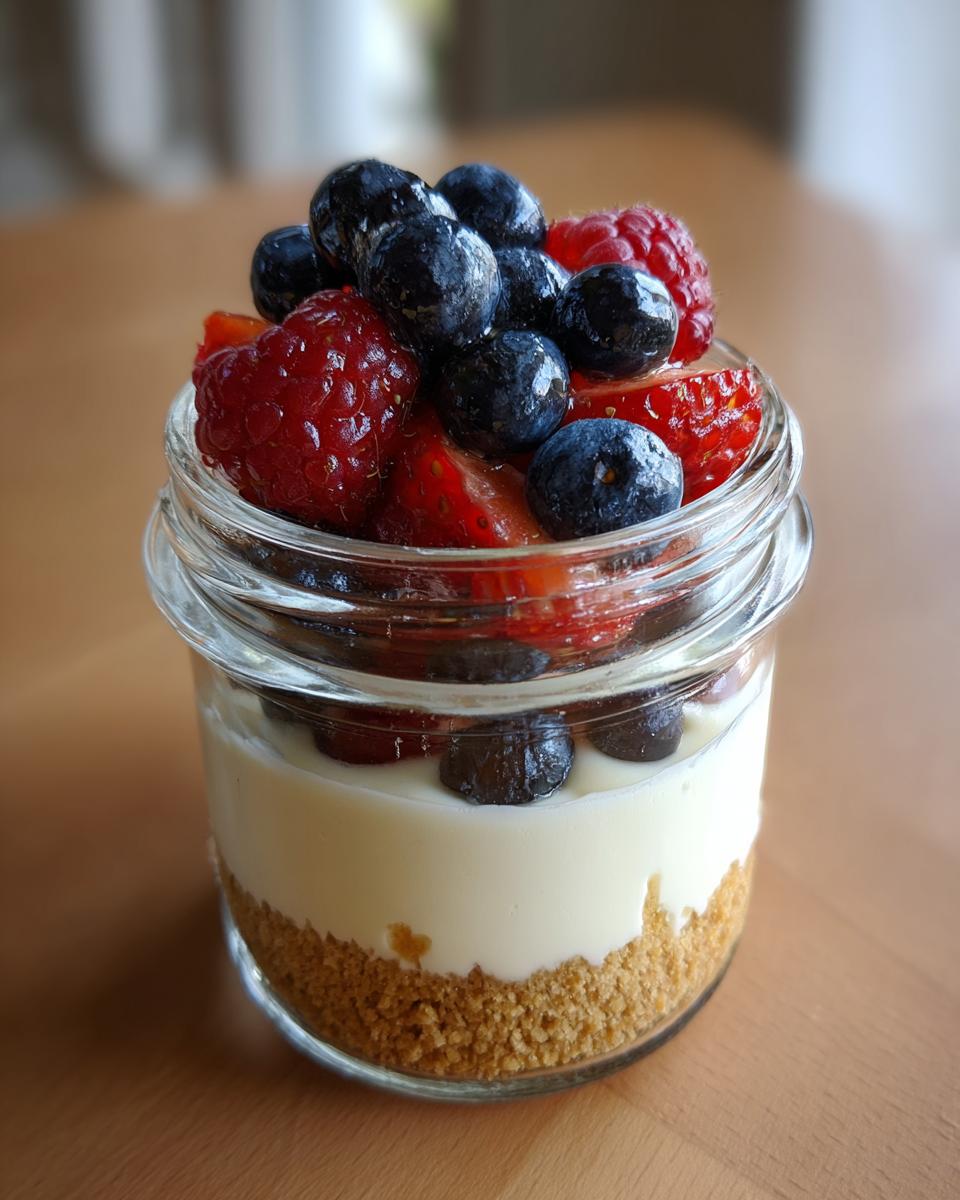
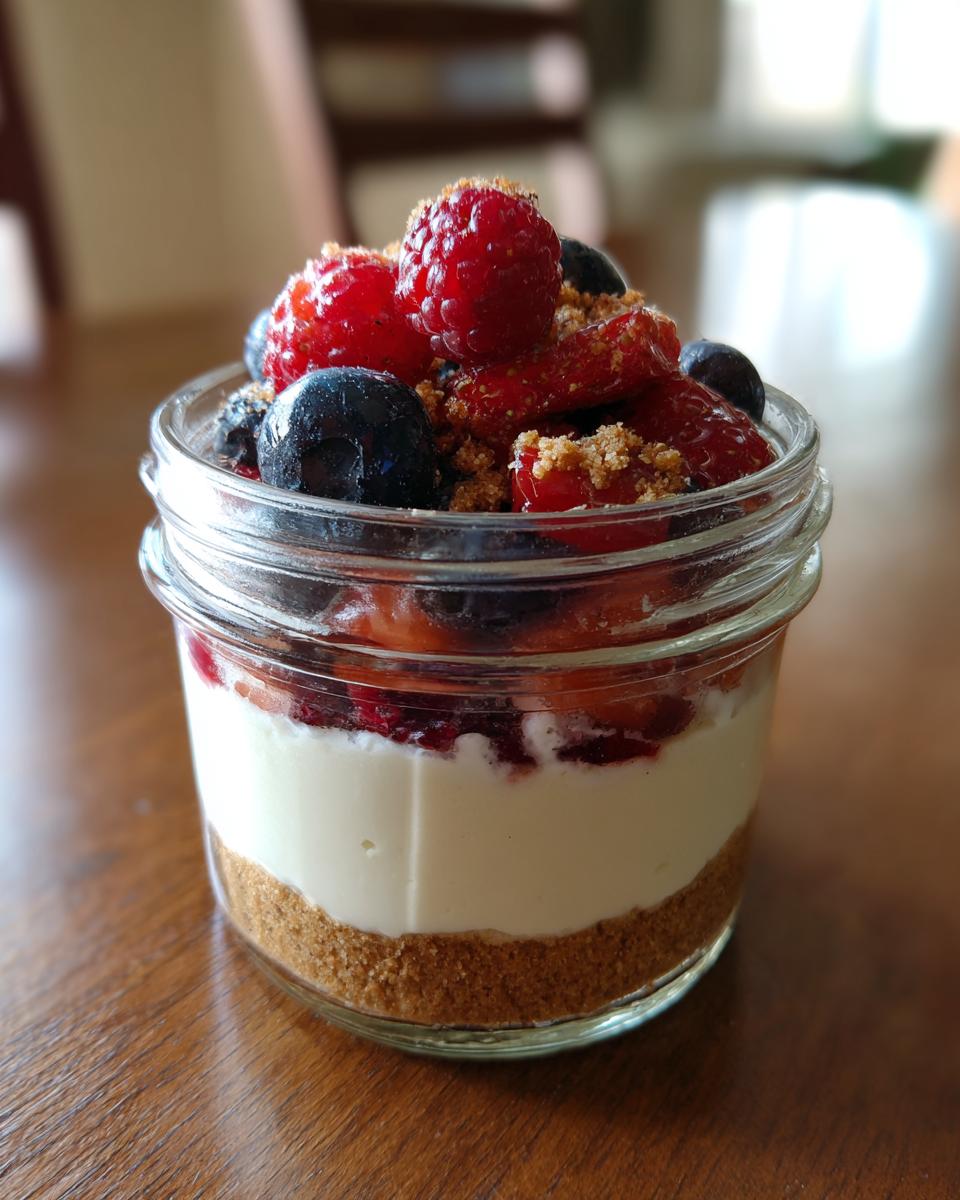
- First things first, let’s build the base! Mix your crushed graham crackers with that melted butter or coconut oil. You want it looking like wet sand. Pat about two tablespoons of this mixture right into the bottom of your four little mason jars. Pop those in the fridge to chill while you tackle the filling—this keeps the crust firm!
- Now for the star: the filling. Get your food processor running, or if you’re using a good blender, toss in that softened cream cheese, the cottage cheese (or yogurt!), your protein powder, sweetener, vanilla, and that splash of milk. Blend it, and I mean blend it, until it is silken smooth. Scrape down the sides at least twice. We want zero lumps in this Protein Cheesecake!
- Time to assemble! Spoon that beautiful, thick filling right over your chilled crusts. If you want to be extra neat—and trust me, you do—grab a piping bag fitted with a large round tip. It makes the jars look professional, like something you’d buy from a fancy bakery.
- Finally, the patience part! Cover those jars and slide them into the cold dark of the fridge. You need a minimum of four hours, but honestly, overnight is where the magic truly solidifies. Once they are set, you can top them with berries or whatever topping you picked out. You can learn more about my favorite simple, delicious desserts while they chill!
Tips for Perfect Protein Cheesecake Assembly
A few little tricks will guarantee these jars are perfect every time. First, when you pack that crust down in the bottom, use the flat back of a spoon or the bottom of a shot glass to really compact it. You want it dense so it doesn’t crumble when you dig in.
Second, if you are cheating and using a standard blender instead of a food processor, don’t be afraid to stop and aggressively scrape the sides upward. If you leave those little pockets of unincorporated cream cheese, you’ll get a surprise lump later. We are aiming for guaranteed smoothness here. Remember, this No Bake version is also referenced over at The Big Man’s World if you want to see other techniques!
Making Variations: Beyond the Basic Protein Cheesecake
So, while these jars are my go-to for speed and convenience, I know some of you out there crave that rich, slightly firmer texture you only get from baking! You can absolutely adapt this Protein Cheesecake base for the oven. If you want to go that route, follow the recipe notes and bake your filling in a prepared springform pan at 325°F until it’s just set, usually around 40 minutes. It gives you that satisfying slice, perfect for pairing with those decadent toppings!
Don’t stop there, either! If you’re looking for a different flavor altogether, swap out that vanilla protein powder for chocolate or even unflavored if you want to make a tart lemon Protein Cheesecake. You can find inspiration for other fluff-style, no-bake treats that use similar principles over on my easy pumpkin fluff recipe page. And hey, if you want to see a baked approach to this, check out how Galley Bites handles their high-protein cheesecake!
Storage and Meal Prep Dessert Success with Protein Cheesecake
This is why these jars are the ultimate Meal Prep Dessert! Because they are served cold and have no eggs in the filling component, they last beautifully. You can keep these little Protein Cheesecake jars sealed tight in the fridge for up to five days. That means you can make a batch on Sunday and have a healthy dessert ready for almost every day!
Now, can you freeze them? Yes, you absolutely can, but I recommend letting them freeze for maybe an hour or two tops before eating if you used a whey protein blend. For long-term storage, make sure the lids are tight—think of it like packing for a trip, which you can read more about in my guide to egg muffin cups for meal prep, as the principles of tight sealing are the same!
Frequently Asked Questions About This Healthy Cheesecake Dessert
I know you probably have a few lingering questions—I did too when I first started experimenting with things like Greek Yogurt cheesecake and swapping out traditional fats! Let’s tackle the most common concerns so you can feel confident whipping these up.
Can I use regular sugar instead of a substitute?
You certainly can, but remember this is designed to be a Low Calorie Cheesecake! If you use granulated white sugar, you’re going to add a lot of extra sugar and calories, and since we aren’t baking, you risk dissolving it unevenly. If you must swap, use powdered cane sugar and blend it really well. Otherwise, stick to the granulated substitutes like erythritol for the best texture and macro count.
Can I use only Greek Yogurt instead of cottage cheese?
Yes! This recipe is flexible, which is how I like it. If you prefer using only Greek Yogurt instead of the cottage cheese, go right ahead. It will result in a slightly lighter, tangier mouthfeel, very similar to a true Gluten Free Protein Desserts style frosting. Just be sure to use 2 full cups of yogurt or adjust your milk slightly if it seems too stiff.
How do I make this compliant for Gluten Free Protein Desserts?
That’s easy, and it’s all about that crust! Graham crackers usually contain wheat, so to make these completely gluten-free, just swap your crust base for gluten-free graham crackers or try crushed almonds mixed with a little coconut oil for a nut-based crust. Everything else in the filling is naturally gluten-free!
Can I use different protein flavors like peanut butter or chocolate?
Oh, definitely! This is where you get creative with your flavor profiles. If you use chocolate powder, you might want to use less almond milk. For a fun twist, you could even try a Berry Protein Cheesecake by using unflavored powder and kicking up the vanilla or adding a little lemon zest. These variations keep things exciting!
You can find a few other quick ideas for making adjustments to my recipes over on my quick and easy breakfast page—the same principles apply to tweaking snacks!
Nutritional Estimates for Your Macro Friendly Protein Cheesecake
I know for many of us, knowing the numbers is almost as important as the taste! Because this Protein Cheesecake fits so perfectly into a fitness plan, here are the general estimates per jar. Remember, ingredients vary a ton based on your protein powder brand and the type of light cream cheese you pick up.
- Serving Size: 1 jar
- Calories: 280
- Protein: 24g
- Fat: 12g (Saturated Fat: 6g)
- Carbohydrates: 22g (Fiber: 2g)
- Sugar: 6g
Keep this in mind—these numbers are averages! If you use a different sweetener or a higher-fat cream cheese, your final count for this great little macro friendly dessert will definitely shift a bit. Plug in your specific brands for the most accurate tracking!
Share Your Creamy Protein Treat Creation
Now that you have the secrets to the best Protein Cheesecake ever, I really, really want to see how you made it your own! Did you stick to the classic berries, or did you go wild with a sugar-free peanut butter swirl? Don’t keep all that creativity to yourself!
When you serve up these Guilt Free Cheesecakes, snap a picture and tag me on social media. I absolutely live for seeing your jars topped with chopped nuts or maybe little slivers of sugar-free dark chocolate. Sharing photos helps me see what you all are loving most, and frankly, it just makes my day!
More importantly, jump down into the comments section below. Tell me your absolute favorite thing about this creamy protein treat. Was it how fast it came together? Did the texture surprise you? Which protein powder gave you the best result? Don’t be shy—I read every single comment. If you have any burning questions that didn’t get answered above, drop them there, and I’ll get back to you right away. If you need me for anything else, you can always reach out via the contact page. Happy tasting!
PrintUltimate No-Bake High-Protein Cheesecake Jars (Low Sugar, Creamy & Meal-Prep Friendly)
Make satisfying, creamy, high-protein cheesecake desserts in convenient jars. This no-bake recipe is low in sugar and perfect for meal preparation.
- Prep Time: 15 min
- Cook Time: 0 min
- Total Time: 4 hr 15 min
- Yield: 4 servings 1x
- Category: Dessert
- Method: No-Bake
- Cuisine: American
- Diet: Low Calorie
Ingredients
- 1 cup crushed graham crackers or gluten-free alternative
- 2 tablespoons melted light butter or coconut oil
- 1 scoop vanilla or unflavored protein powder (whey or casein recommended)
- 8 ounces light cream cheese, softened
- 1 cup low-fat cottage cheese or Greek yogurt
- 1/2 cup powdered erythritol or preferred sugar substitute
- 1 teaspoon vanilla extract
- 1/4 cup unsweetened almond milk (or milk of choice)
- 1/2 cup fresh or frozen mixed berries (for topping)
Instructions
- Prepare the crust: Mix the crushed graham crackers with the melted butter or coconut oil. Press about 2 tablespoons of this mixture into the bottom of four small mason jars. Chill the jars while you prepare the filling.
- Make the protein filling: In a food processor or high-speed blender, combine the softened cream cheese, cottage cheese (or Greek yogurt), protein powder, sugar substitute, vanilla extract, and almond milk. Blend until the mixture is completely smooth and creamy, scraping down the sides as needed.
- Assemble the jars: Spoon or pipe the protein cheesecake filling evenly over the crust layer in each jar. Fill them almost to the top.
- Chill: Cover the jars and refrigerate for at least 4 hours, or preferably overnight, to allow the filling to set firmly.
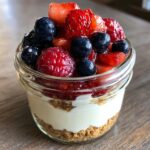
- Serve: Before serving, top each cheesecake jar with fresh or slightly thawed mixed berries.
Notes
- For a thicker, more traditional texture, use casein protein powder or a blend of whey/casein.
- If you prefer a baked version, you can bake the filling in a springform pan at 325°F (160°C) for 40 minutes, then cool completely.
- You can substitute the berries with a sugar-free chocolate drizzle for a different flavor profile.
- This recipe is excellent for macro tracking and fits well into a low-calorie dessert plan.
Nutrition
- Serving Size: 1 jar
- Calories: 280
- Sugar: 6
- Sodium: 250
- Fat: 12
- Saturated Fat: 6
- Unsaturated Fat: 6
- Trans Fat: 0
- Carbohydrates: 22
- Fiber: 2
- Protein: 24
- Cholesterol: 35