

There’s just nothing better than pulling a batch of perfectly cured meat from the machine after a long week, right? Especially coming off hunting season, that sense of accomplishment when you turn fresh game into a delicious, shelf-stable snack is unbeatable. I’ve been perfecting this recipe for years—it’s my go-to for preserving that amazing harvest. Forget those tough, bland store-bought bags; this recipe gives you truly flavorful, tender venison jerky every single time. It’s got that killer sweet heat and smoky profile, and the best part? You don’t need fancy equipment. Whether you rely on a trusty dehydrator or just your oven, I promise you’ll end up with the best homemade jerky you’ve ever tasted.
- Why This Sweet and Smoky Venison Jerky Recipe Works (Primary Keyword Focus)
- Gathering Ingredients for Your Venison Jerky Marinade
- Preparing the Sweet and Smoky Marinade for Venison Jerky
- How to Make Homemade Jerky Using the Dehydrator Jerky Method
- Achieving Perfect Deer Jerky Recipe Results with the Oven Jerky Method
- Determining Doneness: What Great Venison Jerky Looks Like
- Storage and Gifting Tips for Your Make Ahead Protein Snack
- Frequently Asked Questions About Brown Sugar Venison Jerky
- Understanding the Estimated Nutrition of This Venison Jerky
- Share Your Hunting Season Recipes Success
- Understanding the Estimated Nutrition of This Venison Jerky
- Share Your Hunting Season Recipes Success
Why This Sweet and Smoky Venison Jerky Recipe Works (Primary Keyword Focus)
Honestly, I’ve tried a dozen ways to make venison jerky, but this one always wins. It consistently delivers that amazing sweet and smoky flavor without sacrificing texture, which is huge when you’re busy but still want high-quality treats. It really sticks to our philosophy here: great flavor shouldn’t require hours of fuss.
- The blend of brown sugar and liquid smoke is magic for flavor penetration.
- It guarantees pliable, chewy results, not those hard snapping sticks.
- It’s fast enough to make on a weeknight when you realize you’re out of snacks!
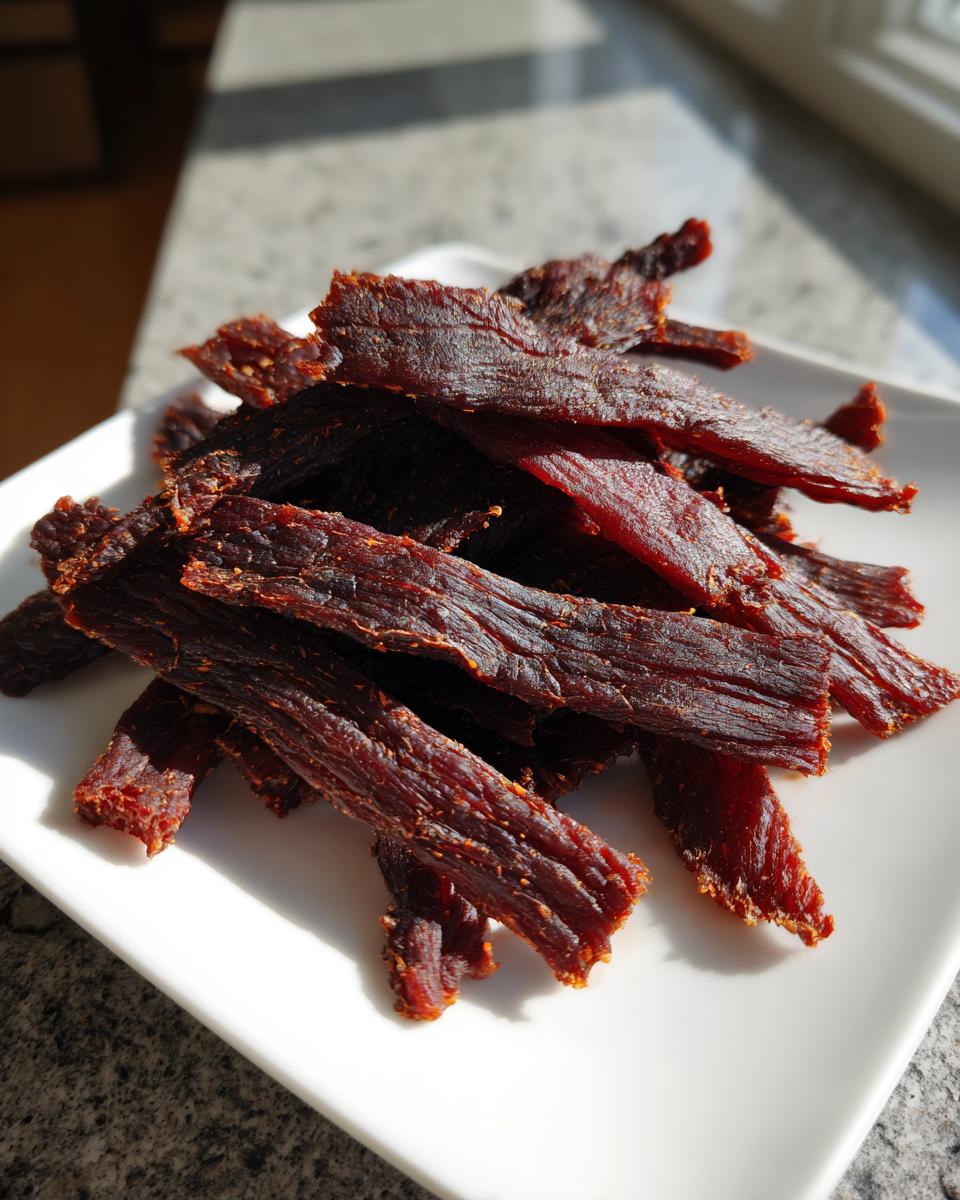
Perfect Texture: Slicing for Ideal Venison Jerky
If you want truly tender venison jerky, the prep work is everything, trust me. First, you absolutely have to trim every speck of fat and silver skin off. Fat just won’t dry right and it goes rancid fast, which ruins a good batch! Next, stick that trimmed meat in the freezer for about 30 to 60 minutes. You want it firm—almost like hard cheese—but not rock solid.
This firmness is your secret weapon for slicing. Use a very sharp knife and cut thin strips, aiming for about 1/8 to 1/4 inch thick. The rule here is vital: always slice *against the grain*. Cutting with the grain leaves you with long, tough fibers that are hard to chew. Cutting across those fibers breaks them up, giving you that satisfying, pull-apart tenderness we all want in great homemade jerky.
Gathering Ingredients for Your Venison Jerky Marinade
Getting the marinade right is where the sweet and smoky magic starts! Before you even look at the spices, make sure your venison is totally clean—I mean *every* bit of fat gone. That good, lean muscle is soaking up flavor, not grease. You’ll need your soy sauce and Worcestershire for that deep umami base, but the brown sugar, that’s what gives us the perfect candied texture. Don’t forget the liquid smoke; it’s the punch of the campfire right in your kitchen! Just measure everything carefully; we want perfect balance for this deer jerky recipe.
Ingredient Notes and Substitutions for Sweet and Smoky Jerky
You can mess with the spices a little, but I always tell people to be careful with the liquid smoke. That stuff is potent! If you’re worried about it overpowering the subtle sweetness from the meat, start with just one tablespoon instead of two, especially if you plan on trying the oven jerky method.
If you happen to be out of smoked paprika, don’t panic! You can sub in regular paprika, but you might want to bump up the liquid smoke just a hair to compensate for that lost smokiness. Also, make sure that brown sugar is packed tightly into your measuring cup; that extra molasses makes a real difference in the final color and depth of flavor we’re going for.
Preparing the Sweet and Smoky Marinade for Venison Jerky
Okay, once you’ve got your beautifully sliced, trimmed venison strips ready to go, it’s marinade time. This is where the real flavor infusion happens! Grab a bowl and get whisking. You need to make sure that brown sugar is completely dissolved into the liquids. If you leave any grainy pockets behind, they won’t break down in the meat and you’ll end up with weird sugary crumbles instead of that tacky, delicious coating we want on our venison jerky.
Once everything is whisked smooth and smells heavenly—all savory, sweet, and smoky—toss it into a big zip-top bag with the meat. Squeeze out most of the air and gently massage the bag until every single piece is glossy and covered. Seriously, get in there and move the meat around!
Now comes the hardest part: waiting. You need to let this marinate in the fridge for a minimum of six hours. But look, if you’re planning ahead—which is always smart for homemade jerky—let it go overnight. Twenty-four hours is even better because the soy sauce and Worcestershire have time to really penetrate deep into the muscle fibers. That long soak is what guarantees flavor in every bite.
When you pull that bag out the next day, you might be tempted just to toss the strips straight onto the trays. Stop right there! This next step is absolutely crucial if you don’t want steamed, leathery jerky. Take every single strip out and use paper towels to pat them as dry as you possibly can. We need surface moisture gone so the drying equipment can actually remove water, not just evaporate liquid from the outside layer. Pat, pat, pat! This quick step makes the difference between great deer jerky recipe results and a batch that just doesn’t firm up correctly.
How to Make Homemade Jerky Using the Dehydrator Jerky Method
If you’re lucky enough to have a dedicated dehydrator, this is absolutely my favorite way to make dehydrator jerky. It provides the most consistent heat source, which is perfect for ensuring your meat dries safely and evenly—and that’s the most important thing when preserving game meat, right?
First, get those racks ready. You want to arrange your patted-dry strips of meat in a single layer on the dehydrator trays. I cannot stress this enough: do not let them touch or overlap. If they are touching, they steam each other instead of drying, and you just won’t get that great texture you’re looking for in amazing homemade jerky.

Set your temperature gauge to 160 degrees Fahrenheit, or about 71 degrees Celsius. That higher initial heat helps kill off any surface bacteria quickly before the longer, slower drying process kicks in. Once everything is loaded up, fire it up!
The time frame is usually between 4 and 8 hours, but you absolutely must check them periodically. You might have a really humid day, or your strips might be thicker than mine, so checking is non-negotiable. As you get toward the 4-hour mark, start pulling out a strip to test every 30 minutes or so. You’re looking for that slight bend without a snap. This is how we nail that perfect chewiness every single time. It takes a little practice, but once you see the results, you’ll understand why I love this method so much. If you want to know more about why we focus on simple, reliable methods that work even for busy schedules, you can check out my philosophy over on the About Us page!
Achieving Perfect Deer Jerky Recipe Results with the Oven Jerky Method
Now, if you’re like me and you occasionally have to make a big batch of deer jerky recipe creations but don’t want to pull out the big dehydrator, the oven is your wonderful backup plan. I know, I know, using an oven for jerky sounds scary—like you’re going to bake it right into a roast, but stick with me here! The trick to making this work beautifully is managing the heat and, most importantly, getting the moist air *out* of the oven cavity.
First thing: find the lowest setting your oven goes to. You want to aim for that sweet spot between 160 and 170 degrees Fahrenheit. If your oven runs hot, you might even need to set it to 150°F and adjust, but usually, the lowest setting gets you close enough. Don’t just crank it to ‘Bake’! You need a temperature that encourages significant drying, not cooking.
Here is the absolute non-negotiable step for the oven jerky method: you have to prop the door open! Seriously, grab a wooden spoon—the handle works perfectly—and wedge it between the door and the frame. This tiny gap is essential because it allows all that moisture evaporating off your strips to escape instead of condensing back onto the meat, which would lead to steamed, rubbery failure.
Lay your patted-dry strips on oven racks. If you can, it’s best to place a sheet of foil or a baking tray on the rack underneath to catch any drips from the marinade. Then, just let them go! Just like with the dehydrator, you’re looking at 4 to 8 hours total.
Start checking them around the 4-hour mark. You’re listening for the same clues: bendability, not breaking. It might take longer than the dehydrator because the oven heat isn’t as direct, but if you keep that door cracked open and the temperature low, you’ll end up with some incredible, melt-in-your-mouth homemade jerky that tastes just as smoky and savory as if it came from a commercial setup!
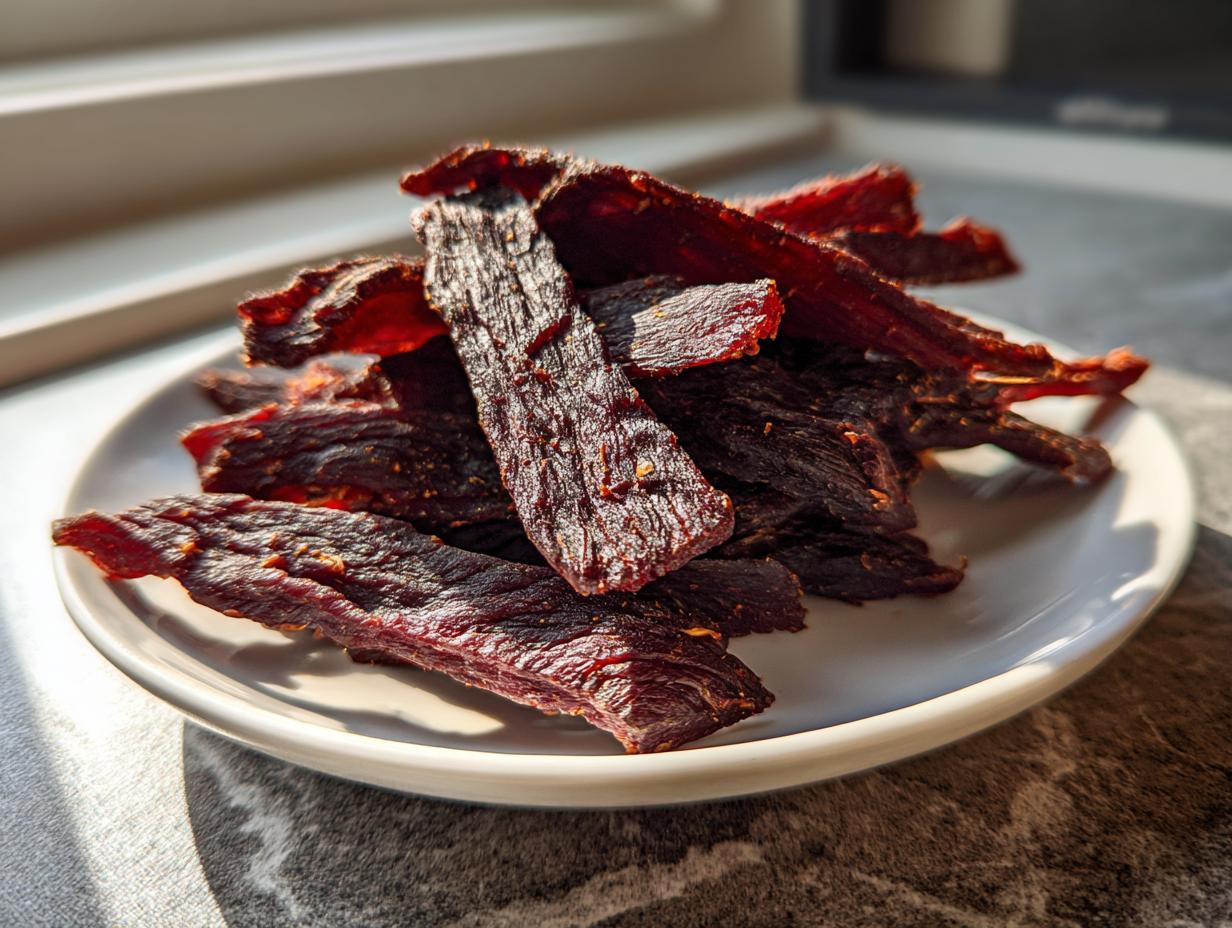
Determining Doneness: What Great Venison Jerky Looks Like
Finally, we get to the moment of truth! You smell that amazing sweet and smoky aroma, and your stomach is rumbling. But how do you know when to pull these strips out of the dehydrator or oven? This isn’t like baking a cake where a toothpick test tells you everything; jerky requires a bit more finesse. You have to learn to listen to—and feel—your meat!
My biggest piece of advice for perfect results in any batch of venison jerky is to pull it slightly *before* you think it’s done. Why? Because it keeps cooking and drying out just a little bit as it cools down on the rack. If you wait until it feels totally dry in the machine, you’ll end up with brittle, snack sticks instead of the pliable meat you want.
Start checking around the 4-hour mark, but approach it like a detective. You need three checks to confirm that great texture:
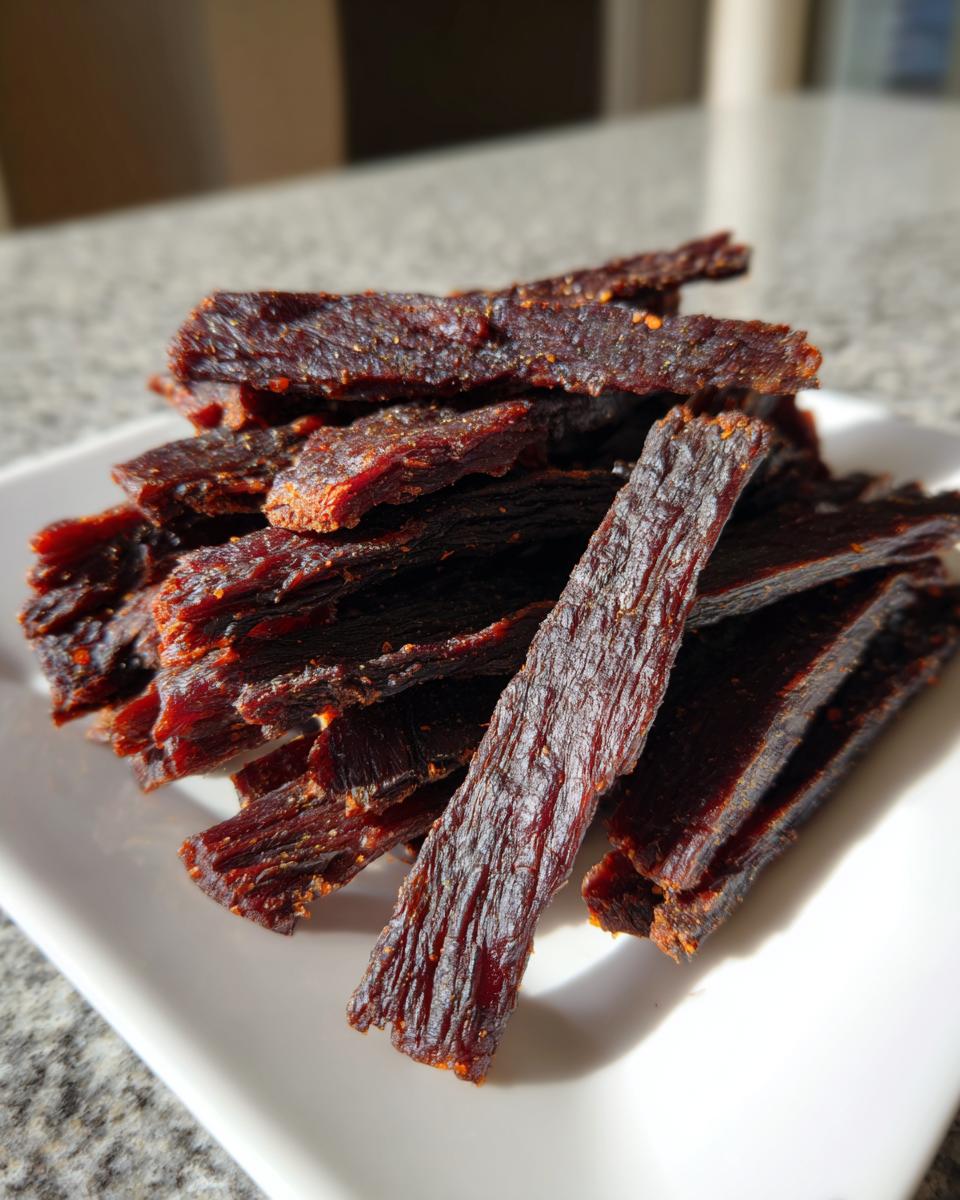
- The Look Test: Does the meat look dry on the surface? There shouldn’t be any obvious glistening moisture puddles remaining, even where the strips curved over the racks.
- The Bend Test: This is the best indicator! Take one strip that looks about right and let it cool for just a minute so you don’t burn yourself. Now, try to bend it in half. It should bend significantly—it should be pliable and chewy—but it should also show a small crack, or a slight splintering, right in the middle. That crack is exactly what we look for!
- The Snap Test (The Warning Sign): If the strip breaks cleanly in two the second you try to bend it, you’ve gone too far! That means it’s over-dried and will be too hard to enjoy.
Once you’ve confirmed a few strips have that perfect pliable-but-cracking texture, turn off your equipment immediately. You need to get that jerky off the heat and onto a clean wire cooling rack. Seriously, don’t stack it up on a plate! It needs air circulation all the way around to stop the cooking process and allow any residual internal moisture to evaporate evenly. Let it cool completely—and I mean totally room temperature—before you even think about testing the final texture or putting it into storage containers. This cooling step sets the jerky perfectly for long-term storage!
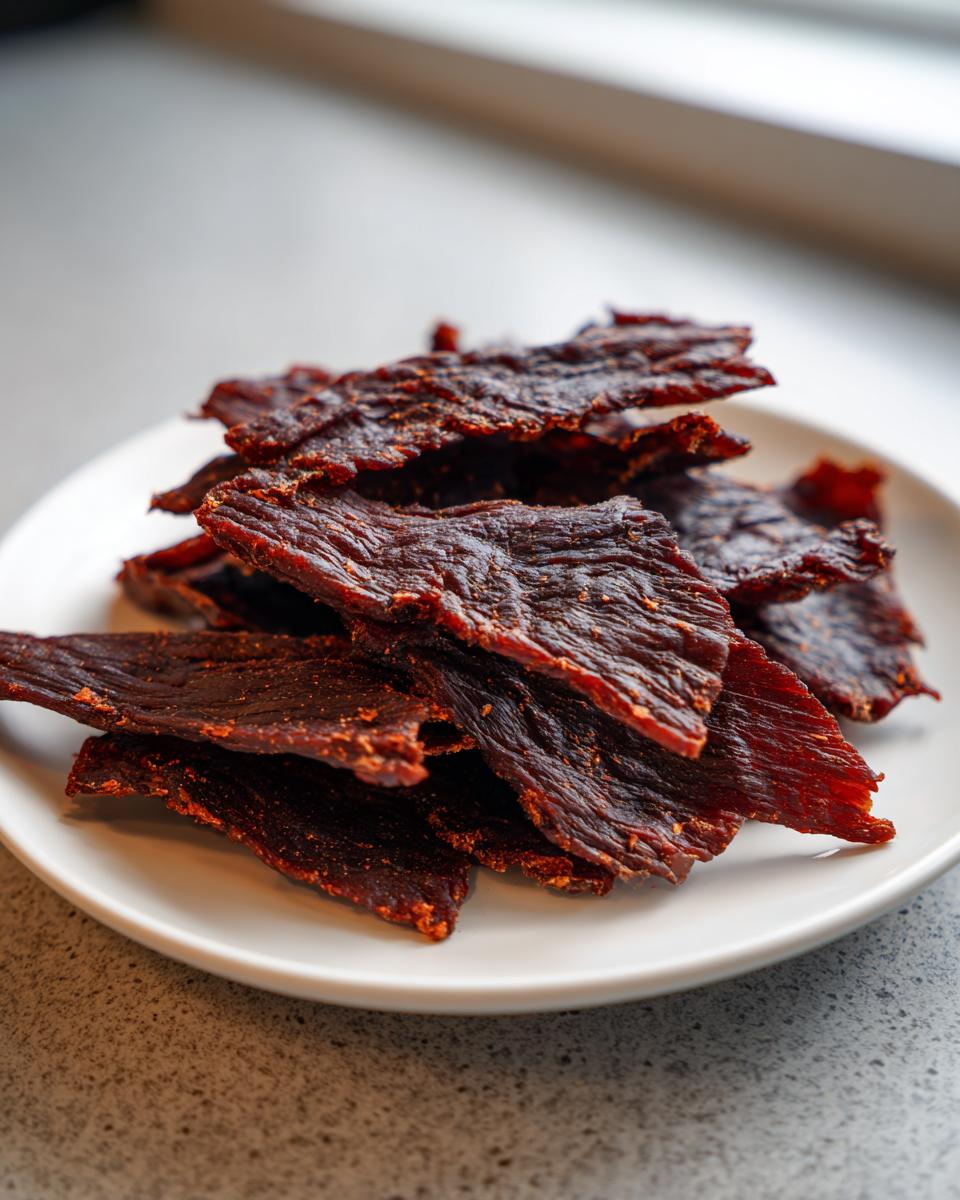
Storage and Gifting Tips for Your Make Ahead Protein Snack
You did it! You managed to turn that beautiful venison into perfectly cured, smoky snacks. Now, the goal is keeping them delicious until you’re out in the field or until it’s time to share them with friends. Because we painstakingly dried them correctly, this homemade jerky is a fantastic make ahead protein snack; it’s meant to last!
First things first: cooling! I mentioned this before, but I’m saying it again because it’s vital for storage: the jerky must be completely, 100% cool to room temperature before it goes into *anything* airtight. If you bag it warm, you trap residual heat and moisture, and trust me, that leads to sweatiness and potential spoilage. Give it at least an hour on that wire rack to fully shed its heat.
For short-term storage, like keeping it in your truck console or packing it for a weekend hunt, a simple zip-top bag works just fine for a week or two, provided you used the 160°F setting and it passed the bend-and-crack test. But if you want this venison jerky to hang around for hunting season prep or longer trips, move up to airtight containers.
If you’re planning way ahead, the freezer is your best friend. Vacuum sealing the completely cooled jerky is the ultimate way to preserve that fresh flavor for months! They come right back to perfect texture once they thaw back to room temperature.
Making Deer Jerky Recipe Gifts for Fellow Hunters
This stuff makes the best practical gift, hands down. Everyone who loves the outdoors appreciates quality, handmade provisions. When packaging these up for friends or family—maybe as a thank you after a successful trip or just because—presentation matters! Gather the strips and place them loosely in nice mason jars or small burlap sacks. Skip the airtight seals if you’re gifting them immediately or gifting them to people who will eat them within a week.
Why skip the airtight seal for gifts? Because if there is *any* possible chance that a piece wasn’t dried to a precise 100% perfection, trapping that air can cause issues over time when humidity shifts. For sure-fire gifting safety, cool it completely, then place it in decorative, breathable packaging. If you’re worried about anything, treat it like my notes suggest: vacuum seal it tight! Either way, your recipients will be thrilled to have this quality sweet and smoky jerky ready to go when the season kicks off.
Frequently Asked Questions About Brown Sugar Venison Jerky
I get so many questions about handling game meat, and that’s completely fair! Working with venison requires a little extra attention compared to beef, but once you get this simple deer jerky recipe down, you’ll never look back. Here are some of the things I hear most often from folks making their first batches of brown sugar venison jerky.
Can I use other cuts of meat or even beef instead?
You absolutely can substitute! If you’re not heading out hunting but still want that smoky flavor, this recipe works beautifully for beef, elk, or even turkey breast. Just remember that beef tends to have a bit more internal fat than venison, so take the time to trim it meticulously—that’s the key to success for any sweet and smoky jerky. If you have any questions about how to get in touch with me for more recipe tweaks, you can always send a message through my contact page!
Help! My jerky is still sticky on the outside even after the oven method. What went wrong?
Ugh, that sticky feeling is the worst! That usually means that you needed more venting during the drying process, especially if you used the oven. If the moisture can’t escape fast enough, it just sits there, creating a gummy surface layer instead of drying down into that tacky shell. Next time, make sure you had that oven door wedged open a little wider. For your next batch of homemade jerky, make sure you really patted those strips dry before they even hit the racks, too!
How can I amp up the heat level?
I love a bit of kick in my snacks, so I totally get this question! If you want to spice up your venison jerky beyond the little bit of cayenne I suggested, you have a couple of great options. You can double the cayenne pepper, that’s the easiest way. OR, and this is what I prefer for a deeper flavor heat, add a teaspoon of chipotle powder along with the smoked paprika. That gives you heat *and* even more smoke!
Safety Check: Must I fully dry the venison jerky?
This is the most important question, and the answer is a huge, resounding yes. Because we are using lean game meat and relying on low, slow heat methods like the dehydrator jerky setting or the oven method, you must ensure the meat reaches a safe internal drying level. Drying isn’t just about texture; it’s about food safety! If the meat isn’t dried down enough, it won’t be shelf-stable and could develop spoilage over time.
You need to treat that drying time as non-negotiable. If your jerky still bends easily without cracking after 8 hours, keep going! Only when the strips are pliable but crack slightly in the center (and certainly feel dry to your fingertips) are they safe and ready for storage. Never guess on this—it’s the difference between a delicious snack and a wasted batch.
Understanding the Estimated Nutrition of This Venison Jerky
Since this is an incredible source of protein and we trim all that excess fat out, it makes for a fantastic, guilt-free snack, especially when you’re looking for high-protein options for a hike or quick fuel. I always like to give a general idea of what you’re putting into your body when you grab one of these strips.
Keep in mind that these numbers are just my best estimate when using the specified ingredients and after the meat has thoroughly dried down. Your actual counts might swing a little based on how much moisture is left or the exact brands of soy sauce you use. This makes a huge batch, so remember these stats are just for a single one-ounce serving.
For one ounce serving, you’re looking at roughly:
- Calories: About 95
- Protein: A solid 16 grams!
- Fat: Very low, just around 1 gram total.
- Carbs: Only about 4 grams, most of that coming from that sugary marinade.
- Sodium: This is higher because of the soy sauce and Worcestershire blend, sitting around 450mg.
It is such a powerhouse of protein, and it’s so much better than the highly processed snack bars you grab in a pinch. It truly fits that niche for a clean, make ahead protein snack that you feel good about eating!
Share Your Hunting Season Recipes Success
Well, friend, that’s everything I know! We’ve gone from beautiful, raw strips of venison all the way to perfectly dried, smoky, sweet little treasures. I really hope you give this venison jerky recipe a try this fall—or any time you have game meat to process. There is nothing quite like that first taste of your own hand-made product!
When you finally pull your batch out of the oven or that dehydrator, please come back here and let me know how it turned out for you. Did you go for the oven method or the dehydrator? Did you sneak a little extra cayenne into your marinade? Leave a comment below with your rating and any survival tips from your own kitchen adventures! I love hearing how you’re all making these simple recipes your own. And if something wasn’t quite right, please don’t hesitate to look up our privacy policy to see how we handle feedback, or reach out directly if you need help troubleshooting. Happy curing!
Understanding the Estimated Nutrition of This Venison Jerky
Since this is an incredible source of protein and we trim all that excess fat out, it makes for a fantastic, guilt-free snack, especially when you’re looking for high-protein options for a hike or quick fuel. I always like to give a general idea of what you’re putting into your body when you grab one of these strips.
Keep in mind that these numbers are just my best estimate when using the specified ingredients and after the meat has thoroughly dried down. Your actual counts might swing a little based on how much moisture is left or the exact brands of soy sauce you use. This makes a huge batch, so remember these stats are just for a single one-ounce serving.
For one ounce serving, you’re looking at roughly:
- Calories: About 95
- Protein: A solid 16 grams!
- Fat: Very low, just around 1 gram total.
- Carbs: Only about 4 grams, most of that coming from that sugary marinade.
- Sodium: This is higher because of the soy sauce and Worcestershire blend, sitting around 450mg.
It is such a powerhouse of protein, and it’s so much better than the highly processed snack bars you grab in a pinch. It truly fits that niche for a clean, make ahead protein snack that you feel good about eating!
Share Your Hunting Season Recipes Success
Well, friend, that’s everything I know! We’ve gone from beautiful, raw strips of venison all the way to perfectly dried, smoky, sweet little treasures. I really hope you give this venison jerky recipe a try this fall—or any time you have game meat to process. There is nothing quite like that first taste of your own hand-made product!
When you finally pull your batch out of the oven or that dehydrator, please come back here and let me know how it turned out for you. Did you go for the oven method or the dehydrator? Did you sneak a little extra cayenne into your marinade? Leave a comment below with your rating and any survival tips from your own kitchen adventures! I love hearing how you’re all making these simple recipes your own.
We built this space to be a place where busy folks can find joy in their cooking, and that community sharing is such a big part of it. If you run into any issues or have questions down the line, don’t hesitate to check out the answers to common problems in the FAQ section! And if you need to review our usage policies or guidelines on sharing content, you can always find that information in our privacy policy. Happy curing!
PrintSweet and Smoky Venison Jerky
Make flavorful homemade venison jerky using a simple sweet and smoky marinade. This recipe works well for dehydrator or oven drying.
- Prep Time: 20 min
- Cook Time: 6 hr
- Total Time: 6 hr 20 min
- Yield: About 1 pound 1x
- Category: Snack
- Method: Dehydrating or Oven Drying
- Cuisine: American
- Diet: Low Fat
Ingredients
- 2 lbs venison, trimmed of all fat
- 1/2 cup soy sauce
- 1/4 cup Worcestershire sauce
- 1/4 cup brown sugar, packed
- 2 tablespoons liquid smoke
- 1 tablespoon smoked paprika
- 1 teaspoon black pepper, ground
- 1 teaspoon garlic powder
- 1/2 teaspoon onion powder
- 1/4 teaspoon cayenne pepper (optional)
Instructions
- Trim all fat and silver skin from the venison. Freeze the meat for 30 to 60 minutes until firm but not frozen solid.
- Slice the venison thinly against the grain into strips about 1/8 to 1/4 inch thick. Uniform thickness helps with even drying.
- In a bowl, whisk together the soy sauce, Worcestershire sauce, brown sugar, liquid smoke, smoked paprika, black pepper, garlic powder, onion powder, and cayenne pepper until the sugar dissolves.
- Place the sliced venison into a large zip-top bag or non-reactive container. Pour the marinade over the meat, ensuring all pieces are coated.
- Refrigerate and marinate for a minimum of 6 hours, or preferably overnight (up to 24 hours) for deeper flavor penetration.
- Remove the meat from the marinade and pat the strips dry with paper towels. This step is crucial for safe drying.
- Arrange the strips on dehydrator trays or oven racks, ensuring they do not overlap.
- For a dehydrator: Set the temperature to 160 degrees Fahrenheit (71 degrees Celsius) and dry for 4 to 8 hours, checking for doneness periodically.
- For an oven: Set the oven to its lowest temperature, ideally between 160 and 170 degrees Fahrenheit (71 to 77 degrees Celsius). Prop the oven door open slightly with a wooden spoon to allow moisture to escape. Dry for 4 to 8 hours.
- The jerky is done when it is dry to the touch, pliable, and bends without breaking, though it should crack slightly in the middle.
- Cool the jerky completely on a wire rack before storing.
Notes
- For gifting, cool the jerky completely, then store in airtight containers or vacuum-sealed bags. Properly dried jerky can last for several weeks at room temperature or months if frozen.
- If you prefer a less intense smoke flavor, reduce the liquid smoke to 1 tablespoon.
- If you do not have a dehydrator, the oven method works well for making homemade jerky.
Nutrition
- Serving Size: 1 ounce
- Calories: 95
- Sugar: 3
- Sodium: 450
- Fat: 1
- Saturated Fat: 0.5
- Unsaturated Fat: 0.5
- Trans Fat: 0
- Carbohydrates: 4
- Fiber: 0.5
- Protein: 16
- Cholesterol: 45