

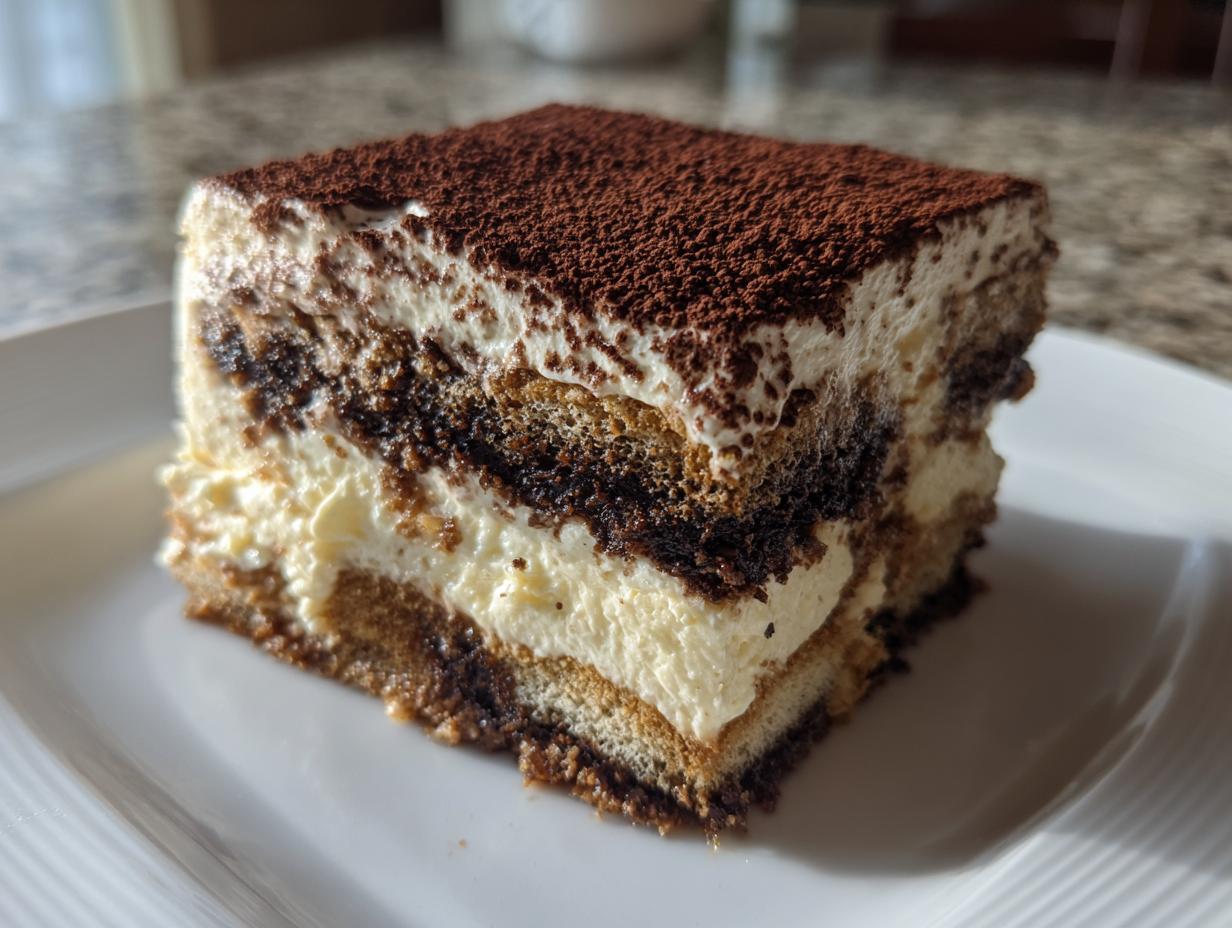
Sometimes, you just crave two incredible desserts at once, right? That’s the story behind dessert fusion—taking two superstars and making them even better together. My goal, rooted in the belief that no one should sacrifice joy for a busy schedule, is to bring that showstopping moment to your table without turning your evening into an all-day ordeal. That’s why this tiramisu cheesecake is my absolute pride and joy. It captures the elegant, coffee-soaked sophistication of traditional tiramisu and marries it with the rich, velvety structure of a perfect New York-style cheesecake. The best part? We’re skipping the oven entirely! This decadence is achieved entirely in the fridge, making it the ultimate easy make ahead dessert for when you want to impress.
- Why This No Bake Tiramisu Cheesecake is Your New Favorite Dessert
- Gathering Ingredients for Your Decadent Tiramisu Cheesecake Recipe
- Step-by-Step Instructions for the No Bake Tiramisu Cheesecake
- Tips for the Best Tiramisu Cheesecake Results
- Serving Suggestions for Your Layered Cheesecake Recipe
- Storage and Make-Ahead Convenience for Your Tiramisu Cheesecake
- Variations: Baked Tiramisu Cheesecake and Other Twists
- Frequently Asked Questions About Tiramisu Cheesecake
- Sharing Your Culinary Creations
Why This No Bake Tiramisu Cheesecake is Your New Favorite Dessert
I get it—weeknights are hectic, but that doesn’t mean your dessert spread has to feel drab. This tiramisu cheesecake is the showstopper that requires zero oven time, which is a huge win, especially when hosting. It truly stands out from the crowd because of its incredible flavor combo and simplicity.
- It delivers intense coffee and creamy notes without any fuss.
- You can prep the whole thing the day before your party!
- It has that luxurious, decadent feel you want for a special dinner.
Effortless Elegance: The No Bake Tiramisu Cheesecake Appeal
The magic here is avoiding the oven entirely. Baking can sometimes make a cheesecake either crack or toughen up, but since this is a no bake tiramisu cheesecake, the texture when it sets overnight is unbelievably silky. It gives you all the richness of a classic dessert but fits perfectly into a chaotic schedule. This is hands-down my favorite easy make ahead dessert.
Gathering Ingredients for Your Decadent Tiramisu Cheesecake Recipe
Okay, since this is a layered masterpiece, the ingredient prep is almost as important as the mixing! Don’t let the list scare you; these are all simple items you probably have on hand, or can grab easily. Getting the temperatures and consistencies right—like making sure that espresso is fully cooled—is how we guarantee that beautifully smooth, silky mascarpone filling when we put this tiramisu cheesecake together. Let’s gather our components!
For the Chocolate Wafer Crust
- 1 1/2 cups chocolate wafer crumbs (Graham crackers work if you’re in a pinch, but chocolate is so much better here!)
- 1/4 cup granulated sugar
- 6 tablespoons unsalted butter, melted
For the Espresso Soak and Ladyfingers
This is where the real tiramisu flavor kicks in, so pay attention!
- 1 cup strong brewed espresso or coffee, cooled completely
- 2 tablespoons coffee liqueur (like Kahlua or Tia Maria), optional, but so good
- 1 package (3 ounces) ladyfingers
For the Silky Mascarpone Filling
We need that luxurious, cloud-like texture, so make sure your dairy fats are ready!
- 2 packages (8 ounces each) cream cheese, softened so it’s pliable
- 1 cup powdered sugar (nothing worse than grainy cheesecake!)
- 1 teaspoon vanilla extract
- 1 1/2 cups cold heavy whipping cream
- 8 ounces mascarpone cheese, softened just slightly
- Unsweetened cocoa powder, for dusting later (don’t skip this step!)
Step-by-Step Instructions for the No Bake Tiramisu Cheesecake
Alright, now for the fun part! This is where we assemble our gorgeous tiramisu cheesecake. Remember, since we aren’t baking, technique is still key to getting that amazing structure. We want firmness, but we absolutely must maintain that airy, creamy texture. Follow these steps exactly, and I promise this will be the most elegant, fuss-free dessert you’ve made all year. Honestly, if you can manage this, you can handle any easy make ahead dessert!
Creating and Chilling the Crust
First things first, we build the base. Take those mixed chocolate wafer crumbs, sugar, and melted butter and stir them together until it feels like wet sand. Now, press that mixture firmly into the bottom of your 9-inch springform pan. Use the bottom of a measuring cup or glass to really pack it down tight—we want this crust sturdy to hold up our creamy layers. Pop that pan into the fridge for at least 15 minutes while you tackle the espresso soak. That quick chill helps it set up beautifully.
Preparing the Espresso Soaked Ladyfinger Layer
Pour that cooled espresso (and liqueur, if you’re using it!) into a shallow dish. This is critical: you need to dip your ladyfingers *quickly*. Seriously, less than a one-second dunk on each side. If you let them sit, they soak up too much liquid, and you end up with mush instead of defined layers in your tiramisu cheesecake. Arrange a single, neat layer of those lightly kissed ladyfingers right over your chilled crust base.
Mixing the Creamy Mascarpone Cheesecake Filling
We handle the filling in two main phases to maximize airiness. First, grab your large bowl and beat the softened cream cheese until it’s completely smooth—no lumps allowed! Beat in the powdered sugar and vanilla until everything is just incorporated. Next, in a *separate* bowl, take that cold heavy whipping cream and beat it until you have stiff peaks. That means when you lift the whisk, the cream holds its shape perfectly! Gently fold that whipped cream into the cream cheese mixture. Now, gently, gently, fold in your softened mascarpone cheese. Be gentle here! We are aiming for that luscious, silky mascarpone filling; overmixing deflates the air we worked so hard to whip in.
Layering and Setting the Tiramisu Cheesecake
Time to layer! Spread exactly half of your beautiful, fluffy filling evenly over that first layer of espresso-soaked ladyfingers. Then, create your second layer of soaked ladyfingers right on top of that cream layer. Finally, spoon the remaining filling over the top and use an offset spatula to create a nice, smooth surface. Now comes the hardest part: waiting! Cover the pan loosely with plastic wrap and stick it in the fridge. You must let it chill for a minimum of 6 hours, but trust me, overnight is when this coffee flavored cheesecake really locks in its flavor and firmness.
Tips for the Best Tiramisu Cheesecake Results
Even though this is a no-bake recipe, little details can take your tiramisu cheesecake from great to absolutely unforgettable. Because we are relying on chilling time instead of heat to set things, the initial texture of your ingredients matters so much. Stick with these little tricks, and you’ll nail that perfect, melt-in-your-mouth texture every time you make this mascarpone coffee dessert.
Achieving Maximum Coffee Flavor in Your Tiramisu Cheesecake
I know the recipe calls for espresso, but if you want that deep, robust flavor that screams traditional tiramisu, you might need a little boost. The little secret is adding a teaspoon of instant espresso powder right into the filling mixture itself, not just the soak! It intensifies the coffee notes beautifully without adding extra liquid, ensuring your coffee flavored cheesecake is bold.
Ensuring a Firm and Silky Mascarpone Coffee Dessert
Remember how I stressed whipping the heavy cream until stiff peaks form? That’s non-negotiable for a firm set! The cream has to be ice cold before you start whipping it. Also, when it comes to the mascarpone, make sure it’s just softened—not warm or runny. If it’s warm, it won’t incorporate smoothly and you’ll lose all that gorgeous air we whipped into the cream. That balance keeps the silky mascarpone filling stable.
Serving Suggestions for Your Layered Cheesecake Recipe
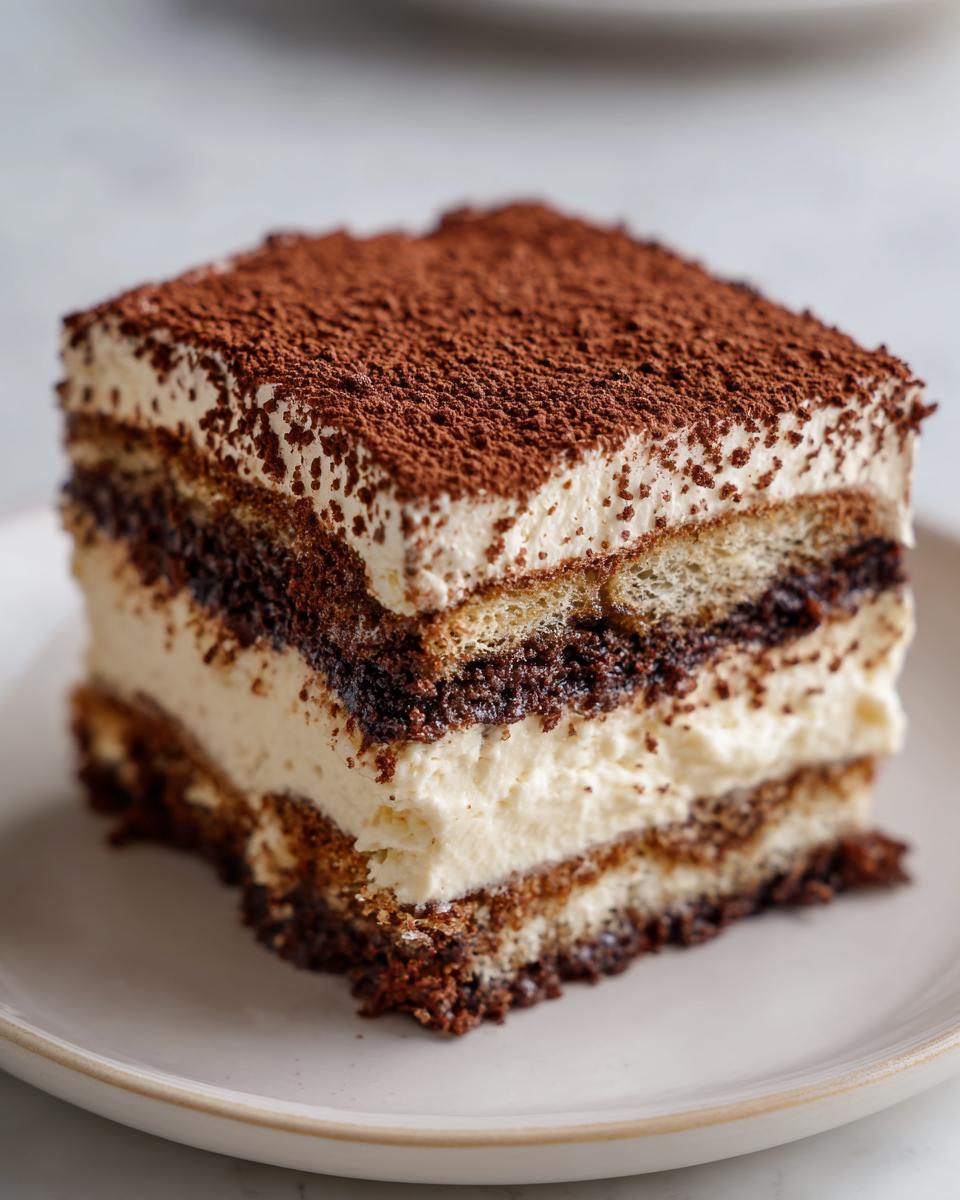
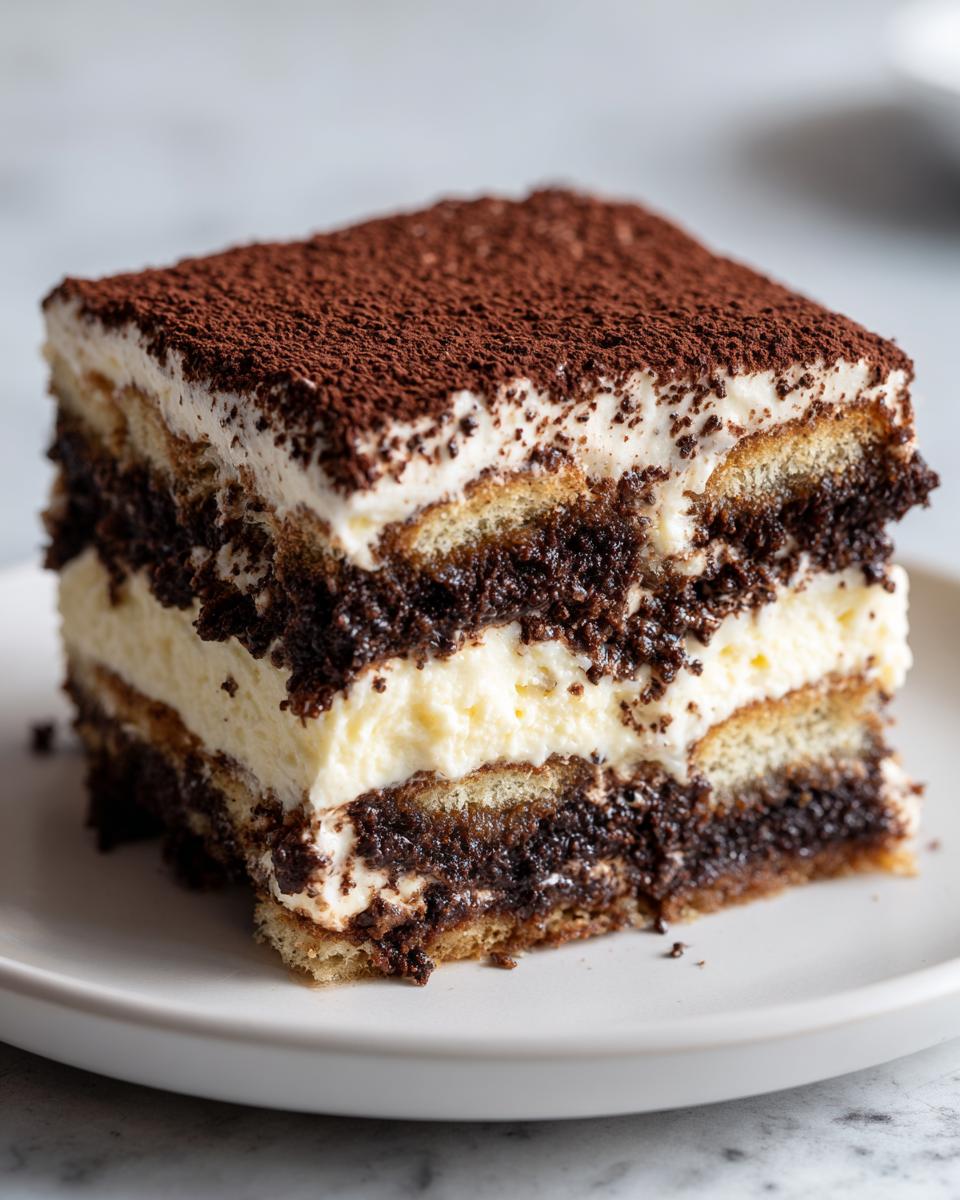
Once that beautiful tiramisu cheesecake has set properly—and please, let it set overnight if you possibly can!—the presentation is what really makes this impressive. Since we didn’t use a baked crust, you get this gorgeous, clean edge, which is perfect for showing off those lovely layers of coffee-dipped ladyfingers when you slice into it.
The very last step, dusting the top, is hands-down my favorite moment. Use a fine-mesh sieve and dust it liberally, but evenly, with unsweetened cocoa powder right before you pierce that springform ring. Don’t dust it too early! The moisture from the fridge will start to melt the cocoa powder into the top layer of cream cheese, making it look muddy instead of that beautiful, velvety brown finish we want.
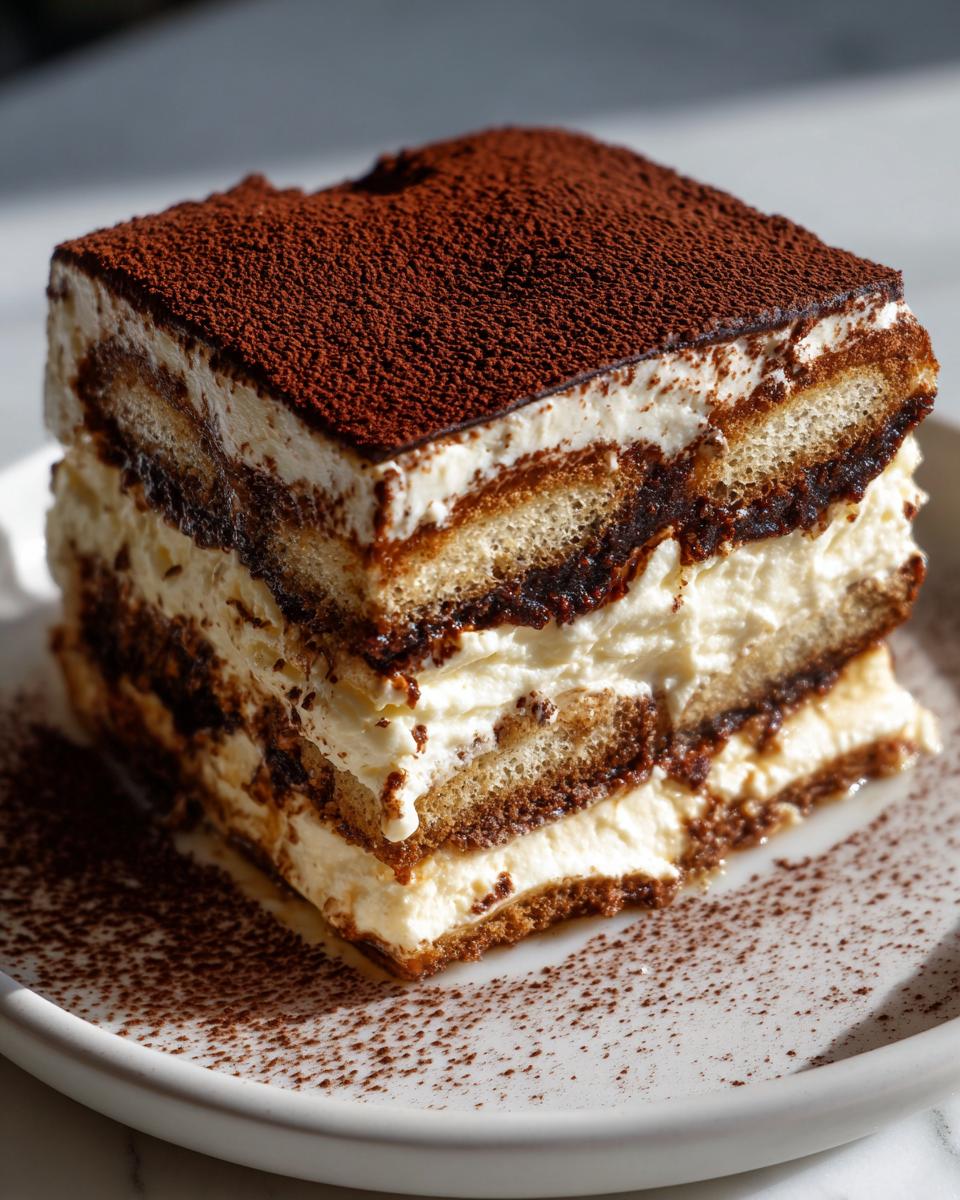
When it comes to slicing this layered cheesecake recipe, presentation is everything. We need clean cuts to show off the structure. Do this: dip a long, sharp knife into a tall glass of very hot water, dry the blade completely with a clean dish towel, and then make your cut. Wipe the knife clean between every single slice! It sounds tedious, but it’s the secret to maintaining those crisp lines, making your coffee flavored cheesecake look like it came straight from a pastry shop. It’s just as elegant as my Italian Love Cake, just in a different format.
Storage and Make-Ahead Convenience for Your Tiramisu Cheesecake
This is one of the biggest selling points for this dessert, truly! If you’re looking for an easy make ahead dessert that actually tastes better the longer it sits, you’ve found it. Since this tiramisu cheesecake relies on chilling to set those lovely layers, making it ahead isn’t just convenient—it’s required for the best texture.
I always plan to make this at least a full day before I serve it. You need that time for the espresso soak to fully meld with that rich mascarpone filling. Cover the springform pan tightly with plastic wrap—make sure the wrap isn’t touching the cocoa powder dusting yet!—and place it in the refrigerator. It will keep beautifully for up to three days. After day three, the ladyfingers might start getting a little too soft for my liking, so aim for that 24- to 48-hour window.
What about freezing? That’s a great question for a dessert this rich! Good news: because this is a no bake tiramisu cheesecake based on cream cheese and heavy cream, it freezes surprisingly well, provided you wrap it properly. Take it out of the springform pan first, place it on a sturdy cardboard circle, and wrap the entire thing tightly in plastic wrap, followed by a layer of aluminum foil. Pop it in the freezer for up to a month. When you’re ready to serve, let it thaw gently in the refrigerator overnight. Just remember to add that final, gorgeous dusting of cocoa powder only after it’s fully thawed!
Variations: Baked Tiramisu Cheesecake and Other Twists
I absolutely adore this no bake tiramisu cheesecake because it’s so simple, but I know some of you really prefer that dense, classic structure you only get from baking. If you’re craving a slice of that baked tiramisu cheesecake texture, you can certainly adapt this recipe! It means shifting gears quite a bit, but the flavor profile remains the same luxurious coffee and mascarpone dream.
How to Turn This Into a Baked Tiramisu Cheesecake
If you want to bake this, you’ll need to mix in structural ingredients. The main change is adding two large eggs (room temperature!) to the filling mixture right before you pour it over the ladyfingers. You’ll need to bake this gently in a water bath—a wet, hot environment—to prevent cracks. Bake at 325°F for about 55 to 65 minutes, or until the edges are set but the center jiggles just a bit. Then, you must cool it slowly on the counter before chilling, which is why I still lean towards the no-bake version when time is tight!
Crust Swaps for a Deeper Flavor
That chocolate wafer crust is fantastic, right? It mimics the cocoa element perfectly. But if you want to experiment, try grinding up some chocolate wafer cookies that have espresso powder already mixed in—you can find those, or just add a teaspoon of the instant espresso powder right into your crust mix! Another great option for a more Italian vibe is crushing some store-bought, plain biscotti. It gives a crunchier texture, though you might need a touch more melted butter to hold it together since biscotti are drier.
If chocolate isn’t your main vibe, a classic graham cracker crust works fine, but you lose that deep background note. Honestly, for this specific flavor fusion, chocolate is the way to go, similar to how I always use chocolate in my chocolate crinkle cookies recipe—it just amplifies everything else.
Spicing Up the Coffee Soak
We talked about the optional coffee liqueur, but there are other ways to play with the soak! If you aren’t keen on alcohol but want complexity, try adding a splash of pure almond extract to the cooled espresso soak instead of rum or liqueur. Almond pairs beautifully with coffee and creamy dairy. For a richer Italian feel, a tiny splash of Marsala wine instead of coffee liqueur works wonders, too. Just remember, whatever you use in that soak, use it sparingly so those ladyfingers don’t turn to mush!
Frequently Asked Questions About Tiramisu Cheesecake
I know when you nail a recipe like this tiramisu cheesecake, you start thinking about all the little details and potential substitutions. Don’t worry about tweaking things; I’ve tried most variations while finalizing this process! Here are the questions I get asked most often about assembling this decadent cheesecake fusion.
Can I make this Tiramisu Cheesecake Recipe without coffee?
That’s tough! Honestly, coffee—that strong espresso flavor—is what defines the tiramisu side of this equation. If you absolutely cannot have caffeine or coffee flavor, you can swap the espresso soak for strongly brewed black tea, like Earl Grey, or just use plain cold milk if you want a very mild base. However, the resulting dessert will be more of a vanilla or chocolate cream-cheese hybrid than a true tiramisu cheesecake. To keep some of that Italian depth, try adding a splash of almond extract instead of liqueur to your soak liquid to give it a different kind of aromatic complexity.
What is the best way to get a clean slice of this Layered Cheesecake Recipe?
This is so important for presentation because we want those gorgeous layers to show! For the cleanest cuts on this layered cheesecake recipe, you need heat and sharpness. Don’t just use a regular kitchen knife. Grab your sharpest, thinnest slicing knife. Dip the blade completely into a tall glass of very hot water. Wipe the entire blade completely dry with a clean towel. Make your cut, then immediately repeat the hot water and wipe routine before making the next slice. This process melts the cream just enough so it doesn’t drag, leaving you with perfect, velvety slices every time.
Is the coffee liqueur necessary in the espresso soak?
It’s not strictly necessary, but wow, does it add depth! The liqueur adds a slight alcoholic bite that cuts through the richness of the heavy cream and mascarpone, balancing the whole dessert out beautifully. If you are avoiding alcohol for any reason, don’t just skip it! That liquid needs flavor. Instead, I suggest you add an extra teaspoon of instant espresso powder right into the cooled espresso for a stronger coffee flavor, or use a pure vanilla extract if you want a sweeter, non-coffee note in that soak. It keeps the moisture there while enhancing the overall flavor of your cream cheese mascarpone dessert.
Sharing Your Culinary Creations
Alright, my friends, we’ve made it to the end! You’ve crafted a masterpiece that brings together the best of two dessert worlds—it’s truly a Creamy Italian Cheesecake hybrid that everyone dreams about. Now that you’ve had that first perfect, cocoa-dusted bite of your tiramisu cheesecake, I want to hear all about it!
This community is built on sharing what works, what surprises you, and the little adjustments you might try next time. Did someone ask for the recipe before you even finished dusting the cocoa? Tell me!
Please, take a moment to leave a star rating right below this section. Knowing how your no bake tiramisu cheesecake turned out helps me know I’m giving you recipes that truly deliver on flavor and ease. And if you snapped a photo of that beautiful cross-section showcasing those coffee-soaked layers, tag me on social media! I absolutely love seeing your kitchens transformed into Italian pastry shops.
If you ran into any questions while assembling or chilling, or if you made a killer variation, drop a comment below. If you need to get in touch directly for a dedicated question, you can always reach out through my contact page. Happy baking—or rather, happy chilling!
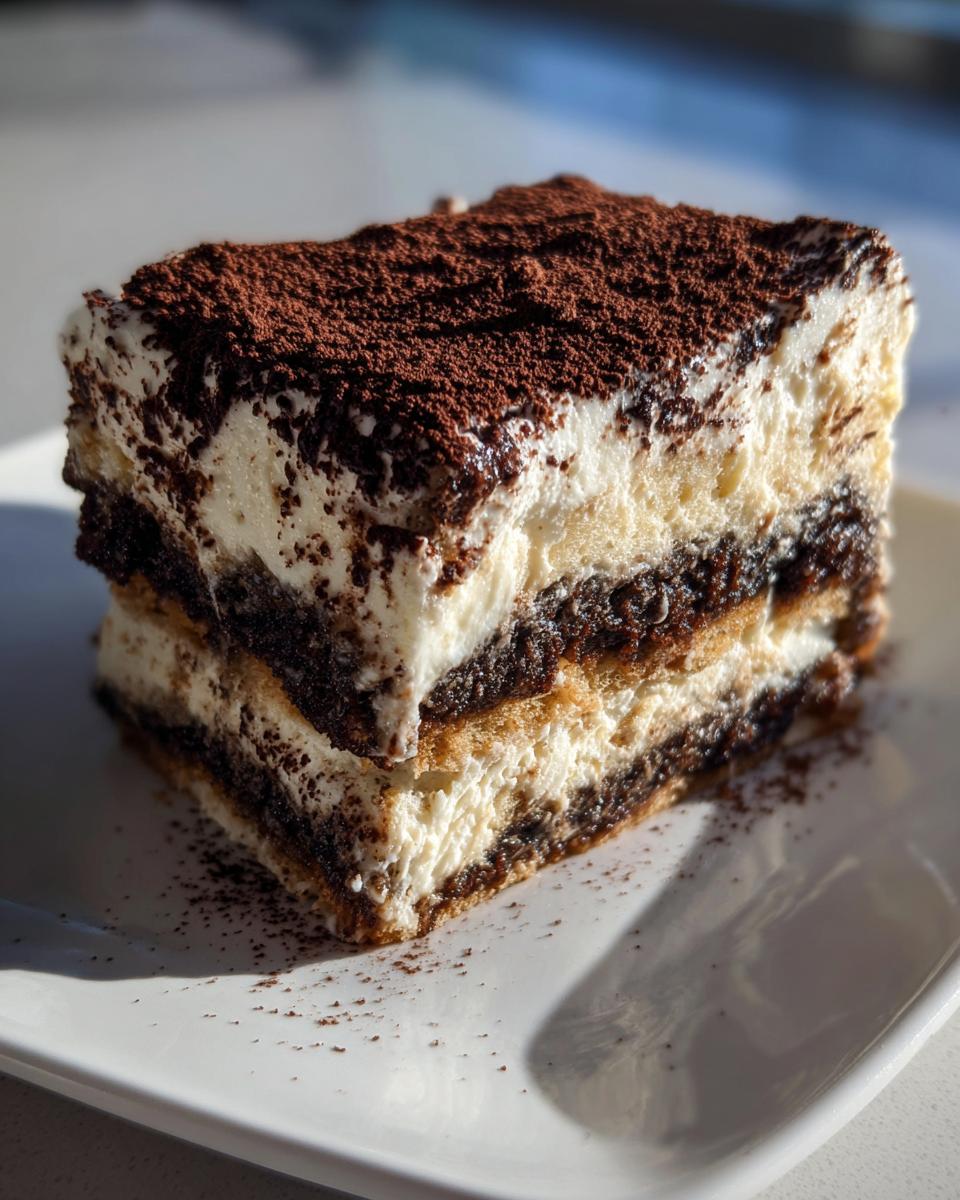
PrintDecadent No-Bake Tiramisu Cheesecake
Create this luxurious Tiramisu Cheesecake fusion dessert. It combines a creamy mascarpone filling with espresso-soaked ladyfingers, offering the indulgence of cheesecake with classic Italian tiramisu flavor. This no-bake recipe is simple to prepare ahead for your next dinner party.
- Prep Time: 30 min
- Cook Time: 0 min
- Total Time: 6 hr 30 min
- Yield: 10 servings 1x
- Category: Dessert
- Method: No Bake
- Cuisine: Italian Fusion
- Diet: Vegetarian
Ingredients
- 1 1/2 cups chocolate wafer crumbs (or graham cracker crumbs)
- 1/4 cup granulated sugar
- 6 tablespoons unsalted butter, melted
- 1 cup strong brewed espresso or coffee, cooled
- 2 tablespoons coffee liqueur (optional)
- 1 package (3 ounces) ladyfingers
- 2 packages (8 ounces each) cream cheese, softened
- 1 cup powdered sugar
- 1 teaspoon vanilla extract
- 1 1/2 cups cold heavy whipping cream
- 8 ounces mascarpone cheese, softened
- Unsweetened cocoa powder, for dusting
Instructions
- Prepare the crust: Mix wafer crumbs, 1/4 cup sugar, and melted butter. Press the mixture firmly into the bottom of a 9-inch springform pan. Chill for 15 minutes while you prepare the coffee soak.
- Mix the espresso soak: Combine the cooled espresso and coffee liqueur (if using) in a shallow dish.
- Assemble the base layer: Quickly dip each ladyfinger into the espresso mixture, ensuring they are coated but not soggy. Arrange a single layer of soaked ladyfingers over the chilled crust.
- Make the cheesecake filling: In a large bowl, beat the softened cream cheese, powdered sugar, and vanilla extract until smooth. In a separate bowl, whip the heavy cream until stiff peaks form. Gently fold the whipped cream into the cream cheese mixture.
- Fold in mascarpone: Gently fold in the softened mascarpone cheese until just combined. Do not overmix.
- Layer the filling: Spread half of the mascarpone filling over the ladyfinger layer. Add a second layer of espresso-dipped ladyfingers. Top with the remaining filling, smoothing the top with a spatula.
- Chill: Cover the pan loosely with plastic wrap and refrigerate for at least 6 hours, or preferably overnight, until the cheesecake is firm.
- Serve: Before serving, carefully remove the springform ring. Dust the top generously with unsweetened cocoa powder. Slice and serve this coffee flavored cheesecake.
Notes
- For an even richer flavor, substitute half of the heavy cream with chilled mascarpone cheese when whipping.
- If you skip the coffee liqueur, add 1 teaspoon of instant espresso powder to the espresso soak for a stronger coffee flavor.
- This is an easy make ahead dessert; it tastes best when chilled for a full 12 hours.
Nutrition
- Serving Size: 1 slice
- Calories: 450
- Sugar: 35g
- Sodium: 250mg
- Fat: 30g
- Saturated Fat: 18g
- Unsaturated Fat: 12g
- Trans Fat: 0.5g
- Carbohydrates: 40g
- Fiber: 1g
- Protein: 7g
- Cholesterol: 110mg