

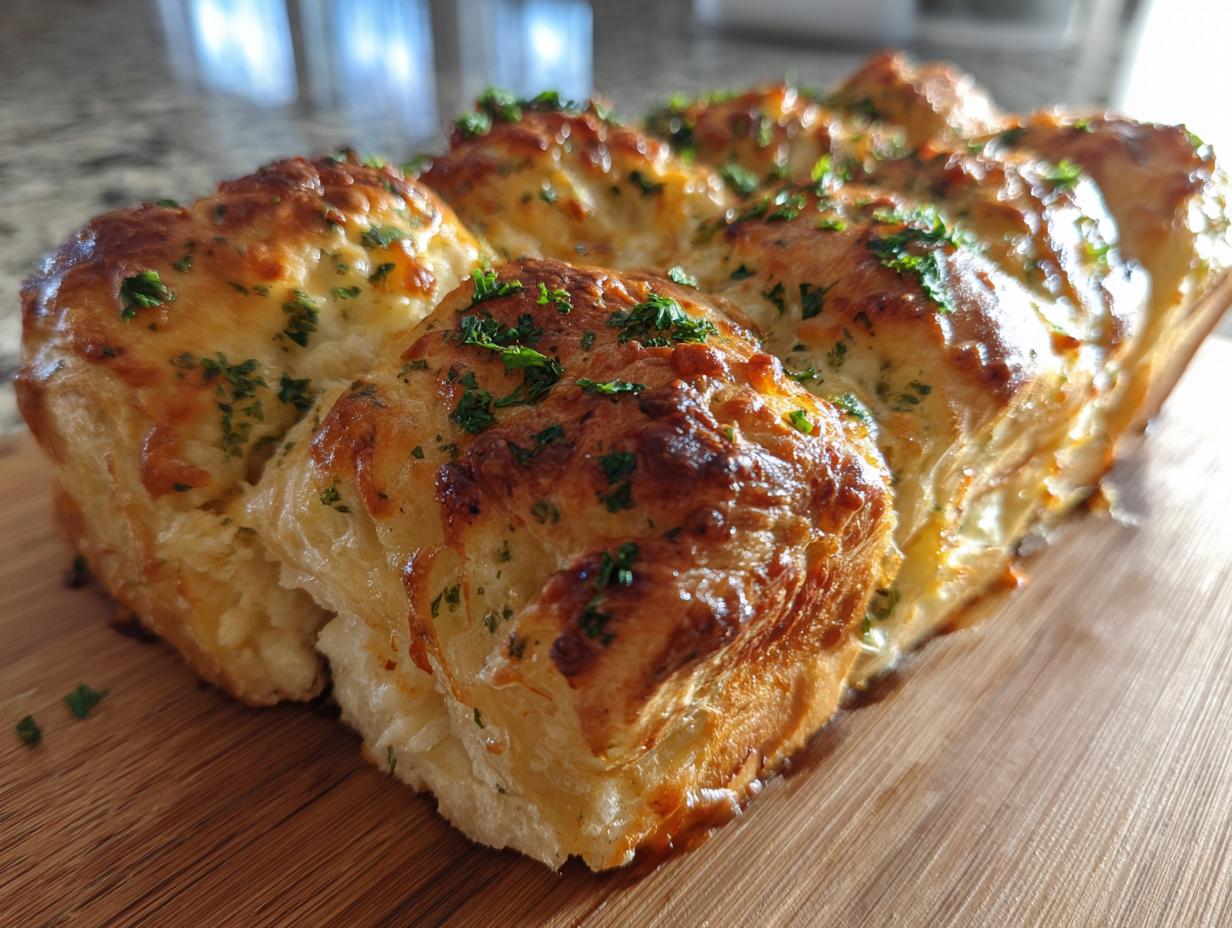
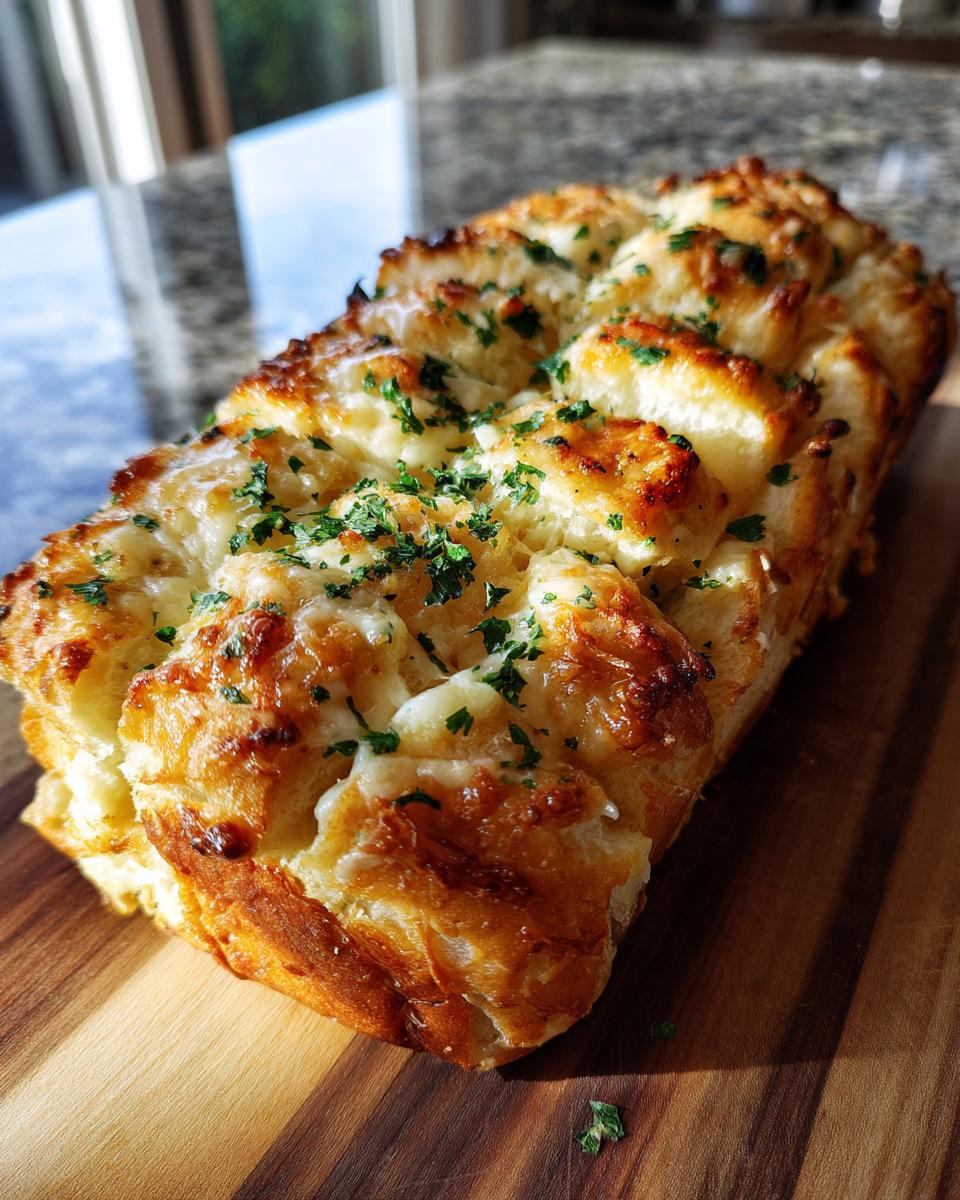
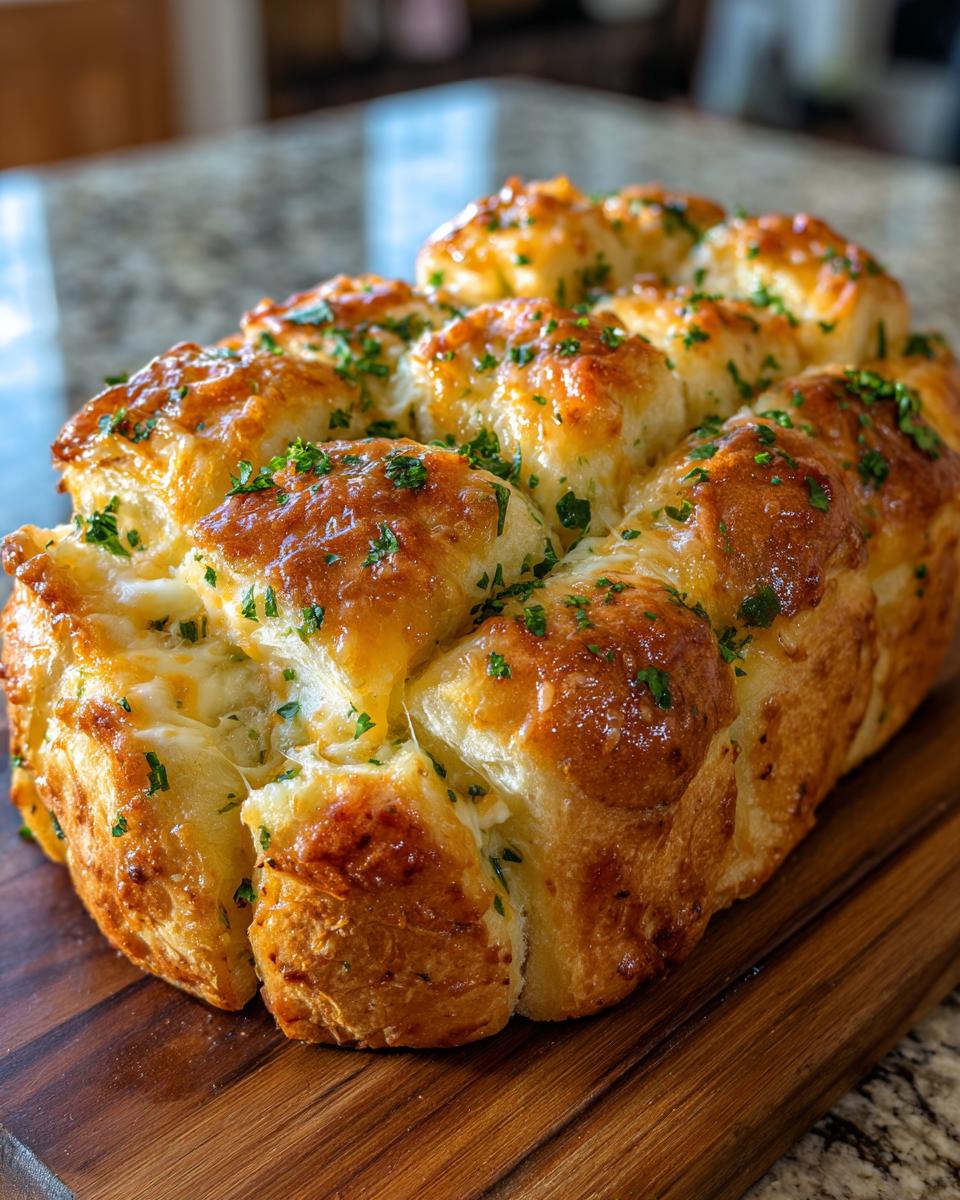
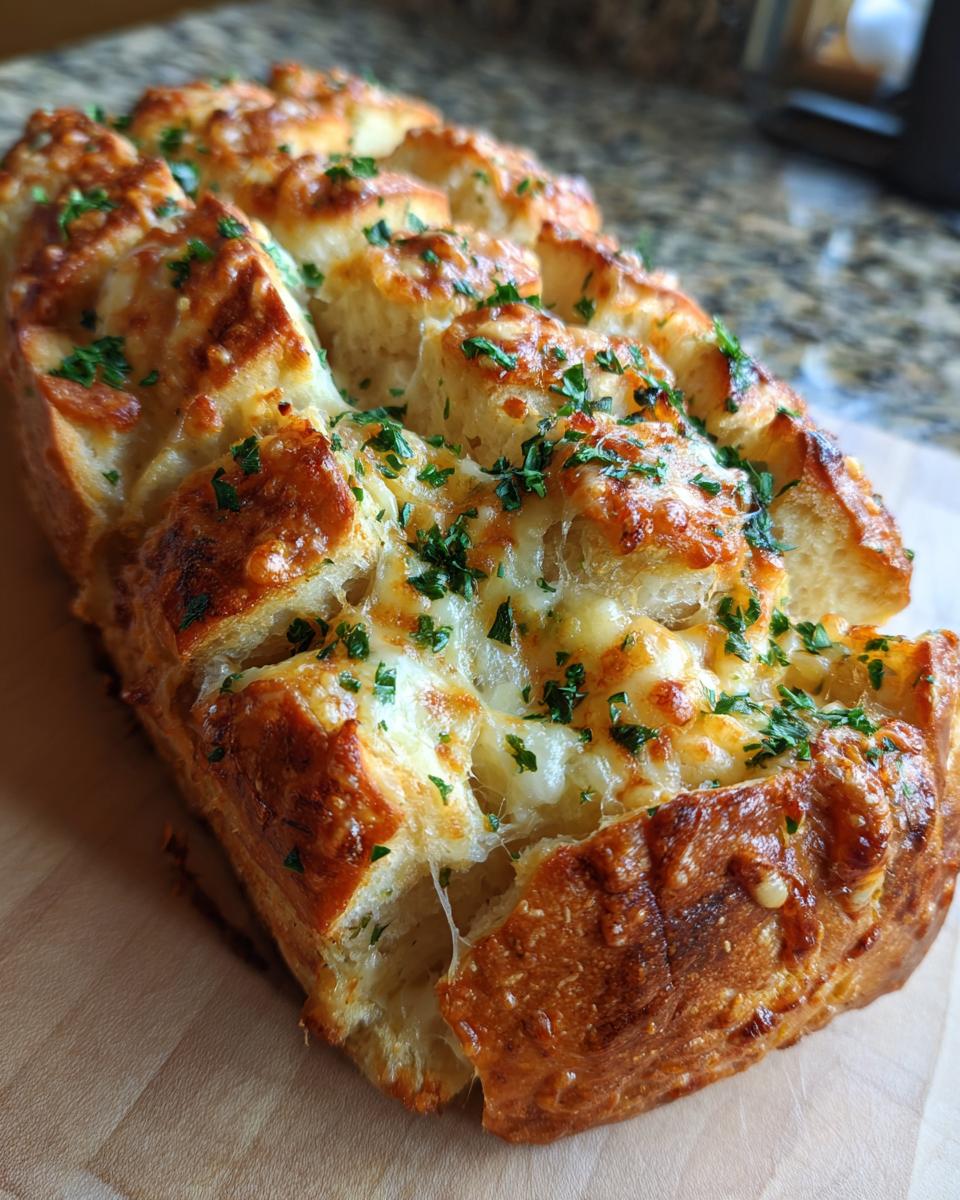
Life gets busy, right? Some evenings you need a side dish that screams comfort but only takes about twenty minutes of active time. That’s when I turn to this absolute game-changer: Cheesy Garlic Hawaiian Roll Pull-Apart Bread. Seriously, the sheer magic of this **hawaiian roll garlic bread** is how it marries the famous sweet softness of those little buns with savory, garlicky butter and gooey cheese. It’s everything you want in a warm appetizer or a quick dinner side. I spent years developing recipes that taste amazing without demanding all your attention, focusing on turning simple, accessible ingredients into something truly special, just like my philosophy over on the About page promises!
- Why This hawaiian roll garlic bread Recipe Is Your New Favorite Comfort Food Side
- Gathering Ingredients for Cheesy hawaiian roll garlic bread
- Step-by-Step Instructions for Easy Garlic Bread with Hawaiian Rolls
- Tips for Success with Your hawaiian roll garlic bread
- Serving Suggestions for Your hawaiian roll garlic bread
- Storage and Reheating Instructions for Leftover hawaiian roll garlic bread
- Frequently Asked Questions About hawaiian roll garlic bread
- Estimated Nutritional Breakdown for Parmesan Garlic Bread Rolls
- Share Your hawaiian roll garlic bread Experience
Why This hawaiian roll garlic bread Recipe Is Your New Favorite Comfort Food Side
Look, I get it. You need something fast, something that everyone in the family will actually eat without complaining, and something that smells incredible while it bakes. This recipe delivers on all those promises. It’s not just bread; it’s instant happiness in a pan. Forget dry supermarket garlic bread; we’re making the ultimate **Crowd Pleaser Bread** here!
- It’s buttery until the very last soft bite.
- It transforms simple rolls into a gourmet **Comfort Food Side**.
- The melted cheese layer is pure, gooey heaven.
Speed and Simplicity: The 15 Minute Garlic Bread Promise
You barely have time to put your feet up before this amazing side dish is ready. Prep time is only about 10 minutes—seriously! You mix the butter while the oven heats up. The whole thing, including the baking time, clocks in under 35 minutes total. That’s the kind of cooking I believe in: maximum flavor impact for minimum kitchen cleanup. This is the definition of **15 Minute Garlic Bread** magic.
The Perfect Sweet and Savory Bread Balance
This is the part that confuses people until they take a bite. Why would you put savory garlic butter on sweet rolls? Because—trust me on this—those rolls were made for it! The sweetness of the Hawaiian Rolls cuts through the richness of the garlic butter and salty Parmesan cheese perfectly. It creates this incredible **sweet and savory bread** flavor profile that keeps everyone coming back for more. It’s that unexpected combination that makes this **Easy Garlic Bread with Hawaiian Rolls** so addictive!
Gathering Ingredients for Cheesy hawaiian roll garlic bread
Okay, getting organized is half the battle, and when you see these simple ingredients laid out, you’ll realize how fast this whole process actually is. I swear, having everything ready to go means zero stress when that oven timer starts ticking. The beauty of this **Cheesy Hawaiian Roll Garlic Bread** is that it’s mostly pantry staples plus the star of the show—those gorgeous, soft Hawaiian rolls. We’re going to mix up a killer butter sauce and pile on the cheese for guaranteed gooeyness.
Garlic Butter Components for hawaiian roll garlic bread
This is where the flavor really builds! You absolutely need your butter melted before you start mixing, otherwise things get clumpy. Don’t skimp on the fresh garlic, either; that’s a non-negotiable for me. You need:
- 1/2 cup unsalted butter, melted (Make sure it’s fully liquid!)
- 4 cloves garlic, finely minced (Don’t even think about the jarred stuff here!)
- 1 tablespoon fresh parsley, chopped up finely
- 1/2 teaspoon dried onion powder
- 1/4 teaspoon salt
The Cheesy Topping for Pull Apart Garlic Rolls
If you want truly unbelievable **Pull Apart Garlic Rolls**, we need two kinds of cheese. The mozzarella gives you that fantastic chew, and the Parmesan adds a sharp, salty counterpoint to the sweet rolls. Get these measured out so they are ready to go right after the butter bath:
- 1 cup shredded mozzarella cheese (No pre-shredded bags with anti-caking agents, please!)
- 1/4 cup grated Parmesan cheese
Oh, and of course, the main event: one full package of the King’s Hawaiian Sweet Rolls—make sure it’s the usual 12-count package so it fits perfectly in your 9×13 dish!
Step-by-Step Instructions for Easy Garlic Bread with Hawaiian Rolls
This is where the assembly happens, and honestly, it’s the easiest part of the whole baking experience. We aren’t dealing with messy dough or kneading; we are maximizing convenience! The goal here is to get that glorious garlic butter soaking deep down into every single one of those sweet rolls before we bake them until they are golden bombs of flavor. Make sure your 9×13 dish is ready to go before you even think about pouring anything!
Preparation and Butter Mixing for hawaiian roll garlic bread
First things first, let’s get the oven ready. You want to preheat it to 350°F (that’s 175°C for my international friends). Next, grab that 9×13 baking dish and give it a little grease so we don’t have any sticking drama later—no one wants to wrestle bread out of a pan!
Now, for the butter mixture. In a separate bowl, dump in your perfectly melted butter. Whisk in that minced garlic, the parsley, the onion powder, and just a tiny pinch of salt. Mix it until it all looks like delicious, bright green-flecked liquid gold. Taste it! It should be aggressively garlicky because it has to flavor all those soft rolls.
Here’s a little trick I picked up, which is great for getting deep flavor penetration: Before pouring the butter over the whole package, you can gently lift the whole cluster of rolls and use a serrated knife to slice them horizontally almost all the way through. You want to cut the *bottom* half, leaving them attached at the side seam. Then, pour that butter mixture right over the top, letting it pool and seep down into those little cuts. If you skip this expert step, no sweat—just pour it evenly over the top as is, and it will still be amazing!
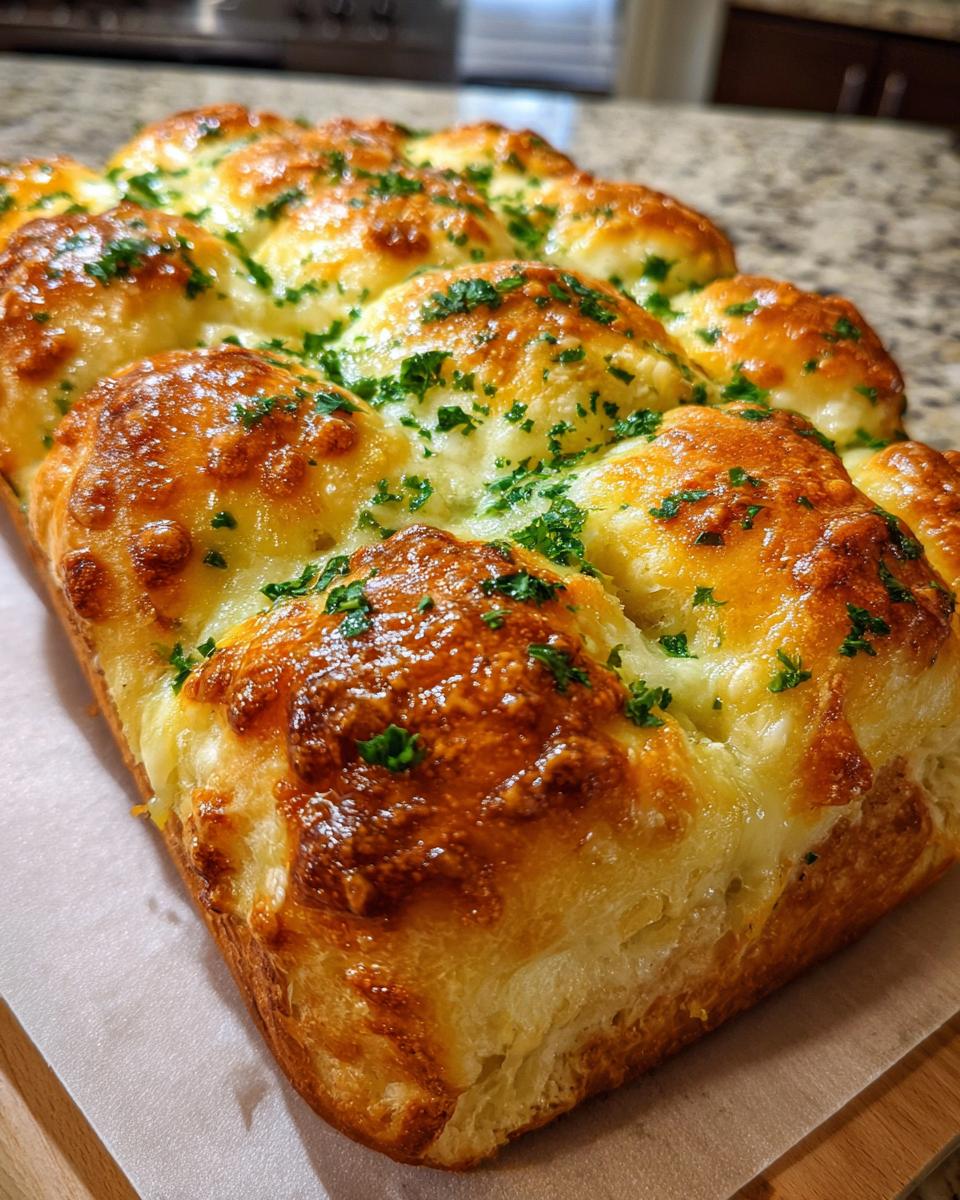
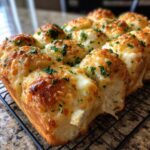
Baking the Cheesy hawaiian roll garlic bread
Once the butter is distributed, pile on the cheeses! Sprinkle that mozzarella and Parmesan right over the top, coating every visible roll top. Now, cover the entire dish TIGHTLY with aluminum foil. This step is crucial! We steam them slightly under the foil first to ensure the insides get perfectly soft and fluffy.
Slide that foil-covered pan into your preheated oven and set a timer for 15 minutes. Don’t open it early! After 15 minutes, carefully remove the foil. Watch out for hot steam escaping! Now, we bake uncovered for another 5 to 7 minutes. You are looking for two things: the mozzarella should be fully melted and bubbly, and you want those beautiful golden-brown spots appearing on top of the cheese.
Once you pull it out, resist the urge to grab one immediately! Let this glorious **Cheesy hawaiian roll garlic bread** rest for just about 5 minutes. This short cooling period lets the cheese settle just slightly so it doesn’t run everywhere when you pull the rolls apart at the table. Then, just grab the seam and pull—instant **Pull Apart Garlic Rolls**!
Tips for Success with Your hawaiian roll garlic bread
We want this bread to be legendary, right? Not just good, but the *best* **Buttery Garlic Rolls** anyone has ever tasted. Because we’re using a store-bought base, we need to treat those little rolls with a little extra love to make them taste wonderfully homemade. Don’t worry; these are just small tweaks that guarantee success every single time you make this **Easy Garlic Bread with Hawaiian Rolls**.
Ingredient Substitutions for Buttery Garlic Rolls
Sometimes you open the spice drawer and realize you’re out of something crucial. It happens to me all the time! If you are short on fresh parsley, don’t stress. You can absolutely substitute it with 1 teaspoon of dried parsley flakes. It won’t be quite as bright, but the garlic and onion powder will carry most of the savory flavor.
Now, about the butter. The recipe calls for unsalted butter, which gives us control over the final saltiness, especially since we’re adding salt separately. If you only have salted butter on hand, just skip adding the 1/4 teaspoon of salt to the butter mixture. The difference in flavor is minimal, but it stops your bread from tasting a little too aggressive!
Achieving Maximum Flavor Infusion in Your hawaiian roll garlic bread
If you want to really elevate this from ‘quick and easy’ to ‘oh my gosh, how is this so tender?’, you need to try slicing. I mentioned it before, but I need to stress this: carefully slicing through the bottoms of the rolls before you pour the butter over them is a total game-changer. It allows that melted garlic butter to soak deep into the center of the buns, not just sit on top.
Think of it as giving the butter a direct highway to flavor central. When you pour it over the top, the butter naturally runs down the seams, but cutting them almost in half means that when you pull apart the **Pull Apart Garlic Rolls**, every single surface is drenched in flavor. It ensures those lower layers stay moist and buttery, not just fluffy!
Serving Suggestions for Your hawaiian roll garlic bread
Okay, once this amazing **hawaiian roll garlic bread** comes out of the oven, smelling sweet, garlicky, and cheesy, you need an excuse to get it on the table, pronto! This is the ultimate **Quick Dinner Side Dish** solution. It pairs unbelievably well with saucy spaghetti or a hearty bowl of tomato soup—the bread soaks up every last bit of sauce or broth. Honestly, it’s so easy and impressive that I always make a double batch when I’m hosting, because it vanishes instantly as a **Holiday Party Appetizer**.
Seriously, don’t hold back. If you have leftovers (which is rare!), that’s the perfect excuse for a second meal tomorrow!
Storage and Reheating Instructions for Leftover hawaiian roll garlic bread
I rarely have leftovers when I make this **hawaiian roll garlic bread**, because everyone devours it immediately! But sometimes, blessedly, one or two rolls survive. The goal is always to keep them tasting as soft and buttery as they did fresh out of the oven. The natural sweetness of these rolls helps them stay soft longer than standard white bread, but structure advice is still important!
If you have any left, the best way to store them is in an airtight container at room temperature. Just make sure you seal it up tight! Don’t leave them exposed on the counter, or that delicious garlic butter crust will definitely dry out overnight. I usually try to eat any leftovers within two days—that’s when they are still absolutely perfect.
When you’re ready to bring them back to life, you have two real options. If you are reheating a small amount, pop them in the microwave for about 15 to 20 seconds. That burst of heat softens the bread right up almost instantly. But, if you have a bigger batch, I really prefer the oven. Cover the rolls loosely with foil and stick them in a 300°F oven for about 8 minutes. That gentle heat warms the butter back up without turning them tough. It makes them taste almost freshly baked!
Frequently Asked Questions About hawaiian roll garlic bread
After you’ve made this bread once, you’ll probably have a few burning questions pop up before your next batch, I know I did! Since this recipe has gotten so popular online—mentioning that viral aspect—people always ask about the tweaks. Don’t hesitate to reach out via the contact page if you have something truly unique, but here are the top things folks ask me about making this **Easy Garlic Bread with Hawaiian Rolls**.
Can I make this hawaiian roll garlic bread without cheese?
You absolutely *can*, but wow, you’d be missing the best part of the modern versions! The addition of mozzarella and Parmesan is what makes this the famous **Cheesy Hawaiian Roll Bread** that everyone loves right now. If you absolutely must skip it—maybe for dietary reasons—just make sure you double the amount of garlic butter you pour over the rolls to compensate for that lost richness. But honestly, the cheese is what makes it that ultimate **Comfort Food Side**!
How do I prevent the bottom rolls from getting soggy?
This is a classic concern when you drench something buttery, and it’s usually about distribution! First, make sure you’re using the full package of rolls snugly packed in the 9×13 dish; that tight fit helps them support each other. Second, when you are pouring the butter mix, try to drizzle it around the edges and seams instead of dumping one giant puddle in the center. I also find that baking it on the middle rack of the oven works best. If you feel like they are prone to soggy bottoms anyway—maybe your rolls are extra fresh—you can slightly elevate your baking dish on the rack with a sheet pan underneath it. That extra bit of air circulation underneath helps wick away any excess moisture while the top gets crispy!
If you want to check out some of the buzz that made this recipe huge, you can see why people love the toppings so much over on some of the popular articles, like this one about the viral TikTok versions!
Estimated Nutritional Breakdown for Parmesan Garlic Bread Rolls
Now, I know some of you are tracking things closely, and others just want to know how much deliciousness you are sneaking onto your plate! Since the ingredients list is based on specific measurements and we are dividing it up exactly by the 12 rolls included in a standard package, we can get a pretty good idea of what you’re looking at per serving. Remember, this is my best estimate based on the ingredients list, and your final numbers might shift a tiny bit depending on the exact brand of rolls or cheese you use.
Be aware that since we are dealing with butter, cheese, and sweet rolls, these **Parmesan Garlic Bread Rolls** clock in a little higher on the fat and carb count—but what’s half a roll of this goodness going to hurt, right? It’s comfort food, made simply!
Here is the breakdown for one serving, which is defined here as one single roll:
- Calories: 210
- Fat: 12 grams (Remember, a lot of that is from our delicious butter!)
- Carbohydrates: 22 grams
- Protein: 5 grams
- Sugar: 8 grams (That’s from the Hawaiian Rolls themselves!)
It’s super important, especially if you are serving this alongside a big pasta dinner, to keep these numbers in mind. Just enjoy it when you make it, because this **hawaiian roll garlic bread** is worth every single calorie!
Share Your hawaiian roll garlic bread Experience
Wow, you made it! You’ve successfully created the easiest, most addictive **Comfort Food Side** ever, and I am so proud of you! Seriously, I want to know how it turned out. Did your family devour the entire batch before dinner even started? Did the cheese get perfectly golden?
Please, please, take a moment to drop a rating (five stars if you loved it!) and share your thoughts down in the comments below. Hearing how this **hawaiian roll garlic bread** worked for your busy weeknights or upcoming holiday gatherings is genuinely the best part of my job. It helps me know what recipes to keep sharing with you.
We value your input immensely, and just a quick note: if you ever have questions about privacy related to leaving comments or navigating the site, you can always check out our Privacy Policy—though generally, just sharing your yummy bread success stories is all I’m looking for!
PrintCheesy Garlic Hawaiian Roll Pull-Apart Bread
Make this easy, crowd-pleasing bread using sweet Hawaiian rolls, garlic butter, and melted cheese. It is a quick, comforting side dish perfect for any meal or gathering.
- Prep Time: 10 min
- Cook Time: 22 min
- Total Time: 32 min
- Yield: 12 servings 1x
- Category: Side Dish
- Method: Baking
- Cuisine: American
- Diet: Vegetarian
Ingredients
- 1 package (12 count) King’s Hawaiian Sweet Rolls
- 1/2 cup unsalted butter, melted
- 4 cloves garlic, minced
- 1 tablespoon fresh parsley, chopped
- 1/2 teaspoon dried onion powder
- 1/4 teaspoon salt
- 1 cup shredded mozzarella cheese
- 1/4 cup grated Parmesan cheese
Instructions
- Preheat your oven to 350°F (175°C). Lightly grease a 9×13 inch baking dish.
- Keep the Hawaiian rolls connected in the package or arrange them closely together in the prepared baking dish. Do not separate them.
- In a small bowl, combine the melted butter, minced garlic, chopped parsley, onion powder, and salt. Mix well to create the garlic butter sauce.
- Pour the garlic butter mixture evenly over the top of the rolls, making sure the butter seeps down between the rolls.
- Sprinkle the shredded mozzarella cheese and grated Parmesan cheese evenly over the top of the rolls.
- Cover the baking dish tightly with aluminum foil.
- Bake for 15 minutes covered.
- Remove the foil and bake for an additional 5 to 7 minutes, or until the cheese is melted, bubbly, and lightly golden brown.
- Let the bread cool for 5 minutes before serving. Pull apart the rolls to serve immediately.
Notes
- For extra flavor, you can slice the rolls horizontally almost all the way through before pouring the butter mixture over them, allowing the butter to soak into the middle layers.
- If you do not have fresh parsley, use 1 teaspoon of dried parsley flakes instead.
- This bread pairs well with pasta dishes or soup for a quick dinner side.
Nutrition
- Serving Size: 1 roll
- Calories: 210
- Sugar: 8
- Sodium: 350
- Fat: 12
- Saturated Fat: 7
- Unsaturated Fat: 5
- Trans Fat: 0.3
- Carbohydrates: 22
- Fiber: 1
- Protein: 5
- Cholesterol: 25