

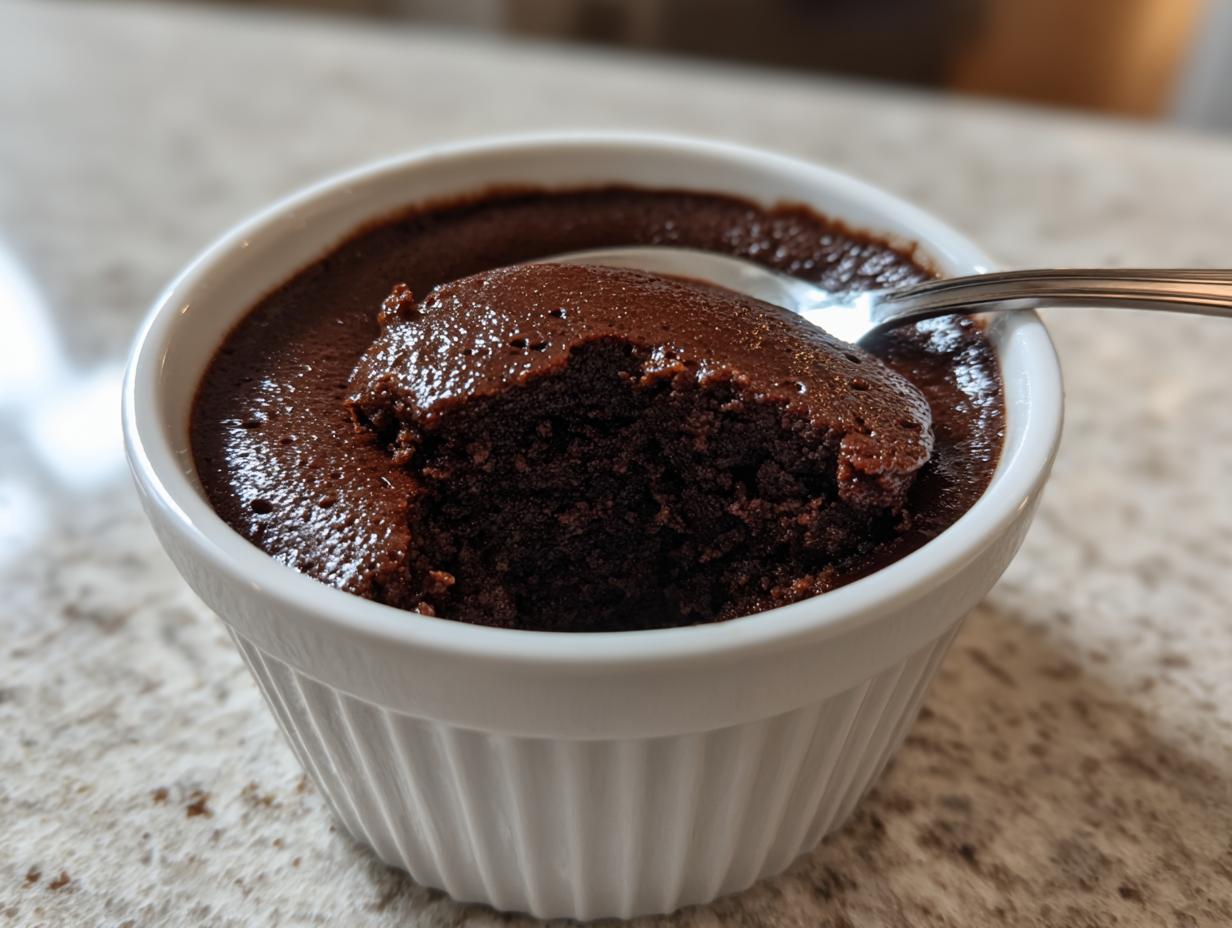
When you’re craving something truly decadent—something that screams ‘dinner party’ or ‘special romantic night’—but you only have about fifteen minutes to actually *make* it, what do you do? I get it. Life moves fast, but your dessert shouldn’t taste like a compromise! That’s why I developed this absolute winner. Forget complex French techniques; this is the Easiest Silky 3-Ingredient Chocolate Mousse you will ever make. It embodies everything I believe in here at Cooking by Felix: that simple, accessible ingredients, when treated with just a bit of care, create something truly exceptional. Trust me, this rich, light chocolate mousse is about to become your new go-to elegant dessert.
If you’re looking for more quick, impressive sweets to fit into your busy schedule, check out my collection of simple, delicious desserts that never require you to sacrifice flavor for speed.
- Why This Easy Chocolate Mousse Recipe Works for Busy Cooks
- Gathering Ingredients for Your 3 Ingredient Chocolate Mousse
- Step-by-Step Instructions for the Best Chocolate Mousse
- Tips for Success When Making Homemade Chocolate Mousse
- Serving Suggestions for Your Decadent Mousse
- Make Ahead Dessert and Storage for Chocolate Mousse
- Frequently Asked Questions About This Quick Chocolate Dessert
- Nutritional Estimate for Your Creamy Chocolate Treat
- Share Your Experience Making This Simple Chocolate Recipe
Why This Easy Chocolate Mousse Recipe Works for Busy Cooks
I created this particular recipe because I was tired of thinking a truly decadent dessert meant spending half a day in the kitchen. This amazing chocolate mousse cuts through all that complication. It’s proof that you don’t need eggs, custards, or complicated tempering steps to get that incredible, velvety result.
- Speed is Key: Hands-on time is under 15 minutes. Seriously!
- Minimal Ingredients: We only need three things to make this magic happen. No digging through the pantry for obscure extracts.
- Elegant Finish: It looks like something you’d order at a fancy French bistro, yet it’s a no-bake dream.
If you’re looking for more quick wins, you should see how fast my 5-minute Oreo Fudge comes together. It’s that same philosophy of maximum flavor payoff for minimum effort.
Achieving Silky Chocolate Dessert Texture with Few Ingredients
The secret to that luxurious, silky texture lies in the marriage between high-quality melted chocolate and perfectly whipped heavy cream. When we gently fold the two together, we aren’t just mixing; we are stabilizing air pockets within the rich chocolate foundation.
The key ingredient here is the chocolate itself. Because we rely on the fat content in the chocolate and the cream, we skip the egg yolks typical in older recipes. This means less fuss, less chance of scrambling anything, and a pure, uninterrupted wave of smooth, creamy goodness that hits your tongue just right.
Gathering Ingredients for Your 3 Ingredient Chocolate Mousse
Okay, you’re ready to create this amazing chocolate mousse, and the shopping list is almost comically short! We’re sticking strictly to the essentials here. Remember, when you use fewer components, the quality of those components shouts louder, so don’t skip the good stuff. You only need three things for this simple chocolate recipe to produce something genuinely decadent.
- 200g dark chocolate (at least 70% cocoa solids)
- 1 cup heavy whipping cream, chilled (and I mean cold!)
- 1 tablespoon granulated sugar (this one is optional, by the way)
That’s it! Grab those items, and we are halfway to enjoying the best homemade chocolate mousse.
Ingredient Notes and Substitutions for Perfect Chocolate Mousse
Let’s talk specifics so your chocolate mousse recipe turns out perfect. First, the chocolate. You absolutely need 70% cocoa solids or higher. If you use milk chocolate, you end up with something soft and sweet, not a true, rich mousse. The higher the percentage, the firmer and more intense your final creamy chocolate treat will be.
Second, the heavy whipping cream? It must be straight out of the very back of the fridge. Cold cream whips up beautifully; warm cream just turns into sadness. As for the sugar, it’s there just to balance the bitterness of the dark chocolate if your palate leans a little sweeter. If you enjoy intensely dark flavors, feel free to skip it entirely. It won’t affect the structure of your quick chocolate dessert one bit!
Step-by-Step Instructions for the Best Chocolate Mousse
I know reading instructions can sometimes feel like a chore, but I promise you, these steps are the difference between a good dessert and mind-blowing chocolate mousse. Since this is a no-bake recipe, technique is everything—especially when we introduce air later on. We are going to build this creamy flavor base first, and then introduce lightness.
Make sure your chocolate is chopped small and evenly; this helps everything melt beautifully and prevents lumps! We are building the foundation for what will become the silkiest chocolate dessert you’ve ever made right here.
Melting the Chocolate Base for Your Chocolate Mousse Recipe
First things first: chop up that 200g of dark chocolate into little bits and drop them into a heatproof bowl. Next, take half of your heavy cream (just 1/2 cup for now) and heat it in a small saucepan. Here is a crucial point: you want it just hot enough to bubble slightly around the edges—the simmer zone—but absolutely do not let it boil! Boiling cream can actually make your final mousse grainy. Pour that hot cream right over your waiting chocolate.
Now, walk away for five minutes. Do not touch it! Let that trapped heat do the work of melting. After five minutes, whisk it gently until you have a smooth, glossy mixture. If you decided to add that touch of sugar, whisk it in now. Let this beautiful base cool down completely to room temperature before we move on. Seriously, don’t rush this cooling; it’s vital for the next step.
Folding Technique for Light and Airy Dessert
While the chocolate cools, whip that remaining 1/2 cup of *cold* cream in a separate bowl until you hit stiff peaks. When you lift the whisk, the cream should stand straight up like a little mountain peak. This trapped air is what turns our dense chocolate base into a light and airy dessert!
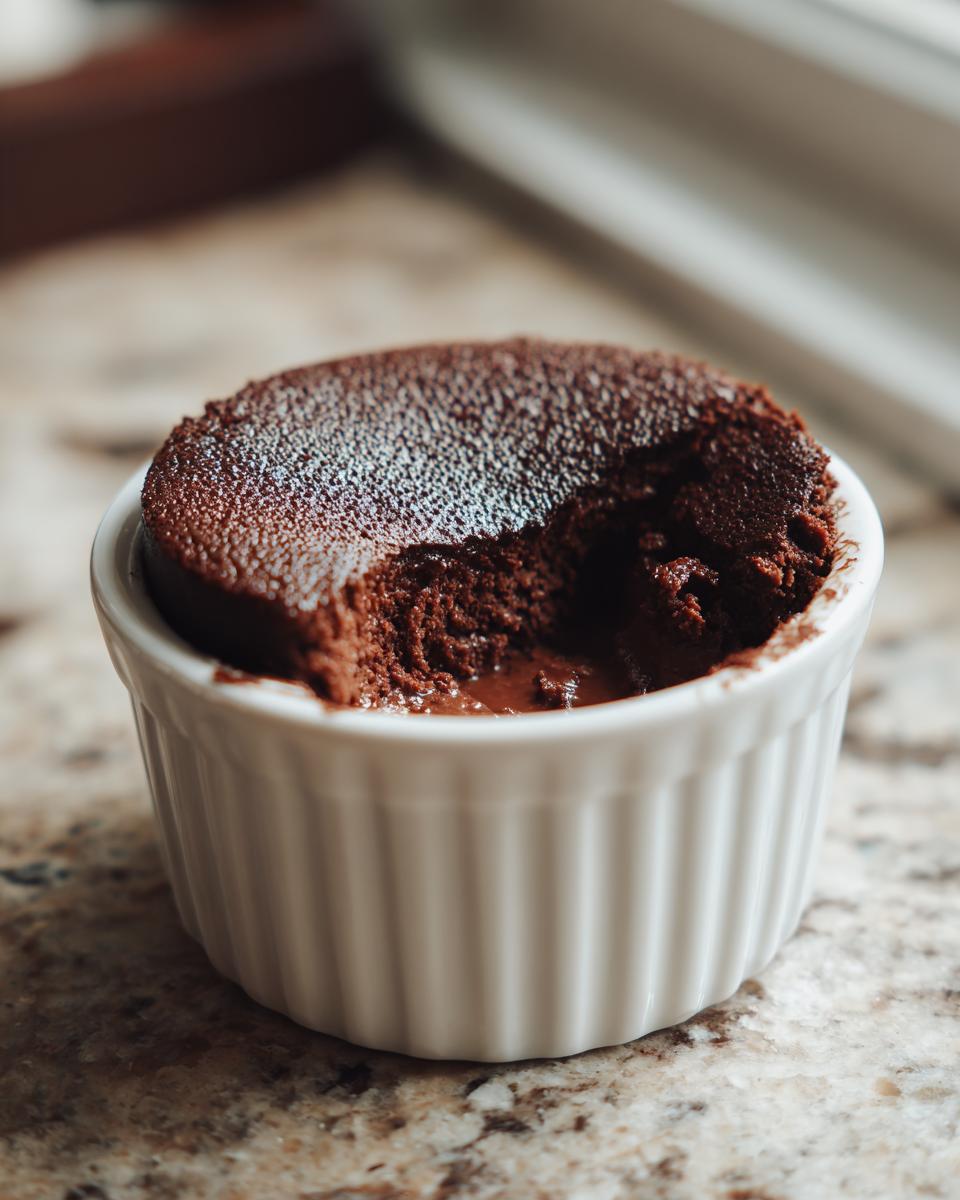
Here’s where gentle hands come in. Take about a third of that whipped cream and fold it into your cooled chocolate base. This step is called ‘sacrificing’ or ‘lightening’—it makes the heavy chocolate mixture less dense so the rest incorporates easily. Once that first bit is folded in, gently, very gently, fold in the rest of the whipped cream. Use a spatula and cut straight down the middle, sweep across the bottom, and fold over. Stop mixing the second you see no more white streaks. Overmixing deflates all that beautiful air we just whipped in! Now, spoon it into ramekins and pop it into the fridge for at least four hours until it’s set.
If you need a quick warm-up idea while the mousse chills, you absolutely have to try my quick chocolate mug cake recipe—it’s instant gratification!
Tips for Success When Making Homemade Chocolate Mousse
Even though this is an easy mousse recipe, technique still matters when you’re trying to create something truly gourmet. I’ve made this dozens of times—sometimes for my own sanity after a tough Tuesday—and I’ve learned a few specific things that guarantee a perfect velvety mousse every single time. These aren’t steps in the recipe, but mindset shifts that make all the difference.
My first big tip? Patience during the chilling phase. That four-hour minimum isn’t just a suggestion! If you try to serve this creamy chocolate treat early, it will probably look more like pudding than the structured dessert we want. Give it time to solidify properly.
Secondly, when folding the whipped cream, think delicate! I see people stirring aggressively, and it breaks my heart because all that lovely volume disappears. You’re trying to blend two separate textures—a heavy, rich one and a light, airy one. Use a wide rubber spatula and employ that gentle cut-down-the-middle motion. You want streaks of white cream to disappear slowly; if you stir until it’s perfectly uniform, you’ve gone too far.
Also, pay attention to your bowl temperature when whipping the cream—it needs to be significantly colder than the chocolate base. If you’re having trouble, pop your mixing bowl and whisk attachment in the freezer for ten minutes before you start whipping the cream. Cold tools equal stiff peaks faster, and that’s a huge win for any no bake chocolate dessert.
Finally, if you find yourself tempted to make this recipe ahead by more than a day, don’t push it. While it keeps well, the texture starts to compact a little after 48 hours just sitting in the fridge. For the absolute best experience, I recommend making it one day ahead, max. If you’re planning a big event, these are the kinds of foolproof timings I use when testing my small-batch chocolate chip cookies, too—timing keeps everything fresh and perfect!
Serving Suggestions for Your Decadent Mousse
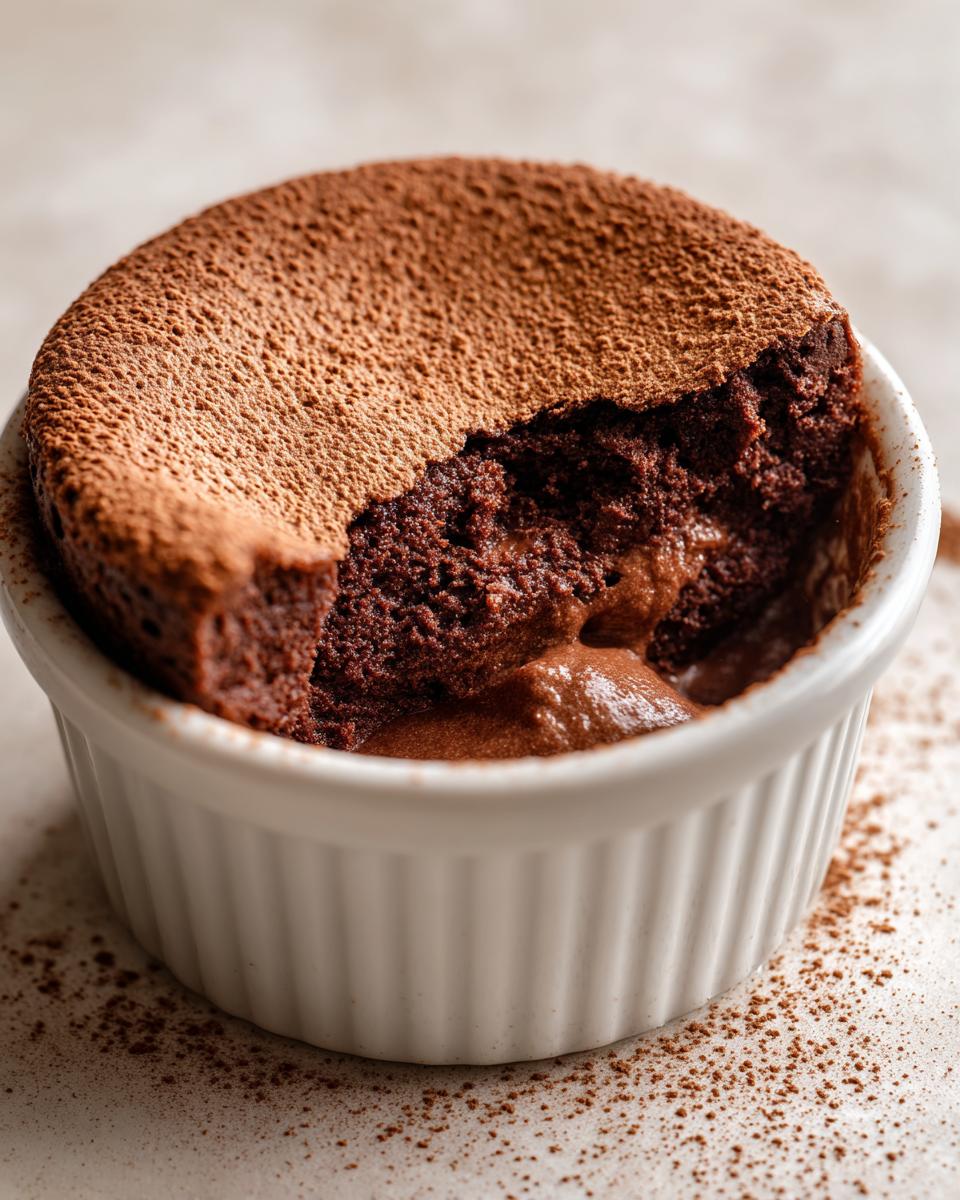
Just because this is an easy mousse recipe doesn’t mean we can’t make it look like a showstopper! When you serve something this rich and velvety, presentation is half the fun. This is the perfect opportunity to turn a quick dessert into one of those show-stopping elegant dessert ideas that guests remember long after the party is over. Trust me, nobody wants to see a scoop of something delicious plopped on a plate; they want a presentation!
Since we are aiming for that gourmet chocolate dessert feel without any extra work, presentation is everything. We aren’t adding any extra baking steps here; we are just focusing on flair while the mousse chills. Think about how amazing this chocolate mousse will look nestled in fancy glassware!
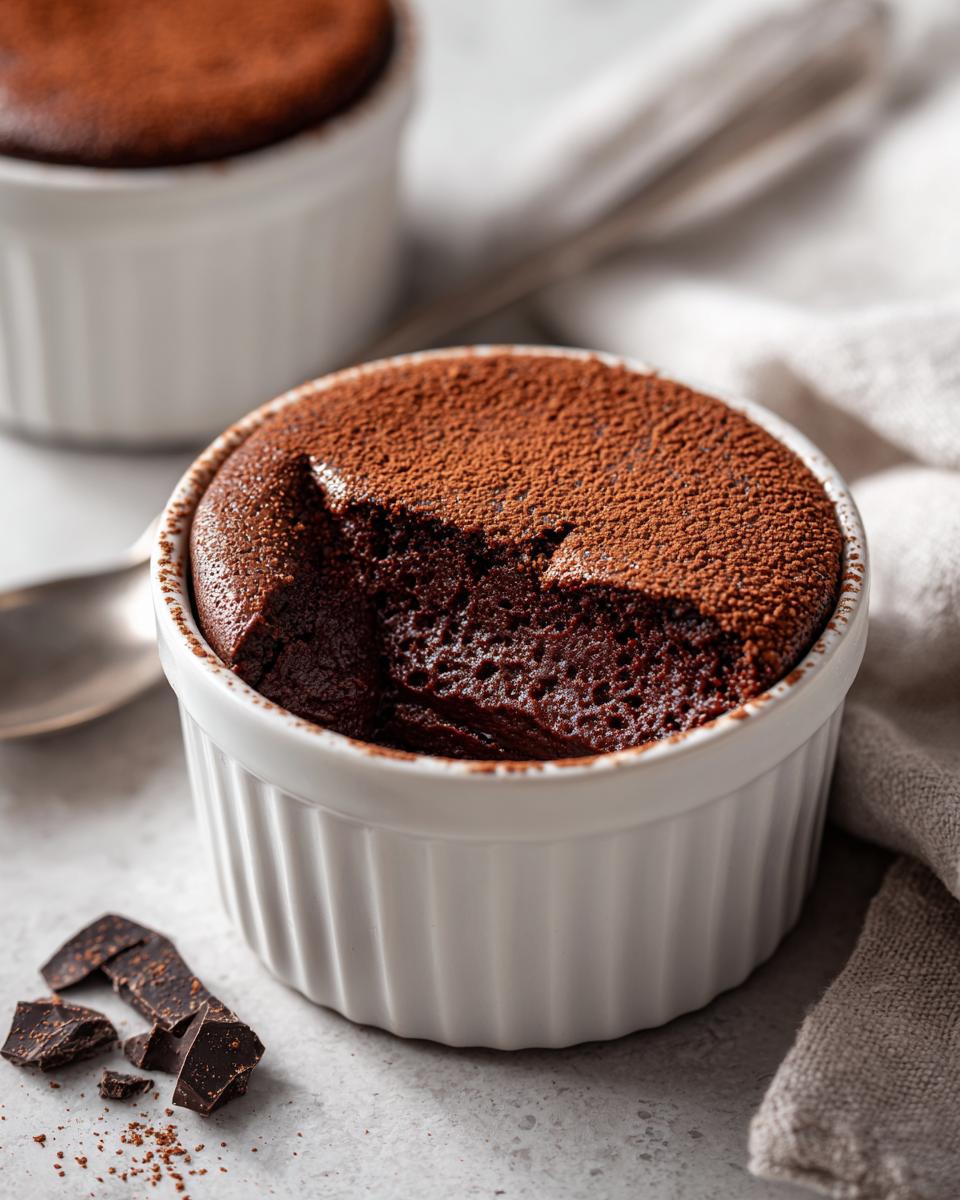
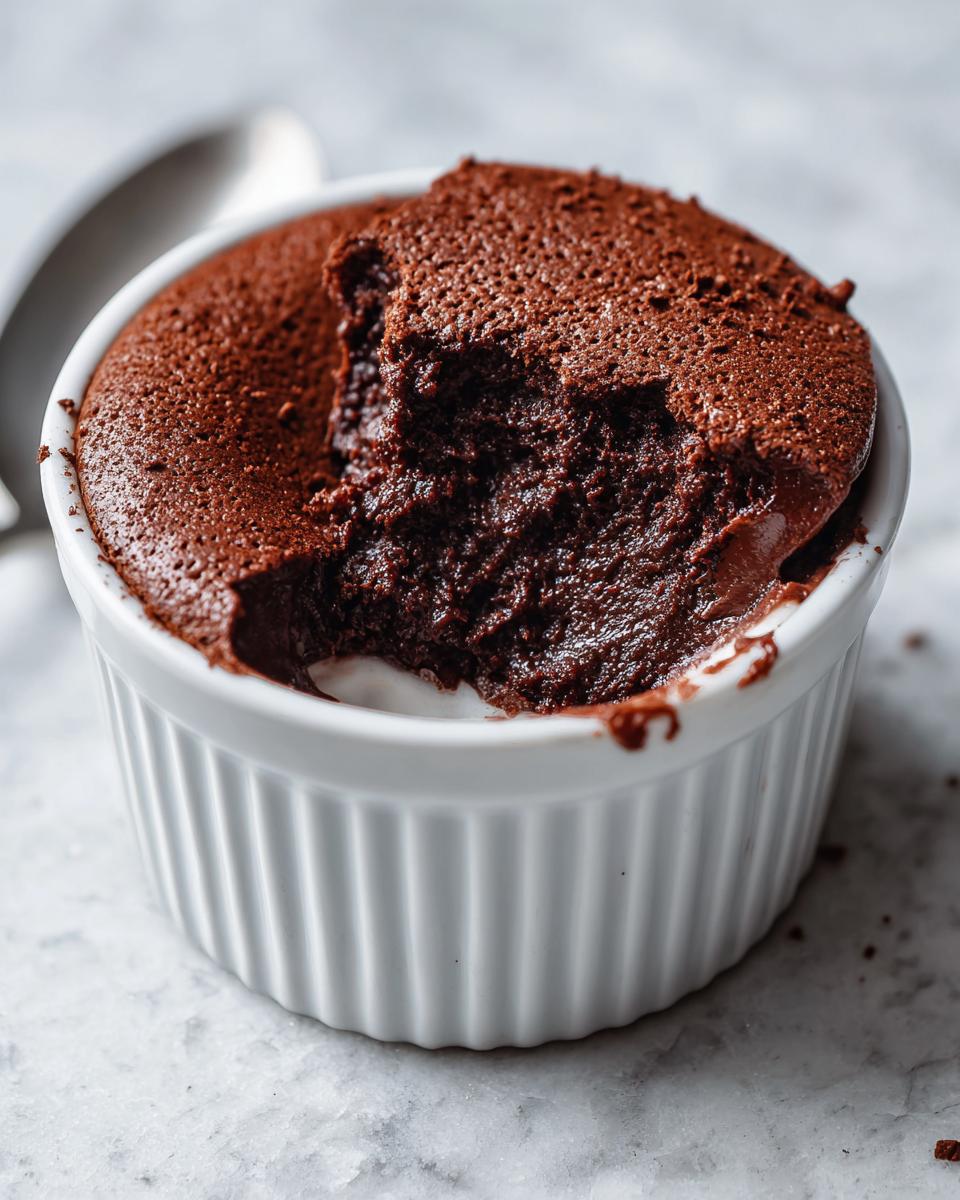
Creating Individual Chocolate Mousse Cups
For the most elegant presentation—and honestly, the simplest serving method—you want to pour your mousse into individual glasses or ramekins. This is where the term (don’t worry about the link here, just the concept!) Individual Chocolate Mousse Cups comes in handy. Small espresso glasses, martini glasses, or even clear wine goblets look fantastic for this. Since this is a soft, no-bake dessert, portioning it out before it fully sets in the fridge makes plating effortless.
Once your chocolate mousse has chilled for those crucial four hours, it’s time to dress it up! Remember those garnishes I mentioned in the recipe notes? They are your finishing touch. I love using a few fresh raspberries—the tartness cuts the deep chocolate flavor perfectly. A light dusting of high-quality unsweetened cocoa powder or a few delicate dark chocolate shavings goes a long way. You can even pipe a little dollop of extra whipped cream on top if you have any leftover from the batch. It’s these little details that elevate this simple chocolate recipe into something truly special.
Make Ahead Dessert and Storage for Chocolate Mousse
This is honestly the best feature of this quick chocolate dessert: it’s totally a make ahead dessert champion! Since this creamy chocolate treat sets up in the fridge, you can whip it together the morning of your dinner party, or even the day before. I usually aim for chilling for at least four hours, but if you cover your individual chocolate mousse cups tightly with plastic wrap, they hold up beautifully for a full 24 hours.
Just remember that you don’t want to “reheat” this chocolate mousse—it’s a cold dessert! If you made it a day ahead, pull it out about 15 minutes before serving just to take the chill off completely. This one is fantastic for easy entertaining because once it’s set, it requires zero last-minute fuss.
If you are planning a big meal, sometimes you need savory appetizers too! My slow cooker Reuben dip is another make-ahead hero that saves my sanity on busy nights.
Frequently Asked Questions About This Quick Chocolate Dessert
I know sometimes the simplest recipes spark the most questions, which is totally understandable when you’re trying to master a new technique! I’ve gathered the things I hear most often about making this easy mousse recipe. It’s all about making sure you end up with that perfect, velvety mousse without any hiccups.
Can I use milk chocolate instead of dark chocolate?
This is a tough one, but for the best chocolate mousse that achieves that rich, structured texture we love, I really advise sticking to 70% dark or higher. Milk chocolate has way more sugar and cocoa butter, which interferes with the setting process. If you use milk chocolate, you’ll likely end up with a super soft, slightly unstable ganache layer rather than a true, light and airy dessert. If you must, use milk chocolate, but know it won’t set up quite as firmly as the original!
What happens if I skip the chilling time?
Oh, honey, don’t skip the chilling! This is a crucial step for our no bake chocolate dessert. Because we aren’t using eggs for structure, we are relying on that ganache base (chocolate + hot cream) to cool down and solidify around the air we whipped into the cream. If you try serving it before it’s firm, you’ll just have thick chocolate soup! At least four hours, but honestly, overnight is even better for flavor development.
Can I substitute the heavy whipping cream with something else?
For this specific three-ingredient recipe, the answer is generally no if you want that signature airy texture. Heavy whipping cream is unique because of its high fat content (usually 36% or more), which allows it to hold stiff peaks when whipped. Substitutes like half-and-half or milk just won’t hold the air needed to create the light texture we are aiming for in this creamy chocolate treat. You need the fat to trap the air!
Is this mousse recipe better than one made with egg whites?
That’s a great question about traditional French mousse recipe styles! Older recipes often use raw egg whites folded in for lift, which gives you a very light, almost marshmallow-like feel. My philosophy here is simplicity and speed, so we skip the eggs entirely. The cream-based version is more decadent, richer tasting, and, frankly, safer and faster for the home cook who wants a guaranteed delicious outcome every time. If you’re stressed about weeknight cooking, this no-fail method wins every time.
If you ever want to try my approach to quick meals that save you time later in the week, check out my guide on easy one-pot Spanish rice—it’s another winner for busy nights!
Can I make this ahead of time for a party?
Absolutely! I mentioned this above, but it bears repeating because it’s so useful for entertaining. This is a fantastic make ahead dessert. Prepare it one day in advance, cover your individual chocolate mousse cups, and let them chill. They will taste just as incredible the next day!
Nutritional Estimate for Your Creamy Chocolate Treat
Look, I’m a cook, not a nutritionist! Gathering precise calorie counts is impossible since everyone’s dark chocolate selection varies wildly—the higher the cocoa solids, the lower the sugar, right? So please take these numbers as a general guide for a single serving of this decadent mousse.
The richness comes from the fat in the heavy cream and the solids in the chocolate, so yes, this is an indulgent treat! But think of it as a genuinely satisfying conclusion to your meal. Remember, this is just an estimate based on the standard ingredients.
- Serving Size: 1 serving
- Calories: 350
- Fat: 28g (17g Saturated)
- Carbohydrates: 25g
- Sugar: 20g
- Protein: 5g
If you’re watching sugar, remember we kept the added sugar optional! That’s one of the beauties of keeping the ingredient list short—you are completely in charge of what goes into your creamy chocolate treat.
Share Your Experience Making This Simple Chocolate Recipe
I truly hope you loved diving into this simple chocolate recipe as much as I do! This velvety chocolate mousse is the definition of fuss-free elegance, and hearing about your success stories keeps me inspired in the kitchen every day. Please leave a quick rating below and tell me if this quick chocolate dessert made your week!
If you want to know more about why I focus on these simple, time-saving methods, head over to the About page. And if you made it and adored it, I dare you to compare notes with this very popular version from a fellow fast-food lover!
PrintEasiest Silky 3-Ingredient Chocolate Mousse

Make this light and airy chocolate mousse with only three simple ingredients. It comes together quickly, tastes rich, and offers a velvety texture perfect for an elegant, no-bake dessert.
- Prep Time: 15 min
- Cook Time: 0 min
- Total Time: 4 hours 15 min
- Yield: 4 servings 1x
- Category: Dessert
- Method: No Bake
- Cuisine: French
- Diet: Vegetarian
Ingredients
- 200g dark chocolate (at least 70% cocoa solids)
- 1 cup heavy whipping cream, chilled
- 1 tablespoon granulated sugar (optional, adjust to taste)
Instructions
- Chop the dark chocolate into small, uniform pieces. Place the chocolate in a heatproof bowl.
- Heat half of the heavy whipping cream (1/2 cup) in a small saucepan over medium heat until it just begins to simmer around the edges. Do not let it boil.
- Pour the hot cream over the chopped chocolate. Let it sit undisturbed for five minutes to allow the chocolate to melt completely.
- Gently whisk the chocolate and cream mixture until it is completely smooth and glossy. If using, whisk in the sugar now. Set the mixture aside to cool to room temperature.
- Pour the remaining 1/2 cup of cold heavy whipping cream into a separate mixing bowl. Beat the cream with an electric mixer until stiff peaks form.
- Gently fold one-third of the whipped cream into the cooled chocolate mixture to lighten it.
- Carefully fold in the remaining whipped cream until just combined. Avoid overmixing to keep the mousse light and airy.
- Spoon the mousse into individual serving cups or ramekins.
- Chill the chocolate mousse in the refrigerator for at least four hours, or until firm. Serve cold.
Notes
- For a richer flavor, use a higher percentage dark chocolate.
- If you prefer a lighter texture, you can skip the optional sugar.
- This mousse is excellent made ahead of time for dinner parties.
- Garnish with fresh raspberries or chocolate shavings before serving for an elegant dessert presentation.
Nutrition
- Serving Size: 1 serving
- Calories: 350
- Sugar: 20
- Sodium: 30
- Fat: 28
- Saturated Fat: 17
- Unsaturated Fat: 11
- Trans Fat: 0.5
- Carbohydrates: 25
- Fiber: 3
- Protein: 5
- Cholesterol: 95