

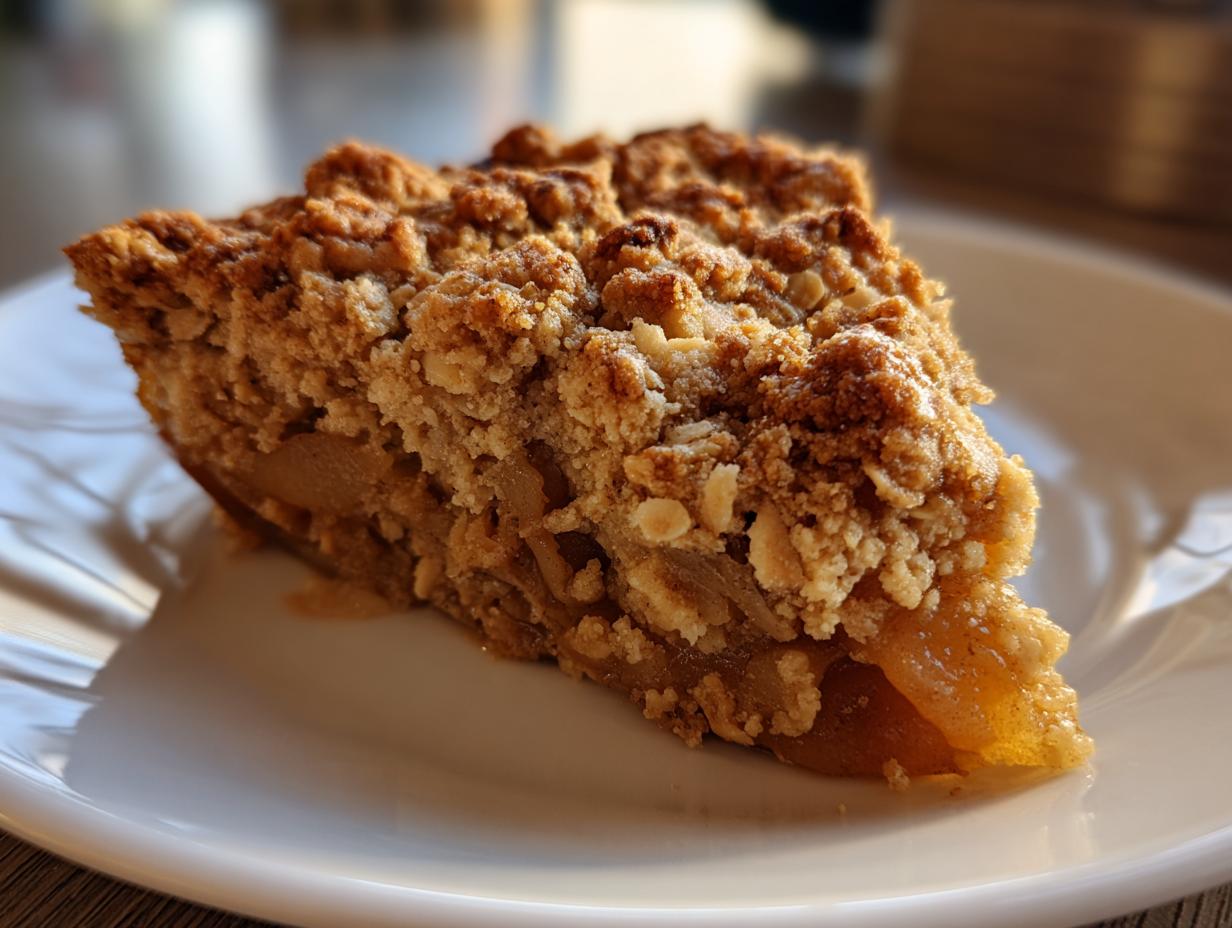
Isn’t that the way it always goes? You crave that cozy, warm-from-the-oven feeling that only a fall fruit dessert can give you, but you look at the clock and realize you only have a few minutes before dinner needs to be on the table. That’s exactly why I’m so excited to share this **Easy Brown Sugar Cinnamon Pear Crisp** with you today. It’s the perfect answer for busy people who refuse to sacrifice incredible flavor just because time is short. This is one of my absolute favorite recipes to pull together, proving that a truly exceptional homemade pear dessert doesn’t need hours of fuss. This pear crisp is pure comfort, built on the Cooking by Felix philosophy: maximum flavor, minimum stress, every single time. If you love baking simple fall goods, you absolutely have to check out my recipe for moist apple bread too!
- Why This Easy Pear Crisp Recipe is a Family Favorite Crisp Recipe
- Ingredients for the Best Pear Crisp
- How to Prepare Your Brown Sugar Cinnamon Pear Crisp
- Tips for the Perfect Pear Crisp
- Making Variations on the Classic Pear Crisp
- Storage and Reheating Instructions for Leftover Pear Crisp
- Serving Suggestions for this Homemade Pear Dessert
- Frequently Asked Questions About Making Pear Crisp
- Nutritional Information Estimate for this Pear Crisp
Why This Easy Pear Crisp Recipe is a Family Favorite Crisp Recipe
When things get hectic around here, I turn to this recipe because it hits that sweet spot between fast and soulful. It’s earned its title as a true Family Favorite Crisp Recipe, even over fancier baked goods. Honestly, there’s nothing better than pulling this out of the oven when you’ve only been working for about 40 minutes total. That aroma of warm cinnamon and sweet caramelizing pears? It just signals that the chaos of the day is over, and now we settle in.
What makes it my go-to is the topping. It’s rustic, buttery, and gives you that satisfying crunch with every spoonful. If you’re looking for a simple, Comforting Pear Crumble that tastes like you spent all afternoon on it, this is it. It just tastes like autumn settled right onto your plate.
Ingredients for the Best Pear Crisp
Getting the Best Pear Crisp means starting with ingredients that are clear and precise. I never want you to guess what kind of pears to grab, or how that butter should look! Because this dessert is so humble, the quality of what you put in really shines through, especially when you’re aiming for that perfect comforting texture.
For the fruit filling, we keep it super straightforward to let those sweet pears do all the talking:
- 6 ripe pears, peeled, cored, and sliced
- 1/4 cup granulated sugar
- 1 tablespoon lemon juice (this keeps them bright!)
- 1 teaspoon ground cinnamon
- 1/4 teaspoon ground nutmeg
The success of any crisp lies almost entirely in that lovely, crumbly layer on top. Here’s exactly what you need for the magic to happen:
The Simple Topping for Fruit Crisp
This topping is what turns simple baked fruit into something truly special. Remember, we need crunch, not paste! If your butter is too warm, you’ll struggle to get the right texture, so make sure those 6 tablespoons of cold unsalted butter are cut into small pieces before you start building this layer. It makes that ‘cutting in’ process so much easier when everything starts chilled.
- 1/2 cup all-purpose flour
- 1/2 cup packed brown sugar (this is where the caramel flavor comes from!)
- 1/2 cup rolled oats (make sure they are rolled oats, not instant)
- 1/4 teaspoon salt
- 6 tablespoons cold unsalted butter, cut into small pieces
How to Prepare Your Brown Sugar Cinnamon Pear Crisp
Alright, putting this together is just as easy as gathering the ingredients! Since we are aiming to get this deliciousness on the table quickly, we need to get our oven fired up first. Preheat your oven right now to 375°F (190°C). Next, just give an 8×8 inch baking dish a little light greasing. That’s it for prep. This entire pear crisp comes together so fast, you won’t even believe it.
Preparing the Spiced Pear Filling
Now for the exciting part: turning those pears into something spiced and wonderful. Grab a big bowl—the bigger, the better so you don’t make a mess! Gently combine your sliced pears with the granulated sugar, that little splash of lemon juice to keep everything tasting fresh, and those warm spices—the cinnamon and nutmeg we talked about. Toss everything around super gently. We want those luscious pear slices coated, but we definitely don’t want to bruise them into mush. When they look glossy and fragrant, spread them out into that greased dish in one even layer.
Assembling the Buttery Oat Topping for this Pear Crisp
Time to switch bowls! In a separate medium bowl, whisk together your dry topping ingredients: the flour, that rich brown sugar, the oats, and the salt. Now for the butter—remember, it has to be cold! I have a little trick here: if you want to take this from great to *amazing*, substitute two tablespoons of that cold butter for browned butter. Browning the butter first adds this incredible nutty depth to the topping that perfectly complements the cinnamon. That said, if you’re in a real rush, just use the cold butter straight from the fridge.
Use a pastry blender, or honestly, just your fingertips is my favorite way, to cut that butter into the dry mix. You have to work quickly so the heat from your hands doesn’t melt it too much. Keep rubbing and squishing until the mixture looks like coarse, sandy crumbs. Don’t worry if a few bigger clumps remain; those turn into the best bites on top of your pear crisp!
Just sprinkle that incredible oat topping evenly over your spiced pears. Don’t press it down at all—let it sit loosely on top so it can get perfectly golden!
Baking and Resting Your Warm Pear Dessert Recipe
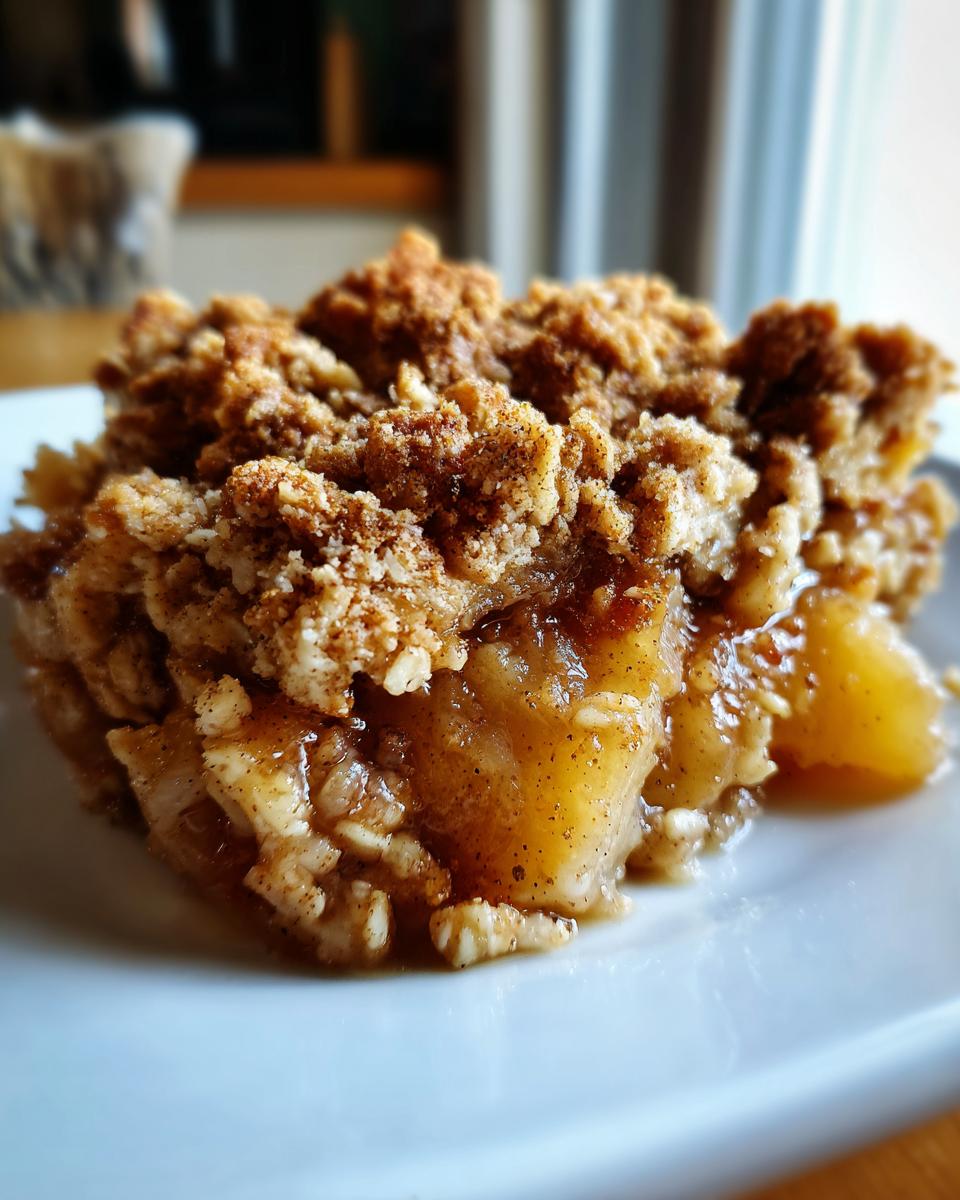
Slide that dish into your preheated oven. You’re looking at about 35 to 40 minutes baked time. You’ll know it’s ready for the next step when the topping is that beautiful golden brown color we all look for, and the fruit underneath is bubbling up around the edges. That bubbling fruit tells you everything is tender and ready.
This step is necessary, I promise! Even though it smells completely heavenly, you must let this Warm Pear Dessert Recipe rest on the counter for at least 15 minutes before you serve it. This lets all those lovely juices settle down so you don’t end up with a runny mess on your plate. If you want to learn another quick trick for decadent baking, take a peek at my easy white chocolate fudge recipe! For more inspiration on quick baked fruit desserts, I always look at what my friends are doing, like this recipe from Easy Pear Crisp.
Tips for the Perfect Pear Crisp
Even though this is an Easy Pear Crisp Recipe, paying attention to a few little details is what elevates it from good to truly unforgettable. You know me—I love sharing the little behind-the-scenes secrets that make baking less guesswork and more rewarding! Honestly, when you spend minimal time on prep, you want the results to sing, right?
I mentioned browning the butter in the assembly section, but if you skip that, here is another way to deepen the flavor: use half brown sugar and half granulated sugar in the filling as well as the topping. That mix gives you both structure from the white sugar and that deep, wonderful molasses note from the brown sugar.
Ingredient Notes and Substitutions for Your Pear Crisp
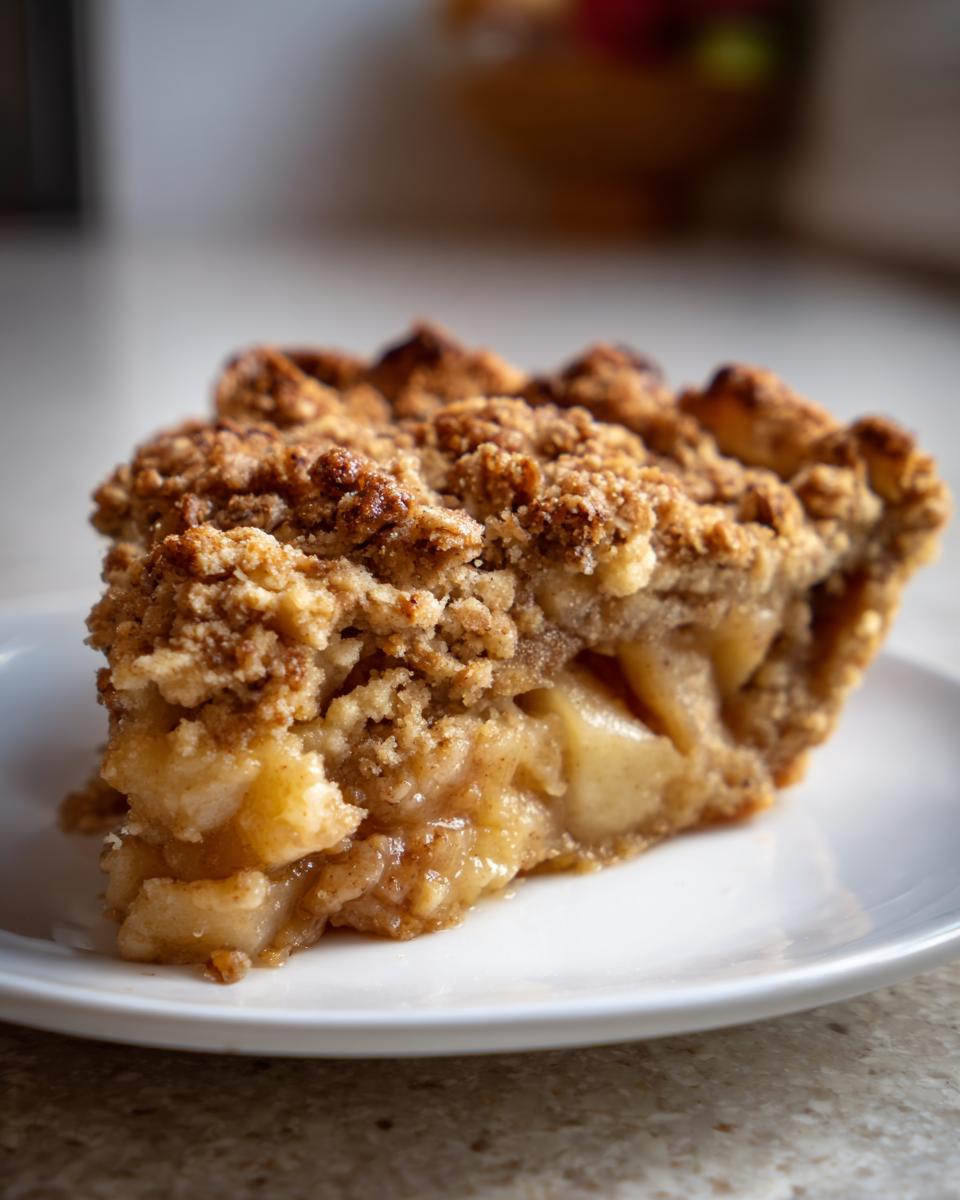
When choosing your fruit for the main event of this pear crisp, please go for firmer varieties like Bosc or Anjou. Pears that are too soft, like Bartlett when they’re intensely ripe, tend to break down almost completely into mush during the baking process. We want tender slices, not baby food! If you prefer a little complexity, try swapping out a quarter cup of the oats in the topping for chopped walnuts or pecans for an extra textural surprise.

Also, if you ever find yourself out of regular flour, all-purpose works perfectly for the topping mix. But keep in mind, if you are adapting this for someone avoiding wheat, the topping will need a 1:1 gluten-free flour blend. You can also check out my thoughts on mixing ingredients when I talk about my best classic creamy egg salad recipe; precision matters in simple recipes like this!
Making Variations on the Classic Pear Crisp
This basic, beautiful recipe is just the starting point, honestly. Once you nail the texture of the topping, you can start experimenting with all sorts of fun combinations! I always encourage you to look at what’s in season or grab something tart to balance out the sweetness of the pears.
If you have some leftover cranberries from the holidays, throwing them in with the pears creates a stunning Cranberry Pear Crisp—the tartness is just incredible against that brown sugar topping. Seriously, try it! For other Apple Pear Crisp Ideas, you can easily adapt this by swapping two of the pears out for two crisp apples, like a Granny Smith. That mix of fruit is a guaranteed win.
And if you’re feeling extra adventurous, maybe try adding some chopped walnuts directly into the topping mix. It gives you another layer of crunch and a nutty depth. If you are loving these seasonal bake ideas, you’ve got to see my recipe for moist spice cake—it uses a lot of the same cozy fall spices!
For a really gorgeous tartness pairing, you can check out this idea for a rustic cranberry pear crisp some friends of mine put together. It’s proof that minimal effort yields maximum fall flavor!
Storage and Reheating Instructions for Leftover Pear Crisp
Listen, the hardest part about making this pear crisp is having leftovers, but when you do, we need to treat that topping right! If you have any left over, just cover the dish loosely with plastic wrap or foil and leave it on the counter for a day if you plan on eating it soon. If you need it to last longer, tuck it into the fridge.
Now, here’s the critical part: reheating! Please, please, avoid the microwave if you can. It instantly softens that beautiful, crunchy topping we worked so hard to achieve. The best way to bring it back to life is popping the portion onto a baking sheet in a 350°F oven for about 10 minutes, or even better, using an air fryer for 5 minutes until it’s golden and bubbly again. That guarantees you get that satisfying crisp texture back.
Serving Suggestions for this Homemade Pear Dessert
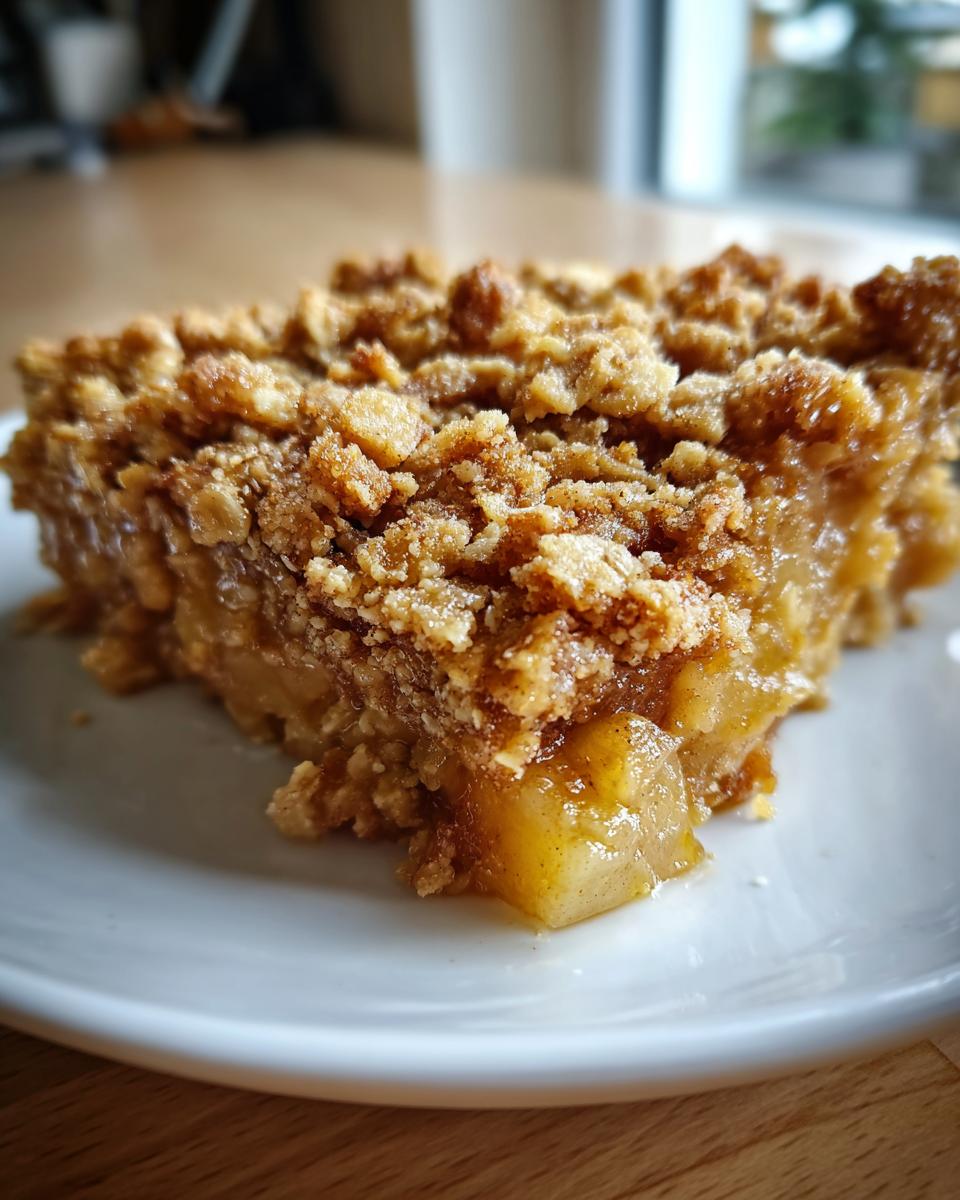
That first bite of a Homemade Pear Dessert is always the best when it’s warm, right? The flavor of the brown sugar and cinnamon filling just sings when it’s hot. While it’s lovely all by itself, I have a few ideas to make your serving moment extra special—and slightly indulgent!
You absolutely can’t go wrong with a generous scoop of really good vanilla bean ice cream melting right over the top. The cold creaminess against the warm, spiced pears? Perfection! If you need something a bit lighter, a dollop of fresh whipped cream works beautifully. My favorite extra touch? A really thin drizzle of store-bought caramel sauce right before it goes to the table. It adds just a touch more richness without feeling heavy.
If you are looking for a non-frozen partner for your slices, check out how I make my easy creamy homemade chocolate pudding; it’s surprisingly fantastic served alongside fruit crisps too!
Frequently Asked Questions About Making Pear Crisp
I know when I’m trying a new recipe, especially a quick one, I always have a stack of little questions pop up right before I start. That’s totally normal! We want this to be the best, most reliable pear crisp you’ve ever made, so let’s tackle some of those common sticking points right now. I’ve gathered a few things people always ask me about, so you can move straight to baking!
What is the best type of pear for a pear crisp?
This is a great question because the wrong pear can literally turn your dessert into soup! For this recipe, because we want those beautiful slices to hold up nicely under the topping and turn tender but not disappear, you absolutely need a firmer pear. My top picks are always Bosc or Anjou. They have just the right density to keep their shape during that 40 minutes in the oven. Avoid super soft pears like very ripe Bartletts unless you really prefer a more sauce-like filling, because they break down much faster!
Can I make this dessert ahead of time?
Yes, you can get ahead, but timing matters for the topping! You can absolutely peel, core, and slice your pears ahead of time, toss them with the spices and sugar, and store them covered in the fridge for up to 24 hours. But promise me you won’t make the topping until you are ready to bake. The buttery oat mixture really needs that cold butter to stay crumbly. If you mix the topping too early, the butter warms up, and you risk it melting into a greasy layer instead of baking up crunchy. Assemble the topping right before it goes in the oven for the best results.
How do I ensure my topping stays crunchy for this easy baked fruit dessert?
This is the secret handshake for any good crisp! The overriding rule is to keep your fat—the butter—as cold as possible. I already told you, but I’m saying it again: use butter straight from the freezer or fridge, cut into small cubes. When you cut the butter into the flour and oats, work quickly, using just your fingertips. You aren’t trying to blend it smooth; you are aiming for coarse crumbs, like rough gravel, with some pea-sized chunks of butter still visible. Those cold pockets of butter steam in the oven, creating voids that result in that airy, golden crunch we love. If you’re looking for other quick, reliable recipes you can prep ahead—for savory meals, in this case—you should check out my quick and easy homemade BBQ sauce recipe!
Nutritional Information Estimate for this Pear Crisp
Listen, when we’re talking about a rustic, indulgent dessert like this glorious pear crisp, I’m definitely not baking this because I’m counting every calorie! However, I know some of you like to plan ahead, or maybe you’re curious about what goes into this buttery goodness. So, based on the ingredients list we used, here is an estimated breakdown for one serving of this delicious, warm dessert.
Please remember, this is just an estimate based on standard ingredient measurements; what you use—like the type of pear or how much butter sticks to your fingers—can change things a bit. But this gives you a great ballpark figure for the richness you’re enjoying!
- Serving Size: 1 serving
- Calories: 310
- Fat: 15g
- Saturated Fat: 9g
- Carbohydrates: 45g
- Sugar: 35g
- Protein: 4g
Doesn’t that sound like a perfect ending to a chilly evening? It’s full of carbs and sugar because, well, it’s a crisp! But it packs in 5 grams of fiber from those oats and pears, which I love seeing in a dessert. Enjoy it guilt-free—you earned that cozy moment!
PrintEasy Brown Sugar Cinnamon Pear Crisp

Make this simple pear crisp featuring tender, spiced pears beneath a buttery, crunchy oat topping. It is a comforting dessert ready quickly.
- Prep Time: 15 min
- Cook Time: 40 min
- Total Time: 55 min
- Yield: 6 servings 1x
- Category: Dessert
- Method: Baking
- Cuisine: American
- Diet: Vegetarian
Ingredients
- 6 ripe pears, peeled, cored, and sliced
- 1/4 cup granulated sugar
- 1 tablespoon lemon juice
- 1 teaspoon ground cinnamon
- 1/4 teaspoon ground nutmeg
- 1/2 cup all-purpose flour
- 1/2 cup packed brown sugar
- 1/2 cup rolled oats
- 1/4 teaspoon salt
- 6 tablespoons cold unsalted butter, cut into small pieces
Instructions
- Preheat your oven to 375°F (190°C). Lightly grease an 8×8 inch baking dish.
- In a large bowl, combine the sliced pears, granulated sugar, lemon juice, cinnamon, and nutmeg. Toss gently to coat the pears evenly.
- Spread the pear mixture into the prepared baking dish in an even layer.
- In a separate medium bowl, prepare the topping. Combine the flour, brown sugar, rolled oats, and salt.
- Cut in the cold butter using a pastry blender or your fingertips until the mixture resembles coarse crumbs.
- Sprinkle the oat topping evenly over the spiced pears.
- Bake for 35 to 40 minutes, or until the topping is golden brown and the fruit filling is bubbly.
- Let the pear crisp cool for at least 15 minutes before serving.
Notes
- For a richer flavor, substitute 2 tablespoons of the cold butter with browned butter in the topping mixture.
- If you want a sweeter dessert, increase the granulated sugar in the filling to 1/3 cup.
- Serve this warm pear dessert with vanilla ice cream or whipped cream for a classic finish.
Nutrition
- Serving Size: 1 serving
- Calories: 310
- Sugar: 35g
- Sodium: 110mg
- Fat: 15g
- Saturated Fat: 9g
- Unsaturated Fat: 6g
- Trans Fat: 0g
- Carbohydrates: 45g
- Fiber: 5g
- Protein: 4g
- Cholesterol: 35mg