

I don’t know about you, but sometimes the craving hits for real homemade candy, and my energy level is hovering somewhere near zero. Scrolling through complicated holiday fudge recipes that require thermometers and hours of stirring? Forget about it! That’s exactly why I built my whole brand, Cooking by Felix, around giving you back your time without sacrificing flavor. That’s why I’m so fired up to share what I genuinely think is the best white chocolate fudge out there. Seriously, you only need three ingredients for this easy white chocolate fudge. It’s totally no-bake, incredibly reliable, and based on the practical, no-fuss cooking traditions my family passed down to me. We’re making simple white fudge that melts in your mouth every single time.
- Why This Easy White Chocolate Fudge Recipe Works (The Secret to Creamy White Chocolate Candy)
- Gather Your Ingredients for Simple White Fudge
- Step-by-Step Instructions for No Bake White Chocolate Fudge
- Tips for Success When Making White Chocolate Fudge
- Creative Variations for Your White Chocolate Fudge Recipe
- Storage and Make Ahead Sweets: Keeping White Chocolate Fudge Fresh
- Serving Suggestions for This Easy Dessert Squares
- Frequently Asked Questions About Homemade White Fudge
- Nutrition Estimate for This Quick Candy Recipe
Why This Easy White Chocolate Fudge Recipe Works (The Secret to Creamy White Chocolate Candy)
Okay, I know what you’re thinking: fudge is supposed to be tricky, right? You need fancy thermometers or hours of stirring heavy cream? Nope! Not with this recipe. Felix’s promise is that this is the most reliable creamy white chocolate fudge you’ll ever make. Since it’s a fantastic no bake white chocolate fudge, we’ve ditched the stovetop entirely. This method guarantees that picture-perfect, smooth texture without any gritty surprises.
The Magic of Condensed Milk Fudge
The absolute genius behind this homemade white fudge is the sweetened condensed milk. Think of it: regular fudge requires you to boil sugar to the soft-ball stage—which gives me instant kitchen anxiety! With condensed milk, the necessary sugar is already dissolved and stabilized. It acts as our sweetener *and* our stabilizer all in one can. It’s the backbone of truly easy confectionery.
Microwave Method for Perfect White Chocolate Fudge
Whenever I’m making simple white fudge, I tell everyone to treat that microwave with respect! White chocolate chips HATE high heat; they’ll seize up faster than you can say “Oops!” That’s why we use fifty percent power. It’s a slow, gentle melt. Trust me, give that mixture a really good stir after every short burst. You’ll get a gorgeous, smooth finish when you’re done, not a solid block of sadness!
Gather Your Ingredients for Simple White Fudge
I love that this recipe feels like cheating because the shopping list is so short. Seriously, this is the essence of a quick candy recipe! You only need three essentials to make this amazing batch of easy white chocolate fudge. Having these items on hand means you can decide on dessert five minutes before guests arrive, and no one will ever know how simple it was.
- One 14-ounce can of sweetened condensed milk (the star!)
- Three cups of white chocolate chips. Don’t skimp on quality here!
- One teaspoon of good vanilla extract.
That’s it! No butter, no heavy cream, just three things to get you to that perfect melt in your mouth fudge texture.
Step-by-Step Instructions for No Bake White Chocolate Fudge
Alright, let’s get down to business, because this is the fun part. Since this is a quick candy recipe, prep is crucial, but the actual cooking takes about three minutes flat. Follow these steps exactly, and you’ll have perfect slices of easy white chocolate fudge ready for the fridge. Pay close attention to that melting step—it’s where the magic (and potential disaster) happens!
Pan Preparation and Melting the White Chocolate Fudge Base
First things first: get your container ready. Grab an 8×8 inch pan and line it with parchment paper. Make sure you leave an overhang on two opposite sides—we call this using ‘sling handles.’ That little bit of paper is how we lift this beautiful, soft fudge right out later! Now for the main show. Put your white chocolate chips and the entire can of sweet condensed milk into a microwave-safe bowl. Microwave it on fifty percent power for just 30 seconds. Stir it like you mean it! Then, keep going in 30-second bursts, stirring hard between each one. It usually takes about a minute and a half total to get it completely silky smooth. Keep checking; you do *not* want to scorch this white chocolate fudge.
Setting and Cutting Your Creamy White Chocolate Fudge
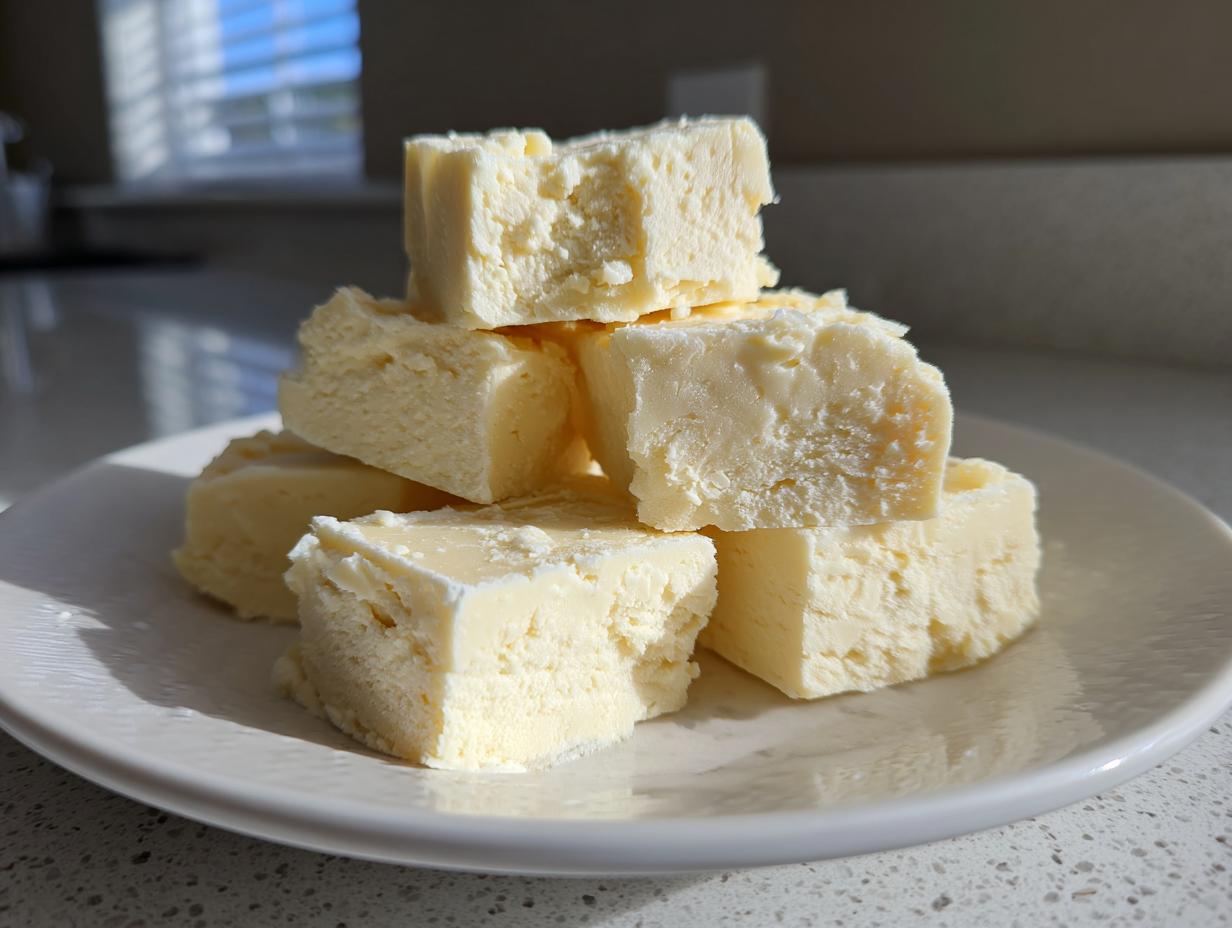
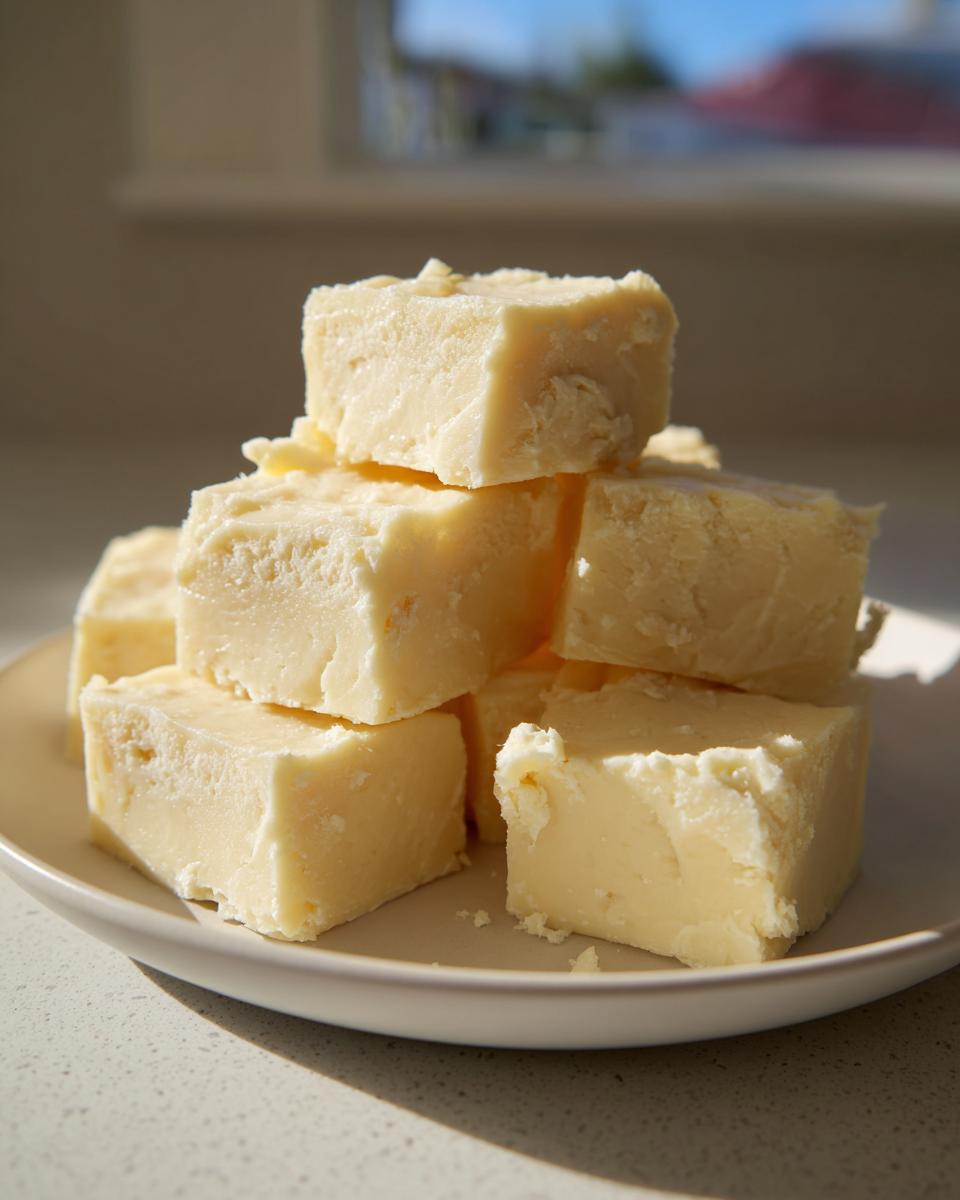
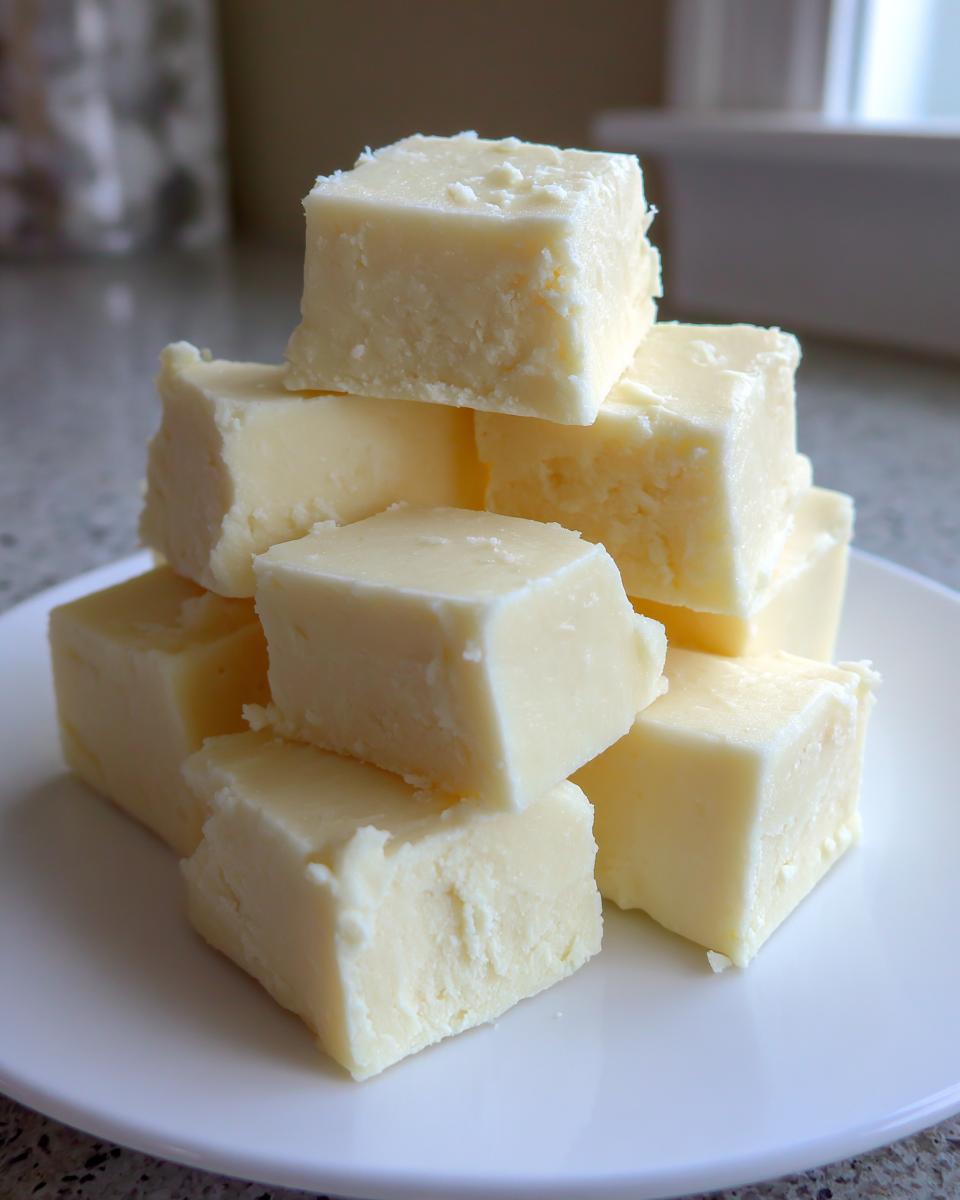
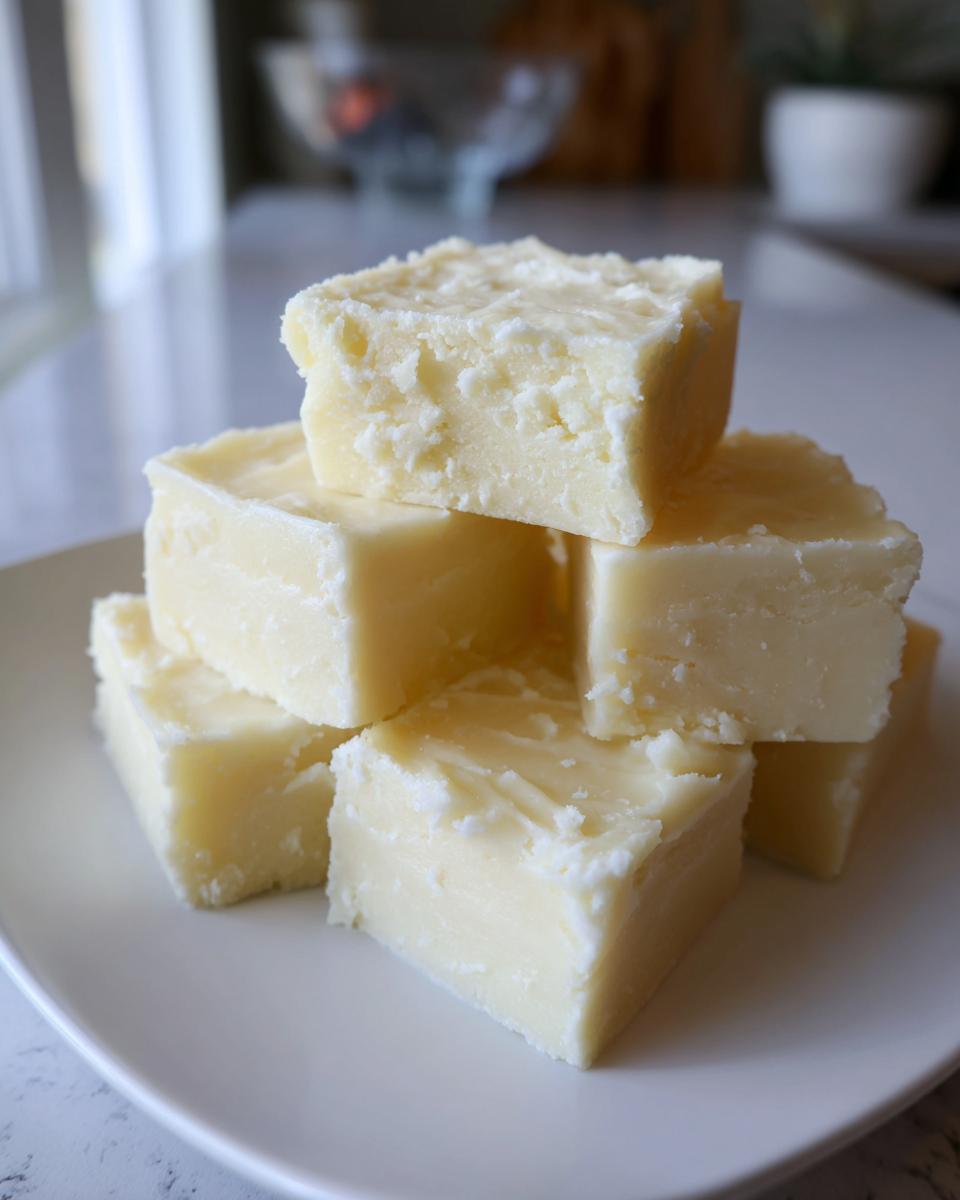
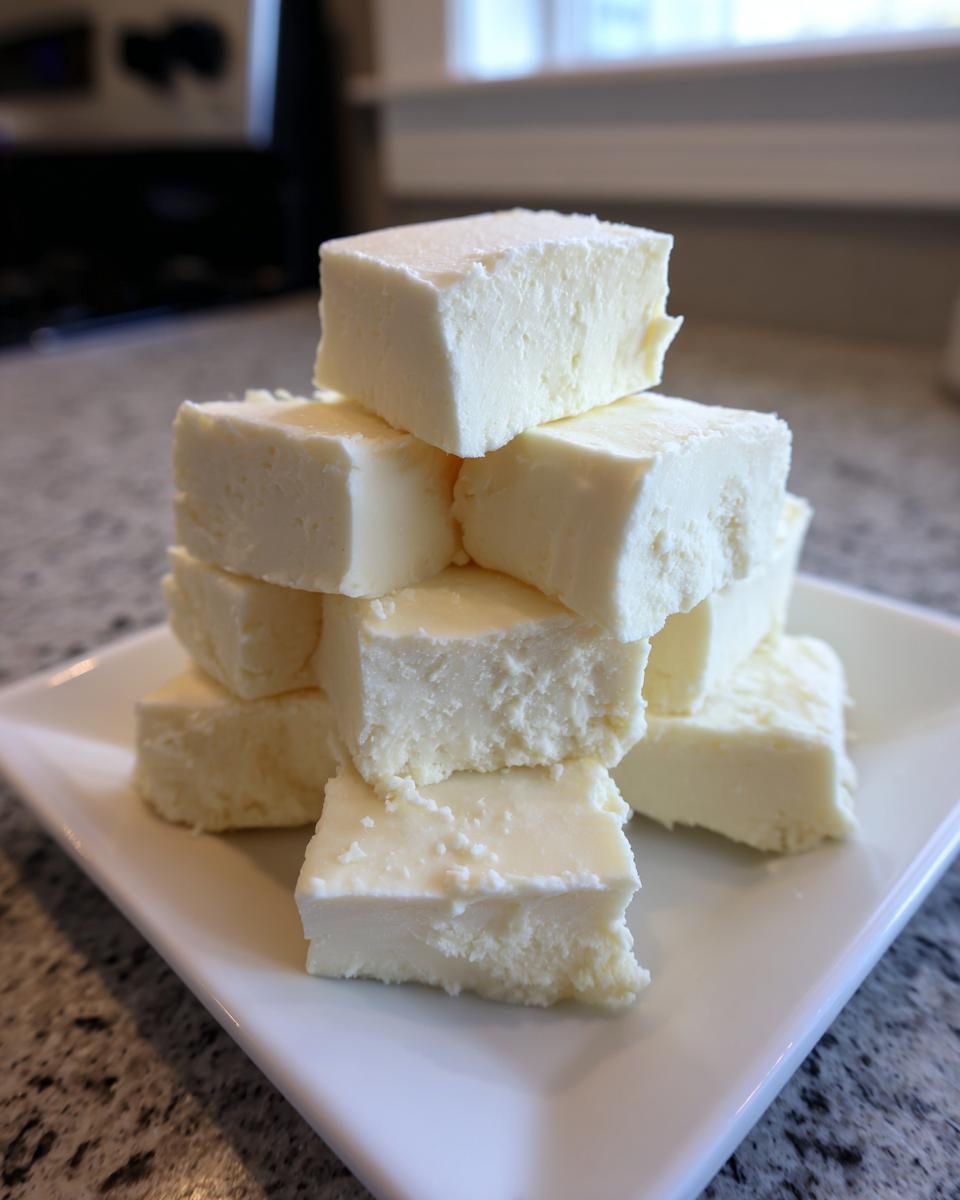
Once you’ve got that heavenly smooth base, quickly stir in that vanilla extract until it disappears. Scrape every bit of that goodness into your prepared pan and spread it out evenly with a spatula—don’t overwork it! Then, pop it into the refrigerator. It needs at least two hours to get firm enough to handle cleanly, though I usually leave mine for three just to be safe. Once it’s solid, use those parchment paper handles to lift the entire block out. Wipe your knife clean between cuts, and slice it into small squares. These little pieces are perfect for setting out on a platter for spontaneous snacking!
Tips for Success When Making White Chocolate Fudge
I’ve learned a few hard lessons over the years trying to get that perfectly creamy texture. Believe me, there were batches of white chocolate that ended up looking like grainy sand—the dreaded seize! When you are relying solely on melted chocolate, you have to treat those ingredients delicately, especially when we aren’t using tempering techniques. Follow these rules of thumb I keep taped inside my cabinet, and you’ll nail this white chocolate dessert every time.
First, let’s talk about the state of your ingredients before they even go near the microwave. The single biggest tip I can give you for achieving the best ever creamy white chocolate fudge is this: make sure your sweetened condensed milk is sitting out at room temperature. If it’s chilled, it hits that warm chocolate suddenly and BAM! Instant seize. I learned this the hard way when I was trying to rush a batch for a last-minute bake sale—I grabbed the milk straight from the fridge, stirred it in, and watched my beautiful melting chocolate turn into stiff, unusable clumps. Heartbreaking!
It’s also worth mentioning the chips themselves. While this is an easy fudge recipe, the quality of your chips truly matters for that smooth finish. High-quality baking chips generally melt better than ‘white baking morsels,’ which sometimes have more vegetable fats that don’t cooperate as well. Use what you love the taste of, but know that better melting equals smoother final bites!
Finally, remember that the refrigerator is your friend during the setting phase. This simple white fudge is meant to be rich and dense, and rushing the chilling time means you’ll get a sticky, messy slab instead of clean-cut squares for gifting. Give it the full two hours to firm up properly before you even think about slicing.
Creative Variations for Your White Chocolate Fudge Recipe
Just because this recipe uses only three main ingredients doesn’t mean you can’t get super creative! This base is practically begging for mix-ins, turning it into impressive white chocolate cranberry fudge or whatever else strikes your fancy. When you’re folding things in, remember that you add these right after stirring in the vanilla, before you pour the mixture into the pan. You want to incorporate them gently so you don’t mess up that beautifully smooth texture we worked so hard for.
Festive Mix-Ins for Holiday Fudge
If you’re putting this out for parties or wrapping it up for holiday fudge recipes, texture is everything. Try folding in about half a cup of dried cranberries—they give you that perfect tangy pop against the sweet white chocolate. Crushed peppermint candies are another winner for the Christmas season! You only need to fold them in right at the end, just before it goes into the pan, so they keep their crunch.
Adding Flavor Layers to Your Simple White Fudge
Sometimes you don’t need crunch; you just need complexity. If you want to elevate this beyond a standard vanilla fudge recipe, swap out the vanilla extract for almond extract—it gives it a really sophisticated, nutty note. Or, if you’re feeling adventurous, drizzle a spoonful of warm, melted salted caramel across the top just before chilling. It creates beautiful, sweet ribbons and makes it look like you spent all day on it!
Storage and Make Ahead Sweets: Keeping White Chocolate Fudge Fresh
One of the best things about this no-bake white chocolate fudge? It’s the ultimate make ahead sweet! Since it’s firm and holds its shape so beautifully once chilled, you can whip up a batch days before a party or holiday gathering. This cuts down on last-minute kitchen chaos, which, as a busy person, I totally value. You don’t need to worry about reheating or fussing with it!
For keeping your beautiful, creamy homemade white fudge in top shape, refrigeration is your best friend. Once you’ve cut it into those nice little squares, place them in an airtight container. They’ll stay fresh and firm in the fridge for up to a week. Because of the high sugar content in the condensed milk, it doesn’t spoil quickly, but the texture stays much better when it’s cool.
Now, if you need to serve it right away or want it slightly softer (more ‘melt in your mouth’), you can actually let it sit on the counter for about 30 minutes before serving. Just don’t leave it out all day long, especially if your kitchen gets warm, or you might end up with slightly sticky edges around your squares. For long-term storage, like prepping for a big holiday platter, the fridge is the only place to be.
Serving Suggestions for This Easy Dessert Squares
Making this white chocolate dessert is only half the fun; the other half is deciding how glorious you’re going to present it! Since we cut this easy white chocolate fudge into small, uniform squares, it instantly elevates from a simple snack to a beautiful piece of homemade candy. Presentation really matters, especially if you’re planning on dropping these off to friends or taking them to a potluck!
For casual snacking throughout the week, just keep them in that airtight container in the fridge—grab one whenever you need that quick burst of creamy sweetness. There is no judgment here; I’ve certainly eaten three squares while walking back from the fridge myself!
However, if you’re using this as part of a larger holiday spread or aiming for beautiful fudge for gifting, presentation makes all the difference. Try sticking two squares together with a little melted dark chocolate as a tiny sandwich, or press a single pecan half right onto the top of each square before it fully sets for a little textural contrast.
They look incredible nestled inside small, jewel-toned paper baking cups—the kind you usually use for mini muffins. It looks fancy, but it takes zero extra effort! This simple trick keeps them from sticking together in the box and makes them look like professional little treasures when you hand them out.
Frequently Asked Questions About Homemade White Fudge
Since this simple white fudge is usually a first-time candy-making experience for so many people, I get questions all the time! It’s better to ask now than to end up with a grainy pan when you were hoping for that perfect, smooth texture. I want every single batch of white chocolate fudge you make to be a total success, whether it’s for yourself or for gifting.
Can I make white chocolate fudge without sweetened condensed milk?
That’s a fair question, especially since some recipes claim to be just 2 ingredient fudge! Well, for *this* specific, super easy, no-bake method, no, you really can’t leave out the sweetened condensed milk. It’s doing the heavy lifting! It provides the sugar structure and the moisture needed to create that signature creamy finish. If you tried to make a traditional fudge without it, you’d need corn syrup, butter, and a candy thermometer to get the sugar right. So while you might find other recipes using evaporated milk or cream, the condensed milk is the key that unlocks this famous, foolproof white chocolate fudge recipe.
My white chocolate fudge mixture seized. What went wrong?
Ugh, seize! It’s my culinary nemesis, and I’ve definitely done it before. Usually, when your white chocolate fudge seizes up into a hard, grainy mess, it means it got too hot, or a tiny drop of water got in there. Remember how I stressed using fifty percent power in the microwave? That’s usually the culprit if it goes wrong! It means the chocolate got scorched instead of gently melted.
My other biggest guess is temperature shock. If your can of condensed milk was cold right out of the fridge and dumped into mostly melted chocolate, that temperature difference can cause the cocoa butter to seize up. Always, always, always make sure your milk is room temperature or slightly warm. A quick zap in the microwave for five seconds before you add it to the chips can save your whole batch!
What is the best type of white chocolate chip to use for creamy white chocolate fudge?
This is an expert tip from me to you! You want to make sure you get that glorious melt in your mouth fudge texture, right? So, pay attention to what ‘white chocolate chips’ actually contain. If the bag largely lists vegetable oil as the primary fat other than cocoa butter, they might not melt as smoothly. I always go for high-quality white chocolate baking chips—the ones that are generally thicker and designed for baking.
If you want the absolute best result for your homemade white fudge, skip the chips altogether and buy a good quality white chocolate bar (look for one with real cocoa butter listed near the top) and chop it up yourself. Buying good chocolate is pricier, sure, but when you’re making something this simple, the quality of the star ingredient really shines through!
Nutrition Estimate for This Quick Candy Recipe
I always include an estimate for the nutrition because I believe in being open about what we’re eating, even when it’s a sweet treat like this white chocolate dessert. Now, remember that this is just a guide! I’m not a registered dietitian, and the exact measurements can shift based on the brand of chips or milk you use. If you load this up with extra mix-ins, those numbers will climb!
But for a standard square of this easy white chocolate fudge made with our three base ingredients, here is the general breakdown:
- Serving Size: 1 square
- Calories: Around 145
- Sugar: Approximately 18g
- Fat: About 7g (These are rich squares!)
- Protein: A small boost at around 2g
Since this is designed as a perfect little treat for gifting or snacking, cutting it into smaller pieces (we got 36 squares out of ours!) keeps the portion size nice and manageable. Enjoy it knowing you made it yourself with just a few simple ingredients!
PrintEasiest 3-Ingredient No-Bake White Chocolate Fudge
Make creamy, melt-in-your-mouth white chocolate fudge using only three simple ingredients. This no-fail microwave recipe is quick, perfect for last-minute desserts, or making homemade candy for gifting.
- Prep Time: 5 min
- Cook Time: 3 min
- Total Time: 125 min
- Yield: 36 servings 1x
- Category: Dessert
- Method: Microwave
- Cuisine: American
- Diet: Vegetarian
Ingredients
- 1 (14 ounce) can sweetened condensed milk
- 3 cups white chocolate chips
- 1 teaspoon vanilla extract
Instructions
- Prepare an 8×8 inch baking pan by lining it with parchment paper, leaving an overhang on two sides for easy removal. Lightly grease the paper.
- Combine the white chocolate chips and sweetened condensed milk in a microwave-safe bowl.
- Microwave on 50 percent power for 30 seconds. Stir well. Continue microwaving in 30-second intervals, stirring thoroughly after each interval, until the mixture is completely smooth and melted. This usually takes 1.5 to 2 minutes total. Do not overheat, as this can cause the chocolate to seize.
- Stir in the vanilla extract until fully combined.
- Pour the fudge mixture into the prepared pan. Spread evenly using a spatula.
- Refrigerate for at least 2 hours, or until the fudge is firm enough to cut.
- Lift the fudge out of the pan using the parchment overhang. Cut into small squares.
Notes
- For the creamiest texture, ensure your sweetened condensed milk is at room temperature before mixing. Cold milk can cause the chocolate to seize.
- If you want to add mix-ins like dried cranberries or crushed cookies, gently fold them in after the vanilla extract before spreading the fudge into the pan.
- Store this homemade white fudge in an airtight container in the refrigerator for up to one week.
Nutrition
- Serving Size: 1 square
- Calories: 145
- Sugar: 18g
- Sodium: 35mg
- Fat: 7g
- Saturated Fat: 4g
- Unsaturated Fat: 3g
- Trans Fat: 0g
- Carbohydrates: 20g
- Fiber: 0g
- Protein: 2g
- Cholesterol: 10mg