

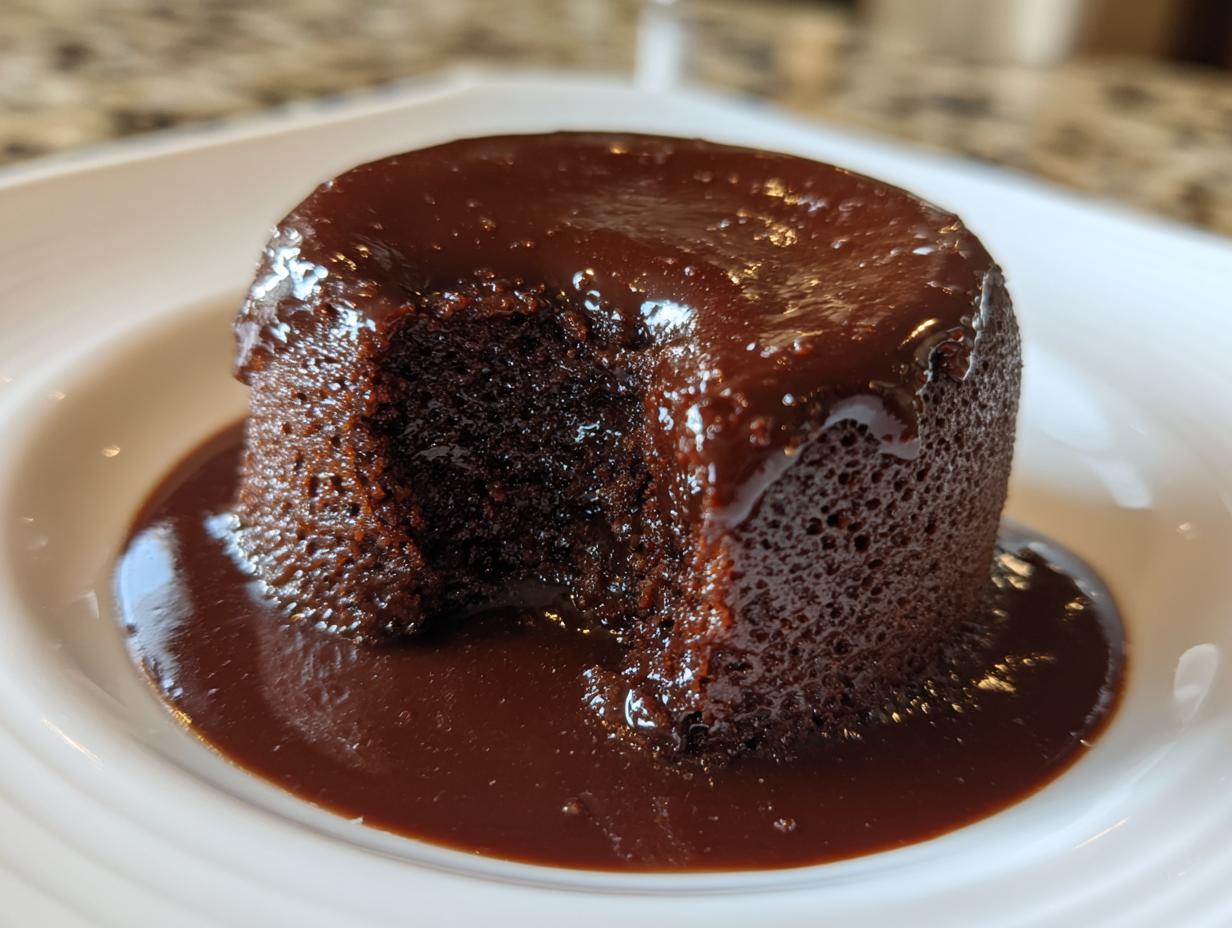
Honestly, sometimes you just need sunshine in a bowl, right? After a long day, nothing beats the deep comfort of a real, amazing dessert, and when that dessert can be made faster than waiting for delivery, that’s a win. Forget those dusty boxes from the grocery aisle—we are making the easiest, creamiest homemade chocolate pudding from scratch. Seriously, this stovetop method is shockingly fast and gives you that velvety, rich texture that instant mixes only dream about. My whole philosophy here at Cooking by Felix is that great flavor shouldn’t stress you out. This simple recipe is my go-to for reclaiming a little bit of kitchen joy, even on a Tuesday night!
- Why This Homemade Chocolate Pudding Recipe Works for Busy Cooks
- Ingredients for the Best Chocolate Pudding
- Step-by-Step Instructions for Creamy Pudding From Scratch
- Tips for Perfect Stovetop Chocolate Pudding
- Storage and Reheating Instructions for Your Chocolate Pudding
- Serving Suggestions for This Velvety Chocolate Treat
- Troubleshooting Common Chocolate Pudding Issues
- Frequently Asked Questions About Classic Chocolate Pudding
- Nutritional Estimate for This Simple Pudding Recipe
Why This Homemade Chocolate Pudding Recipe Works for Busy Cooks
I get it—you’re looking for a dessert that tastes like you slaved over it, but you only have about 25 minutes of free time. That’s why this recipe blows the box mixes out of the water! When you use simple pantry ingredients, you control the flavor, making it instantly richer and deeper than anything artificial. You also skip all those weird stabilizers they put in the boxed stuff. We want real satisfaction here!
Here’s the payoff for choosing homemade:
- It’s unbelievably easy—no fancy equipment needed, just a good whisk.
- You feel good about what you’re feeding your family (no weird colors or flavorings!).
- The texture is miles better; it’s purely luscious.
If you’re whipping these up, maybe try tossing some candied pecans on top later, but honestly, it’s perfect bare-bones.
Achieving Silky Smooth Pudding Texture
The secret weapon here is cornstarch. It builds body beautifully and gives you that perfect structural stiffness without being gloopy. We also use one egg yolk, but here’s the trick: you have to temper it! I walk through it in the next section, but proper tempering is what guarantees a silky smooth pudding texture instead of scrambled eggs floating in your dessert.
Quick Chocolate Dessert Timeline
This is where this recipe shines when life gets hectic. Prep time is just over 10 minutes—that’s just grabbing things out of the cupboard and whisking the dry ingredients together. The cooking time is only about 15 minutes on the stovetop. Twenty-five minutes, start to finish, gets you the absolute best homemade chocolate pudding. That’s faster than running to the store for a pre-made dessert, I promise you!
Ingredients for the Best Chocolate Pudding
Okay, let’s talk about what you need. I love this part because you probably have 90% of this lying around right now! There’s no need for special trips or fancy shelves in your pantry. This recipe is designed to be your trusty backup for any sudden chocolate craving. It yields four perfect, comforting servings.
Here is exactly what you need for this rich, creamy chocolate pudding:
- 1/4 cup granulated sugar
- 1/4 cup unsweetened cocoa powder (Make sure it’s the good stuff!)
- 2 tablespoons cornstarch (Don’t skimp on this thickener!)
- 1/4 teaspoon salt
- 1 1/2 cups whole milk (I use whole milk for flavor, but feel free to experiment!)
- 1 large egg yolk (This adds richness—make sure it’s separated before you start!)
- 1 tablespoon unsalted butter (It needs to be room temperature or slightly soft)
- 1 teaspoon vanilla extract
See? Simple! You get four servings of truly gourmet, from-scratch goodness with just a few core items. This clarity helps you trust the process, and when you trust the process, you get the best chocolate pudding.
Step-by-Step Instructions for Creamy Pudding From Scratch
Okay, here’s the main event! Making this creamy pudding from scratch is really just about managing the heat and trusting your whisk. We’re sticking exactly to the method because it guarantees that deep, decadent flavor we’re looking for without any lumps in your final spoonful. Make sure your stove is set to medium heat—we want consistency, not a race!
- First thing, grab that medium saucepan and put in all your dry stuff: the sugar, the cocoa powder, the cornstarch, and the salt. Whisk them together really well so there are no clumps hiding anywhere before you add liquid.
- Now, slowly whisk in the whole milk until it looks perfectly smooth. You don’t want any grainy bits on the bottom.
- Put the pan over medium heat. This is where you have to stay present! You must stir constantly with your whisk for about 8 to 10 minutes. You’ll know it’s ready when it gets thick enough to coat the back of a spoon. Listen to me: do not let this boil rapidly! A gentle bubble is fine, but rapid boiling means we’re going to break that cornstarch structure.
- Once it’s thick, take it OFF the heat immediately. In a separate little bowl, whisk your one egg yolk just until it’s smooth.
- This next part is vital for our creamy chocolate pudding to turn out perfectly: **tempering**. You slowly drizzle about half a cup of that hot pudding mixture into the yolk while whisking the yolk non-stop. This warms up the egg gently so it doesn’t instantly seize up.
- Pour that warmed yolk mixture right back into the main saucepan. Put it back on low heat and stir gently for just one more minute—remember, do NOT boil again!
- Finally, take it off the heat for the last time and stir in your tablespoon of butter and that teaspoon of vanilla. That butter just melts right in and makes everything glossy. Pour it into your bowls now and press plastic wrap right onto the surface before chilling for a couple of hours.
The Crucial Step: Tempering the Egg Yolk
I know tempering sounds fussy, but trust me, we do it to protect our gorgeous homemade chocolate pudding! If you dumped that hot liquid straight into the raw yolk, the heat would cook the outside of the yolk instantly, resulting in little solid bits floating around instead of smooth texture. By slowly whisking just a touch of the hot liquid into the cold yolk first, you are gently coaxing the yolk’s temperature up to meet the pudding. It’s a safety net for velvety smoothness!
Tips for Perfect Stovetop Chocolate Pudding
Even though this is simple, a couple of kitchen veteran moves can make this stovetop chocolate pudding go from great to absolutely unforgettable. We want that true depth of flavor, that rich decadent pudding payoff, right?
Ingredient Adjustments for Texture Variation
Sometimes you want something lighter, and sometimes you want it thicker than thick! If you find yourself wanting a slightly looser, more pourable consistency—maybe for topping something else—just cut back on the cornstarch slightly. Use 1 1/2 tablespoons instead of the full two tablespoons, and watch it still thicken up nicely without getting too firm.
Now, if you want the *ultimate* indulgence, try this: substitute half of your whole milk with heavy cream. Seriously, when you do this, you get an intensely rich flavor and a texture that rivals any fancy restaurant dessert. It’s an easy swap that makes a huge difference in mouthfeel!
Storage and Reheating Instructions for Your Chocolate Pudding
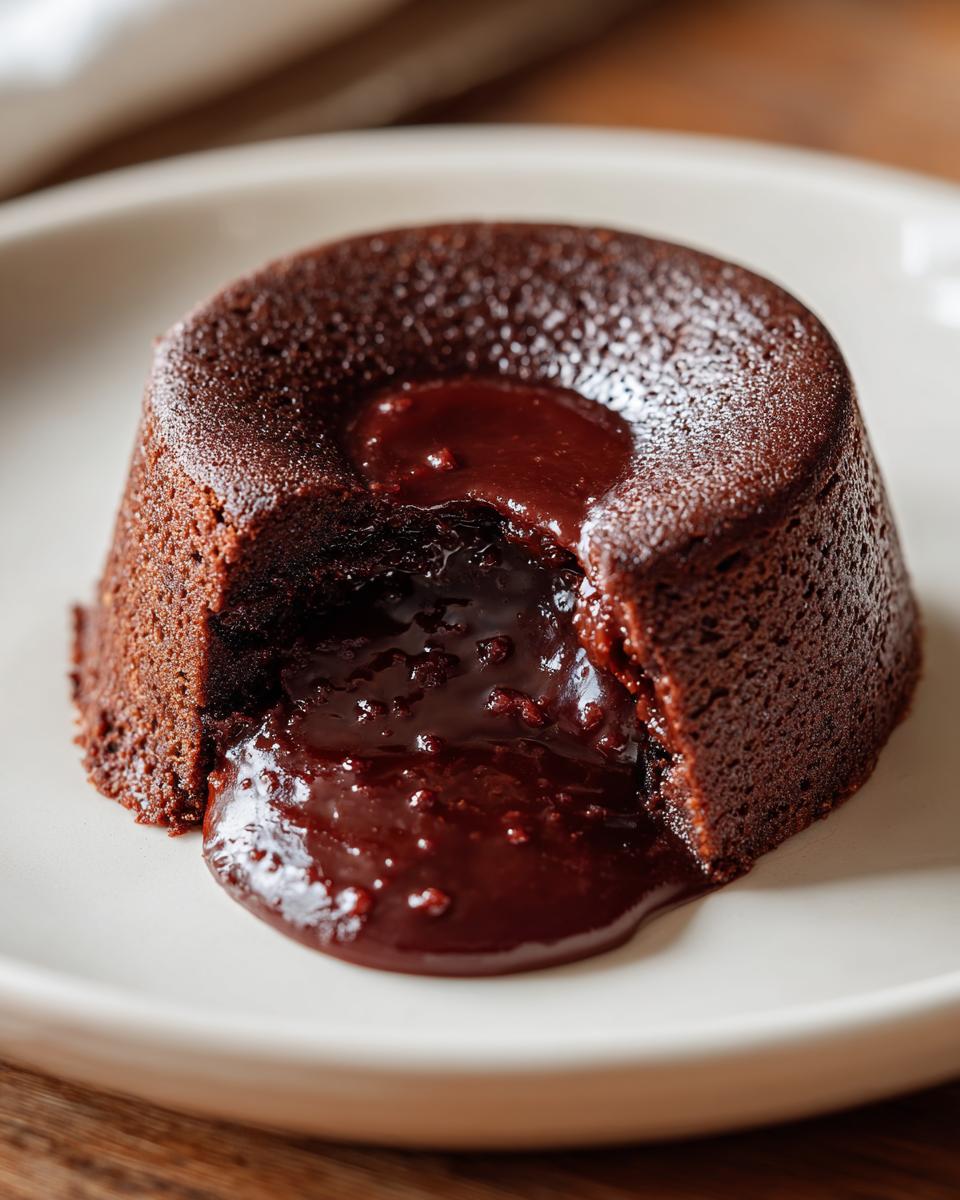
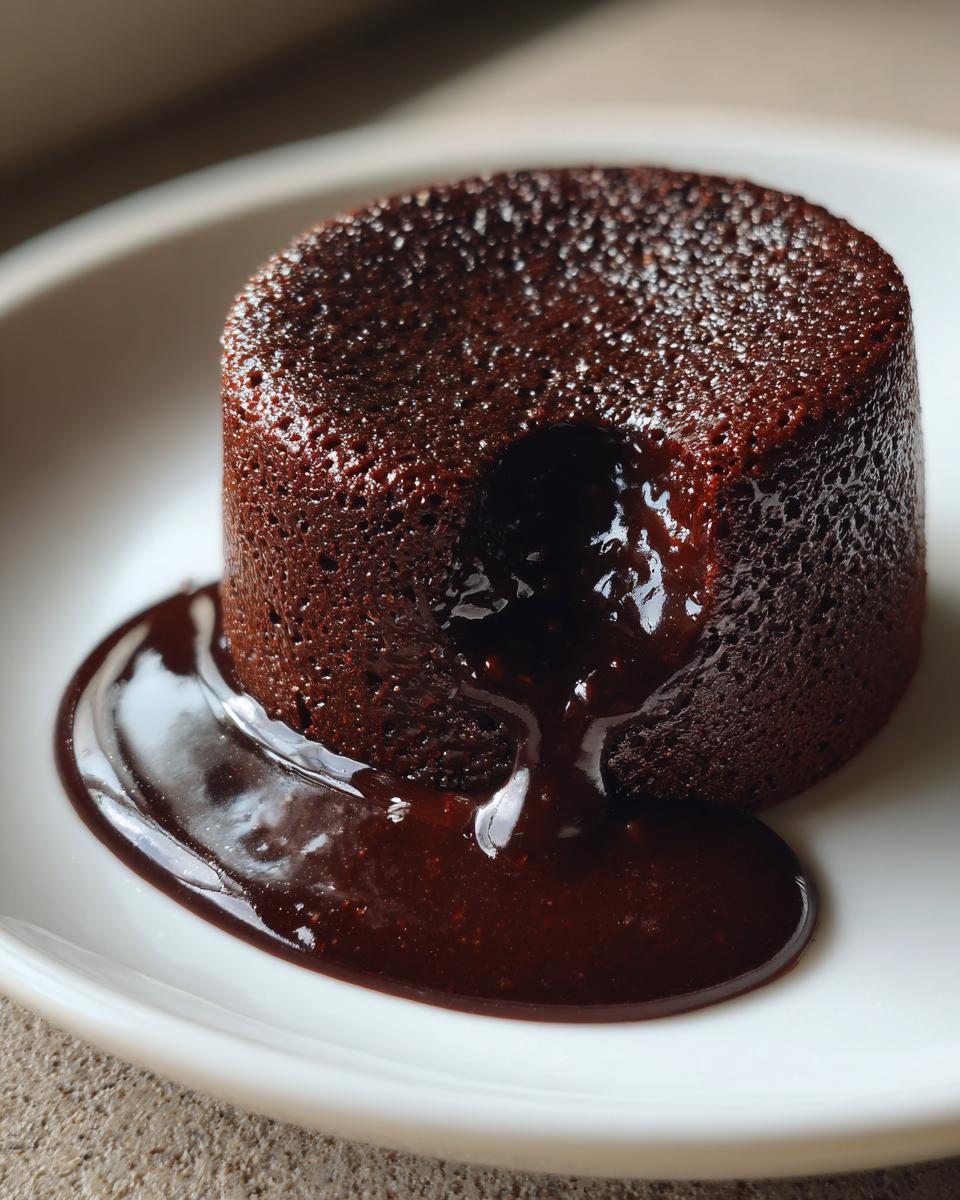
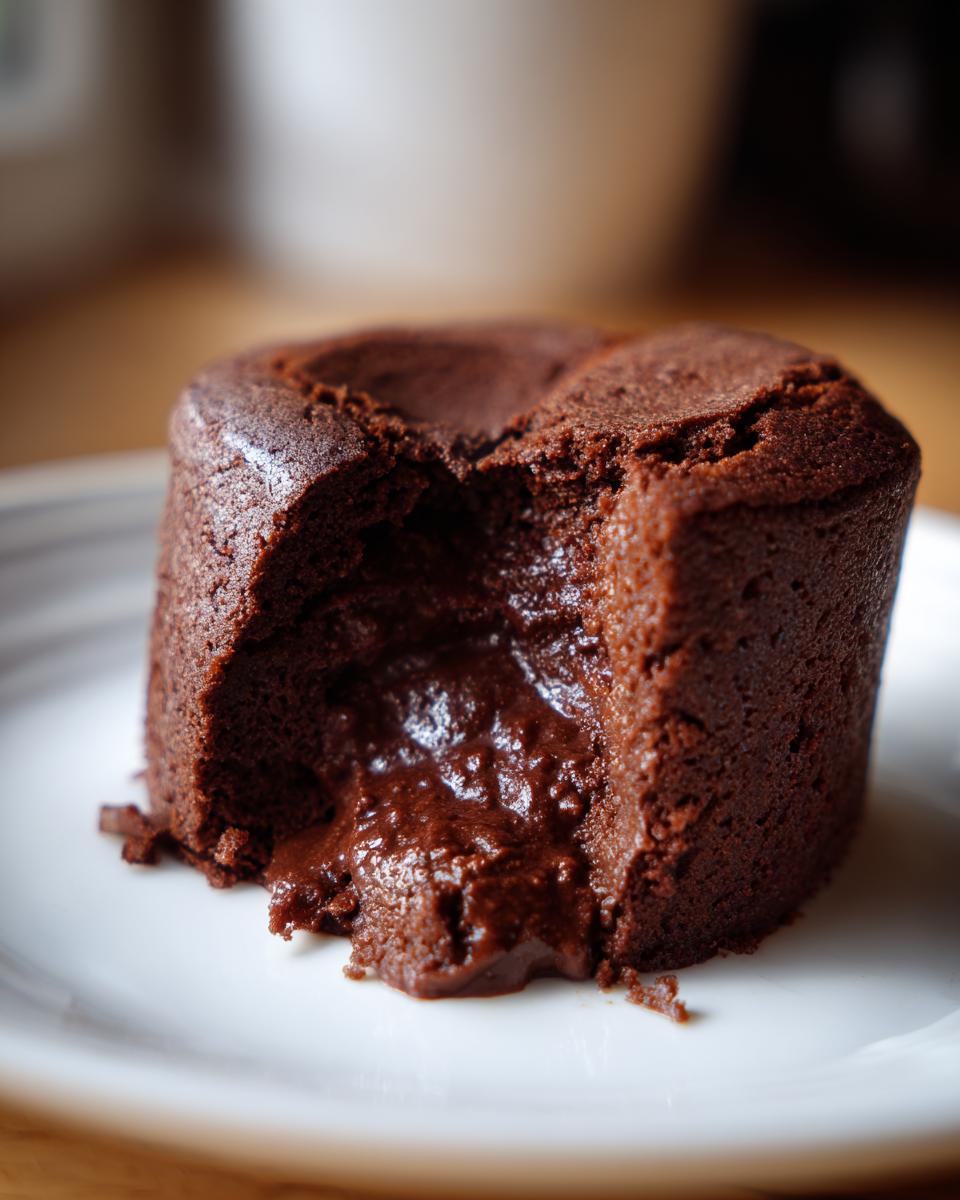
Once you’ve poured your pudding into those individual dishes—or one big gorgeous bowl—you need to handle the chilling. This is where we lock in that perfect, non-skin texture. You MUST press a piece of plastic wrap directly onto the surface of the chocolate pudding. I mean, absolutely touching the top layer. If you leave any air gap, you guarantee a tight skin forms, and nobody wants that rubbery top layer! Chill it for at least two hours until it’s completely cold and set up firm. Stored correctly in the fridge, this homemade chocolate pudding stays dreamy for about four to five days.
Serving Suggestions for This Velvety Chocolate Treat
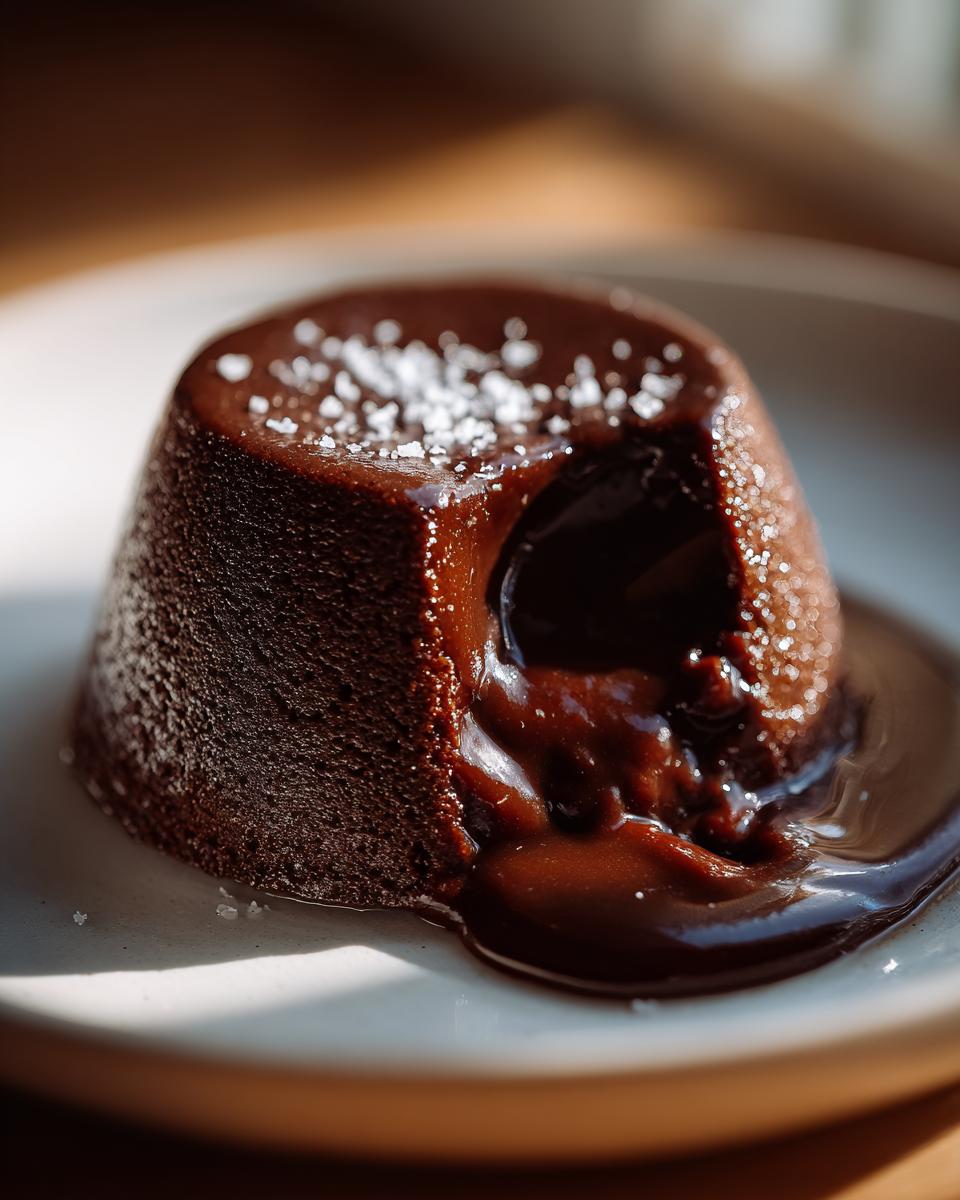
The best part about this velvety chocolate treat is that it stands completely on its own. It’s the ultimate comfort food dessert! But, if you want to dress it up for company, I have a few quick ideas that take zero extra cooking time. A big dollop of homemade whipped cream, obviously, never hurts. If you have some fresh raspberries or sliced strawberries, that bright fruit cuts through the richness beautifully. For a little crunch, sprinkle some flaky sea salt on top right before serving—it really wakes up the cocoa flavor in this simple pudding recipe.
If you made the vanilla buttercream frosting, you can pipe a little swirl on top too if you’re feeling fancy. However you serve it, enjoy that rich chocolate pudding!
Troubleshooting Common Chocolate Pudding Issues
Don’t panic if your first attempt isn’t exactly perfect. Cooking is chemistry, and sometimes the stovetop rebels! If your chocolate pudding won’t thicken up when you think it should be done, it usually means your heat wasn’t quite high enough, or you added the liquid too fast. Keep it on medium and just keep whisking; sometimes it needs that extra minute or two of steady heat.
If you end up with lumps, don’t throw it out! Strain the entire mixture right before serving through a fine-mesh sieve. It’s a fast rescue move. The biggest worry is scrambling the yolk, which leads to those tiny, unfortunate white specks. If you see those, that means your tempering step wasn’t slow enough. It happens to everyone, but for this recipe, a slow, steady drip for the tempering process is your absolute best friend.
Frequently Asked Questions About Classic Chocolate Pudding
Can I make this chocolate pudding recipe vegan?
You absolutely can make this into an easy chocolate dessert! Swap the whole milk for any unsweetened plant milk—almond or oat works great. Since the egg yolk is purely for richness here, you can omit it entirely if you want to stick strictly to vegan ingredients. You might need to cook it just a shade longer to reach the same thickness.
How long does this homemade chocolate pudding last in the fridge?
Because we use fresh ingredients like milk and egg, it’s best enjoyed within 4 to 5 days. Just make sure you keep that plastic wrap pressed down tightly on the surface every time you put leftovers back in the fridge. It tastes just as glorious on day three, I guarantee it!
Why is my pudding grainy instead of silky smooth pudding?
Graininess almost always comes from the dry ingredients not being fully dissolved before you turn on the heat, or sometimes if the sugar fully concentrates at the bottom before mixing. Next time, really whisk those dry ingredients in Step 1 until you see no dry pockets. If it happens, you can try whisking vigorously off the heat when it’s cooling, or straining it before chilling. For a foolproof version next time, check out these great easy homemade salad dressing recipes for quick whisking practice!
Nutritional Estimate for This Simple Pudding Recipe
It’s always nice to know what you’re enjoying! Please remember that these figures are estimates based on the recipe as written. Since this is a homemade chocolate pudding, actual nutritional content can shift slightly based on the specific brand of milk or cocoa powder you use, but this gives you a good baseline!
- Serving Size: 1 serving
- Calories: 210
- Sugar: 24g
- Sodium: 150mg
- Fat: 8g
- Saturated Fat: 4g
- Unsaturated Fat: 4g
- Trans Fat: 0g
- Carbohydrates: 32g
- Fiber: 2g
- Protein: 6g
- Cholesterol: 55mg
Tips for Perfect Stovetop Chocolate Pudding
Even though this is simple, a couple of kitchen veteran moves can make this stovetop chocolate pudding go from great to absolutely unforgettable. We want that true depth of flavor, that rich decadent pudding payoff, right? If you follow these little tweaks, you’ll nail that silky, luxurious mouthfeel every single time. Don’t forget, if you’re worried about cutting the crust, you might want to check out my recipe for chocolate chess pie next week—it’s gooey perfection!
Ingredient Adjustments for Texture Variation
Sometimes you want something lighter, and sometimes you want it thicker than thick! If you find yourself wanting a slightly looser, more pourable consistency—maybe for topping something else—just cut back on the cornstarch slightly. Use 1 1/2 tablespoons instead of the full two tablespoons, and watch it still thicken up nicely without getting too firm.
Now, if you want the *ultimate* indulgence, try this: substitute half of your whole milk with heavy cream. Seriously, when you do this, you get an intensely rich flavor and a texture that rivals any fancy restaurant dessert. It’s an easy swap that makes a huge difference in mouthfeel! That little addition pushes this from just ‘good’ to ‘best chocolate pudding you’ve ever made.’
Storage and Reheating Instructions for Your Chocolate Pudding
Okay, you’ve mastered the stovetop magic, and now you have this gorgeously smooth mixture staring up at you in the pot. Do *not* mess up the chill time! This is where so many people lose the perfect texture.
The absolute minimum chilling time you need for this chocolate pudding to set up properly is about two hours in the refrigerator. If you try to eat it before then, it’s going to be more like chocolate soup, and we worked too hard for that!
But here’s the big secret for keeping it perfectly velvety: when you pour the pudding into your serving dishes—whether that’s cute little ramekins or one big bowl—you have to prevent that skin from forming on top. This is non-negotiable!
Take a piece of plastic wrap and gently press it directly onto the surface of the pudding. Don’t just lay the wrap loosely over the bowl; you need that wrap physically touching the surface of the chocolate pudding. This blocks the air from drying out the top while it chills. If you do this right, you lift that plastic off after two hours, and the surface underneath is pure silk, every single time. If you’re saving leftovers, just re-apply the plastic wrap pressing directly onto the surface again when you put it back in the fridge.
Serving Suggestions for This Velvety Chocolate Treat
The best part about this velvety chocolate treat is that it stands completely on its own. It’s the ultimate comfort food dessert! But, if you want to dress it up for company after using up all your time making the perfect vanilla buttercream, I have a few quick ideas that take zero extra cooking time. Remember, we want to maximize that rich flavor we built using simple techniques.
For that bright counterpoint to the deep cocoa, fresh berries are a must. A few raspberries or thin slices of strawberry on top make it look instantly professional, but it took you five seconds. Or, if you’re feeling slightly more indulgent, a big dollop of freshly whipped heavy cream is always the way to go. It cuts through the richness without weighing you down.
Here is how I usually serve up my finished chocolate pudding:
- Flaky Salt Finish: A tiny sprinkle of good flaky sea salt on the very top right before serving is a game-changer. It doesn’t make it salty, it just makes the chocolate flavor POP!
- Shaved Chocolate: If you have a vegetable peeler, grab a bar of decent semisweet chocolate and peel thin ribbons right over the top. It looks so elegant!
- Simple Crunch: Crushed graham crackers or even shortbread cookies layered beneath the pudding (or sprinkled on top) bring in a nice textural contrast to that silky smooth pudding texture.
Honestly, no matter what you do, this easy chocolate dessert is a showstopper. Enjoy that rich chocolate pudding!
Troubleshooting Common Chocolate Pudding Issues
Don’t panic if your first attempt isn’t exactly perfect. Cooking is chemistry, and sometimes the stovetop rebels! If your chocolate pudding won’t thicken up when you think it should be done, it usually means your heat wasn’t quite high enough, or you added the liquid too fast. Keep it on medium and just keep whisking; sometimes it needs that extra minute or two of steady heat. That cornstarch needs time to wake up and do its job!
If you end up with lumps, don’t throw it out! That happens if you didn’t fully incorporate the dry ingredients at the start, or maybe you whisked too gently while heating. The classic fix is simple: strain the entire mixture right before serving through a fine-mesh sieve. It’s a fast rescue move that catches every single unwelcome lump. You’ll still end up with truly creamy pudding from scratch!
The biggest texture worry is scrambling the yolk, which leads to those tiny, unfortunate white specks of cooked egg. If you see those, that means your tempering step wasn’t slow enough. It happens to everyone—even me! My advice in that situation? If it looks truly curdled, sometimes it’s just easier to start over with a fresh yolk rather than salvage a batch that might taste slightly funky. But remember the rule: slow, steady drip for the tempering process is your absolute best friend here.
Frequently Asked Questions About Classic Chocolate Pudding
I figured we should go over a few last things before you dive into stirring that cocoa powder. There are always a few questions buzzing around when it comes to making something special like this stovetop chocolate pudding at home, especially when we’re trying to make it the best we can!
Can I make this chocolate pudding recipe vegan?
You absolutely can make this into an easy chocolate dessert! Swap the whole milk for any unsweetened plant milk—almond or oat works great. Since the egg yolk is purely for richness here, you can omit it entirely if you want to stick strictly to vegan ingredients, or you could try replacing it with a small teaspoon of cornstarch mixed with a little water for color and body. You might need to cook it just a shade longer to reach the same thickness because those yolks add a lot of oomph!
How long does this homemade chocolate pudding last in the fridge?
Because we use fresh ingredients like milk and egg, it’s best enjoyed within 4 to 5 days. If you made a big batch, that’s a whole week of easy chocolate dessert ready to go! Just make sure you keep that plastic wrap pressed down tightly on the surface every time you put leftovers back in the fridge. If you’re already looking for your next recipe, you might want to check out my tips on easy homemade salad dressing recipes for something totally different.
Why is my pudding grainy instead of silky smooth pudding?
Graininess almost always comes from the dry ingredients not being fully dissolved before you turn on the heat, or sometimes if the sugar totally settles at the bottom before mixing. Next time, really whisk those dry ingredients in the saucepan until you see zero dry pockets before you add any milk! If it happens, the quickest rescue is to strain the entire mixture right before chilling through a fine-mesh sieve. That catches everything and should give you that luxurious, silky smooth pudding texture you deserve!
Can I use instant pudding mix instead of making this homemade chocolate pudding?
Oh honey, no! If you want that rich, deep, authentic flavor, you really need to skip the mix here. The whole point of this recipe is ditching the artificial stuff and using real cocoa and real milk. Instant mixes rely on different stabilizers, but they can never match the deep flavor you get from cooking the cornstarch and tempering that egg yolk the way we do. Stick with scratch—it’s faster than you think!
Nutritional Estimate for This Simple Pudding Recipe
It’s always nice to know what you’re enjoying! Please remember that these figures are estimates based on the recipe as written. Since this is a homemade chocolate pudding, actual nutritional content can shift slightly based on the specific brand of milk or cocoa powder you use, but this gives you a good baseline!
- Serving Size: 1 serving
- Calories: 210
- Sugar: 24g
- Sodium: 150mg
- Fat: 8g
- Saturated Fat: 4g
- Unsaturated Fat: 4g
- Trans Fat: 0g
- Carbohydrates: 32g
- Fiber: 2g
- Protein: 6g
- Cholesterol: 55mg
Easy, Creamy Homemade Chocolate Pudding From Scratch

Make rich, velvety chocolate pudding using simple pantry ingredients on the stovetop. This recipe delivers a satisfying, classic comfort dessert without relying on box mixes.
- Prep Time: 10 min
- Cook Time: 15 min
- Total Time: 25 min
- Yield: 4 servings 1x
- Category: Dessert
- Method: Stovetop
- Cuisine: American
- Diet: Vegetarian
Ingredients
- 1/4 cup granulated sugar
- 1/4 cup unsweetened cocoa powder
- 2 tablespoons cornstarch
- 1/4 teaspoon salt
- 1 1/2 cups whole milk
- 1 large egg yolk
- 1 tablespoon unsalted butter
- 1 teaspoon vanilla extract
Instructions
- In a medium saucepan, whisk together the sugar, cocoa powder, cornstarch, and salt until combined.
- Gradually whisk in the whole milk until the mixture is smooth.
- Place the saucepan over medium heat. Cook, stirring constantly with a whisk, until the mixture thickens enough to coat the back of a spoon. This takes about 8 to 10 minutes. Do not let it boil rapidly.
- Remove the saucepan from the heat. In a small bowl, lightly whisk the egg yolk. Temper the yolk by slowly whisking about 1/2 cup of the hot pudding mixture into the yolk.
- Pour the tempered yolk mixture back into the saucepan with the remaining pudding. Return the pan to low heat and cook for 1 minute, stirring constantly. Do not boil.
- Remove from heat. Stir in the butter and vanilla extract until the butter is fully melted and incorporated.
- Pour the pudding into individual serving dishes or a single bowl. Press plastic wrap directly onto the surface of the pudding to prevent a skin from forming.
- Chill in the refrigerator for at least 2 hours, or until completely cold and set.
Notes
- For an extra rich flavor, substitute half of the milk with heavy cream.
- If you prefer a thinner pudding, reduce the cornstarch to 1 1/2 tablespoons.
- This recipe makes four standard servings.
Nutrition
- Serving Size: 1 serving
- Calories: 210
- Sugar: 24
- Sodium: 150
- Fat: 8
- Saturated Fat: 4
- Unsaturated Fat: 4
- Trans Fat: 0
- Carbohydrates: 32
- Fiber: 2
- Protein: 6
- Cholesterol: 55