

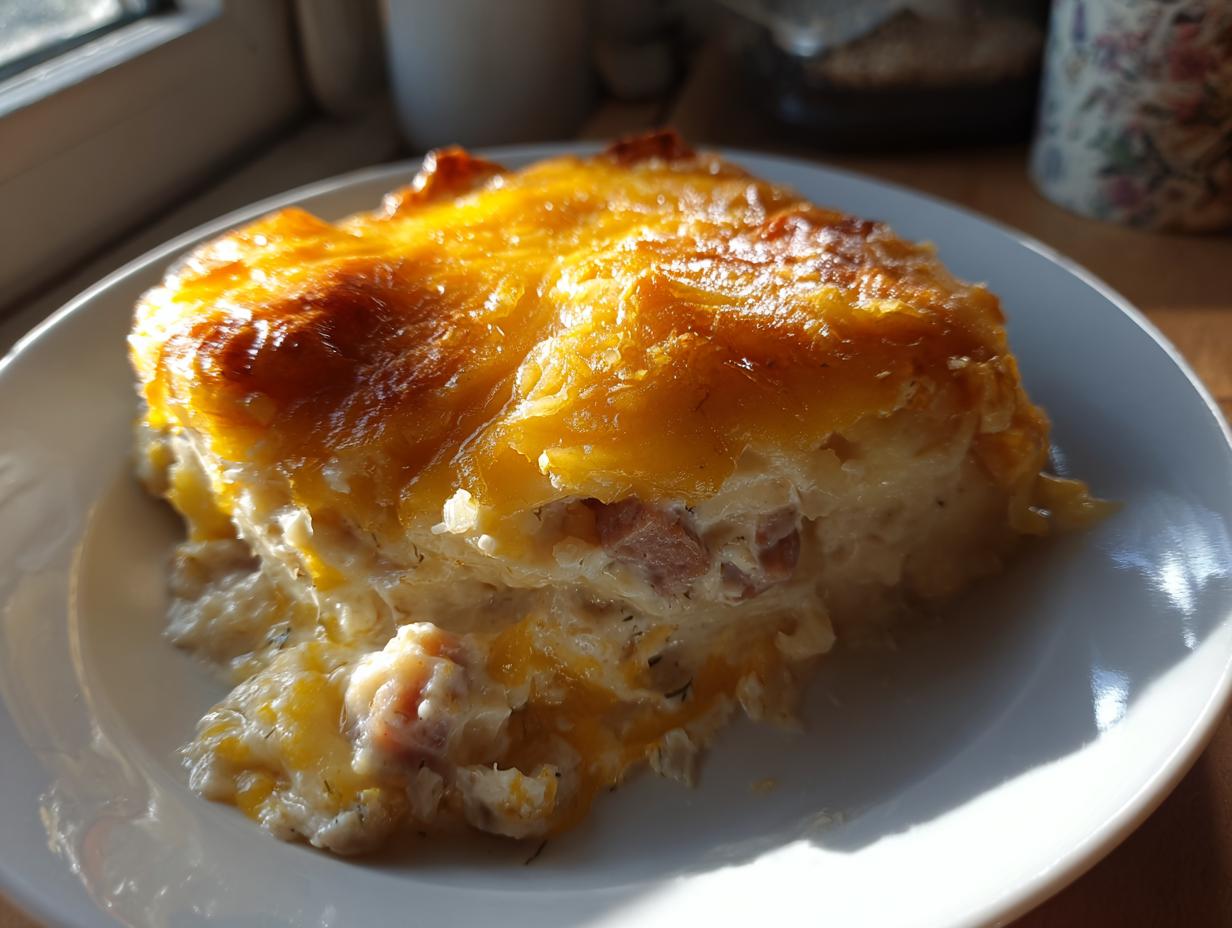
I swear, sometimes after a long day, all you really crave is something deeply comforting, cheesy, and hearty. You know, the kind of food that wraps you up in a warm blanket? The problem is, most classics take forever. That’s why I’m sharing this Easy Cheesy Baked pierogi casserole. It’s the answer to that weeknight craving that doesn’t involve ordering takeout! This recipe is total proof of my philosophy here at Cooking by Felix: a truly satisfying, incredible meal shouldn’t be a luxury reserved only for the weekends. I created meals like this when my marketing career had me running ragged, often needing an incredibly quick yet flavorful dinner—you can check out how I simplify other things, like my quick and easy homemade BBQ sauce. It uses simple ingredients and straightforward layering to give you that soul-soothing flavor in under an hour total. Trust me on this one—it hits every single right note!
- Why This Creamy Baked Pierogi Casserole is Your New Weeknight Favorite
- Ingredients Needed for the Best Pierogi Casserole Recipe
- Step-by-Step Guide to Making Your Easy Pierogi Casserole
- Tips for Success with Your Kielbasa Pierogi Casserole
- Storage and Reheating Instructions for Leftover Pierogi Casserole
- Variations on the Classic Pierogi Casserole Recipe
- Serving Suggestions for This Comfort Food Casserole
- Frequently Asked Questions About This Pierogi Casserole
- Estimated Nutritional Information for this Hearty Pierogi Dish
Why This Creamy Baked Pierogi Casserole is Your New Weeknight Favorite
Look, I developed this recipe because I needed dinner on the table yesterday. This amazing pierogi casserole checks every box you could possibly have for a truly satisfying meal without demanding your whole evening. It’s creamy, it’s loaded with cheese, and it tastes like it simmered all day, but nope!
When you need a dependable, crowd-pleasing dish, this is what you reach for:
Quick Assembly for Busy Cooks
This is where we save the day! Prep time clocks in at just 15 minutes. Seriously, that’s faster than chopping vegetables for a complicated roast. We rely on those wonderful frozen pierogi—they go straight from the freezer into the sauce, no messy boiling required. It’s the definition of a quick weeknight casserole, making those crazy Tuesday evenings feel much calmer.
Hearty and Satisfying Comfort Food Recipes
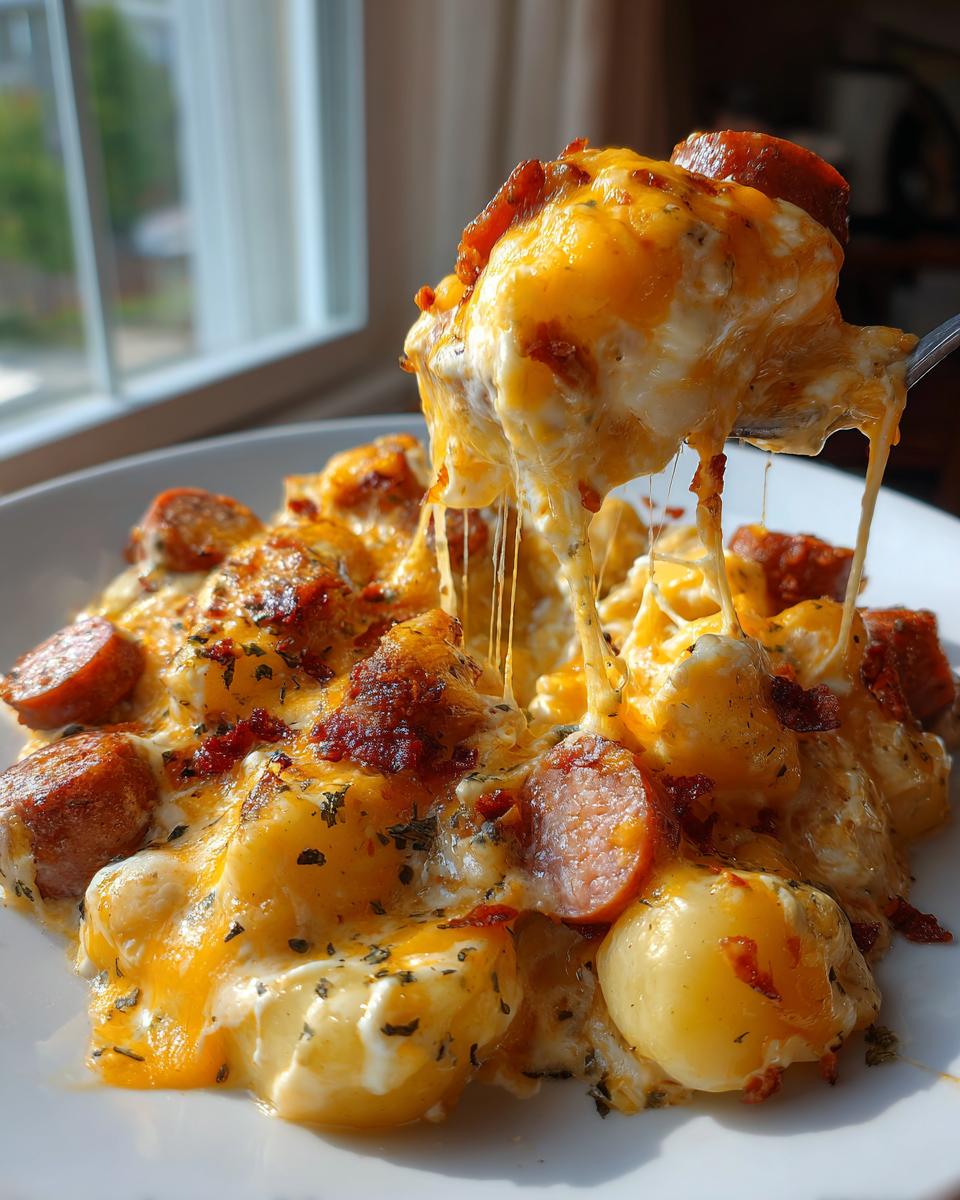
This isn’t just about speed; it’s about flavor. The combination of smoky kielbasa, savory dill, and a rich sauce made from cream of chicken soup and plenty of cheddar makes this exceptionally hearty. It’s warm, it’s filling, and it’s incredibly family-friendly. If you are looking for those deep, rich comfort food recipes that feel homemade, you just found your winner. You can explore how I handle comfort foods differently over at my chicken fried steak recipe too!
Ingredients Needed for the Best Pierogi Casserole Recipe
Getting this right is all about having the right players on the field before you start assembling. Because this is a one-pan wonder that comes together so fast, having everything measured out—what we call mise en place, though I just call it “making sure I don’t forget the dill”—is key. Remember, we skip boiling the pierogi, so these ingredients go straight into the sauce. If you’ve ever wanted to skip the canned stuff, you can see how I make my own base here: homemade cream of chicken soup, but for this quick version, the can is perfect!
Here’s exactly what you need for a truly spectacular and easy pierogi casserole recipe:
- 1 (12 ounce) package smoked kielbasa sausage, sliced
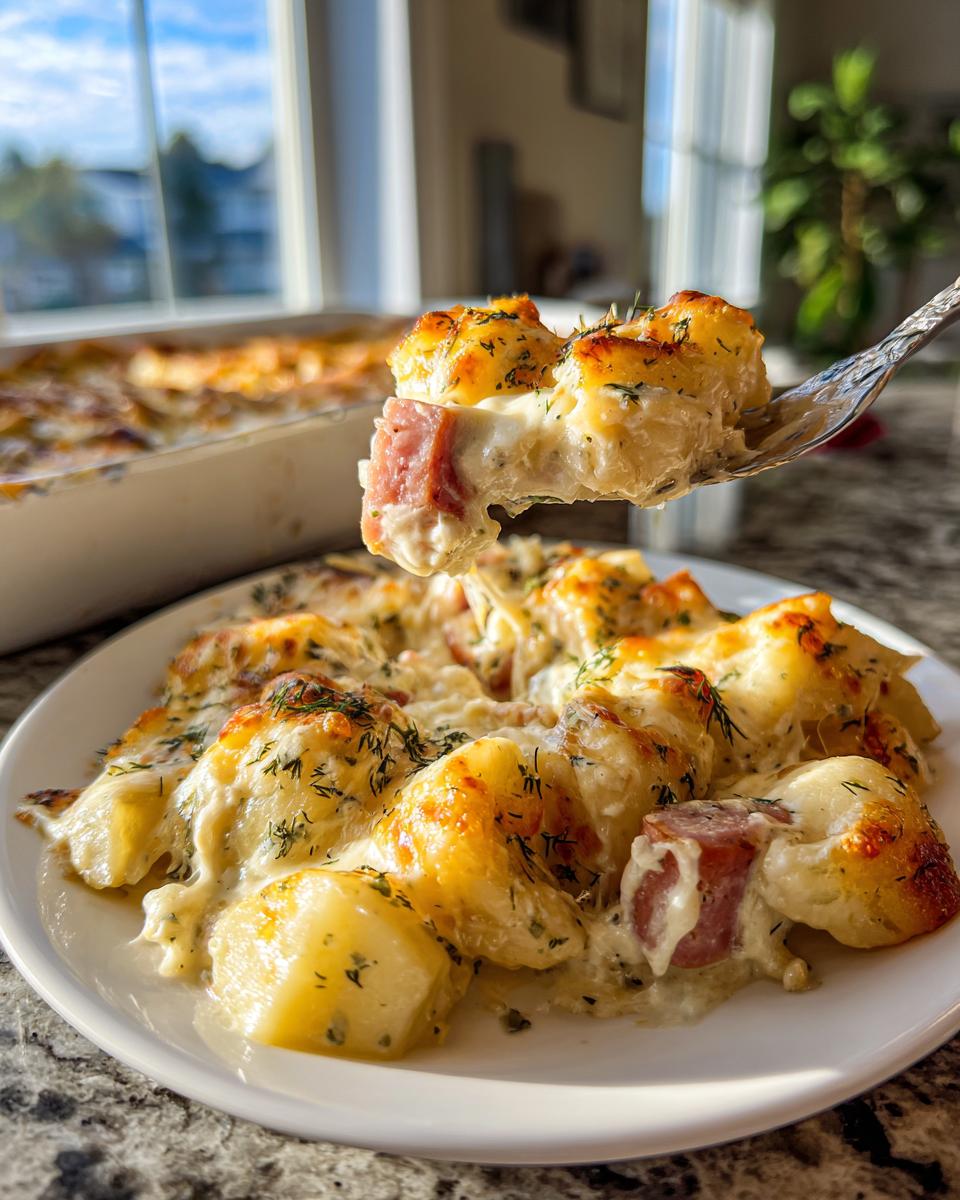
- 1 (16 ounce) package frozen potato and cheese pierogi
- 1 cup chopped onion
- 4 tablespoons butter
- 1 (10.5 ounce) can cream of chicken soup
- 1/2 cup sour cream
- 1/2 cup milk
- 1 teaspoon dried dill weed
- 1/2 teaspoon garlic powder
- 1/4 teaspoon black pepper
- 2 cups shredded cheddar cheese, divided
- 1 cup shredded mozzarella cheese
Step-by-Step Guide to Making Your Easy Pierogi Casserole
Okay, this is the fun part! Since this is a baked pierogi casserole, we are building flavor layers right on the stovetop first, then popping it into the oven to get all bubbly and golden. Remember to preheat that oven to 375 degrees Fahrenheit right away, and grease up your 9×13 dish so you’re ready to roll when the sauce is done. Here’s how we turn those simple ingredients into pure magic.
Preparing the Base and Sauce
First things first, we need to get some color on that kielbasa! Heat a large skillet over medium heat and cook the sliced sausage until it gets just a little browned around the edges. You want that smoky fat to render out. Use a slotted spoon to pull the kielbasa out and set it aside—it’s going back in later, I promise!
Now, toss in your chopped onion right into those drippings. Cook them down until they get soft and sweet, which should take about 5 minutes. Melt that butter in with the onions. Once everything is incorporated, whisk in the cream of chicken soup, sour cream, milk, and all your seasonings: dill weed, garlic powder, and pepper. Keep whisking until that sauce is super smooth. You’re building the foundation for an amazing, creamy meal here!
Assembling the Cheesy Pierogi Bake
Time to bring the main players together! Take a cup of that shredded cheddar cheese—just one cup for now—and stir it right into your hot sauce until it melts beautifully. Once it’s incorporated, gently fold in your cooked kielbasa and those wonderful frozen pierogi. I mean it when I say *gently* fold. We don’t want to smash up our pierogi shells before they even bake, right? This whole mixture should be coated nicely in that luscious sauce. That’s what creates that perfect cheesy pierogi bake.
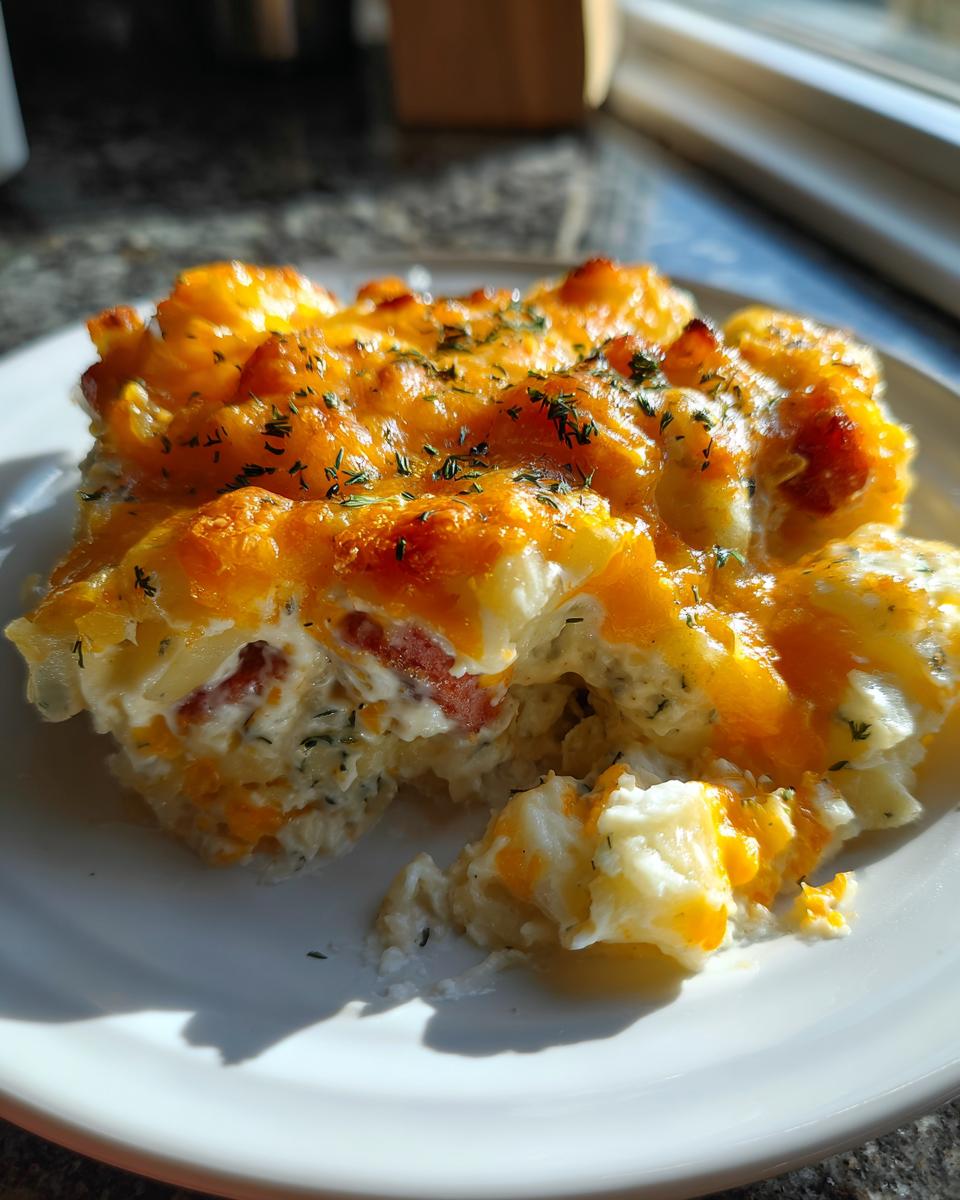
Next, just pour everything into your prepared baking dish evenly. Don’t press it down too hard! Now, we finish it off with the rest of the cheese: sprinkle the remaining cup of cheddar all over, then blanket the whole thing with that mozzarella. That combination melts into the best crispy, gooey top layer.
Baking and Resting the Pierogi Casserole
Pop that dish into your preheated 375°F oven. You are looking for about 25 to 30 minutes. How do you know it’s done? Easy! The edges should be bubbling fiercely and the cheese on top should be melted, bubbly, and getting those beautiful little golden spots. This is where you can stop watching it and go set the table!
But wait, don’t touch it yet! Even with something this hearty, structure matters. Let the pierogi casserole rest on the counter for 5 full minutes after it comes out. This lets that sauce set up just enough so it doesn’t end up soupy on your plate. Then, dig in! If you want to know how to get incredible flavors into your sides, check out my tips for garlic butter mushrooms!
Tips for Success with Your Kielbasa Pierogi Casserole
Even though this recipe is ridiculously simple, paying attention to just a few details can elevate your kielbasa pierogi casserole from good to absolutely unforgettable. I’ve learned over the years that the best comfort food demands just a little insider knowledge, which is why I always make sure to share my little secrets. Think of these as quick tweaks that ensure perfect results every single time, just like how I always double-check the seasoning in my creamy egg salad.
Meat Substitutions and Flavor Boosts
Kielbasa is my number one choice here because that smoky flavor really permeates the creamy sauce. But if you are out of it or just want a change, you have options! The recipe notes mentioned using turkey bacon or cooked chicken, and those are fantastic swaps. If you want to go deep on flavor—and I mean *really* deep—try this: cook about four ounces of chopped bacon right at the start. Render that bacon fat out, scoop out the crispy bits, and then cook your onions in that bacon grease before adding the butter. When you add the kielbasa back in later, you get this background richness that is just incredible.
Achieving Perfect Creaminess
The soup base is crucial here. While I called for cream of chicken soup because it’s fast, the recipe note mentions you can totally swap it for cream of mushroom soup if that’s what you have, and honestly, mushroom soup adds this deeper, earthy note that is amazing with the dill. My biggest textural tip concerns the pierogi themselves: remember, they are coming straight from the freezer!
You need to fold them into the sauce carefully. If you beat them around like you’re mixing cake batter, they’ll turn into sad little potato mush pockets. We want distinct pierogi shapes holding all that creamy sauce. Folding gently ensures they stay mostly intact while they bake and get those slightly crispy edges on top! Perfect softness, perfect structure.
Storage and Reheating Instructions for Leftover Pierogi Casserole
If you’re anything like me, you always hope for leftovers of a great casserole! This pierogi casserole truly tastes just as good—maybe even better—the next day once all those cheesy, savory flavors have had time to mingle overnight. Storing leftovers properly is key to making sure they taste great when you reheat them, which is part of being a smart home cook. I always wrap things tightly so they don’t absorb any funny smells from the fridge, just like I prep all my toppings ahead of time for my famous deviled eggs!
Here is how you handle the leftovers so they are ready for lunch or a quick dinner later in the week:
For storage, let any extra casserole cool down completely, then scoop it into an airtight container. You can keep this in the refrigerator for up to three or four days. It holds up really well! Make sure the lid seals tight.

When you’re ready for Round Two, you have two main options for reheating:
- Oven Reheat (Best Texture): This is my preferred method because it brings the cheese topping back to life! Pop the portion you want into an oven-safe dish, cover it loosely with foil (so the cheese doesn’t burn), and heat at about 350 degrees Fahrenheit until it’s hot all the way through, usually about 15 to 20 minutes depending on how big your portion is.
- Microwave Reheat (Fastest): If you are just heating up a single serving, the microwave is your friend. Place a portion on a microwave-safe plate and heat it in 60-second bursts. Give it a stir halfway through heating up to make sure those middle bites aren’t freezing cold. It heats fast, but watch it closely so it doesn’t dry out!
Variations on the Classic Pierogi Casserole Recipe
You know, this pierogi casserole is fantastic as written, but I always encourage people to treat my recipes as a starting point. Cooking should be creative, and sometimes you need to adjust for what’s in the fridge or what mood you’re in! Since we’re aiming for maximal comfort with minimal fuss, adapting this recipe for different methods or adding a few fresh ingredients is always a great idea. If you love adapting classic dishes, you might also want to see how I handle comfort food using alternative bases, like my chicken cauliflower rice casserole.
Making a Crockpot Pierogi Casserole Version
I know, I know, sometimes even baking feels like too much effort! If you’d rather let your slow cooker do all the heavy lifting, turning this into a crockpot pierogi casserole is super simple. The main thing you need to remember is that the slow cooker traps moisture way more effectively than the oven, so you might need to tweak that liquid just a tiny bit.
Here’s the quick switch: Instead of preheating the oven, spray the inside of your slow cooker lightly. Mix up all your ingredients—the sauce, the kielbasa, the frozen pierogi—but cut the milk down slightly, maybe to 1/3 cup instead of 1/2 cup, just so it doesn’t end up soupy. Toss it all in, give it a gentle stir, and cook on LOW for about 4 to 5 hours or on HIGH for 2 to 2.5 hours. It won’t get that nice golden-brown top like the baked version, but the inside will be incredibly creamy and tender!
Adding Vegetables for a Loaded Pierogi Bake
If you want to bulk this up or just add some fresh color besides the onions we already use, loading it up with veggies is the way to go. Feel free to treat this like a kitchen clean-out night!
My favorite additions are things that hold up well to baking in cream sauce. You could easily sauté some sliced mushrooms along with your onions and kielbasa for a deeper, earthier flavor. Or, if you want something green, stir in a handful of fresh spinach right before you add the frozen pierogi; it wilts down perfectly into the sauce. Another great texture boost is caramelized onions—if you have time to sauté onions on low heat for 20 minutes until they’re dark brown, they add a sweetness that makes this feel like the most gourmet loaded pierogi bake.
Serving Suggestions for This Comfort Food Casserole
Honestly, once you pull this amazing baked pierogi casserole out of the oven, you’ll think you’re done. It’s so rich and satisfying, it really can stand alone as a meal. But because it’s so creamy, cheesy, and hearty—thanks to all that kielbasa and potato—I always like to pair it with something bright and fresh on the side. It’s about balance, right? We don’t want to weigh everyone down too much!
Think crisp textures and sharp, acidic flavors to cut through all that cheddar melt. My go-to solutions are always simple because, remember, we kept the main dish simple for a reason!
- Simple Green Salad with Vinaigrette: Skip the heavy ranch! A light mix of spring greens, maybe some thinly sliced radishes or carrots, tossed in a simple lemon vinaigrette is heaven next to this casserole. It just cleanses the palate perfectly between bites.
- Quick Pickled Veggies: If you happen to have a jar of quick pickles handy—like dill pickles or pickled red onions—serve them right on the side. The sharp vinegar is the perfect foil for the richness of the sour cream sauce. This works great if you are serving this up for a potluck!
- Vinegary Slaw: My favorite pairing! A crisp cabbage slaw dressed minimally with vinegar, a little sugar, and mustard seed really offers a necessary crunch. It’s so much brighter than a mayo-based coleslaw. If you want an easy recipe that fits this style, you have to try my cucumber tomato salad; it brings the exact fresh, acidic brightness we need here.
Keep the side dishes light and zesty, and you’ve got a complete, powerhouse family dinner casserole idea that feels both indulgent and relatively balanced!
Frequently Asked Questions About This Pierogi Casserole
I always get asked so many great questions about these kinds of dependable recipes, and honestly, I love it! It means you’re thinking critically about how to make this dish perfectly for your family. Since this is such great comfort food, people want to make sure they get it right. Whether you are trying to save five minutes or boost the flavor profile, here are the answers to the things I hear most often about this dish.
Can I use homemade pierogi instead of frozen in this pierogi casserole recipe?
Absolutely, you can! My recipe is designed for speed using store-bought frozen ones, but if you’ve made amazing homemade pierogi, please use them! They will taste even better, obviously. The only thing I caution you about is temperature. If your homemade pierogi are rock-solid frozen, they might need a little longer sitting in the warm sauce before you bake them, or you’ll need to bump that baking time up by about 5 to 10 minutes so the center heats through properly. Since they can be more delicate, fold them in gently, gentler than you think you need to!
What kind of cheese works best for a cheesy pierogi bake?
For the best results in a cheesy pierogi bake, you really need that sharp cheddar for that classic tang and a good mozzarella for that glorious, stretchy melt. That combination is unbeatable for texture and flavor in this casserole. But if you want to feel like a genius and take this flavor up a notch, swap about half of the cheddar for a good Gruyère cheese. Gruyère melts like a dream and adds this amazing, nutty depth that pairs beautifully with the dill and potato. It makes the whole dish feel a little more elegant without making the process any harder!
Is this recipe considered a quick weeknight casserole if I skip browning the kielbasa?
That’s a great question, and it dives right into the trade-off between speed and flavor complexity! If you are in a true emergency and need the absolute fastest version of this quick weeknight casserole, yes, technically you can skip browning the kielbasa and just toss it straight into the sauce. It will still be delicious because the sausage cooks through in the oven.
However—and this is important—you lose significant flavor depth! Browning the kielbasa creates those little browned, crispy bits and releases smoky oils that infuse the sauce while you cook the onions. Skimming that step saves you about five minutes, but you end up with a flatter, less complex flavor profile. For me, those five minutes are worth it to get that big flavor reward, but I won’t judge you if you skip it when you’re exhausted!
If you want to see other ways I manage to sneak big flavors into fast dishes, you should check out my tips for easy white chocolate fudge—it tastes like a holiday but takes no time at all!
Estimated Nutritional Information for this Hearty Pierogi Dish
When we’re making comfort food this satisfying—loaded with sausage, cheese, and potato—we know it’s going to be rich, and that’s perfectly okay! But I always want you to have an idea of what you’re serving up. Keep in mind that these numbers are just estimates based on the ingredients laid out in the recipe, and they will change a bit depending on the brand of kielbasa or cheese you decide to use! For context, if you ever want to compare how different recipes stack up, I’ve got a fantastic, lighter dessert you can check out, my easy Filipino cassava cake.
For a single serving (we yield 6 generous servings here), here are the approximate nutritional values for this amazing hearty pierogi dish:
| Nutrient | Amount (Approximate) |
| Serving Size | 1 serving |
| Calories | 580 |
| Fat | 35g |
| Saturated Fat | 18g |
| Trans Fat | 1g |
| Cholesterol | 85mg |
| Sodium | 1150mg |
| Carbohydrates | 45g |
| Fiber | 3g |
| Sugar | 4g |
| Protein | 22g |
See? It’s rich, but everything in moderation, right? It’s a filling meal that keeps you satisfied until morning!
PrintEasy Cheesy Baked Pierogi Casserole with Kielbasa

Make this hearty, cheesy baked pierogi casserole with kielbasa for a satisfying comfort food dinner that comes together with simple assembly.
- Prep Time: 15 min
- Cook Time: 30 min
- Total Time: 45 min
- Yield: 6 servings 1x
- Category: Dinner
- Method: Baking
- Cuisine: American
- Diet: Vegetarian
Ingredients
- 1 (12 ounce) package smoked kielbasa sausage, sliced
- 1 (16 ounce) package frozen potato and cheese pierogi
- 1 cup chopped onion
- 4 tablespoons butter
- 1 (10.5 ounce) can cream of chicken soup
- 1/2 cup sour cream
- 1/2 cup milk
- 1 teaspoon dried dill weed
- 1/2 teaspoon garlic powder
- 1/4 teaspoon black pepper
- 2 cups shredded cheddar cheese, divided
- 1 cup shredded mozzarella cheese
Instructions
- Preheat your oven to 375 degrees Fahrenheit. Lightly grease a 9×13 inch baking dish.
- In a large skillet over medium heat, cook the sliced kielbasa until lightly browned. Remove the kielbasa with a slotted spoon and set aside.
- Add the chopped onion to the same skillet and cook in the remaining drippings until softened, about 5 minutes. Add the butter and let it melt.
- Stir in the cream of chicken soup, sour cream, milk, dill weed, garlic powder, and pepper until the mixture is smooth.
- Fold in one cup of the cheddar cheese, the cooked kielbasa, and the frozen pierogi into the sauce mixture. Stir gently to coat everything.
- Pour the pierogi mixture into the prepared baking dish, spreading it into an even layer.
- Top the casserole evenly with the remaining one cup of cheddar cheese and the mozzarella cheese.
- Bake for 25 to 30 minutes, or until the casserole is hot and bubbly and the cheese topping is melted and lightly golden brown.
- Let the casserole rest for 5 minutes before serving.
Notes
- You can substitute turkey bacon or cooked chicken for the kielbasa if you prefer a different meat.
- If you want a richer flavor, use cream of mushroom soup instead of cream of chicken soup.
- For extra flavor, sauté the onions with 4 ounces of chopped bacon before adding the kielbasa back in.
Nutrition
- Serving Size: 1 serving
- Calories: 580
- Sugar: 4
- Sodium: 1150
- Fat: 35
- Saturated Fat: 18
- Unsaturated Fat: 17
- Trans Fat: 1
- Carbohydrates: 45
- Fiber: 3
- Protein: 22
- Cholesterol: 85