


Oh, the heartbreak! You’ve baked the prettiest cutout cookies, maybe you spent ages rolling them out just right, and then—disaster strikes when you try to decorate. Nothing kills the joy faster than runny cookie icing that spreads right off the edges, or worse, a frosting that just stays sticky forever. Trust me, I know that feeling. After years of balancing my demanding career with the deeply satisfying traditions I learned in my family’s kitchen, I realized that the decorating shouldn’t be the stressful part.
That’s why I put together this guide. We’re moving past frustrating glazes! We’re focusing on mastering two essential types of cookie icing: the legendary Royal Icing, which dries rock-hard, and a killer sugar cookie version that gives you that same durable finish. My goal is simple: teach you the tricks to get that smooth, glossy finish that looks totally professional, even if you’re just starting out. You deserve gorgeous cookies without the constant kitchen stress!
- Why You Need a Foolproof Cookie Icing Recipe
- The Best Cookie Icing Recipe: Royal Icing with Meringue Powder
- Adjusting Consistency: Flooding vs. Piping Cookie Icing
- Coloring and Finalizing Your Cookie Icing
- Alternative: Sugar Cookie Icing That Hardens (Beginner Option)
- Tips for Success with Hardening Cookie Icing
- Storing Leftover Cookie Icing
- Serving Suggestions for Decorated Cookies
- Frequently Asked Questions About Cookie Icing
Why You Need a Foolproof Cookie Icing Recipe
Look, if you’re going to spend time rolling out perfect cutout shapes, you need a cookie icing recipe that respects that effort! I’ve been there, packing cookies carefully into a gift box only to open it later and find everything stuck together in a sweet, colorful mess. That’s not baking success; that’s just sticky sadness.
A reliable, hardening recipe transforms your decorated cookies from a fun home project into something truly display-worthy. Here are the reasons why swapping out your old glaze for a proper hardening icing is non-negotiable:
- It lets you stack them high for presentation without worry.
- It keeps your detailed designs pristine when you pack them up to gift or ship—which is huge!
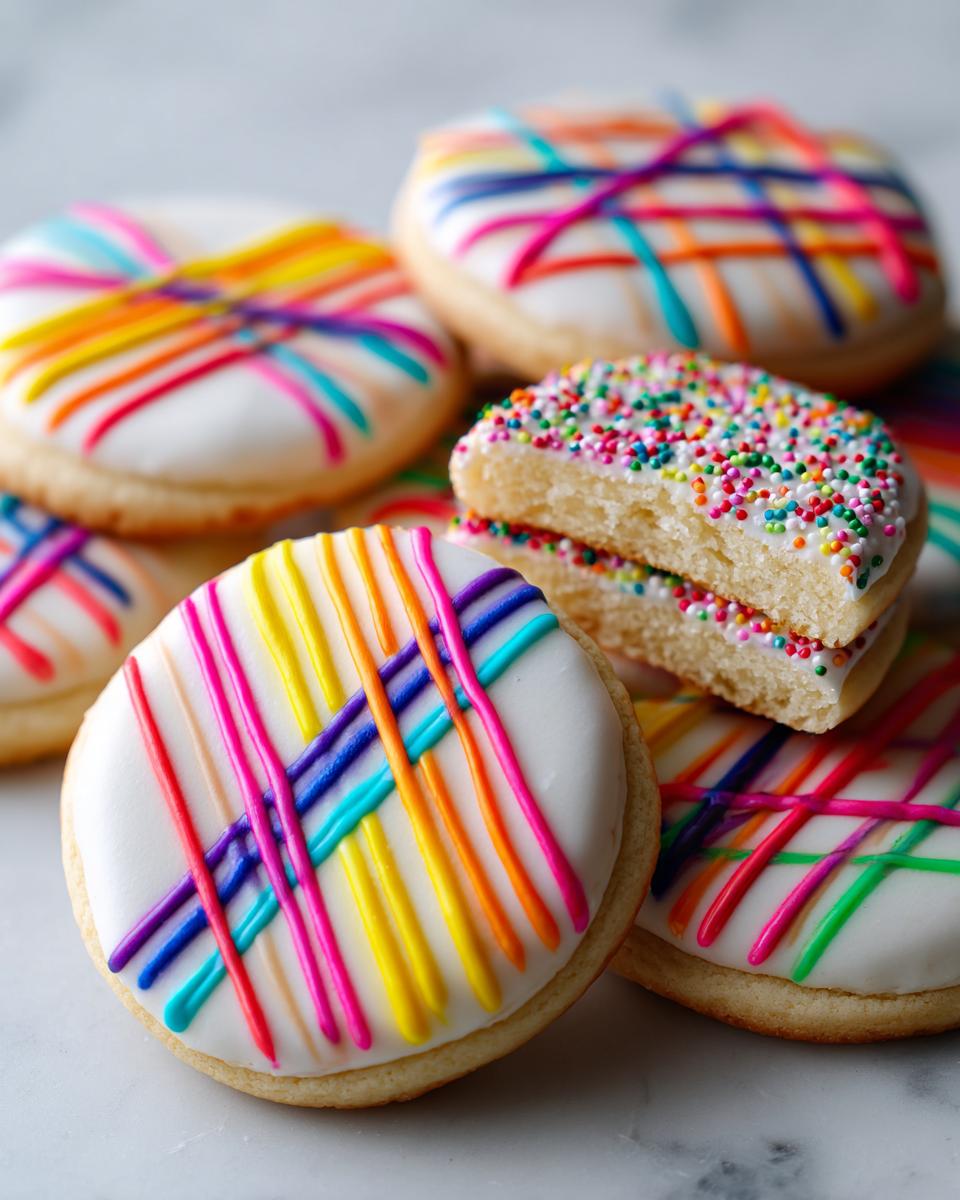
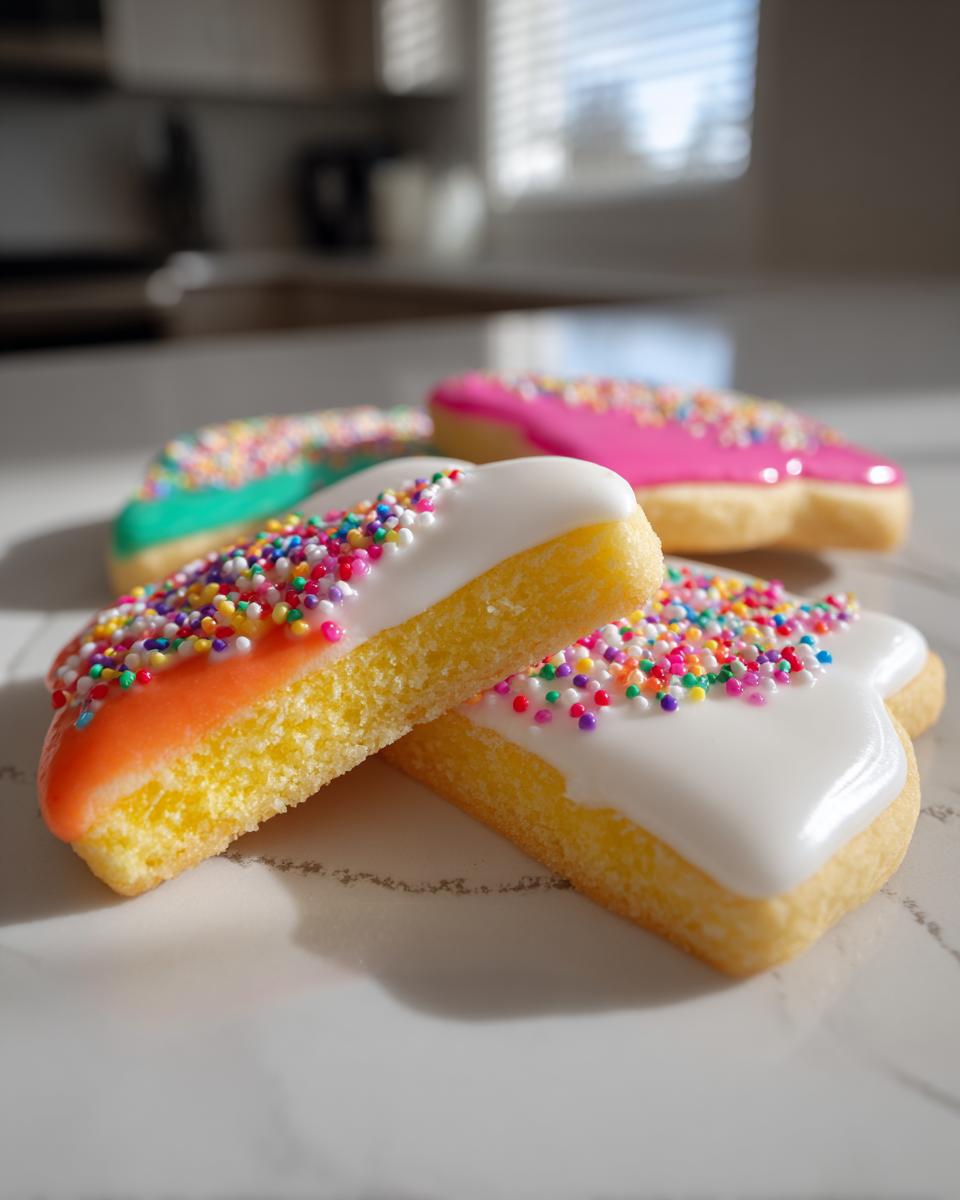
- It gives you that satisfying, crisp snap when someone bites into your cookie.
Achieving Durable Icing That Dries Hard
When I talk about an icing that dries hard, I’m not talking about a simple powdered sugar glaze that stays slightly soft in the middle, you know? We need structure! Royal Icing—the recipe we’ll get to next—is formulated to dry rock-solid. This durability is the secret weapon for anyone making cookies for holidays or selling them. If you plan on stacking your cookies, even just two or three high, you absolutely need that hard shell to protect the detail work underneath and prevent smearing. You can learn more about excellent hardening techniques over at this guide, which I always recommend checking out!
The Goal: Smooth Cookie Icing Tutorial for Professional Looks
Beyond just being hard, the other major benefit is the look. Who doesn’t want that beautiful, high-gloss, smooth finish? That professional appearance comes directly from achieving the right consistency. Whether you’re outlining with a thick piping consistency or filling in large areas with a thinner flood consistency, how you mix it dictates if your final cookie looks rushed or refined. We are aiming for velvet, not lumpy paste!
The Best Cookie Icing Recipe: Royal Icing with Meringue Powder
When you need a cookie icing that won’t let you down—the kind that dries hard as a rock so you can admire your work later—you need Royal Icing made with meringue powder. This is my go-to choice for professional durability! The brilliant part? You can get this base recipe mixed up in about 10 minutes flat, which is perfect when you’re on a tight schedule. Forget fussing with raw egg whites; meringue powder is the steady, reliable friend you need for consistently spectacular results. I always refer back to resources like this guide when I’m doing large batches!

Ingredients for Perfect Royal Cookie Icing
Grab your mixing bowl! For this essential batch, which should generously coat about two dozen cookies, you’ll need three cups of sifted powdered sugar—don’t skip the sifting! Mix that with four tablespoons of meringue powder for structure. Then, slowly incorporate about six tablespoons of warm water, keeping in mind this is approximate, and maybe a teaspoon of clear vanilla extract if you want that classic taste without adding any unwanted color. You can find amazing tips specifically on timing and execution when you check out this recipe!
How to Make Royal Icing for Cookies: Step-by-Step
The method here is super important for that glossy, cracking finish. First, whisk your dry items—the sugar and the powder—to make sure there are no hiding lumps. Then, add your water slowly, just a tablespoon at a time, mixing on low speed until it’s mostly combined. Now, here’s the magic: crank that mixer up to medium-high and beat it hard for a solid five to seven minutes! Seriously, don’t skimp here. That long beating time is what whips the air in and gives you that gorgeous, smooth texture that holds stiff peaks, which is exactly what we want for outlining borders.
Adjusting Consistency: Flooding vs. Piping Cookie Icing
Once you have that beautiful base Royal Icing mixed up, knowing how to thin it correctly is the difference between a good cookie and a professional one! You can’t use the same bowl of cookie icing for outlining every tiny detail and then try to fill in a large space with it—unless you want lumpy edges or craters. It’s all about control, my friends, and we control it with water!
I always have two bowls ready: one for piping and one for flooding. It takes just a few extra seconds to adjust, and it saves you hours of frustration later. Knowing these two textures is key if you want to keep stress out of your decorating sessions.
Achieving Piping Consistency Icing Guide
Piping consistency is your workhorse for borders, writing, and defining the edges of your design. This is the texture you have right after you finish the main mixing stage in the section above—stiff peaks! What does that mean practically? Well, when you lift your mixer attachment or spoon out of the bowl, the icing that drips off should immediately stand up on itself, basically refusing to slump back into the bowl. It almost looks like whipped cream, but much denser. This thickness is necessary so when you pipe your outlines, they hold their shape firmly and don’t melt into the base layer.
Mastering Flooding Consistency for a Smooth Cookie Icing Finish
The flood is what fills in those piped outlines and creates that sleek, smooth surface. To get there, we need more water, but we have to be careful! You’ll add water just a half-teaspoon at a time to your piping consistency icing. The test here is what we call the 10-second rule; grab a separate spoon, drizzle some icing back onto the surface of the bowl, and watch it. If the drizzle that sinks back in disappears completely in about 10 seconds, you are good! If it vanishes faster than that, it’s too thin, whoops! This article has some great visual tips for understanding flow rates.
Coloring and Finalizing Your Cookie Icing
Okay, we have this perfect, smooth base! Now for the fun part: color! If you try to use standard liquid food coloring from the grocery store, guess what happens? It adds too much precious water, and suddenly your stiff piping cookie icing turns into soup! Terrible, right?
So, listen to Felix on this: always reach for gel or paste food coloring. Even a tiny dip of gel color gives you intense color without messing up that beautiful texture we worked so hard to achieve. Once you’ve mixed in your shade—be it a soft pastels or a vibrant red—you need to use that icing right away. It doesn’t like to sit around once it’s colored, because the colors can start to bleed or the consistency can shift slightly. Get it onto those cookies!
Alternative: Sugar Cookie Icing That Hardens (Beginner Option)
Now, I know meringue powder is fantastic, but maybe you’re out of it, or maybe you just prefer using standard pantry items. That’s totally fair! For those times, we have a wonderful, quick alternative if you’re looking for sugar cookie icing that hardens without the meringue powder fuss. This uses simple egg whites—or, if you’re nervous about raw whites entirely, you can swap in cream of tartar, which acts as a stabilizer.
This version of hardening cookie icing is super beginner-friendly because it feels more familiar than the Royal Icing process. However, the biggest trade-off you need to know about—and this is important—is that this type of icing needs refrigeration once made if you use egg whites. It doesn’t have the same shelf stability as the meringue powder version.

If you want to explore how to make cookies that look incredible with this slight variation, check out the detailed steps on Emma’s Cookie Studio. It’s a great fallback when you need that smooth, firm finish on your holiday cookies!
Tips for Success with Hardening Cookie Icing
Even with the best cookie icing recipe, sometimes things go a little sideways in the mixing bowl. Don’t panic and definitely don’t toss the whole batch! Having a few troubleshooting tricks up my sleeve, learned from years of baking under pressure, is what separates a good baker from a stressed baker. Remember, clarity and consistency are our friends here.
Troubleshooting Common Issues: Grainy or Runny Icing
Did you taste your icing and notice a funky, grainy texture? That usually just means you didn’t beat it long enough! Don’t worry; just put the mixer back on medium-high and give it a few more minutes. Patience pays off for that smooth, professional look. If your icing is too thin, though—maybe you added too much water while trying to thin it for flooding—slowly add powdered sugar, just one tablespoon at a time, mixing well after each addition until you get that desirable flow back. For a deeper dive into getting that perfect flow, check out this helpful link from Bliss Batter.
Drying Time for Icing That Dries Hard
This is where patience is truly tested, especially when you’re excited to stack up your decorations! For any Royal Icing—or any icing that dries hard, for that matter—you cannot rush the drying process. Leave those decorated cookies out at room temperature until they are completely dry. I usually aim for several hours, but honestly, if I can let them sit uncovered overnight, that’s when I know I’ll get that beautiful, secure, rock-hard finish my cookies deserve. Don’t put plastic wrap over them until the top surface is totally solid! If you are ever second-guessing your technique, this advice on Ana Bakes is a lifesaver.
Storing Leftover Cookie Icing
Life happens, and sometimes you whip up a big batch of Royal Icing but only decorate half your cookies. Don’t just dump the rest! The good news is that this cookie icing keeps really well, which is one more reason I love using the meringue powder version. You just need to store it right to keep it usable for next time.
Transfer any leftover icing into a truly airtight container. The key step here, which I follow religiously, is pressing a piece of plastic wrap directly onto the surface of the icing itself, eliminating any air pockets that could cause it to crust over. Stored like this at cool room temperature, your royal icing will stay perfect for up to two full weeks. Isn’t that convenient?
Serving Suggestions for Decorated Cookies
Since we spent all that time making sure our cookie icing dries totally hard and glossy, we owe it to ourselves to show these cookies off! Because this isn’t just some sticky glaze, you can finally stack your creations without fear. I love making big tins of these for neighbors and friends during the holidays, and knowing the icing is secure means I don’t have to worry about them looking smushed when they arrive!
If you’re having a party, arrange them on a tiered tray—the shiny finish looks so professional under lights. For an extra fun touch, you can tie a little ribbon around the cookie stack before gifting; this just screams lovely homemade effort. Seriously, check out the tips on Cincy Shopper for more ways to package your perfect, hardened cookies!
Frequently Asked Questions About Cookie Icing
I know we covered a lot of ground here, going from runny messes to rock-solid, glossy masterpieces! But I always get a few questions popping up at the end about the little details. It’s totally normal when you’re trying to master a new technique, especially when it comes to achieving that perfect, durable cookie icing for gifting or stacking. Let’s knock out those last few lingering worries!
Can I use regular milk instead of water in my cookie icing?
Oh, that’s a common thought, but no, you really can’t, especially if you want that rock-hard, professional finish we’re aiming for. Milk has fat and a lot of moisture, and that fat prevents the sugar crystals in the Royal Icing from setting up tightly and drying hard and glossy. For this Royal Icing recipe, you have to stick to water, and keep it warm, to make sure it sets up beautifully. If you want that rich flavor, you can use clear vanilla extract, but skip the milk!
How do I get a truly glossy cookie frosting finish?
Glossiness comes down to two things we talked about: beating time and extract choice. If you properly beat that Royal Icing on high speed for that full five to seven minutes, you’re incorporating enough air to make it smooth and shiny. Secondly, you saw that I suggested *clear* vanilla or almond extract. Those clear extracts do the job without adding any brown tint or extra cloudiness that can dull the final shine. If you’re looking for more ways to ensure beautiful results every time, take a peek at the advice on The Women Home.
Is this icing that dries hard safe for kids to eat?
That’s a crucial question, especially around the holidays! For the **cookie icing** recipe I gave you—the one using meringue powder—yes, it’s perfectly safe once it’s fully dried. The powder is cooked and stabilized, so you don’t have to worry. Now, if you decide to try that alternative recipe using raw egg whites instead of the powder, you need to be cautious. Either make sure you bake your iced cookies afterward to cook the egg white through, or, if you’re using them uncooked, only use pasteurized eggs for safety. Better safe than sorry when it comes to my little bakers!
PrintFoolproof Royal Icing vs. Hardening Sugar Cookie Icing: Master Both Textures for Perfect Cookie Decorating

Learn the best cookie icing recipes to achieve smooth, glossy finishes that dry hard. We cover both Royal Icing using meringue powder and classic sugar cookie icing that hardens perfectly for durable, professional cookie decorating.
- Prep Time: 10 min
- Cook Time: 0 min
- Total Time: 10 min
- Yield: Coats approximately 2 dozen cookies 1x
- Category: Baking
- Method: Mixing
- Cuisine: American
- Diet: Vegetarian
Ingredients
- 3 cups powdered sugar, sifted
- 4 tablespoons meringue powder
- 6 tablespoons warm water (approximate)
- 1 teaspoon clear vanilla extract (optional)
Instructions
- In a medium bowl, combine the sifted powdered sugar and meringue powder. Whisk them together thoroughly to break up any lumps.
- Add the warm water slowly, about one tablespoon at a time, while mixing with a hand mixer or stand mixer on low speed.
- Once the water is incorporated, increase the speed to medium-high and beat for 5 to 7 minutes until the icing is very smooth and holds stiff peaks. This creates the base for piping consistency.
- For flooding consistency, add water 1/2 teaspoon at a time until the icing flows smoothly off a spoon but still holds a visible line on the surface for about 10 seconds.
- For decorating, separate the icing into bowls and mix in gel food coloring until you achieve your desired shade.
- Use the icing immediately for piping details or flooding cookies. If the icing thickens while working, add a few drops of water to restore the correct consistency.
- Allow decorated cookies to dry uncovered at room temperature for several hours, or overnight, until the icing is completely hard to the touch.
Notes
- To achieve a rock-hard, glossy finish, use only clear vanilla extract or almond extract, as brown extracts can affect the color and texture.
- If your icing seems grainy, beat it longer. If it is too thin, add powdered sugar one tablespoon at a time.
- For a quick, beginner-friendly sugar cookie icing that hardens, substitute the meringue powder with 1 egg white and 1/2 teaspoon of cream of tartar, but note that this version requires refrigeration.
- Store unused royal icing in an airtight container at room temperature for up to two weeks, pressing plastic wrap directly onto the surface to prevent a crust from forming.
Nutrition
- Serving Size: 1/4 cup
- Calories: 180
- Sugar: 45g
- Sodium: 5mg
- Fat: 0g
- Saturated Fat: 0g
- Unsaturated Fat: 0g
- Trans Fat: 0g
- Carbohydrates: 45g
- Fiber: 0g
- Protein: 1g
- Cholesterol: 0mg