

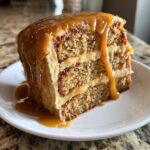
You know that feeling when you bite into a dessert that tastes instantly like tradition? We all crave those show-stopping **Classic Caramel Cake** moments, but let’s be real—who has hours for fussy techniques? That’s precisely why I developed this recipe. This isn’t just any cake; it’s the ultimate, incredibly moist Southern Caramel Cake that deepens in flavor without ever crossing that line into being overly sweet. It’s my promise to you, following the Cooking by Felix philosophy: to bridge the gap between a busy Tuesday night and achieving genuine, bakery-style results right in your own kitchen. If you are looking for more treats that fit this busy lifestyle, check out my guide on simple, delicious desserts. Trust me, making this from scratch is easier than you think, and it’s absolutely worth the time.
- Why This Moist Caramel Cake Recipe Works for Busy Cooks
- Ingredients for Your Buttery Layers Cake
- Step-by-Step Instructions for the Classic Caramel Cake Recipe
- Tips for Success with Your Old Fashioned Caramel Cake
- Storage and Reheating Instructions for Caramel Cake
- Serving Suggestions for Your Celebration Desserts
- Frequently Asked Questions About This Caramel Cake Recipe
- Understanding the Nutrition of This Decadent Dessert
- Share Your Baking Journey
Why This Moist Caramel Cake Recipe Works for Busy Cooks
When you’re trying to balance work and life, every recipe needs to deliver big on flavor without demanding all your time. This Caramel Cake recipe is designed for you. It hits all the classic notes you want—deep butter and brown sugar flavor—but streamlines the hard parts.
- The cake layers stay soft for days, meaning no last-minute panic.
- The caramel icing technique is surprisingly fast once you trust the heat.
- It gives you that impressive, authentic look without needing to be a professional decorator.
Achieving That Signature Moist Caramel Cake Texture
It all comes down to the buttermilk and how we mix the batter. Using buttermilk keeps the crumb tender, and we treat the butter and sugar right at the beginning. We cream them thoroughly so we incorporate air, which stops the cake from sinking or becoming heavy. It’s simple chemistry that results in that perfect texture!
The Secret to Perfect Caramel Frosting
Forget about icings that turn grainy fast. The magic here is in that quick boil for the **Caramel Frosting**. Cooking it for exactly four minutes—no more, no less—ensures the sugar properly caramelizes before we cool it slightly and pour it over the warm cake. That controlled heat gives you a luscious, luxurious flavor you won’t forget.
Ingredients for Your Buttery Layers Cake
Getting this beautiful, Moist Caramel Cake on the table starts with having everything ready to go. Seriously, don’t even think about starting until you’ve measured out everything, especially since we move quickly once the mixing starts! For the best results, make sure your butter for the cake layers has been sitting out for a bit—it needs to be perfectly softened, no mushy spots allowed, okay?
Cake Layer Components
These ingredients combine to make those perfect, buttery layers. Room temperature eggs are key here; they blend so much better into the creamed butter, making our aeration process smooth. If you want fluffy results, don’t skip letting them warm up a little first. You can find my tips on using buttermilk for tenderness in my pancake recipe, but it works just as well here!
- 1 1/2 cups unsalted butter, softened
- 2 cups granulated sugar
- 4 large eggs (room temperature is best!)
- 1 tablespoon vanilla extract
- 3 cups all-purpose flour
- 1 teaspoon baking soda
- 1/2 teaspoon salt
- 1 cup buttermilk
- 1/2 cup packed light brown sugar (for cake layers)
For the Rich Caramel Icing
This is the star show! The heavy cream really locks in that rich texture for the **Caramel Icing** later on. Don’t try to use half-and-half or anything lighter; we need that fat content for the best finish when we boil it up.
- 1 cup unsalted butter
- 2 cups granulated sugar
- 1/2 cup heavy cream
- 1/4 cup milk
- 1 teaspoon vanilla extract
- 1/4 teaspoon salt
Step-by-Step Instructions for the Classic Caramel Cake Recipe
Okay, deep breath! This is where the magic happens, and I promise, if you follow these steps exactly, you’ll have a Classic Caramel Cake that tastes like it took all day. We’ve got two main jobs here: baking the layers until they are perfectly soft, and then making that gooey frosting.
Preparing the Buttery Layers Cake
First things first: crank that oven to 350°F (175°C) and get those three 8-inch pans greased and floured. You want zero sticking later, trust me! Now for the mixing. Start by creaming that softened butter and the granulated sugar until it looks pale and fluffy—really beat it well. This is crucial for air! Once you’re happy with that, beat in the eggs one by one, making sure each one is totally incorporated before adding the next. Don’t forget to scrape down the sides of your bowl about halfway through this step so you don’t have pockets of unmixed sugar hiding out!
Next, we deal with the dry stuff and the wet stuff separately. Whisk your flour, baking soda, and salt together in one bowl. In another, whisk your buttermilk and that packed light brown sugar until it seems mostly dissolved. Now, we alternate! Add about a third of your dry mix, mix just until it disappears, then add half of the buttermilk mixture. Repeat this: another third of the dry, the rest of the buttermilk, and finish with the last third of the dry ingredients. Remember, mix only until just combined. Overmixing beats out all that air we worked so hard to get in there, leading to a tough cake!
Once it’s barely mixed, divide that gorgeous batter equally between your three pans. Bake them for about 25 to 30 minutes. Test them by inserting a toothpick—if it comes out clean, you’re golden. Let them chill in the pans for just 10 minutes before you flip them out onto a wire rack to cool completely. You absolutely must wait for them to be totally cool before frosting, or the whole thing will just slide right off! You can see how I handle buttermilk moisture in my old-fashioned pancakes, but here we use it for tenderness!
Making the Homemade Caramel Cake Icing
While the cake layers are cooling (or after they are fully cool, depending on how fast you are!), we tackle the sauce. This isn’t a complicated frosting process, but timing is everything here. In a saucepan, dump the butter, granulated sugar, heavy cream, and milk. Stir it constantly over medium heat until that sugar totally dissolves. You’ll know it’s ready for the next step when it starts to bubble! Let it boil vigorously—and don’t stir it once it boils!—for exactly 4 minutes. Set a timer! Timing ensures the perfect, deep caramel flavor profile for your Caramel Cake.
Pull that pan off the heat immediately. Stir in your vanilla and salt. Now, this is important: You have to let this icing cool for about 15 minutes. If you try to pour it on warm, it’ll run straight off the cake. If you wait too long, you won’t be able to drizzle it! Fifteen minutes usually gives it just enough time to thicken up nicely, but still remain pourable.
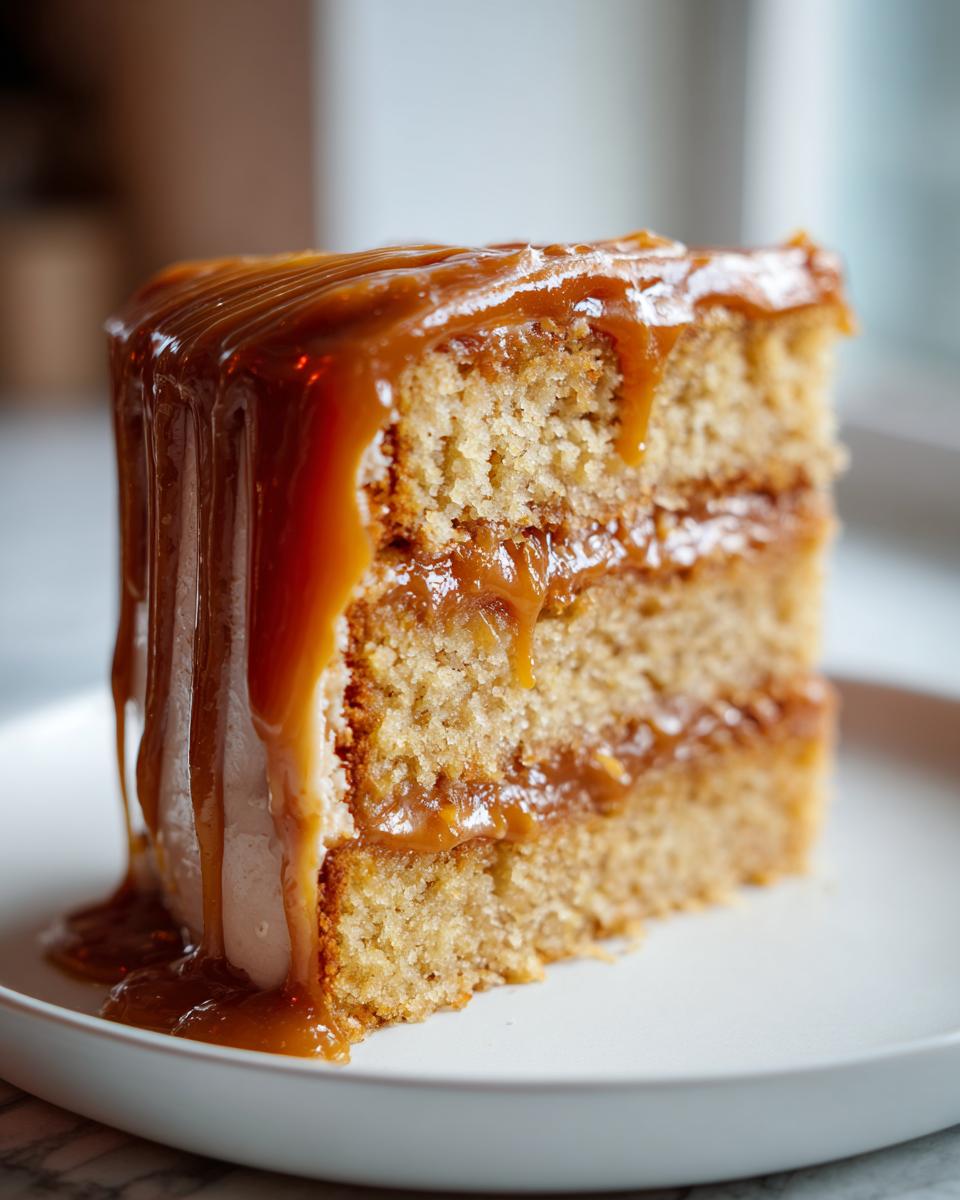
Assembling Your Decadent Dessert
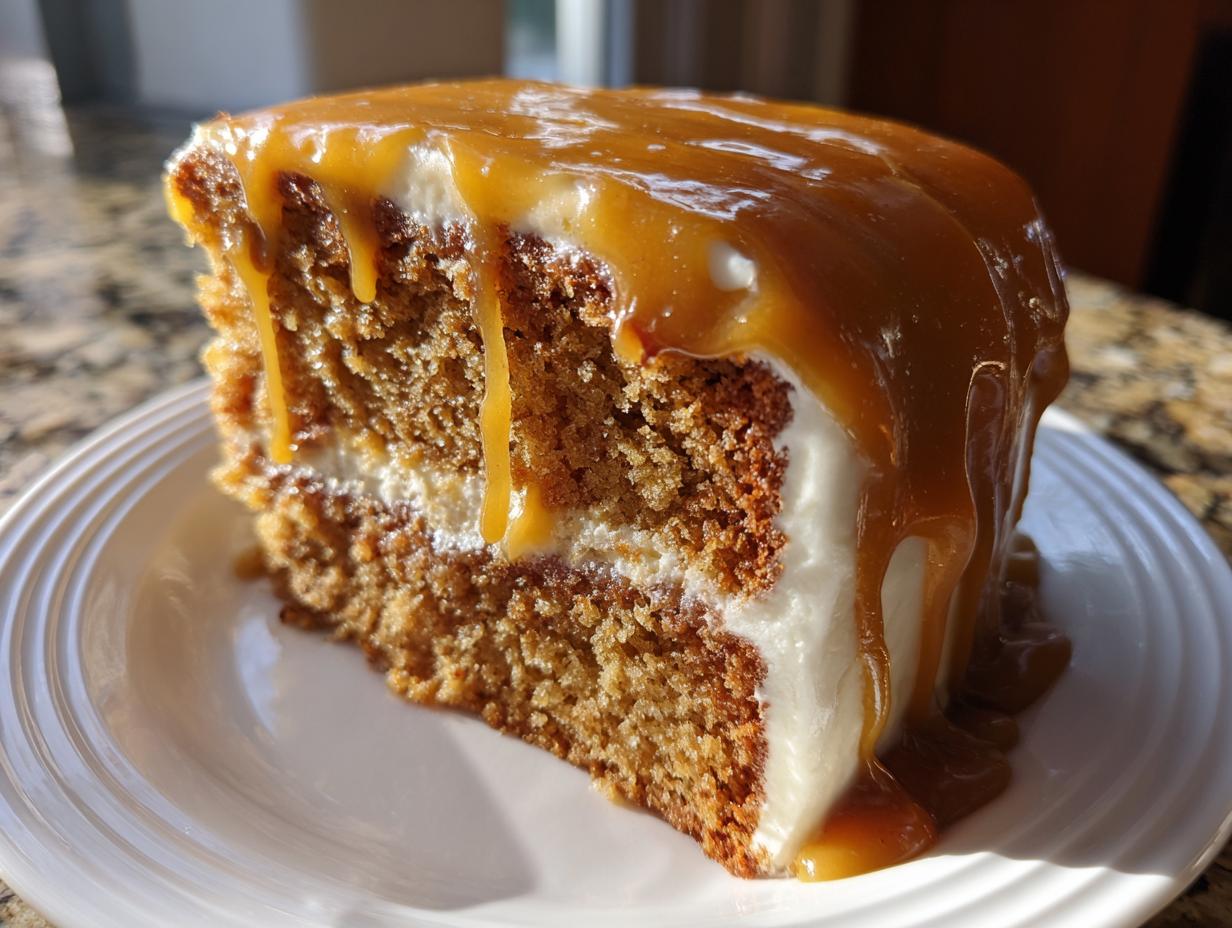
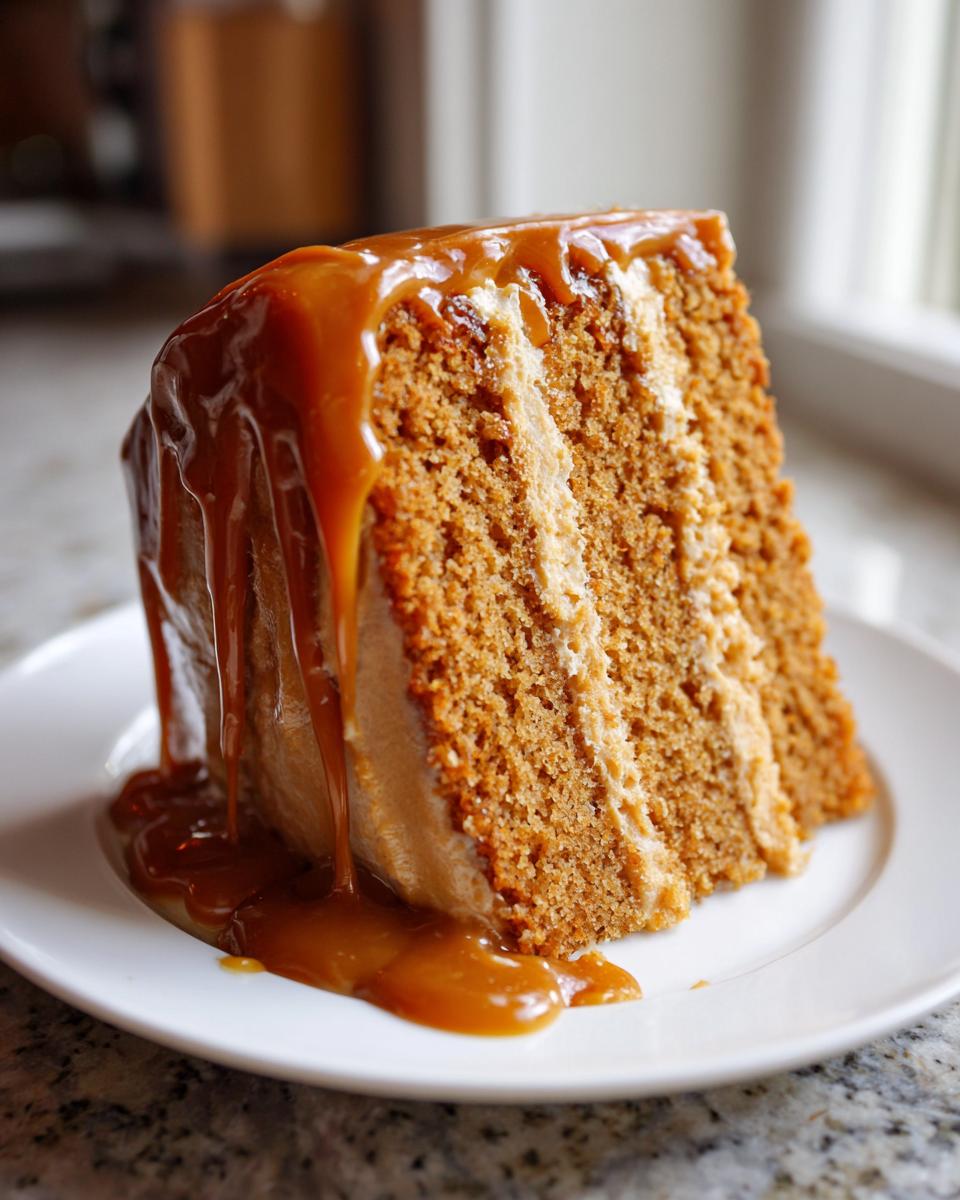
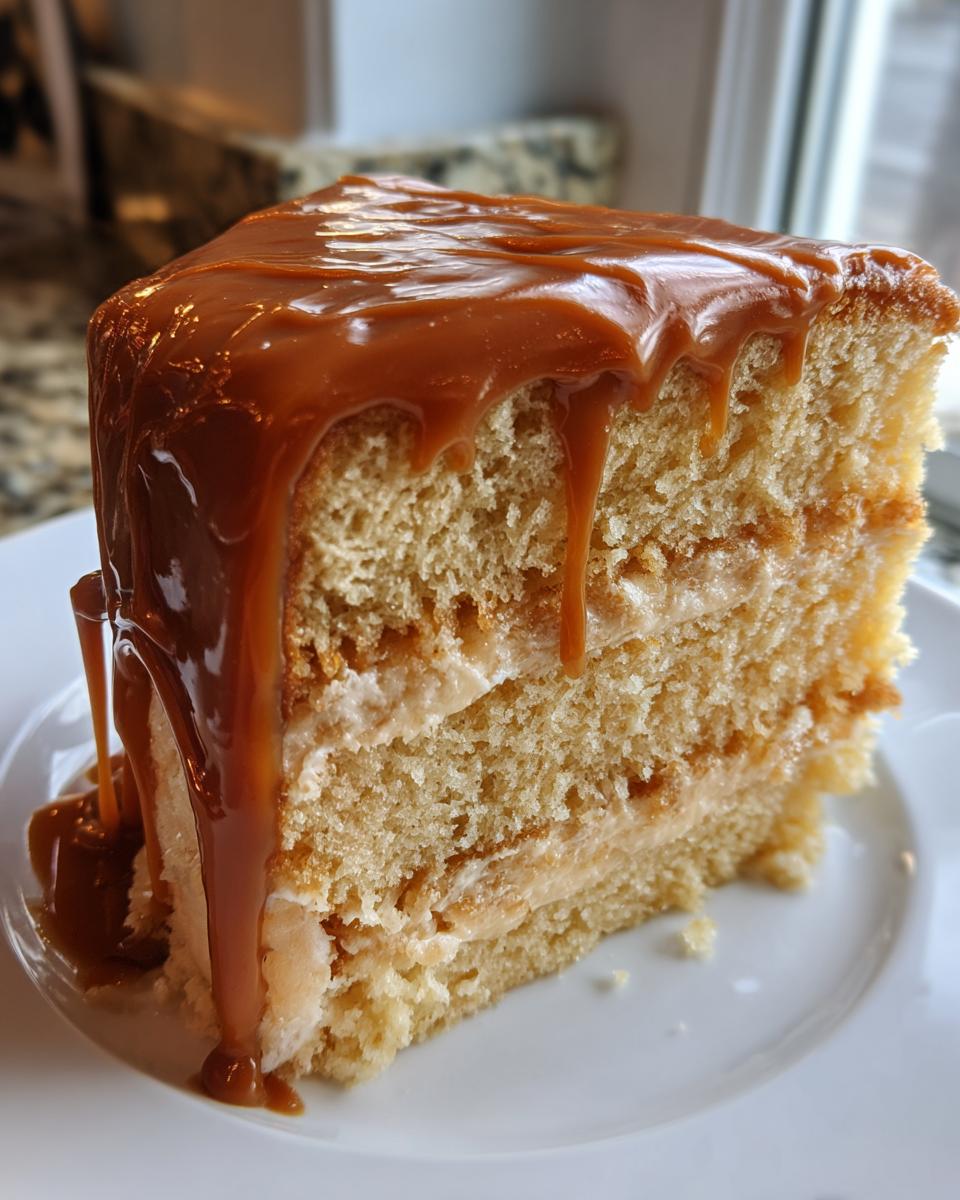
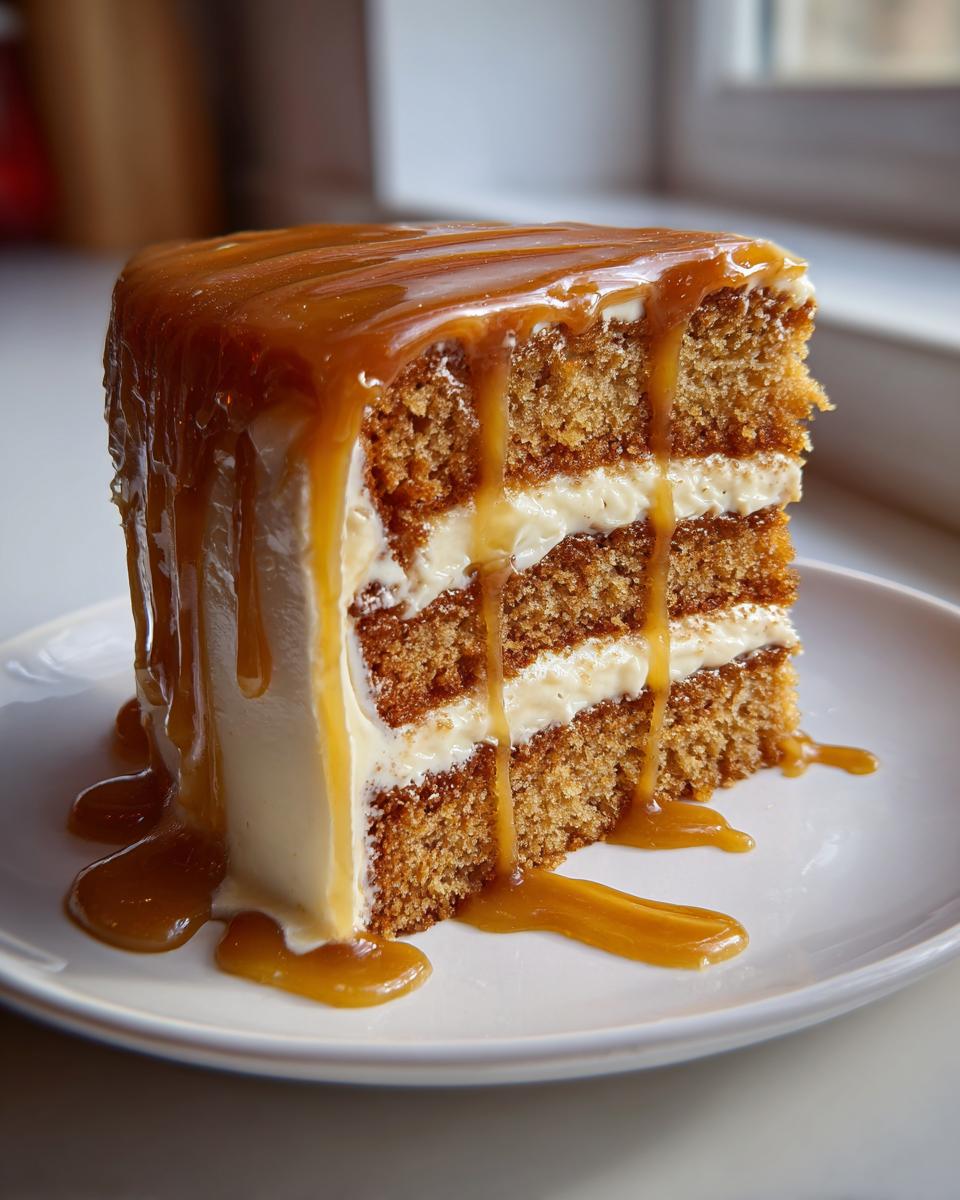
Time to build this masterpiece! Get your first cooled layer centered on your serving plate. Take about one-third of that slightly cooled caramel icing and pour it right into the middle. Use an offset spatula to gently guide it towards the edges so it drips down naturally. You want those gorgeous, rustic drips! Place your second cake layer on top and repeat the process, adding another generous layer of icing.
Put the last layer on top and cover the entire thing—sides and top—with the remaining warm icing. Because we let the icing cool slightly, it should start to set up quickly. Don’t try to smooth it perfectly; the charm of this Southern style cake is in its luscious, imperfect coating. Let the whole thing sit at room temperature for at least 30 minutes before you attempt to slice it. This lets the icing firm up just enough so you can get a clean slice and show off those beautiful layers!
Tips for Success with Your Old Fashioned Caramel Cake
Even though this Old Fashioned Caramel Cake is designed to be straightforward, a few insider tips will take it from great to legendary. Baking is rewarding, but sometimes the smallest change in temperature or timing makes all the difference. I learned these little tricks I the hard way so you don’t have to! We want that melt-in-your-mouth texture that transports you straight back to Grandma’s kitchen, right?
Making This a Salted Caramel Cake Variation
If you are looking to bring a little modern flair to this classic, turning it into a **Salted Caramel Cake** is the easiest upgrade ever! The salty edge cuts through the sugariness perfectly. Right after you pour that warm icing over your finished layers—before it has a chance to firm up too much—just grab some flaky sea salt. I prefer Maldon because those flakes look beautiful scattered across the top. Sprinkle it lightly over the whole cake. It pops visually and tastes amazing. Save this trick for your next birthday showstopper!
Adjusting the Caramel Frosting Consistency
So, you might have noticed in the instructions that when the icing comes off the heat, it’s pourable. But often, people want that thick, spreadable **Caramel Frosting** where you can make nice swirls on top, like you see on a bakery cake. This is totally adjustable!
If you want that thicker, spreadable version, you just need patience. After pulling the icing off the heat and stirring in the vanilla and salt, let it sit on the counter, stirring every five minutes, until it cools down significantly—maybe closer to 25 or 30 minutes total. It needs to go from warm to just slightly warm or even room temperature before it gets thick enough to hold its shape. If you’re aiming for a true Southern cake where the icing is almost like a thick caramel glaze that melts as you cut into it, follow the 15-minute cool-down time exactly. If your icing gets too stiff before you can pour it, you can gently reheat it on very low heat for just a few seconds while stirring constantly. Don’t boil it again, though, or you mess with the sugar structure!
Another great resource for understanding classic Southern baking techniques, especially around ingredients like buttermilk, is my guide on buttermilk pie. Understanding that one ingredient helps so much!
Storage and Reheating Instructions for Caramel Cake
Finding a proper place to keep your beautiful **Caramel Cake** is almost as important as baking it perfectly! Since this cake has that gorgeous, rich, homemade caramel icing—which is made mostly with butter and sugar—we have to be smart about storage. You want it to stay moist and look pretty, not separate or weep.
I always try to keep this cake at room temperature for as long as possible, especially if you’re serving it the same day you bake it. The layers are so wonderfully moist, and when the icing is cool but not rock hard, the texture is just unbeatable. Cover it loosely with a cake dome or a large inverted bowl. If your kitchen is super hot or humid, or if you made a lot and need to keep it longer than two days, then the fridge is your best bet. Just make sure you pull it out about an hour before you plan to serve it.
Why the warm-up time? Because when this icing gets too cold, that butter in the frosting gets hard as a rock, and you lose that signature melt-in-your-mouth experience. Letting it sit out softens everything up beautifully so every slice tastes fresh.
Now, reheating? Honestly, I rarely reheat this particular cake. Once the icing has set, warming it up can turn it into a sticky, drippy mess because of the high sugar content. If you absolutely must revive a slice—say, you’re eating it plain the next day—I’d suggest warming just the uncakes slice in the microwave for about 5 to 10 seconds on a low setting. Don’t put the frosted cake in there, or you’ll have a huge caramel puddle!
Serving Suggestions for Your Celebration Desserts
This Caramel Cake is already such a showstopper—it practically demands a spotlight on your dessert table, doesn’t it? Because the layers are so rich and the icing is wonderfully decadent, you don’t have to do a lot of heavy lifting to make this a stunning centerpiece for any gathering. It shines all on its own, but sometimes a little something extra just makes the whole experience feel more complete. When I make this for parties, I focus on simple, elegant accompaniments.
If you’re setting up a dessert spread, try placing your sliced cake next to something tart to cut through all that sweet butter and caramel. Fresh raspberries or even thinly sliced, slightly tart green apples look gorgeous against the deep gold of the frosting. The bright fruit flavor is a perfect contrast. Plus, the red and green against the brown and gold just screams celebration, doesn’t it?
For a truly impressive look when serving up slices, a simple scoop of vanilla bean ice cream is always a winner. The cold creaminess contrasts beautifully with the cake’s room-temperature softness. If you’re feeling extra fancy—maybe for a holiday or anniversary—a light dusting of cinnamon or even some crushed pecans sprinkled around the plate edge elevates it instantly. It makes it look like you spent a week on it, even though we know it was surprisingly easy to achieve this level of perfection!
If you’re looking for other impressive but easy ideas to round out your party menu, I’ve put together a few simple recipes in my favorites collection that always get rave reviews. You can check them out here: simple, delicious desserts.
Frequently Asked Questions About This Caramel Cake Recipe
I know baking can sometimes bring up questions, especially when you’re trying a recipe for the first time, like this Caramel Cake. Don’t hesitate to ask! Most of the time, people worry about the texture of the cake layers or how to handle that buttery caramel icing. I’ve gathered answers to the ones I get asked most often so you can bake with confidence!
Is this an Easy Caramel Cake to make?
Well, ‘easy’ is relative, isn’t it? I wouldn’t call it a 15-minute dump cake, but I designed this recipe specifically so a dedicated home baker can nail it without feeling stressed. The cake itself uses standard creaming methods, and the layer assembly is simple because the icing is so forgiving. The only tiny spot where you need focus is watching that saucepan for the icing, but honestly, once you get the hang of that four-minute boil, you’ll feel like a star! It’s an incredibly rewarding bake that’s much less complicated than it looks.
Can I substitute the buttermilk in this Layer Cake Recipe?
I love buttermilk for the tang and tenderness it gives our **Buttery Layers Cake**, so I really hope you can use it! But if you’re totally out or can’t grab some, you can absolutely make a substitute. Take one cup of regular milk—whole milk works best—and stir in one tablespoon of white vinegar or fresh lemon juice. Let that sit on the counter for about five to ten minutes until it curdles slightly. That’s your homemade substitute!
Now, here’s the catch: your resulting cake might be *slightly* less tender than if you used true cultured buttermilk, just because the reaction time is different. But don’t worry! It will still be a delicious, moist cake. If you want to learn more about my favorite substitutions and kitchen hacks, check out my About Me page!
Understanding the Nutrition of This Decadent Dessert
Now, look, I’m Felix, and while I preach joy and flavor, I also believe in being honest about what we’re serving up! When you bake a truly **Decadent Dessert** like this **Caramel Cake**, you know it’s going to be rich—it’s made with butter, sugar, and that glorious icing. This isn’t a diet food, and that’s perfectly okay! We bake things like this for celebrations and comfort, and knowing what’s in that slice helps you enjoy it even more.
Everything I give you here is an estimate based on the exact ingredients listed in the recipe card, assuming you stick to the proportions I laid out. Please remember that if you add extra salt, use heavier whipping cream, or use different sized eggs, these numbers will shift slightly. Think of this as your baseline for this fantastic, homemade treat.
- Serving Size: 1 slice (of 12 total servings)
- Calories: 450
- Sugar: 55g (Yes, it’s sweet, that’s the caramel talking!)
- Sodium: 250mg
- Fat: 24g
- Saturated Fat: 15g
- Unsaturated Fat: 9g
- Trans Fat: 0.5g
- Carbohydrates: 60g
- Fiber: 1g
- Protein: 5g
- Cholesterol: 90mg
See that sugar number? It reflects the richness of the cake layers combined with that boiled-down caramel icing. It’s meant to be a treat that satisfies those deep cravings! This is why we only need one slice to feel completely satisfied. Enjoy every bite, knowing you made it lovingly from scratch!
Share Your Baking Journey
Now that you have the secrets to making this truly amazing, moist Caramel Cake, I really, truly want to know what you think! That’s the whole point of us sharing these recipes, right? I want to see your gorgeous, layered creations sitting on your tables!
Did the four-minute boil on the icing work perfectly for you? Did you decide to sprinkle on that flaky sea salt for the ultimate sweet and salty dessert experience? Don’t be shy! Life is too short to bake in silence. Head down to the comments section below and leave a rating for the recipe—five stars if it made someone’s day!
If you snapped a picture of your final masterpiece, please tag me on social media! Seeing your homemade versions of this classic makes my whole week. It takes a little effort to bake a Homemade Caramel Cake, but the joy it brings is worth ten times the work. If you ever have specific questions about substitutions or timing, feel free to reach out directly through my contact page. Happy baking, and I can’t wait to hear all about your sweet success!
PrintMoist Southern Caramel Cake with Homemade Icing
Bake this classic Southern Caramel Cake featuring incredibly moist vanilla brown sugar layers and a rich, deep-flavored caramel frosting that balances sweetness perfectly. This recipe delivers bakery-style results for your next celebration dessert.
- Prep Time: 30 min
- Cook Time: 30 min
- Total Time: 60 min
- Yield: 12 servings 1x
- Category: Dessert
- Method: Baking
- Cuisine: American
- Diet: Vegetarian
Ingredients
- 1 1/2 cups unsalted butter, softened
- 2 cups granulated sugar
- 4 large eggs
- 1 tablespoon vanilla extract
- 3 cups all-purpose flour
- 1 teaspoon baking soda
- 1/2 teaspoon salt
- 1 cup buttermilk
- 1/2 cup packed light brown sugar (for cake layers)
- For Caramel Icing: 1 cup unsalted butter
- 2 cups granulated sugar
- 1/2 cup heavy cream
- 1/4 cup milk
- 1 teaspoon vanilla extract
- 1/4 teaspoon salt
Instructions
- Preheat your oven to 350°F (175°C). Grease and flour three 8-inch round cake pans.
- In a large bowl, cream together the softened butter and granulated sugar until light and fluffy.
- Beat in the eggs one at a time, mixing well after each addition. Stir in the vanilla extract.
- In a separate bowl, whisk together the flour, baking soda, and salt.
- In a small bowl, whisk the buttermilk with the light brown sugar until the sugar dissolves slightly.
- Gradually add the dry ingredients to the wet ingredients, alternating with the buttermilk mixture, beginning and ending with the flour mixture. Mix until just combined. Do not overmix.
- Divide the batter evenly among the prepared cake pans. Bake for 25 to 30 minutes, or until a toothpick inserted into the center comes out clean.
- Let the cakes cool in the pans for 10 minutes before inverting them onto a wire rack to cool completely.
- To make the caramel icing, combine the butter, granulated sugar, heavy cream, and milk in a medium saucepan.
- Cook over medium heat, stirring constantly, until the sugar dissolves. Bring the mixture to a boil without stirring. Boil for exactly 4 minutes.
- Remove from heat and stir in the vanilla extract and salt. Let the icing cool for about 15 minutes until it thickens slightly but is still pourable.
- Assemble the cake: Place one cooled cake layer on a serving plate. Pour about one-third of the warm caramel icing over the top, allowing it to drip down the sides.
- Repeat with the second layer. Place the final layer on top and cover the entire cake with the remaining icing. Let the icing set before slicing.
Notes
- For a Salted Caramel Cake variation, sprinkle flaky sea salt over the top of the finished cake before the icing sets.
- If you prefer a thicker, more traditional Southern caramel icing that holds its shape better, allow the icing to cool longer until it reaches a spreadable consistency.
- Use high-quality vanilla extract to achieve a deep, rich flavor in both the cake and the frosting.
Nutrition
- Serving Size: 1 slice
- Calories: 450
- Sugar: 55g
- Sodium: 250mg
- Fat: 24g
- Saturated Fat: 15g
- Unsaturated Fat: 9g
- Trans Fat: 0.5g
- Carbohydrates: 60g
- Fiber: 1g
- Protein: 5g
- Cholesterol: 90mg