

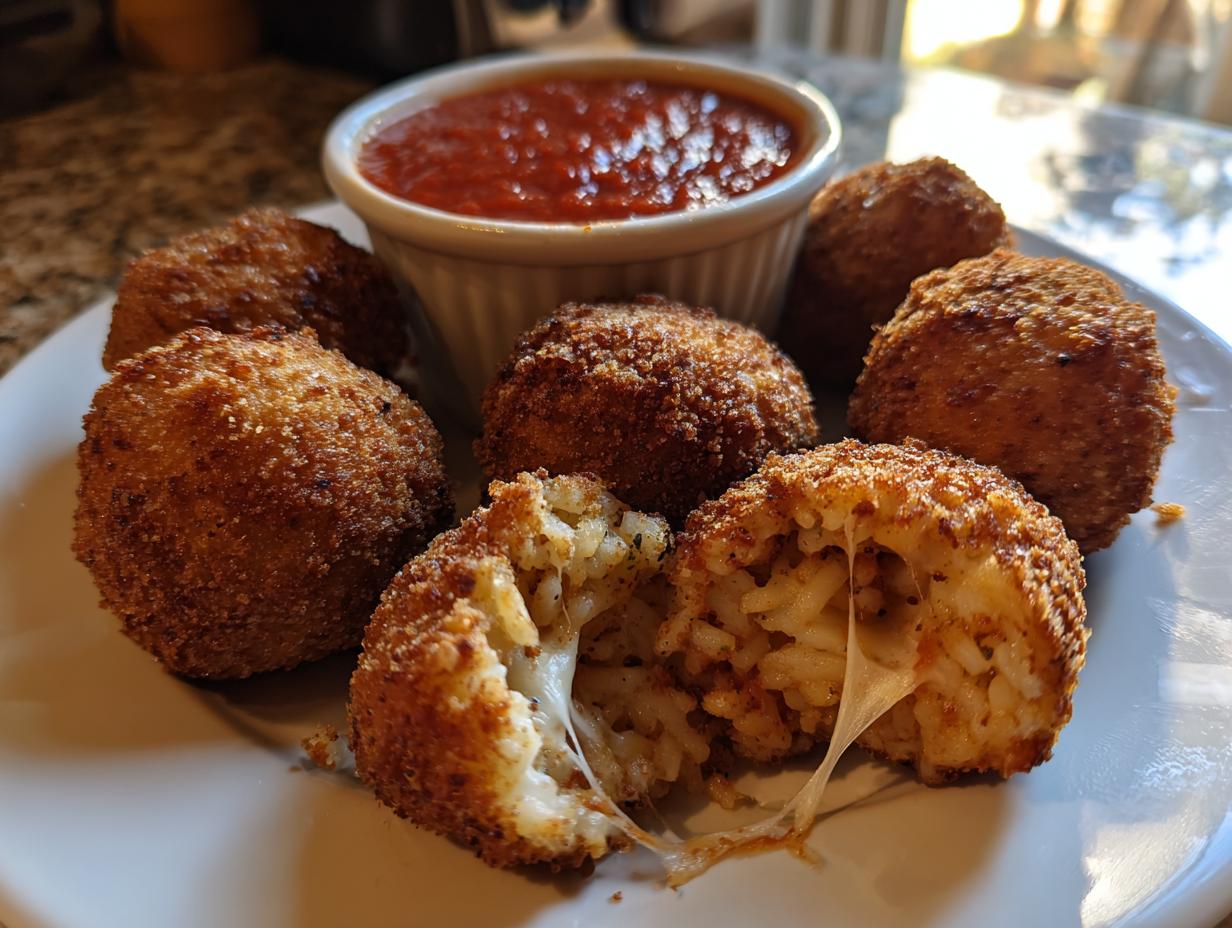
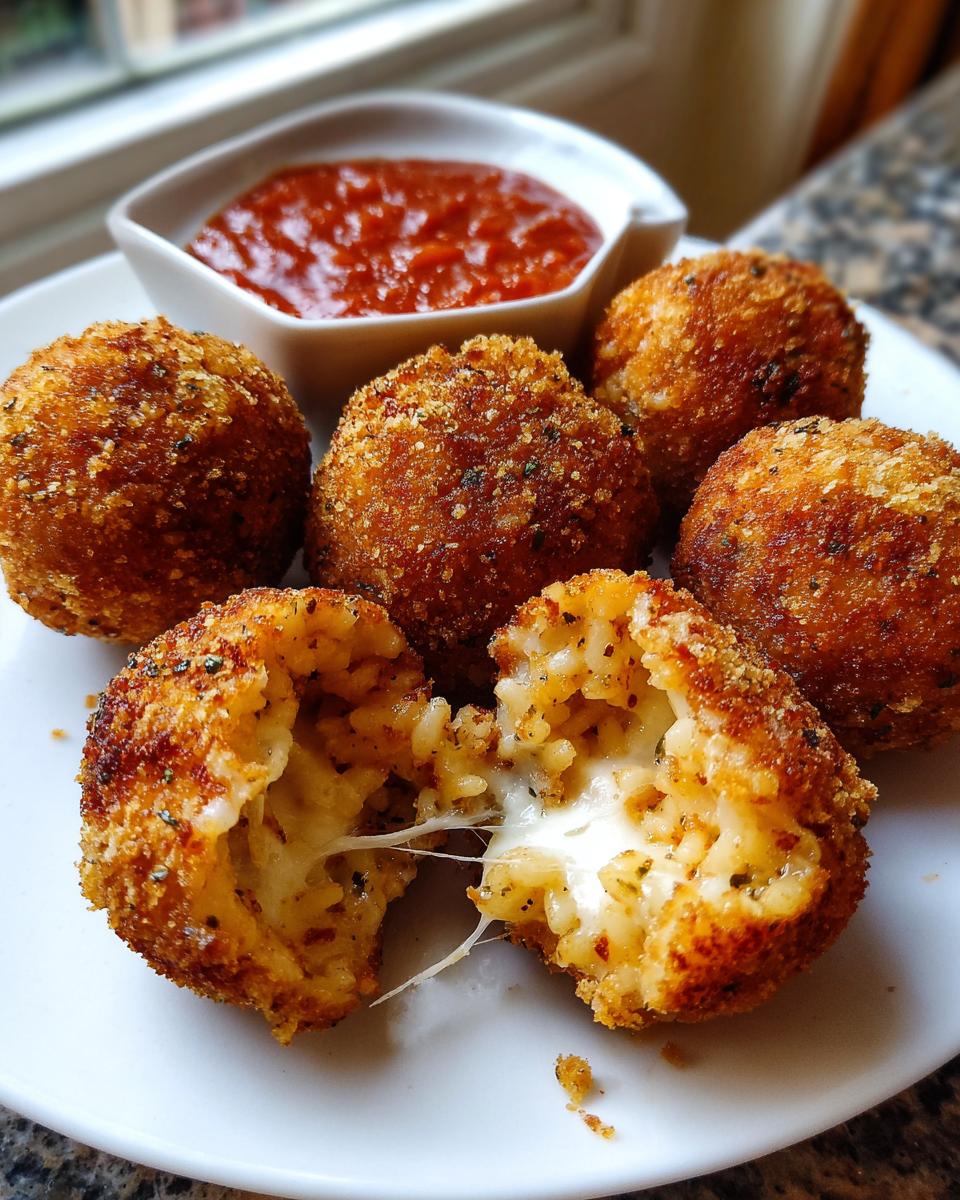
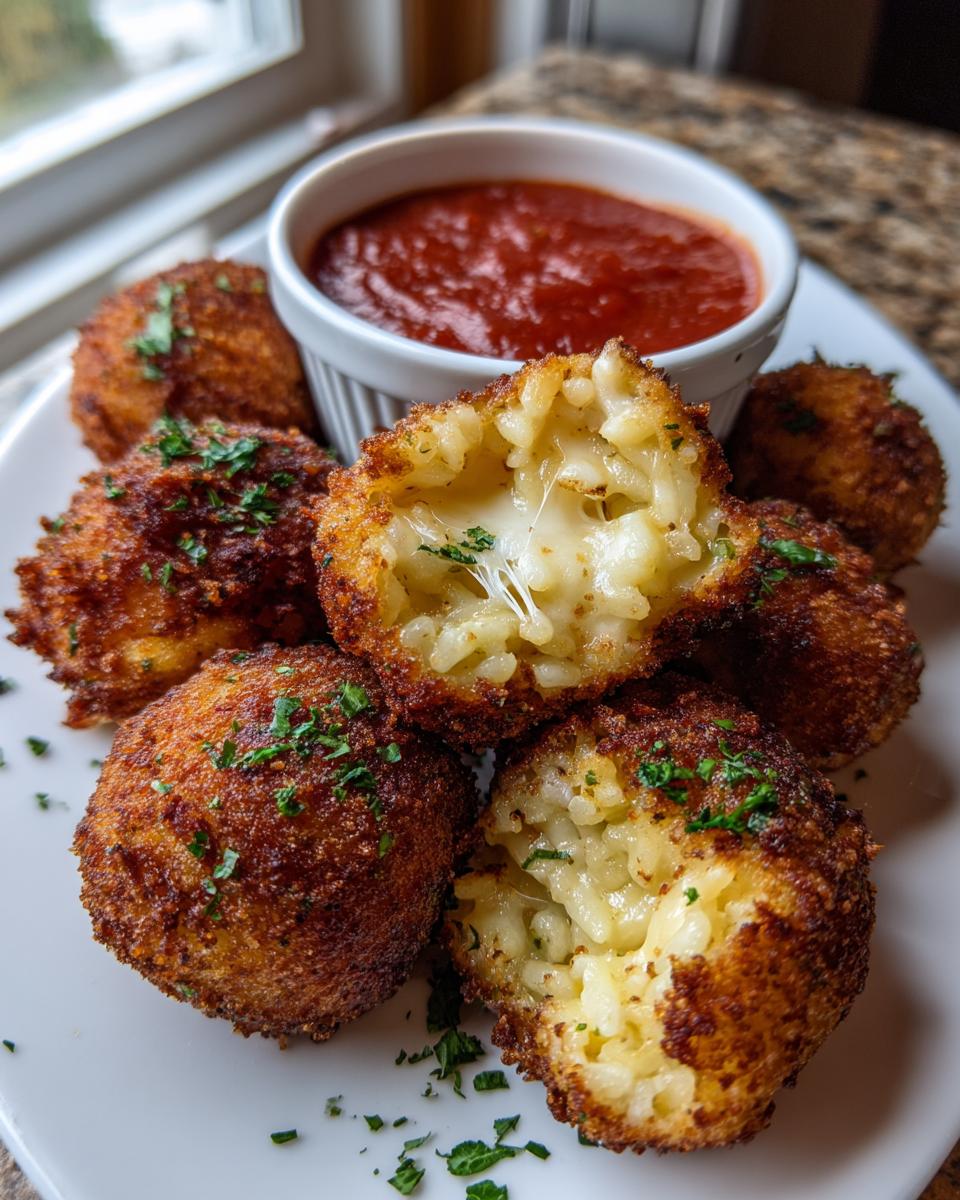
Sometimes, you just need that deep, satisfying crunch followed immediately by something warm and gooey, right? Life gets hectic, and my mission here at Cooking by Felix is to make sure you never have to sacrifice incredible flavor for speed. That’s why I spent so much time perfecting these comfort food recipes and turning them into something achievable on a tougher weeknight. Forget complicated restaurant fare; we’re making the Ultimate Cheesy Italian Arancini Rice Balls. These aren’t just fancy appetizers; they hit that perfect spot where crispy snack meets hearty meal. I promise, if you follow my lead, you will conquer the art of making these incredible fried rice balls successfully, every single time.
- Why These Classic Italian Rice Balls Are Your New Favorite Appetizer
- Gathering Ingredients for Perfect Cheesy Rice Balls
- Step-by-Step Guide: How to Make Arancini Rice Balls
- Tips for Success with Homemade Arancini
- Storage and Reheating Instructions for Leftover Rice Balls
- Serving Suggestions for Your Party Snacks Rice Balls
- Frequently Asked Questions About Making Rice Balls
- Estimated Nutritional Information for Arancini Rice Balls
- Share Your Experience Making These Comfort Food Recipes
Why These Classic Italian Rice Balls Are Your New Favorite Appetizer
If you’re looking for truly rewarding finger foods, these Italian rice balls are the answer. I developed this recipe to bring you maximum flavor without the fuss. They are famous for a reason, and I want you to see how simple they are to manage at home! These are way simpler than making the recipe for stuffed mushrooms, trust me.
- They deliver the ultimate crispy snacks experience—that perfect golden shell is non-negotiable!
- Perfect as easy appetizers for game day or your next get-together.
- They are fantastic party snacks because they hold their heat well.
Honestly, they just taste like pure comfort in a bite.
Key Features of These Homemade Arancini
The real success here is relying on day-old, cold risotto. That firm texture lets you roll tight balls that won’t fall apart when they hit the oil. We aim for a temperature that crisps the breading fast while just barely melting that mozzarella center into pure gooey goodness. These crunchy bites are absolutely worth the simple assembly time.
Gathering Ingredients for Perfect Cheesy Rice Balls
Alright, let’s talk about what you need for this magic to happen! The ingredients might look long, but everything plays a crucial role, especially when we are talking about *homemade arancini*. The absolute most important thing you must have ready is your leftover risotto—and I mean truly cold risotto. If it’s even a little warm, those rice balls won’t hold their shape, and oops, that means messy frying!
For the coating, I highly suggest Panko breadcrumbs; they make all the difference when you’re aiming for that fantastic crunch. We group the main components here so you can see what goes into the rice itself versus what is used for the dredging station later.
Why leftover risotto is essential
Listen, you can’t use warm, freshly made risotto for these Italian rice balls. When the rice is cold, the starches firm up, making the mixture dense enough to handle. If you try to roll warm rice, it’s going to stick everywhere, and your shapes will be sloppy. Make your risotto one day, chill it overnight if you can, and then you’re ready to roll in the morning!
The filling itself is simple but rich. We rely on shredded mozzarella for that incredible stretch when you bite in, and Parmesan adds the necessary salty depth. Don’t skip seasoning the filling mixture slightly!
Step-by-Step Guide: How to Make Arancini Rice Balls
This is where the fun really starts! Rolling these up feels like playing with edible playdough, but you have to be a little careful to make sure your **cheesy rice balls** hold together. Remember, warm rice is the enemy here, so we work quickly and efficiently with the cold, firm base. If you’ve ever made potato croquettes, the shaping is similar! We’ll break this down into three manageable phases so you can feel totally confident frying up a batch of perfect **fried risotto balls**.
Preparing the Risotto Base and Filling
First things first, if you don’t have leftover risotto, you absolutely need to make a fresh batch but then chill it for at least two hours—seriously, don’t skip that cooling time! Once it’s cold, move onto the filling. I combine shredded mozzarella, Parmesan, and any cooked meat I want—that’s the secret to the **best arancini filling**! Mix those cheese components well. Remember, because the risotto itself is already seasoned, we only lightly salt the filling.
Forming and Breading Your Savory Rice Balls
Grab about two tablespoons of that cold risotto. Flatten it gently in your hand, almost like making a small pancake. Now, push a little bit of your cheese mixture right into the center. This is key: gently fold the rice around that filling and roll it between your palms until you have a perfectly smooth, tight little ball. Don’t press so hard that it cracks! Next is dredging: flour first (tap off the excess!), then dip into the egg wash, and finally, press it firmly into the Panko breadcrumbs. Make sure it’s totally covered!
Achieving Crispy Fried Risotto Balls
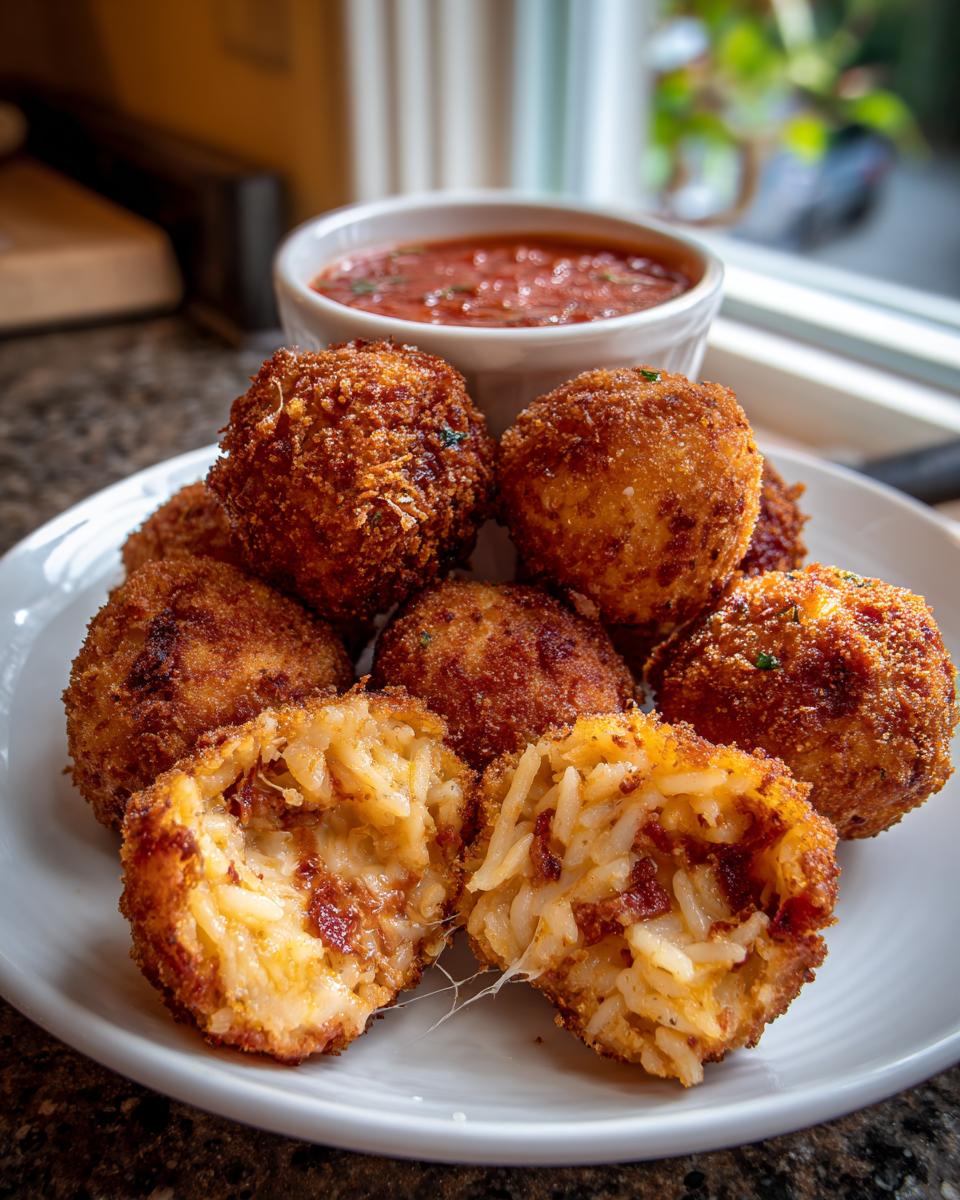
Now, put on your safety glasses because we’re frying! Fill your pot with oil about two inches deep and heat it carefully to exactly 350°F (175°C). This temperature is what guarantees that beautiful, golden, non-soggy coat. Drop your **Italian rice balls** into the hot oil, but work in small batches—if you crowd the pot, the oil temperature drops, and you end up with oil-logged snacks! They only need about three to five minutes until they are beautifully golden brown. Scoop them out swiftly, drain them on a paper towel-lined rack, and hit them with a tiny sprinkle of salt right away while they are hot.
Tips for Success with Homemade Arancini
I want your **homemade arancini** to be absolutely perfect, so let me share a few critical tips that I learned the hard way. First, like I said, cold, leftover risotto is your best friend; it’s the absolute cornerstone for success here. If your mixture feels a bit sticky or wet when you start rolling—maybe your risotto was slightly creamier than mine—don’t panic! Just mix in another tablespoon of Parmesan or a tablespoon of plain flour. This tightens things up instantly.
When you are rolling them, take your time to make them firm and smooth. If they are loose, they will crack open in the oil. Think smooth sphere, no cracks, no weak spots! And hey, if you want to avoid frying altogether, you can totally bake them! Just spray them lightly with cooking spray like you would my fried cornbread, and bake them at 400°F until they are golden. Either way, just focus on a tight seal!
Storage and Reheating Instructions for Leftover Rice Balls
I always make double batches of these because, honestly, they taste almost better the next day once the flavors have really settled in! If you have leftover fried **rice balls**, skip the microwave—it just turns them sad and soft. For best results, store the cooled, cooked arancini in an airtight container in the fridge for up to three days. When you’re ready to eat them, reheat them in the oven at 375°F (190°C) for about 10 minutes. That blast of dry heat brings back that amazing crispness we worked so hard for. For longer storage, they actually freeze beautifully! If you like leftovers stored neat, think of how organized you’ll be when you tackle my sweet potato casserole topping!
Serving Suggestions for Your Party Snacks Rice Balls
Okay, we’ve got the perfect batch of crispy, cheesy mouthfuls, but what do we serve them with? Marinara sauce is a classic, and you already know I love it, but let’s offer a little variety for your next gathering. For a slightly brighter contrast to the richness of the fried **Italian rice balls**, try dipping them into something fresh! Have you ever made my easy bruschetta dip? It’s tangy and herbaceous, and the cool vegetable freshness cuts through the richness of the frying perfectly.
This really elevates them from standard comfort food recipes to something a bit more special for serving as **party snacks rice balls**. It’s so easy, and people love having options when they dip!
Frequently Asked Questions About Making Rice Balls
I know when you look at a recipe like this, you start thinking about all the little variations you could try! Because you might have seen recipes out there for things like **Tuna Rice Balls** or even **Spam Rice Balls**, I wanted to clear up how this recipe fits into that world. This method is specifically for the Italian style—Arancini—but the core skill of shaping the rice is universal for all kinds of **savory rice balls**.
It’s easy to get confused between the different cultural takes, but once you master the rolling, you can pivot to almost any style of **finger foods** you like. Also, if you’re looking for something hearty that cooks up fast, check out my recipe for easy chicken tortilla soup—it’s amazing!
Can I make Japanese Rice Balls (Onigiri) using this method?
Well, yes and no! The physical act of shaping and breading the rice balls is similar, but Onigiri are usually just seasoned rice, often triangular, and they aren’t typically battered and fried like these Arancini. If you want true **Japanese Rice Balls** or **Yaki Onigiri**, you’d season your rice differently and skip the messy flour-egg-breadcrumb station entirely!
What is the best rice to use for these Italian Rice Balls?
For authentic texture in the beginning, you should always start with a short-grain Italian rice like Arborio or Carnaroli to make your risotto because they release just the right amount of starch. But here’s the real secret: since we are using leftovers, *any* sticky rice that made good risotto the first time works! The key isn’t the specific grain type as much as using leftover rice that is firm and moldable. It just has to be sticky enough for your **homemade arancini** to hold its shape.
Estimated Nutritional Information for Arancini Rice Balls
Now, I want to be super upfront about this part. Because we are frying these delicious things, and because your choice of filling—whether you go with meat or just stick to the chicken alfredo lasagna vibe with extra cheese—makes a huge difference, these numbers are just an estimate! Think of this as a general guideline for two of these fried risotto balls.
- Calories: Around 350
- Fat: About 18g
- Carbohydrates: Roughly 35g
- Protein: About 14g
These are definitely a treat, but oh my goodness, they are worth every delicious, crispy bite!
Share Your Experience Making These Comfort Food Recipes
I truly hope you get as much joy making these cheesy rice balls as I do sharing them with you! Once you try this recipe, please come back and let me know what you thought. Did you stick with the classic mozzarella, or did you sneak in some spicy pepperoni?
Don’t forget to rate these wonderful comfort food recipes with five stars below if they brought that crispy, comforting goodness to your table. Happy cooking, everyone!
PrintUltimate Cheesy Italian Arancini Rice Balls

Make these crispy Italian rice balls stuffed with gooey mozzarella and savory filling. This recipe shows you how to achieve a perfect golden crust and a satisfying, cheesy center, perfect for appetizers or party snacks.
- Prep Time: 30 min
- Cook Time: 15 min
- Total Time: 45 min
- Yield: About 12 rice balls 1x
- Category: Appetizer
- Method: Frying
- Cuisine: Italian
- Diet: Vegetarian
Ingredients
- 3 cups leftover cooked risotto (cooled)
- 1 cup shredded mozzarella cheese
- 1/2 cup grated Parmesan cheese
- 1/4 cup finely chopped cooked meat or ragu (optional filling)
- 2 large eggs, lightly beaten
- 1 cup all-purpose flour
- 2 cups plain breadcrumbs (Panko recommended for extra crispiness)
- Vegetable oil, for frying
- Salt and black pepper to taste
- Marinara sauce, for serving
Instructions
- Prepare the risotto base: If you do not have leftover risotto, make a simple, thick risotto and allow it to cool completely in the refrigerator for at least 2 hours.
- Prepare the filling: In a small bowl, mix the mozzarella, Parmesan, and optional cooked meat or ragu. Season lightly with salt and pepper.
- Form the rice balls: Scoop about 2 tablespoons of the cold risotto into your palm. Flatten it slightly. Place about 1 teaspoon of the cheese/meat mixture in the center. Gently fold the risotto around the filling and roll it into a tight ball, about 1.5 inches in diameter. Repeat until all the risotto is used.
- Set up the breading station: Place the flour in one shallow dish, the beaten eggs in a second dish, and the breadcrumbs in a third dish.
- Dredge the rice balls: Roll each rice ball first in the flour, shaking off excess. Dip it into the beaten egg, letting excess drip off. Finally, roll it thoroughly in the breadcrumbs, pressing gently to ensure full coverage. Place the breaded balls on a tray.
- Heat the oil: Pour vegetable oil into a deep, heavy-bottomed pot or deep fryer to a depth of about 2 inches. Heat the oil to 350°F (175°C). Use a thermometer to monitor the temperature.
- Fry the arancini: Working in batches to avoid overcrowding the pot, carefully lower the rice balls into the hot oil. Fry for 3 to 5 minutes, turning occasionally, until they are deep golden brown and crispy.
- Drain: Remove the arancini with a slotted spoon and place them on a wire rack lined with paper towels to drain excess oil. Season immediately with a pinch of salt.
- Serve: Serve the hot, crispy rice balls immediately with warm marinara sauce for dipping.
Notes
- Use leftover risotto for the best texture; fresh, warm risotto will not hold its shape well.
- For a baked arancini alternative, spray the breaded balls lightly with cooking spray and bake at 400°F (200°C) for 15-20 minutes, turning halfway, until golden.
- If you skip the meat filling, these become simple cheesy rice balls, which are also excellent.
Nutrition
- Serving Size: 2 rice balls
- Calories: 350
- Sugar: 3
- Sodium: 450
- Fat: 18
- Saturated Fat: 8
- Unsaturated Fat: 10
- Trans Fat: 0
- Carbohydrates: 35
- Fiber: 2
- Protein: 14
- Cholesterol: 55