

You know how you bite into one of those perfect loaves from a fancy bakery? The kind that practically melts before it even hits your tongue? Well, stop dreaming because I’m sharing the secret to making that absolutely perfect brioche bread right in your own kitchen. This isn’t just another recipe; this is the ultimate *easy* guide that promises you that soft, buttery result every single time. Felix poured years into simplifying rich baking, knowing that we all crave exceptional food even when life is hectic. Trust me, this foolproof method turns complex French baking into something wonderfully achievable for you!
- Why This is the Best Homemade Brioche Bread Recipe
- Ingredients for Your Soft and Fluffy Brioche Loaf
- Easy Brioche Bread Instructions: Step-by-Step Brioche Dough Process
- Baking Your Bakery Style Brioche Bread
- Tips for Perfect Classic Brioche Baking
- How to Use Your Homemade Brioche Bread
- Storing Your Rich Buttery Bread
- Frequently Asked Questions About Brioche Bread
- Estimated Nutritional Information for Brioche Bread
Why This is the Best Homemade Brioche Bread Recipe
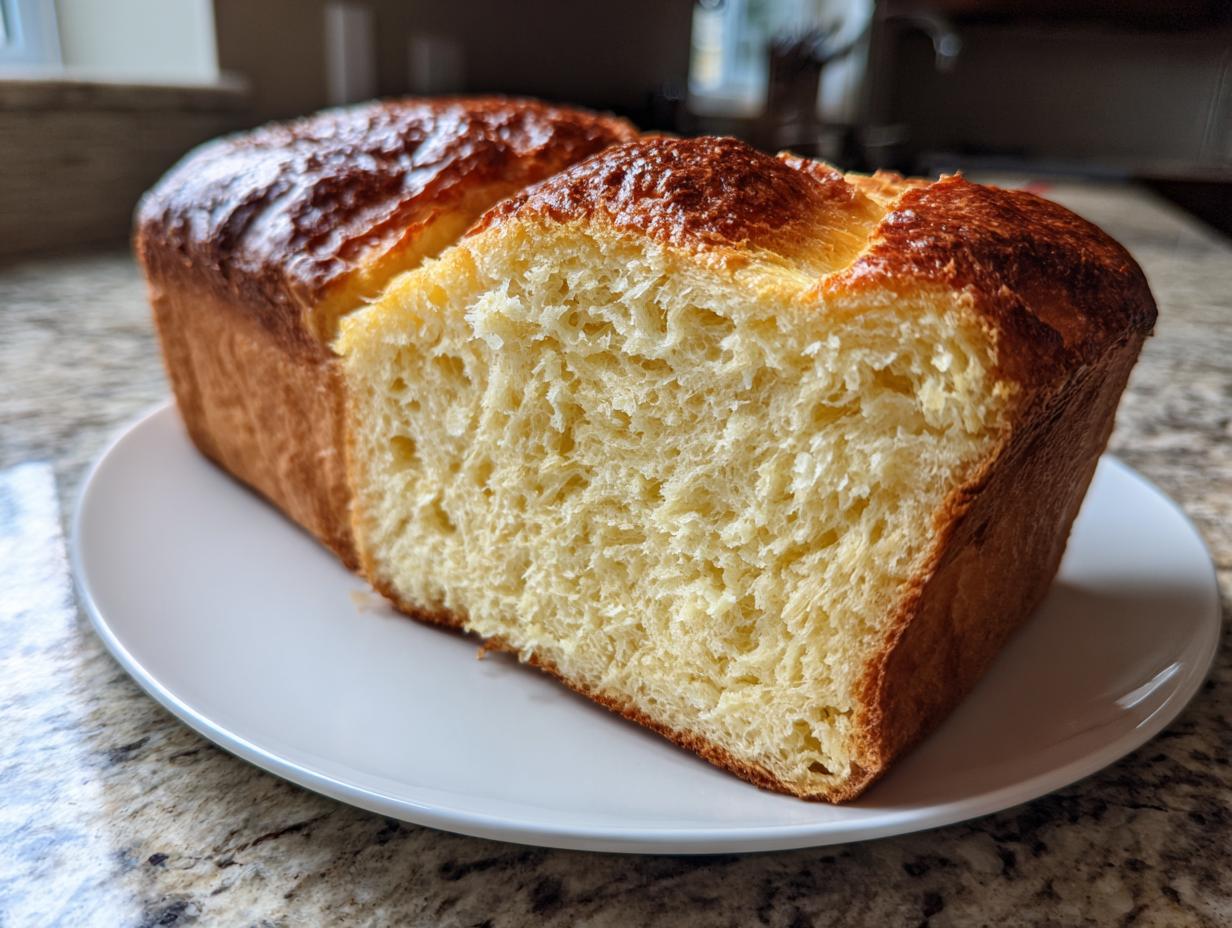
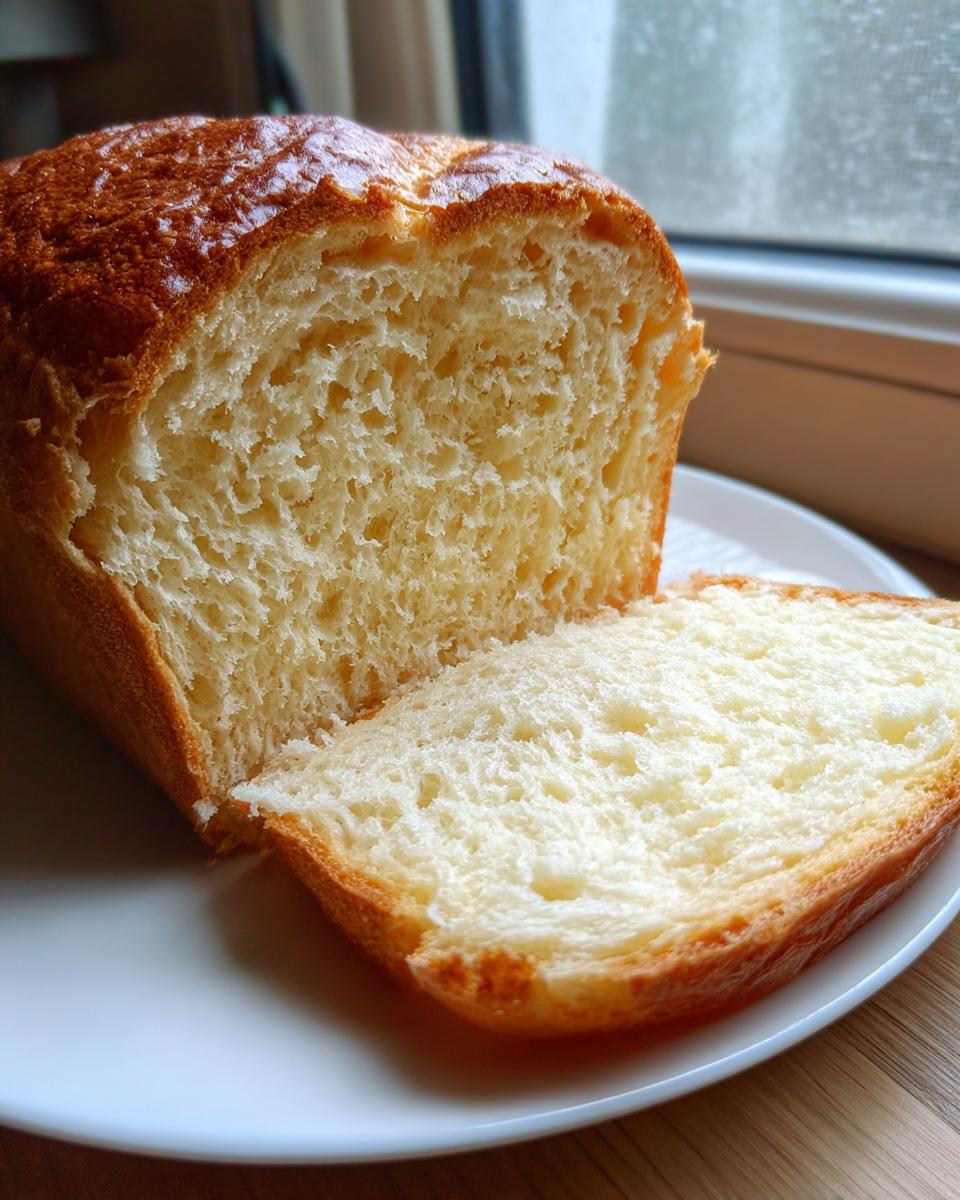
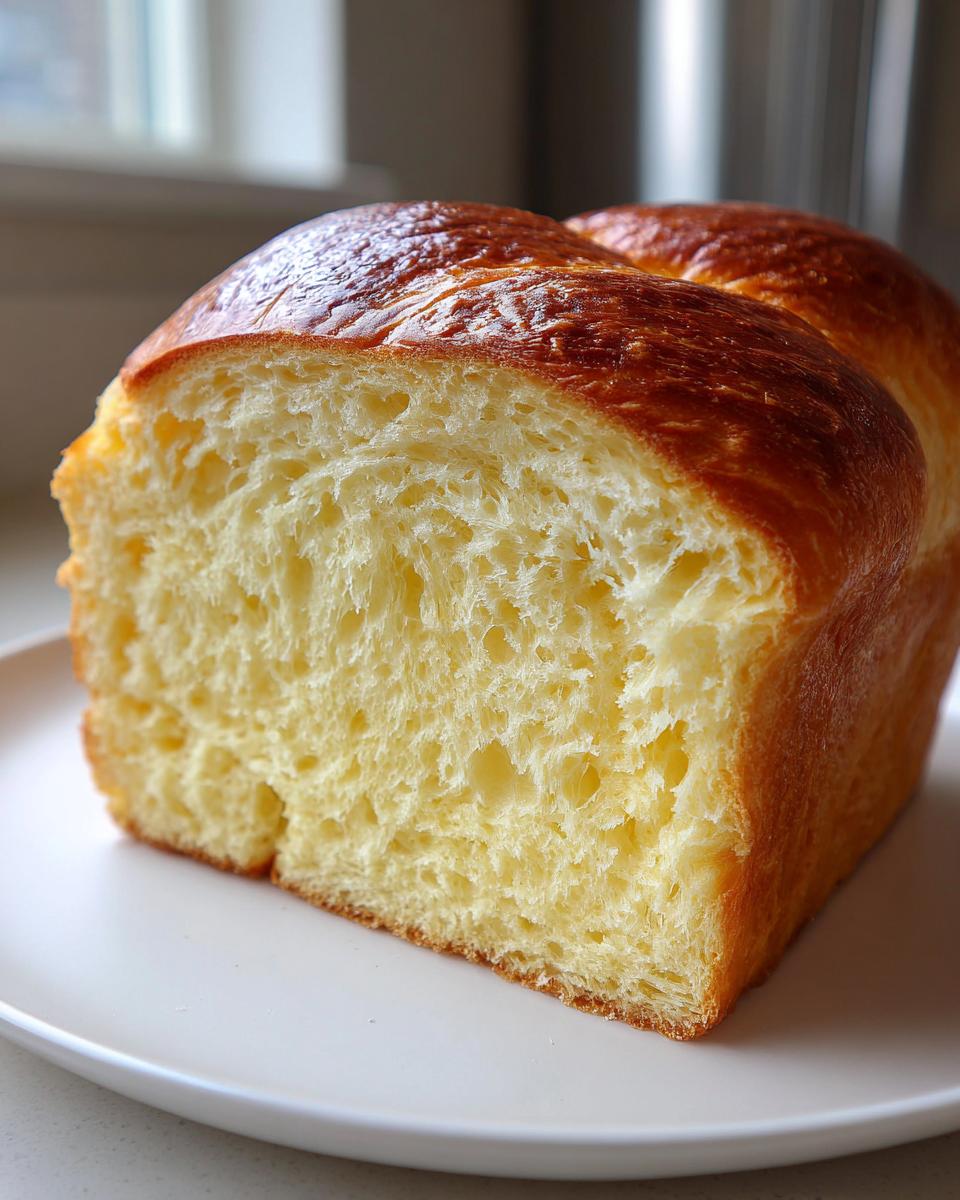
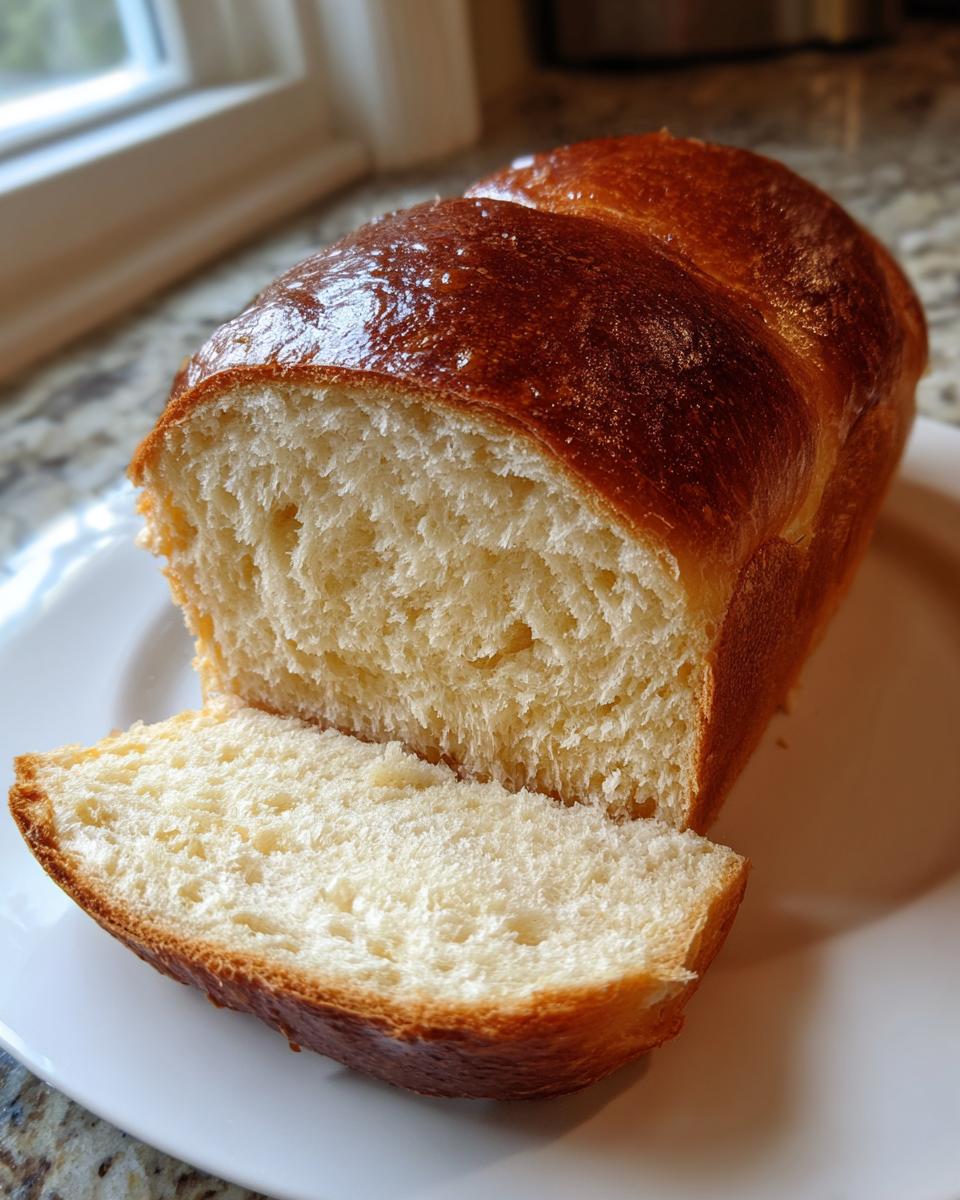
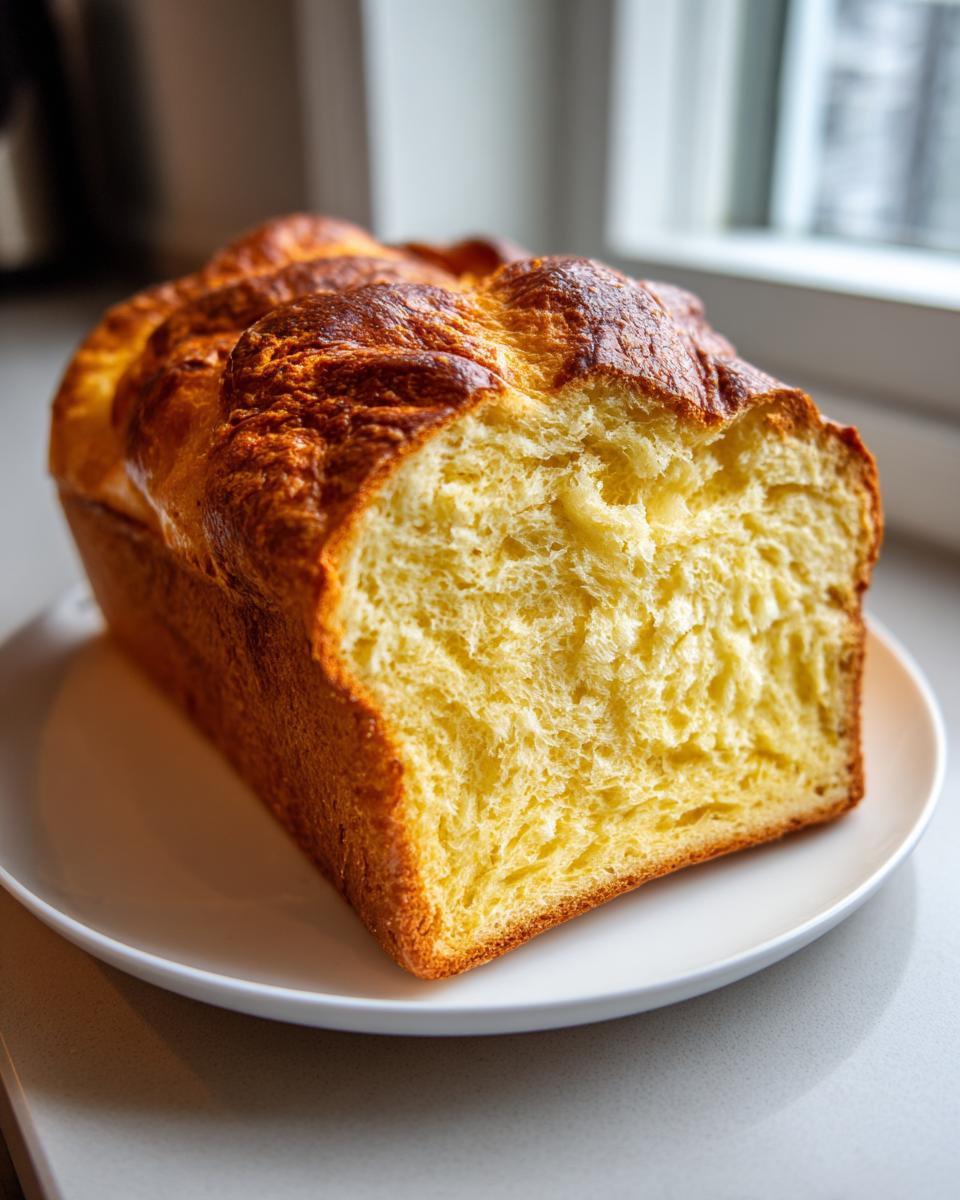
I honestly believe this is the best homemade brioche bread recipe out there because it manages to be surprisingly easy while still delivering that stunning bakery quality. You get that gorgeous deep golden crust without needing a fancy setup. But the real payoff is the texture; it’s so wonderfully soft and fluffy! If you’ve been searching for a no-fail brioche bread that feels rich, buttery, and looks like it came straight from Paris, you’ve found it here.
Achieving That Tender Crumb Technique in Your Brioche Bread
What sets this recipe apart for that signature soft and fluffy brioche loaf feel is simply the sheer amount of butter. Yes, we’re making a rich buttery bread here! The technique focuses on slowly adding all those butter cubes while kneading. This slow incorporation is crucial because it allows the gluten structure to fully develop around the fat without breaking down. That patience is what gives you the tender crumb technique in the final product. Don’t rush this part, seriously!
Ingredients for Your Soft and Fluffy Brioche Loaf
Making truly excellent brioche bread starts right here, with the ingredients. Because this is a yeast bread recipe with high butter content, the quality and state of your items really matter. Don’t worry, once you have these things ready, the rest is just following the steps! I need you to pay special attention to the temperature of the milk and the state of the butter, okay? Those are non-negotiable if you want the best homemade brioche bread recipe result.
- 1 cup whole milk, warmed to 105-115°F
- 2 1/4 teaspoons active dry yeast
- 1/4 cup granulated sugar
- 3 large eggs, room temperature
- 1 teaspoon salt
- 4 cups all-purpose flour, plus more for dusting
- 12 tablespoons (1 1/2 sticks) unsalted butter, softened and cut into cubes
- 1 large egg yolk, beaten with 1 teaspoon water (for egg wash)
Ingredient Notes and Substitutions for Rich Buttery Bread
Let’s talk specifics so you nail that rich buttery bread texture. First, that milk temperature! It has to be warm, but not hot—aim for that sweet spot of 105°F to 115°F so you wake up that yeast without killing it. Second, room temperature eggs are a must for this brioche bread dough. Cold eggs shock the mixture when they go in, which messes up that gorgeous emulsification we are aiming for during the long knead.
Also, since butter is such a huge player in the final flavor, please use the best quality unsalted butter you can find. That high-quality fat is what delivers the incredible, melt-in-your-mouth taste that makes this bread so special. Skip any margarine swaps here; we need pure butter to create that signature golden crust bread tutorial finish!
Easy Brioche Bread Instructions: Step-by-Step Brioche Dough Process
Okay, let’s get our hands dirty! This section walks you through the entire brioche dough step by step. People think making this dough is hard because of the butter, but if you follow these easy brioche bread instructions, you’ll see how simple it really is. We’re going to focus on time and patience, which are the secret sauces for any great yeast bread recipe with high butter content.
Mixing and Kneading the Brioche Bread Dough
First things first: wake up your yeast! Mix the warm milk, yeast, and just a little bit of sugar in your mixer bowl—wait about five to ten minutes until it looks foamy and happy. Then, toss in the rest of the sugar, your room-temperature eggs, and the salt. Finally, hit it with all the flour. If you have a stand mixer, use that dough hook and start low until everything comes together into a shaggy mess. Then, that initial kneading takes about five minutes where the dough is going to be super sticky; don’t panic!
If you’re kneading by hand, this initial mix is going to take you about ten minutes, and yes, your arms will get a workout! But honestly, the stand mixer really shines during the butter incorporation phase.
Incorporating Butter for Classic Brioche Bread
This is where the magic—and the patience—comes in. You must add your softened butter cubes one at a time. I mean it! Don’t drop them all in at once. Wait until the first cube is mostly absorbed into the dough before you risk adding the next one. This slow feeding of fat is what creates those beautiful, airy pockets we want in the final brioche bread.
I know, I know, it feels like it takes forever—probably another 10 minutes in the mixer—but if you try to speed this up, the butter just smears around instead of actually mixing into the gluten strands beautifully. Felix always says the dough will fight you a little during this stage; just keep the mixer going medium speed until it pulls cleanly away from the sides. That’s how you know you’ve achieved that perfect, rich, buttery bread structure.
Proofing and Shaping the Brioche Loaf Recipe Oven
Once you have that gorgeously smooth, elastic dough, tuck it into an oiled bowl, cover it up, and let it double—that first rise takes about an hour and a half to two hours, depending on how warm your kitchen is. When it’s ready, gently punch it down and shape it into a tight log for your greased loaf pan. Make sure you cover that loaf pan loosely for the second, quicker rise.
For this brioche loaf recipe oven stage, we are looking for it to puff up until it crowns about one inch over the rim of the pan. Maybe 45 minutes to an hour. If it’s rising too fast, your oven temperature might be too high when you go to bake later!
Baking Your Bakery Style Brioche Bread
Now that your dough has finished its final, fluffy rise, it’s time to get that beautiful bakery style brioche bread look! About twenty minutes before you want to bake, crank that oven up to 375°F. Next up is the egg wash—this is important because it gives you that gorgeous, glossy, deep golden crust bread tutorial finish. Just brush that simple mix of yolk and water gently over the top.
Bake it for about 30 to 35 minutes. I know it looks done on top when it’s dark brown, but you really need to check inside. For real accuracy, trust your thermometer; you are looking for an internal temperature of 200°F. If the top is getting too dark before the inside cooks? Don’t panic! Just loosely tent a piece of foil over it and keep baking. Patience here guarantees that perfect, buttery interior!
Tips for Perfect Classic Brioche Baking
We’ve nailed the mixing and baking, but I want to share a few extra little things I learned over the years ensuring every single brioche bread loaf comes out exactly how it should. Think of these as the finishing touches that take your bread from great to absolutely unforgettable.
The first thing is about that sticky dough. When you’re incorporating the butter, yes, it’s going to look messy for a while. That’s normal! Don’t throw in extra flour just because it’s sticking to the sides mid-mix. Adding too much extra flour late in the process ruins the tenderness we worked so hard to build. Resist the urge; keep kneading until the mixer starts cleaning itself!
Second, let’s talk about the cooling process—this is huge for the texture. You must let the loaf cool completely on a wire rack before you even look at slicing it. If you cut into that hot, rich buttery bread too soon, all that internal steam rushes out, and what you’re left with is a slightly gummy, dense crumb where a fluffy interior should be. It takes serious willpower, but wait about two hours!
If you’re worried about over-browning like we talked about in the baking section, a quick tip: you can always reduce your oven temperature by 25 degrees for the last 10 minutes if you see it getting too dark, or give it that foil tenting early. You want beautiful, even color, not burnt ends. For more amazing bread inspiration after you finish this, check out this great easy brioche bread instructions guide I always reference when I’m doing variations!
How to Use Your Homemade Brioche Bread
So, you’ve done it! You have a golden, perfect, rich buttery bread loaf cooling on your counter. Now what? Honestly, you can eat it plain with just a smear of good butter, but this bread truly sings when used in specific ways. Since we put so much effort—and butter—into this loaf, we want to show it off!
The natural sweetness and tenderness of this bread make it unbeatable for breakfast spreads, but it’s also sturdy enough for savory applications. I know Felix always saves the ends and any slightly imperfect slices for the absolute best application: the ultimate French toast. It soaks up the custard without turning to mush, unlike regular sandwich bread.
If you haven’t decided to turn it into a decadent breakfast yet, think about upgrading your lunch game. This brioche bread truly elevates simple meals. Imagine making a gourmet grilled cheese or whatever is in your fridge that needs a little luxury poured over it—like maybe a fantastic chicken salad sandwich? It just works better here.
Making Brioche for French Toast
If you are planning your brioche for French toast adventure, you should slice the bread thick—at least an inch thick, if you can manage it! Because this brioche bread is so rich, it holds up beautifully when dipped in that eggy mixture. If you slice it too thin, it will just dissolve before it gets the chance to brown perfectly on the griddle. Let those thick slices soak up the mixture for a full minute per side before cooking; you want that custardy gooeyness deep in the center!
Storing Your Rich Buttery Bread
Even though this loaf disappears fast, sometimes you just can’t eat it all in one day! Store your amazing brioche bread tightly wrapped at room temperature for up to three days. Please don’t refrigerate it—that cold air makes bread go stale faster, and we don’t want that to happen to our soft, fluffy brioche loaf.
If you need it to last longer, pop slices into the freezer! When you’re ready to enjoy it again, just pop those frozen pieces straight into the toaster or a warm skillet. A quick zap is all it takes to bring back that buttery, delicious texture perfectly.
Frequently Asked Questions About Brioche Bread
I get so many questions about this recipe once people realize how much effort goes into perfecting that beautiful, rich buttery bread. Don’t worry if you have concerns; that just means you care about getting that fantastic soft and fluffy brioche loaf texture! Finding a how to make brioche at home tutorial can be easy, but troubleshooting is the key to mastering this.
Can I skip the stand mixer when making brioche bread?
Oh, absolutely you can skip the stand mixer! I know not everyone has one, and I’ve certainly made this brioche bread without one back when I was just starting out. The catch is that long, steady kneading. Remember how I said kneading takes 10 to 15 minutes *after* the butter is in? Be prepared to add about 20 to 30 minutes of serious, dedicated hand kneading to get the gluten structure developed enough to hold all that fat. It takes muscle, but you can certainly manage it to get that bakery style brioche bread!
Why is my homemade brioche bread dense instead of fluffy?
That is the most heartbreaking question! When your homemade brioche bread ends up dense instead of airy, it almost always comes down to one of two things. First, did you knead long enough? The gluten needs that power to trap the gas and create space for that soft crumb. If you stopped too early, it collapses into a brick, sadly. Second, check your butter incorporation. If you added cold butter or dumped it all in at once, the butter coats the flour before the gluten can form properly, which locks in density. So, make sure that butter is pliable and soft, and add it slowly, slowly, slowly!
Estimated Nutritional Information for Brioche Bread
I always like to give a little heads-up on what you’re serving up, even though baking at home means you are controlling the ingredients way better than any store-bought option. Here are the general estimates based on the recipe details we just covered for this rich brioche bread. Don’t stress too much over these numbers, okay? Baking is about joy, but it’s good to know!
Please remember that these are just rough estimates based on standard ingredients. If you used a different type of flour or if your butter measurement was a touch heavy (which I totally support, by the way!), your final numbers will look slightly different when you make this soft and fluffy brioche loaf.
- Serving Size: 1 slice
- Calories: 220
- Sugar: 6g
- Sodium: 250mg
- Fat: 10g
- Saturated Fat: 6g
- Carbohydrates: 30g
- Protein: 6g
The Ultimate Easy Homemade Brioche Bread Loaf Recipe (Soft, Buttery, and Bakery-Quality)
Make rich, buttery brioche bread at home with this easy, step-by-step recipe. This guide produces a soft, fluffy loaf with a golden crust, perfect for sandwiches or French toast.
- Prep Time: 30 min
- Cook Time: 35 min
- Total Time: 3 hr 5 min
- Yield: 1 loaf 1x
- Category: Baking
- Method: Oven Baking
- Cuisine: French
- Diet: Vegetarian
Ingredients
- 1 cup whole milk, warmed to 105-115°F
- 2 1/4 teaspoons active dry yeast
- 1/4 cup granulated sugar
- 3 large eggs, room temperature
- 1 teaspoon salt
- 4 cups all-purpose flour, plus more for dusting
- 12 tablespoons (1 1/2 sticks) unsalted butter, softened and cut into cubes
- 1 large egg yolk, beaten with 1 teaspoon water (for egg wash)
Instructions
- Activate the yeast: In a large bowl or the bowl of a stand mixer, combine the warm milk, yeast, and 1 teaspoon of the sugar. Let stand for 5 to 10 minutes until foamy.
- Mix the dough: Add the remaining sugar, eggs, and salt to the yeast mixture. Mix briefly. Add the flour. Using the dough hook attachment, mix on low speed until a shaggy dough forms.
- Knead the dough: Increase the mixer speed to medium-low and knead for 5 minutes. The dough will be sticky.
- Incorporate the butter: Add the softened butter cubes, one or two at a time, waiting until each piece is mostly incorporated before adding the next. This process takes time.
- Continue kneading: After all butter is added, increase the speed to medium and knead for 10 to 15 minutes until the dough is smooth, elastic, and pulls away from the sides of the bowl. If kneading by hand, this will take about 20 minutes.
- First rise: Place the dough in a lightly oiled bowl, turning to coat. Cover the bowl with plastic wrap and let it rise in a warm place until doubled in size, about 1.5 to 2 hours.
- Shape the loaf: Gently punch down the risen dough. Turn it out onto a lightly floured surface. Shape the dough into a log and place it into a greased 9×5 inch loaf pan.
- Second rise: Cover the loaf pan loosely with plastic wrap and let it rise again in a warm place until the dough has crowned about 1 inch over the rim of the pan, about 45 to 75 minutes.
- Preheat and egg wash: Preheat your oven to 375°F (190°C) about 20 minutes before the end of the second rise. Gently brush the top of the dough with the egg wash.
- Bake: Bake for 30 to 35 minutes, or until the top is deep golden brown and the internal temperature reaches 200°F (93°C). If the top browns too quickly, loosely tent it with foil.
- Cool: Remove the loaf from the pan immediately after baking and cool completely on a wire rack before slicing.
Notes
- For the softest crumb, ensure your butter is truly soft, not melted, when adding it to the dough.
- If you do not have a stand mixer, you can mix the initial ingredients by hand, but the long kneading time required for the butter incorporation is much easier with a mixer.
- This rich buttery bread makes excellent French toast or gourmet sandwiches.
Nutrition
- Serving Size: 1 slice
- Calories: 220
- Sugar: 6
- Sodium: 250
- Fat: 10
- Saturated Fat: 6
- Unsaturated Fat: 4
- Trans Fat: 0
- Carbohydrates: 30
- Fiber: 1
- Protein: 6
- Cholesterol: 45