

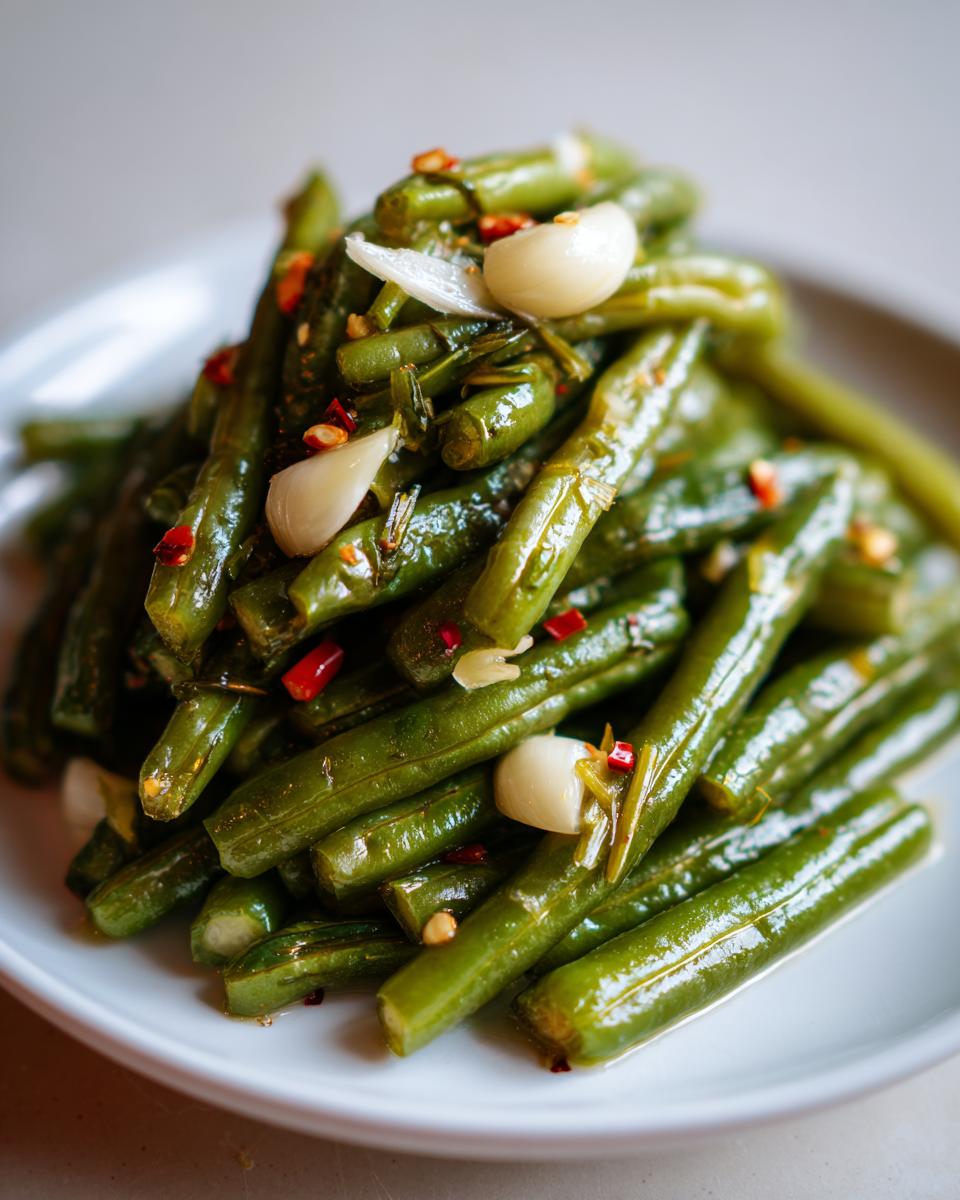
You know that moment when you just need a CRAVING satisfied? Something tangy, something crunchy, something packed with garlicky dill flavor that stops you dead in your tracks? Well, that’s why I got obsessed with making the perfect dilly beans. Forget spending hours over a hot stove; I learned from my background in keeping things simple for busy lives that amazing flavor doesn’t need complex steps. These quick pickled green beans are exactly what you need when the snack siren calls. Seriously, they’re addictive, and I’m thrilled to share Felix Hayes’ trick to getting that unbeatable snap, even on a Tuesday night.
- Why You Will Love This Easy Spicy Dilly Beans Recipe
- Gathering Ingredients for Perfect Dilly Beans
- Step-by-Step Instructions for Making Refrigerator Dilly Beans
- Adapting Your Dilly Beans for Long-Term Canning
- Tips for Success with Crunchy Green Bean Snacks
- Serving Suggestions for Tangy Side Dishes
- Storage and Reheating Instructions for Your Dilly Beans
- Frequently Asked Questions About Homemade Dill Pickles
- Share Your Best Dilly Bean Recipe Experience
Why You Will Love This Easy Spicy Dilly Beans Recipe
When I put this recipe together, I was laser-focused on what busy people actually *need* from a pickle. It’s not about complicated science; it’s about getting that incredible flavor combination delivered fast. Trust me, once you taste this snap, you won’t go back to store-bought jars.
- Instant Crunch Factor: We’re talking maximum texture here! These refrigerator dilly beans stay incredibly crisp because we skip the long canning process and use techniques to lock in that garden snap.
- Ready in a Day: While canning takes weeks for flavor to deepen, you only have to wait 24 hours before these babies are perfectly tangy and ready to demolish straight from the fridge.
- Just the Right Heat: That little kick from the red pepper flakes hits just right. It brightens up the garlic and dill without overpowering the fresh green bean flavor. You can totally control this part, too!
- Minimal Cooking Time: Seriously, it only takes five minutes to boil the vinegar brine. That’s less time than it takes to decide what to watch on TV next.
- Perfect Small Batch Pickles: This recipe yields two quarts, which is the ideal amount for having plenty to snack on without having fifty jars taking up precious pantry space.
Gathering Ingredients for Perfect Dilly Beans
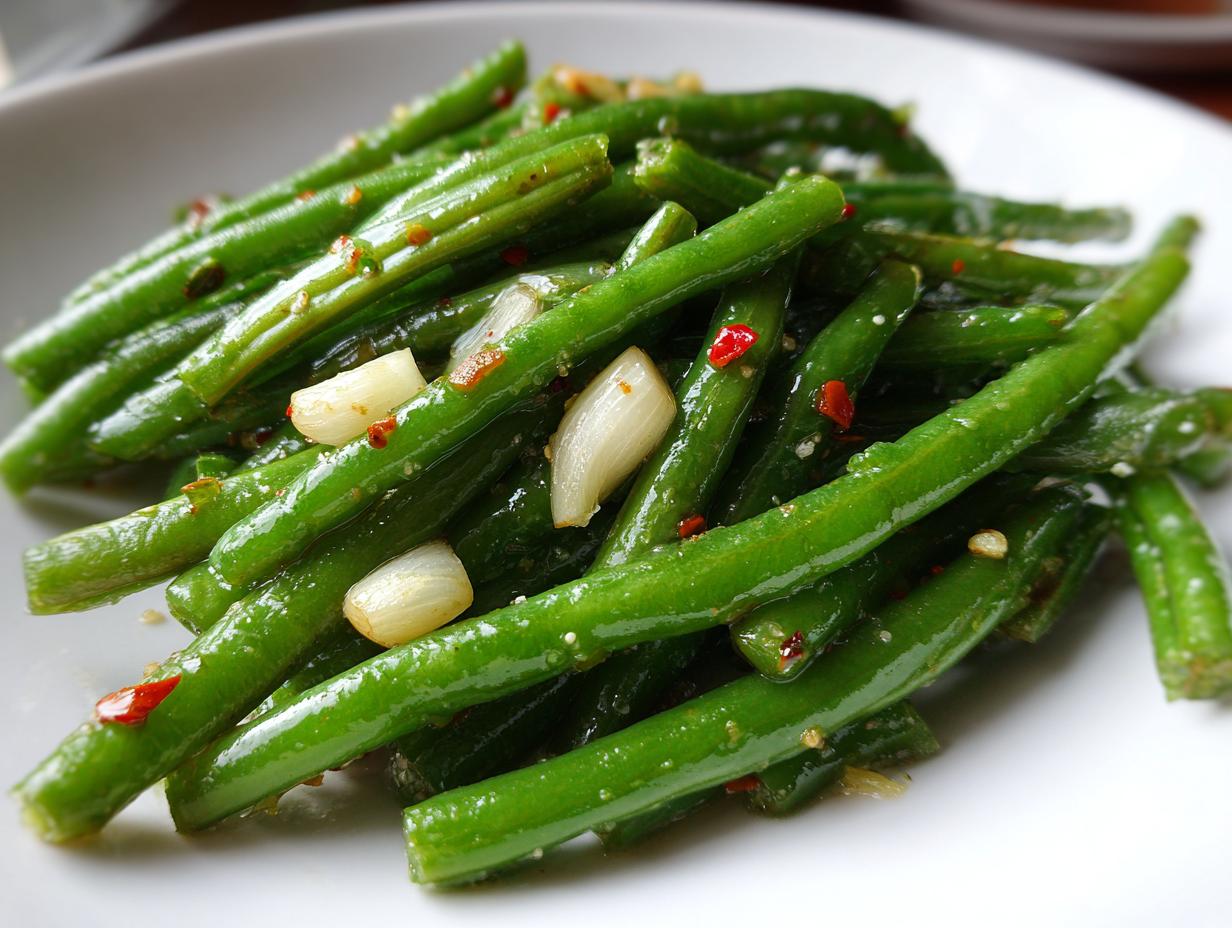
Okay, let’s talk about what you need, because the quality of what goes in directly impacts that tangy side dish flavor you’re chasing. For this recipe, you’re grabbing about two pounds of really fresh green beans. Don’t even think about using the floppy ones at the bottom of the crisper drawer! You need those firm ones, and make sure you trim the tough ends off every single one before they go into the jar. That’s step one for keeping them tidy.
Next are the flavor stars: garlic and fire. We are loading these jars up with four plump cloves of garlic, and you want to slice those thinly—no big chunks allowed! For that essential spicy kick, I call for one teaspoon of red pepper flakes, but honestly, bump that up if you’re like me and chase that spicy pickled vegetables vibe. Then we get to the dill. You can use a big, beautiful bunch of fresh dill sprigs, which gives you that gorgeous, fragrant smell, or if you’re low on fresh herbs, two tablespoons of dried dill seed works perfectly fine.
Finally, the brine components. This is where we build the classic homemade dill pickles foundation. You’ll need four cups of water, two cups of sharp white vinegar, two tablespoons of pickling salt—important, we’ll talk about that in a minute—and just one tablespoon of plain granulated sugar to balance out the sharpness. Don’t skip the sugar; it smooths everything over perfectly!
Ingredient Notes and Crunchy Texture Tips for Your Dilly Beans
I know you want these crunchy green bean snacks to stay snappy, and folks, texture is non-negotiable! A lot of people ask me how I keep them from getting soft and limp, and it all comes down to little tricks that really boost your pickling game.
First, about that salt: stick to pickling or canning salt if you can manage it. Regular table salt has additives that can make your vinegar brine look cloudy later, and we want crystal clear jars of goodness! If you really want to go the extra mile and guarantee that crunch when preserving green beans easy, check your spice cabinet for pickling crisping powder, which is calcium chloride—it’s a lifesaver for texture.
Another old-school secret, and this is something my grandmother swore by, is dropping in one tiny grape leaf per jar if you have access to them. Those leaves have tannins that help the beans stay firm while they pickle. It sounds weird, but trust me, these small things elevate your quick pickled vegetables for beginners straight into gourmet territory!
Step-by-Step Instructions for Making Refrigerator Dilly Beans
Alright, time to get these beans pickled! This part moves fast, which is why I love this method so much. First, take those beautiful, trimmed green beans and pack them snugly—and I mean *snugly*—into your clean quart jars. You’re aiming to get them in tight so they don’t float around when we add the liquid. Make sure you divide up that sliced garlic and those spicy red pepper flakes evenly between the two jars. You want every spoonful of dilly beans to have that flavor kick!
Once they’re packed, it’s time for the most important part of any pickle: the liquid. We are now heading to the stove to whip up the brine. Remember, these jars go straight into the fridge after cooling, which means they are easy pickled green beans recipe magic! After we boil the brine and pour it over, let things cool down on the counter for about 30 minutes before sealing them up tight and tucking them into the cold. You absolutely have to wait a full 24 hours before digging in, or you won’t get the full, tangy effect!
Preparing the Vinegar Brine Recipes for Your Dilly Beans
This hot liquid is what cures the beans and makes them tangy! We are mixing up our vinegar brine recipes right now. Grab a medium saucepan and pour in your four cups of water and two cups of white vinegar. Next, toss in that pickling salt and the sugar. Crank the heat up to high and bring that mixture to a hard, rolling boil. You have to keep stirring every so often until you can no longer see any grains of salt or sugar—we need them totally dissolved before they hit the beans! Once everything is clear, turn off the heat and get ready to pour carefully!
Adapting Your Dilly Beans for Long-Term Canning
Now, while I absolutely adore how fast these refrigerator dilly beans come together—seriously, snack time tomorrow!—I know some of you out there are proper preservers. You have the canner ready, and you want these babies shelf-stable for months, which is totally achievable!
The beauty of this recipe is that the brine ratio is spot-on for both quick pickles and proper **canning green beans easy**. If you want to take these zesty vegetable snacks and keep them around until next summer’s harvest, you just need one extra, but very important, step after you’ve packed your jars and sealed those lids fingertip tight.
Once the jars have cooled on the counter for about 30 minutes—just enough time to let the glass adjust—you’re going straight to the boiling water bath canner. You’ll process those quart jars for exactly 10 minutes. Yes, 10 minutes! Now, always remember, if you live somewhere high up in the mountains, you need to adjust that time based on altitude, but for most of us down here, 10 minutes does the trick.
After you take them out, let them cool completely undisturbed overnight. You’ll hear those satisfying pops as the seals set! Storing them in a cool, dark spot means you get to enjoy these amazing homemade dill pickles for up to a year. If you need a deep-dive into the actual mechanics of keeping your hot water bath perfect, this guide is a great resource. How to Can Dilly Beans is a lifesaver for nailing the processing time!
So, whether you want them tomorrow or next New Year’s Eve, you’ve got the instructions right here. It’s all about what your schedule allows!
Tips for Success with Crunchy Green Bean Snacks
Getting those fantastic, addictive crunchy green bean snacks comes down to a couple of small, crucial details that go beyond just measuring the salt. It’s the difference between a good pickle and a truly *great* one. I always tell folks that the final result is about 80% ingredient selection and 20% technique, so let’s focus on maximizing that crispness!
First and foremost, pick your beans wisely! This is my biggest piece of advice from years of seeing people struggle. You want beans that are young, tender, and straight—no big, floppy, bulbous ones that look like they’re about to burst. Those older beans are fibrous, and no amount of brine in the world will make them snap. Look for beans that look like they were picked yesterday. If you can find local ones from a farmer’s market, even better. They have better structure right out of the gate.
Next is temperature management, especially if you’re making the refrigerator batch. Make sure your vinegar brine is truly boiling hot when you pour it over those fresh veggies. The shock of that sudden heat helps set the cellular structure of the bean right away, which is key for that first bite crunch. Don’t just let it simmer; you need the rolling boil!
For flavor infusion, don’t be shy with the garlic. I know some people worry about using too much garlic in their dilly beans, but that’s the whole point! The vinegar bath softens the garlic, mellowing its raw bite while letting the wonderful savory notes permeate the beans. I also like to take my fresh dill sprigs and gently bruise them between my hands just before dropping them in the jar—it releases all those glorious essential oils right into the brine.
One last thought on flavor: once those jars are chilling, give them a gentle shake every day for the first two days. This helps redistribute the spices and ensures that pepper flake heat is hitting every bean evenly. It keeps the flavor profile consistent throughout the jar. You’re going to be so proud when you pull out a jar tomorrow and hear that crunch!
Serving Suggestions for Tangy Side Dishes
So, you’ve waited the agonizing 24 hours for your **dilly beans** to pickle up, and now you have these intensely flavored, wonderfully crunchy jewels staring at you from the fridge. What do you actually do with them besides stand in front of the open door eating them by the handful? That’s the best part! They are such a versatile, zesty addition to almost anything.
First off, they are inherently a fantastic late-night snack—no need to complicate things if you just want that quick pickled vegetables for beginners fix. But hold on, because these go so well alongside heartier meals too. Think of them as your built-in palate cleanser for rich food.
When I’m putting together a platter of cold cuts, cheese, and olives, these homemade dill pickles absolutely have to be there. They provide the perfect sharp contrast to salty meats and creamy cheeses. They’re amazing as an appetizer, cutting right through the richness!
If you’re building a barbecue plate, you need these spicy pickled vegetables right next to that slow-cooked pork or a burger. Their bright acidity cuts the fat beautifully. They’re also fantastic roughly chopped and tossed into potato salad or even mixed into a tuna salad to give that classic dish a much-needed acidic punch. Seriously, toss them into my Chicken Caesar Pasta Salad sometime—it changes the whole game!
For a really simple lunch, line up a few of these alongside a turkey sandwich or even just a piece of crusty bread with some good butter. They become one of those perfect **tangy side dishes** that make a boring 5-minute lunch feel intentional and gourmet. Don’t underestimate how much these little jars can elevate a simple meal!
Storage and Reheating Instructions for Your Dilly Beans
Now that we’ve made these bright, snappy dilly beans, the burning question is: how long can I keep my hands off them before they go bad? And honestly, how do I keep them perfectly crunchy while they wait for me in the fridge?
The storage totally depends on which method you chose. If you went the refrigerator route—the fast and easy path—you need to treat them like a fresh product, even though the vinegar is doing tons of preservation work. For these no canning pickles, the absolute best time to eat them for maximum crunch is within the first week, but they are generally fantastic for up to three weeks in the fridge. After that third week mark, you’ll start noticing the beans softening just a tiny bit. I mean, they’ll still be tasty, but that initial incredible snap starts to fade, so eat them up!
Make sure they are always stored in the coldest part of your refrigerator, sealed tight in those clean mason jars. Keep them submerged under the brine, too! That hot vinegar brine needs to cover those beans completely to keep that garlicky dill flavor locked in.
Now, if you went the long-term route and processed them in the water bath canner—kudos to you for preserving the summer harvest—storage is simpler! Once cooled and sealed, they are shelf-stable. You just need a cool, dark cupboard or pantry. Canned dilly beans will happily wait for you for up to a whole year. No cooling or reheating is necessary for either kind, which is a major win for this type of snack!
And here’s a quick note on reheating, though honestly, you shouldn’t need to! If you feel like you want them warm—maybe you are serving them on a dreary winter night—don’t microwave the jar itself, never do that! Just pour out the amount you want into a small bowl and microwave that small serving for about 15 seconds. But be warned: heating them up *will* soften the texture, so I highly recommend eating your dilly beans cold, straight from that chilly fridge.
Frequently Asked Questions About Homemade Dill Pickles
I know when you’re diving into a new recipe, especially preserving green beans, questions pop up fast. Don’t worry; that’s just smart cooking! I’ve gathered the ones I get asked most often about getting those perfect, tangy snacks.
Can I use regular salt instead of pickling salt for dilly beans?
This is such a good question, and I really recommend sticking with pickling or canning salt if you can find it. If you use regular table salt that has anti-caking agents in it, those additives don’t dissolve well in the vinegar brine. What happens is they can leave a dusty white film floating around the jar, or worse, make your beautiful brine look dull and cloudy. For that crystal-clear look we love in **homemade dill pickles**, grab the right salt! It’s a small shopping trip that pays off big in presentation.
How long until my dilly beans are ready to eat?
If you made the **Easy Refrigerator Pickles** version—which is the method I outlined for speed—the minimum wait time is 24 hours. Seriously, try to wait the full day! The beans need that time to absorb the strong flavors of the garlic, dill, and spice. While you can technically eat them sooner, they won’t have that delightful tangy punch yet. If you went the canning route, they’ll taste better after a week or two, but they are safe to eat right after they seal and cool.
What is the best way to make spicy pickled vegetables?
You want that heat, I get it! The absolute best way to control the temperature in your **dilly beans** is by adjusting the red pepper flakes, just like we do here. In the recipe, I listed one teaspoon, but if you’re making **spicy pickled vegetables** for a party, feel free to bump that up to two full teaspoons, or even start adding a few slices of jalapeño right along with the garlic cloves. You are in charge of the fire, so make it exactly how you like it!
If you have any other lingering questions about making **no canning pickles** or worried about your vinegar brine recipes, don’t hesitate to reach out on my contact page. Happy pickling!
Share Your Best Dilly Bean Recipe Experience
Okay, that’s everything I can possibly tell you about turning a simple pile of green beans into an addiction-level snack! Now comes the best part—hearing from you, the person who actually tried making magic in their kitchen. I put all my best knowledge into this recipe, especially for those of you mastering **small batch pickling** for the first time, and I truly want to know how it turned out.
Did you stick to my mild suggestion for heat, or did you turn those red pepper flakes up to eleven? Let me know in the comments below how your spice level landed! If you made any clever swaps or found another trick that kept your beans extra crunchy, please share it with the community here. We all learn from each other when we’re trying to reclaim the joy of a home-cooked meal.
And if you managed to take a gorgeous picture of your jars lined up in the fridge—all bubbly and bright—I would absolutely love to see them! Tag me if you post them online. Your success stories are why I put these simple, flavor-forward recipes together in the first place. Head over to my privacy policy page if you have any questions about sharing your thoughts, and happy snacking!
PrintEasy Spicy Refrigerator Dilly Beans Recipe
Make crunchy, tangy dilly beans quickly using this simple refrigerator pickle method. These pickled green beans are packed with garlic and dill flavor, with an optional spicy kick perfect for snacking.
- Prep Time: 20 min
- Cook Time: 5 min
- Total Time: 25 min
- Yield: 2 quarts 1x
- Category: Appetizer
- Method: Quick Pickling
- Cuisine: American
- Diet: Vegetarian
Ingredients
- 2 lbs fresh green beans, ends trimmed
- 4 cloves garlic, thinly sliced
- 1 teaspoon red pepper flakes (adjust for spice level)
- 4 cups water
- 2 cups white vinegar
- 2 tablespoons pickling salt
- 1 tablespoon granulated sugar
- 1 large bunch fresh dill sprigs (or 2 tablespoons dried dill seed)
Instructions
- Wash the green beans thoroughly. Trim the ends off the beans.
- Pack the green beans tightly into two clean quart-sized mason jars, leaving about 1 inch of headspace. Distribute the sliced garlic and red pepper flakes evenly between the jars.
- In a medium saucepan, combine the water, vinegar, pickling salt, and sugar. Bring the mixture to a rolling boil over high heat, stirring until the salt and sugar dissolve completely. This is your vinegar brine.
- Carefully pour the hot brine over the beans in the jars, ensuring the beans are completely submerged. Leave 1/2 inch of headspace at the top of each jar.
- Place a dill sprig or sprinkle dill seed on top of the beans in each jar.
- Wipe the rims clean with a damp cloth. Seal the jars with lids and rings, tightening them to fingertip tight.
- Allow the jars to cool on the counter for about 30 minutes. Then, transfer the jars to the refrigerator.
- Wait at least 24 hours before eating. These refrigerator dilly beans are best eaten within 3 weeks for maximum crunch.
Notes
- For long-term storage (canning): After sealing the jars, process them in a boiling water bath canner for 10 minutes, adjusting for altitude if necessary. Let the sealed jars cool completely before storing in a cool, dark place. Canned dilly beans will last up to one year.
- To keep your dilly beans extra crunchy, you can add 1/2 teaspoon of pickling crisping powder (calcium chloride) to the brine, or use grape leaves in the jar, which contain tannins that help maintain crispness.
- If you prefer a milder flavor, reduce the red pepper flakes to 1/2 teaspoon or omit them entirely.
Nutrition
- Serving Size: 1/2 cup
- Calories: 25
- Sugar: 2
- Sodium: 350
- Fat: 0.1
- Saturated Fat: 0
- Unsaturated Fat: 0
- Trans Fat: 0
- Carbohydrates: 5
- Fiber: 1
- Protein: 1
- Cholesterol: 0