

Life moves so fast these days, doesn’t it? I remember wanting to hold onto the taste of summer—that burst of ripe strawberry sunshine—but facing down a full day of boiling water and sterilizing jars just felt impossible some weeks. That’s why I’m so passionate about sharing this recipe. We deserve food that tastes incredible without demanding our entire evening, and this **freezer jam** is the absolute answer!
This isn’t complicated canning, friends. This is pure, concentrated berry flavor made accessible for even the busiest schedules. As someone who understands the hustle, I promise you this quick jam recipe delivers that deep, fresh fruit taste we crave without sacrificing an ounce of quality. It’s simple, it’s fast, and it guarantees the freshest spread for your morning toast.
- Why This Easy Freezer Jam Recipe Captures Summer Flavor
- Ingredients for Perfect Strawberry Freezer Jam
- Strawberry Freezer Jam Instructions: The No Cook Jam Recipe Method
- Tips for Success Making Homemade Berry Jam
- Storage and Serving Suggestions for Your Quick Freezer Jam
- Frequently Asked Questions About Making Freezer Jam
- Estimated Nutrition for This Homemade Fruit Preserves
- Share Your Homemade Freezer Jam Creations
Why This Easy Freezer Jam Recipe Captures Summer Flavor
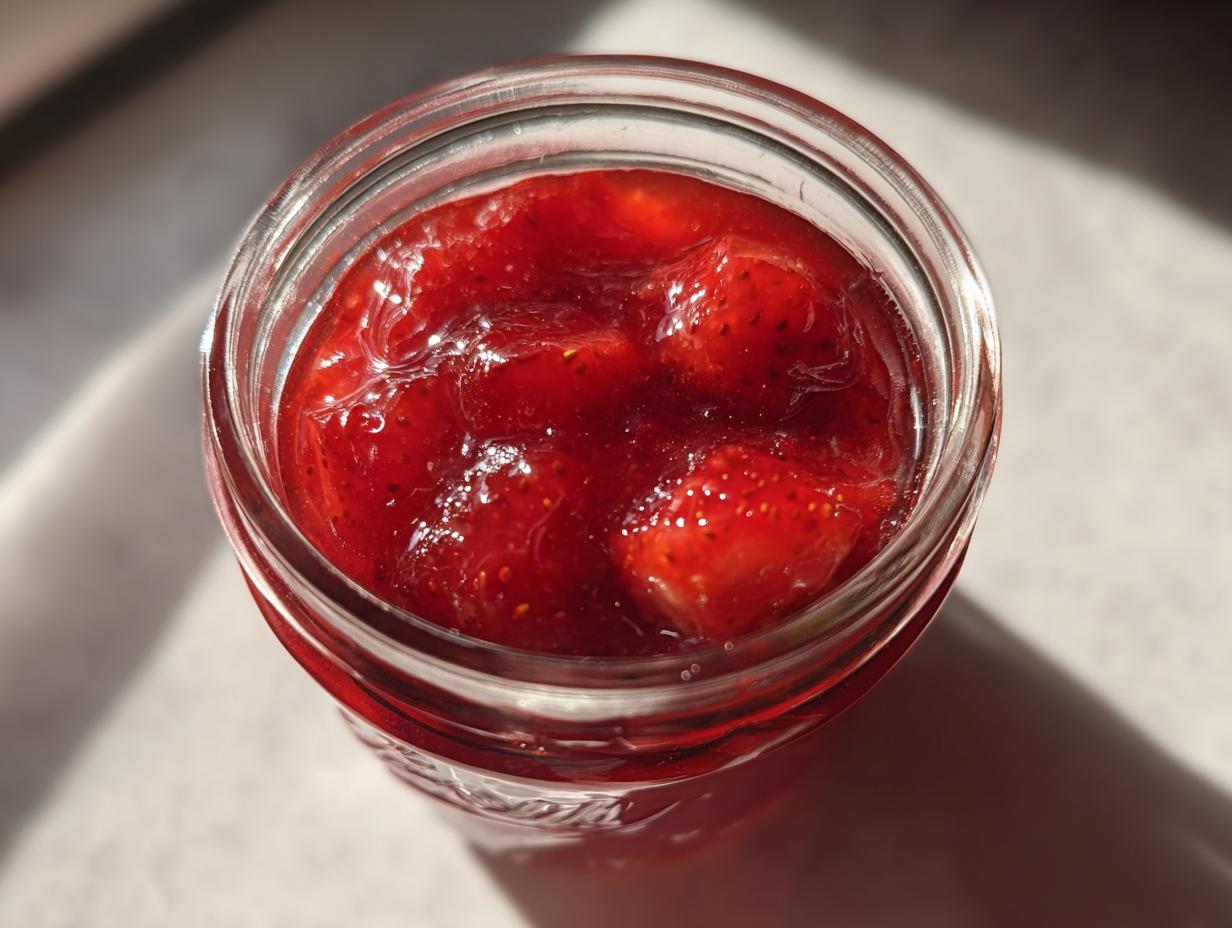
The magic of this strawberry creation is that we skip the long, hot boiling process entirely. When you don’t boil the fruit down, you lock in that bright, fresh-picked taste. Seriously, it tastes like summer just sitting in the jar! It’s a total game-changer if you love **freezer jam** but hate the fuss.

- It tastes incredibly fresh because the cooking time is zero!
- It’s perfect for tossing into the fridge or freezer right after mixing.
- It provides that wonderful, vibrant color you lose when you cook fruit too long.
It’s all about keeping things simple so you can enjoy real flavor without the commitment. You can find more effortless ways to start your day right here: quick and easy breakfast ideas!
Quick Freezer Jam: Ready in Minutes
If you’re looking for a truly quick fix, this is it. We’re talking active time under 25 minutes, maybe even less if you’re a speedy masher! That speed is why this **freezer jam** works so well for weeknights or when you’ve just come back from the farmer’s market with too many berries. You mix it, jar it, and you’re done.
Beginner Jam Making Success with No Canning Preserves
Don’t let the word “preserves” scare you! This method is my go-to assurance that beginners will succeed. Because we aren’t using a hot water bath, it qualifies as **no canning preserves**, which cuts out 90% of the intimidating steps. If you can stir, you can make this jam perfectly the very first time.
Ingredients for Perfect Strawberry Freezer Jam
When making this **freezer jam**, quality ingredients really sing because we aren’t cooking them to death! I’m laying out exactly what you need here. Remember, fresh fruit is key to getting that vibrant flavor that makes this recipe so popular.
- 4 cups fresh strawberries, hulled and crushed
- 7 cups granulated sugar
- 1 package (1.75 oz) powdered fruit pectin (optional, for a firmer set)
- 1 tablespoon lemon juice (optional)
If you skip the pectin, the jam will be looser, more like a thick syrup—still delicious, but definitely softer!
Ingredient Notes and Substitutions for Your Freezer Jam
Make sure those strawberries are ripe—they should smell amazing! If you go the no-pectin route, just skip Step 3 entirely. You’ll notice the resulting texture is much softer, almost like a thick sauce, which is delightful on ice cream, but less ideal for spreading on toast.
Also, don’t skip that optional lemon juice if you use pectin! A little acid helps balance the sweetness and activates the texture enhancers beautifully.
Strawberry Freezer Jam Instructions: The No Cook Jam Recipe Method
Okay, this next part is pure gold because it’s where we prove just how fast this **freezer jam** comes together. Remember, the whole point here is maximizing that fresh flavor by cutting out the boiling. We’re relying on the sugar and the pectin (if you choose to use it) to do all the heavy lifting!
You’ll need a large bowl for this. Seriously, make sure your bowl is big enough, or you’ll end up doing the messy cleanup I mentioned earlier. We are keeping the active time low, but we need a little patience during the setting phases.
Preparing the Fresh Fruit Jam Base
First things first, get those strawberries ready. You want 4 cups of crushed fruit. I usually just use a sturdy potato masher right in the bowl—it gives you those nice chunks that texturally define **strawberry freezer jam instructions**. If you pulse them in a food processor, be careful! You want them mashed, not completely pureed into baby food. That little bit of texture is heaven.
Once they are mashed to your liking, toss in all 7 cups of sugar. Stir it up, and then you have to wait 10 minutes. Yes, 10 whole minutes! But just stir it occasionally during that time until the sugar starts to look dissolved into the fruit juices. This step is crucial for proper texture later on.
Activating the Pectin in Your Freezer Jam
Now, if you are using that optional box of powdered fruit pectin to get a nice, firm spread, go ahead and sprinkle it right over that sugary fruit mix. You need to stir this faithfully for about 2 minutes straight. Make sure there are no dusty white clumps left lurking at the bottom of your bowl!
After you’ve incorporated the pectin, the mixture needs to rest for a solid 30 minutes. This is non-negotiable if you used pectin, as it needs time to activate and thicken up before jarring. You can use this downtime to clean up your masher or maybe check out this quick fudge recipe later! Pop back in every ten minutes while it rests to give it a quick, gentle stir to maintain that even consistency.
Tips for Success Making Homemade Berry Jam
Even though this is a super simple **no cook jam recipe**, a few tricks ensure you get beautiful results every single time. Since we aren’t using a hot water bath, the final texture really relies on how you handle the mixture right after it thickens up.
When you go to jar this **homemade berry jam**, containers are everything! You absolutely cannot use standard canning jars if you are just popping them in the freezer without processing. The mixture expands as it freezes, and that will crack glass that wasn’t designed for that pressure. Stick to sturdy freezer-safe plastic containers or mason jars that explicitly state they are freezer-safe.
And this is a big one—the headspace! You must leave about half an inch of empty space between the surface of the jam and the top of the container. If you fill them right to the brim, the jam expands, pushes the lid off, and you end up with a messy, sticky freezer situation. Trust me, I’ve learned that lesson the hard way!
The final step before freezing? Wipe down every single rim before you seal the lids tightly. Any sticky residue left on the top edge will freeze hard, making it nearly impossible to open later without wrestling with it. A quick wipe with a damp cloth is all it takes.
I know it sounds tedious, but taking that extra minute for clean jars and headspace means your beautiful, fresh jam is ready for gifting or spreading later. If you’re looking for another great recipe that uses simple, whole ingredients and turns out amazing results, check out my recipe for date nut bread—it’s just as reliable!
Storage and Serving Suggestions for Your Quick Freezer Jam
We’ve done all the work to capture that peak summer flavor, so now we need to talk about keeping it perfect. The great thing about this **freezer jam** is its longevity! Properly sealed and stored in the coldest part of your freezer, this jam is good for up to a whole year. Can you believe that? It means you can stock up in June and still have homemade spread for your pancakes in February!
If you need jam sooner, just keep it in the refrigerator, covered tightly. It stays fresh and delicious for about three weeks this way. It’s perfect for a week or two of slathering on your favorite buttermilk pancakes!
How to Thaw and Use Refrigerator Jam Recipe
When you’re ready for a jar, don’t try to rush it on the counter! Take the container out of the freezer and let it thaw overnight in the refrigerator. This slow thaw keeps the texture lovely and spreadable.
Once thawed, this isn’t just for toast, though it is divine there! Try swirling a spoonful into plain Greek yogurt for an instant, delicious breakfast boost. It’s also wonderful warmed slightly and drizzled over cheesecake or even ice cream. It’s such a versatile sweet spread!
Frequently Asked Questions About Making Freezer Jam
I know when you’re first starting out, you have a million little questions spinning around. And honestly, that’s great! It means you care about getting it right. I tried to think about what I wished someone had told me when I first started making **homemade berry jam**!
Here are the main things people always ask when they want a **quick freezer jam** that sets just right.
Can I make this easy freezer jam recipe without pectin?
Oh, absolutely, yes! That’s the flexibility built into this recipe. If you decide to skip the pectin, you are moving toward a **no cook jam recipe** that relies purely on the sugar to preserve the fruit flavor. The trade-off? The texture will be noticeably softer. It won’t slice neatly like a traditional jelly; it’ll be runnier, maybe even closer to a compote. But honestly, for spooning over yogurt or waffles, it’s heavenly. It’s just a great option for **beginner jam making**!
What is the difference between refrigerator jam and freezer jam?
That’s an important distinction to make! For this specific recipe, the difference is purely down to where you store it and how long you want to keep it fresh. If you plan on eating it all within three weeks, sticking it in the fridge is totally fine—it acts as a great **refrigerator jam recipe**. If you want to save the flavor of summer all the way until next year, into the deep freeze it goes!
Because we aren’t using the high heat of canning, neither method preserves the product indefinitely, but freezing gives you that amazing year-long window for using your amazing **fresh fruit jam**! It’s all about having that perfect container ready to go.
Estimated Nutrition for This Homemade Fruit Preserves
Now, because we’ve kept this **homemade fruit preserves** recipe so simple—just fruit, sugar, and maybe a touch of pectin—it’s surprisingly clean! I always want to give you a ballpark idea of what you’re eating, though I have to be honest, these numbers are just estimates, based on the specific measurements you see in the recipe card.
Remember, because this is a whole-fruit item made with fresh ingredients, the final count can shift slightly depending on the sugar absorption rate of your specific berries. This is just here to give you transparency when you’re counting those macros!
- Serving Size: 2 tablespoons
- Calories: 100
- Sugar: 26 grams
- Sodium: 0 mg
- Fat: 0 grams
- Protein: 0 grams
- Carbohydrates: 26 grams
See? It’s mostly pure fruit energy! The sugar content is high, which is necessary for both flavor and for helping the **freezer jam** set when you choose the no-pectin route, but it’s a beautiful way to enjoy the results of your minimal effort. Just keep that serving size in mind when you’re grabbing a jar for your breakfast treat!
Share Your Homemade Freezer Jam Creations
I really hope you feel as empowered as I do when you realize how simple it is to capture real summer flavor without spending hours slaving over a hot stove. This recipe proves that cooking by Felix is all about getting incredible, nourishing results without sacrificing your time or energy. It’s truly the magic I wanted to share with all of you!
Now that you’ve made your first batch of **homemade berry jam**, I want to see it! Snap a picture of those beautiful jars—whether they’re heading straight into the freezer or getting spread thick on your favorite muffin—and tag me. I love seeing your successes.
Most importantly, please come back and leave a rating and a quick comment below. Letting other home cooks know how easy and delicious this jam turned out helps spread the word! If you tried the pectin version or went straight for the softer, no-pectin style, let us know which one you preferred. Your feedback helps build our community.
If you have any questions while you’re enjoying your fresh batch, or if you just want to say hello, don’t hesitate to reach out through my contact page. Happy spreading!
PrintEasy Strawberry Freezer Jam (No Cook, Pectin Option)

Make this simple strawberry freezer jam without boiling or canning. It captures the fresh flavor of summer berries and sets quickly, making it perfect for busy cooks.
- Prep Time: 20 min
- Cook Time: 0 min
- Total Time: 20 min
- Yield: About 6 half-pint jars 1x
- Category: Preserves
- Method: No Cook
- Cuisine: American
- Diet: Vegetarian
Ingredients
- 4 cups fresh strawberries, hulled and crushed
- 7 cups granulated sugar
- 1 package (1.75 oz) powdered fruit pectin (optional, for a firmer set)
- 1 tablespoon lemon juice (optional)
Instructions
- Prepare the strawberries: Wash, hull, and crush the fresh strawberries. You can use a potato masher or pulse them lightly in a food processor. Measure out 4 cups of crushed fruit.
- Combine sugar and fruit: In a large bowl, mix the crushed strawberries and the granulated sugar. Let this mixture sit for 10 minutes, stirring occasionally until the sugar begins to dissolve.
- Add pectin (if using): If you want a firmer set, sprinkle the powdered fruit pectin over the sugar-fruit mixture. Stir well for about 2 minutes until the pectin is fully incorporated. Add the lemon juice now if you are using it.
- Rest the mixture: Let the jam mixture stand for 30 minutes, stirring every 10 minutes. This allows the pectin to activate and the mixture to thicken slightly.
- Fill containers: Ladle the jam mixture into clean, freezer-safe containers, leaving about 1/2 inch of headspace at the top for expansion. Wipe the rims clean.
- Seal and freeze: Cover the containers tightly. Let the jam sit at room temperature for 1 hour, then transfer the containers to the refrigerator for 24 hours to fully set before moving them to the freezer.
- Store: The freezer jam lasts up to one year in the freezer or up to 3 weeks in the refrigerator once thawed.
Notes
- For a no-pectin variation, skip the pectin and increase the sugar slightly, or use a recipe specifically designed for no-pectin jam. Note that the texture will be softer.
- If you prefer a smoother jam, process the strawberries longer until they reach your desired consistency.
- This recipe makes a small batch, perfect for beginners or those wanting to try homemade preserves.
- Thaw overnight in the refrigerator before serving.
Nutrition
- Serving Size: 2 tablespoons
- Calories: 100
- Sugar: 26
- Sodium: 0
- Fat: 0
- Saturated Fat: 0
- Unsaturated Fat: 0
- Trans Fat: 0
- Carbohydrates: 26
- Fiber: 1
- Protein: 0
- Cholesterol: 0