

You know those nights, right? When the day just swallows all your energy, and the last thing you want to think about is dinner, but you still crave something deeply flavorful and satisfying? That’s exactly when I turn to my ultimate 15-Minute kimchi fried rice recipe. It’s pure, honest Korean comfort food, and honestly, it’s what I cook for myself most often when I’m back in the marketing grind. Drawing on years of needing to bring restaurant-quality tastes into my kitchen fast, this Bokkeumbap Recipe proves you don’t have to sacrifice texture or depth just because time is short. This isn’t guesswork; this is tested, real-life cooking that works every single time. If you’re looking for the perfect 30-minute weeknight dinner solution, you found it!
- Why This 15-Minute Kimchi Fried Rice Recipe Works for You
- Gathering Ingredients for Flavorful Rice Dishes
- How to Make Kimchi Fried Rice Step-by-Step
- Tips for Success with Fried Rice with Kimchi
- Customizing Your Kimchi Fried Rice Recipe
- Serving Suggestions for Your Savory Rice Bowl
- Storage and Reheating Instructions for Leftover Kimchi Fried Rice
- Frequently Asked Questions About Kimchi Fried Rice
- Share Your 15 Minute Dinner Ideas Success
Why This 15-Minute Kimchi Fried Rice Recipe Works for You
I know what you’re thinking—can anything truly delicious really be done in 15 minutes? Yes! This recipe is designed for the reality of a busy schedule. It takes classic Korean comfort food flavors and makes them available right now.
Speed and Simplicity: Your Quick Korean Dinner Solution
When I started developing these fast meals, speed was mission-critical. This Easy Kimchi Fried Rice is genuinely ready from start to finish in about 15 minutes. It’s the perfect, zero-fuss Quick Korean Dinner you can throw together when you’re starving and tired. No complicated steps, I promise.
Texture Focus: Mastering Crispy Rice with Leftover Rice Recipes
The way you handle the rice makes all the difference, and this is where we build that *Homemade Fried Rice Better Than Takeout* taste. We skip mushy rice completely! It all comes down to using cold, day-old rice. Trust me, if you use fresh rice, you just won’t get those beautiful, slightly chewy, crispy bits that define great kimchi fried rice.
Gathering Ingredients for Flavorful Rice Dishes
Okay, you can’t rush flavor, but you can certainly keep the ingredient list short and punchy! When making any of the best kimchi fried rice recipes, what you use matters more than how much you use. Everything here is accessible, but those aged ingredients are where the magic lives, giving you that deep umami satisfaction without needing hours of simmering.
Essential Components for Authentic Kimchi Fried Rice
For this simple, quick Korean dinner, you need to pay attention to the kimchi itself. Make sure you are grabbing your *aged* kimchi—the older and funkier, the better! That means it’s packed with the fermentation flavor we crave. Don’t forget to measure out that kimchi juice; that liquid gold is what drives the seasoning throughout the rice. Oh, and the bacon? That’s optional, but heating it up first is how we build our flavor base. If you aren’t using meat, you’ll want to grab some tofu or your favorite veggie instead—check out my homemade BBQ sauce recipe sometime for future meat swaps, but for now, stick to the list!
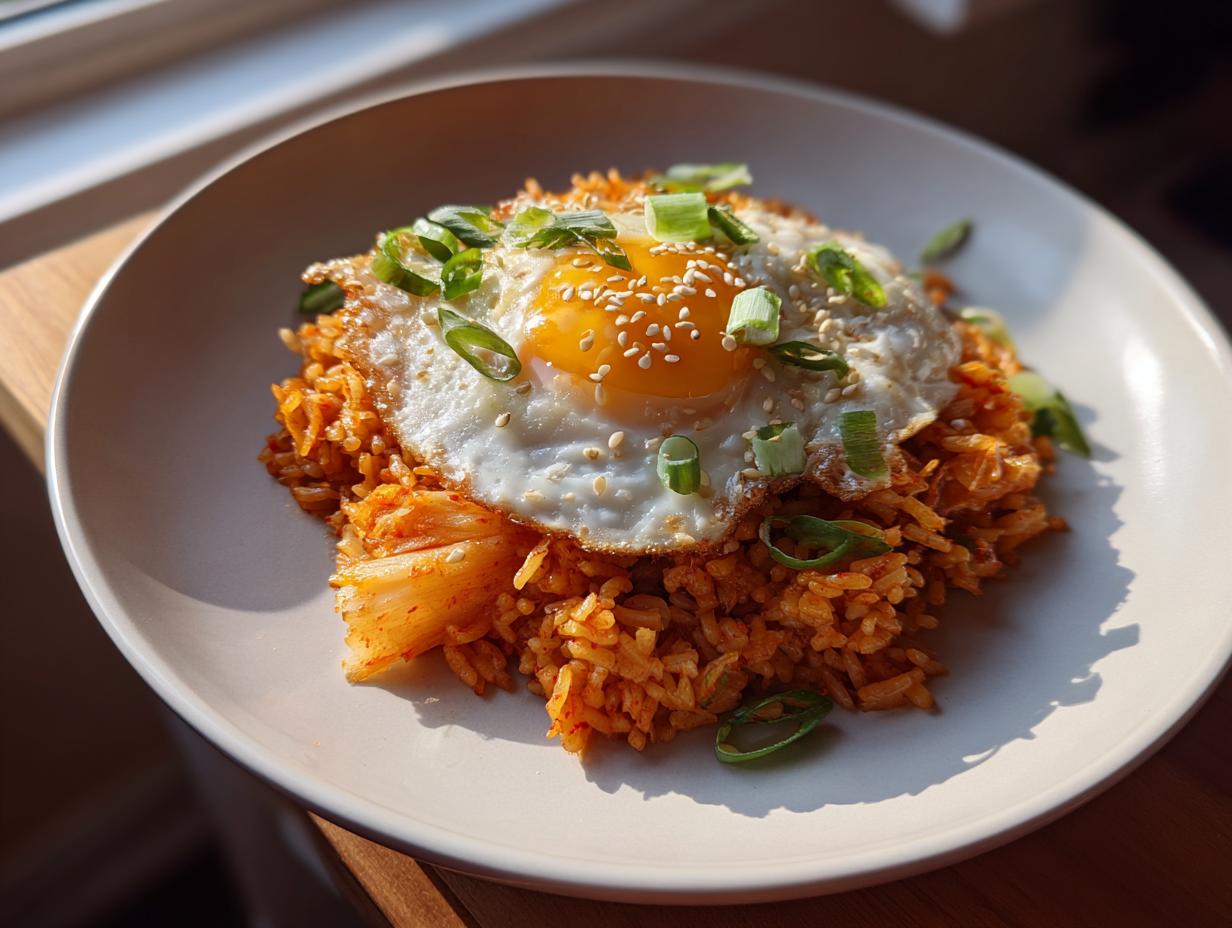
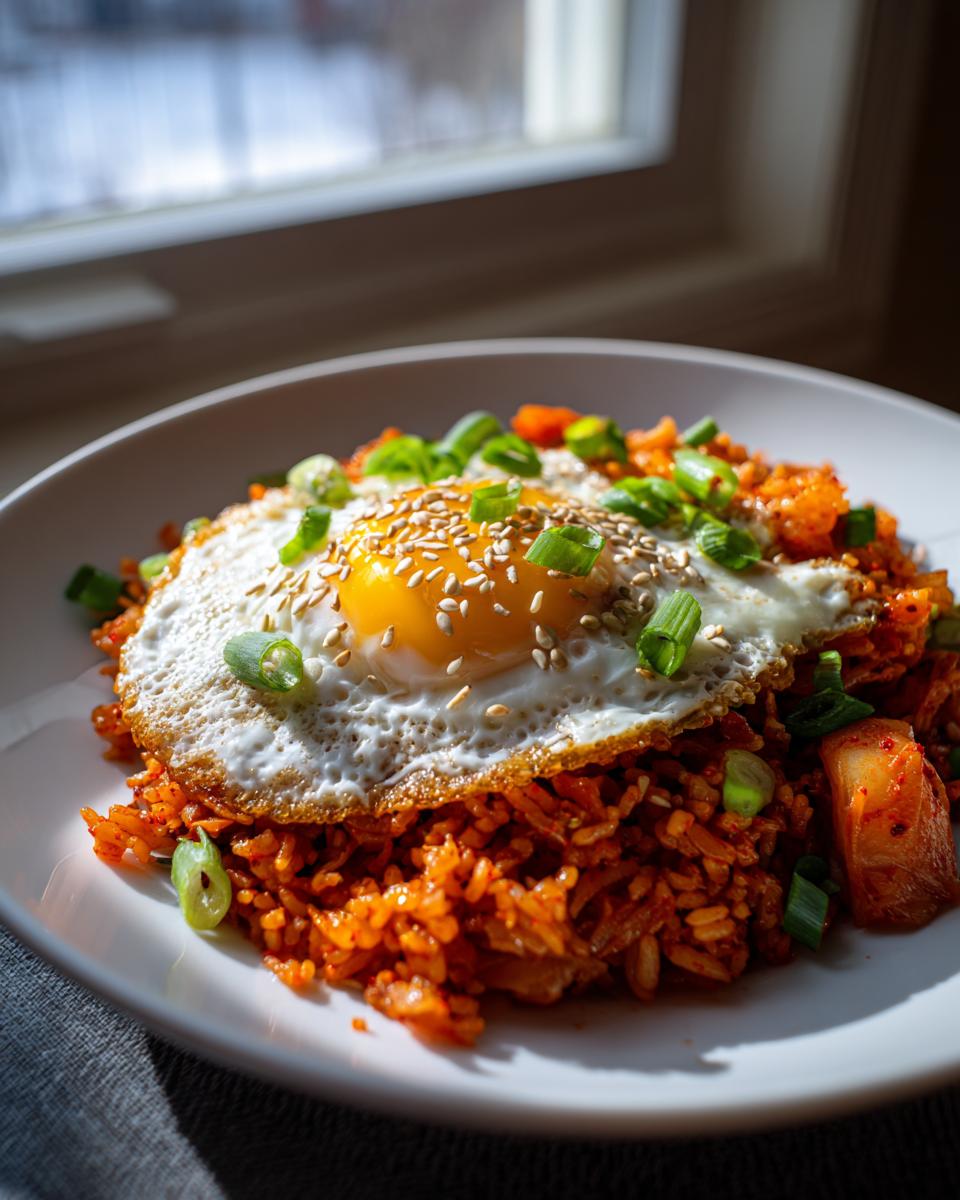
The Fried Egg Topping Rice Finish
I cannot stress this enough: You absolutely need that egg on top. It transforms this from a simple bowl of rice into the full experience. I cook my eggs sunny-side up so that the yolk stays perfectly runny to coat the Spicy Fried Rice when you break it open. Finally, just a sprinkling of fresh green onion and sesame seeds for color and crunch finishes the whole beautiful mess.
How to Make Kimchi Fried Rice Step-by-Step
This is where the real fun begins, folks! Since we’re aiming for that 15-minute mark, speed is the name of the game. Everything needs to be cut and ready to go before the heat even hits the pan. Once you start cooking, it moves *fast*. Read these steps once, keep your spatula handy, and let’s get this Spicy Fried Rice going!
Prepping and Sautéing Aromatics for Spicy Fried Rice
First order of business: get your ingredients diced up. If you’re using bacon, toss it straight into your big skillet or wok over medium-high heat. We want it crispy! Once it’s done, use a slotted spoon to pull those crunchy bits out and stash them on a plate for later—we’re keeping the fat in the pan, that’s flavor we earned! Next, throw in your diced onion and cook those until they soften up, which takes about two minutes. Then, quickly add the minced garlic and let it sizzle for just 30 seconds until you can really smell it. Don’t let it burn!
Stir-Frying Kimchi and Building the Gochujang Fried Rice Base
Now, slide that chopped kimchi right in there. You need to stir-fry this for a good solid three to four minutes. You’ll watch the color deepen, and that’s when you know it’s softening up perfectly. Once the kimchi is happy, push all that mixture over to one side of your hot pan. See that empty space? Use it! Drop your gochujang and soy sauce right into that hot spot and let them cook alone for about 30 seconds—we’re blooming that chili paste to boost the flavor profile of our kimchi fried rice. Then, stir that gorgeous paste right into the kimchi mix.
Incorporating Rice and Achieving the Perfect Bokkeumbap Recipe Texture
Time for the star: the cold rice! Dump all three cups in and start breaking up any clumps with your spatula. This is key! You need to stir-fry this aggressively for three to five minutes. Don’t just toss it—press some of the rice mass against the hot surface of the pan occasionally. That’s how we get those tasty little crispy bits we love in a good Bokkeumbap Recipe. When you’re happy with the texture, stir in the kimchi juice and a touch of sesame oil for aroma. Give it one last minute of heating, taste it, and then fold your crispy bacon back in if you’re using it. You can find my guide on making shrimp fried rice for even more inspiration!
Tips for Success with Fried Rice with Kimchi
Listen, I’ve burned enough rice in my time to know the difference between a good kimchi fried rice and something that just tastes okay. The secret isn’t complicated equipment; it’s knowing the game-changing quirks of the ingredients. If you want that restaurant-quality texture, you have to follow just a couple of my non-negotiable rules. Don’t worry, I’m not going to ask you to grate ginger for 20 minutes!
The Non-Negotiable Rule for Great Kimchi Fried Rice
If you take only one thing away from this whole recipe, let it be this: Never, ever use hot or freshly cooked rice! We are talking strictly cold, day-old rice here. When you try to fry freshly steamed rice, it’s too wet and steamy—you end up with mush, which nobody wants. The cold rice grains are firmer and separate beautifully in the wok, allowing you to get those amazing crispy edges we talked about earlier. It’s the simplest trick, but it makes the biggest difference for your weeknight fried rice.
Adjusting Spice Levels in Your Gochujang Fried Rice
This dish is meant to have a kick, right? But everyone’s spice tolerance is different, so you’re in charge here with that gochujang. If you want a milder flavor, treat the gochujang like a seasoning rather than a main event—maybe start with half a tablespoon. But if you’re like me and you need that heat, go ahead and add more! It always pairs perfectly with the salty, savory bacon. This lets you turn it into the truly perfect, custom Spicy Fried Rice just for your palate. Speaking of flavor boosters, have you ever tried my recipe for easy garlic butter? It works magic on everything!
Customizing Your Kimchi Fried Rice Recipe
The beauty of making kimchi fried rice at home is that you are the boss! While I love the classic texture the bacon gives us—that little bit of rendered fat is amazing—I totally get that we all have different needs on any given night. Maybe you’re trying to sneak in more veggies, or perhaps you just ran out of pork belly. That’s fine! This recipe is extremely adaptable; it’s truly an Easy Kimchi Fried Rice at its core, no matter what you throw in there.
Protein Swaps: Bacon Alternatives for your Kimchi Bokkeumbap Easy
If bacon isn’t happening, don’t sweat it! Spam is super traditional in Korean-style fried rice, and yes, it fries up beautifully, giving you that salty, savory pop. Diced chicken breast or even shrimp works wonderfully too, just remember to cook your proteins all the way through before you start the onions and garlic. You can also make one of my favorite chicken fried steak recipes if you need a different kind of comfort later in the week, but for this Kimchi Bokkeumbap Easy, just stick to diced, quick-cooking proteins!
Making a Vegetarian Kimchi Fried Rice
If you need a full Vegetarian Kimchi Fried Rice, skipping the bacon is easy. My main advice is to make sure you replace that fat we rendered out—that flavor base is important! Instead of bacon, cube up some firm or extra-firm tofu. Pan-fry those cubes in the initial tablespoon of oil until they get nicely browned and crispy before you add the onions and garlic. That step gives the rice the little textural anchor it needs when you dive into that delicious, spicy mix without any meat.
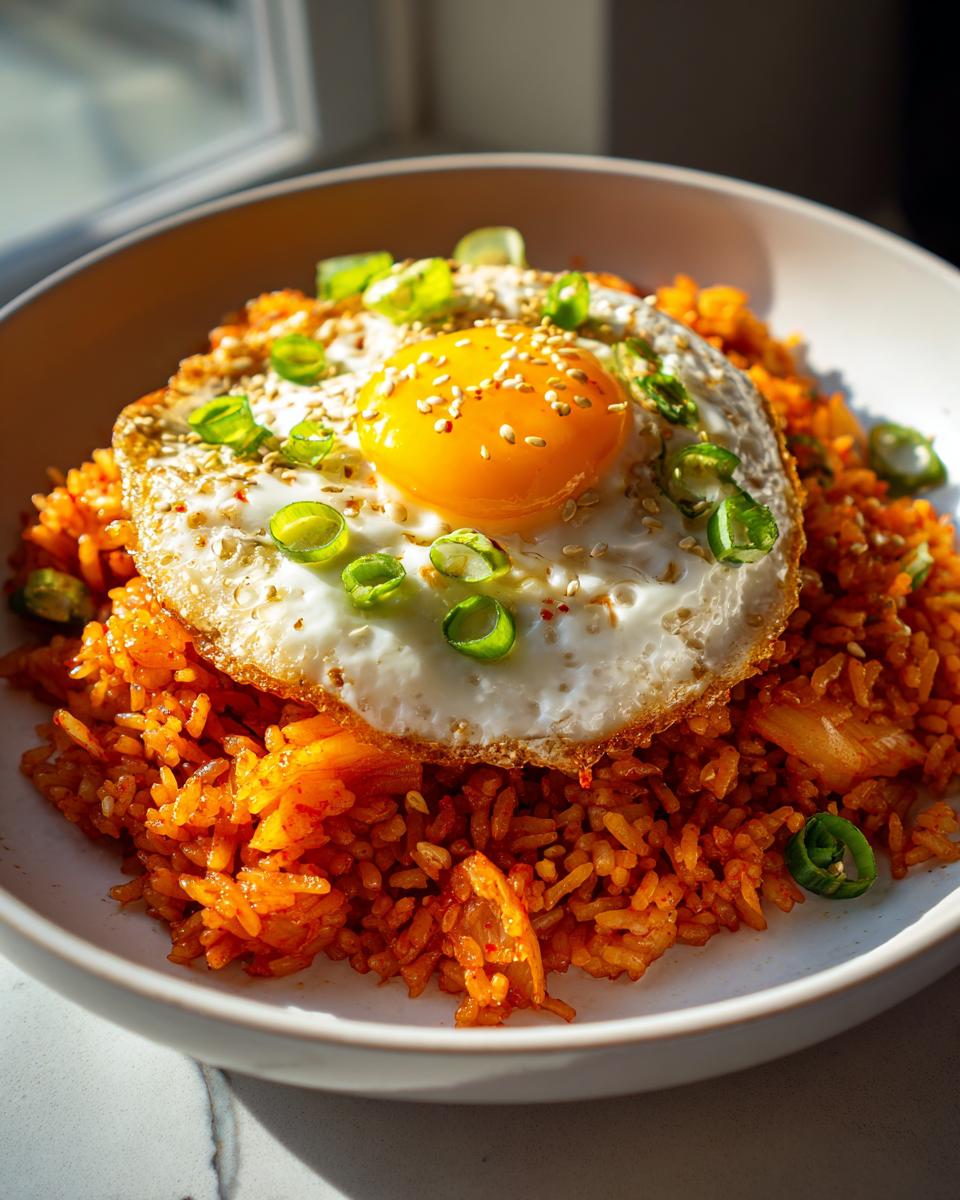
Serving Suggestions for Your Savory Rice Bowl
Once your kimchi fried rice is off the heat, it’s time for the grand finale! This dish truly shines when it’s served right away, hot and fragrant. We’ve already talked about that essential fried egg, and seriously, don’t skip it. That golden, runny yolk draping over the spicy rice creates an instant sauce that makes this whole thing feel like a special occasion meal, even though you made it in 15 minutes.
Serve it immediately in deep bowls—it makes for the most satisfying Savory Rice Bowl you can imagine. If you want something extra, a few thin slices of crisp cucumber on the side offer a cool, fresh contrast to the heat. It’s the perfect, easy finish to what I hope becomes your new go-to weeknight meal! If you are looking for other ways to top your carb-heavy delights, check out my recipe for the best classic creamy egg salad recipe—though maybe save that one for lunch the next day!
Storage and Reheating Instructions for Leftover Kimchi Fried Rice
Don’t be surprised if you have leftovers, because this kimchi fried rice is just as good the next day, honestly! Store any extras in an airtight container right away. Keeping it cold is vital for maintaining those great textures we worked so hard for in the pan. When you’re ready to eat it again, please avoid the microwave if you can. The microwave just steams the rice!
For the best experience, throw those leftovers into a skillet over medium heat. Add just a tiny splash of water or extra kimchi juice if it seems dry. Stir it constantly for about three minutes, pressing it down lightly against the hot surface. This little trick reawakens some of that crispness, making it taste almost freshly made. It’s the best of all the Leftover Rice Recipes, trust me!
Frequently Asked Questions About Kimchi Fried Rice
I always get questions when people try this for the first time, mostly because it comes together so fast! Don’t worry if you have a few lingering thoughts. This is where we nail down any final details to make sure your Easy Kimchi Fried Rice turns out perfect every time you make this Weeknight Fried Rice staple.
Can I use fresh kimchi instead of aged kimchi in this recipe?
Oh, that’s tempting, but I really caution against it! Fresh kimchi is still mellow; it hasn’t developed that fantastic, deep sour tang yet. For kimchi fried rice, we want the funk! Aged kimchi has a richer fermented flavor that holds up beautifully to the high heat of the wok and mixes so much better with the gochujang. If you only have fresh, you really need to let it sit out on the counter for a few days first to get that necessary tang.
What is the best way to reheat kimchi fried rice?
This is crucial for maintaining texture! If you zap your leftovers in the microwave, you’ll end up with a soggy mess, and that completely defeats the purpose of using cold rice in the first place. You absolutely must reheat it in a skillet over medium heat. Toss it around as it heats up—that low, slow stir-fry will crisp up those edges again and bring back the texture you loved the first time. It tastes about 90% as good as fresh!
Is this recipe considered a healthy lunch option?
I built this recipe around speed, but it uses great, whole ingredients, so while it’s definitely more satisfying than grabbing takeout, you do need to keep an eye on the sodium. Both the kimchi and the soy sauce bring a good amount of salt to the table. If you are seriously worried about sodium, try rinsing your chopped kimchi quickly under cold water before you toss it in the pan—it knocks back some salt but keeps most of the flavor. It’s a fantastic base for a quick lunch, especially if you skip the bacon and double up on veggies!
If you end up with extra kimchi, you might also want to check out my recipe for the easy white chocolate fudge recipe—just kidding! But seriously, let me know how your first batch of kimchi fried rice goes!
Share Your 15 Minute Dinner Ideas Success
Now that you have the insider scoop on making the BEST kimchi fried rice in what feels like no time at all, I really want to hear about it! Seriously, these quick meals only work if they bring joy back to the dinner table, and I rely on your feedback.
Did you manage to get those crispy bits on the rice? Did you top it with that perfect runny fried egg? Go ahead and try this 15 Minute Dinner Idea tonight, and then come back and drop a comment with your success story or any little twist you added!
If you found this recipe helpful for getting a delicious, authentic Korean meal on the table when you were short on time, please tag me or reach out over on the Contact page! I love seeing your kitchen wins. Happy frying, everyone!
Print15-Minute Kimchi Fried Rice for Busy Weeknights
Make this quick and flavorful Kimchi Fried Rice (Bokkeumbap) in 15 minutes using leftover rice. It is a satisfying Korean comfort food perfect for a fast weeknight dinner.
- Prep Time: 5 min
- Cook Time: 10 min
- Total Time: 15 min
- Yield: 2 servings 1x
- Category: Dinner
- Method: Stir-Frying
- Cuisine: Korean
- Diet: Vegetarian
Ingredients
- 3 cups cold, day-old cooked rice
- 1 cup chopped aged kimchi
- 1/4 cup kimchi juice
- 2 tablespoons neutral cooking oil
- 4 ounces bacon or pork belly, diced (optional)
- 1/2 small onion, diced
- 2 cloves garlic, minced
- 1 tablespoon gochujang (Korean chili paste)
- 1 teaspoon soy sauce
- 1/2 teaspoon sesame oil
- 2 large eggs (for topping)
- 1 green onion, sliced (for garnish)
- 1 teaspoon toasted sesame seeds (for garnish)
Instructions
- Prepare your ingredients: dice the bacon (if using), chop the kimchi, dice the onion, and mince the garlic. Have your cold rice ready.
- Heat the cooking oil in a large skillet or wok over medium-high heat. If using bacon, add it now and cook until crispy. Remove the bacon pieces with a slotted spoon and set aside, leaving the rendered fat in the pan.
- Add the diced onion to the skillet and cook for 2 minutes until softened. Add the minced garlic and cook for 30 seconds until fragrant.
- Add the chopped kimchi to the skillet. Stir-fry for 3 to 4 minutes until the kimchi softens and darkens slightly.
- Push the kimchi mixture to one side of the pan. Add the gochujang and soy sauce to the cleared space and cook for 30 seconds to deepen the flavor. Stir the paste into the kimchi mixture.
- Add the cold rice to the skillet. Break up the rice clumps with your spatula. Stir-fry everything together for 3 to 5 minutes, pressing the rice against the hot surface occasionally to create crispy bits.
- Stir in the kimchi juice and sesame oil. Mix well and cook for 1 more minute. Taste and add the reserved crispy bacon back into the rice if desired.
- While the rice finishes, cook the eggs in a separate small pan to your liking (sunny-side up is traditional).
- Divide the Kimchi Fried Rice into bowls. Top each serving with a fried egg. Garnish with sliced green onion and toasted sesame seeds.
Notes
- Using cold, day-old rice is key to achieving the best texture in fried rice; it prevents the rice from becoming mushy.
- For a vegetarian version, skip the bacon and add 1/2 cup of firm tofu, cubed and pan-fried until golden before adding the onions.
- Adjust the amount of gochujang based on your preference for spice level in this spicy fried rice.
Nutrition
- Serving Size: 1 serving
- Calories: 450
- Sugar: 5
- Sodium: 850
- Fat: 18
- Saturated Fat: 6
- Unsaturated Fat: 12
- Trans Fat: 0
- Carbohydrates: 60
- Fiber: 4
- Protein: 18
- Cholesterol: 185