


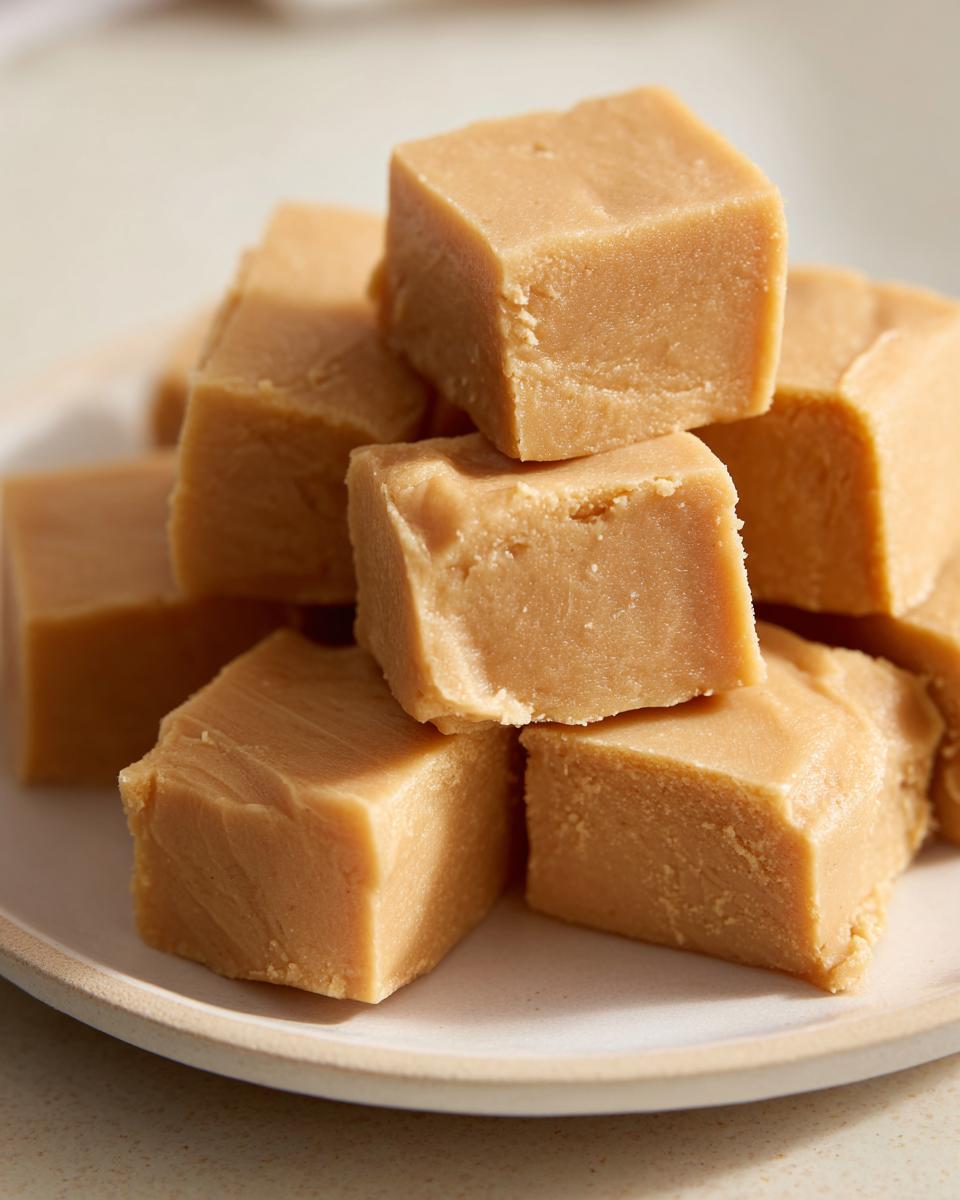
I get it. Life moves at a million miles an hour, and sometimes you just need that sweet, comforting flavor of a classic dessert without spending an entire afternoon wrestling with sugar temperatures. That was exactly my mindset when Chef Felix Hayes launched this whole simple-cooking philosophy. That’s why I’m thrilled to share what I think is the ultimate peanut butter fudge recipe out there right now. Seriously, this is the one. It’s wonderfully creamy fudge, demands just three ingredients, and the best part? Forget the candy thermometer—we’re going straight to pure, melt-in-your-mouth satisfaction using the microwave. It’s proof that quick doesn’t have to mean cutting corners on flavor!
- Why This Creamy Peanut Butter Fudge Recipe Works for You
- Gathering Ingredients for Your 3 Ingredient Peanut Butter Fudge
- Step-by-Step Instructions for Perfect Peanut Butter Fudge
- Tips for Achieving Classic Peanut Butter Treats Success
- Making Your Peanut Butter Fudge a Holiday Fudge Recipes Star
- Frequently Asked Questions About This Easy Fudge
- Nutritional Estimates for Your Simple Dessert Ideas
- Share Your Best Fudge Recipe Creations
Why This Creamy Peanut Butter Fudge Recipe Works for You
When I first saw this, I thought, “No way. Fudge has to be a pain.” But this simple method proves everyone wrong! It’s honestly the best route if you need an easy fudge that tastes exactly like the stuff you loved growing up, only faster. Felix puts this together so you get maximum reward for minimum effort. It’s my go-to quick dessert when I need a gift in a pinch.
- It’s truly no-bake—just a quick zap in the microwave!
- You only need three pantry staples; no fancy grocery runs required.
- It sets up beautifully every single time, which gives me so much confidence. This recipe really delivers that classic, rich flavor you find in recipes like the one over at this wonderfully smooth fudge.
The Secret to Melt in Your Mouth Fudge Texture
The magic is absolutely in the sweetened condensed milk. It provides all the sugar and structure you need! When you blend it with the peanut butter before adding the powdered sugar, those ingredients marry up perfectly. That means you get that gorgeous, smooth, creamy fudge texture without ever having to worry about hitting that tricky soft-ball stage on the stove. It’s just pure, easy success!
Gathering Ingredients for Your 3 Ingredient Peanut Butter Fudge
Okay, let’s talk supplies, because with only three things, you need to make sure they’re the right ones! This is where the simplicity of this 3 Ingredient Fudge really shines. You don’t have a long shopping list, but we need precision so we get that ‘melt in your mouth’ result, not something weirdly grainy. This recipe makes about 36 small squares, which is honestly never enough, so maybe even consider doubling up right away!
Here is our short list:
- One 14-ounce can of sweetened condensed milk (Don’t grab evaporated milk by mistake—they are totally different!)
- One cup of creamy peanut butter (Yes, it has to be the classic, smooth kind for this texture.)
- Three cups of powdered sugar (Also called confectioners’ sugar.)
If that’s all you need, why do people still mess up their homemade candy? It usually comes down to the details, which is why we’re diving into substitutions next.
Ingredient Notes and Simple Substitutions
Listen, I know buying natural peanut butter is usually my go-to for health reasons, but for this specific peanut butter fudge recipe, you really want the commercial, creamy kind. Because it has those extra stabilizers and oils, it mixes better into the condensed milk foundation when heated. If you *must* use natural peanut butter, you absolutely have to stir the oils back into the jar until it’s perfectly homogenous before you scoop it out. It’s an extra step, but necessary!
And please, keep the powdered sugar! You cannot substitute granulated or brown sugar here. Powdered sugar is super fine, and that small particle size dissolves perfectly into the base so you avoid that gritty, crunchy texture. This recipe is fantastic because it relies on that powder to deliver that dreamy smooth finish without any fuss or extra cooking.
Step-by-Step Instructions for Perfect Peanut Butter Fudge
Alright, buckle in! This is the fun part, and honestly, it’s so fast you’ll barely believe you’re making genuine no bake fudge. First things first, preparation is everything in the kitchen, even for the simplest recipe. Grab an 8×8 inch baking pan—this size is key for the right thickness. Line it completely with parchment paper, making sure you leave a generous overhang on two opposite sides. Trust me on this! Those paper flaps are your handles later when you wrestle this glorious block onto the cutting board.
Next, combine that can of sweetened condensed milk and your cup of creamy peanut butter in a large, microwave-safe bowl. I always use the biggest bowl I have because you’re going to be stirring quite a bit! Microwave this duo on high for exactly 60 seconds. Watch it carefully! When you pull it out, stir it until it’s glossy and smooth. If a tiny bit is still looking stubborn, zap it for 15 more seconds—no more! We just want it warm enough to blend, not hot enough to cook. It’s all about getting that smooth start before we move to the next step, similar to the timing tips you’d find when looking at classic microwave candy recipes.
Now for the main event! Start adding your three cups of powdered sugar, mixing it in gradually. This thickens up fast, sometimes surprisingly fast! Keep folding until the sugar is totally gone. The mixture goes from creamy to thick, almost dough-like, and that’s how you know you’re doing it right.
Preparing the Pan and Setting the Peanut Butter Fudge
Once that mixture is totally combined, you need to work quickly. Scoop that thick goodness right into your parchment-lined pan. I use a small offset spatula, but the back of a spoon works just as well, to press it down evenly across the bottom. You want a flat top, not a lumpy mountain range!
Smooth the top surface as best you can—it won’t be perfectly flat, but try to get it even so your squares look nice later. Then, pop it into the refrigerator. You need to let this peanut butter fudge chill for at least two hours, but I usually sneak it in there for three just to be safe. If you try to cut it early, you end up with a gooey mess all over your knife, and nobody wants that disappointment after all this easy work!
Tips for Achieving Classic Peanut Butter Treats Success
Even with this super simple recipe, there are a few little secrets that take your result from “good” to “Grandma’s Old Fashioned Fudge.” My biggest tip, beyond using the creamy peanut butter, is how you treat the top surface before chilling. Since we aren’t dealing with a cooked sugar syrup, the surface can sometimes get a bit messy looking when you press it into the pan. You want a nice, clean look for your Classic Peanut Butter Treats.
Use a lightly oiled piece of plastic wrap or even just a spatula sprayed with non-stick spray to gently press the surface smooth while it’s settling in the pan. Don’t press down hard—just skim the top until it’s level. Felix told me once that she tried to rush this step on one batch when she was helping her mom, and the top cracked right off when they cut it! She said she learned that day that patience for two hours of chilling is way faster than trying to patch up uneven fudge later.
Oh, and since we use powdered sugar, you don’t need to sift it beforehand, which is a huge time saver! That fine texture generally mixes right in during the second folding stage perfectly fine.
Making Your Peanut Butter Fudge a Holiday Fudge Recipes Star
This peanut butter fudge is always my favorite centerpiece when I make my easy dessert ideas for gatherings, especially around the holidays. Since this recipe is so simple, we can spend a little extra time on the presentation! Once it’s firm, lift it out using those parchment paper handles and place it on a nice cutting board. For a really festive look, I love cutting the squares small—like bite-sized jewels—and setting them in little paper candy cups.
You can step this up even more! A drizzle of melted chocolate across the top looks fabulous, or you can press a single mini peanut butter cup right into the center of each square before it sets. It instantly elevates this simple treat into something worthy of any Christmas candy platter. It feels fancy, but honestly, it took two extra seconds!
Storage and Keeping Your Homemade Candy Fresh
Since this is such a popular holiday fudge recipe, you need to know how to store it! The good news is, it keeps really well. Since it involves condensed milk, it’s pretty stable. You can keep your homemade candy airtight on the counter at room temperature for about three to four days, and it stays deliciously soft. I really don’t suggest leaving it out much longer than that, though.
If you need it to last longer, wrap the cut squares tightly in plastic wrap first, then pop them into an airtight container in the fridge. That keeps them firm and fresh for up to two weeks. Just pull them out about 15 minutes before you want to serve them so they soften up again to that perfect, smooth consistency. You don’t want fridge-hard fudge, so give it a little time to warm up before you eat!
Frequently Asked Questions About This Easy Fudge
I know that when you find a recipe this simple, you start wondering about all the ways you can twist it! Don’t worry, I’ve been there. Here are the most common questions I get about making this super soft, easy fudge. Think of these as my little troubleshooting guide based on what I’ve learned from readers and my own kitchen adventures.
Can I use natural peanut butter in this peanut butter fudge recipe?
That’s such a good question, and I touched on it above, but it bears repeating! Yes, you *can*, but you have to treat that natural peanut butter with respect. Because the oil separates out naturally, if you just scoop it in, you end up with a weird, oily layer on top of your fudge. Before you microwave it with the condensed milk, you have to stir that natural jar *really* well to incorporate all the separated oil back in. If you do that, everything should combine nicely!
Is this considered a Condensed Milk Fudge recipe?
Absolutely, 100% yes! If you see a recipe online that calls for sweetened condensed milk, powdered sugar, and peanut butter—that is exactly what this is! The condensed milk is our superstar here. It has so much sugar already cooked into it, which means we don’t need to cook anything on the stove. That high sugar content is exactly what gives you that guaranteed, gorgeous, creamy fudge texture that melts perfectly on your tongue. It’s the easiest cheat code for making amazing homemade candy!
I also often get asked how long they last, so here’s one more for you:
How long does this peanut butter fudge last?
Since these are super rich Classic Peanut Butter Treats, you don’t have to rush to eat them all in one day—though my family usually tries! They keep perfectly fine in an airtight container on the counter for about four days. If you’re making them way ahead of time for Christmas, wrap them well and place them in the fridge. They’ll stay great for almost two weeks in there, but remember to let those chilled squares sit out on the counter for about 15 minutes before serving so they get back to that dreamy, soft texture.
If this turned out to be the best batch of peanut butter fudge you’ve ever made—and I bet it will be!—come back and rate my recipe below! And if you want more ideas like this, check out how to make other simple treats over at this great spot for simple sweets.
Nutritional Estimates for Your Simple Dessert Ideas
Now, listen, I’m not a nutritionist, and Felix focused her energy squarely on making things taste amazing and easy, not counting every single calorie! But because this is such a rich little bite, I know you’re curious about what you’re getting into when you indulge in this simple dessert idea. So, I pulled the estimated numbers straight from the recipe card for you.
Keep in mind that these numbers are just rough guides for a single, small square (we got 36 squares total—a good, responsible serving size!). Your total fat content or sugar count might jump around a bit depending on the brand of condensed milk or peanut butter you pick up at the market.
Here is the ballpark breakdown:
- Calories: About 155 per square
- Fat: Around 8 grams (with about 2 grams saturated)
- Carbohydrates: Roughly 20 grams
- Protein: A solid 4 grams—thanks, peanut butter!
- Sugar: About 18 grams
See? It’s definitely a treat—that sweet hit comes from the condensed milk and powdered sugar combo! But honestly, given that this is one of the best peanut butter fudge recipes you’ll ever find, I think 155 calories is a bargain for that melt-in-your-mouth experience. Don’t stress the numbers too much; just enjoy the fact that you made this incredible homemade candy with minimal work!
Share Your Best Fudge Recipe Creations
Well, that’s it! We have officially made the creamiest, dreamiest peanut butter fudge with barely any effort at all. I’m so excited for you to try this easy fudge recipe and experience that incredible texture for yourself!
Now comes the part that truly makes this blog feel like a community, not just my little corner of the internet. I really want to hear what you think! Did it come out perfectly smooth for you? Did you sneak in some extra chocolate drizzle? Please, please, please leave a rating for this recipe—five stars if it blew away your expectations!—and drop any lingering questions down in the comments for me.
If you tried out some fun variations, like maybe swapping in a different nut butter or using it as your main Christmas candy this year, come tell us about it! Your successes help the next person who is scrolling by thinking, “Can I really make this simple dessert idea work?” Show them your results!
For more inspiration on making similar classic treats that taste incredible without taking forever, you should definitely peek at the techniques used in this excellent old-fashioned recipe. And if you are looking to see other ways people are loving this fudge method, check out what folks are sharing over at Kippi At Home’s post! Happy baking, and I can’t wait to see what you create!
PrintThe Ultimate Creamy 3-Ingredient Peanut Butter Fudge (No Candy Thermometer Required)
Make this easy peanut butter fudge using only three simple ingredients. This recipe delivers a rich, creamy, melt-in-your-mouth texture perfect for quick treats or holiday gifting.
- Prep Time: 10 min
- Cook Time: 2 min
- Total Time: 2 hours 12 min
- Yield: 36 small squares 1x
- Category: Dessert
- Method: No Bake
- Cuisine: American
- Diet: Vegetarian
Ingredients
- 1 (14 ounce) can sweetened condensed milk
- 1 cup creamy peanut butter
- 3 cups powdered sugar
Instructions
- Line an 8×8 inch baking pan with parchment paper, leaving an overhang on the sides for easy removal.
- In a large microwave-safe bowl, combine the sweetened condensed milk and peanut butter. Microwave on high for 60 seconds.
- Stir the mixture until it is completely smooth. If necessary, microwave for another 15 seconds and stir again until fully combined and smooth.
- Gradually add the powdered sugar to the peanut butter mixture, stirring until fully incorporated. The mixture will become very thick.
- Press the fudge mixture evenly into the prepared baking pan. Use a spatula or the back of a spoon to smooth the top.
- Refrigerate the fudge for at least 2 hours, or until firm.
- Use the parchment paper overhang to lift the fudge from the pan. Cut into small squares before serving.
Notes
- For a richer flavor, use natural, unsweetened peanut butter, but ensure you stir it very well before microwaving.
- If you prefer a firmer fudge, chill it for 4 hours instead of 2.
- This recipe is excellent for making Christmas candy or simple dessert ideas when you need something fast.
Nutrition
- Serving Size: 1 square
- Calories: 155
- Sugar: 18
- Sodium: 65
- Fat: 8
- Saturated Fat: 2
- Unsaturated Fat: 6
- Trans Fat: 0
- Carbohydrates: 20
- Fiber: 1
- Protein: 4
- Cholesterol: 5