

Oh, friend, I know that feeling. You look at the clock, and suddenly it’s 6:30 PM, and all you’ve managed today is a lukewarm cup of coffee. We all get caught in that whirlwind, but that doesn’t mean we have to sacrifice real, soul-satisfying food! That’s why I’m obsessed with this tuna onigiri recipe. Seriously, we’re talking maximum flavor impact for like, 15 minutes total time. This isn’t just another recipe; it’s my way of fighting back against the crazy schedule. It’s incredibly beginner-friendly, tastes like something you picked up at a fantastic little shop in Tokyo, and it’s the ultimate answer when you just need some fantastic Quick Dinner Ideas right now. If you’re looking for more fast yet amazing meals, check out my guide to healthy lunch recipes! Let’s reclaim some kitchen joy together, okay?
- Why This Spicy Tuna Onigiri Recipe Works for You
- Gathering Ingredients for Perfect Tuna Onigiri
- Step-by-Step: How To Make Onigiri (Shaping Technique)
- Expert Tips for Flawless Tuna Onigiri
- Variations: Making Yaki Onigiri Recipe Style
- Serving Suggestions and Storing Your Tuna Onigiri
- Frequently Asked Questions About Tuna Onigiri
- Nutritional Estimates for Homemade Tuna Onigiri
- Share Your Success Making Tuna Onigiri
Why This Spicy Tuna Onigiri Recipe Works for You
I get it—you’re busy, and the thought of complicated Japanese cooking feels overwhelming. But trust me when I say this Spicy Tuna Onigiri is a game-changer. It’s the exact kind of recipe I used when I was deep in marketing deadlines and needed comfort food fast.
It honestly performs perfectly for the modern kitchen because it ticks every box:
- It’s lightning fast! We’re looking at about 15 minutes total, which is perfect for a weeknight panic.
- They are wonderfully portable. Pack them up for lunch, and suddenly you have a fantastic 30-minute weeknight dinner item ready to go.
- The flavor is bold! That spicy blend transforms simple canned tuna into something addictive.
- You absolutely do not need any special rolling mats or skills. This is the simplest Homemade Sushi Alternative you’ll ever try.
If you want more quick wins for dinner, peek at my 30-minute weeknight dinners collection!
Gathering Ingredients for Perfect Tuna Onigiri
Before we get to the fun part—the actual shaping—we need to talk ingredients. Seriously, getting these measurements right is half the battle for perfect tuna onigiri. If you’re using the wrong rice, the whole thing falls apart, and trust me, we don’t want sad, crumbly rice balls! Pay close attention to the filling, too; that’s where all the spicy flavor pops.
I always stress using short-grain Japanese rice, like sushi rice. It has the necessary starch to hold its shape when lightly salted. If you need help getting that rice just right as a foundation, I have a deep dive on perfect sushi rice preparation.
Rice and Nori Essentials
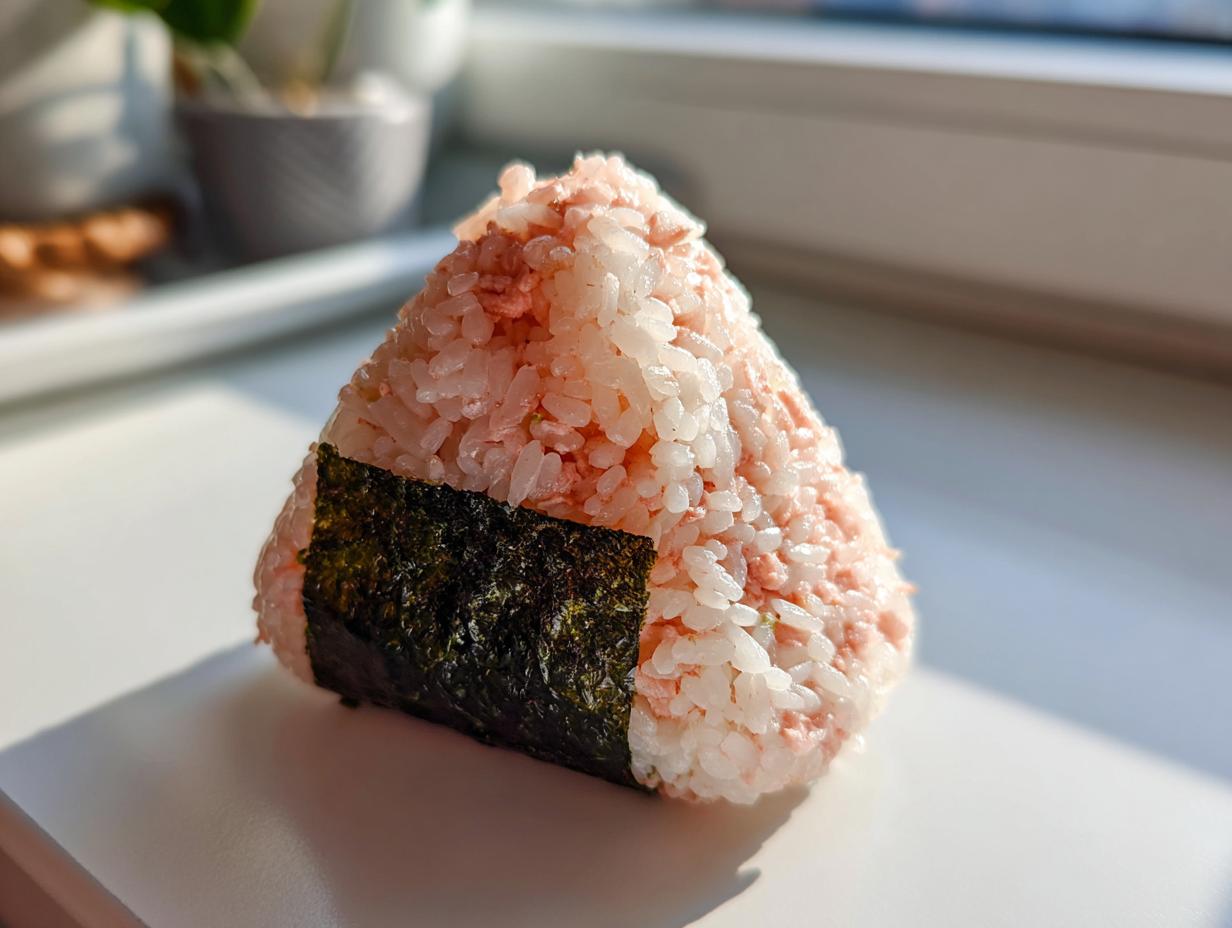
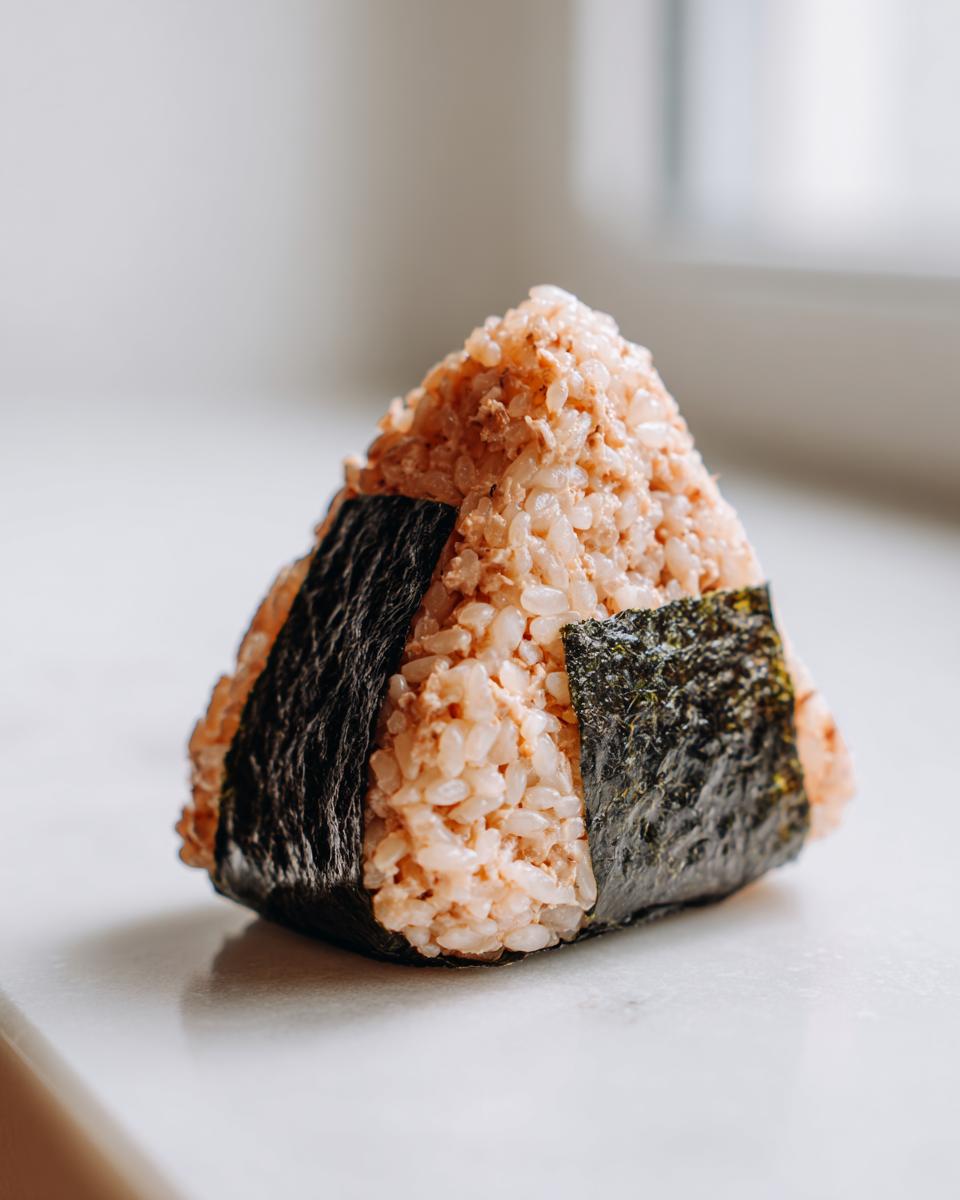
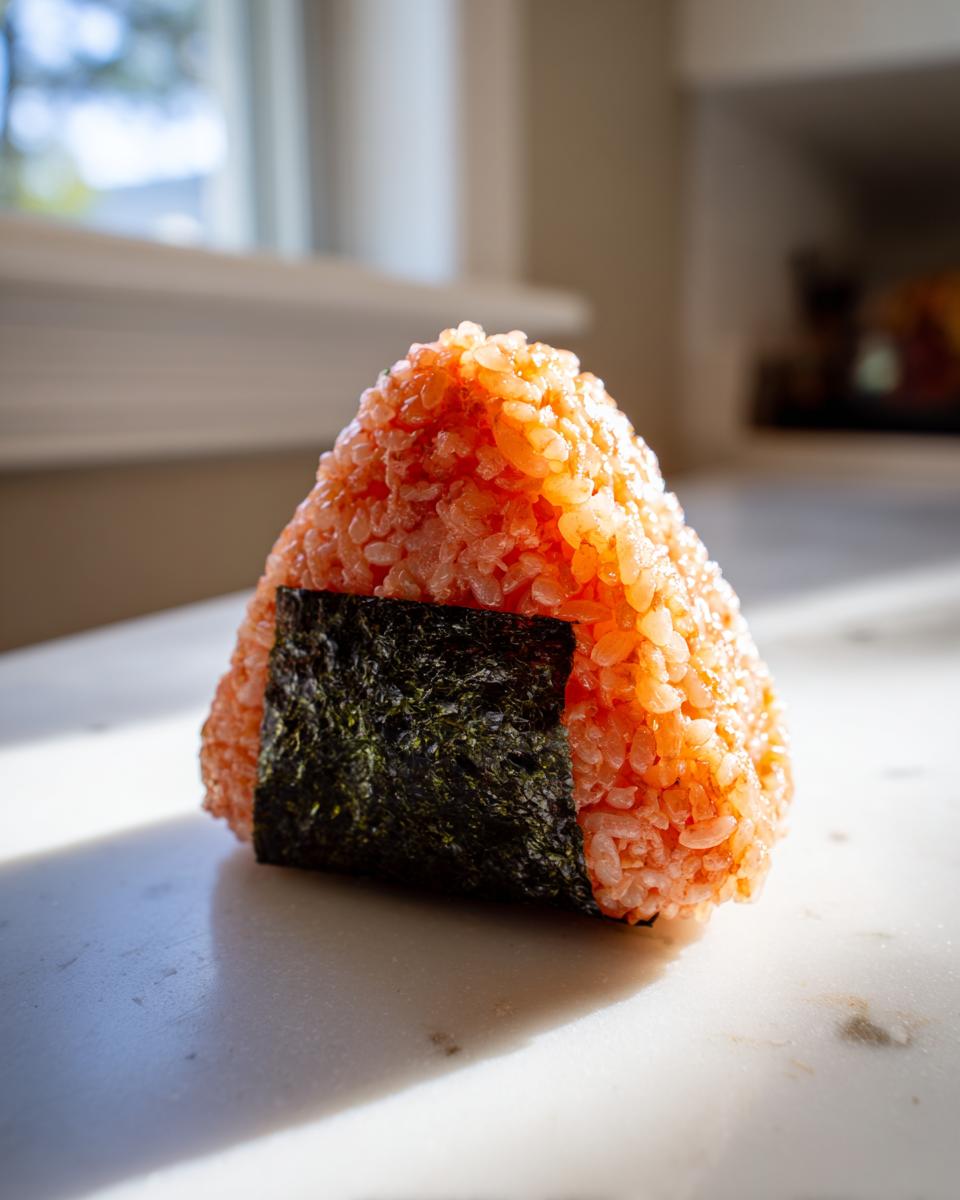
You only need three things for the structure, but they matter a lot! You’ll need 2 cups of cooked short-grain Japanese rice—it needs to be warm when you season it, not piping hot or stone cold. Then, grab one teaspoon of salt to gently sprinkle over the warm rice. Finally, get those sheets of nori. You’re cutting these into strips; they act like the little napkin holding your little rice package together, so they need to be crisp!
Crafting the Creamy Tuna Filling
This creamy tuna filling is what elevates this from plain rice to an Easy Japanese Snack. You must drain the canned tuna really, really well—I mean, squish out every drop of water. Then, into a bowl it goes with 3 tablespoons of mayonnaise. If you can get your hands on Kewpie mayo, please do; it makes everything taste immediately more authentic! To get that signature kick for our Spicy Tuna Balls, mix in 1 to 2 teaspoons of Sriracha—adjust that burn factor to your liking—along with just half a teaspoon of soy sauce for depth. Mix it until it’s completely creamy and uniform; that’s the magic happening right there.
Step-by-Step: How To Make Onigiri (Shaping Technique)
Okay, this is the part where we actually turn simple ingredients into those gorgeous little Japanese rice balls! Don’t get stressed if your first one looks a little wonky; mine looked like smooshed potatoes the first time I tried how to make onigiri. The secret is gentle handling. We want sticky rice, not rock-hard baseballs!
We need to work with rice that’s warm enough to handle but cool enough not to burn your fingers. If it’s too hot, it will steam the nori; if it’s too cold, it won’t stick together.
Seasoning and Cooling the Rice
Remember those 2 cups of cooked rice we seasoned earlier? Let that sit for about 10 minutes—just until you can comfortably touch it. The salt needs a moment to seep in and season the starch. If you’re making this for a later lunch, let it cool down a bit more at room temperature before you start shaping, as excessive heat can really affect the final texture.
Assembling and Forming the Perfect Tuna Onigiri
Now for the magic trick! First, wet your hands—this is non-negotiable, or the rice will stick everywhere. Lightly sprinkle a pinch of salt right onto your wet palms; this seasons the outside layer of the tuna onigiri. Scoop up about half a cup of that seasoned rice and gently flatten it into a rough circle or square in one hand. Make a little divot in the center—that’s where the filling goes. Spoon about one tablespoon of your creamy spicy tuna mixture right into that well.
This is critical: Gently cup the rice around the filling using both hands—think of making a gentle fist over it but don’t clench! Slowly start pressing and maneuvering the rice around the filling, bringing the corners up to form that classic triangle shape or a neat little ball. Use light pressure! You need enough pressure to hold it together, but if you crush it too hard, it becomes dense and chewy. Seriously, be kind to the rice!
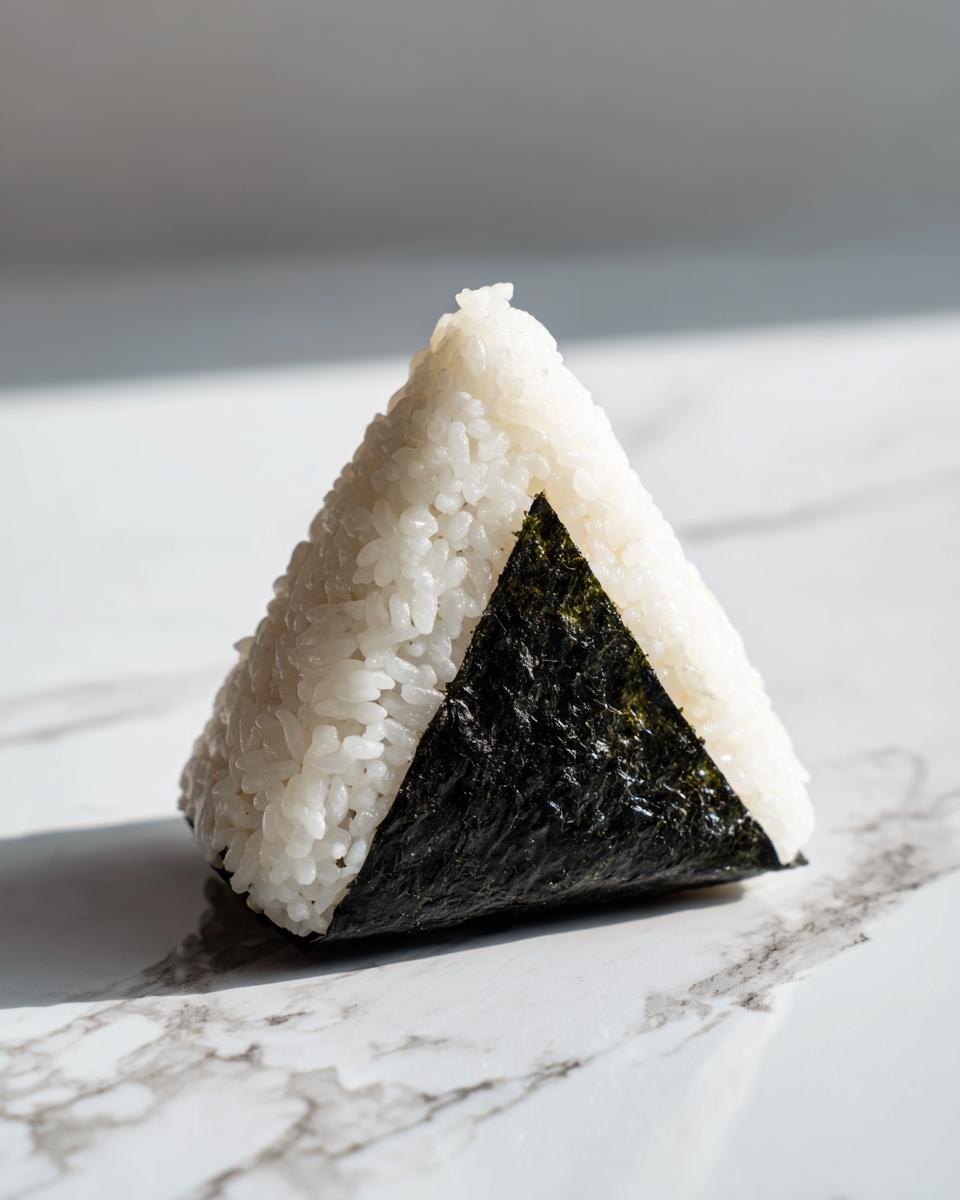
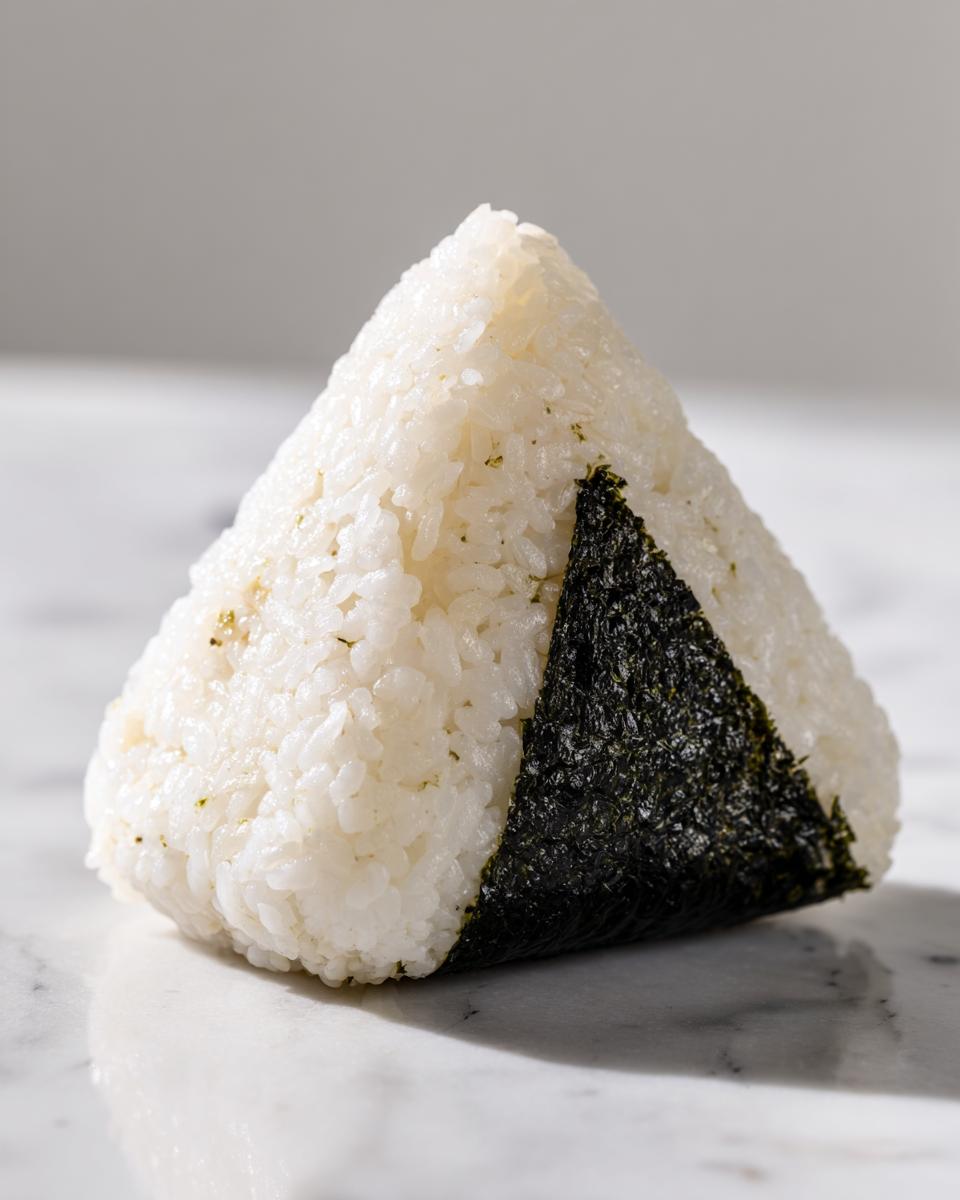
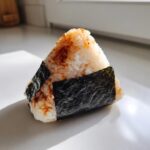
Once you have a solid shape, take that strip of nori and wrap it around the base. The warmth of the rice should make that seaweed stick right away. If you’re not eating it immediately, wrap each one tightly in plastic wrap; this keeps them super fresh!
Expert Tips for Flawless Tuna Onigiri
I’ve made enough of these tuna onigiri now to know the little tricks that take you from “pretty good” to “I can’t stop eating these!” My number one piece of advice, which I mentioned before but I have to say again, is keeping your hands wet. Have that little bowl of water right next to you. Dipping your hands frequently when you are squishing the rice is the only way to stop the tacky rice from clinging everywhere. It makes the whole shaping process feel so much cleaner!
Also, don’t feel tied just to the spice! Sometimes I’m having these for a lighter lunch or packing them for my nephew who can’t handle the heat. That is where the classic Tuna Mayo Onigiri shines. You just omit the Sriracha completely. Use the same drained tuna, the same great mayo (I still advocate for Kewpie!), and just a tiny sprinkle of salt, and you’ve got that perfect, savory, milder flavor. It’s just as satisfying as the spicy version, really. If you’re looking for other great creamy fillings, you have to check out my best classic creamy egg salad recipe; it works wonders in these rice balls too!
Variations: Making Yaki Onigiri Recipe Style
So, you nailed the basic tuna onigiri and now you’re feeling brave? Fantastic! We have to talk about Yaki Onigiri. This is when you take your perfectly shaped rice balls and turn them into these gorgeous, crispy, slightly salty snacks. They become true Seared Rice Balls, and honestly, the texture is unbelievable. It takes maybe five extra minutes, but wow, is it worth the upgrade!
The recipe note says that for this, you just brush the formed onigiri lightly with a mixture of soy sauce and maybe a tiny drop of oil—I love using my easy homemade garlic butter recipe here instead of plain oil if I’m feeling decadent! Then you just pan-sear them over medium heat. You want to press gently on the sides that touch the heat until they turn golden brown and get that wonderful crisp crust. It’s a totally different experience, but still just as fast for a satisfying Asian snack!
Serving Suggestions and Storing Your Tuna Onigiri
Once you’ve shaped your beautiful tuna onigiri, the next question is, how do I keep them fresh until lunch? Since these are fantastic as a Bento Box Filler or just a super simple Quick Dinner Idea, storage is key. The absolute best way to keep them fresh and prevent them from drying out overnight is wrapping them individually in plastic wrap. This seals in the moisture from the rice and keeps the nori from getting soggy too fast.
If you’re taking them for lunch, eat them the same day if you can! They are best when the rice is still soft. They are wonderful served right away just as they are, or if you’re making a bigger meal, pair them with something light. Maybe a bowl of quick miso soup, or even alongside some vegetables tossed with my quick, easy homemade BBQ sauce recipe used as a dipping glaze if you’re feeling adventurous! But honestly, they’re a perfect handheld meal all on their own.
Frequently Asked Questions About Tuna Onigiri
It’s totally normal to have questions when you’re trying a new technique! Making these at home is so much easier than you think, but there are a couple of sticking points that trip people up sometimes. Here are the things I get asked most often about perfecting these Japanese Rice Balls.
Can I use regular long-grain rice instead of sushi rice for my tuna onigiri?
Oh, please don’t try that! I know it sounds like a simple swap, but it really won’t work well. Long-grain rice, like what you’d use for plain steamed rice, just doesn’t have the right starch content. It ends up being fluffy and separate, instead of sticky enough to cling together when you form the ball. If the rice doesn’t stick, your tuna onigiri will just crumble apart when you try to eat it. Stick to short-grain sushi rice—it’s the core requirement here!
How long do these spicy tuna balls last if I make them for meal prep?
They are truly best the day you make them, especially because of the nori. If you wrap them tightly in plastic wrap right after shaping, they’ll hold up great until the next day for refrigerated lunch. However, rice doesn’t love being cold—it gets hard. My rule? Eat them within 24 hours if possible. If you have leftovers you must keep longer, store them in the fridge in an airtight container, but try to bring them to room temperature for about 20 minutes before eating so the rice softens up a bit.
What is the difference between Tuna Mayo Onigiri and the spicy version?
It’s super simple—it’s all about the heat! The spicy version, which I love for a quick dinner boost, gets its kick from Sriracha mixed into the tuna filling. The standard Tuna Mayo Onigiri is just the canned tuna, mayo, and a touch of salt. It’s milder and maybe a little more kid-friendly, but just as creamy and satisfying. Both are fantastic ways to use up that pantry staple with my favorite canned tuna recipe methods!
Nutritional Estimates for Homemade Tuna Onigiri
Now, I want to be super clear here: since this is homemade and you’re controlling the mayo and Sriracha levels, these numbers are just estimates based on the specific recipe yields. But if you’re watching macros, it’s good to know what you’re working with! This recipe yields about 4 rice balls, and using the ingredients listed, we land pretty nicely for a satisfying snack.
Per serving (which is one rice ball!), you’re looking at roughly:
- Calories: 250
- Fat: 8g
- Protein: 12g
- Carbohydrates: 35g
See? That’s not bad at all for a delicious, handheld bite! It’s definitely one of my favorite ways to manage calories while still feeling totally satisfied.
Share Your Success Making Tuna Onigiri
I’ve told you all my secrets for making these unbelievably fast and flavorful **tuna onigiri**, and now it’s your turn! Honestly, seeing you all recreate these little handheld meals in your own kitchens is the best part of this whole process. When you nail that perfect triangle shape and it actually stays together, you’ve earned a little victory dance, trust me.
If you loved this straightforward recipe—and how could you not, it’s ready in 15 minutes!—I really hope you take a second to leave a quick rating right here on the blog. It helps others who are hesitant about trying Japanese cooking see that it’s totally doable!
And please, snap a picture of your beautifully shaped rice balls! Whether you went with the spicy kick or stuck to the classic **Tuna Mayo Onigiri**, tag us on social media. Seeing your creations reminds me why I share these recipes in the first place—to help busy people like us eat wonderfully every single day. If you’ve got feedback or suggestions for the next quick meal I should test out, feel free to reach out directly through my contact page. Happy cooking, everyone!
PrintEasy Spicy Tuna Onigiri Recipe
Make satisfying Japanese rice balls filled with creamy, spicy tuna. This beginner-friendly recipe is fast, portable, and perfect for a quick dinner or lunchbox filler.
- Prep Time: 15 min
- Cook Time: 0 min
- Total Time: 15 min
- Yield: 4 servings 1x
- Category: Snack
- Method: Hand Shaping
- Cuisine: Japanese
- Diet: Low Fat
Ingredients
- 2 cups cooked short-grain Japanese rice (sushi rice)
- 1 teaspoon salt (for seasoning rice)
- 1 (5 ounce) can tuna, drained well
- 3 tablespoons mayonnaise (Kewpie preferred)
- 1 to 2 teaspoons Sriracha (adjust to your spice preference)
- 1/2 teaspoon soy sauce
- 2 sheets nori (seaweed), cut into strips
- Sesame seeds (optional, for garnish)
Instructions
- Prepare the rice: While the rice is still warm, sprinkle it with 1 teaspoon of salt and mix gently. Allow the rice to cool slightly until it is warm enough to handle but not hot.
- Make the spicy tuna filling: In a small bowl, combine the drained tuna, mayonnaise, Sriracha, and soy sauce. Mix until the filling is creamy and well combined.
- Shape the rice: Wet your hands lightly with water and sprinkle a small amount of salt on your palms. Take about 1/2 cup of seasoned rice and flatten it slightly in one palm.
- Fill the rice ball: Place about 1 tablespoon of the spicy tuna filling in the center of the flattened rice.
- Form the onigiri: Gently cup the rice around the filling, using both hands to shape it into a triangle or a round ball. Press firmly enough so the rice holds its shape but not so hard that it becomes dense.
- Wrap with nori: Take a strip of nori and wrap it around the base or side of the rice ball. The moisture from the rice will help it stick.
- Garnish: Sprinkle sesame seeds over the onigiri if desired.
- Serve immediately or wrap individually in plastic wrap for a portable Asian snack or bento box filler.
Notes
- If you prefer a milder flavor, use the Tuna Mayo Onigiri variation by omitting the Sriracha and using only mayonnaise and a pinch of salt for the filling.
- For Yaki Onigiri (seared rice balls), brush the formed onigiri lightly with a mixture of soy sauce and a drop of oil before pan-searing until golden brown and crisp.
- Keep your hands wet while shaping the rice to prevent sticking.
Nutrition
- Serving Size: 1 rice ball
- Calories: 250
- Sugar: 1
- Sodium: 350
- Fat: 8
- Saturated Fat: 1
- Unsaturated Fat: 7
- Trans Fat: 0
- Carbohydrates: 35
- Fiber: 1
- Protein: 12
- Cholesterol: 25