

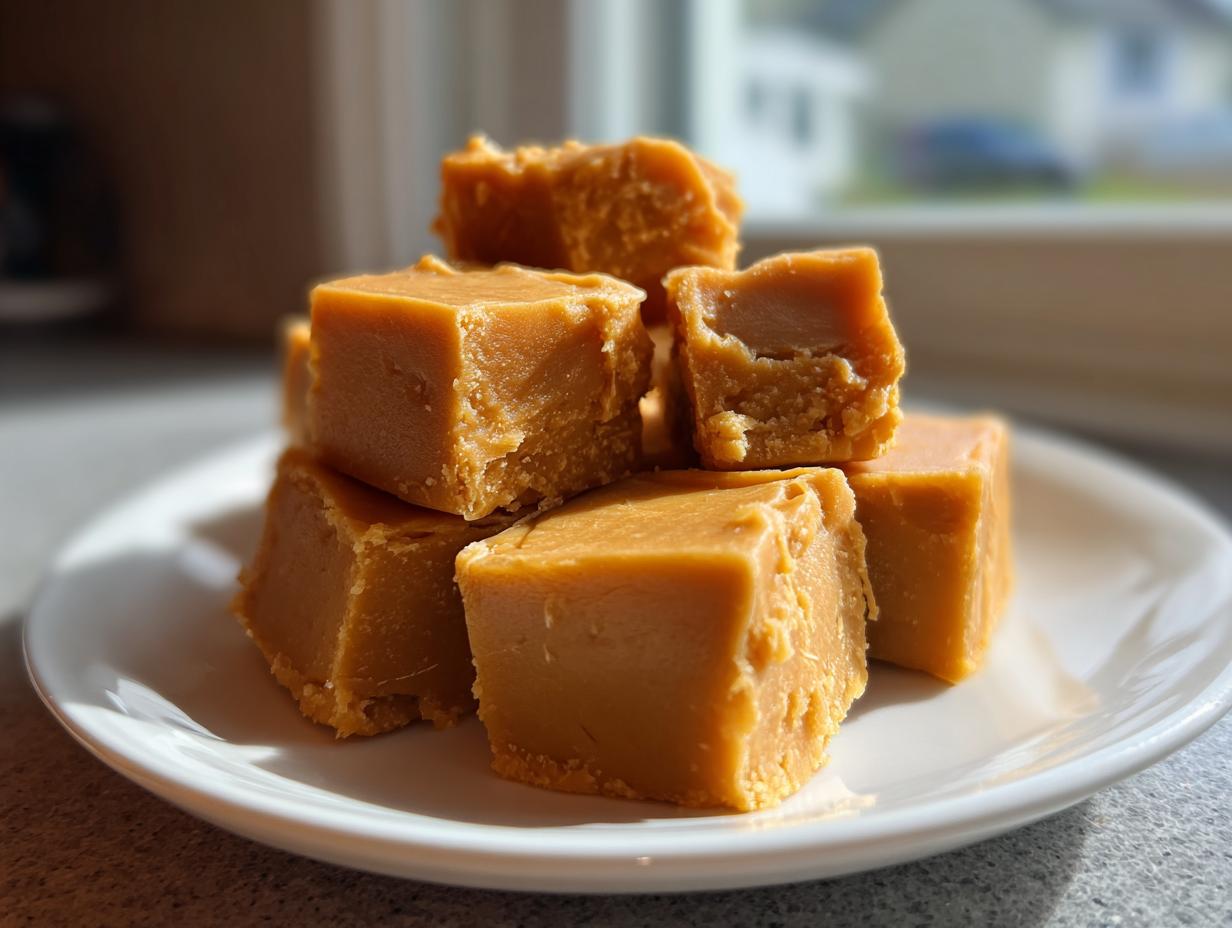
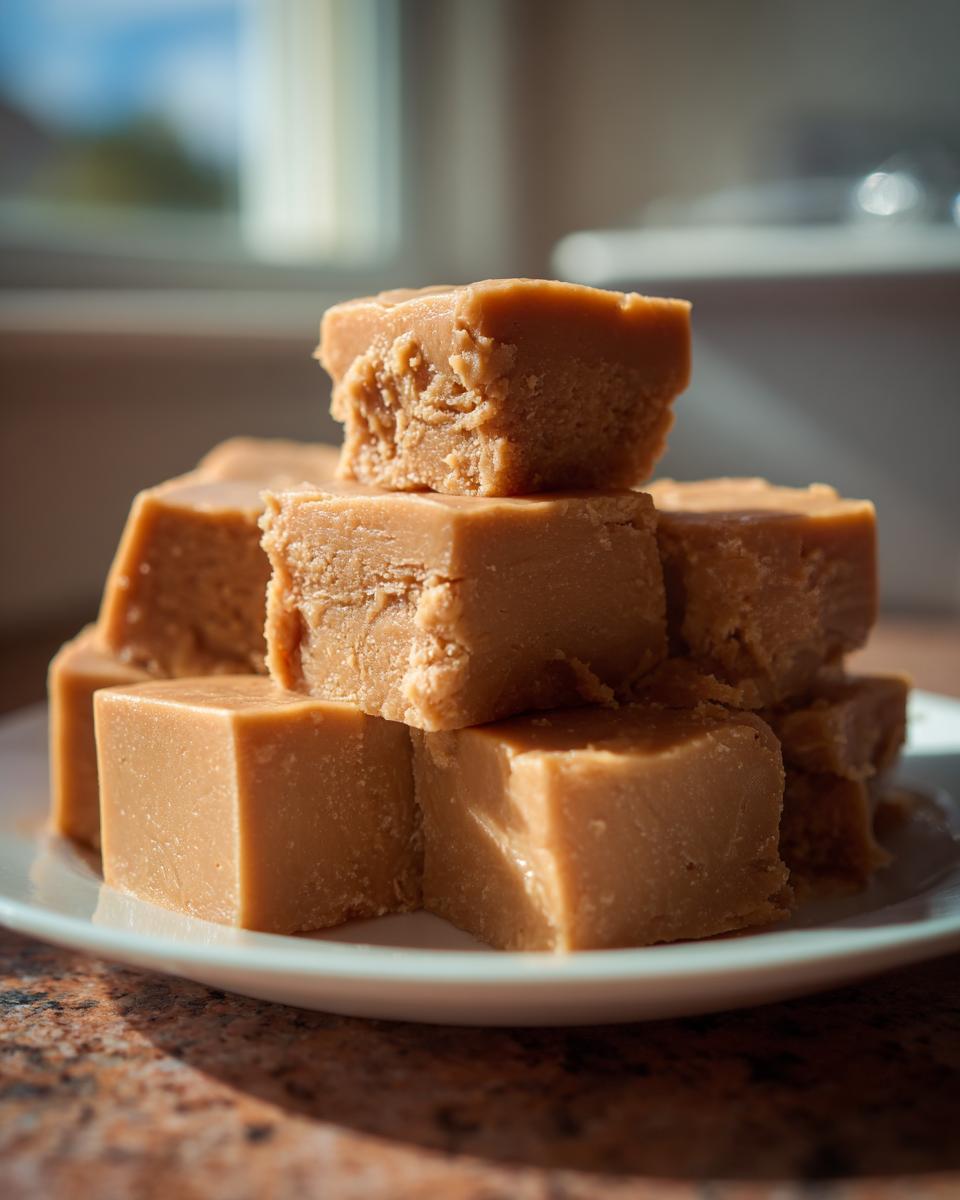
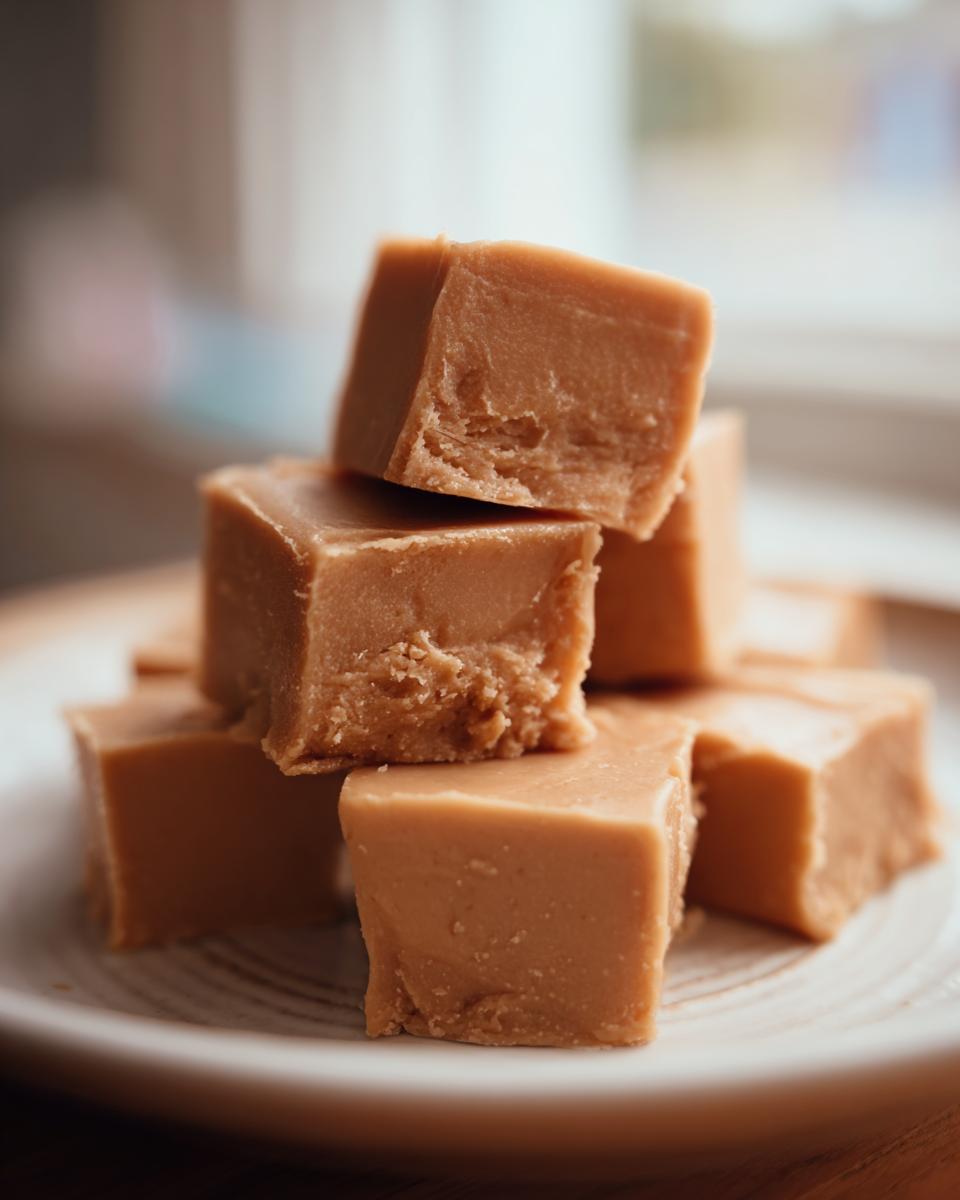
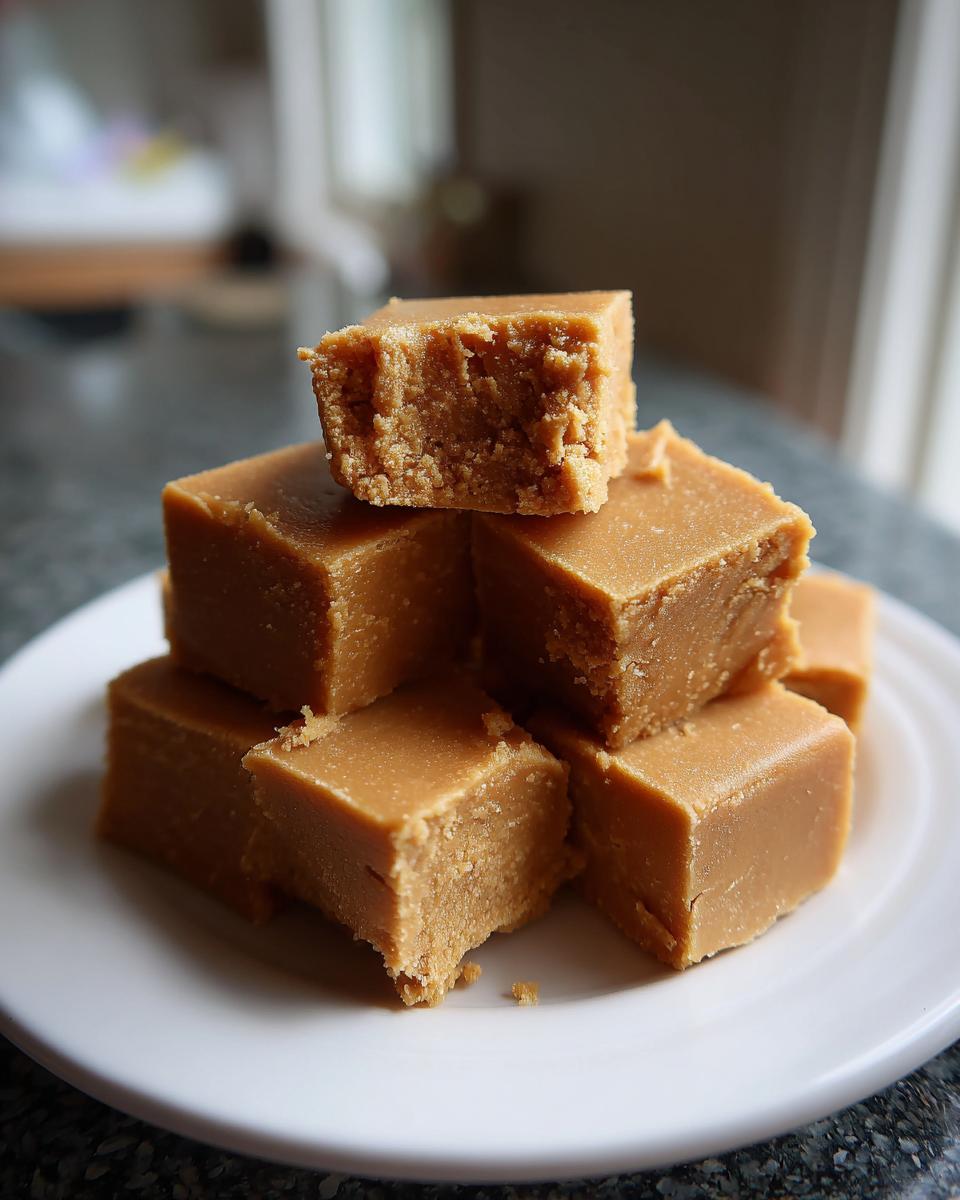
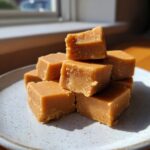
There is just something about homemade candy that stops you in your tracks, isn’t there? Forget those chalky, weirdly processed squares you find in tourist shops—we’re talking about real, comforting sugary goodness. Today, we’re diving deep into my recipe for Classic Creamy Maple Fudge. This isn’t the kind that crumbles; this is the kind that genuinely melts in your mouth as soon as it hits your tongue, just bursting with pure maple flavor.
If you’re worried that making fudge sounds too complicated for a weeknight, relax! Felix built this whole blog because she understands the hustle of busy life after marketing gave her zero downtime. But she always believed that great flavor doesn’t need hours of fuss. This stovetop maple fudge honors that tradition—it’s straightforward, uses simple ingredients, and delivers that decadent, smooth texture without fail. It’s the perfect sweet treat to conquer those cookie cravings! If you need another quick fix while this sets up, you should check out my instructions for quick and easy 5-minute Oreo fudge.
- Why This Creamy Maple Fudge Recipe Works (Expert Tips)
- Ingredients for the Best Maple Fudge Recipe
- Step-by-Step Instructions for Perfect Maple Fudge
- Variations: Maple Walnut Fudge and Other Sweet Treats
- Storage and Keeping Your Maple Fudge Fresh
- Making Maple Fudge for Holiday Gifts and Cozy Nights
- Frequently Asked Questions About Homemade Maple Fudge
- Estimated Nutritional Data for Maple Fudge
- Share Your Smooth Maple Fudge Creations
Why This Creamy Maple Fudge Recipe Works (Expert Tips)
Okay, let’s talk texture because that’s where most fudge recipes fall apart—literally! Nobody wants sandy or grainy fudge; we want that luxurious, melt-in-your-mouth experience. The secret to making this truly creamy maple fudge lies entirely in respecting the candy-making process. Don’t worry if you’ve never made candy before; I’ve broken down the difficult steps so you can nail this every single time.
When you follow these steps for our maple fudge, you’re setting yourself up for success. The main reason people end up with crumbly sugar crystals instead of smooth candy is rushing the cooling or beating stage. We’re aiming for perfection here!
The Importance of Real Maple Syrup for Pure Maple Fudge
This is non-negotiable, friends. If the recipe calls for maple syrup, you must use pure maple syrup. Pancake syrup is mostly corn syrup with artificial flavoring, and it will mess up the crystallization process entirely. Using pure maple fudge means trusting the real deal! That deep, woodsy sweetness of genuine maple is what makes this confection so incredibly special, especially when it’s used in homemade maple fudge.
Mastering the Soft-Ball Stage for Smooth Maple Fudge
This is the technical part, but seriously, stick to the thermometer! We need that sugar mixture to hit exactly 234 degrees Fahrenheit—that’s the soft-ball stage. If it goes even a few degrees too high, you shift the internal structure, and suddenly your beautiful batch of smooth maple fudge is turning crunchy! Pull it off the heat immediately at 234°F. This specific temperature ensures the milk solids and sugar bind just right, giving you that desirable—and delicious—creamy maple fudge texture we crave.
Ingredients for the Best Maple Fudge Recipe
You need very little fuss to get amazing flavor here, which is why I love this homemade maple fudge so much! It’s just a handful of pantry staples shining bright, centered around that incredible maple flavor. Remember, for the smoothest possible candy, make sure your butter is at room temperature before you add it in later. We want everything blending nicely!
You’ll want to have all your measurements ready to go before you even turn the stove on; once this cooks, things move fast! If you’re thinking about adding nuts (which, trust me, brings a wonderful crunch!), you can find my technique for making amazing candied pecans if you want to upgrade the walnuts, but standard chopped nuts are perfect, too.
- 2 cups granulated sugar
- 1 cup whole milk (use the cold stuff from the fridge!)
- 1 cup pure maple syrup (Seriously, only the real stuff!)
- 1 tablespoon unsalted butter, softened slightly
- 1 teaspoon vanilla extract
- 1/4 teaspoon salt
- 1 cup chopped walnuts (if you want that extra texture treat)
Step-by-Step Instructions for Perfect Maple Fudge
Look, I know candy making sounds scary, but once you see how structured this is, you’ll breeze through it. My whole goal creating this maple fudge recipe was to make foolproof candy that tastes like it came from an old-fashioned candy store. We need to be precise with the heat, but gentle with the mixing later on. Don’t rush the pot, and don’t rush the cooling!
This recipe is designed to give you that perfectly thick, decadent texture. So grab your heavy-bottomed pot—we don’t want any hot spots scorching our sugar! Make sure your 8×8 pan is ready to go before you even turn on the burner. Trust me, when it’s time to pour, you won’t have a second to spare.
Preparing the Pan and Initial Cooking of Maple Fudge
First things first: get the pan ready! Line that 8×8 pan with parchment paper and let the edges hang over the sides; that’s your handle later. Now, into the heavy pan goes the sugar, the milk, and your glorious pure maple syrup. Heat this over medium heat, stirring constantly only until you see that sugar completely dissolve—no gritty bottoms allowed! Once it’s smooth, attach that candy thermometer and stop stirring. We need a clean boil now to make great maple fudge. Boil it steadily until the thermometer screams “234 degrees Fahrenheit.” Take it off the heat right then!
Achieving Creamy Maple Fudge Texture Through Beating
This is the second critical phase for achieving that smooth maple fudge texture. Stir in your butter, salt, and vanilla until the butter vanishes. If you’re adding those crunchy walnuts, drop them in now! Now, here’s the patience part: let the whole mixture cool down undisturbed until it hits 110°F. Do not touch it! Once it’s cooler, it’s time to beat! Use a sturdy wooden spoon or an electric mixer and beat it hard. Keep going until that shiny gloss disappears and the mixture thickens up like dreamy peanut butter—that’s how you know your creamy maple fudge is set up perfectly. Spread it fast into your prepared pan and let it chill out on the counter for at least four hours. Perfection takes quiet time!
If you’re preparing something for a big batch you need to store, I sometimes use a quick application of pecan crunch topping on top of the fudge before it sets, just for flair!
Variations: Maple Walnut Fudge and Other Sweet Treats
The base of this maple fudge is so fantastic that it begs for a little customization! The variation everyone seems to ask about—and for good reason—is the maple walnut fudge. It adds such a nice little crunch to cut through all that dense, soft sweetness. It’s divine!
If you are going the nut route, remember that we added them right before the final vigorous beating stage. This ensures they suspend nicely throughout the entire batch, not just sinking to the bottom. If you toast your walnuts first, the flavor is even deeper, tying in beautifully with the maple. You could also swap out the walnuts for pecans, or if you want to get really fancy, try using some chopped dried cherries instead for a totally different texture profile. Honestly, the possibilities for these sweet treats are endless once you master the core recipe!
If you love the melt-in-your-mouth quality of this fudge, I bet you’ll also adore the delicate texture of my classic melt-in-your-mouth Russian Tea Cakes for your cozy dessert rotation. Enjoy creating these sweet moments!
Storage and Keeping Your Maple Fudge Fresh
Now that you’ve put in the effort to nail that incredible texture, you want to make sure this spectacular maple fudge lasts, right? Good news: this candy keeps beautifully! Since it’s cooked to that perfect soft-ball stage, it doesn’t need refrigeration, which is fantastic for holiday cookie tins or if you plan on giving some away.
I usually store my fudge at cool room temperature. Don’t put it in the fridge unless your kitchen is super hot and humid, because the condensation can make the sugar weep a little, and nobody wants sticky squares! Just keep it airtight. I use a simple tin or a heavy glass container.
If stored correctly, your maple fudge should stay wonderfully creamy and smooth for easily two weeks. After that, it might start to firm up just a tiny bit, but it’s still perfectly good for another week or so. The real trick to longevity is keeping it away from air—air is the enemy of soft candy! Enjoy these sweet treats slowly, or share them quickly; they never seem to last long around my house either way!
Making Maple Fudge for Holiday Gifts and Cozy Nights
Honestly, making this maple fudge is almost as good as eating it, especially when you think about who you’re going to share it with. This is my absolute go-to homemade gift when I need something that feels incredibly thoughtful but doesn’t take all day. Forget buying expensive candles—a tin of this rich, creamy maple fudge screams holiday spirit and genuine care!
I remember one year, around Christmas, I was swamped with work, and I felt terrible that I hadn’t organized gifts for my neighbors. I whipped up a batch of this fudge, cooled it while I worked late on a proposal, and then cut it up perfectly the next morning. Wrapping those little squares in simple cellophane with a piece of twine? Instant holiday magic. Everyone raved about the pure maple flavor. It proved that the best things we give often come straight from our own kitchen.
When the weather gets chilly and you’re curled up with a mug of something warm, there’s no better companion than a square of this sweet confection. It just screams cozy baking vibes. It’s that perfect decadent dessert for a quiet evening in. If you love the melt-in-your-mouth quality of this fudge, I bet you’ll also adore the delicate texture of my classic melt-in-your-mouth Russian Tea Cakes for your cozy dessert rotation. Enjoy creating these sweet moments!
Frequently Asked Questions About Homemade Maple Fudge
I get so many messages about this recipe, which tells me you all love a good, sweet, homemade treat as much as I do! Most questions seem to circle back to texture or making the process even quicker. Don’t worry, I’ve got the answers right here to make sure your next batch is perfect.
Can I make this maple fudge recipe without a candy thermometer?
Oh, that’s a tough one! While I strongly recommend the thermometer for guaranteed creamy maple fudge, I know not everyone keeps one handy. If you absolutely can’t use one, you’ll have to rely on the traditional soft-ball test. You need a bowl of ice-cold water ready—seriously cold water—next to your stove.
When you think you’re close to temperature, drop a small spoonful of the hot syrup mixture into the ice water. If it forms a soft, pliable ball that flattens slightly when you press it gently, it’s done! If it stays hard and brittle, keep cooking. If it just dissolves, you’ve gone too far or need more time. It’s less precise than the thermometer, but people made candy this way forever!
Is there an easy maple fudge recipe that doesn’t require cooking?
That is the allure of the no bake maple fudge, isn’t it? Absolutely, those quick versions exist, usually relying on sweetened condensed milk and melted chips. They are fantastic when time is ticking! However, if you look at those recipes, they usually have a different texture—often a bit denser, sometimes sweeter, and they don’t quite achieve that silky, pure maple melt that this cooked method does.
For the absolute best maple fudge in terms of smooth, unparalleled flavor depth, you need this stovetop time to properly combine the sugar and syrup. I always tell people that taking that extra 15 minutes to cook it correctly is the difference between *good* fudge and *remember-all-year* fudge. If you want lightning fast, maybe try the condensed milk route, but for true decadence, stick with this one!
My maple fudge turned out grainy. What went wrong?
Ugh, the dreaded graininess! This is usually the result of one of two errors, both dealing with how those sugar crystals formed. First, did you stir the sugar mixture while it was boiling up to 234°F? If you stirred it, those tiny sugar molecules bumped into each other and started clustering too early, leading to grittiness in the final product. We need a calm boil!
Second possibility: the cooling phase. If you cooled the mixture way too fast, or if you started beating it before it rested down to 110°F, you shocked the sugar structure. The beating stage is vital for creating that smooth finish, but it only works if the syrup has calmed down first. Try to let it sit still during that cooling period so the crystals can stabilize before you whip them into submission!
For more tips on getting your kitchen workflow smooth, check out how I organize my pantry for making quick jams when produce is perfectly ripe!
Estimated Nutritional Data for Maple Fudge
Okay, now for the part where we talk about fueling all that cozy baking! Because this is homemade maple fudge made with real butter and pure syrup, it’s definitely a rich treat. I always tell people that the nutrition facts are the necessary paperwork for any decadent dessert.
Please remember that these numbers below are educated estimates based on the ingredients I listed—especially if you decide to add those delicious walnuts! The exact brand of milk or the amount of maple syrup you get onto the spoon before it hits the pot can slightly change the final count. Use this as a guideline for your sweet treats!
- Serving Size: 1 square
- Calories: 145
- Sugar: 25g
- Carbohydrates: 27g
- Fat: 4g
- Saturated Fat: 2g
- Cholesterol: 10mg
- Sodium: 25mg
- Protein: 1g
See? Nothing too shocking for a truly satisfying piece of candy! Enjoy it responsibly, or, like I usually do, enjoy two pieces and call it dessert!
Share Your Smooth Maple Fudge Creations
Now that you’ve mastered the soft-ball stage and achieved that unbelievably creamy maple fudge, I seriously want to see what you’ve made! Don’t let these beautiful, melt-in-your-mouth squares stay hidden in your kitchen!
If you tried the maple walnut fudge variation, show off those nuts! Did you get that perfect snap when you cut the squares? Leave me a rating and a quick comment below telling me exactly how it went. Seriously, hearing from you about the texture makes my whole day—it confirms that my tips for getting that smooth maple fudge really work for everyone.
Tag me on social media when you share photos of your holiday fudge platters or your cozy evening snacks. I love seeing my recipes out in the world bringing people joy! Getting in touch with me is easy if you have any nagging questions left, or if you just want to share feedback—make sure you hit up the contact page!
PrintClassic Creamy Maple Fudge
Make this smooth, melt-in-your-mouth maple fudge using real maple syrup for a rich, comforting sweet treat perfect for holidays or cozy nights.
- Prep Time: 15 min
- Cook Time: 15 min
- Total Time: 4 hours 30 min
- Yield: About 64 small pieces 1x
- Category: Dessert
- Method: Stovetop Cooking
- Cuisine: American
- Diet: Vegetarian
Ingredients
- 2 cups granulated sugar
- 1 cup whole milk
- 1 cup pure maple syrup
- 1 tablespoon unsalted butter
- 1 teaspoon vanilla extract
- 1/4 teaspoon salt
- 1 cup chopped walnuts (optional)
Instructions
- Line an 8×8 inch baking pan with parchment paper, leaving an overhang for easy removal. Lightly grease the paper.
- Combine the sugar, milk, and pure maple syrup in a heavy-bottomed saucepan.
- Heat the mixture over medium heat, stirring constantly until the sugar dissolves.
- Attach a candy thermometer to the side of the pan, avoiding the bottom.
- Stop stirring and bring the mixture to a rolling boil. Cook until the temperature reaches 234 degrees Fahrenheit (Soft-ball stage). This may take 10 to 15 minutes.
- Remove the pan from the heat immediately. Stir in the butter, vanilla extract, and salt until the butter melts completely.
- If using, stir in the chopped walnuts now.
- Let the mixture cool undisturbed until it reaches 110 degrees Fahrenheit (about 120 degrees Fahrenheit if you added nuts). Do not rush this cooling process.
- Once cooled, beat the mixture vigorously with a wooden spoon or an electric mixer on medium speed. Continue beating until the fudge loses its glossy shine and becomes thick and creamy, resembling peanut butter. This usually takes 5 to 10 minutes.
- Quickly spread the thickened fudge evenly into the prepared pan.
- Let the fudge set completely at room temperature for at least 4 hours, or chill briefly to speed up setting.
- Once firm, lift the fudge out using the parchment overhang and cut it into 1-inch squares. Store in an airtight container.
Notes
- Use only pure maple syrup for the best flavor; avoid pancake syrup.
- For the creamiest texture, do not stir the mixture while it boils to the target temperature.
- If you want Maple Walnut Fudge, add 1 cup of toasted, chopped walnuts during the final beating stage.
- This fudge is excellent for homemade gifts during the holiday season.
Nutrition
- Serving Size: 1 square
- Calories: 145
- Sugar: 25
- Sodium: 25
- Fat: 4
- Saturated Fat: 2
- Unsaturated Fat: 2
- Trans Fat: 0
- Carbohydrates: 27
- Fiber: 0
- Protein: 1
- Cholesterol: 10