

I get it. You want a showstopper. You stare at those gorgeous, deep red layer cakes in bakery windows and think, “There’s no way I have time for that on a Tuesday,” right? Well, let me tell you, that perfection doesn’t have to mean hours of kitchen chaos. My goal here at Cooking by Felix, inspired by my own journey from a hectic marketing career, is to let you take back those moments of joy in the kitchen. We take those grand, classic flavors—the kind that smell like comfort and celebration—and make them genuinely achievable for you, even when life is moving at a mile a minute. That’s exactly what we’ve done with The Best Southern Red Velvet Cake from Scratch. This recipe respects that beautiful, old-school Southern tradition while using clever techniques so you get that signature moistness and fluffy taste without feeling overwhelmed. You can always read more about my philosophy of bringing achievable meals to busy lives on the About Page. Trust me, you can absolutely nail this!
- Why This Southern Red Velvet Cake Recipe Stands Above Others
- Ingredients for Your Red Velvet Cake from Scratch
- Step-by-Step Instructions for the Best Red Velvet Cake
- Tips for a No-Fail Red Velvet Cake Experience
- Ingredient Notes and Substitutions for Red Velvet Cake
- Serving Suggestions for Your Showstopping Dessert
- Storage and Reheating Instructions for Red Velvet Cake
- Frequently Asked Questions About Red Velvet Cake
- Baking Your Next Decadent Cake
Why This Southern Red Velvet Cake Recipe Stands Above Others
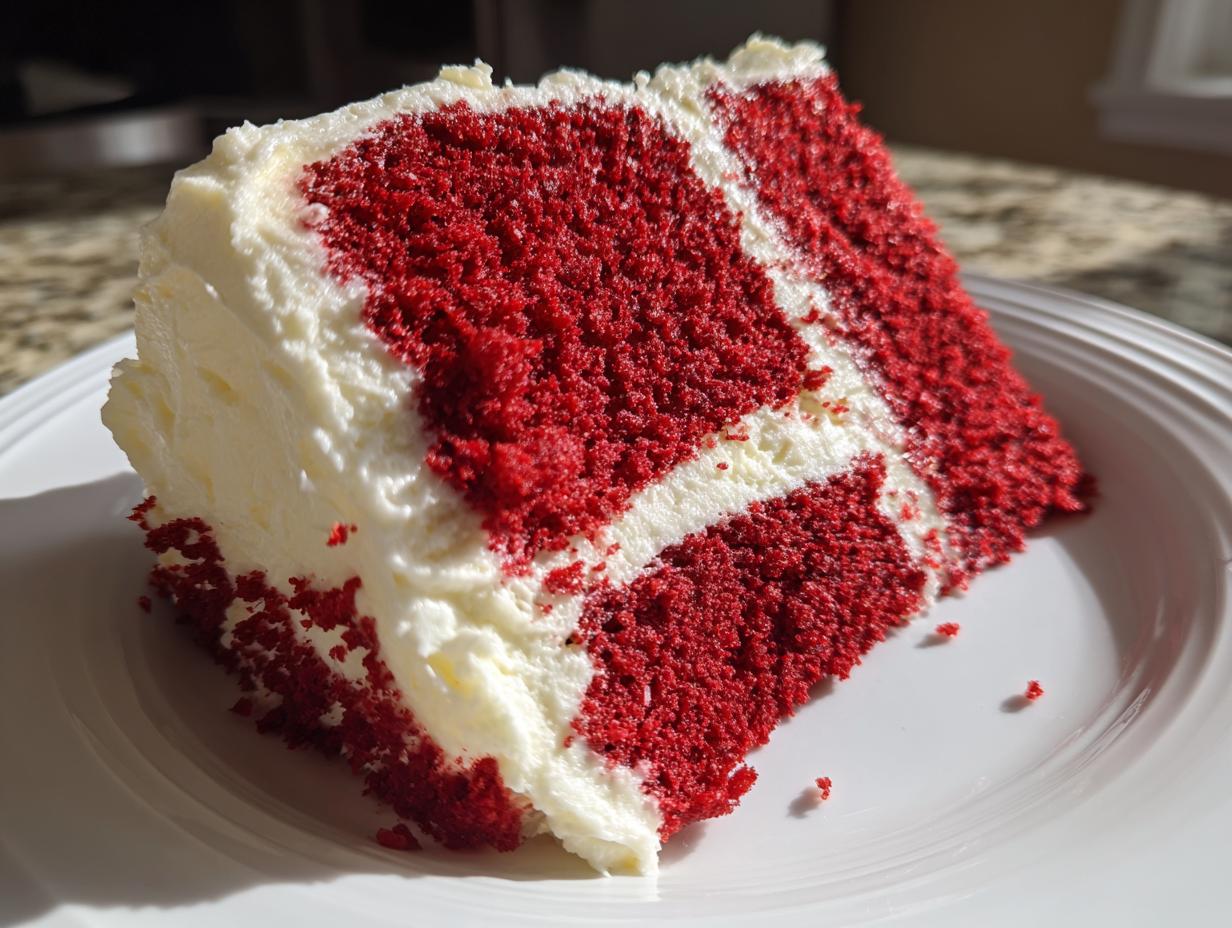
If you’ve ever been burned by a dry, sad excuse for a cake calling itself red velvet, I feel you. Boxed mixes are fast, sure, but they often miss the mark on that truly authentic, subtle cocoa tang and that melt-in-your-mouth texture. What makes this recipe the best red velvet cake is our method. We use both oil and butter, which is a secret to keeping every bite incredibly moist red velvet cake even days later. This isn’t just about color; it’s about creating that truly tender crumb cake that screams Southern comfort. It’s the difference between reading a recipe and truly understanding the technique behind it! If you love this dedication to true Southern baking, you might want to check out how I approach my easy Southern peach cobbler recipe too.
Achieving the Perfect Vibrant Red Cake
Listen, we want that iconic look, but we don’t want it to taste like food dye! Skip the weak liquid coloring. I promise you, investing in a good, high-quality gel coloring makes all the difference. You use far less paste, and the color penetrates the fat beautifully, giving you that vibrant red cake without an artificial aftertaste. About a tablespoon gets you there without fighting the subtle cocoa notes.
Ingredients for Your Red Velvet Cake from Scratch
Okay, gathering your ingredients is the first big step toward success here. You need to remember a couple of things before you start mixing: make sure your eggs and buttermilk are at room temperature—this helps everything blend smooth! Also, for the frosting, always use softened butter and cream cheese, and definitely grab that powdered sugar already sifted; it saves a ton of whisking later. This recipe really shines when the components are ready. If you want more ideas on using that tangy star ingredient, you must look at my buttermilk pie classic old-fashioned southern recipe!
Cake Layer Ingredients
- 1 1/2 cups vegetable oil
- 1 1/2 cups granulated sugar
- 2 large eggs, room temperature
- 1 teaspoon vanilla extract
- 1 tablespoon red food coloring (liquid or gel)
- 1 cup buttermilk, room temperature
- 1 teaspoon white vinegar
- 2 1/2 cups all-purpose flour
- 1 teaspoon baking soda
- 1 teaspoon salt
- 1 tablespoon unsweetened cocoa powder
Classic Cream Cheese Frosting Recipe
- 1 cup cream cheese, softened
- 1/2 cup unsalted butter, softened
- 3 cups powdered sugar, sifted
- 1 teaspoon vanilla extract
Step-by-Step Instructions for the Best Red Velvet Cake
Okay, here is where the magic happens, and I promise it’s not complicated! When you stick to the order and don’t rush the mixing, you get that incredible, moist red velvet cake everyone raves about. Remember, we are aiming for a tender crumb cake, so when we mix the flour in, we go gentle. It’s all about controlling the batter instead of wrestling with it. If you want to see another one of my favorite ways to use that rich cream cheese base, take a peek at my recipe for cream cheese-stuffed French toast!
Preparing the Cake Batter for a Moist Red Velvet Cake
First things first: get that oven going to 350°F (175°C) and prep those 9-inch pans! Now, grab a big bowl. We’re going to whip the oil and sugar until they are happy together. Then, beat in the eggs one by one, followed by your vanilla and that beautiful red coloring until the whole thing looks like bright, creamy velvet. In a separate bowl, quickly mix your buttermilk and vinegar; letting that sit for five minutes helps it do its job reacting to create that signature tang and lightness. Alternate adding the dry ingredients (flour, cocoa, salt) and that slightly soured buttermilk mixture into your wet ingredients. Mix just until it all barely comes together—no long mixing! Finally, take that baking soda, dissolve it really fast in just a tiny bit of water, and swiftly stir that into your batter. That little fizz is your leavening power!
Baking and Cooling the Homemade Layer Cake
Divide that gorgeous batter evenly between your two prepared pans. Pop them into the oven for about 30 to 35 minutes. How do you know when they are done? Stick a wooden pick right in the middle; if it comes out clean, they are ready to go! This is crucial: let those layers cool right in the pans for about 10 minutes. Don’t try to rush them out! If you handle them too soon, they collapse. After that short rest, carefully flip them out onto a wire rack. They have to be completely, totally cool before we even *think* about frosting them. Seriously, don’t even try it when they feel slightly warm—it’s a disaster waiting to happen!
Assembling the Red Velvet Cake with Frosting
While those cakes are cooling down (patience is a virtue in baking!), you can whip up that amazing frosting. Beat your softened cream cheese and butter until they look smooth, like silk. Then, start adding that sifted powdered sugar slowly, a cup at a time, along with the vanilla. Keep beating until it’s light and fluffy—that beautiful texture makes any homemade layer cake look professional. Once those cakes are stone cold, you can stack them up high. Spread a generous layer between the two layers, then cover the top and sides. If you spread frosting on a warm cake, it melts into a sad, sugary puddle, so make sure they are cool!
Tips for a No-Fail Red Velvet Cake Experience
Baking should always feel successful, especially when you’re aiming for something as classic as a red velvet cake. I’ve gathered the key takeaways from my recipe notes to make sure you get that perfect result, every single time. Follow these rules, and you’ll have a no-fail red velvet cake on your hands!
First, that color! If you want that deep, rich look without tasting the dye, you absolutely must use gel coloring—it’s concentrated, so a little goes a long way. I learned this the hard way when I first tried making this for a holiday party; I used liquid dye, and the texture ended up a little thin! Since then, I learned to trust the gel. Also, please, please, please ensure your buttermilk and eggs are at room temperature. It helps the oil emulsify properly. Finally, that quick dissolve of the baking soda in water right before you fold it in? That reaction is what gives you the gentle lift and helps achieve that delicious, airy crumb we are after.
If you are looking for other breads and bakes I’ve made foolproof, check out my guide on making an easy brioche bread recipe!
Ingredient Notes and Substitutions for Red Velvet Cake
I know ingredients can sometimes look intimidating, especially when you’re trying to recreate a specific, classic flavor profile like this. People often ask me about a couple of key items in this red velvet cake recipe. The main ones are the buttermilk and, surprisingly, the cocoa powder! You see, this is not supposed to be a heavy chocolate cake; it’s meant to be a subtle, velvety cocoa cake kissed with vanilla and acid. That’s why we only use a tablespoon of unsweetened cocoa—it’s there for depth, not dominance. This is where my marketing background helps, honestly; I break down the science so you can bake confidently!
Buttermilk Alternatives for a Velvety Cocoa Cake
If you look in your fridge and see milk but not buttermilk, don’t panic and don’t run to the store! We can whip up a quick substitute right here in the kitchen that gives you that necessary acid to react with the baking soda. This reaction is absolutely key to that light, soft texture you want in a true red velvet cake from scratch. For every cup of buttermilk your recipe calls for, just take one cup of regular milk—whole milk works best for richness—and stir in one tablespoon of white vinegar or fresh lemon juice. Let that mixture sit on the counter for about five to ten minutes. You’ll see it curdle slightly and thicken up. That’s your homemade buttermilk, ready to go! It works perfectly every time to give you that signature tang without changing the cake too much.
Speaking of quick fixes that still taste incredible, if you ever need a fast, decadent treat, you have to try my quick, easy 5-minute Oreo fudge recipe. Sometimes you just need something fast and rich!
Serving Suggestions for Your Showstopping Dessert
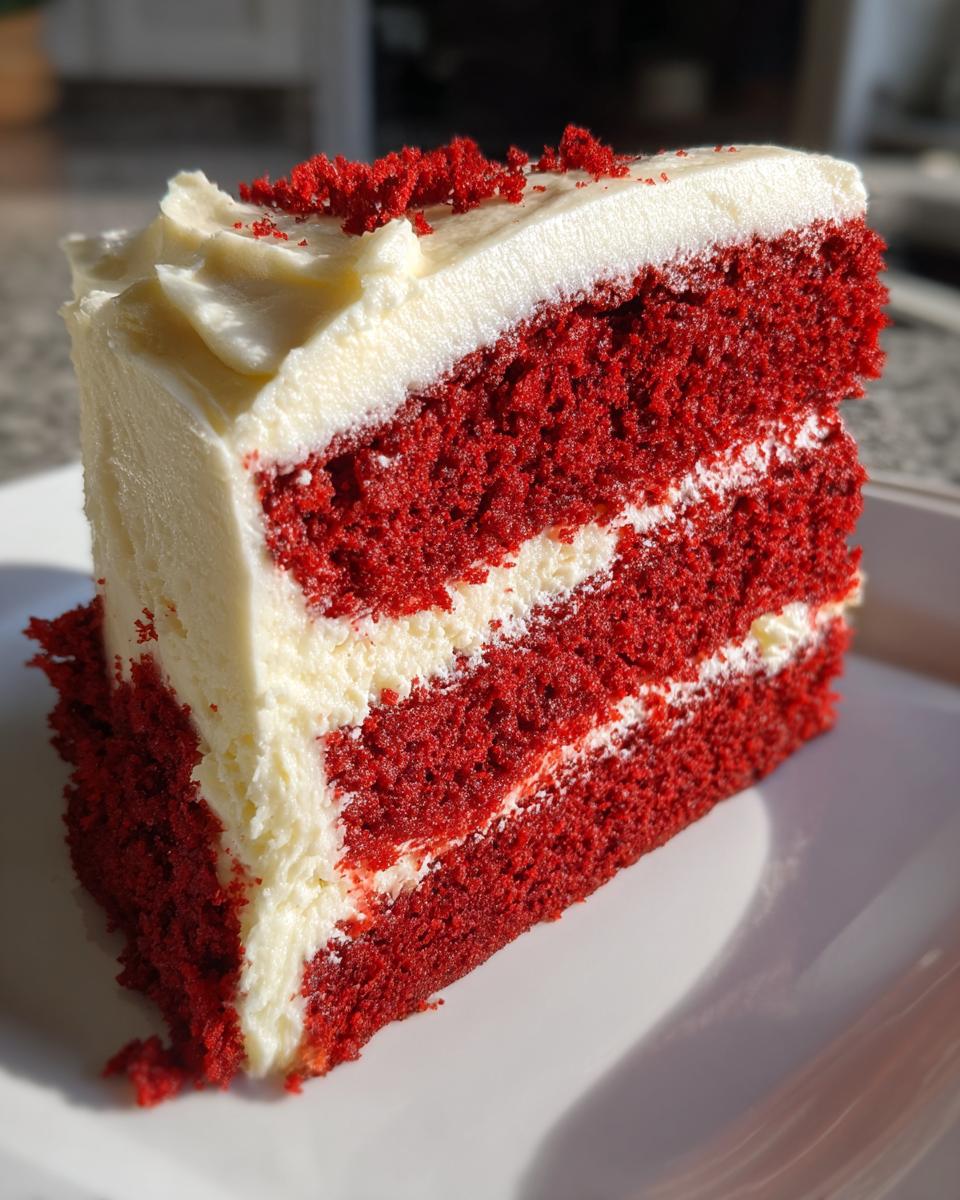
Now that you have this stunning, moist red velvet cake cooling, how should you present this masterpiece? This cake already looks like a million bucks, making it the perfect showstopping dessert for any gathering. It’s truly wonderful simply served as is—the creamy frosting speaks for itself!

For a classic holiday dessert vibe, or maybe for a big birthday celebration, a little crunch goes a long way. I often top the final layer with some crunchy toasted pecans, which you can find my recipe for over here on my candied pecans recipe page. The earthy nut pairs beautifully with that slight cocoa flavor. Honestly, though, it’s just as perfect alongside a strong cup of coffee on a quiet afternoon. Enjoy every single bite!
Storage and Reheating Instructions for Red Velvet Cake
You’ve made the best red velvet cake, and now you have leftovers—or maybe you’re smart and want to bake this ahead of time! Because this gorgeous cake is covered in that luscious, homemade cream cheese frosting, we have to treat it a little differently than a standard butter cake. That frosting is dairy-based, so refrigeration is mandatory to keep everything safe and tasting fresh.
Once your masterpiece is completely assembled, cover it loosely with plastic wrap or place it under a proper cake dome. You can keep this cake wonderfully fresh in the refrigerator for about three to four days. I know, it’s tempting to inhale it all on day one, but trust me, it holds up beautifully! If you have any tips for leftovers, I’d love to see them in the comments, maybe even how you handle my brown butter chocolate chip cookies when they get stuck in the bottom of the jar!
Now, here’s the most important part about leftovers: never serve a slice straight from the fridge! When it’s cold, that cake layer gets a bit firm, and the frosting feels stiff. It loses that beautiful, melt-in-your-mouth texture we worked so hard to achieve. Before you plan to serve any slice, pull the cake (or the plated slice if you’ve already cut it) out onto the counter about an hour before serving. Letting it come up to room temperature allows the oils, butter, and cream cheese to soften just right. You’ll instantly notice that velvety texture return. That little bit of patience guarantees you enjoy that second slice just as much as the first!
Frequently Asked Questions About Red Velvet Cake
I know when you’re trying a new recipe, especially a classic, you end up with a few lingering questions. It’s smart to ask! I’ve pulled together the things folks ask me most often about making sure this cake turns out perfect, aiming to give you confidence whether you’re aiming for an easy red velvet cake or trying to replicate that perfect slice from a high-end shop. If you love this cake, you might also want to try my red velvet cheesecake easy from scratch recipe too!
Is this truly a Southern red velvet cake recipe?
You bet it is! The key to true Southern red velvet isn’t just the color; it’s the chemical reaction! Traditional Southern style relies on using buttermilk and white vinegar reacting with the baking soda, and only a small touch of cocoa powder for that signature hint of flavor. That reaction gives us the tenderness and the subtle tang that distinguishes it from just being a fancy chocolate cake with red dye.
Can I make this red velvet cake recipe without buttermilk?
Yes, you absolutely can, and I walked through exactly how to do it up above! But for a quick answer: if you don’t have buttermilk, just grab your regular milk, stir in a tablespoon of white vinegar or lemon juice, and let it sit for about ten minutes until it looks a little curdled. That simple homemade version works just as well to give you that necessary acidity for the best texture.
How do I get bakery style cake layers?
Ah, the quest for bakery style cake perfection! This comes down to two things: preparation and patience. Make sure you grease and flour your pans really well—or use cake goop, which I mentioned earlier! Then, when you pour the batter in, try your best to get it perfectly even between the pans. Most importantly, do not open that oven door to peek until that 30-minute mark is almost up. Every time you look, you drop the temperature, and that can cause your cake to fall right in the middle, ruining that lovely flat top we want for stacking!
Baking Your Next Decadent Cake
We did it! You shouldn’t just scroll past this moment—you really nailed a showstopper. I hope seeing how achievable this classic is makes you excited to dive into more baking projects. If you share a photo of your glorious, vibrant layers, please tag me! I absolutely love seeing your results in the comments below. Rating the recipe helps other busy folks decide to try making this decadent cake, and that means the world to me. If you’re ready for another easy, amazing bake, check out my collection of simple delicious desserts!
PrintThe Best Southern Red Velvet Cake from Scratch

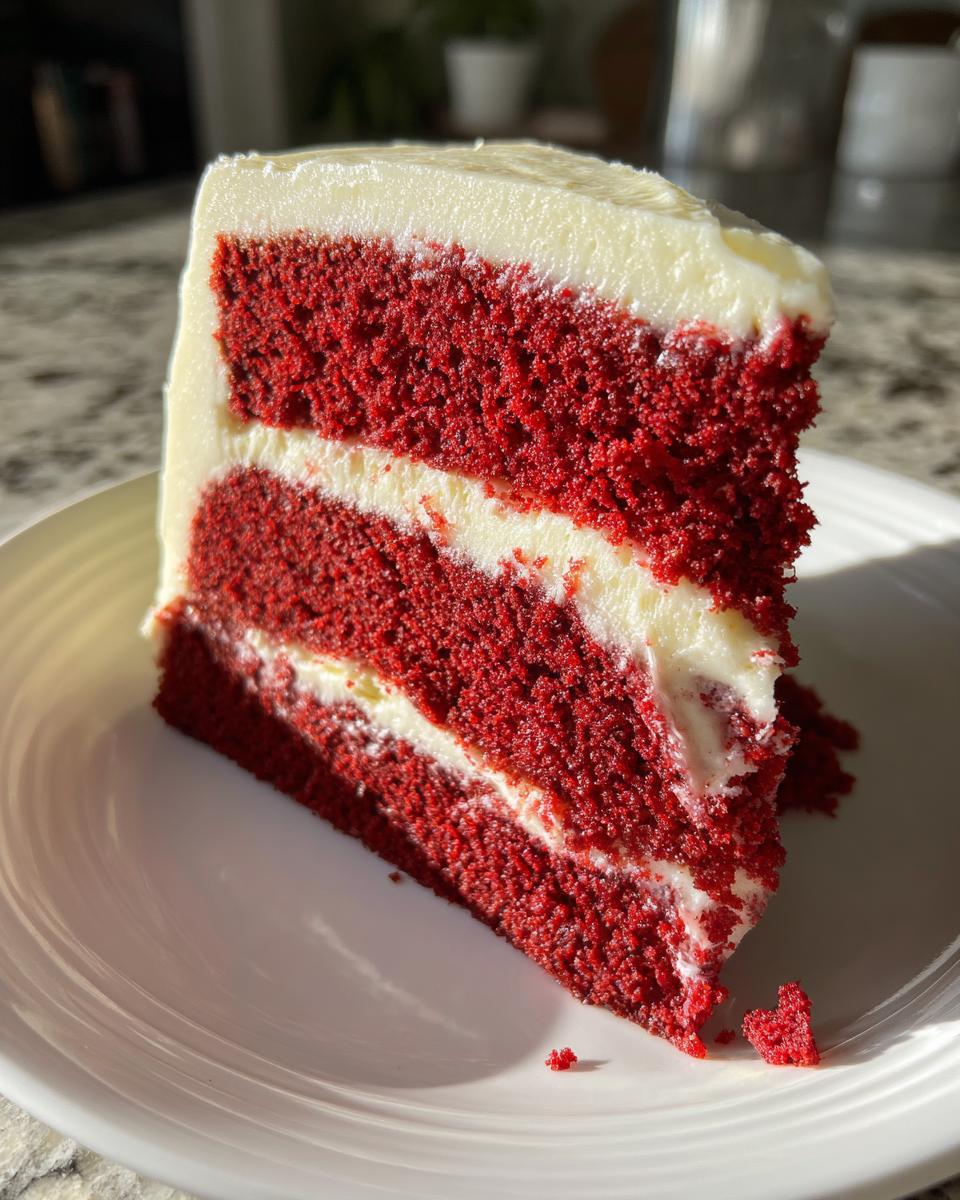
Make a perfectly moist and soft Southern Red Velvet Cake from scratch. This recipe delivers a tender crumb and a vibrant red color, topped with classic cream cheese frosting for a showstopping dessert.
- Prep Time: 25 min
- Cook Time: 35 min
- Total Time: 60 min
- Yield: 12 servings 1x
- Category: Dessert
- Method: Baking
- Cuisine: American
- Diet: Vegetarian
Ingredients
- 1 1/2 cups vegetable oil
- 1 1/2 cups granulated sugar
- 2 large eggs
- 1 teaspoon vanilla extract
- 1 tablespoon red food coloring (liquid or gel)
- 1 cup buttermilk, room temperature
- 1 teaspoon white vinegar
- 2 1/2 cups all-purpose flour
- 1 teaspoon baking soda
- 1 teaspoon salt
- 1 tablespoon unsweetened cocoa powder
- 1 cup cream cheese, softened
- 1/2 cup unsalted butter, softened
- 3 cups powdered sugar, sifted
- 1 teaspoon vanilla extract
Instructions
- Preheat your oven to 350°F (175°C). Grease and flour two 9-inch round cake pans.
- In a large bowl, whisk together the vegetable oil and granulated sugar until combined.
- Beat in the eggs one at a time, then stir in the vanilla extract and red food coloring until the mixture is uniformly red.
- In a separate bowl, whisk together the flour, cocoa powder, and salt.
- In a small bowl, mix the buttermilk and white vinegar together; let it sit for 5 minutes to curdle slightly.
- Alternate adding the dry ingredients and the buttermilk mixture to the wet ingredients, beginning and ending with the dry ingredients. Mix until just combined. Do not overmix.
- In a small cup, dissolve the baking soda in 1 teaspoon of water, then quickly stir this into the batter.
- Divide the batter evenly between the prepared cake pans.
- Bake for 30 to 35 minutes, or until a wooden pick inserted into the center comes out clean.
- Let the cakes cool in the pans for 10 minutes before inverting them onto a wire rack to cool completely.
- To make the cream cheese frosting, beat the softened cream cheese and butter together until smooth.
- Gradually add the powdered sugar and vanilla extract, beating until the frosting is light and fluffy.
- Once the cakes are completely cool, frost and stack the layers.
Notes
- For the most vibrant red color, use a high-quality gel food coloring instead of liquid coloring.
- Ensure your buttermilk and eggs are at room temperature for better batter emulsification.
- True Southern red velvet cake gets its slight tang from the combination of buttermilk and vinegar reacting with the baking soda.
Nutrition
- Serving Size: 1 slice
- Calories: 450
- Sugar: 55g
- Sodium: 300mg
- Fat: 24g
- Saturated Fat: 10g
- Unsaturated Fat: 14g
- Trans Fat: 0g
- Carbohydrates: 58g
- Fiber: 1g
- Protein: 5g
- Cholesterol: 55mg