

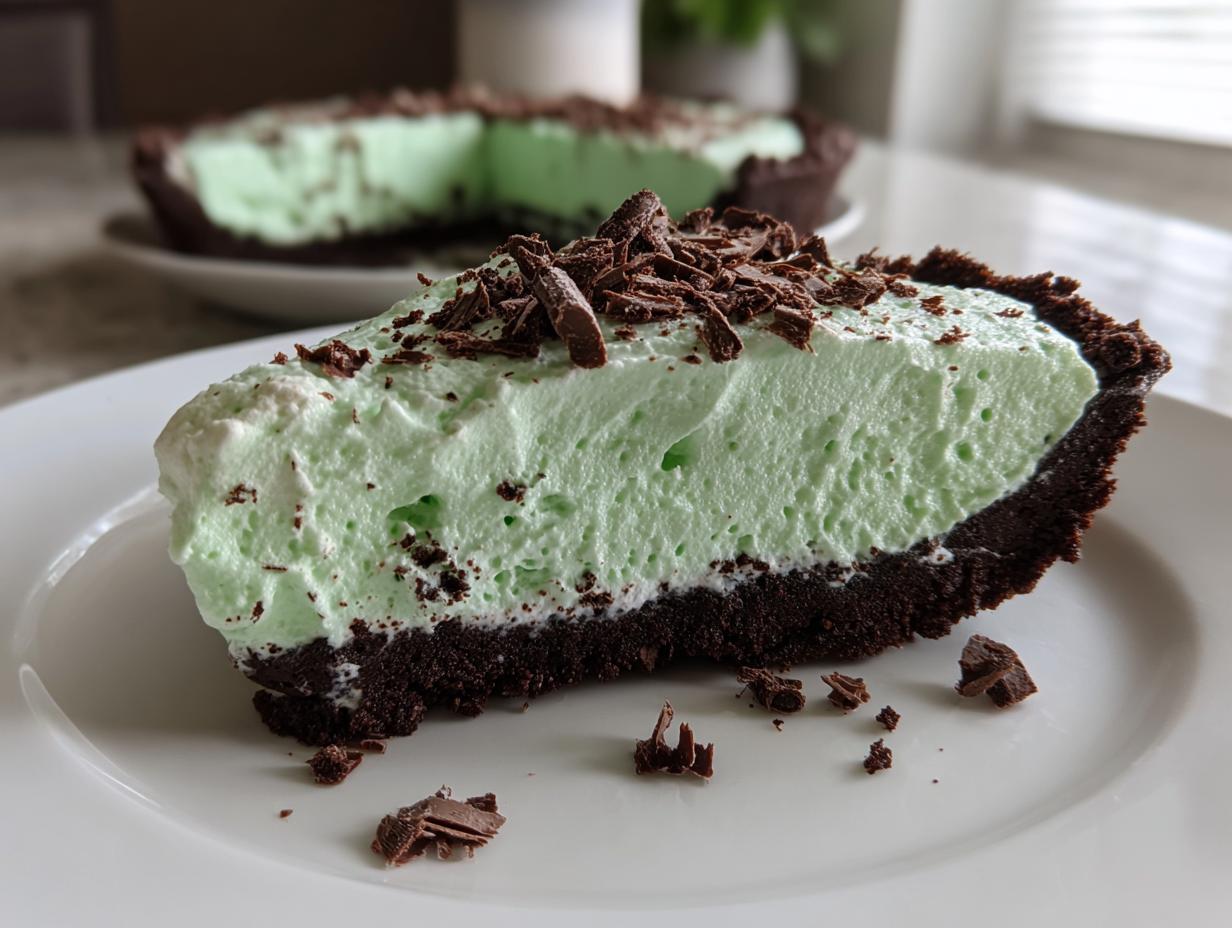
You know those days. The sun is shining, you’ve got company coming over, or maybe you just *deserve* a gorgeous dessert, but the thought of turning on the oven feels like climbing a mountain? I totally get it. That need for something cool, creamy, and incredibly impressive is exactly what pushed me, Felix, away from my old marketing deadlines and straight into the no-fuss kitchen. This is where the **grasshopper pie** steps up and saves the day! It’s got that fantastic, bright minty punch layered over a crunchy chocolate cookie crust. If you love quick, satisfying treats like my easy no-bake peanut butter pie, you’re going to adore this one. Trust me, this no-bake winner sets up beautifully in the fridge and delivers pure satisfaction without the heat.
- Why This No Bake Grasshopper Pie Recipe Works for Busy Cooks
- Gathering Ingredients for Your Creamy Mint Dessert
- Step-by-Step Instructions for No Bake Grasshopper Pie
- Tips for Success with Homemade Mint Pie
- Storage and Reheating Instructions for Leftover Grasshopper Pie
- Variations on the Classic Grasshopper Pie
- Serving Suggestions for This Retro Dessert Recipe
- Frequently Asked Questions About Mint Chocolate Pie
- Nutritional Estimates for One Slice
- Nutritional Estimates for One Slice
Why This No Bake Grasshopper Pie Recipe Works for Busy Cooks
When I was juggling my old job in marketing, finding time to create something that felt special was almost impossible. That’s why I focus, now more than ever, on recipes that deliver huge flavor without demanding hours of active work. This creamy mint dessert is the perfect example of that philosophy shining through. It’s impressive enough for a holiday gathering, but simple enough for a Tuesday night craving. It truly is the ultimate easy 30-minute applesauce recipe equivalent in the dessert world.
Here are the main reasons this is my go-to for quick, satisfying results:
- It’s genuinely no-bake! That means you save the oven for dinner, and the chilling time is mostly hands-off relaxation time for you.
- The filling comes together in about 20 minutes of active work, making it a fantastic quick chill dessert when you need something fast.
- It keeps things simple and inclusive for everyone at the party.
Quick Assembly Time for Your Grasshopper Pie
We’re talking 20 minutes of prep, tops! You crush the cookies, melt the butter, whip the cream, and fold. That’s it. You don’t have to worry about oven temperatures, checking for doneness, or any of the fussy things that happen when you bake. Once that filling is pressed into the chocolate cookie crust, into the fridge it goes to firm up. Honestly, if you can mix ingredients in a bowl, you can nail this Grasshopper Pie. It’s pure magic in minimal time.
Family Friendly Mint Chocolate Pie Flavor
This is a big one for me! A lot of classic recipes rely on those slightly boozy liqueurs like crème de menthe, which is great sometimes, but not always what you want when the kids or older family members are around. So, for this version, we lean heavily on quality mint extract for that vibrant green hue and that cool, refreshing blast of flavor. That way, everyone gets to enjoy this yummy mint chocolate pie. We keep the cream cheese and marshmallow base super light and fluffy so it’s a crowd-pleaser, not a heavy slug of cream.
Gathering Ingredients for Your Creamy Mint Dessert
Okay, the best part about this recipe being an easy no bake dessert is that you probably have half this stuff in your pantry right now! We aren’t looking for anything exotic here. We want simple, accessible ingredients that we can treat with a little bit of care to make them sing. Remember, even with minimal effort, the quality of your basics really shows through in a no-bake situation.
Make sure your labels are right! Precision matters when you aren’t relying on the oven to adjust things for you. You absolutely must let your cream cheese sit out until it’s perfectly room temperature—softened enough that your finger leaves an easy dent, but definitely not melty. And for the whipped cream component? It needs to be bone-cold heavy whipping cream straight from the fridge. That temperature difference is key to getting those stiff, glorious peaks that hold the whole filling up.
Notes on the Chocolate Cookie Crust Dessert Base
Let’s talk crust. This needs to be crunchy, dark, and chocolatey. I always grab chocolate sandwich cookies—you know the ones. My little secret, and feel free to run with this, is that I don’t even bother scraping out the white filling! That little bit of sugary cream solidifies during the chilling process and actually helps bind the crumbs together better. Just toss the whole cookie into the food processor until you have fine crumbs, mix in that melted butter (six tablespoons is the magic number for stability!), and press it firmly into the plate.
Pressing is important! Use the bottom of a flat glass or a measuring cup to really compact those crumbs into the bottom and up the sides of the 9-inch plate. Once that’s done, that crust goes straight into the freezer while we tackle the minty magic.
Achieving the Perfect Mint Flavor in Your Grasshopper Pie Filling
This is where we choose our path! For my family-friendly, kid-approved **Grasshopper Pie**, we rely totally on mint extract. You only need about a half teaspoon, but quality matters here, so grab the good stuff if you can. If you want that classic, richer, slightly booze-tinged flavor—the one that makes this a truly traditional retro dessert recipe—you can swap some of that extract for 1/2 cup of crème de menthe later on. You might even add a splash of crème de cacao if you’re going full adult mode!
Here’s my taste-test tip before you commit the filling to the crust: After you mix the cream cheese base, vanilla, and mint together (and color it green if you’re using coloring—just one or two drops!), taste a tiny bit. Does it make your eyes water with coolness? If not, add another tiny drop of extract. You want that flavor to really pop against the sweet cream cheese, because once that whipped cream and those marshmallows go in, the mint flavor will soften a little bit.
Step-by-Step Instructions for No Bake Grasshopper Pie
Alright, now that we’ve got our ingredients prepped and that chocolate cookie crust chilling (it needs at least 15 minutes in the freezer to set up properly!), it’s time for the fun part: making the filling. This whole process moves really fast once you get going, so make sure you have your mixing bowls ready. We are building layers of texture here, which is what makes this Homemade Mint Pie so much better than just pouring mint pudding into a shell.
Remember when I mentioned making sure your cream cheese is perfectly soft? This step proves why that matters. We are aiming for silkiness, not lumps you have to beat out later. Every step needs to be deliberate, but never rushed. Let’s get this amazing, vibrant **Grasshopper Pie Recipe** assembled!
Preparing and Chilling the Oreo Crust Pie
First things first: grab that chilled crust out of the freezer. It should be rock solid—that’s what we want! If you try to put warm filling into a soft crust, you’ll end up with a melted mess when you try to slice it later. Now we focus on the base of the filling. In your largest bowl, whip that softened cream cheese until it’s beautifully smooth. If you see any lumps, keep going! It needs to have the texture of thick icing.
Next, slowly beat in your powdered sugar until it disappears completely. Then, add your vanilla and that crucial mint extract (and the optional green coloring). I sometimes put in the optional crème de cacao here if I’m making an adult-only version, but for now, whisk it until everything is that gorgeous, pale mint green color.
Creating the Smooth Cream Cheese Base
This is the flavor center, so make it count! Once the cream cheese mixture is smooth and fragrant, turn your attention to your *other* bowl—the one holding your piping-cold heavy whipping cream. You need to whip that heavy cream until you reach stiff peaks. If you’ve never done this before, you’ll see the cream go from liquid to soft mounds, then suddenly it stiffens up like mountain peaks when you lift the beaters. Don’t go past stiff, though, or it’ll break when we fold it in!
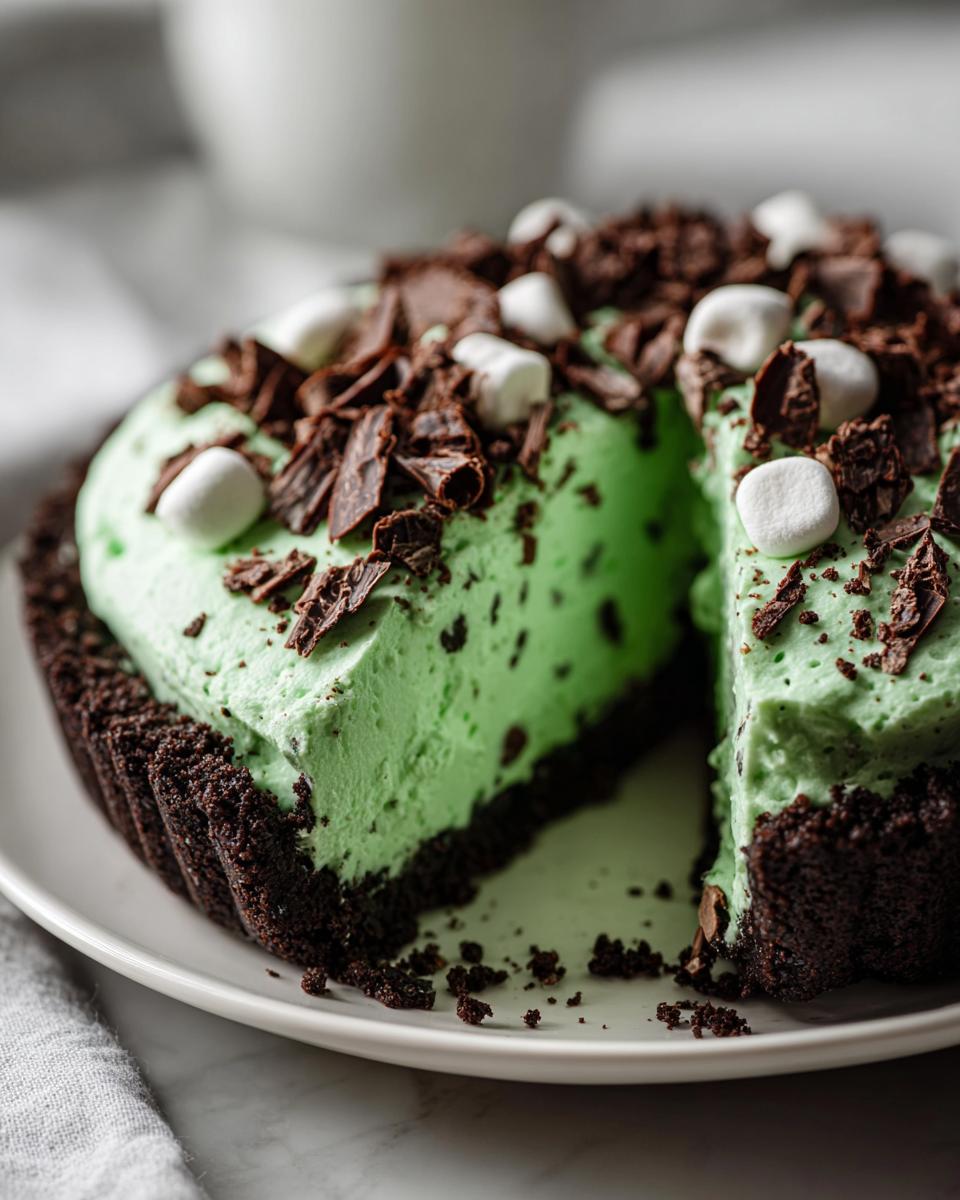
Once you have those perfect peaks, gently fold about a third of the whipped cream into the cream cheese base. Don’t use the electric mixer for this—use a spatula! This first addition helps lighten up the dense cream cheese mixture. Once that first bit is mostly incorporated, add the remaining whipped cream and those adorable miniature marshmallows that give the final texture a little something extra. This is where we create that airy, moussey texture in our **No Bake Grasshopper Pie**.
Folding the Filling for Lightness
I can’t stress this enough: be gentle when you fold! Folding is not mixing. You want to cut down the middle of the bowl with your spatula, sweep along the bottom, and bring the mixture up and over the top, rotating the bowl as you go. Stop folding the second you see only a few white streaks of cream left—seriously, stop! Over-mixing whipped cream into anything else deflates all the wonderful air we just spent time whipping into it. If you overmix, you’ll end up with a dense, heavy **grasshopper pie** instead of the cool, fluffy treat we’re aiming for. Once it’s just combined, pour that beautiful green filling immediately into your prepared crust and smooth the top with your spatula. Into the fridge it goes for at least six hours. Honestly, I always make mine the day before!
Tips for Success with Homemade Mint Pie
Look, even though this is a classic no bake dessert, that doesn’t mean it’s immune to little hiccups! I’ve learned a few tricks over the years—from that time I accidentally made a soupy mess to the time I overbeat the cream until it looked like cottage cheese. These pointers saved me, and they’ll definitely save you when making your perfect **Grasshopper Pie**.
The major enemy of any whipped cream dessert is moisture separation, or weeping. This happens when the fats in the cream separate from the liquid, often because the heavy cream wasn’t cold enough or the filling wasn’t structured enough to hold it all in suspension. My number one rule is this: Chill everything that needs to be cold, and blend everything that needs to be stable!
Here’s how we guarantee flawless results every single time:
- Really Cold Bowls for Whipping: When you whip that heavy cream, use a metal bowl and make sure the beaters (or whisk attachments) are also cold. If you have five minutes, pop the bowl and beaters in the freezer before you start. Cold surfaces help the cream whip up faster and achieve those stiff peaks that won’t collapse later.
- Stiff Peaks are Non-Negotiable: When whipping the cream, you must hit stiff peaks. Medium peaks will slump when you fold them into the cream cheese base, and that’s when your pie gets flat. Stiff peaks mean there’s enough structure to hold the weight of the marshmallows and the cream cheese mixture. The peaks should stand straight up when you lift the beaters out—don’t be shy!
- Stabilize with a Little Helper: If you live somewhere really humid, or if you know this pie needs to sit out for an hour before slicing (like at a party), you might want a stabilizer. You can add a half teaspoon of unflavored gelatin right into the cream cheese base after you’ve mixed in the liquids, but *before* you fold in the whipped cream. Just bloom the gelatin in a tablespoon of hot water first, let it cool slightly, and whisk it into the minty cream cheese mixture. It locks everything in place! You can find tons of tips on how to whip cream perfectly over at Paula’s Kitchen for more ideas on preventing separation, like when she makes her no-bake grasshopper pie.
- The Marshmallow Trick: Make sure those miniature marshmallows are added right at the end of the folding process. They act like little internal supports holding up the airy structure of the filling.
Follow these steps, and you’ll have a clean, perfect slice of **Mint Chocolate Pie** that holds its shape beautifully right up until the very last bite!
Storage and Reheating Instructions for Leftover Grasshopper Pie
This is definitely a dessert meant to be enjoyed chilled or frozen, so you won’t be “reheating” it at all! Since we used no-bake methods, our concerns shift from preventing burning to preventing dry-out or freezer-burn. Whenever I make a big batch of this **Grasshopper Pie**—which is often, because it disappears fast—I always have one of two storage plans ready to go. You want to treat leftovers right so that beautiful minty flavor stays bright and the crust doesn’t get soggy.
If you happen to have any left over from your big spread (which I doubt you will!), here’s how I handle keeping this quick chill dessert perfect for later.
Refrigerating for Short-Term Freshness
For any pie slices you plan to eat within three to four days, covering is key. If you still have the pie in the original dish, cover it tightly with plastic wrap. Make sure the wrap doesn’t actually touch the surface of the filling, especially if you topped it with fresh whipped cream—otherwise, it’ll stick and ruin your pretty garnish! If you’ve already sliced it, transfer those individual pieces into an airtight container. The filling needs that cold to stay firm, so keep it deep in the main body of the fridge, not tucked in the door where temps fluctuate.
The Best Way to Freeze Your Mint Chocolate Pie
If you’re making this pie explicitly for an event next week, or you just want to stock up, freezing is your best friend! Remember how I said this sets up wonderfully when frozen? It gets almost like an ice cream cake. Make sure the pie is fully set in the fridge first (at least 6 hours). Then, use a piece of plastic wrap followed by a layer of aluminum foil to wrap the entire pie dish. This double layer is important to keep any freezer odors out and prevent ice crystals from forming on that beautiful, creamy surface.
When you pull that frozen **Mint Chocolate Pie** out, you have two options. If you want it fully frozen—like a true frozen grasshopper pie—let it sit on the counter for about 10 to 15 minutes before slicing. If you want it softer, more like a frozen mousse, give it an hour. It holds up great in the freezer for up to a month, making it such a handy dessert to have on hand for last-minute needs!
Variations on the Classic Grasshopper Pie
This recipe for **Grasshopper Pie** is fantastic because it’s already so simple and requires zero baking, but sometimes you just want to switch things up a little, right? I love making a batch for a spring holiday and then tweaking it slightly for a summer gathering later on. Think of the base recipe as your best friend—reliable and wonderful—but ready for a little creative dressing up!
You absolutely don’t need to complicate this; the beauty is in its minimalism. But if you followed my advice earlier and used the whole Oreo cookie for that deeply flavored crust, why stop the chocolate goodness there? There are endless ways to personalize this for your family’s taste!
Here are a few of my favorite little twists that keep the effort level low but ramp up the fun factor in this mint chocolate dessert.
Switching Up the Crust Game
While the Oreo crust is the classic, that chocolate cookie flavor is what we’re really after. If you don’t have Oreos on hand, or maybe you just want a slightly different texture, don’t sweat it! You can easily swap out the cookies. I’ve used chocolate graham crackers in a pinch, and those work well too. Another great idea, especially if you or your guests aren’t huge on the intense chocolate flavor, is using plain vanilla wafers. It gives you a lighter crust that lets the bright mint filling truly shine.
If you’re feeling like making something specialized, like my pecan pie cookies, you could crush those up, mix with butter, and create a nutty, textured base! Just remember that the traditional flavor pairing is chocolate, so the Oreos win for authenticity, but feel free to experiment!
Adding Texture to the Filling
We already have those lovely little cushions of marshmallow in the filling, but for an extra layer of yum, you can absolutely fold in extra chocolate elements. I love grabbing a bag of semi-sweet chocolate chips—mini chips work best so they don’t weigh down the light filling too much—and folding those in right before you pour the mixture into your **Oreo Crust Pie**. They provide a wonderful little solid crunch against the creamy mint texture.
If you can find mint chocolate chips, those are a home run! They enhance that cool flavor and give you another pocket of richness. Just be careful not to overmix when you fold them in, or you might start shaving off too much of that gorgeous green color we worked so hard to achieve.
Making It a Frozen Grasshopper Pie
I mentioned earlier that the chilling time is critical for stability, but what if you want a dessert that’s basically ice cream cake you don’t have to churn? Hello, **Frozen Grasshopper Pie**! This is my go-to for the middle of summer when I want something intensely cold and refreshing.
The process is almost identical, but instead of chilling the finished pie for a minimum of six hours, you want to freeze it solid. Four hours in the freezer is usually enough if you’re in a hurry, but for a really firm, sliceable experience, I let it go overnight. When you bring it out to serve, let it sit on the counter for about 15 minutes. That slight softening is key because you want that satisfying crunch from the crust, not a jaw-breaker! It’s an incredibly easy swap that turns this into the ultimate treat.
Serving Suggestions for This Retro Dessert Recipe
It’s a fact: a fantastic dessert deserves the perfect send-off! This **Grasshopper Pie** is definitely a showstopper on its own—that bright green color and snappy chocolate crust just scream celebration. But just like a great outfit needs the right accessories, this creamy treat really sings when paired with the right complementary flavors. Since this is such a fun, vibrant, retro dessert recipe, I like to keep the serving suggestions classic but elevated.
When I bring this out after dinner, I usually go for something warm to contrast that intense chill, or something rich to double down on the chocolate experience. You don’t want to cover up that beautiful mint flavor, though; you just want to introduce it to some good friends!
The Perfect Coffee Companions
Because the filling is so cool and minty, a strong, hot cup of coffee is absolutely heavenly alongside it. The bitterness of the coffee acts as a palate cleanser between bites of the sweet, rich pie. If you’re serving this after a big holiday meal, a small cup of strong black coffee or a simple espresso makes people feel satisfied without feeling overly full.
If you prefer your coffee a little sweeter, skip the flavored creamers. Instead, try stirring in a small spoonful of pure vanilla extract into your brew. It enhances the vanilla undertones we put into the cream cheese base and ties the flavors together beautifully! It’s simple, but it makes a difference.
Doubling Down on Chocolate Goodness
For the true chocolate lovers at the table—and let’s be honest, there are always a few—you need a good sauce. Forget the stuff in the squeeze bottle if you can. A simple, slightly warmed drizzle of rich chocolate sauce is outstanding over a slice of this **Mint Chocolate Pie**. It melts slightly where it hits the cold pie, creating these gorgeous little ribbons of dark and light green on your plate.
If you don’t want to melt down a whole chocolate bar, you can cheat slightly and use my recipe for easy 5-minute chocolate frosting, just thin it out with a tiny splash of milk or cream until it’s easily pourable. It keeps the effort low but the payoff high!
A Touch of Fruit for Contrast
This might sound counterintuitive, but a tiny bit of bright acid cuts through the richness of the cream cheese and the dark chocolate crust perfectly. You don’t want a pile of fruit, just a garnish. Think fresh raspberries or maybe a few sliced strawberries placed artfully on the side of the plate.
The red color looks stunning next to that bright green filling, and that slight tartness wakes up your mouth after the cool sweetness. If you want something even simpler, a quick dusting of unsweetened cocoa powder over a small dollop of whipped cream on top works wonders too! It gives that perfect pop of bitter chocolate right on top.
Frequently Asked Questions About Mint Chocolate Pie
I always get asked the same few things when people first try their hand at making this **Grasshopper Pie**, and that’s totally fair! A no-bake dessert seems simple, but getting that perfect texture and flavor balance takes a little insider knowledge. I’ve gathered the most common questions here to make sure your dessert is a total home run. Seriously, you’ll look like a baking genius!
If you’ve got a specific question about making this chocolate chess pie recipe or something else, don’t hesitate to drop it in the comments!
Can I make this a boozy Grasshopper Pie?
Absolutely, you sure can! While my main recipe focuses on using mint extract to keep it family-friendly—making it a fantastic **Creamy Mint Dessert** for everyone—that is the easiest place to introduce alcohol if you need something just for the adults. If you look back at the ingredients list, you’ll see I included optional measurements for crème de menthe and crème de cacao.
Here’s the simple swap: If you are using mint extract in the primary recipe, you can replace half of that (or more, to taste!) with crème de menthe. If you want that richer, darker chocolate note alongside the mint, go ahead and mix in the crème de cacao as well. Just remember that adding liquid alcohol will slightly thin out the filling, so make sure your whipped cream is extra stiff, and maybe give it that extra hour in the fridge to make sure your **Grasshopper Pie** sets up perfectly solid!
How long does the No Bake Grasshopper Pie need to set?
Patience is the secret ingredient here, even when it’s a no-bake recipe! If you just whip the filling up and immediately try to slice it, it’s going to ooze everywhere. For the best texture—that firm, cool, yet creamy consistency that slices cleanly—you need a minimum of six hours in the refrigerator. I always aim for overnight if I can swing it, because that allows the flavors to really meld together.
If you are in a huge rush and need this for a party tonight, you can absolutely turn this into a **Frozen Grasshopper Pie**. Pop it in the freezer until it gets rock hard, which takes about four hours depending on your freezer’s temperature. When you pull it out, let it sit on the counter for about 15 minutes. This helps soften the crust just enough so it doesn’t shatter when you cut it. Works like a charm! For more no-bake setting tips, check out the recipe from The Recipe Mom’s site, as they have great info on setting times for their ultimate no-bake grasshopper pie.
What’s the best way to crush the cookies for the Oreo Crust Pie?
Oh, I’ve got an entire method for this! Forget using a rolling pin and a plastic bag—that never comes out even. The easiest, cleanest—and most fun—way to handle this step is using a food processor. Toss those chocolate sandwich cookies (filling and all!) right into the bowl and pulse until you get fine crumbs. They should look sandy, not like coarse gravel.
If you don’t have a food processor, a heavy-duty blender works too, but watch it closely so you don’t end up with pulverized sugar instead of crumbs! If you’re doing this by hand, put the cookies in a sturdy zip-top bag, seal it, and then use a meat mallet or the flat bottom of a sturdy saucepan to smash them evenly. You want that base packed tight and uniform so that when you pour in the filling, you don’t get thin spots that crack when you serve it.
Can I add more “green” color to my pie?
You totally can adjust the color! I generally start with just one or two drops of standard neon-green food coloring in the cream cheese mixture because I like that vibrant, almost cartoonishly colored look that really screams “retro dessert recipe!” Some people prefer a much more muted, natural green. If you want less artificial color, you can try using a small amount of natural spinach powder, though honestly, for this specific kind of novelty dessert, a drop or two of high-quality gel coloring gives you the brightest, prettiest result against that chocolate cookie crust dessert base.
Nutritional Estimates for One Slice
When we talk about rich, creamy desserts like this **Mint Chocolate Pie**, we know we are indulging, and that’s okay! Sometimes you just need that decadent treat. I always want to be upfront with you all about what’s in the food we make. Below are the estimated nutritional figures per slice—remember, these are just estimates based on standard ingredients, not laboratory testing! Treat these numbers as a guide for a single serving of this wonderfully fudgy date brownie alternative.
Please note that these figures assume you are making the non-alcoholic version with mint extract and using the full recipe yield of 8 slices.
- Serving Size: 1 slice
- Calories: 350
- Sugar: 30g
- Sodium: 250mg
- Fat: 22g
- Saturated Fat: 13g
- Carbohydrates: 35g
- Protein: 4g
Nutritional Estimates for One Slice
When we talk about rich, creamy desserts like this Mint Chocolate Pie, we know we are indulging, and that’s okay! Sometimes you just need that decadent treat. I always want to be upfront with you all about what’s in the food we make. Below are the estimated nutritional figures per slice—remember, these are just estimates based on standard ingredients, not laboratory testing! Treat these numbers as a guide for a single serving of this wonderfully fudgy date brownie alternative.
Please note that these figures assume you are making the non-alcoholic version with mint extract and using the full recipe yield of 8 slices.
- Serving Size: 1 slice
- Calories: 350
- Sugar: 30g
- Sodium: 250mg
- Fat: 22g
- Saturated Fat: 13g
- Carbohydrates: 35g
- Protein: 4g
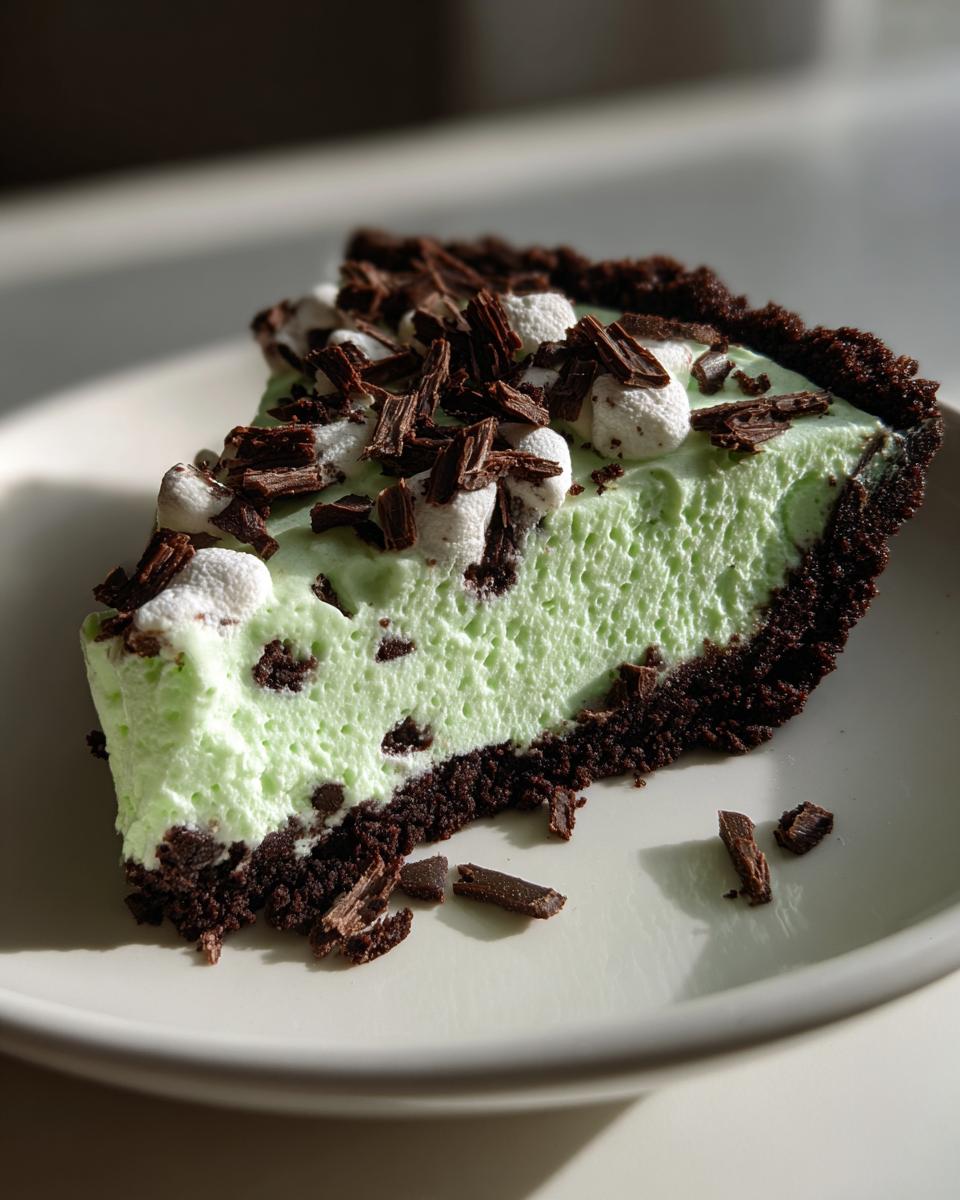
No-Bake Creamy Mint Grasshopper Pie

Make this cool, creamy, and refreshing No-Bake Grasshopper Pie. It features a simple chocolate cookie crust and a bright mint filling, perfect for holidays or any time you need an easy, impressive dessert.
- Prep Time: 20 min
- Cook Time: 0 min
- Total Time: 6 hr 20 min
- Yield: 8 servings 1x
- Category: Dessert
- Method: No-Bake
- Cuisine: American
- Diet: Vegetarian
Ingredients
- 1 1/2 cups chocolate cookie crumbs (about 30 cookies)
- 6 tablespoons unsalted butter, melted
- 1 (8 ounce) package cream cheese, softened
- 1 cup powdered sugar
- 1 teaspoon vanilla extract
- 1/2 teaspoon mint extract (or 1 teaspoon crème de menthe for an alcoholic version)
- 1–2 drops green food coloring (optional)
- 1 cup heavy whipping cream, cold
- 1/2 cup miniature marshmallows
- 1/4 cup crème de cacao (optional, for alcoholic version)
- Whipped topping or extra whipped cream, for garnish
- Chocolate shavings, for garnish
Instructions
- Prepare the crust: Combine the chocolate cookie crumbs and melted butter in a bowl. Press the mixture firmly into the bottom and up the sides of a 9-inch pie plate. Place the crust in the freezer while you prepare the filling.
- Make the cream cheese base: In a large bowl, beat the softened cream cheese until smooth. Gradually beat in the powdered sugar and vanilla extract until fully combined.
- Add mint flavor: Mix in the mint extract and green food coloring, if using, until the color is uniform. If you are using crème de cacao, mix it in now.
- Whip the cream: In a separate, clean bowl, beat the cold heavy whipping cream until stiff peaks form.
- Combine the filling: Gently fold the whipped cream into the cream cheese mixture until just combined. Fold in the miniature marshmallows. Do not overmix.
- Assemble the pie: Pour the mint filling into the chilled chocolate cookie crust and spread evenly.
- Chill the pie: Cover the pie loosely with plastic wrap and refrigerate for at least 6 hours, or until the filling is firm. For a faster set, you can freeze it for 2-3 hours.
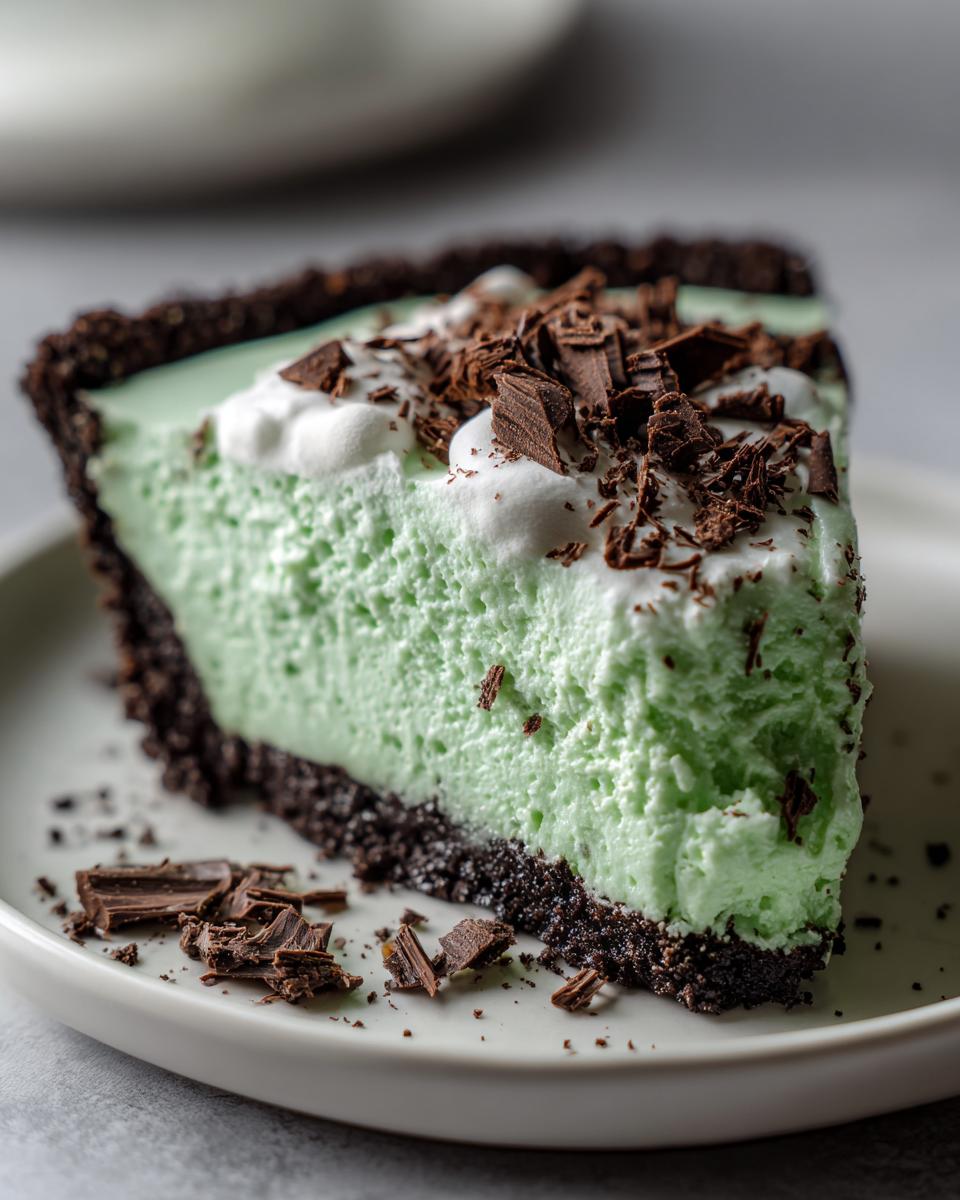
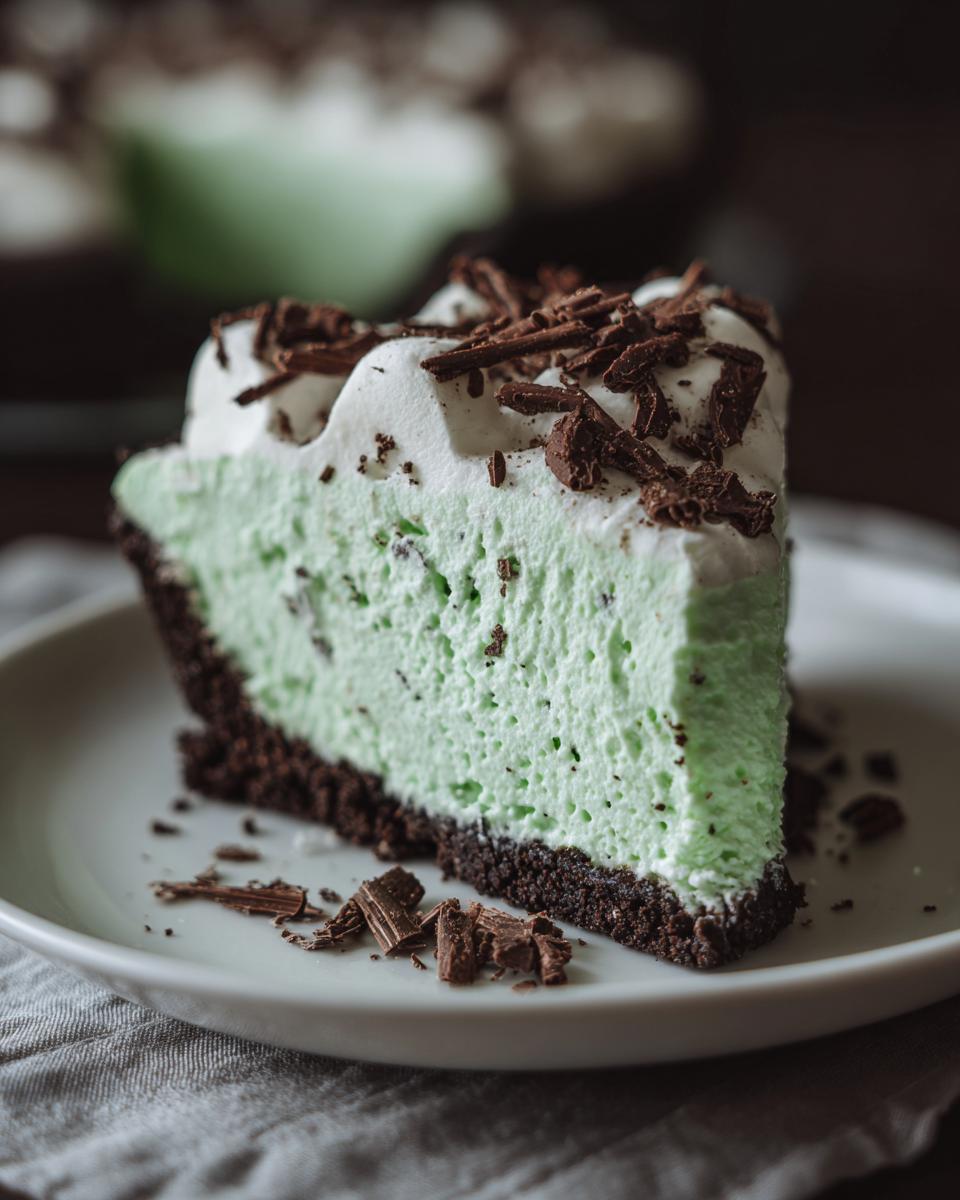
- Serve: Before serving, top the pie with whipped topping or extra whipped cream and garnish with chocolate shavings. Slice and serve cold.
Notes
- For a richer chocolate flavor in the crust, use chocolate sandwich cookies like Oreos and do not scrape out the filling.
- If you prefer a frozen grasshopper pie, freeze the assembled pie for at least 4 hours until solid, then let it sit at room temperature for 10 minutes before slicing.
- Use high-quality mint extract for the best flavor in this easy no bake dessert.
Nutrition
- Serving Size: 1 slice
- Calories: 350
- Sugar: 30
- Sodium: 250
- Fat: 22
- Saturated Fat: 13
- Unsaturated Fat: 9
- Trans Fat: 0
- Carbohydrates: 35
- Fiber: 1
- Protein: 4
- Cholesterol: 55