

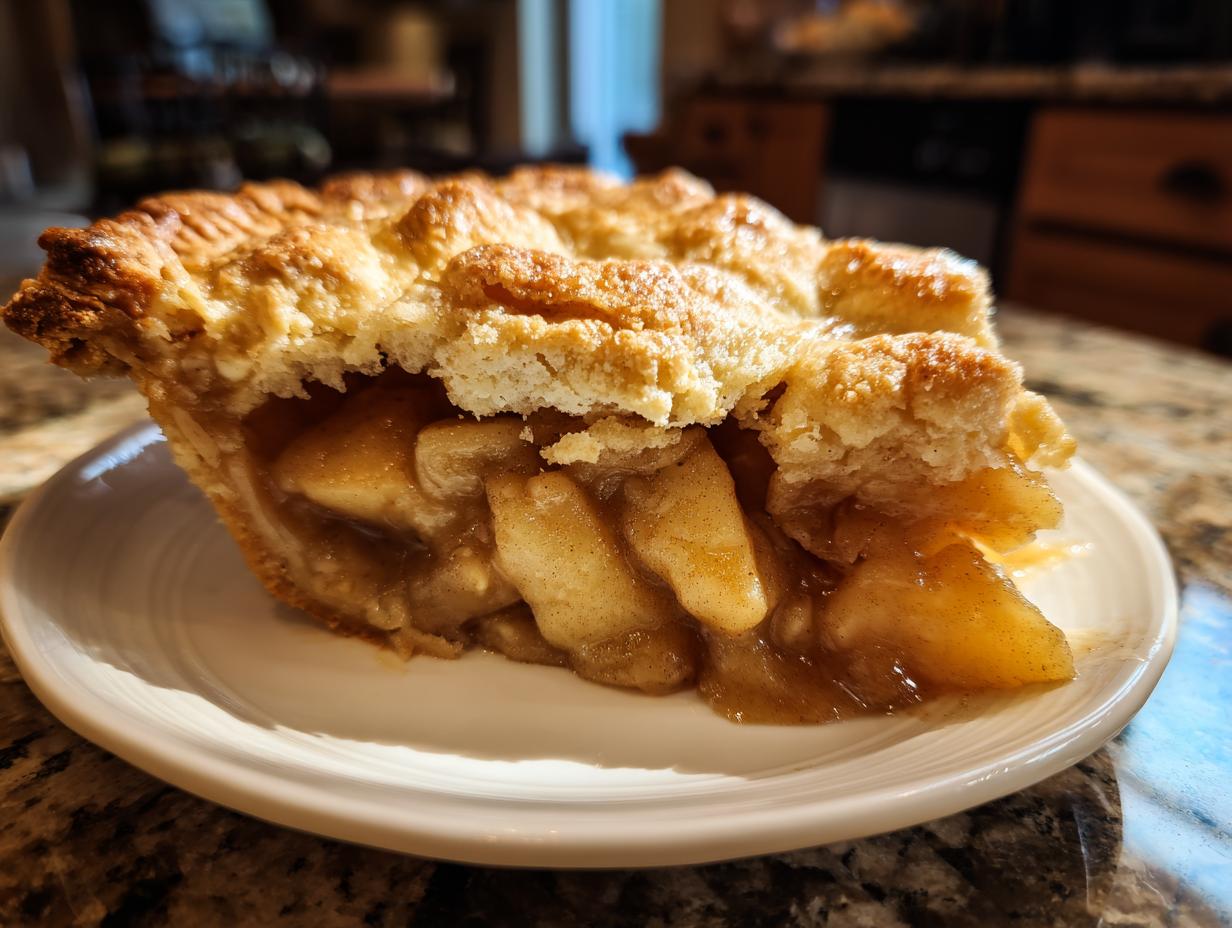
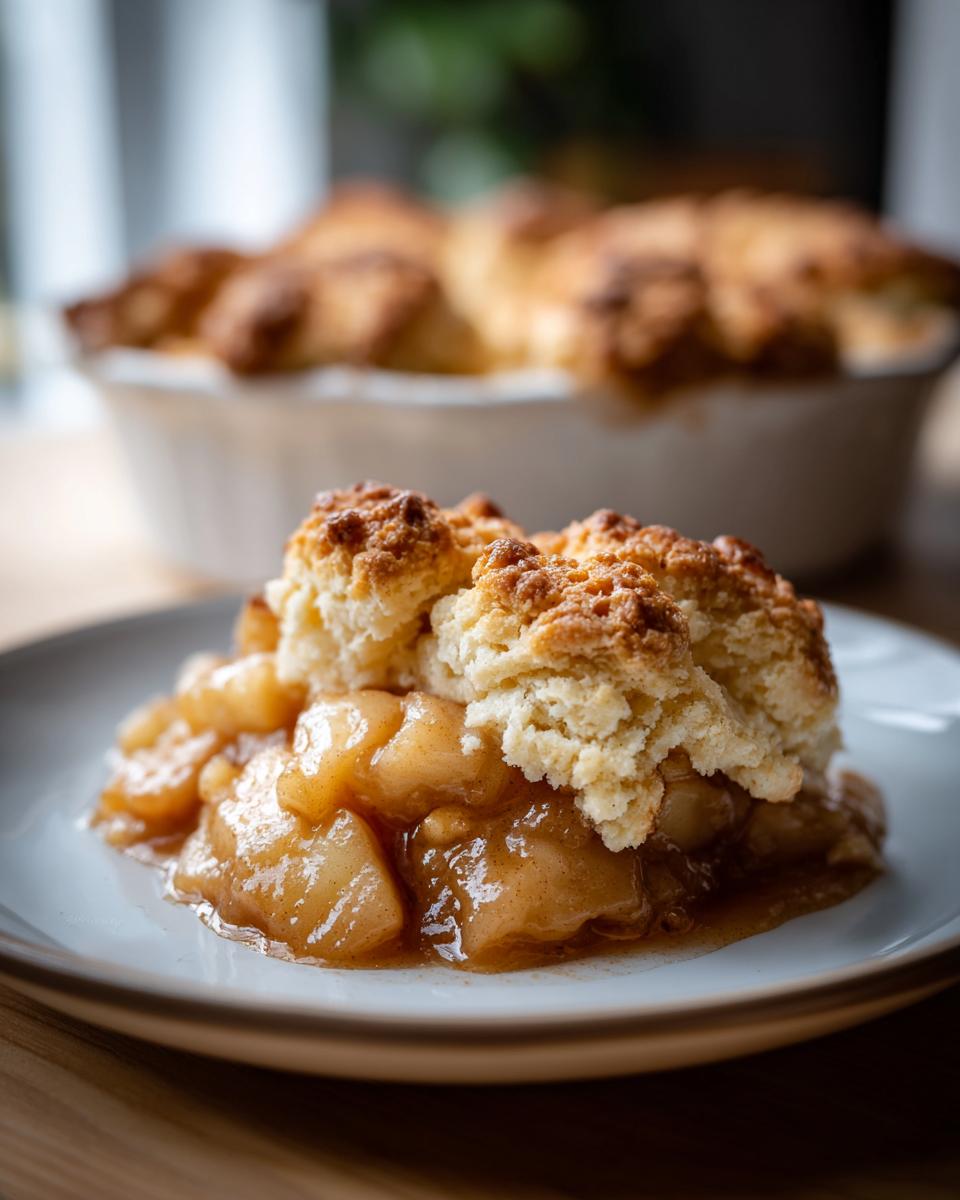
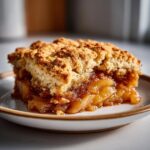
Oh, the sheer bliss of pulling a bubbling, fragrant fruit dessert straight from the oven! There’s nothing quite like that warmth and sweetness to make even the busiest day feel cozy. If you think making an amazing homemade apple cobbler is a weekend-only job, I’m here to change your mind. My mission here at the kitchen counter is to prove that you don’t need hours to achieve peak comfort food perfection. This apple cobbler recipe delivers everything you want—tender, spiced apples underneath a topping that bakes up like a tender, buttery biscuit. It’s exactly what Felix designed this kitchen space for: exceptional food that fits into your real life. It’s so easy, you might even make an easy Southern peach cobbler next week!
- Why This Easy Apple Cobbler Recipe Works for Busy Cooks
- Ingredients for Your Homemade Apple Cobbler
- Step-by-Step Instructions for the Best Apple Cobbler
- Serving Suggestions for Your Warm Dessert Ideas
- Storage and Reheating Instructions for Apple Cobbler Leftovers
- Troubleshooting Common Apple Cobbler Issues
- Frequently Asked Questions About This Apple Cobbler Recipe
- Nutritional Estimates for This Cinnamon Apple Dessert
- Share Your Experience Making This Apple Cobbler
Why This Easy Apple Cobbler Recipe Works for Busy Cooks
Look, I get it. You want that classic, comforting dessert, but you can’t spend four hours wrestling with dough. That’s the beauty of this Easy Apple Cobbler! It’s designed for real life. We keep the hands-on time minimal so you can toss it together quickly and let the oven do the heavy lifting. It truly is a fantastic Quick Apple Dessert when that craving hits.
- Prep time clocks in around 20 minutes—you can get the kids involved with the mixing!
- The topping requires no rolling or cutting complex shapes; it’s just rustic dollops.
- It’s ready in under an hour total, perfect for a weeknight treat or an unexpected dinner guest.
If you need something even faster later on, check out my 5-minute fudge recipe for a different kind of quick fix!
Cobbler vs Crisp: Understanding Your Classic Apple Dessert
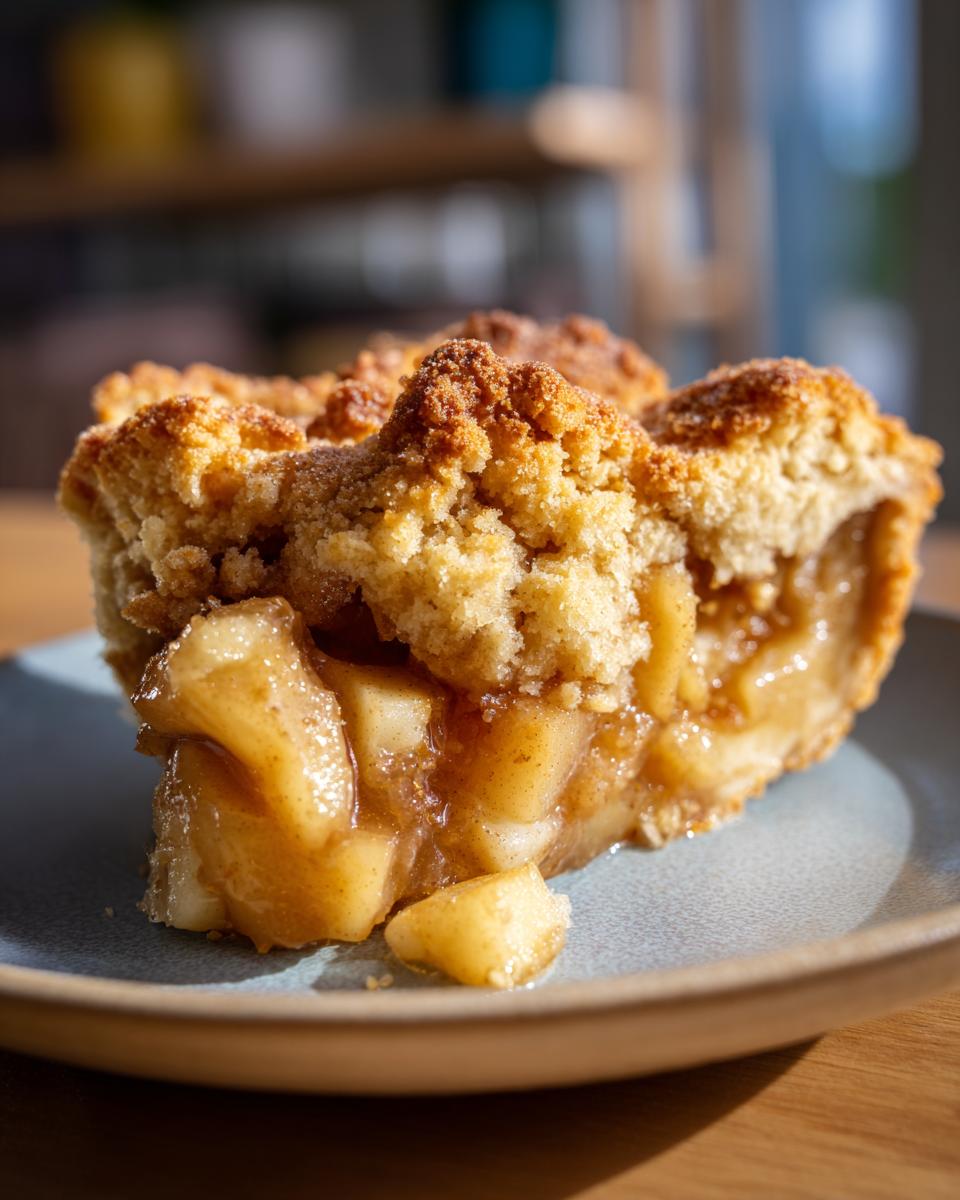
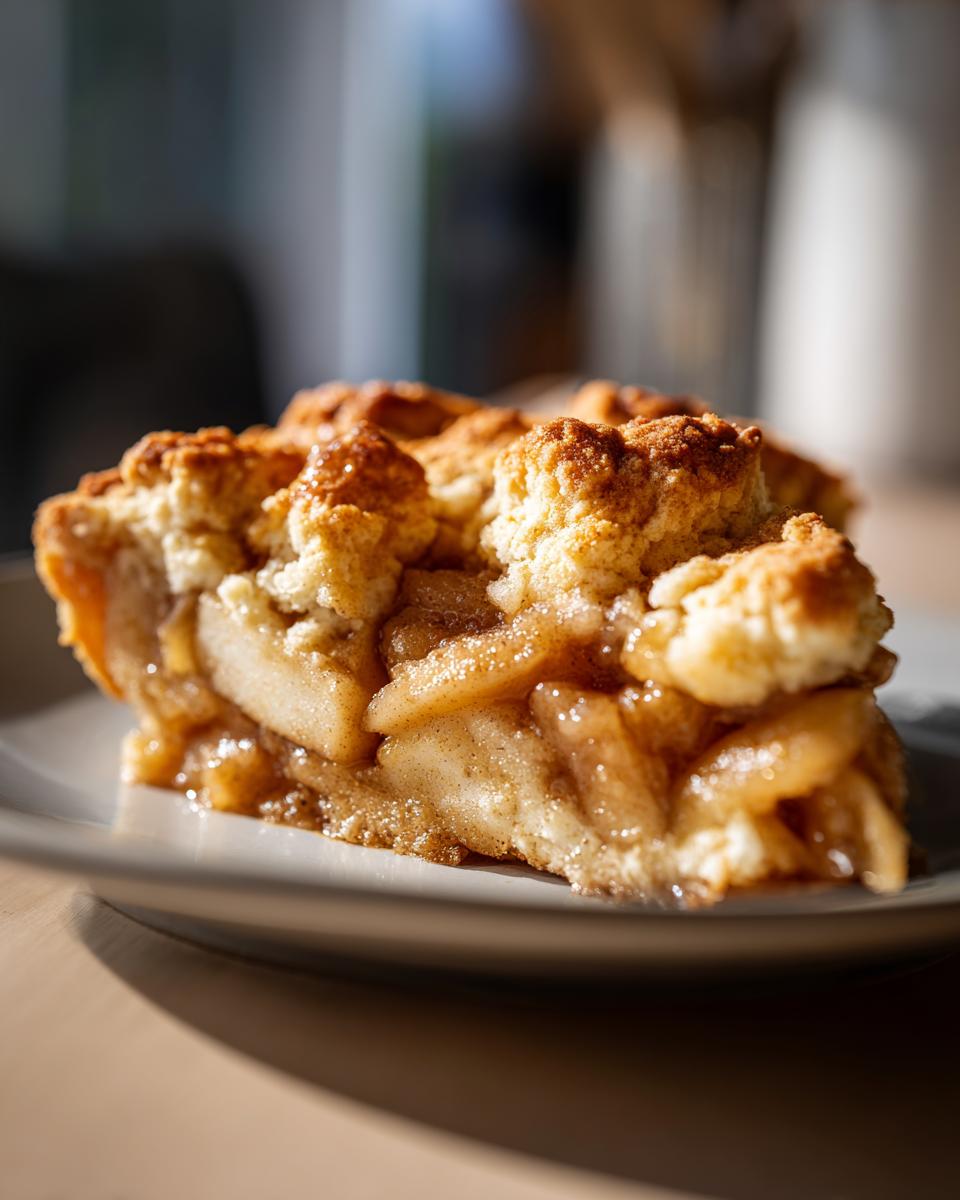
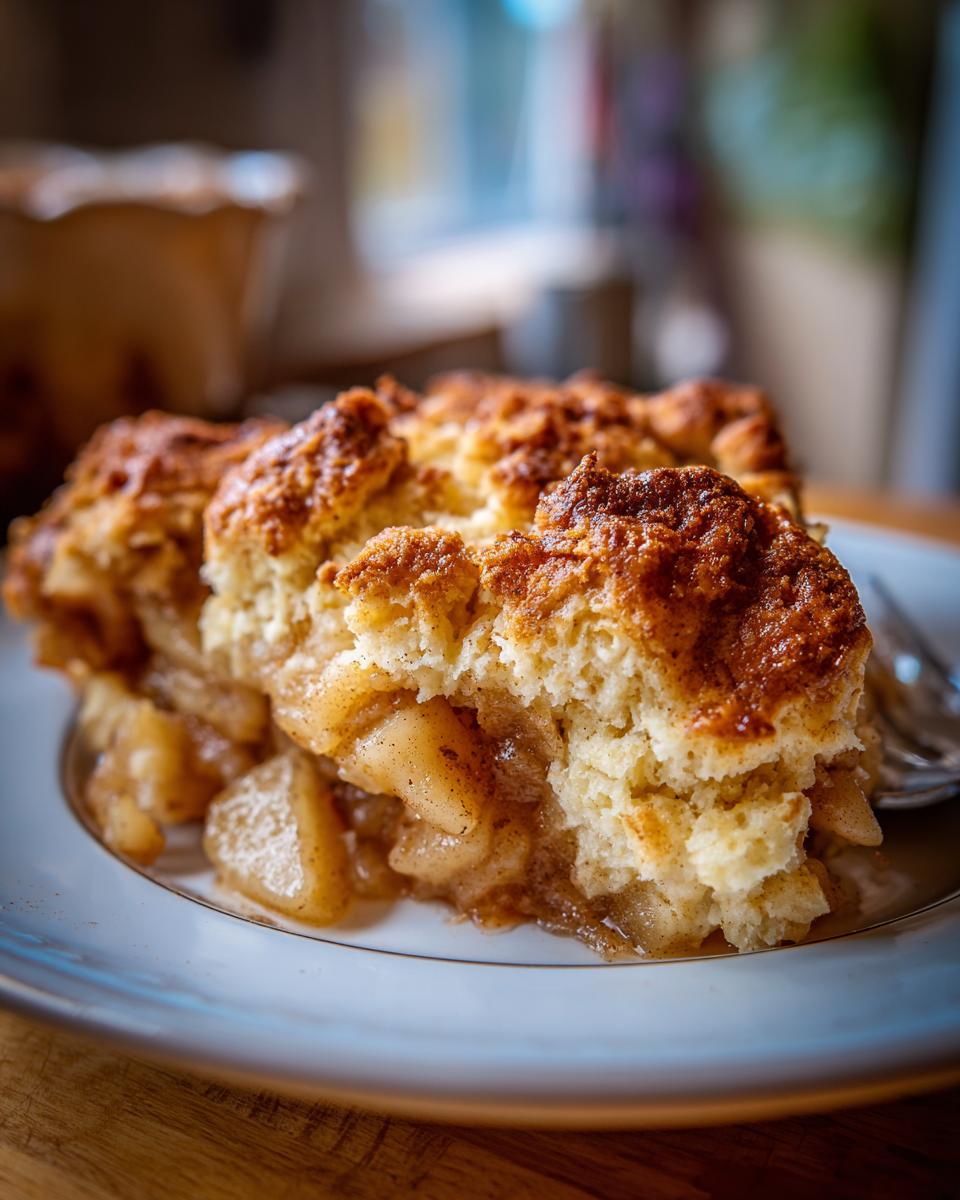
People sometimes confuse a cobbler with a crisp, but they are totally different experiences! A crisp usually involves oats and nuts, giving you that crunchy texture. Our Classic Apple Dessert here is a true apple cobbler because it features a topping that bakes up soft and cake-like, almost like a biscuit dropped right on top of the bubbling apples. That tender, buttery topping is what makes this recipe such a comforting hug in a dish.
Ingredients for Your Homemade Apple Cobbler
Okay, gathering ingredients for a proper homemade apple cobbler shouldn’t feel like a scavenger hunt. I’ve broken this down simply into the juicy stuff underneath and the gorgeous, buttery topping that goes on top. Remember, using quality ingredients—especially cold ones where it counts—is the secret sauce here. If you ever need a good crunchy topping for something else, like my sweet potato bake, I use a similar technique on my pecan topping recipe!
For the Apple Filling:
- 6 large Granny Smith apples, peeled, cored, and sliced
- 1/2 cup granulated sugar
- 1/4 cup packed light brown sugar
- 1 tablespoon all-purpose flour
- 1 teaspoon ground cinnamon
- 1/4 teaspoon ground nutmeg
- 1 tablespoon lemon juice
For the Buttery Topping Recipe:
- 1 1/2 cups all-purpose flour
- 1 tablespoon baking powder
- 1/2 teaspoon salt
- 1/4 cup granulated sugar
- 1/2 cup cold buttermilk
- 1/2 cup (1 stick) cold unsalted butter, cut into small pieces
Ingredient Notes and Buttery Topping Recipe Tips
For the apples, please reach for Granny Smith if you can get them! Their tartness is essential to balance the sweet, warm spices. When we get to the topping ingredients, treat that butter kindly. It must be very cold and cut into small cubes. This is the heart of what makes our Buttery Topping Recipe work—those cold pieces steam in the oven, creating little pockets of tenderness in the biscuit topping.
Also, don’t skimp on the lemon juice for the apples; it brightens everything right up!
Step-by-Step Instructions for the Best Apple Cobbler
Getting this Best Apple Cobbler into the oven is surprisingly straightforward, honestly! We start with getting the oven hot first—preheat that baby to 375 degrees F and grease up your pie dish or 8×8 pan. Don’t wait until the apples are mixed to preheat; timing is key for a good bake! If you’ve struggled with timing savory dishes, I find recipes like my easy butter chicken recipe help build confidence in getting the oven ready quickly.
Next, we focus on the filling. Grab that large bowl and toss your sliced apples with all the sugars, flour, cinnamon, nutmeg, and that little splash of lemon juice until everything looks wonderfully coated. See how beautifully those spices cling to the fruit? Spread that gorgeous mixture evenly in the bottom of your prepared dish.
Now for the topping—this is hands-on but so quick. Whisk the dry topping ingredients (flour, baking powder, salt, sugar) together in a separate bowl. Then, you use your fingers or a pastry blender to cut in the cold butter until it looks like coarse meal. Pour in the cold buttermilk and stop mixing the second it comes together. Seriously, stop! Overmixing makes it tough. For another take on achieving that perfect buttery texture, you should see how I handle butter in my brown butter cookie recipe.
Don’t try to make the topping pretty. Just grab spoonfuls of that shaggy dough and drop them unevenly all over the apples. Think rustic! Bake it for about 40 to 45 minutes. You’ll know it’s done when the filling is aggressively bubbly around the edges and the topping is golden brown.
My very last piece of advice right when it comes out of the oven: step away! You absolutely must let this glorious apple cobbler cool for at least 15 minutes before digging in. Believe me, if you cut into it immediately, the filling will spill everywhere. Patience rewards you with a much better slice.
Expert Tips for Perfect Apple Cobbler Baking
Achieving that perfect texture every single time is all about observation. When you think the Fall Baking Recipe is done, stick a fork right into the fruit between the biscuit dollops. If it slides in easily, those apples are tender—that’s your sign! Also, if you’re doubling this recipe to make a huge batch, use a 9×13 pan, but you might need to add 5 to 10 minutes to the bake time since the overall volume is bigger—this makes it an excellent Dessert for a Crowd.
Remember, your topping shouldn’t look like a uniform sheet cake; it should be chunky and uneven. If you prefer a crisper edge, make sure your baking dish is metal, as glass holds heat differently!
Serving Suggestions for Your Warm Dessert Ideas
This apple cobbler is truly one of my favorite Warm Dessert Ideas because it begs for something cold right on top. Seriously, do not skip this step! Felix tells me that growing up, their rule was always a massive scoop of good vanilla ice cream melting right into the bubbling cinnamon apples. That hot-meets-cold contrast is just heaven, isn’t it?
If ice cream isn’t your thing, a light dollop of homemade whipped cream works beautifully too. I actually have a super easy recipe for three-ingredient banana ‘nice cream’ that pairs fantastically well if you want something slightly different!
Storage and Reheating Instructions for Apple Cobbler Leftovers
Don’t you hate when the best part of dinner is what you have for breakfast the next day? Luckily, this apple cobbler keeps really well! If you have any of this glorious homemade apple cobbler left over, just cover the dish tightly with foil or plastic wrap. If you plan to eat it within a day, leaving it on the counter is usually fine, especially if your kitchen isn’t too warm.
For longer storage—say, up to three days—tuck it into the fridge. Now, for reheating, please, please, please use your oven! Pop a slice onto a baking sheet at about 350 degrees for about 8 minutes. That brings back the slight crispness to the biscuit topping. Microwaving works in a pinch, but honestly, it steams the topping and turns it a little chewy. We want that buttery crunch!
Troubleshooting Common Apple Cobbler Issues
Even the most fabulous apple cobbler can sometimes decide to act stubborn! Don’t panic if things look a little ‘off’ coming out of the oven. Often, it’s just a small temperature or mixing issue. If your topping came out soggy instead of that perfect biscuit texture, nine times out of ten it’s because your butter or buttermilk was slightly too warm, or you stirred the dough longer than the two seconds needed. Stop mixing as soon as it *just* comes together!
On the flip side, if you think the dessert is done but the apples underneath still feel stubbornly hard, that means it needs more time. Don’t be afraid to cover the edges of your dish loosely with foil if the topping is getting too brown, and let it bake another 10 minutes. That extra time ensures the apples are wonderfully tender—which is key for a great comfort food dessert. If you ever need a different kind of savory cobbler fix, you might want to try my chicken cobbler casserole!
Frequently Asked Questions About This Apple Cobbler Recipe
What are the best apples to use for this Classic Apple Dessert?
Oh, this is important! For the absolute best balance of sweet and tart, you really want to stick with Granny Smith apples. They hold their shape perfectly when baked, so you get tender slices instead of mush. If you only have Gala or Honeycrisp on hand, they are fine, but you might want to bump up the brown sugar just a touch to counteract the sweetness. You can see another great perspective on apple choice over at Celebrating Sweets, too!
Can I make the apple mixture ahead of time?
You certainly can make the diced fruit filling ahead of time! Toss the apples with the sugar, spices, and lemon juice, and store it covered in the fridge for up to 24 hours. What you *shouldn’t* do is prepare the topping ahead of time; that biscuit dough needs the butter to be ice cold right before it hits the oven, so mix that topping last minute for the Best Apple Cobbler.
Is this truly a Comfort Food Dessert?
One hundred percent, yes! This apple cobbler is the definition of Comfort Food Dessert. It’s warm, it’s heavy on the fragrant cinnamon, and it tastes exactly like something your favorite relative would serve at Thanksgiving. It’s gooey on the bottom and tenderly biscuit-y on top—pure comfort in every spoonful.
What if I don’t have buttermilk for the topping?
If you’re out of buttermilk, please don’t just use regular milk! You need that acid for the topping to activate the baking powder correctly. The easiest swap is this: take a regular measuring cup, add 1/2 cup of milk (any kind!), and stir in one teaspoon of white vinegar or lemon juice. Let it sit on the counter for five minutes until it looks slightly curdled. That’s your homemade buttermilk for the topping! For more on using buttermilk, check out my buttermilk pie recipe.
Nutritional Estimates for This Cinnamon Apple Dessert
Now, I know we aren’t baking this Cinnamon Apple Dessert for its low-calorie count—it’s pure comfort food! But just so you know what you’re digging into, here are the approximate figures per serving. Please remember these are just estimates!
- Calories: About 380
- Total Fat: 18g
- Carbohydrates: 55g
- Protein: 4g
This is based on 6 servings total. As Felix always says, we cook with love, not measuring everything down to the microgram, so treat these numbers as a general guideline. Enjoy every bite of your gorgeous apple cobbler!
Share Your Experience Making This Apple Cobbler
Okay, now that you’ve made this spectacular Old Fashioned Apple Cobbler, tell me everything! Did you serve it warm with ice cream? Please drop a comment below and give this recipe a solid 5 stars if it made your kitchen smell like heaven. You can always reach out via my contact page if you have questions! I love seeing your results—maybe check out the amazing cobbler recipe from The Food Charlatan next!
PrintEasy Apple Cobbler with Buttermilk Biscuit Topping
Make this comforting apple cobbler featuring tender, cinnamon-spiced apples beneath a simple, buttery topping that bakes up like a tender biscuit. It is a perfect warm dessert for any gathering.
- Prep Time: 20 min
- Cook Time: 45 min
- Total Time: 65 min
- Yield: 6 servings 1x
- Category: Dessert
- Method: Baking
- Cuisine: American
- Diet: Vegetarian
Ingredients
- 6 large Granny Smith apples, peeled, cored, and sliced
- 1/2 cup granulated sugar
- 1/4 cup packed light brown sugar
- 1 tablespoon all-purpose flour
- 1 teaspoon ground cinnamon
- 1/4 teaspoon ground nutmeg
- 1 tablespoon lemon juice
- 1/2 cup (1 stick) cold unsalted butter, cut into small pieces (for topping)
- 1 1/2 cups all-purpose flour (for topping)
- 1 tablespoon baking powder
- 1/2 teaspoon salt
- 1/4 cup granulated sugar (for topping)
- 1/2 cup cold buttermilk
Instructions
- Preheat your oven to 375 degrees Fahrenheit. Lightly grease a 9-inch pie dish or an 8×8 inch baking dish.
- In a large bowl, combine the sliced apples, 1/2 cup granulated sugar, brown sugar, 1 tablespoon flour, cinnamon, nutmeg, and lemon juice. Toss gently until the apples are evenly coated.
- Pour the apple mixture into your prepared baking dish and spread it into an even layer.
- In a separate medium bowl, whisk together the 1 1/2 cups flour, baking powder, salt, and 1/4 cup sugar for the topping.
- Cut in the cold butter pieces using a pastry blender or your fingertips until the mixture resembles coarse crumbs.
- Pour in the cold buttermilk and stir just until the dough comes together. Do not overmix.
- Drop spoonfuls of the dough evenly over the apple filling. The topping will look rustic and uneven; this is correct.
- Bake for 40 to 45 minutes, or until the topping is golden brown and the apple filling is bubbly and tender when pierced with a fork.
- Let the apple cobbler cool for at least 15 minutes before serving warm.
Notes
- Serve this classic apple dessert warm with a scoop of vanilla ice cream or whipped cream for the best experience.
- If you prefer a crisper topping, you can use a crumb topping recipe instead of the biscuit topping.
- This recipe is great for feeding a crowd; consider doubling it and using a 9×13 inch baking dish.
Nutrition
- Serving Size: 1 serving
- Calories: 380
- Sugar: 45
- Sodium: 250
- Fat: 18
- Saturated Fat: 11
- Unsaturated Fat: 7
- Trans Fat: 0.5
- Carbohydrates: 55
- Fiber: 4
- Protein: 4
- Cholesterol: 45