

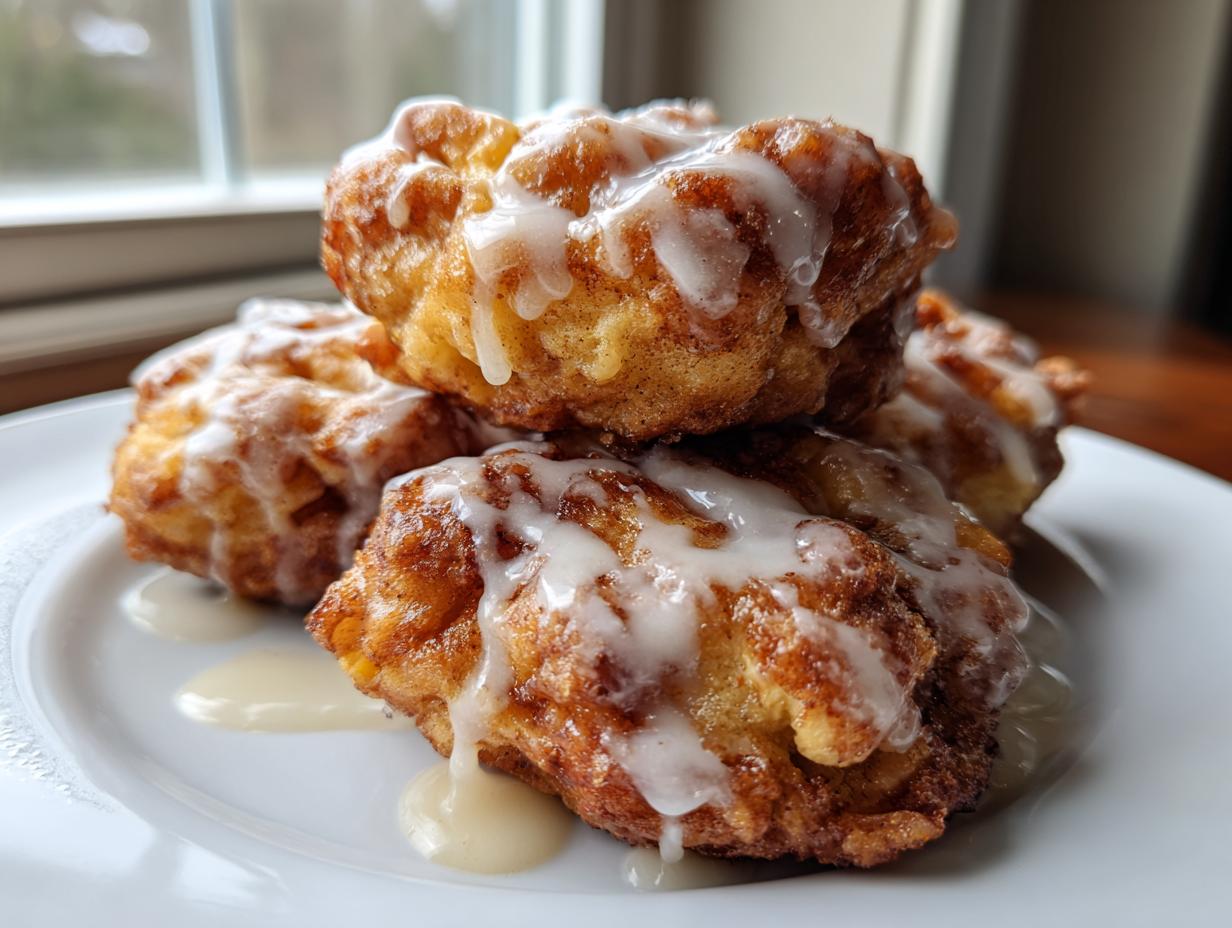
I know the craving. It’s that perfect fall weather moment, you want that classic fairground flavor—warm, doughy, spiced apple—but the thought of deep frying sends you straight into a cleanup panic attack. Trust me, I’ve been there! My marketing career was built on speed, so I needed cozy comfort food that didn’t demand an hour of messy work. That’s how I finally perfected these **baked apple fritters**. They deliver that soft, tender interior and slightly crisp chewiness you expect, all while baking neatly in a muffin tin. If you’re looking for something truly effortless, check out my quick 30-minute applesauce recipe, but for a real treat, these baked apple fritters are the answer for busy weekends.
- Why You Will Love These Easy Apple Fritters
- Gathering Ingredients for Baked Apple Fritters
- Mastering the Technique for Crispy Baked Apple Fritters
- Ingredient Notes and Substitutions for Baked Apple Fritters
- Tips for Success with Your Homemade Apple Fritters
- Serving Suggestions for Your Cozy Apple Breakfast
- Storage and Reheating Instructions for Baked Apple Fritters
- Frequently Asked Questions About Baked Apple Fritters
- Estimated Nutritional Data for Baked Apple Fritters
Why You Will Love These Easy Apple Fritters
Listen, I didn’t spend weeks tinkering with baking powder ratios just for them to turn out like sad little muffins. We want that classic vibe! These are everything you love about a traditional fritter, minus the oil splatter. It’s a game-changer for your weekend brunch lineup!

- Baked, Not Fried: This is the huge win, right? You get all the warm, comforting flavor of a classic without feeling like you need a shower immediately after eating. It’s the ultimate excuse for a little sweet crunch in the morning!
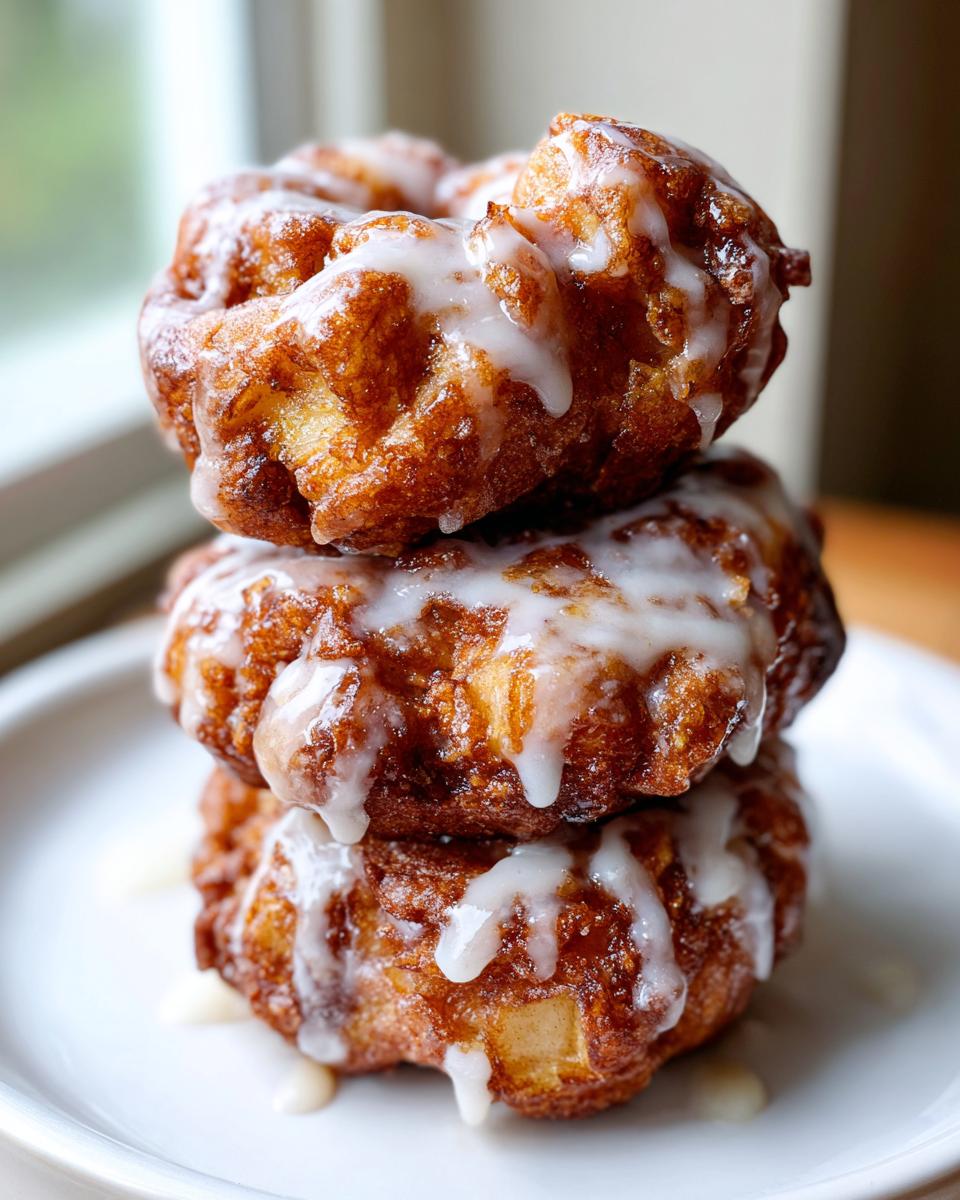
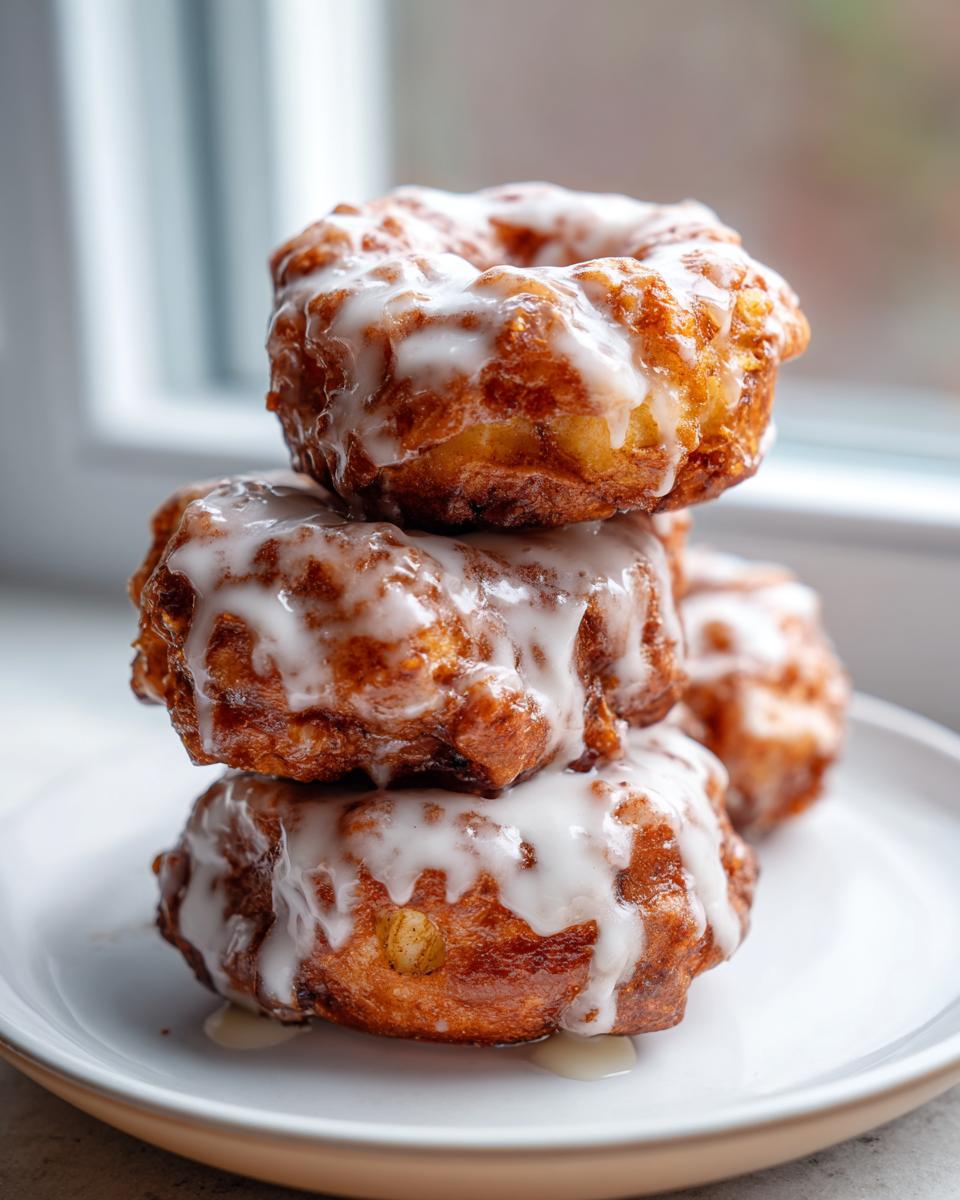
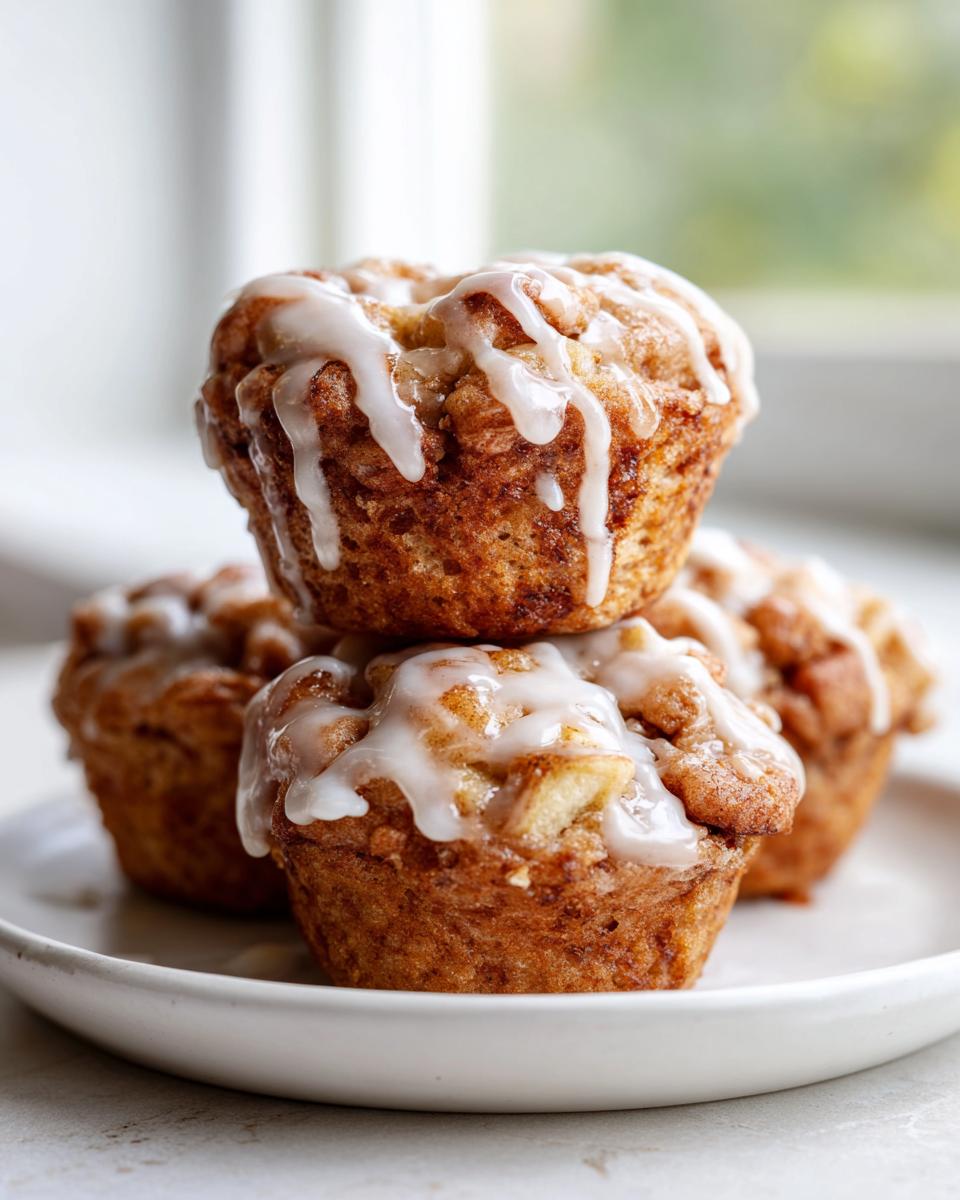
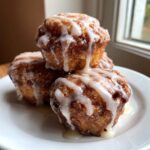
- Texture Perfection: I’ve worked hard on this! The edges get that beautiful golden crispness that makes you stop and look, but the inside remains incredibly soft, cakey, and packed with apple chunks.
- Simple Cleanup: Because we use a muffin tin, cleanup is honestly a breeze. Just a few bowls and the pan, no deep fryer basket to scrub later.
- Flavor That Hugs You: That blend of cinnamon and nutmeg, paired with the sweet, gooey vanilla glaze, just screams cozy autumn morning. They actually taste like fall feels!
Gathering Ingredients for Baked Apple Fritters
Okay, the beauty of keeping these baked apple fritters simple is that most of what you need is already sitting in your pantry. We aren’t doing anything fancy here—no obscure flours or extracts required. Just be sure you have good, solid baking staples ready to go. When you organize your ingredients this way, the mixing process goes so much faster. If you ever need a backup plan for apples, my stovetop apple pie filling is fantastic, but for these, we want fresh texture!
For the Soft Baked Apple Treats
These are the core components that bring that fantastic flavor and structure, making sure we get that signature soft center we are aiming for.
- 2 large apples (I swear by Honeycrisp or Granny Smith—they hold their texture so well when baked!), peeled, cored, and finely diced. Don’t grate them, we want those little chunks!
- 1 3/4 cups all-purpose flour
- 1 1/2 teaspoons baking powder (This is key for the lift!)
- 1/2 teaspoon baking soda
- 1/2 teaspoon ground cinnamon
- 1/4 teaspoon ground nutmeg
- 1/4 teaspoon salt
- 1/2 cup granulated sugar
- 1 large egg, lightly beaten
- 1/2 cup milk
- 1/4 cup unsalted butter, melted (Make sure it’s cooled slightly so it doesn’t scramble the egg!)
- 1 teaspoon vanilla extract
For the Sweet Cinnamon Glaze Recipe
You absolutely must do the glaze; it brings everything together. It’s what makes these feel decadent instead of just healthy-ish. We want this ready to go right when the fritters come out of the oven!
- 1 cup powdered sugar
- 2 tablespoons milk (use a touch more if necessary)
- 1/2 teaspoon vanilla extract
- Pinch of cinnamon
Mastering the Technique for Crispy Baked Apple Fritters
This is where the magic—and the mess avoidance—happens! We are taking simple batter and apples and turning them into something amazing. Since we aren’t frying these, the mixing technique has to be spot-on to trick your brain into thinking you’re eating a classic doughnut. Remember, for the best texture, you simply can’t rush the oven or overmix the batter. For more tips on getting crisp edges, check out how I handle these crispy edges over on Gourmetra!
Preparing the Batter for Perfect Baked Apple Fritters
First things first: preheat your oven to 375 degrees Fahrenheit. You want the tin hot and ready! Then, grab your muffin tin—I don’t even bother with liners sometimes; just grease it well. Now, attack the dry and wet ingredients separately, just like we talked about. When you combine them, be gentle! Seriously, don’t reach for the electric mixer here. Mix just until you see the flour disappear. Those little lumps are your friends; they keep the crumb tender inside and help prevent the rubbery texture we get from overmixing. Finally, gently fold in those diced apples until they look evenly spaced throughout the batter.
Baking Time and Achieving Golden Color for Baked Apple Fritters
Spoon that beautiful batter right into your prepared cups, aiming to fill them about two-thirds full. Now, if you really want those golden, slightly crisp tops—which I always do—take a can of cooking spray and give the tops a light dust right before they go into the oven. Bake these beauties for 18 to 20 minutes. How do you know they’re done? The tops should be beautifully golden brown. Give one a gentle poke; it should feel set. A toothpick test is great too; you want moist crumbs sticking to it, not wet batter. While they bake, whisk up that glaze!
Applying the Vanilla Glaze Recipe for Fritters
The timing here makes all the difference. You want the fritters *warm*, not scalding hot, when you glaze them. Take them out, let them cool in the tin for maybe five minutes, and then move them onto a wire rack. While they cool slightly more, whisk your powdered sugar, milk, vanilla, and that pinch of cinnamon until it’s perfectly pourable. Drizzle that sweet vanilla glaze generously over the top. Seriously, don’t skimp! If you aren’t feeling the glaze today, try immediately tossing the warm fritters in a mix of granulated sugar and cinnamon instead. That cinnamon sugar coating always hits the spot too. Don’t forget to check out my tips for making soft, chewy lemon crinkle cookies if you need another batch of cozy comfort!
Ingredient Notes and Substitutions for Baked Apple Fritters
Look, sometimes you’re following a recipe and you realize you’re out of Honeycrisps, or maybe you’re trying to sneak in just a little extra fiber. Don’t panic! These baked apple fritters are really forgiving, but there are a few ingredients that make a huge difference, and I want to make sure you get that perfect texture every time, no matter what you grab from the pantry. I’ve looked through a ton of different methods, including some of the gluten-free ones over at No Dash of Gluten, and I’ve found what really counts.
Using the right apple makes my short list of non-negotiables. If you use a mushy apple, even baking won’t save you, and you’ll end up with apple mush rather than chunks. Granny Smith is tart and holds its shape beautifully. Honeycrisp is sweet and crisp, which is exactly what I love for that sweet-tart contrast against the glaze. If you can find either of those, go for it!
Now, about the flour. This recipe is set up for standard white flour, but if you’re looking to make these a bit heartier for a morning breakfast treat, you can swap things around. Remember my rule: don’t change things if you don’t have to, but if you must, keep it simple. You can substitute about half of the all-purpose flour with whole wheat flour. It’ll give the final product a slightly denser chew, which some folks actually prefer! Just don’t go all whole wheat, or you might need a little extra milk to keep the batter loose enough. If you’re running low on ingredients for dressings, check out my easy homemade salad dressing recipes while you’re here—sometimes you just need a quick win!
Tips for Success with Your Homemade Apple Fritters
We’ve all had those baked goods that sounded good in theory but came out a little… sad. Flattened, gummy, or just not quite reaching that *fried standard*. Don’t worry about that happening here! Achieving that perfect balance—crispy on the outside, fluffy apple goodness inside—comes down to paying attention to three easy things I learned over my trials. You want to make sure that when people take a bite of these homemade apple fritters, they actually ask if you cheated and used the fryer! If you need a super crunchy side to go with these, you absolutely have to try my creamy broccoli salad recipe.
The biggest pitfall with baked versions is usually moisture management. Since we aren’t submerging them in hot oil, we have to actively encourage that exterior to firm up and brown nicely. That’s why the spray comes in handy. When you spray the tops of the batter cups lightly with cooking spray right before they go into the 375°F oven, it helps the sugars on the surface caramelize faster and develop a barrier against drying out. It’s the closest we can get to that crisp shell without deep frying!
Also, remember what I said earlier about not overmixing? That’s still tip number one for keeping them tender! Overdeveloped gluten equals tough cake texture. Mix only until you see that flour vanish. While you browse here, you might want to check out how Chef Amina suggests handling her baked apple fritters too; sometimes seeing another pro’s angle helps solidify the concept, though I stand by this method!
One last thing: temperature. Make sure your oven is fully preheated. If you put these tender little domes into a luke-warm oven, they’ll just sit there and start spreading sideways instead of puffing up tall. Give your oven a solid 15 minutes to come to temperature, and you’ll be rewarded with beautiful, tall apple fritter bites every time.
Serving Suggestions for Your Cozy Apple Breakfast
You’ve made these gorgeous, warm apple treats, and now it’s time for the best part: eating them! These baked apple fritters fit so perfectly into the ‘cozy apple breakfast’ vibe, but honestly, they are amazing any time of day. They need companions that match their spiced sweetness.
If you’re serving these for brunch, keep it simple but elegant. A hot mug of strong black coffee or maybe a spiced chai tea cuts through the sweetness of the glaze beautifully. They are fantastic on their own, but if you want to elevate them into a real dessert experience? Go for a scoop of good vanilla bean ice cream right on top while they are still warm. That contrast between the hot, spiced fritter and the melting cold ice cream? Absolute perfection. I actually have an amazing recipe for soft and gooey cinnamon buns if you want another cozy morning fix, but these fritters are definitely faster!
Sometimes I’ll just dust them lightly with powdered sugar instead of glazing them, and serve them alongside a cold glass of milk—just like we did when we were kids. Either way, they disappear fast, so maybe make an extra batch!
Storage and Reheating Instructions for Baked Apple Fritters
Now, I know you want to eat all twelve of these amazing baked apple fritters in one sitting, but sometimes life happens, and you have leftovers. Good news: these freeze and store way better than their deep-fried cousins! However, the glaze adds a little complication, so you have to store them properly if you want them to stay that perfect soft-but-light texture for brunch tomorrow. For my absolute favorite holiday bake, which uses similar storage rules, be sure to check out my easy gingerbread brownies!
If you glazed them, they are best eaten the same day, honestly. That sugary glaze can start to weep or get a little sticky overnight, especially if you live somewhere humid. If you do have leftovers with glaze, just pop them into an airtight container and keep them on the counter for up to two days. Don’t put them in the fridge; that just dries them out faster. If you are storing them for longer, or if they are unglazed, then snap an airtight container on them and they should be great for four days.
The reheating is critical. If you try to microwave these, you get a steamed, gummy thing that has lost all its crispy character—we worked too hard for that! To bring back that warmth and that slight chew on the edge, you need dry heat. Pop the fritters onto a baking sheet and warm them in a 300°F oven for about 5 to 7 minutes. They come out perfectly cozy and almost fresh-from-the-tin ready. For other comforting ideas that capture that fall delight, take a peek at this article on warm baked apple fritters comfort so you can keep that cozy vibe going all season long.
Frequently Asked Questions About Baked Apple Fritters
It’s totally normal to have questions when switching from deep-frying to baking—I certainly did! These are the things that always pop up when folks try these **baked apple fritters** for the first time. I want to make sure you get that perfect result right away!
Can I make the apple fritter dough recipe ahead of time?
That’s a great question if you’re planning a big brunch! You can mix the batter, but I wouldn’t push it too far. Since this recipe relies on baking powder and soda for its lift, the leavening agents start working immediately once they hit the wet ingredients. If you let the **apple fritter dough recipe** sit for longer than about 30 minutes, those little bubbles deflate, and you’ll end up with denser, flatter fritters. My advice? Dice your apples the night before and store them in the fridge, but mix the wet and dry ingredients right before you plan to scoop them into the muffin tin. That way, you maximize the fluffy texture!
How do I ensure my baked apple fritters are crispy without frying?
This is the million-dollar question for anyone trying to make **apple fritters without frying**! Full disclosure: they won’t have that thick, oily crust you get from deep frying, but we can get close enough to be thrilled! The main secret is twofold. First, make sure you are using the right ratio of leavening agents—we use a bit more baking powder than baking soda here to promote a quick rise and set the exterior before the inside overbakes. Second, and this is non-negotiable: give the tops a light spray with a neutral cooking oil (like canola or vegetable spray) right before they go into that hot 375°F oven. That fat on the surface helps create a shell that crisps up beautifully while the center stays soft. It really works miracles!
If you want another quick fix for baked goods, I have a few ideas in my lemon scones recipe that you might find helpful for other morning bakes!
Estimated Nutritional Data for Baked Apple Fritters
Alright, let’s talk numbers for a second. As much as I preach about joy in cooking, I know a lot of you still like to peek at the macros, especially since these are baked! I’ve run the numbers based on the ingredients listed for these baked apple fritters. Just remember that this is my best estimate—the type of apple you use or how thick you make that vanilla glaze can shift things around a bit. If you’re looking for another quick sweet fix, maybe try my easy 5-minute chocolate frosting and see how that affects things!
Since these are meant to be a cozy treat or a weekend brunch item, they are understandably sweet, but they are certainly lighter than deep-fried versions you find out there. For comparison, I always look at what others are doing, like the data they provide over at Cooking Circuit. Here is the breakdown, based on a single fritter serving:
- Calories: About 240 per fritter
- Sugar: Roughly 25g (A good chunk of that is in that irresistible glaze!)
- Fat: Around 9g
- Protein: A modest 3g
- Carbohydrates: About 38g
So there you have it! A warm, comforting treat that fits neatly into your weekend plans. Happy baking!
PrintThe Ultimate Crispy Baked Apple Fritters with Sweet Cinnamon Glaze
You can achieve the warm, soft interior and slightly crisp exterior of classic apple fritters without deep frying. This easy baked recipe delivers comforting fall flavor perfect for brunch or dessert.
- Prep Time: 15 min
- Cook Time: 20 min
- Total Time: 35 min
- Yield: 12 fritters 1x
- Category: Breakfast
- Method: Baking
- Cuisine: American
- Diet: Vegetarian
Ingredients
- 2 large apples (like Honeycrisp or Granny Smith), peeled, cored, and finely diced
- 1 3/4 cups all-purpose flour
- 1 1/2 teaspoons baking powder
- 1/2 teaspoon baking soda
- 1/2 teaspoon ground cinnamon
- 1/4 teaspoon ground nutmeg
- 1/4 teaspoon salt
- 1/2 cup granulated sugar
- 1 large egg, lightly beaten
- 1/2 cup milk
- 1/4 cup unsalted butter, melted
- 1 teaspoon vanilla extract
- For the Glaze: 1 cup powdered sugar
- 2 tablespoons milk
- 1/2 teaspoon vanilla extract
- Pinch of cinnamon
Instructions
- Preheat your oven to 375 degrees Fahrenheit. Lightly grease a standard 12-cup muffin tin or line it with paper liners.
- In a medium bowl, whisk together the flour, baking powder, baking soda, cinnamon, nutmeg, and salt.
- In a separate large bowl, whisk the granulated sugar and the beaten egg until combined. Add the milk, melted butter, and vanilla extract, mixing until smooth.
- Gradually add the dry ingredients to the wet ingredients, mixing only until just combined. Do not overmix; a few lumps are fine.
- Gently fold in the finely diced apples until they are evenly distributed throughout the batter.
- Spoon the batter evenly into the prepared muffin cups, filling each about two-thirds full.
- Bake for 18 to 20 minutes, or until the tops are golden brown and a toothpick inserted into the center comes out clean.
- While the fritters bake, prepare the glaze. In a small bowl, whisk together the powdered sugar, 2 tablespoons of milk, vanilla extract, and a pinch of cinnamon until you have a smooth, pourable glaze. Add more milk, a drop at a time, if the glaze is too thick.
- Remove the fritters from the oven and let them cool in the pan for 5 minutes before transferring them to a wire rack to cool slightly more.
- Drizzle the warm fritters generously with the sweet cinnamon glaze. Serve warm for the best texture.
Notes
- For crispier edges, you can lightly spray the tops of the batter with cooking spray before baking.
- If you want a cinnamon sugar coating instead of a glaze, toss the warm fritters immediately after baking in a mixture of 1/4 cup granulated sugar and 1 teaspoon cinnamon.
- You can substitute half of the all-purpose flour with whole wheat flour for a slightly heartier texture.
Nutrition
- Serving Size: 1 fritter
- Calories: 240
- Sugar: 25g
- Sodium: 180mg
- Fat: 9g
- Saturated Fat: 5g
- Unsaturated Fat: 4g
- Trans Fat: 0g
- Carbohydrates: 38g
- Fiber: 1g
- Protein: 3g
- Cholesterol: 35mg