

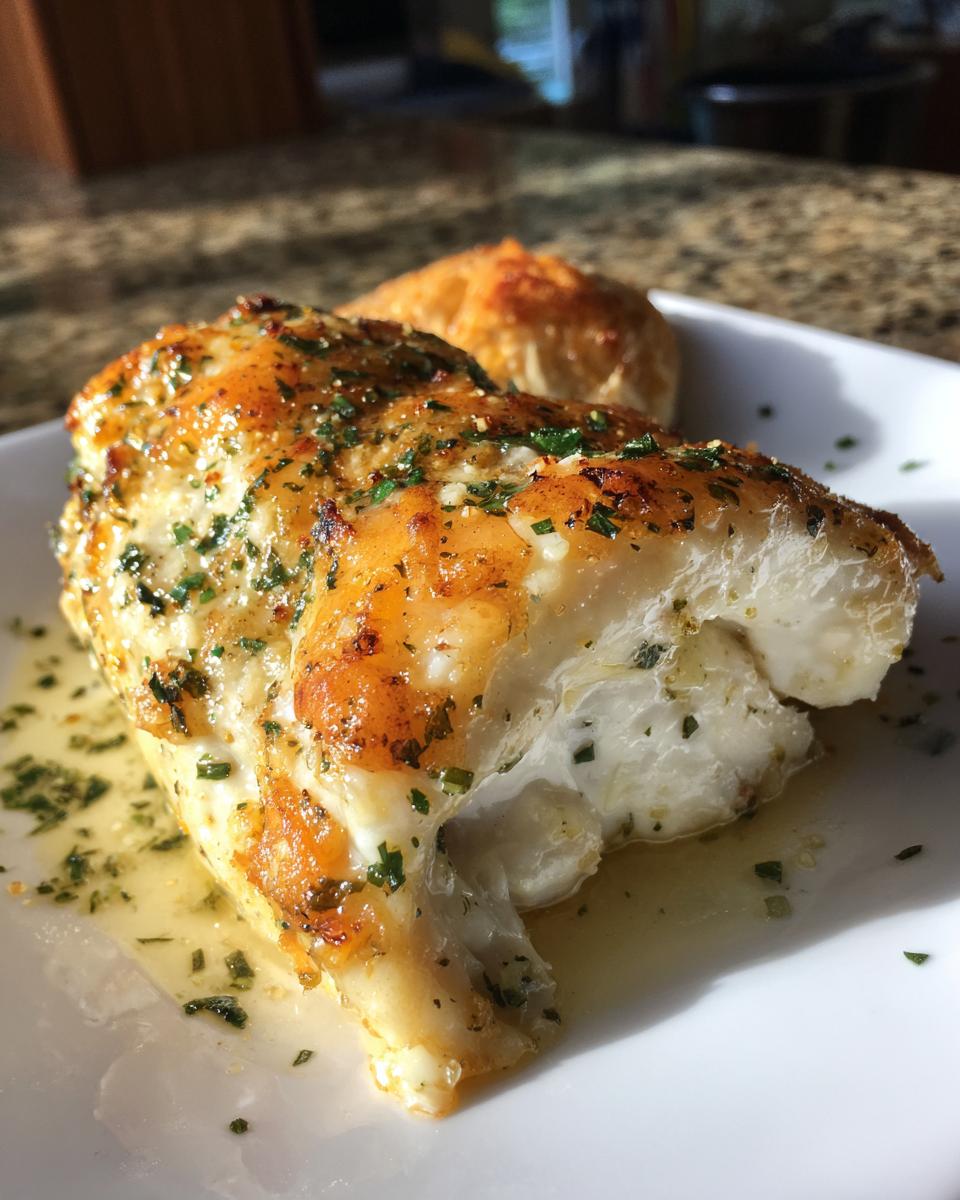
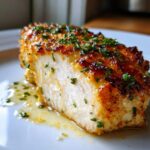
Let’s be honest: baking chicken breasts often ends in tears. Dry, sad, flavorless white meat that looks like it’s been sitting under a heat lamp since Tuesday. It’s the culinary challenge we all face when trying to get a truly satisfying baked chicken breast on the table fast. I spent years chasing that perfect texture while juggling work deadlines—that’s where my background really helped me streamline things. I realized great food doesn’t have to take hours; it just needs the right technique and flavor foundation. That’s why I’m handing over the blueprint for the Juicy Garlic Butter Baked Chicken Breast. This recipe is proof that you can have amazing, melt-in-your-mouth chicken without sacrificing your entire evening. It’s about efficiency meeting absolute deliciousness, just how I like to cook!
- Why This Easy Baked Chicken Breast Recipe Works Every Time
- Ingredients for Garlic Butter Baked Chicken Breast
- Step-by-Step Instructions for the Best Baked Chicken Breast
- Tips for Perfect Baked Chicken Breast Every Time
- Serving Suggestions for Your Weeknight Chicken Dinner
- Storage and Meal Prep Chicken Breast Guidelines
- Frequently Asked Questions About Baked Chicken Breast
- Nutritional Estimates for this Garlic Butter Chicken Breast
- Share Your Easy Baked Chicken Breast Success
Why This Easy Baked Chicken Breast Recipe Works Every Time
I know, I know. You’ve tried dozens of recipes promising the best baked chicken breast, and they all end up dry. That’s because most recipes skip the two things that matter most when you’re in a rush. I’ve tested this method hundreds of times, both when I was slammed with marketing deadlines and now, focusing purely on flavor, and it’s foolproof. This is the simplest, most reliable approach for a tender chicken breast recipe you’ll use weekly. If you need something even faster, check out my 30-minute chicken breast recipe!
- It requires zero marinating time, making it a true weeknight chicken dinner hero.
- The fat from the butter acts as an instant seal, locking in juices immediately.
- We rely on precise temperature, not guesswork, guaranteeing success. If you want a great guide on general technique, check out this article on how to bake chicken breasts for more insight!
Achieving Juicy Oven Baked Chicken
The magic that answers how to bake chicken breast without drying out is twofold: the butter barrier and the mandatory rest. That garlic butter melts down the sides right away, bathing the meat as it cooks. But the absolute secret? Taking it out slightly *before* you think it’s done. That extra five minutes on the cutting board does more work than another ten minutes in the oven, ensuring juicy oven baked chicken every time.
Simple Baked Chicken Seasoning Profile
We aren’t messing around with 14 different spices here. This recipe leans into bold, simple flavors. The garlic and high-quality salt create an incredible crust, building a wonderful baseline for flavor without masking the chicken itself. It’s the perfect example of how effective a simple baked chicken seasoning can be when applied correctly.
Ingredients for Garlic Butter Baked Chicken Breast
When I shop for this, I keep it super simple because the flavor comes from the high-quality butter and fresh garlic—not from complicated additions. For four servings, you’ll need four nice, plump boneless, skinless chicken breasts. Don’t worry about them being perfectly identical in size; we’ll manage that in the directions!
Next up is the flavor bomb! You need four tablespoons of unsalted butter, and this is crucial: it has to be softened, not melted. I usually leave it on the counter for about an hour before I start prepping. Then, mince up four cloves of garlic—and please, use fresh garlic, not that stuff in a jar; it makes all the difference! We mix the butter and garlic with one teaspoon of dried Italian seasoning, half a teaspoon of salt, and just a pinch of black pepper. That’s it for the main coating!
For an optional but totally delightful finish, especially if you’re feeling a little decadent, grab about a quarter cup of grated Parmesan cheese. Seriously, grate it fresh if you can. And save a little sprig of fresh parsley for chopping up right before you serve it for color. That’s everything needed for a delicious, flavor-packed baked chicken breast!
Ingredient Notes and Low Carb Baked Chicken Substitutions
This recipe sings when you keep it simple, but I know everyone cooks differently. If you are trying to keep this super clean for a low carb baked chicken night, just ensure your Italian seasoning blend has no added sugars—most dried ones are naturally fine. The base is naturally compliant for a keto baked chicken breast too, since there’s very little sugar or carbs!
That Parmesan cheese I mentioned? Totally optional! If you skip it, you’ve got an even healthier, leaner meal. Now, if you’re looking for that ultra-comforting feel and want to turn this into a creamy baked chicken recipe without much extra effort, here’s a little hack: before it goes into the oven, pour about a quarter cup of heavy cream right over the top of the butter-coated chicken. It bakes right down into a dreamy sauce. Keep in mind, that addition naturally brings up the fat content, but oh my goodness, is it worth it sometimes!
Step-by-Step Instructions for the Best Baked Chicken Breast
When I’m getting dinner ready after a crazy day, the last thing I want is fussy instructions. This is why I streamlined the process down to the absolute necessities to ensure you get that perfectly seasoned, best baked chicken breast result without any guesswork. First things first: get that oven roaring! Preheat it to 400 degrees Fahrenheit. While it’s heating up, lightly grease your baking dish or, honestly, save yourself a mountain of cleanup and line it with parchment paper. Trust me on the parchment paper shortcut; it’s a lifesaver!
You’ll need about 20 to 25 minutes of oven time, depending on how thick your chicken is, but we rely on a thermometer, not the clock, for true success. If you are looking for a fantastic side dish to pair with this, check out my recipe for quick, easy one-pot beans and rice—it cooks while the chicken is in the oven!
Preparing the Garlic Butter and Chicken
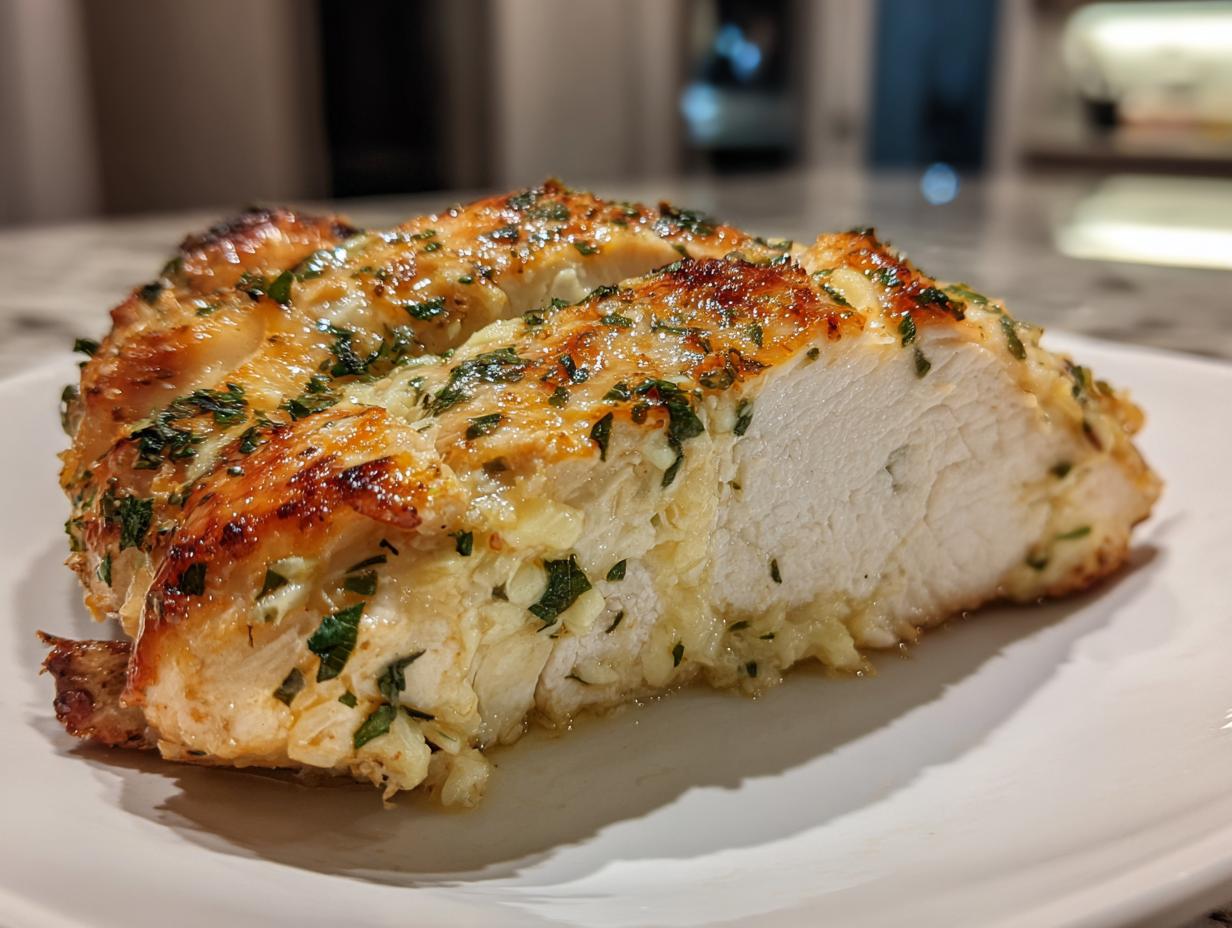
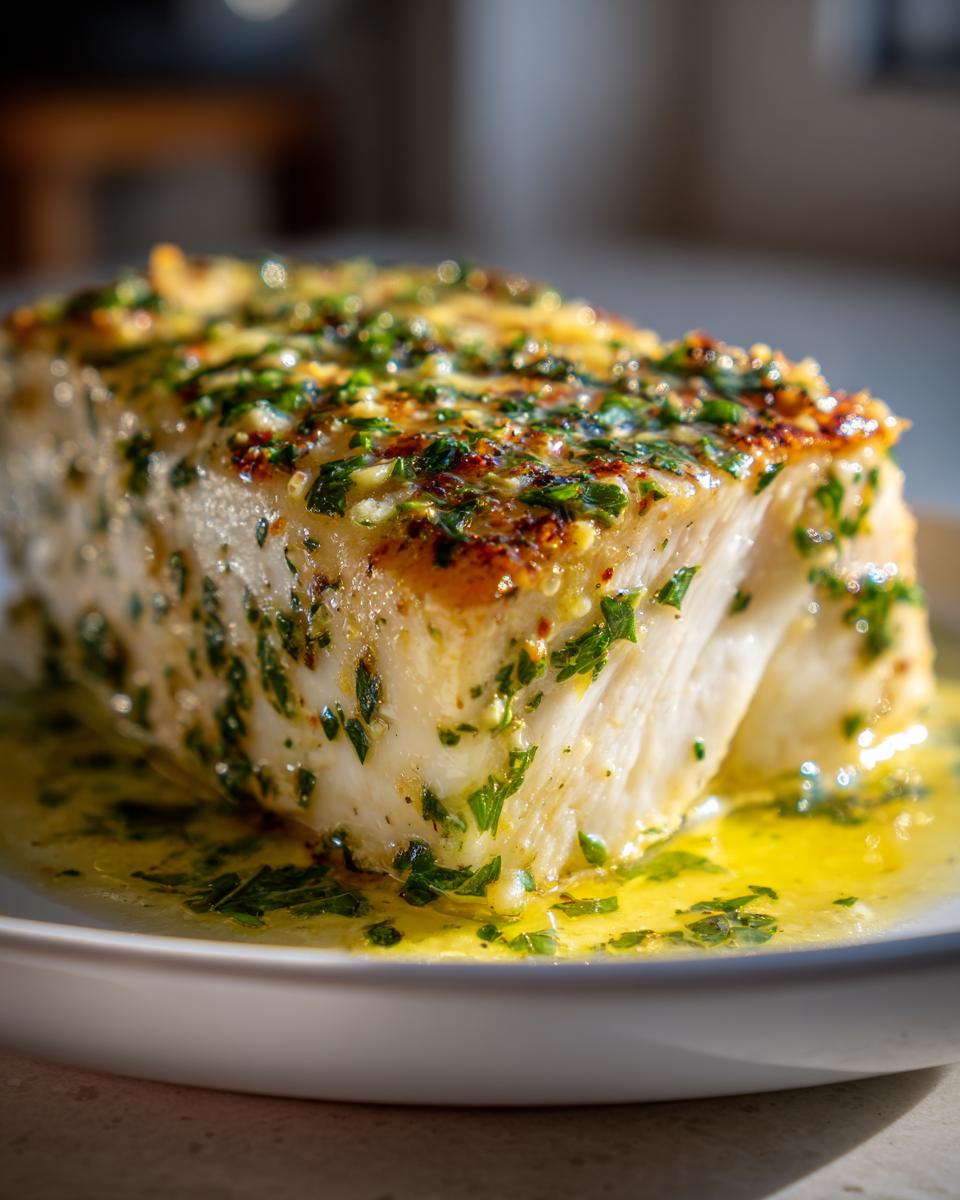
Remember that softened butter, garlic, and seasoning mix we whipped up? You want to spread that gorgeous garlic butter evenly over the top of each chicken breast. Make sure you press it down gently; we want it clinging on tight! Before we even think about butter, though, you must pat your chicken dry. I use tons of paper towels. This simple step is vital because damp chicken steams instead of browning, and we want surface flavor adherence, not soggy texture. Seriously, dry chicken is the first secret to juicy garlic butter baked chicken breast.
Baking Times and Temperature Check for Tender Chicken Breast Recipe
Once the butter is applied, slide that dish into the 400-degree oven. Now, here is the non-negotiable rule for a tender chicken breast recipe: use a reliable meat thermometer. We are aiming for an internal temperature of 165 degrees Fahrenheit to be safe, but to guarantee you get that melt in your mouth chicken texture, you need to pull it out when the thermometer reads 160 degrees. The carryover heat while it rests will get it safely to 165 without overcooking the edges. If you’re adding that Parmesan sprinkle, do it in the last 5 minutes!
Tips for Perfect Baked Chicken Breast Every Time
Listen, success in the kitchen isn’t about following the recipe blindly; it’s about understanding the ‘why’ behind the steps. Since I’ve struggled through numerous dry chicken dinners myself when first balancing my career and cooking, I figured out the small things that make the real difference between rubbery poultry and actual, honest-to-goodness melt in your mouth chicken. Sticking the landing on a simple baked chicken breast is all about respecting the meat after it leaves the heat source. It takes discipline, but trust me, it’s the key to serving truly juicy oven roasted chicken breast. If this garlic butter recipe is a hit, you should definitely try my garlic parmesan chicken skillet recipe next week!
The Non-Negotiable Resting Period
I cannot stress this enough: Do not cut into that chicken the second it comes out of the oven! When the meat is hot, all those beautiful juices are swimming just under the surface, eager to escape. If you slice it immediately, all that moisture floods onto your cutting board instead of staying in the meat where it belongs. Let it sit quietly for five minutes. This resting time lets everything settle down and redistribute. It’s the simplest move you can make for juicy oven baked chicken.
Achieving Even Cooking in Your Baked Chicken Breast
Sometimes you buy chicken breasts that look like they were cut by a very enthusiastic toddler—one side is thin and delicate, and the other is the size of a softball. If you bake them like that, guess what happens? The thin end is dried out before the thick end is even cooked through! For this easy baked chicken breast recipe, if you have really uneven pieces, just place the thickest part between two sheets of plastic wrap and gently give it a few whacks with a meat mallet or even a small pot. You don’t want to smash it flat, just encourage it to be roughly the same thickness so everything finishes cooking at the same time. It makes a huge difference in texture consistency across your plate!
Serving Suggestions for Your Weeknight Chicken Dinner
I firmly believe that the main dish is only half the battle on a busy weeknight. Once you’ve mastered that perfectly baked chicken breast, you need sides that won’t stress you out! Since this recipe is packed with savory garlic and butter flavors, you want sides that either soak up those delicious pan juices or offer a bright, fresh contrast. Because we’ve kept this recipe so simple and quick, you’ve got time in your 30-minute window to whip up something excellent.
If you’re in need of that ultimate comfort combination—and let’s face it, we all are on a Tuesday night—you absolutely need creamy mashed potatoes. They are brilliant for catching any remaining garlic butter runoff from the chicken. I have a recipe for creamy roasted garlic mashed potatoes that uses an immersion blender to make them super smooth with minimal fuss. That’s officially my top pairing for a hearty main dish chicken recipe.
But if you need something lighter that screams healthy baked chicken, simple steamed green beans tossed with just a tiny squeeze of lemon juice wake everything up beautifully. Or, honestly, a quick bag of Caesar salad mix is perfect. Serve the chicken right over the greens for a ready-made chicken salad lunch tomorrow, which is fantastic for your meal prep chicken breast plans!
Storage and Meal Prep Chicken Breast Guidelines
One of the hidden perks of this ridiculously easy recipe is how well it travels into tomorrow’s lunch! We all know that chicken breast can get tough reheating, which is why I am particular about how I store my leftovers from this batch. This isn’t just about putting it in a container; it’s about preserving that initial juiciness we worked so hard to achieve.
For the very best results when planning your meal prep chicken breast, make sure you let the chicken cool down completely after the required resting period. Don’t rush it! If you seal warm chicken in a tight container, you trap steam, which basically makes the beautiful crust soggy overnight. Once it’s totally cool, slice the chicken against the grain or leave it whole, depending on how you plan to eat it later. Store it in an airtight container.
When it comes to reheating for a quick weeknight chicken dinner replacement, please—please—avoid the microwave if you can! The microwave is the enemy of tender chicken breast because it heats unevenly and dries out the edges instantly. If you can swing it, slice the cold chicken and warm it quickly in a skillet with just a splash of water or broth over medium-low heat until it’s warmed through. That splash of moisture is magic!
If you absolutely must use the microwave, try to use lower power settings (like 50% power) and heat it in very short bursts, maybe 30 seconds at a time, stirring or flipping it in between. This slow warming prevents the muscle fibers from squeezing out all the built-in moisture. When I need speedy lunches, I often just eat this garlic butter chicken cold over a big salad—it’s still tender and flavorful even when chilled! For more ideas on packing lunches that stay good all week, take a peek at my tips for healthy lunch recipes.
Frequently Asked Questions About Baked Chicken Breast
It’s totally normal to have little doubts before you dive into a recipe, especially when your biggest fear is ending up with dry poultry! I’ve gathered up the questions that popped up most often when friends first tried making my baked chicken breast. Getting these details right is what separates a good dinner from a fantastic, reliable main dish chicken recipe you’ll turn to again and again.
Can I bake frozen chicken breast using this recipe?
Oh, I really wouldn’t advise it if you want truly tender chicken breast. If you try to bake chicken breast right out of the freezer following these instructions, the outside butter coating will burn long before the very center thaws enough to cook evenly. Plus, frozen meat releases extra water as it thaws in the oven, leading to a steamed, watery texture instead of that slightly crisp, buttery top we love. For the best results, always thaw your chicken completely in the fridge overnight before seasoning and baking!
What temperature should I cook my baked chicken breast to?
Food safety matters, so the official answer the USDA gives is 165 degrees Fahrenheit internally. However, if you wait until your thermometer reads 165°F while it’s still in the oven, by the time you pull it out and it rests, it will often be closer to 170°F, which means dry chicken! For that melt in your mouth chicken experience we are aiming for, pull this batch of baked chicken breast out when your instant-read thermometer hits exactly 160°F. As it sits on the cutting board during that crucial five-minute rest, the temperature will safely climb a few degrees to hit that 165°F mark without overshooting it. Precision pays off!
Is this a healthy baked chicken option?
Yes, absolutely! If you weigh the core ingredients—chicken, garlic, herbs, salt, and pepper—against the nutritional facts, you’ll see it’s a powerhouse meal. This base recipe lands in that great spot of being naturally high in protein and very low in carbohydrates, making it an excellent choice for low carb baked chicken plans. The fat primarily comes from the butter, which you control, and the Parmesan, which is optional. When I cook this for meal prep, I love that it’s minimal ingredients but maximizes filling protein. If you’re looking for other clean lunches, I have some fun chicken lettuce wraps!
Nutritional Estimates for this Garlic Butter Chicken Breast
Okay, so we’re making something delicious and easy—a true weeknight chicken dinner winner—but I always like to give you folks an idea of where this meal lands nutritionally. Since we aren’t using breading and we are focusing on fresh ingredients and protein, this baked chicken breast recipe is fantastic if you are watching your macros or looking for a simple, healthy baked chicken option.
Keep in mind, these numbers are just estimates based on the standard ingredients above, and they can definitely shift depending on the exact brand of butter you use or if you decide to skip the Parmesan topping. Think of this like a really good educated guess to help you plan your plate!
For one serving (one chicken breast):
- Calories: Around 310 (Wow! That’s a lot of flavor for a low count!)
- Fat: Roughly 18 grams (Mostly from that delicious butter coating, but a good hunk of that is unsaturated fat.)
- Protein: A huge 34 grams! This is why this makes such a satisfying main dish chicken recipe.
- Carbohydrates: Barely anything—only about 2 grams. Perfect for low carb baked chicken goals.
The sugar content is incredibly low, just 1 gram, coming mostly from the natural traces in the spices and garlic. It’s all wholesome energy, which means you get that rich, savory satisfaction without any of the guilt. Feel good about putting this on the table!
Share Your Easy Baked Chicken Breast Success
Now that you’ve created a batch of juicy, garlicky perfection, I’d absolutely love to hear about it! Seriously, seeing your results is what makes writing these recipes worthwhile for me. Knowing that I helped banish dry poultry from your dinner rotation? That’s the real win. I put a lot of heart into testing these methods, from figuring out the best way to handle the seasoning to making sure the resting time was respected, all so you could have a reliable easy baked chicken breast recipe.
Did this turn out to be your new secret weapon for a weeknight chicken dinner? Did a family member go back for seconds? Don’t keep the good news to yourself! Please take a moment to leave a star rating right below the recipe card when you finish up. That quick feedback honestly helps other home cooks decide if this is the right tender chicken breast recipe for them tonight.
And if you snapped a picture of that gorgeous, glistening buttered chicken before you sliced into it—I want to see it! You can tag me on social media or just send me a quick message through the contact page. I love seeing these simple, delicious meals come to life in your kitchens. Go ahead, share your success story with this baked chicken breast—I’m cheering you on!
PrintJuicy Garlic Butter Baked Chicken Breast: Easy Weeknight Dinner
Make tender, juicy baked chicken breast every time with this simple garlic butter recipe. It is perfect for a quick, healthy weeknight chicken dinner with minimal cleanup.
- Prep Time: 10 min
- Cook Time: 25 min
- Total Time: 35 min
- Yield: 4 servings 1x
- Category: Dinner
- Method: Baking
- Cuisine: American
- Diet: Low Fat
Ingredients
- 4 boneless, skinless chicken breasts
- 4 tablespoons unsalted butter, softened
- 4 cloves garlic, minced
- 1 teaspoon dried Italian seasoning
- 1/2 teaspoon salt
- 1/4 teaspoon black pepper
- 1/4 cup grated Parmesan cheese (optional, for topping)
- Fresh parsley, chopped (for garnish)
Instructions
- Preheat your oven to 400 degrees Fahrenheit. Lightly grease a baking dish or line it with parchment paper.
- In a small bowl, combine the softened butter, minced garlic, Italian seasoning, salt, and pepper. Mix until you have a smooth garlic butter spread.
- Pat the chicken breasts dry using paper towels. This step helps the seasoning adhere and promotes better browning.
- Place the chicken breasts in the prepared baking dish.
- Spread the garlic butter mixture evenly over the top of each chicken breast. Press it down gently so it adheres well.
- Bake for 20 to 25 minutes, or until the internal temperature reaches 165 degrees Fahrenheit when checked with a meat thermometer. Cooking time depends on the thickness of the chicken.
- If using Parmesan cheese, sprinkle it over the chicken during the last 5 minutes of baking.
- Remove the baked chicken breast from the oven. Let it rest on a cutting board for 5 minutes before slicing or serving. This helps keep the chicken juicy.
- Garnish with fresh chopped parsley before serving.
Notes
- To ensure your chicken breast is tender and not dry, use a meat thermometer. Pull the chicken out when it hits 160 degrees Fahrenheit, as the temperature will rise to 165 degrees while resting.
- For a low carb baked chicken or keto baked chicken breast option, skip any breading and confirm your seasoning mix has no added sugar.
- If you prefer a creamy baked chicken recipe, you can pour 1/4 cup of heavy cream over the chicken before baking.
Nutrition
- Serving Size: 1 breast
- Calories: 310
- Sugar: 1
- Sodium: 350
- Fat: 18
- Saturated Fat: 10
- Unsaturated Fat: 8
- Trans Fat: 0
- Carbohydrates: 2
- Fiber: 0
- Protein: 34
- Cholesterol: 110