

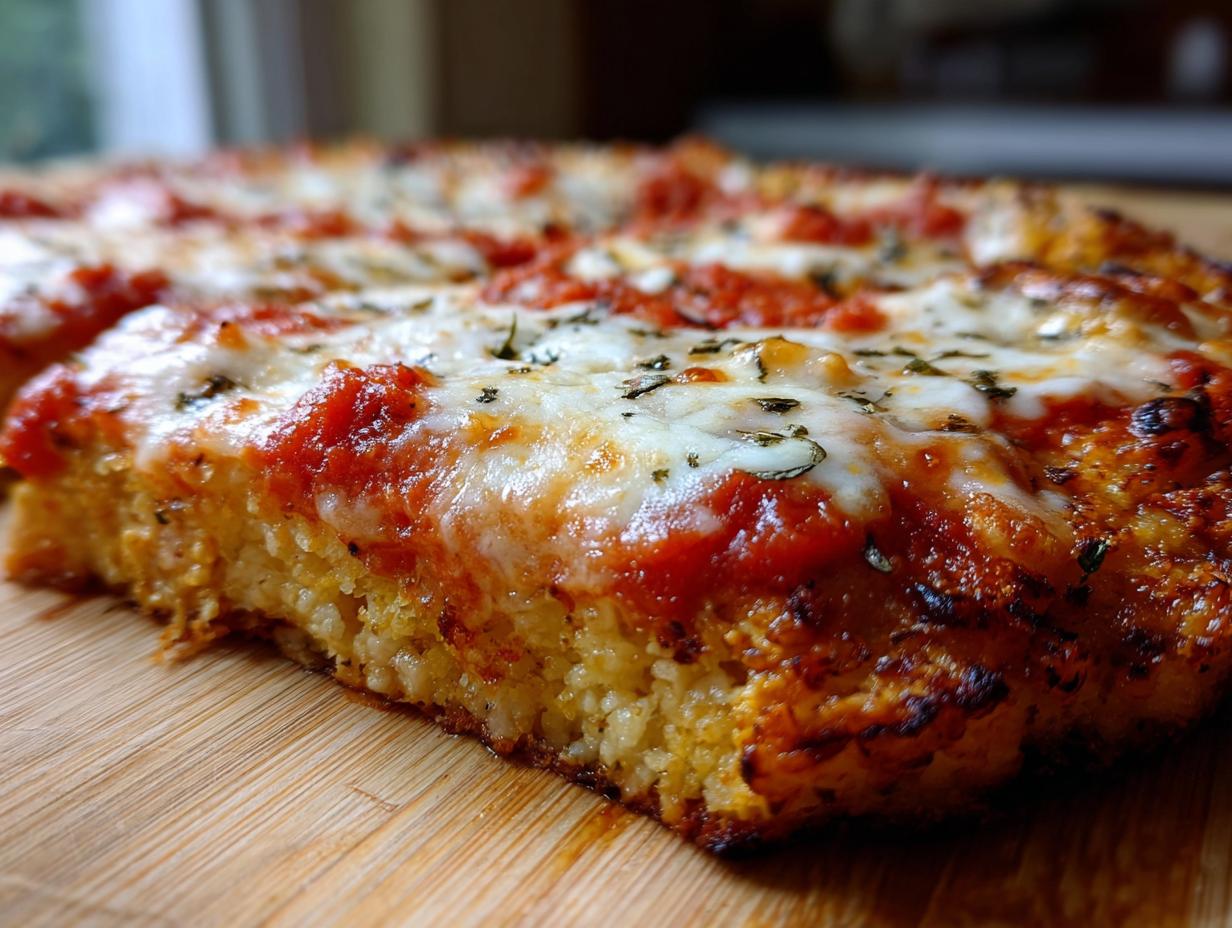
Let’s be honest: giving up traditional pizza when you’re aiming for low-carb or gluten-free eating can feel like a real loss. So many vegetable-based crusts turn into soggy messes halfway through baking, especially once you load them up with sauce and cheese. That’s why I devoted so much time to nailing this recipe. I’m sharing The Easiest Crispy Cauliflower Pizza Crust with you today because it actually works! We skip the fuss and focus on structure, giving you that satisfying, firm base you need. My goal here at Cooking by Felix is always to make sure that healthy eating doesn’t mean sacrificing comfort meals, and this results in a success story every time.
Before we dive into the magic, if you are looking for an even deeper dive into alternative bases, make sure you check out my guide on the keto pizza crust recipe for another fantastic option.
- Why This Cauliflower Pizza Crust Recipe Works (Low-Carb & Gluten-Free Success)
- Gathering Ingredients for Your Easy Cauliflower Pizza Crust
- Step-by-Step: How To Make Cauliflower Pizza Crust Perfectly
- Tips for a Sturdy Cauliflower Pizza Crust That Holds Toppings
- Making Your Cauliflower Pizza Crust Freezer Friendly
- Serving Suggestions for Your Homemade Cauliflower Pizza
- Storage and Reheating Instructions for Leftover Cauliflower Pizza Crust
- Frequently Asked Questions About Cauliflower Pizza Crust
- Nutritional Snapshot of This Healthy Pizza Crust
- Share Your Crispy Cauliflower Pizza Crust Creations
Why This Cauliflower Pizza Crust Recipe Works (Low-Carb & Gluten-Free Success)
So many people tell me they gave up on making their own veggie pizza bases because the result felt gummy or fell apart the second they touched it. That’s just not pizza night! This cauliflower pizza crust recipe is different because we tackle texture head-on. It’s designed specifically to deliver on two fronts: being completely low-carb and unbelievably satisfyingly crispy.
We use the natural binding power of mozzarella and Parmesan to create a truly sturdy pizza base that resists folding under the weight of your favorite meats and veggies. Forget those flimsy attempts; this healthy pizza crust becomes firm and flavorful after its first long bake. If your goal is a genuinely good, gluten-free pizza base, this is where you stop searching. You’ll find tons of great inspiration for your next meal when you stop by my guide on healthy lunch recipes too!
Achieving That Light Crisp Exterior
I cannot stress this enough: crispness hinges entirely on getting the water out of the cauliflower. Think of it like squeezing juice from a sponge—you have to wring it out until it feels almost dry. If you skip or rush this step, you might as well be making pizza soup!
Steaming the riced cauliflower first softens it enough so it releases more water when you squeeze. We aren’t baking a raw vegetable here; we are creating a dough-like structure from cooked, dried cauliflower solids. This thorough moisture extraction is the secret sauce to that light crisp exterior.

Gathering Ingredients for Your Easy Cauliflower Pizza Crust
Okay, let’s talk about what you need, because honestly, this recipe uses such simple stuff! You won’t need a million specialized ingredients to make this work, which is why it stays on my list for quick low carb dinners. The key players here are the cauliflower, of course—make sure you have about four cups once it’s riced—and the cheese.
We use mozzarella and Parmesan together, and that cheesy blend isn’t just for flavor; it helps bind everything into a fantastic, shapeable mass. This combination is what lets you press out a proper cauliflower pizza crust that won’t crumble when you add your sauce. Grab your egg, your simple seasonings like oregano and garlic powder, and get ready!
- 1 medium head cauliflower (about 4 cups riced)
- 1 large egg, lightly beaten
- 1/2 cup shredded mozzarella cheese
- 1/4 cup grated Parmesan cheese
- 1/2 teaspoon dried oregano
- 1/4 teaspoon garlic powder
- 1/4 teaspoon salt
- Pinch of black pepper
Step-by-Step: How To Make Cauliflower Pizza Crust Perfectly
Alright, time to put on our aprons! This is where we turn fluffy cauliflower rice into a firm foundation. The whole process, from starting to squeezing to sliding it into the oven, is surprisingly quick—I’ve gotten this down to a fast prep that fits into most 30-minute weeknight dinners. Set your oven to 400°F (200°C) first, and make sure you line your baking sheet with parchment paper. Trust me, you don’t want to skip the paper; things get sticky fast!
First, run that fresh cauliflower through the food processor until it looks exactly like snow, or rice. Then, we cook it just until it’s tender—a quick steam or 5 minutes in the microwave does the trick. Let it cool down a touch so you don’t burn your hands when you get to the most important part of making this amazing cauliflower pizza crust.
The Essential Moisture Extraction Technique
This is the big secret, the one thing that separates a crunchy success from a sad, wet puddle. Take all that cooked, cooled cauliflower rice and pile it into the center of a thin dish towel or a big stack of cheesecloth. Then, you need to squeeze. I mean really squeeze! Lean into it, twist it, and press out every single drop of water you can force out.
When I tell you the cauliflower should feel relatively dry, I mean it. It’s shocking how much water comes out, even when you think you’ve gotten it all. Remember, the drier the cauliflower mixture is before you add the cheese and egg, the sturdier and crispier your final base is going to be. This effort saves you from a soggy pizza disaster!
Baking the Cauliflower Pizza Crust Base
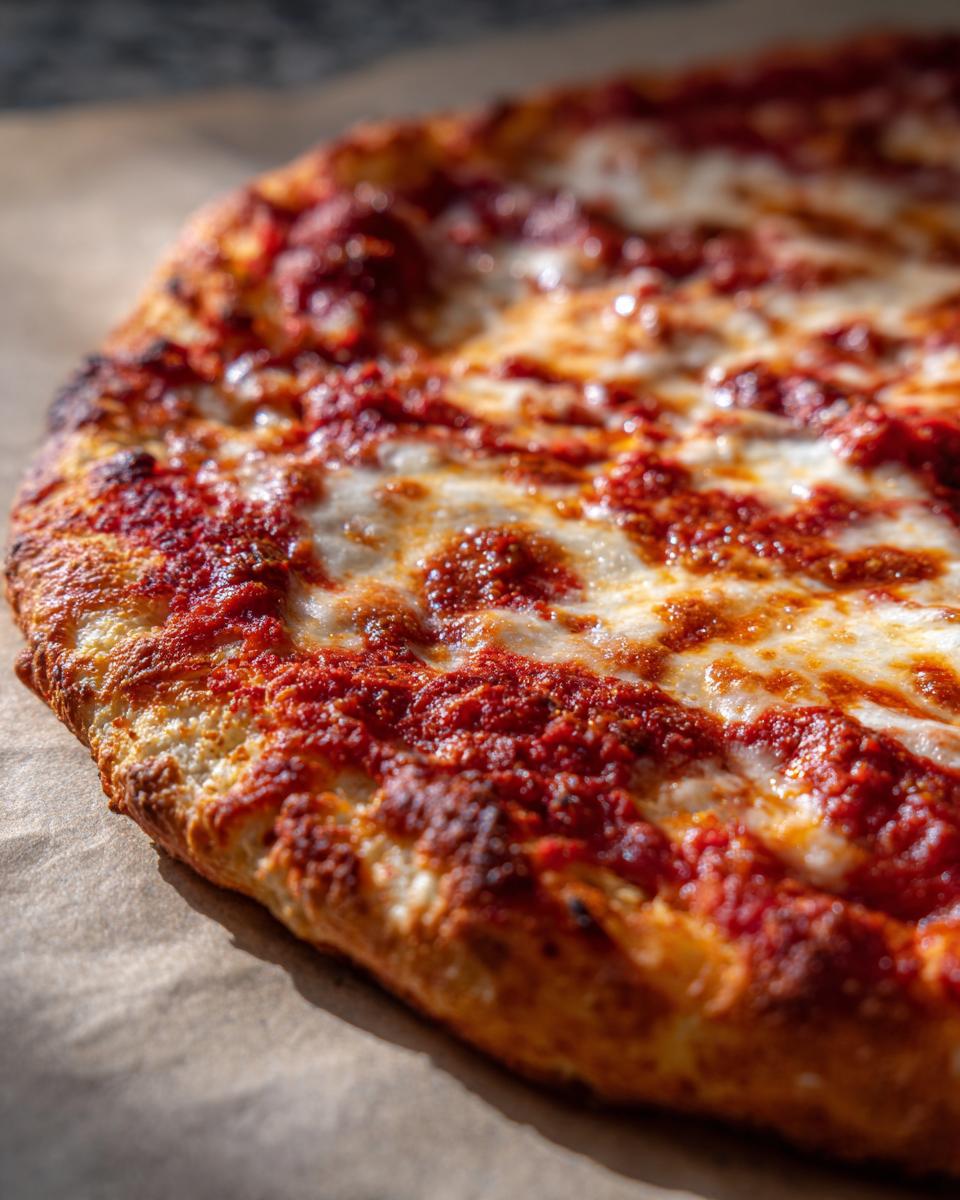
Once you’ve mixed that dry cauliflower with the egg and cheeses until it’s sticky enough to handle, press it out firmly onto your prepared sheet into a rough 10-inch circle. It should be about a quarter-inch thick, maybe a little thicker at the edges if you like a defined rim. Now, slide it into that hot oven for its first bake—about 20 to 25 minutes.
We are baking this crust naked—no sauce yet! You need to watch for those edges to turn beautifully golden brown and for the whole top surface to look firm and dry. This initial bake is what sets the structure for our entire cauliflower pizza crust experience. When it comes out looking solid, you know you’re ready for toppings!
Tips for a Sturdy Cauliflower Pizza Crust That Holds Toppings
The biggest failure point for most homemade veggie crusts happens right after the first bake. You pull out that perfect base, eager to load it up, and suddenly you realize you’ve made a cracker that can only handle three pepperoni slices. Don’t let that happen to your beautiful cauliflower pizza crust!
My biggest tip for topping success lies in restraint and temperature. Keep your sauce light—think a thin layer, not a deep pool of liquid. Also, use toppings you’ve pre-cooked if they release a lot of liquid, like mushrooms or onions. Seriously, if you’re making a Low Carb Pizza Crust to be healthier, don’t drown it in moisture!
Finally, never skip that initial 20+ minute blind bake mentioned earlier. That firmness is what locks in the structure. When you add your sauce and cheese, only return it to the oven just long enough to melt everything—another 5 to 7 minutes max. This prevents over-baking the base entirely.
Making Your Cauliflower Pizza Crust Freezer Friendly
One of the best parts about making this amazing cauliflower pizza crust is that it’s fantastic for meal prep! If you manage to have any leftovers—which I doubt, but we can hope—or if you want to double the batch to save time later, freezing is super easy.
The trick here is that you must bake the crust completely first. Let it cool all the way down so there’s no residual steam trapped inside. Wrap that fully baked base tightly in plastic wrap, then maybe a layer of foil or put it in a zip-top bag. When you’re ready to use your **cauliflower pizza crust** again, just pull it out of the freezer and pop it right back into a 400°F oven for about 10–12 minutes to crisp up before you add your toppings. So simple!
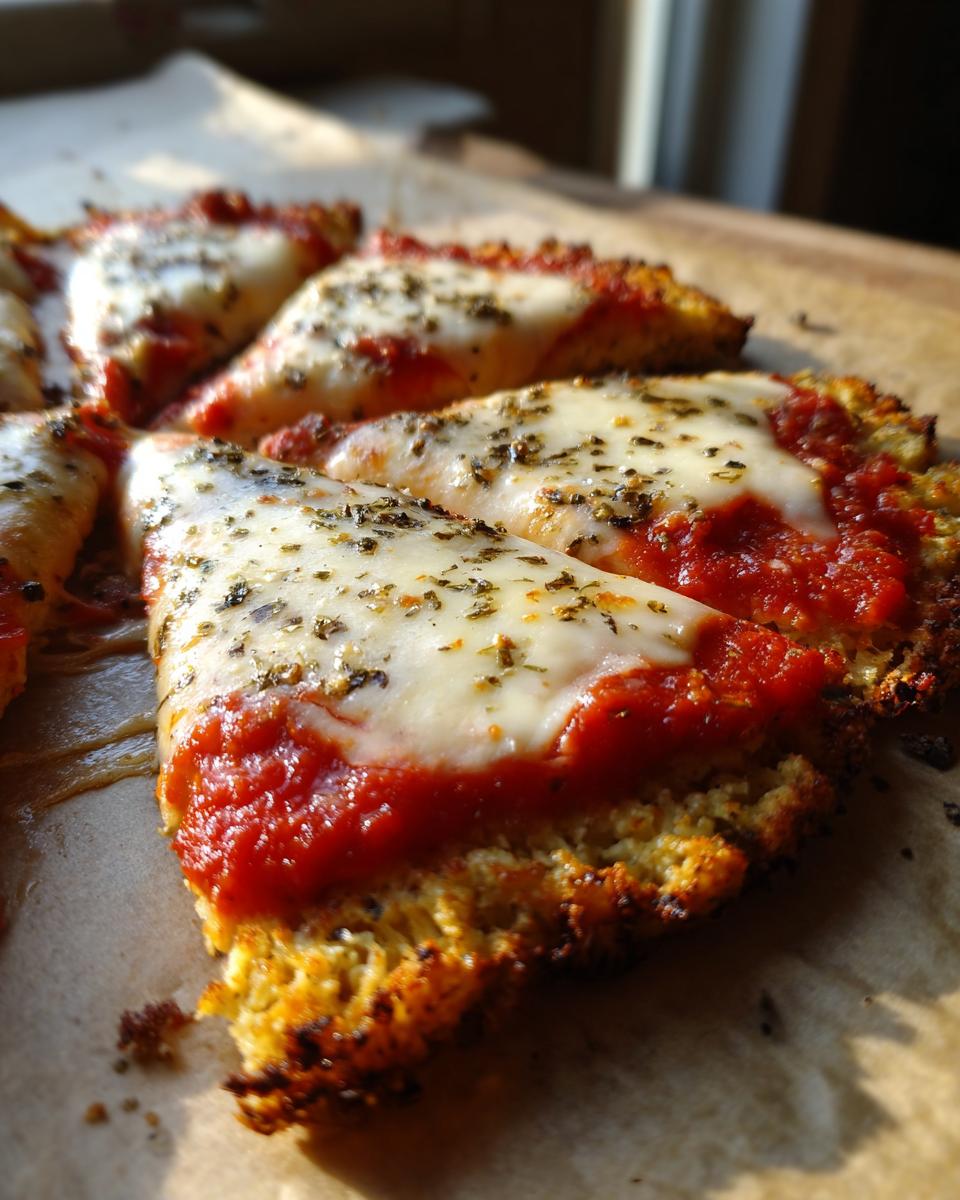
Serving Suggestions for Your Homemade Cauliflower Pizza
Now that you’ve got this incredibly sturdy, cheesy base, the real fun begins: loading it up! Since we are working with a healthier, lighter crust, I tend to lean toward toppings that are bright and fresh instead of heavy sauces that might weigh it down. Remember, this isn’t your standard delivery pizza dough; it cooks faster, so go for quality ingredients.
For a guaranteed winner, try keeping the sauce light. Instead of slathering on heavy tomato sauce, try a thin spread of homemade pesto or even that amazing quick, easy homemade BBQ sauce if savory is what you crave! The Parmesan in the crust really shines when paired with something zesty.
Here are a few combinations that never fail when I make my veggie pizza crust:
- Mediterranean Vibe: Thin layer of hummus (instead of tomato sauce), crumbled feta, sun-dried tomatoes, artichoke hearts, and fresh baby spinach added right at the end.
- Classic & Light: A very light brushing of marinara, fresh mozzarella balls (use less than you think!), basil leaves added *after* the final bake, and a drizzle of good olive oil.
- Spicy Chicken: Use a white sauce or light ranch base, topped with pre-cooked shredded chicken, pickled jalapeños, and thinly sliced red onion.
Since the base itself is already packed with flavor from the herbs and cheese, you don’t need to overdo the toppings. Let that crispy exterior and the vegetable flavor be the star!
Storage and Reheating Instructions for Leftover Cauliflower Pizza Crust
This is one of those recipes that tastes even better the next day, provided you store it correctly! If you have any leftover baked cauliflower pizza crust—even topped slices—you need to keep all the air out. Once completely cool, wrap it tightly in plastic wrap, or store it in an airtight container in the fridge for up to three days. Don’t leave it sitting out, or that crispness we fought so hard for will vanish!
When you’re ready for leftovers, please, for the love of pizza, skip the microwave! The microwave turns everything soft. Instead, reheat plain crusts on a baking sheet at 350°F (175°C) for about 8 minutes until it feels firm again. If it has toppings, a toaster oven works magic to crisp everything up nicely. This ensures your second round of this cauliflower pizza crust is almost as good as the first!
Frequently Asked Questions About Cauliflower Pizza Crust
I get so many questions anytime I post this recipe, which tells me you all want to make the best Gluten Free Pizza Crust possible! Here are the few things I hear most often that can make or break your experience.
Why is my cauliflower pizza crust soggy?
If your crust turns out soggy, I promise you, it’s because of the water! You didn’t squeeze enough out of the cauliflower rice. It’s truly that simple. You need to wring that towel out until your arms ache! A soggy base means the moisture barrier failed, so squeeze harder next time. This is the biggest difference between a great **cauliflower pizza crust** and a sad one.
Can I use pre-riced cauliflower instead of processing my own?
You absolutely *can* use the bag of pre-riced cauliflower, but you need to remember that the pre-riced stuff is often already damp from being bagged. So, you’ll need to steam it just as instructed, let it cool, and then press out even *more* water than you think is necessary. Fresh is always my preference for the best result, but pre-riced is fine for a quick low carb dinner if you dry it out properly. You can find other great veggie tips over at my cauliflower soup recipe post!
Is the cheese necessary, or can I skip it for dairy-free?
The cheese (mozzarella and Parmesan) really helps bind the mixture together, creating that necessary sturdy pizza base. If you need a dairy-free, Low Carb Pizza Crust version, you might need to replace the Parmesan with a few tablespoons of coconut flour or almond flour to help absorb moisture, slightly increasing your egg amount if the mixture seems too loose.
Can I make this crust thicker?
You can, but be warned: thicker bases are more prone to sogginess in the middle, even if you bake it longer. If you do want a thicker crust, I suggest making two very thin crusts instead of one thick one. This gives you more surface area to dry out during that first bake, leading to a better overall texture!

Nutritional Snapshot of This Healthy Pizza Crust
Okay, so you’ve made this amazing, sturdy base, and now you’re probably wondering how this fits into your healthy eating goals. Since this is primarily a vegetable-based crust loaded with cheese for binding—instead of heavy flour—it really cuts down on the empty carbs! I always want you to know what you’re eating, so here is the breakdown for this moist apple bread of a centerpiece.
Remember, these values are just estimates based on the ingredients listed, assuming you divide the crust into 8 slices. If you use extra cheese or sauce later, those numbers go up, of course! But just looking at the crust itself, you get a lot of bang for your buck nutritionally.
- Serving Size: 1 slice (1/8 of crust)
- Calories: About 95
- Total Fat: 6g (Keep an eye on saturated fat, it comes mostly from the cheese!)
- Total Carbohydrates: 5g (Great news for low-carb fans!)
- Dietary Fiber: 2g
- Protein: 7g (That cheese really helps boost the protein!)
- Sugar: Only 2g
See? That’s a fantastic profile for a pizza base! You get good protein and fiber to keep you full without spiking your sugar levels. It really proves that delicious, guilt-free pizza night is totally achievable right here in your own kitchen.
Share Your Crispy Cauliflower Pizza Crust Creations
I really, truly hope you loved making this! When you pull that perfectly firm, golden cauliflower pizza crust out of the oven, I want to see it!
Please do me a favor: rate this recipe down below—five stars if you loved how sturdy and crispy it was! And tell me what toppings you decided to use on your masterpiece in the comments section. Sharing your success helps everyone else conquer their fear of messy veggie crusts. Happy baking!
PrintThe Easiest Crispy Cauliflower Pizza Crust (Low-Carb & Gluten-Free)
Make a sturdy, crispy cauliflower pizza crust that fits your low-carb and gluten-free lifestyle. This recipe delivers a satisfying base ready for your favorite toppings.
- Prep Time: 15 min
- Cook Time: 35 min
- Total Time: 50 min
- Yield: 1 large crust (2-3 servings) 1x
- Category: Dinner
- Method: Baking
- Cuisine: American
- Diet: Low Fat
Ingredients
- 1 medium head cauliflower (about 4 cups riced)
- 1 large egg, lightly beaten
- 1/2 cup shredded mozzarella cheese
- 1/4 cup grated Parmesan cheese
- 1/2 teaspoon dried oregano
- 1/4 teaspoon garlic powder
- 1/4 teaspoon salt
- Pinch of black pepper
Instructions
- Preheat your oven to 400°F (200°C). Line a baking sheet with parchment paper.
- Process the cauliflower in a food processor until it resembles rice. You should have about 4 cups.
- Steam or microwave the riced cauliflower until tender, about 5 minutes. Let it cool slightly.
- Place the cooled cauliflower rice in the center of a clean, thin dish towel or several layers of cheesecloth. Wrap it tightly and squeeze out as much moisture as possible. This step is key for a crispy crust.
- Transfer the dry cauliflower to a medium bowl. Add the beaten egg, mozzarella cheese, Parmesan cheese, oregano, garlic powder, salt, and pepper. Mix well until everything is combined.
- Transfer the mixture to the prepared baking sheet. Press the mixture firmly into a 10-inch circle, about 1/4 to 1/2 inch thick. Make sure the edges are slightly higher.
- Bake the crust for 20 to 25 minutes, or until the edges are golden brown and the crust feels firm and dry to the touch.
- Remove the crust from the oven. Add your sauce and toppings. Return to the oven and bake for another 5 to 10 minutes, until the cheese on top is melted and bubbly.
Notes
- For a freezer-friendly option, bake the crust completely, let it cool, and then wrap it tightly before freezing. Bake directly from frozen when ready to use.
- Squeezing the moisture out of the cauliflower is the most important step for achieving a sturdy, crispy cauliflower crust.
- This crust works well for quick low carb dinners.
Nutrition
- Serving Size: 1 slice (1/8 of crust)
- Calories: 95
- Sugar: 2
- Sodium: 210
- Fat: 6
- Saturated Fat: 3
- Unsaturated Fat: 3
- Trans Fat: 0
- Carbohydrates: 5
- Fiber: 2
- Protein: 7
- Cholesterol: 40