

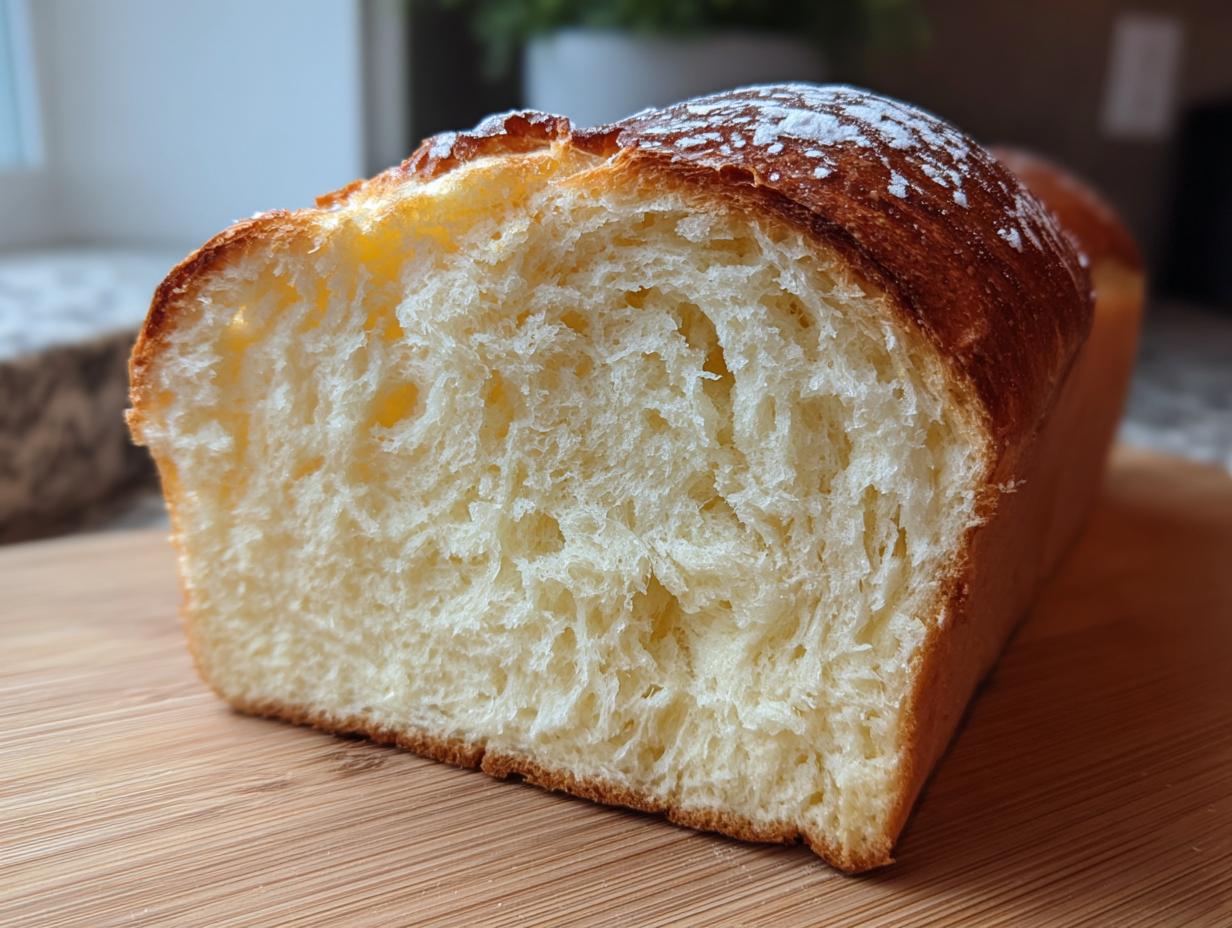
If you’ve ever walked into a bakery and wondered how they get that cloud-like softness in their loaves—you know, the kind that virtually melts when you press it—I have the answer for you today. It’s hiding right there in your pantry! We’re tackling the ultimate condensed milk bread, and trust me, this recipe is a game-changer for your weeknight routine. Here at Cooking by Felix, my whole mission is showing busy people, like myself, that achieving that bakery-quality, slightly sweet, and incredibly tender crumb doesn’t require hours of complicated fuss. This loaf is rich, it’s comforting, and it’s unbelievably straightforward. Get ready for your new favorite sweet bread loaf.
- Why This Condensed Milk Bread Recipe Works for You
- Gathering Ingredients for Your Sweet Bread Loaf
- Step-by-Step Instructions for Soft Condensed Milk Bread
- Tips for Perfect Condensed Milk Bread Results
- Serving Suggestions for Your Sweet Snack Bread
- Storing and Reheating Your Fluffy Bread
- Variations on the Classic Condensed Milk Bread Recipe
- Frequently Asked Questions About Condensed Milk Bread
- Share Your Soft Bread Recipe Success
Why This Condensed Milk Bread Recipe Works for You
I know you want that perfect, soft result without the hassle. This particular soft bread recipe is designed for maximum comfort and minimum stress. It’s truly one of the best approaches for that signature tender crumb bread you dream about.
- It achieves that rich, slightly sweet flavor profile without using complicated additions.
- The method is straightforward, relying on simple proofing rather than complex folding techniques.
The Secret to Fluffy Bread Baking
The magic is the condensed milk, seriously! The high sugar and milk fat content coat the flour proteins so well. This naturally hinders too much gluten development, which keeps the final product from getting tough. That’s expert-level softness achieved by just opening a can.
Perfect for Beginner Bread Baking
If you’ve been nervous about diving into yeast baking, this is your starting line. It stands up beautifully to a little over-handling, and the dough signals are really clear. If you follow the steps later on, you’ve got yourself an amazing batch of easy homemade bread. This is my favorite recipe for anyone starting out in beginner bread baking.
Gathering Ingredients for Your Sweet Bread Loaf
Okay, let’s get our components prepped! When you bake, showing respect for the ingredients makes the recipe work, and that’s never truer than with yeast breads. Having everything ready before you start mixing is my number one tip for keeping things calm in the kitchen. Don’t substitute anything unless I tell you to, especially in this recipe, because the balance here is what gives you that incredible texture. Here is exactly what you need to pull together this wonderful sweet bread loaf.
- 1 cup warm milk (It really needs to be about 110°F—think comfortably warm, not hot!)
- 2 1/4 teaspoons active dry yeast
- 1/4 cup granulated sugar
- 1/2 cup sweetened condensed milk (The star, so make sure it’s the real deal!)
- 1/4 cup unsalted butter, melted
- 1 large egg, room temperature (Room temp is key for smooth incorporation!)
- 3 1/2 cups all-purpose flour, plus more for dusting
- 1 teaspoon salt
- 2 tablespoons milk, for brushing the top
Ingredient Notes and Substitutions
We need to talk about that milk temperature first! If your milk is too hot, you’ll kill the yeast before it even wakes up. You want it warm enough to make the yeast feel happy and active, usually around 110°F. When you see that foam—that’s success talking! This recipe is already wonderfully rich because of the condensed milk, but if you really want to take it up a notch and create an even more luxurious, rich bread recipe, swap your regular milk for whole milk. That extra fat adds just a bit more tenderness right from the start.
Also, don’t forget the salt; it’s not just for flavor! It helps control the yeast so your rise doesn’t get totally out of control! If you’ve made my easy homemade garlic butter recipe, you know I love building flavor in layers, and here, the salt is essential to balancing the sweetness.
Step-by-Step Instructions for Soft Condensed Milk Bread
This is where the magic truly happens! Look, baking bread can feel intimidating, but I promise, once you see how smooth this dough gets and you smell that sweet, yeasty aroma filling your kitchen, you’ll be hooked. We need patience here, especially during the rising times; rushing that process is the quickest route to a dense, sad loaf. Stick with the timelines, and you’ve got yourself the most wonderfully soft loaf around. This entire process, from start to finish, results in the most satisfying condensed milk bread you’ll ever bake.
Activating Yeast and Mixing Wet Ingredients for Condensed Milk Bread
First things first: wake up that yeast! Combine your warm milk and the active dry yeast right in your large mixing bowl. Just let it sit there for five minutes. You are looking for a bubbly, foamy layer on top—that’s your guarantee that the yeast is alive and ready to work its airy wonders. Once it’s foamy, whisk in the granulated sugar, the star ingredient (sweetened condensed milk), the melted butter, and your room temperature egg until everything looks nicely incorporated.
Kneading and First Proofing of the Dough
Next, we tackle the dry stuff. Mix about three cups of your flour with the salt in a separate bowl. Now, slowly start adding those dry ingredients into your wet mixture. Mix until you get a shaggy dough ball. Turn that dough out onto a lightly floured surface—be ready to work it! You need to knead this for about 8 to 10 minutes. Keep adding the remaining flour bit by bit until the dough is smooth, elastic, and just barely holds onto your fingers but doesn’t stick heavily. Once it’s perfect, put it in a greased bowl, cover it up, and let it proof in a warm corner of your kitchen for about 1 to 1.5 hours. It needs to double in size!
Shaping and Baking Your Tender Crumb Bread
Once it’s doubled, give that dough a gentle punch down to release the air. Shape it carefully into a log—keep everything nice and tight—and settle it into your greased 9×5 loaf pan. Cover it again and let it rest for the second rise, which takes about 30 to 45 minutes. You want the dough to crown about an inch over the rim of the pan. Preheat your oven to 350°F (175°C) while it proofs. Brush the top with those last two tablespoons of milk for a nice golden finish. Bake it for 30 to 35 minutes. Don’t just rely on color; grab a thermometer and pull it when the center hits 200°F. That temperature ensures you get that soft, signature tender crumb bread we’re aiming for!
After it comes out of the oven, remove it from the pan right away—don’t let it steam itself in there! Let it cool completely on a wire rack. I know it’s hard, but slicing hot bread just makes it gummy. If you want some inspiration on handling soft doughs, check out my guide for easy naan bread recipe; the handling principles are similar!
Tips for Perfect Condensed Milk Bread Results
Baking is science, sure, but it’s also feel, especially when you’re going for that cloud-like texture. I’ve learned through trial and error (and way too many dense loaves in my early days) that a few small tweaks make a colossal difference in how this loaf turns out. If you follow the recipe exactly, you should be fine, but these tips are my insurance policy for guaranteed incredible results every time you bake this sweet bread loaf.
Achieving the Ideal Sweet Bread Loaf Texture
The biggest enemy of fluffiness? Too much flour. I know the dough feels sticky sometimes, especially during the kneading stage, but trust me—resist the urge to dump in extra flour just to make it stop clinging to your hands! Remember the rule: you want it soft, elastic, and smooth, but not dry. If you over-flour it, you’ve essentially created a sturdy, less exciting bread. That softness we love comes from the high moisture content provided by the condensed milk.
Another point I learned from my early attempts at making loaves like this easy brioche bread recipe is handling it gently after the first rise. Once you punch the air out, be firm but gentle when reshaping it into that log for the pan. You want to keep some of those beautiful gas bubbles intact. Think of it as tucking the dough in for a gentle second nap, not punching it flat!
Also, pay attention to cooling. It’s torturous, I know! But slicing into that hot loaf traps moisture inside and steams the crumb, which can quickly turn it gummy. Let it cool completely on a wire rack so air circulates underneath. That tiny bit of patience sets the structure perfectly for slicing the next day.
Serving Suggestions for Your Sweet Snack Bread
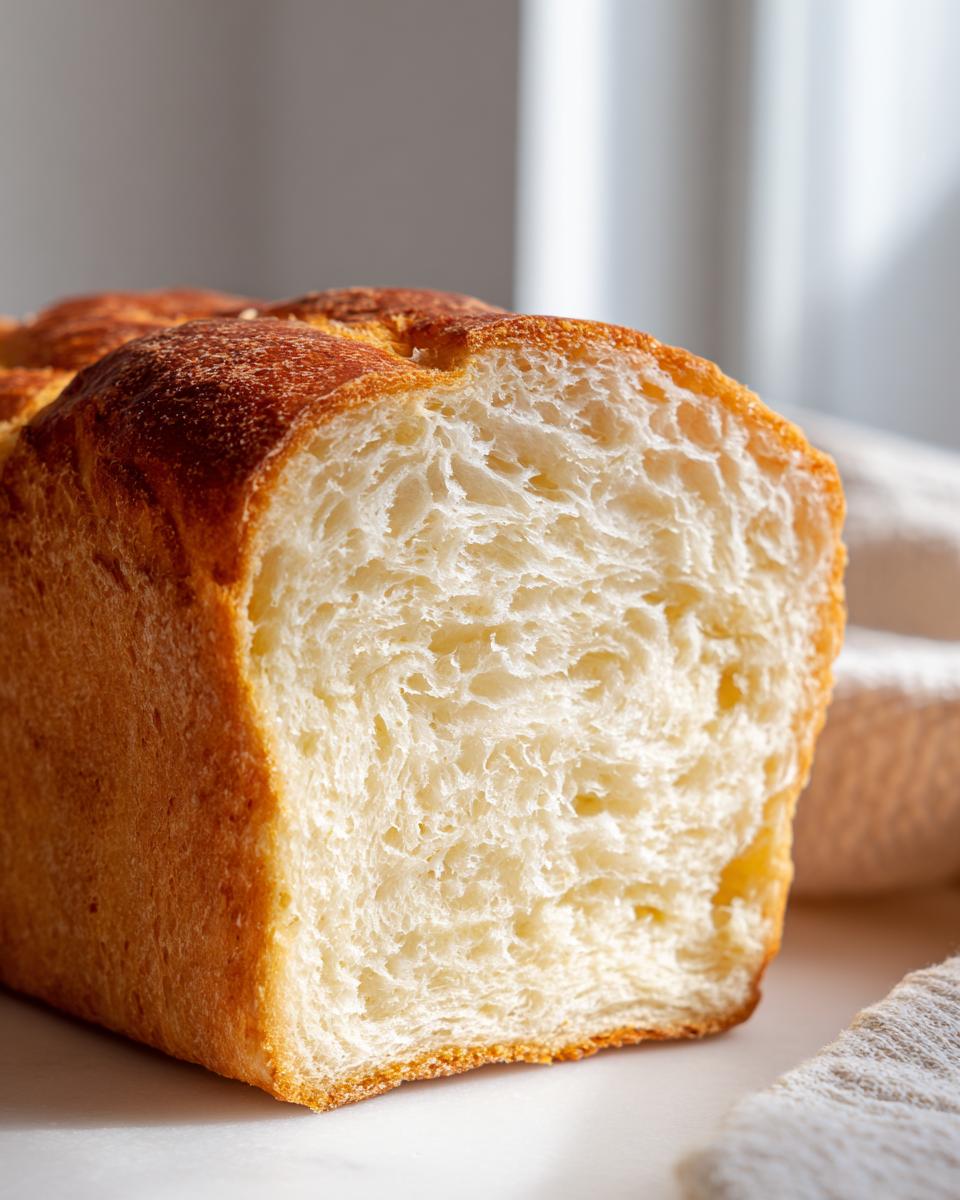
Seriously, slicing into this warm loaf of condensed milk bread for the first time is such a proud moment! The best part about a slightly sweet loaf like this is how versatile it is. It’s rich enough to feel indulgent but soft enough to handle whatever spread you throw at it. Forget dry toast; this is the perfect base for any breakfast bread ideas you have swirling around!
I mean, you absolutely have to try it toasted with salty butter—that quick melt is spectacular. But if you want to go next level, try making French toast with it. Because this bread is so sturdy yet soft, it soaks up the custard beautifully without instantly falling apart. It makes the best handheld treats, especially if you turn the leftovers into something like my French toast muffins with cinnamon sugar! It’s also heavenly dipped into a warm cup of coffee or tea in the afternoon. Honestly, try to save one slice for tomorrow, but I won’t judge if you eat the whole thing tonight!
Storing and Reheating Your Fluffy Bread
Listen, once you have baked this perfectly soft loaf, the last thing you want is for it to go stale overnight! Proper storage is key to maintaining that gorgeous, nearly tender crumb bread texture we worked so hard for. Because this bread is enriched with milk and butter—thanks to that incredible condensed milk—it can dry out faster than a standard lean dough if you leave it exposed to the air.
The absolute best way to keep this bread fresh for about three days is to let it cool completely, then wrap it tightly. I mean really tightly! Use plastic wrap first, squeezing out as much air as possible, and then slip the whole thing into an airtight container or a heavy-duty zip-top bag. Keeping it on the counter is fine for those first few days.
Now, if you made a double batch (and who wouldn’t?), you absolutely need to freeze some! Once it’s totally cool, give it that same tight double-wrap. It freezes beautifully for up to three months. When you pull a loaf out of the freezer, just let it thaw on the counter, still wrapped, for about four hours. It almost tastes like it just came out of the oven!
When you’re ready to eat that thawed or counter-stored bread, reheating is the trick to resurrecting that fresh-from-the-oven steam. Slice what you need, place the slices on a baking sheet, and pop them into a 350°F oven for just five to seven minutes. That little burst of heat melts the butter and sugar slightly, making it feel incredibly soft again. Seriously, don’t use the microwave unless you plan to eat it instantly—it can heat unevenly and sometimes toughen things up faster than you’d like!
Variations on the Classic Condensed Milk Bread Recipe
This loaf recipe is a fantastic, straightforward base, but once you’ve mastered the soft texture, it’s fun to start tweaking things! Honestly, this dough is so forgiving, which is why I love it for exploring new flavor profiles. You can take this beautiful condensed milk bread and turn it into several other show-stopping treats without much extra fuss.
My favorite switch-up is turning the loaf into something more decadent, perfect for weekend brunch or dessert. You can easily transform the dough into amazing rolls! After that first rise, instead of shaping it into a log, divide the dough into about 12 equal pieces. Roll each piece into a tight ball—think of making little plump pillows—and tuck them snugly into a greased 9×13 inch pan. Let them have their second rise, brush them with milk, and bake them until they’re golden. You end up with incredible sweet rolls recipe that pull apart like nothing else. That condensed milk keeps them impossibly moist!
If you want to lean into the ‘sweet snack bread’ side without making rolls, try folding in flavor right before the second rise. A half cup of finely chopped pecans mixed with a tablespoon of cinnamon sugar works wonders. Or maybe you want something citrusy? A teaspoon of orange zest mixed right into the dough before you shape it gives it the brightest flavor imaginable. It contrasts beautifully with the richness from the condensed milk.
For those who love that honey butter bread flavor but want a sweeter base, just brush the top with melted butter mixed with a drizzle of honey just before baking. It gives you a lovely caramelized crunch on the outside. No matter how you customize it, remember that because this is a sweet bread loaf, it pairs perfectly with anything savory too.
Frequently Asked Questions About Condensed Milk Bread
I get so many questions about this little loaf because people can’t believe how soft it comes out when they see the simple ingredient list. Don’t worry if you run into a snag; most issues are easy to fix! I pulled together the most common things folks ask so you can bake with total confidence every time.
Can I make this an easy 30-minute recipe?
Oh, I wish! If only baking yeast bread were that fast! The texture we are chasing here—that fluffy, airy dream—simply cannot be rushed. The proofing times are non-negotiable because that’s when the yeast does all the heavy lifting to create those air pockets. Seriously, those 1 to 1.5 hours for the first rise are sacred for achieving that tender crumb bread.
However, you can optimize your environment! If your kitchen is chilly, you can speed things up a bit by rising the dough in the oven with just the light on, or by placing the covered bowl over a sink filled with very warm (not hot!) water. That small boost of ambient heat can shave about 15 minutes off the total proofing time without compromising the structure. But trust me, this recipe is already one of my fastest methods for easy homemade bread, even with the rising.
How do I ensure my condensed milk bread is not too sweet?
That’s a fair question, especially if you’re used to baking loaves that aren’t overtly sweet. The sweetness in this condensed milk bread is inherent because the milk itself is sweetened! However, the recipe is balanced to taste like a slightly sweet breakfast bread, not a dessert cake. We use a full teaspoon of salt specifically to cut against that sweetness and highlight the yeasty flavor.
If you are particularly sensitive to sugar, you can carefully reduce the granulated sugar from 1/4 cup down to 2 tablespoons. That’s about as far as I’d recommend going before you start affecting the yeast activity or the overall structure. If you prefer a different flavor base, try checking out my guide on easy yeast bread recipes where the sweetness is totally neutral!
Share Your Soft Bread Recipe Success
Now that you’ve pulled that beautiful, fragrant loaf out of the oven, the real fun begins: sharing the joy! Honestly, seeing your successes is what keeps me inspired to break down these recipes into their simplest steps here at Cooking by Felix. I always tell people that baking is truly a shared experience.
Did you make this soft bread recipe? I desperately want to know how it turned out for you! Head down to the comments section and tell me everything. Were you surprised by how easy it was to achieve that fluffy, cloud-like texture? Did you eat the whole loaf in one sitting? (No judgment here, I’ve been close!)
If you snapped a photo, please tag me! Seeing your gorgeous golden tops on social media is the best part of my day. You can tag me on Instagram, but don’t forget about Pinterest—it’s full of so many wonderful bakers sharing their creations from my site. You can check out results on Pinterest, or if you’re looking for something else to try next or just want to get in touch with questions, you can always reach out through my contact page.
Your feedback helps me know which recipes need clarity or maybe a new variation down the road. Happy baking, and thank you for trusting me with your kitchen time!
PrintSoft and Fluffy Sweetened Condensed Milk Loaf Bread
Make this easy, slightly sweet bread loaf using sweetened condensed milk for a tender crumb and rich flavor. It is perfect for breakfast toast or a satisfying snack.
- Prep Time: 20 min
- Cook Time: 35 min
- Total Time: 1 hour 50 min
- Yield: 1 loaf (10 servings) 1x
- Category: Baking
- Method: Yeast Baking
- Cuisine: American
- Diet: Vegetarian
Ingredients
- 1 cup warm milk (about 110°F)
- 2 1/4 teaspoons active dry yeast
- 1/4 cup granulated sugar
- 1/2 cup sweetened condensed milk
- 1/4 cup unsalted butter, melted
- 1 large egg, room temperature
- 3 1/2 cups all-purpose flour, plus more for dusting
- 1 teaspoon salt
- 2 tablespoons milk, for brushing
Instructions
- In a large bowl, combine the warm milk and yeast. Let it sit for 5 minutes until foamy.
- Add the granulated sugar, sweetened condensed milk, melted butter, and egg to the yeast mixture. Whisk until combined.
- In a separate bowl, whisk together 3 cups of the flour and the salt.
- Gradually add the dry ingredients to the wet ingredients, mixing until a shaggy dough forms.
- Turn the dough out onto a lightly floured surface. Knead for 8 to 10 minutes, adding the remaining 1/2 cup of flour as needed, until the dough is smooth and elastic. It should be soft but not sticky.
- Lightly grease a large bowl. Place the dough in the bowl, turning to coat. Cover the bowl with plastic wrap or a clean towel and let it rise in a warm place for 1 to 1.5 hours, or until doubled in size. This is your first proof.
- Gently punch down the risen dough. Shape it into a log and place it into a greased 9×5 inch loaf pan.
- Cover the pan loosely and let the dough rise again in a warm place for 30 to 45 minutes, or until the dough has crowned about 1 inch over the rim of the pan. This is your second proof.
- Preheat your oven to 350°F (175°C).
- Brush the top of the dough lightly with the 2 tablespoons of milk.
- Bake for 30 to 35 minutes, or until the top is golden brown and the internal temperature reaches 200°F (93°C).
- Remove the bread from the pan immediately after baking and let it cool completely on a wire rack before slicing.
Notes
- For an extra rich bread recipe, use whole milk in place of regular milk.
- If you prefer sweet rolls recipe results, divide the dough into 12 equal pieces after the first rise and shape them into balls before placing them in a greased 9×13 inch pan for the second proof. Bake for 20-25 minutes.
- This bread is a great alternative to honey butter bread when you want a slightly sweeter base flavor.
Nutrition
- Serving Size: 1 slice
- Calories: 210
- Sugar: 10
- Sodium: 180
- Fat: 5
- Saturated Fat: 3
- Unsaturated Fat: 2
- Trans Fat: 0
- Carbohydrates: 37
- Fiber: 1
- Protein: 5
- Cholesterol: 25