

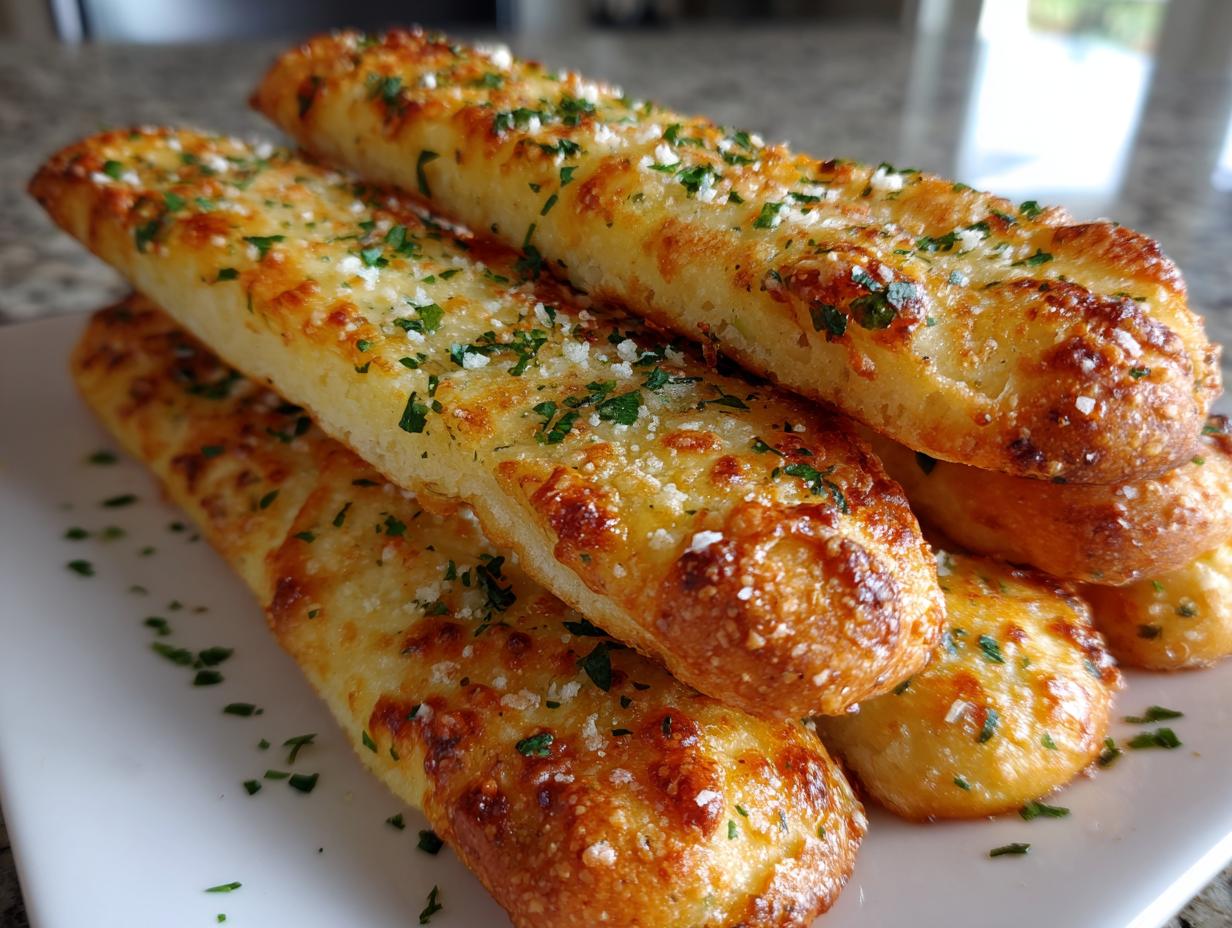
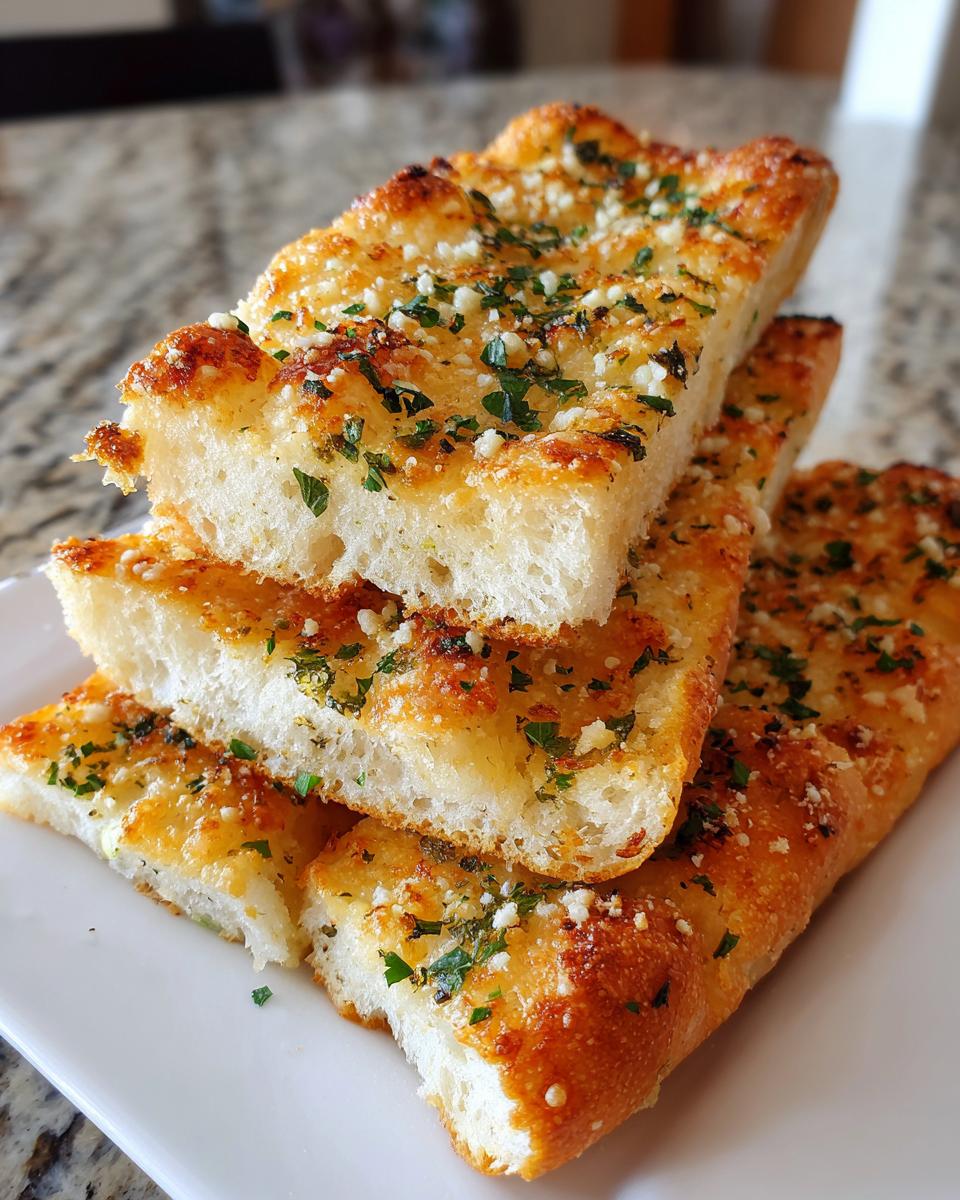
You know that moment—you’re halfway through a bowl of pasta, and all you can think about is that endless basket of warm, salty, garlicky breadsticks waiting at your favorite Italian spot? I totally get it. Working in marketing, I learned fast that craving something delicious shouldn’t have to mean ordering takeout. That’s why my mission at Cooking by Felix is making exceptional food achievable, even on the busiest weeknights. Forget the drive-thru line; today, we are making the absolute Soft & Chewy Olive Garden Style Garlic Parmesan Breadsticks (Copycat). Trust me, these homemade breadsticks are so fluffy, buttery, and packed with garlic flavor, you’ll never go back!
- Why These Homemade Breadsticks Recipe Are the Best Breadsticks Ever
- Ingredients for Soft and Fluffy Breadsticks
- How to Prepare Your Olive Garden Copycat Breadsticks
- Tips for Perfect Garlic Breadsticks Homemade
- Variations: Turning Breadsticks into Cheesy Breadsticks Recipe
- Serving Suggestions for Your Appetizer Breadsticks
- Storage and Reheating Your Parmesan Breadsticks
- Frequently Asked Questions About Homemade Breadsticks
- Estimated Nutritional Data for Your Breadsticks
Why These Homemade Breadsticks Recipe Are the Best Breadsticks Ever
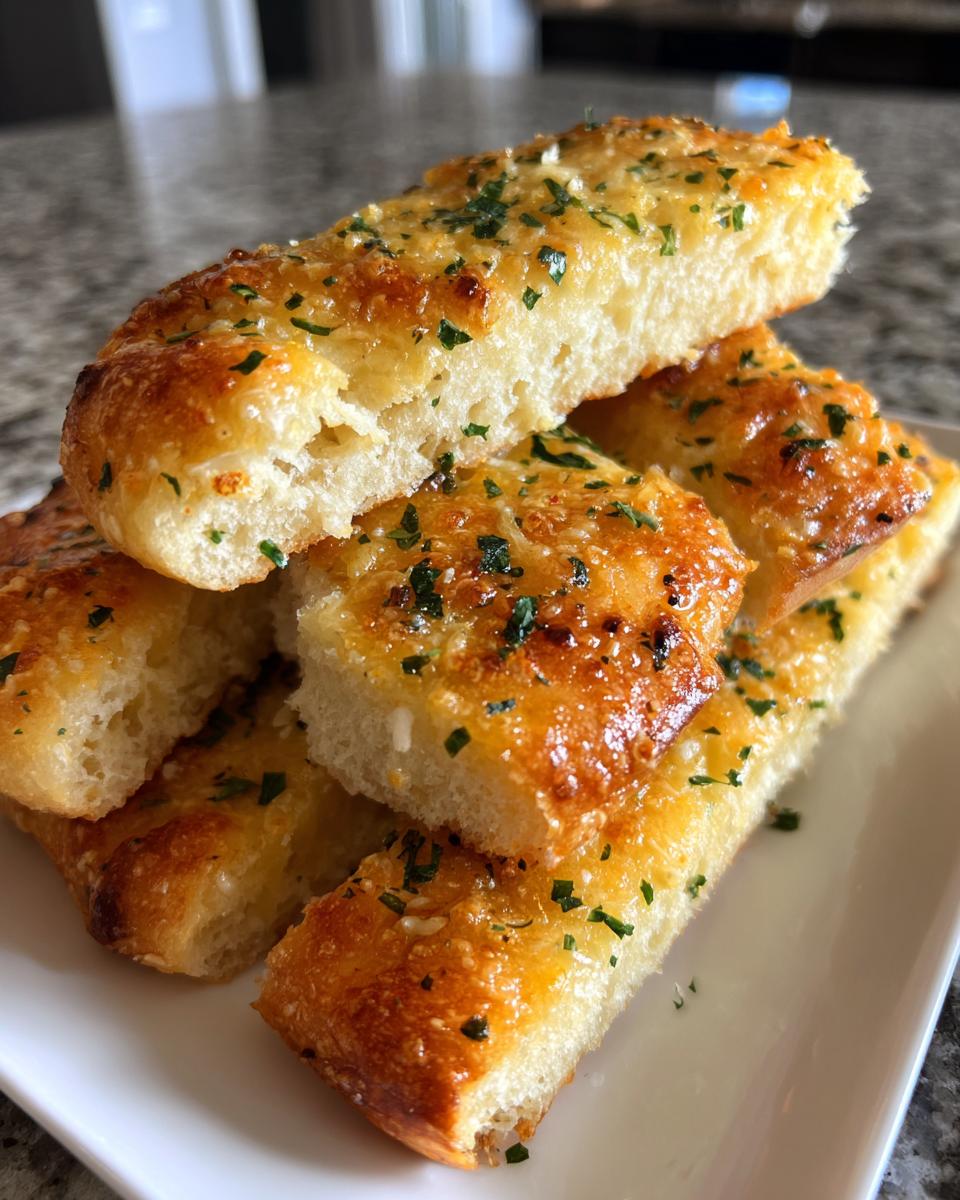
I promise you, finding the Best Breadsticks Ever means nailing that signature texture. We aren’t cutting corners here; these aren’t just okay dough sticks. They are ridiculously soft!
- They nail that fluffy, chewy interior you crave.
- The garlic butter topping is applied while they are piping hot, making every single bite taste like heaven.
- This Homemade Breadsticks Recipe actually comes together faster than you think!
Seriously, stock up on the Parmesan because these breadsticks disappear fast.
Ingredients for Soft and Fluffy Breadsticks
Getting those amazing Soft and Fluffy Breadsticks starts with treating the yeast right. I always measure my warm water carefully—you want it around 105 to 115°F. That temperature wakes up the yeast, and that’s the key to light breadsticks!
Here’s what you need to gather:
- 1 packet active dry yeast (that’s 2 1/4 teaspoons!)
- 1 teaspoon granulated sugar
- 1 cup warm water (make sure it’s about 105-115°F, seriously!)
- 3 cups all-purpose flour, plus whatever you need for dusting
- 1 teaspoon salt
- 2 tablespoons vegetable oil
And for that signature topping that makes these irresistible:
- 1/2 cup (one full stick) unsalted butter, melted
- 1 teaspoon garlic powder
- 1 teaspoon dried parsley
- 1/2 cup freshly grated Parmesan cheese
How to Prepare Your Olive Garden Copycat Breadsticks
Alright, this is where the magic for incredible Olive Garden Copycat Breadsticks really happens! It’s all about respecting the dough. If you want that soft, melt-in-your-mouth texture, we need patience with the yeast. This recipe is my tried-and-true method for getting that perfectly fluffy breadsticks texture without needing a stand mixer.
Making the Fluffy Homemade Dough
First up, we wake up that yeast. Grab a little bowl and mix your warm water—and listen, if the water is too hot, you’ll kill the yeast, so it needs to be just right, around 105 to 115°F. Add the sugar and yeast and let it sit for 5 to 10 minutes until it looks foamy on top. That foam is your confirmation! Next, in a big bowl, whisk your flour and salt together. Pour in the bubbly yeast mix and the oil. Mix it until it’s shaggy, then turn it out onto a lightly floured surface. Knead for a good 5 to 7 minutes until it’s smooth and springs back when you poke it.
Now, the wait! Put that beautiful dough into an oiled bowl, cover it up tight, and let it chill out in a warm spot for about 1 to 1.5 hours. Don’t rush this rising time; it creates all those beautiful air pockets for the softest texture. If you want to check out how I handle other fluffy doughs, swing by my easy brioche recipe for comparison!
Shaping and Baking Your Breadsticks
While the dough is getting big and happy, get your oven preheated to 400°F (200°C). This is a trick: line your huge baking sheet with parchment paper. It saves you so much scrubbing later! Once the dough has doubled, gently punch it down. Divide it into 12 equal pieces—I like to use a kitchen scale for consistency, but eyeballing it works too. Roll each piece into a 10-inch rope. Lay them out on the sheet, giving them about an inch of space. Bake them for 10 to 12 minutes. You want them lightly golden, not dark brown!
Applying the Buttery Breadsticks Topping
This step cannot wait! While those babies are baking, melt your stick of butter in a small saucepan. Whisk in the garlic powder, parsley, and that lovely grated Parmesan cheese until it’s all combined into your glorious coating. The minute those hot breadsticks come out of the oven, you need to brush that Buttery Breadsticks mixture all over them. The heat will melt the butter and let the cheese and garlic sink right in. Serve them hot!
Tips for Perfect Garlic Breadsticks Homemade
If you want truly perfect Garlic Breadsticks Homemade, I have a couple of insider tips that Felix taught me. The biggest thing is don’t skip out on the *real* Parmesan for the topping. The grated shelf-stable stuff just melts differently—use the real, good quality stuff, and grate it yourself if you can!
Now, about speed: I know sometimes you need breadsticks *now*. You absolutely *can* try reducing the first rise time to 30 minutes, maybe setting the bowl on top of your warm oven right after preheating. But I have to warn you, the texture changes. You get a decent breadstick, yes, but it won’t have that signature pillowy softness from a full rise. It’s denser, you know? It just won’t be the copycat winner we are aiming for.
For the butter topping, to really maximize that garlic punch, consider mixing the garlic powder with a tiny splash of hot tap water before adding it to the melted butter. It helps bloom the flavor! If you love that strong garlic/Parm pairing, check out my garlic parmesan chicken skillet recipe—it uses similar flavor notes!
Variations: Turning Breadsticks into Cheesy Breadsticks Recipe
We have the perfect base dough for our breadsticks, which means we can easily pivot into a crowd-pleasing Cheesy Breadsticks Recipe! This is so simple, and honestly, you’ll wonder why you ever ordered the plain ones after trying these.
If you’re using the main recipe above, you just need to use the recipe for the dough (Steps 1 through 4) and then adjust the topping or fold-ins before baking.
For the absolute best result, try folding the cheese *into* the dough right before the final resting period. When you get to step 4 (the first rise), gently punch the dough down, sprinkle about 1/2 cup of fresh mozzarella or Monterey Jack over the surface, and then knead it in quickly—just until you see the cheese streaks. Then, let it rise that final hour! This melts throughout the breadstick as it cooks.
Alternatively, for an easy cheese boost, wait until you apply the garlic butter topping in Step 8. Sprinkle an extra 1/4 cup of Parmesan cheese (use the same high-quality stuff!) over the hot breadsticks so it melts right into the butter coating. It creates this amazing crust.
Want to stick with an herb variation instead of cheese? That’s great too! You can mix 1 teaspoon of dried Italian seasoning right into your flour mix before adding the wet ingredients. Or, swap out the parsley in the topping for dried oregano. If you love that cheesy flavor without the dairy, you should also check out my baked parmesan zucchini recipe for another simple, savory winner.
Serving Suggestions for Your Appetizer Breadsticks
These breadsticks are such a versatile treat! They really shine when they are served warm, fresh from the oven, because that garlic butter topping is still gooey. While they are famous as an Appetizer Breadsticks basket on their own, they taste even better next to something saucy or creamy.
Honestly, you can serve these alongside almost any weeknight dinner, but here are the pairings I always rush back to:
- Dipping Central: Forget plain butter! Serve them next to a big bowl of marinara sauce for dipping. A good, slightly chunky tomato sauce is fantastic here.
- Soup Buddies: Nothing beats tearing off a piece of warm breadstick and dunking it into a rich, velvety soup. I’m particularly obsessed with dipping these into my creamy roasted tomato bisque—it’s perfection.
- The Main Event Side: When you’re having spaghetti or lasagna, these are a non-negotiable dinner side dish. They soak up any extra sauce beautifully, which is why I always make sure to double the butter topping when serving them with pasta.
- Next Level Comfort: If you are feeling extra cozy, try serving them alongside my recipe for easy French onion soup. The cheese on the soup and the garlic on the breadsticks just marry perfectly!
Making these fantastic breadsticks means you always have a crowd-pleasing side dish ready to go. They elevate even the most basic meal!
Storage and Reheating Your Parmesan Breadsticks
Look, these breadsticks are so delicious that you might actually have leftovers, which is either a win or a tragedy, depending on how many you baked! If you do manage to save some of these glorious Parmesan Breadsticks, storing them correctly is crucial to keeping that soft texture we worked so hard to achieve. Don’t just toss them in a plastic bag—that’s the fastest route to rubbery breadsticks!
The best way to store any extras is to let them cool completely, which usually takes about 30 minutes on a wire rack. Once they are cooled down, pop them into an airtight container. You can layer them with a piece of parchment paper in between to make sure they don’t stick together too much. Keep them on the counter at room temperature for up to three days. Refrigerating them tends to dry them out fast, so if you aren’t planning on eating them within that time frame, freezing is your friend!
Now, reheating. This is where you betray the microwave. Microwaves make bread warm up fast, but they also make it tough and chewy when it cools down again. We want soft and fluffy, right?
For the best results, preheat your oven to about 350°F. Yes, it takes a minute, but trust me on this one! Lay the breadsticks out on a baking sheet—you can even give them an extra quick brush of melted butter while you wait for the oven to heat up. Bake them for about 5 to 8 minutes. That gentle oven heat revives the crumb and melts that buttery topping just enough to make them taste nearly freshly baked. If you have a toaster oven, that works great for just one or two sticks, too!
If you are reheating from frozen, just add about 5 extra minutes to the baking time. Easy peasy!
Frequently Asked Questions About Homemade Breadsticks
I know when you look at a recipe this good, you start thinking about all the ways you might want to tweak it! Before you start substituting things wildly, check out some of the questions I get most often about making these breadsticks. It’s always smart to know how ingredients affect that perfect, fluffy end result!
Can I make these breadsticks without yeast for a Quick Breadsticks Recipe?
Oh, the siren call of the Quick Breadsticks Recipe! I totally get the need for speed. You *can* swap the yeast for about 3 teaspoons of baking powder mixed in with your flour. However, I have to be upfront: the result will be different. Yeast gives you that amazing stretchy, chewy texture because the gluten develops during the long rise. Baking powder gives you a lift, sure, but the texture will be more like a biscuit or a slightly denser dinner roll. It’s tasty, but it won’t be the soft, iconic copycat breadstick texture we are aiming for here. If I’m making these for a dinner side dish, I always stick with the yeast, even if it means sacrificing 30 minutes of rising time!
What is the best way to store leftover breadsticks to keep them soft?
This is a top-tier question! Nobody wants stale, hard breadsticks the next day. My golden rule applies here: room temperature and airtight. Once they are completely cool—and I mean *completely* cool—transfer them to an airtight plastic container or a Ziploc bag. If you have a lot, layer them with a small square of parchment paper between layers so the melted butter doesn’t fuse them all into one giant breadstick monolith. Keep the container on the counter. Resist the urge to put them in the fridge! If you need to reheat them later, remember the oven trick—350°F for 5-8 minutes will revive them beautifully. For more time-saving kitchen wisdom, check out my thoughts on quick and easy breakfasts for busy mornings.
Can I add cheese directly into the dough for Cheesy Breadsticks Recipe?
Yes, absolutely, and that’s how you level up to the ultimate Cheesy Breadsticks Recipe! You have two main options for maximum flavor payoff. Option one, which I detailed above, is gently kneading the cheese in right before the final proof. This makes the cheese melt throughout the center of the dough, giving you that beautiful stretch when you pull them apart. Option two is for an extra cheesy crust: sprinkle the cheese you planned for the topping over the baked breadsticks *right after* you apply the garlic butter. The residual heat melts it perfectly onto the butter layer. If you fold it in, stick to low-moisture cheeses like mozzarella or sharp provolone. If you use fresh mozzarella, keep it to a minimum, or it can make the dough a little wet.
Estimated Nutritional Data for Your Breadsticks
Okay, here’s the grown-up section! While these amazing garlic Parmesan breadsticks taste like pure indulgence, they aren’t half bad when you look at the numbers—especially since this recipe makes a generous 12 servings. Remember, this is all based on the recipe provided, and exact nutritional content can swing wildly depending on the brands of flour or cheese you use. This is just a roadmap!
I always think about them as a satisfying appetizer or a perfect addition to a bigger spread, so keeping the serving size to one breadstick is key for tracking. You get a solid helping of carbs for energy and a decent amount of fat from that delicious buttery topping. Not too shabby for a restaurant-quality treat made right at home!
Here is the estimated breakdown for one breadstick:
- Serving Size: 1 breadstick
- Calories: 180
- Fat: 8g
- Saturated Fat: 4g
- Trans Fat: 0g
- Cholesterol: 15mg
- Sodium: 250mg
- Carbohydrates: 23g
- Fiber: 1g
- Sugar: 1g
- Protein: 5g
So go ahead and dunk a couple of these breadsticks into your soup; you’ve earned it!
PrintSoft & Chewy Olive Garden Style Garlic Parmesan Breadsticks (Copycat)
Make the best homemade breadsticks that taste just like the restaurant favorite. These soft, fluffy, and buttery breadsticks are topped with garlic parmesan butter and are perfect as an appetizer or dinner side dish.
- Prep Time: 20 min
- Cook Time: 12 min
- Total Time: 1 hour 32 min
- Yield: 12 breadsticks 1x
- Category: Appetizer
- Method: Baking
- Cuisine: American
- Diet: Vegetarian
Ingredients
- 1 packet active dry yeast (2 1/4 teaspoons)
- 1 teaspoon granulated sugar
- 1 cup warm water (about 105-115°F)
- 3 cups all-purpose flour, plus more for dusting
- 1 teaspoon salt
- 2 tablespoons vegetable oil
- 1/2 cup (1 stick) unsalted butter, melted
- 1 teaspoon garlic powder
- 1 teaspoon dried parsley
- 1/2 cup grated Parmesan cheese
Instructions
- Activate the yeast: In a small bowl, combine the warm water, sugar, and yeast. Let it stand for 5 to 10 minutes until foamy.
- Mix the dough: In a large bowl, whisk together the flour and salt. Pour in the yeast mixture and the vegetable oil. Mix until a shaggy dough forms.
- Knead the dough: Turn the dough out onto a lightly floured surface. Knead for 5 to 7 minutes until the dough is smooth and elastic.
- First rise: Place the dough in a lightly oiled bowl, turning to coat. Cover the bowl with plastic wrap or a clean towel. Let the dough rise in a warm place for 1 to 1.5 hours, or until doubled in size.
- Shape the breadsticks: Preheat your oven to 400°F (200°C). Line a large baking sheet with parchment paper. Punch down the risen dough gently. Divide the dough into 12 equal pieces. Roll each piece into a long, 10-inch rope shape. Place the ropes on the prepared baking sheet, leaving about 1 inch between them.
- Bake: Bake for 10 to 12 minutes, or until the breadsticks are lightly golden brown.
- Prepare the topping: While the breadsticks bake, melt the butter in a small saucepan. Stir in the garlic powder, dried parsley, and Parmesan cheese. Mix well.
- Coat the breadsticks: As soon as the breadsticks come out of the oven, brush the warm garlic butter mixture generously over the tops of the hot breadsticks.
- Serve immediately: Serve your homemade breadsticks warm as a perfect appetizer or dinner side dish for dipping.
Notes
- For extra soft and fluffy homemade dough, make sure your water temperature is correct for activating the yeast.
- You can use this dough for quick breadsticks by reducing the rise time to 30 minutes in a warm spot, though the texture will be slightly denser.
- These breadsticks freeze well after baking; reheat them in the oven until warm.
Nutrition
- Serving Size: 1 breadstick
- Calories: 180
- Sugar: 1
- Sodium: 250
- Fat: 8
- Saturated Fat: 4
- Unsaturated Fat: 4
- Trans Fat: 0
- Carbohydrates: 23
- Fiber: 1
- Protein: 5
- Cholesterol: 15