

You know that feeling when you pull out the holiday tins, and you just *have* to make the classics? For me, that’s the one and only peanut butter blossom. But honestly, half the time when I try those old recipes, the cookies end up kind of dry or the chocolate slides right off. When life gets crazy—and trust me, a demanding marketing pace taught me a thing or two about needing things fast but good—you can’t afford a baking failure.
That’s why I spent years perfecting this version. We’re giving you the blueprint for the ultimate, soft, chewy peanut butter cookies that hold that perfect chocolate kiss right in the center, just like the best holiday baking memories dictate. This recipe is simple, reliable, and absolutely delivers on richness every single time you need it to. It’s my tried-and-true method for bringing that nostalgic flavor back to your kitchen without eating up your whole evening.

- Why This is the Best Chewy Classic Peanut Butter Blossom Recipe
- Ingredients for Perfect peanut butter blossom
- Step-by-Step Instructions for Your peanut butter blossom
- Tips for Success Making Classic Holiday Cookies
- Variations for Your peanut butter blossom
- Storing Your Homemade Peanut Butter Treats
- Frequently Asked Questions About peanut butter blossom
- Nutritional Estimates for This Simple Dessert Recipe
- Share Your Festive Dessert Ideas
Why This is the Best Chewy Classic Peanut Butter Blossom Recipe
Look, you might find faster recipes out there, but they usually result in a hard crunch instead of that satisfying chew we all crave in our Chewy Peanut Butter Cookies. My goal here, coming from those busy days when I needed guaranteed success, wasn’t just speed—it was perfection. We nail the flavor profile that makes these Iconic Christmas Cookies what they are: that perfect salty-sweet balance. If you want cookies that stay wonderfully tender, you need to read up on techniques like those used in this soft peanut butter blossom recipe.
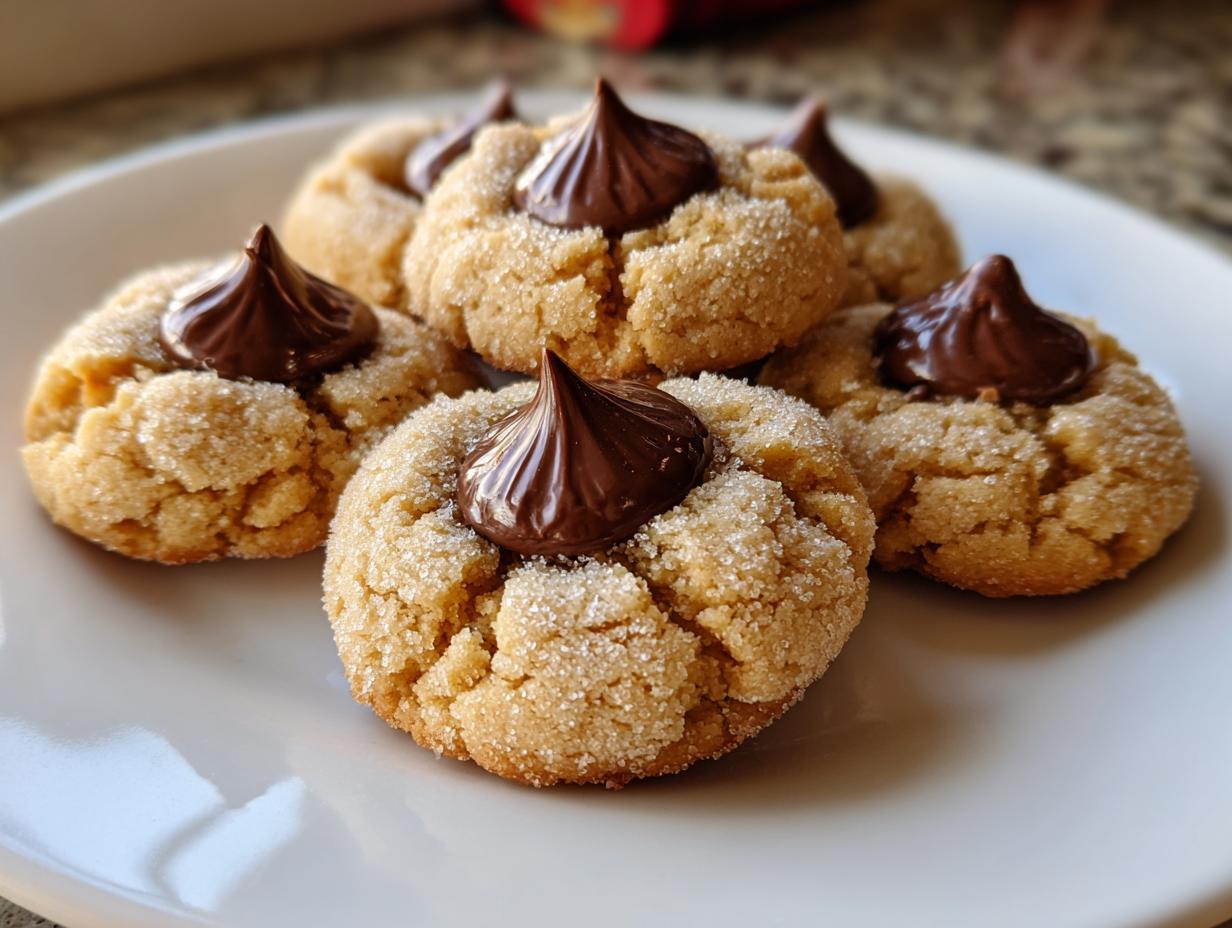
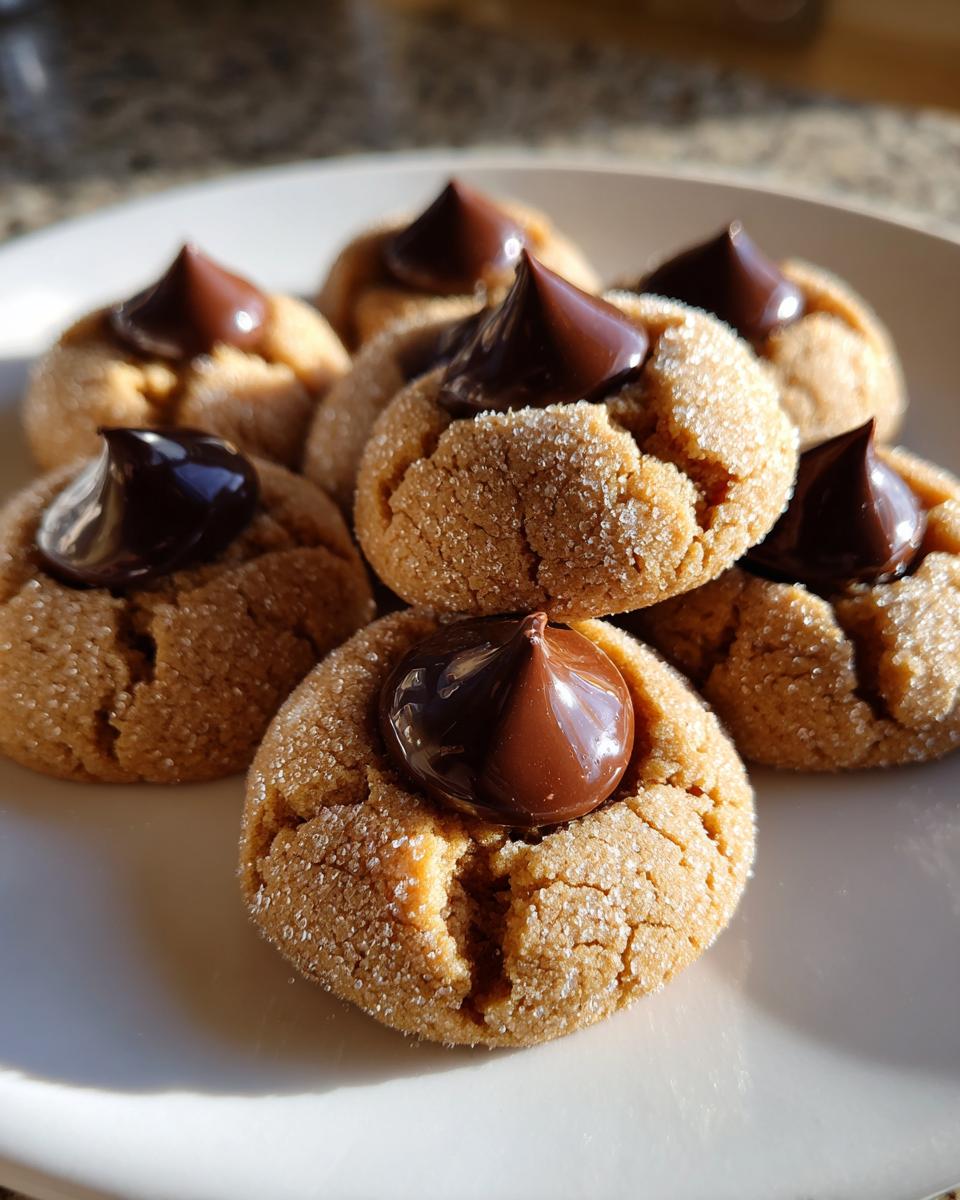
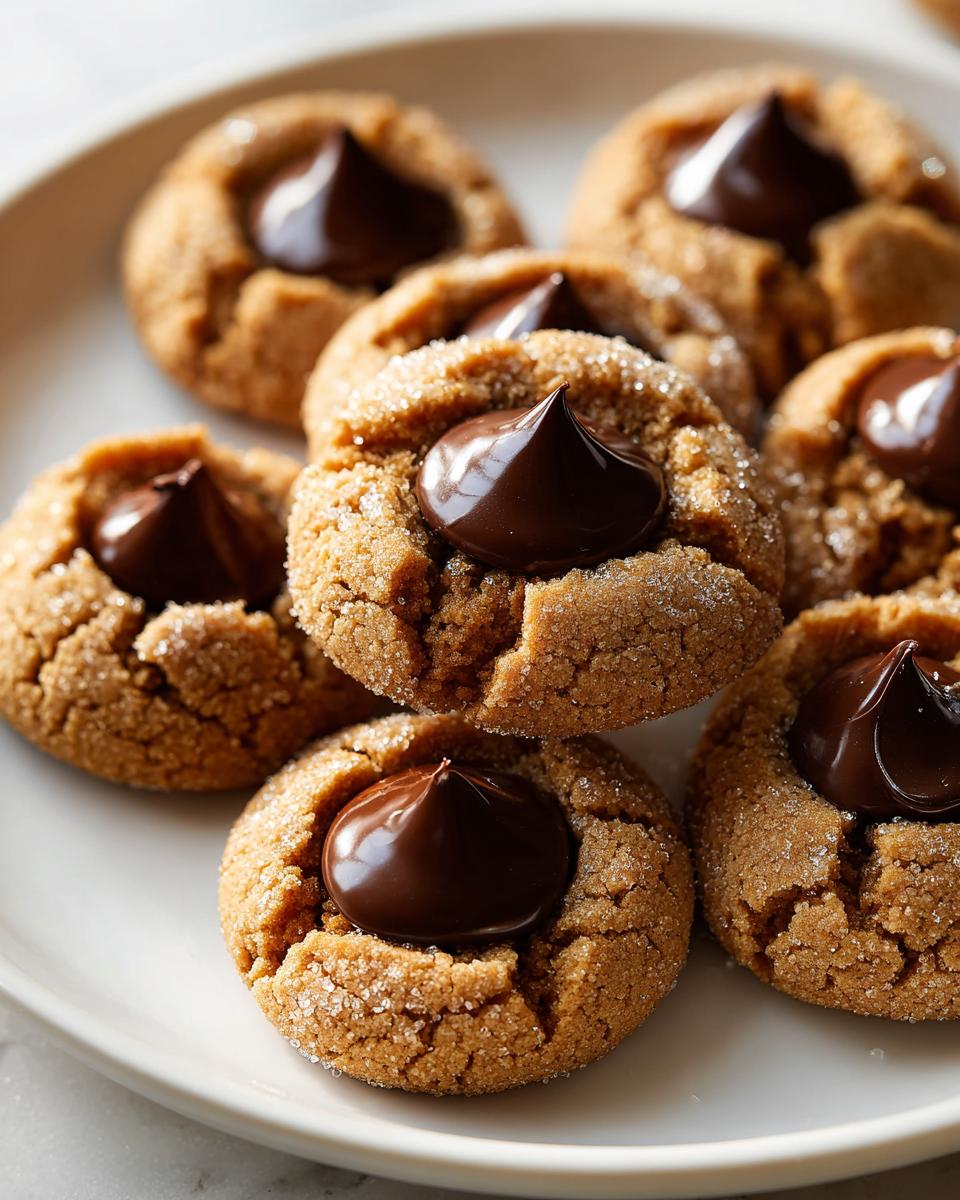
This recipe makes sure the Hershey’s Kiss doesn’t just sit on top; it sinks in just right, giving you that gooey chocolate center without cracking the cookie shell. Trust me, when people ask for your recipe at your next holiday get-together, it’ll be because you finally cracked the code on the texture.
Achieving the Perfect Soft Baked Blossoms Texture
Texture is everything, right? We’re focusing on that! The key here is the combination of brown sugar and granulated sugar—that blend keeps them soft. Also, we’re intentionally slightly underbaking these a tiny bit. They look a little soft coming out of the oven, but that residual heat finishes them perfectly on the pan. If you want a truly soft bite that lasts, you’ve got to focus on that gentle creaming phase. If you want to see how I handle texture in other recipes, check out my guide on brown butter chocolate chip cookies, just for flavor inspiration!
Ingredients for Perfect peanut butter blossom
Okay, gathering your supplies is surprisingly simple. I keep this list handy because I treat every batch like it’s going onto a cookie platter for my family. We need the basics, but precision matters here for that soft texture. You’ll need one full cup of unsalted butter, making sure it’s actually softened up—not melted!
Grab 3/4 cup of creamy peanut butter, a mix of white and packed brown sugar (that’s 3/4 cup of each!), two large eggs, and a teaspoon of vanilla. For the dry stuff, measure out 2 1/4 cups of all-purpose flour, a teaspoon of baking soda, and a half teaspoon of salt. Lastly, don’t forget that extra 1/4 cup of sugar for rolling, and, of course, a whole bag of unwrapped Hershey’s Kisses waiting patiently.
Step-by-Step Instructions for Your peanut butter blossom
Alright, let’s get baking! This is where we turn those ingredients into pure holiday magic. Preheat your oven to 375 degrees Fahrenheit. I always line my baking sheets with parchment paper; it’s my little trick for less cleanup, which means more time enjoying these small batch chocolate chip cookies, or in this case, blossoms!
First, we cream. Get that softened butter, the peanut butter, and both sugars into your big bowl. Beat them until they look light and fluffy—this is the secret handshake for a soft cookie base. Then, one by one, beat in your eggs, followed by the vanilla. In a separate bowl, do a quick whisk of your flour, baking soda, and salt. Now, you need to add the dry stuff to the wet stuff slowly, mixing only until you barely see flour streaks. Don’t go crazy mixing it later!
Mixing the Dough for Chewy Peanut Butter Cookies
That creaming step I mentioned? Don’t rush it! We want air in there to keep these Chewy Peanut Butter Cookies soft. When you add that flour mix, remember my biggest rule: stop mixing as soon as it comes together. Overmixing develops gluten, and gluten makes things tough, not chewy. We want tender, soft baked blossoms, not hockey pucks!
The Chocolate Kiss Finish on Your peanut butter blossom
This timing is critical or you’ll end up with a melted mess or a crumbly mess. As soon as those cookies come out of the oven—and I mean *immediately*—gently press one unwrapped Hershey’s Kiss right into the middle of each warm cookie. The residual heat is what you’re looking for; it softens the chocolate perfectly so it sinks in without making the whole cookie crack. You can learn more about perfect chocolate centers from this great guide on peanut butter blossoms!
Finally, let them sit on that hot pan for about five minutes so they set up just a bit, then carefully move them to a cooling rack. Patience in these last few minutes ensures everything stays put!
Tips for Success Making Classic Holiday Cookies
When you’re making Classic Holiday Cookies, you want reliability! I’ve pulled my best advice directly from the notes I keep next to this recipe to guarantee you get that chewy center every time. First, for the chewiest result possible, you actually want to slightly underbake them. Sounds scary, I know, but they firm up perfectly while cooling on the sheet. Don’t worry if they look a little soft when you slide them out!
Another little thing I learned from watching my Mom is about the peanut butter. If you’re hitting a stiff jar on a cold morning, give that peanut butter an optional 15-second zap in the microwave. It makes incorporating it so much easier during that crucial creaming step. And heed this warning seriously: press that chocolate kiss into the cookie *immediately* after they come out of the oven. Waiting even a minute too long makes the cookie firm up and you’ll end up with a cracked top or the Kiss just sitting there instead of melting beautifully. Have you seen my snickerdoodle recipe? It’s another holiday staple that needs timing!
If you want to see another take on these classics, check out the tips shared by my friends over at Cooking Butter on making sure your blossoms turn out right!
Variations for Your peanut butter blossom
Now, while I’m always loyal to the original, I know sometimes we get brave in the kitchen! If you’re looking for fun Holiday Cookie Swaps that still feel cozy and familiar, try switching up the primary spread. Instead of just creamy peanut butter, try using almond butter or maybe even cashew butter for a slightly nuttier, deeper flavor. Just make sure if your nut butter is stiff, you give it that quick warm-up I mentioned earlier!
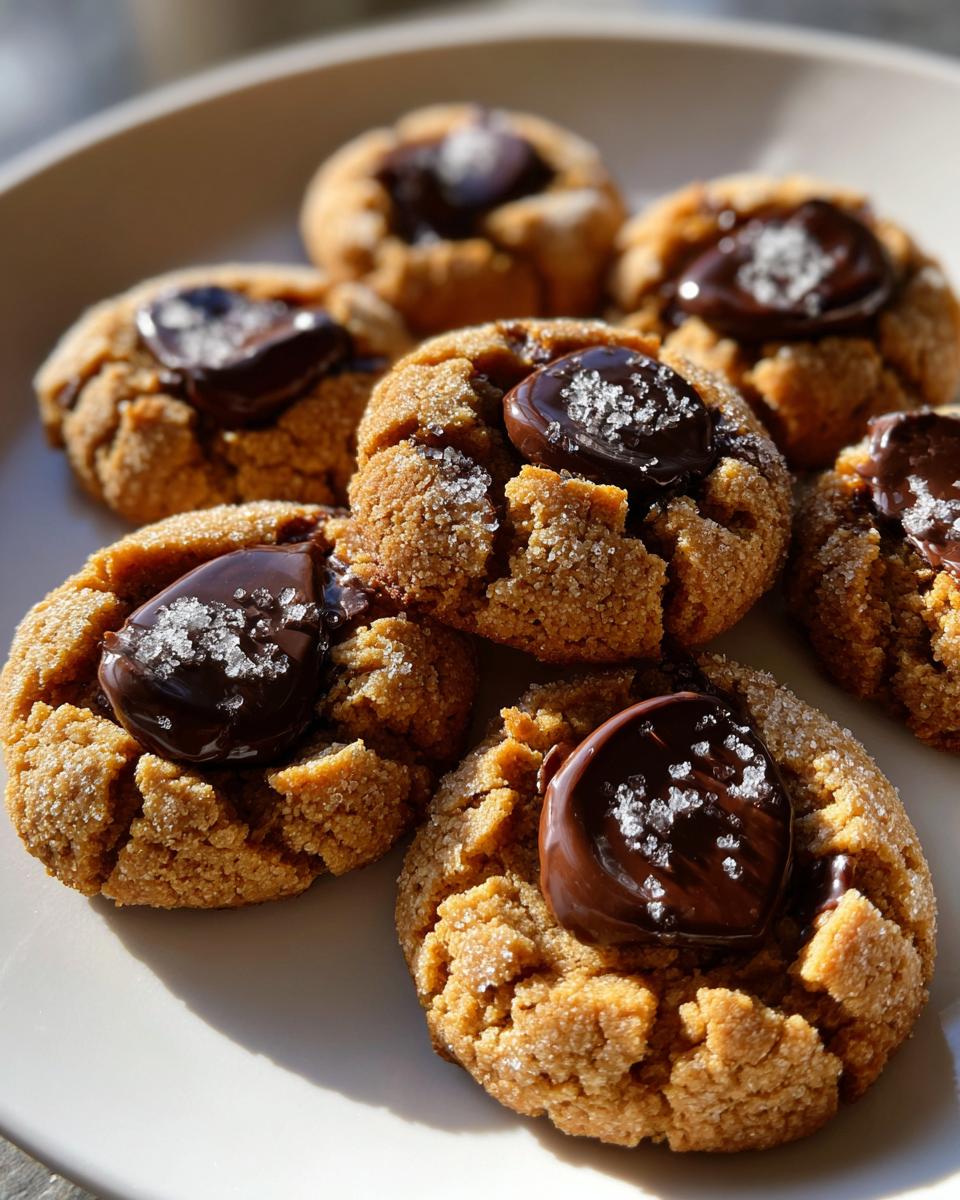
Another simple addition that really lifts the flavor profile, fitting right in with that Easy Christmas Baking vibe, is adding spices to the dough mixture itself. A little half-teaspoon of cinnamon or even a micro-pinch of cardamom right into the flour, baking soda, and salt blend gives the dough a wonderfully scented background note. It’s still a peanut butter blossom, just with a little secret bonus flavor that everyone will rave about!
If you love texture, you could even try folding in some finely chopped nuts or maybe trying candied pecans from my candied pecans recipe right into the dough before rolling. Just remember, anything chunky might affect how the Hershey’s Kiss sinks in!
Storing Your Homemade Peanut Butter Treats
These Homemade Peanut Butter Treats are irresistible, so I know you’ll want them to last past the first day. The absolute best way to keep them soft and chewy is to use an airtight container. Don’t put them directly into plastic bags unless they are sealed super tight, because that can actually make them a little soggy.
You want to store them at room temperature—no need to refrigerate these guys! I usually layer them with sheets of parchment paper between layers in the container. This keeps the chocolate kisses from sticking to each other and makes grabbing one later so easy. If you store them like this, they stay beautifully soft for almost a week. You can always check out the storage tips for my date nut bread; the principle of keeping moisture locked in is the same!
Frequently Asked Questions About peanut butter blossom
I get so many lovely messages asking for just a little more clarity on whipping up these peanut butter blossom cookies perfectly. Because we’re aiming for that ideal soft texture and great presentation, a few little things can trip people up. Don’t sweat it; these are tiny tweaks that make a huge difference!
When you’re making these Classic Holiday Cookies, remember the goal isn’t just baking, it’s architecture! They need to be soft but sturdy enough for that glorious chocolate press. If you’re looking for proven techniques on texture, you can see how I approach pie crust over at my easy pumpkin pie guide—it’s all about the correct ratio of fat!
Why do my chocolate kisses melt out of my peanut butter blossom cookies?
This is the most common question I hear! Usually, it means one of two things: either you baked them a minute or two too long, making the cookie base too firm to accept the chocolate, or you waited too long after pulling them out. You absolutely have to press that Hershey’s Kiss in the second they hit the counter! The residual heat is your friend here. If you wait until they cool down just a little, the Kiss can’t sink in properly and you end up with an unsightly crack or a wandering chocolate top. Check out the detailed timing instructions in the main recipe if you need a refresher; it’s all about that immediate press!
Another thing that helps prevent messy bottoms is to give your cookie dough balls a good, even coating in that extra sugar. I also found this great post on avoiding chocolate issues with ultimate peanut butter blossoms that offers some good visual cues!
Can I skip rolling the dough in sugar?
You technically can, but I wouldn’t do it! Rolling the balls in sugar before baking is essential. It creates that beautiful, crinkly, cracked surface that everyone expects from these Soft Baked Blossoms. Plus, that sugary coating helps prevent the cookies from sticking to the pan slightly, giving you a better overall shape.
How long do these stay soft?
If you store them correctly, sealed up tight with parchment in between layers at room temperature, you’ll find they stay spectacularly soft for at least five to seven days. They really are that good!
Nutritional Estimates for This Simple Dessert Recipe
I always tell people that balancing flavor and enjoyment is more important than counting every single calorie, especially when it comes to Simple Dessert Recipes like these iconic treats! But since you asked, here are the estimates for one single peanut butter blossom.
Keep in mind these are just averages, based on the butter, sugars, and peanut butter we use. You’re looking at roughly 160 calories per cookie. That’s pretty good for a festive bite! We’re seeing about 9 grams of fat, 18 grams of carbohydrates, and 3 grams of protein. The sugar content clocks in around 13 grams. Not too bad for such a classic, satisfying hit of peanut butter and chocolate!
Share Your Festive Dessert Ideas
I’m so excited for you to try these peanut butter blossom cookies! When you whip up a batch for your next cookie swap, please let me know how they turned out in the comments below. Seriously, I love seeing your photos of these Festive Dessert Ideas all decorated on the tray!
Don’t forget to give this recipe a star rating—five stars if it made your holiday season a little sweeter! If you want another amazing, reliable idea for your dessert table, check out my recipe for the easy classic French apple tart. Happy baking, friends!
PrintThe Best Chewy Classic Peanut Butter Blossom Cookies

Make soft, chewy peanut butter blossom cookies that stay fresh long after baking. This recipe provides simple steps for the iconic sweet and salty treat topped with a melted chocolate kiss.
- Prep Time: 15 min
- Cook Time: 10 min
- Total Time: 25 min
- Yield: About 3 dozen cookies 1x
- Category: Dessert
- Method: Baking
- Cuisine: American
- Diet: Vegetarian
Ingredients
- 1 cup unsalted butter, softened
- 3/4 cup creamy peanut butter
- 3/4 cup granulated sugar
- 3/4 cup packed brown sugar
- 2 large eggs
- 1 teaspoon vanilla extract
- 2 1/4 cups all-purpose flour
- 1 teaspoon baking soda
- 1/2 teaspoon salt
- 1/4 cup granulated sugar, for rolling
- 1 bag Hershey’s Kisses, unwrapped
Instructions
- Preheat your oven to 375 degrees Fahrenheit. Line baking sheets with parchment paper.
- In a large bowl, cream together the softened butter, peanut butter, granulated sugar, and brown sugar until the mixture is light and fluffy. This step helps create a soft cookie base.
- Beat in the eggs one at a time, then mix in the vanilla extract.
- In a separate bowl, whisk together the flour, baking soda, and salt. Gradually add the dry ingredients to the wet ingredients, mixing until just combined. Do not overmix the dough.
- Place the remaining 1/4 cup of granulated sugar in a shallow dish.
- Roll the dough into 1-inch balls and then roll each ball in the sugar to coat lightly. Place the coated balls about 2 inches apart on the prepared baking sheets.
- Bake for 8 to 10 minutes, or until the edges are set but the centers still look slightly soft. The cookies will spread and develop small cracks.
- Immediately upon removing the cookies from the oven, gently press one unwrapped Hershey’s Kiss into the center of each warm cookie. The residual heat will soften the chocolate.
- Let the cookies cool on the baking sheet for 5 minutes before transferring them to a wire rack to cool completely.
Notes
- For the chewiest texture, slightly underbake the cookies; they firm up as they cool.
- If your peanut butter is very stiff, warm it briefly in the microwave (about 15 seconds) before mixing to help with creaming.
- Press the chocolate kiss into the cookie right away; waiting even a minute can cause the cookie to set too much, leading to cracks or the kiss not sinking in properly.
Nutrition
- Serving Size: 1 cookie
- Calories: 160
- Sugar: 13g
- Sodium: 85mg
- Fat: 9g
- Saturated Fat: 4g
- Unsaturated Fat: 5g
- Trans Fat: 0g
- Carbohydrates: 18g
- Fiber: 1g
- Protein: 3g
- Cholesterol: 25mg