

When the party invitation lands, don’t panic about fancy cooking! As someone who lives that busy life, trust me when I say we need appetizers that look incredible but don’t keep us chained to the oven. That’s why I’m obsessed with the pineapple cheese ball. It’s the queen of the snack table—that perfect blend of sweet tanginess from the pineapple cutting through the rich cream cheese, all wrapped in a salty, crunchy nut coating. It’s the ultimate crowd-pleaser, and the best part? It involves zero baking! This recipe lives completely in the realm of quick, accessible flavor, proving that my philosophy stands: you deserve amazing food, even when you only have minutes to spare. If you love easy, no-bake treats, check out my recipe for easy no-bake peanut butter bars, too!
- Why This Classic Pineapple Cheese Ball is Your New Favorite Sweet and Savory Appetizer
- Ingredients for the Best Pineapple Cheese Ball
- Expert Tips for Preparing the Perfect Pineapple Cheese Ball
- Step-by-Step Instructions for This Easy Cheese Ball Recipe
- Holiday Cheese Ball Ideas and Tropical Cheese Ball Variations
- Serving Suggestions for Your Tangy Cheese Dip
- Storage and Reheating Instructions for the Pineapple Cheese Ball
- Frequently Asked Questions About the Pineapple Cheese Ball
- Estimated Nutritional Data for This Festive Holiday Spread
Why This Classic Pineapple Cheese Ball is Your New Favorite Sweet and Savory Appetizer
Honestly, if you need a holiday appetizer that disappears near-instantly, this is it. We love a good dip, but sometimes you need something you can set out that still looks totally festive. This pineapple cheese ball hits every single note without ever needing the oven. It’s genuinely the best centerpiece for a snack spread because it tastes so much more complicated than it is!
Perfect Make Ahead Party Food
This is my secret weapon when I have a packed weekend. You mix it up and then wrap it tight. The chilling isn’t just for texture; it’s your free pass to relax the day of the party! Since this is the definition of make ahead party food, you pull it out of the fridge and you are instantly ready to go. Seriously, who needs that stress?
The Ultimate Crowd Pleaser Appetizer
You get that wonderful sweet and savory profile here that everyone loves. The creaminess of the cheese base paired with the tang of the pineapple—it’s just magic! Because it’s not heavy or spicy enough to scare off the kids, but rich enough for the adults, it truly is the ultimate crowd pleaser appetizer. You can find more quick snacks like this in my guide to quick party bites.
Ingredients for the Best Pineapple Cheese Ball
Getting the right stuff for your pineapple cheese ball is crucial. Remember, the texture of this whole thing relies on your prep work right here! We aren’t using fancy gourmet stuff; it’s all about simple ingredients treated correctly. If you are looking for ways to use cream cheese in other simple ways, I have a whole post on my favorite cream cheese appetizers.
Essential Components for Your Pineapple Cheese Ball
- 8 ounces cream cheese, make sure it’s totally softened, friends!
- 1 cup crushed pineapple—and listen to me: it MUST be well-drained. Press the liquid out until you think you can’t get any more, then press harder!
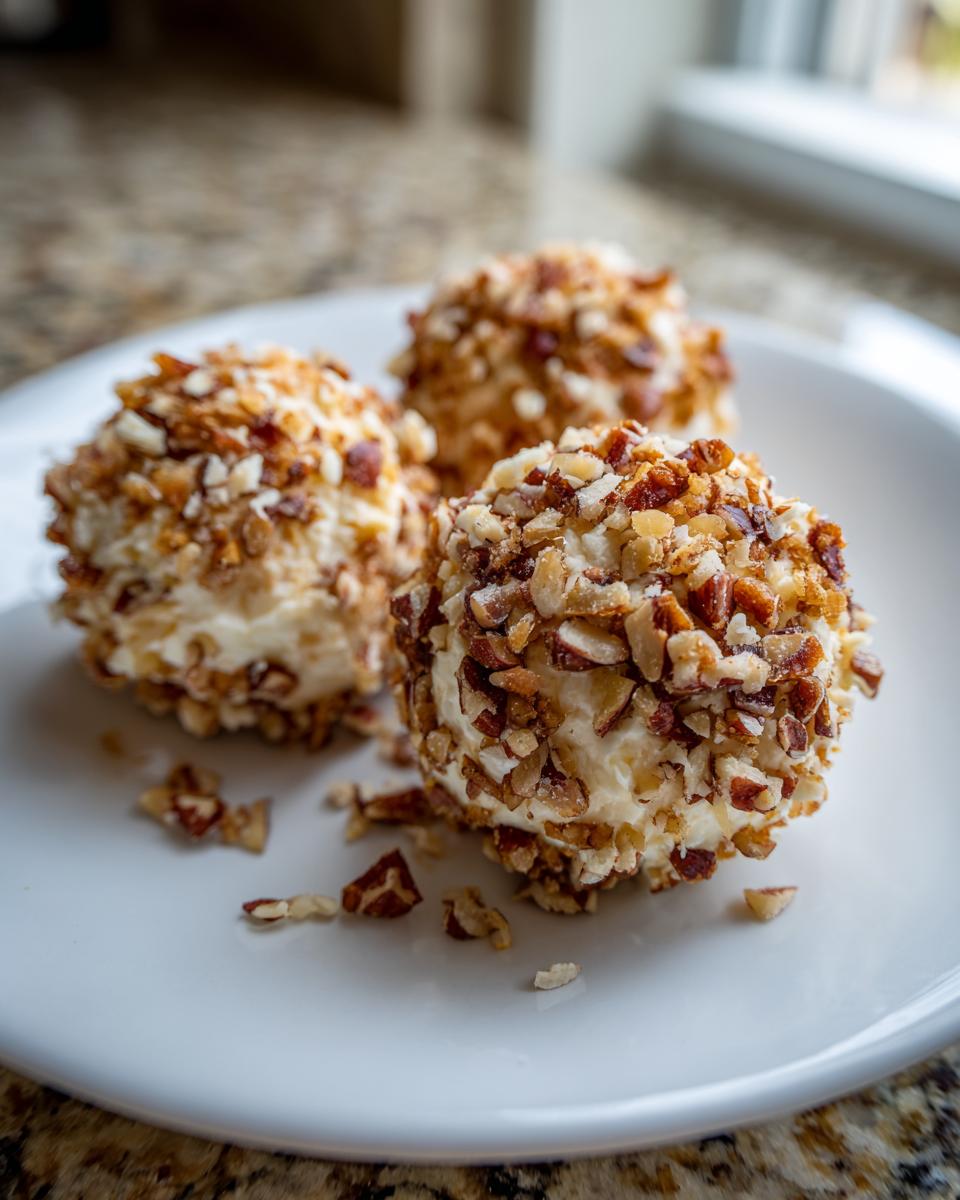
- 1/4 cup finely chopped pecans, plus 1 cup for coating the outside nicely.
- 1/4 cup finely chopped green onion (this is optional, but I use it for a little savory kick).
- 1/4 teaspoon garlic powder
- 1/4 teaspoon onion powder
- A tiny pinch of salt
- Crackers or pretzels for serving (your delivery system!)
Expert Tips for Preparing the Perfect Pineapple Cheese Ball
Look, anyone can throw ingredients in a bowl, right? But to get that genuinely perfect pineapple cheese ball that doesn’t fall apart when someone reaches for a cracker—that takes a couple of insider tricks. My whole goal here is to make sure this easy appetizer is stress-free and firm enough to last the whole party. If you love nuts on top, you absolutely have to try my tips for toasting them first for next-level flavor! If you’re looking for other ways to elevate your nuts, check out my recipe for candied pecans.
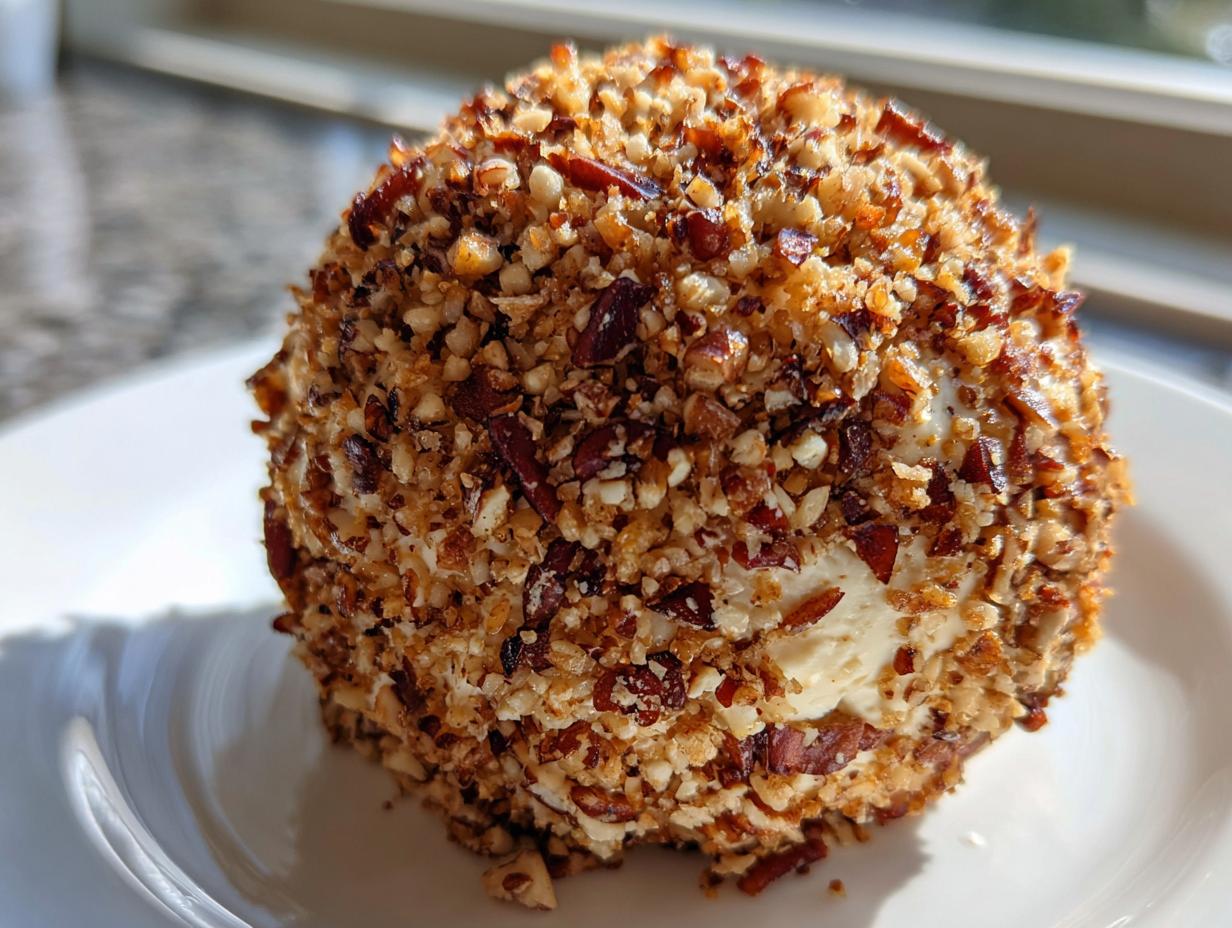
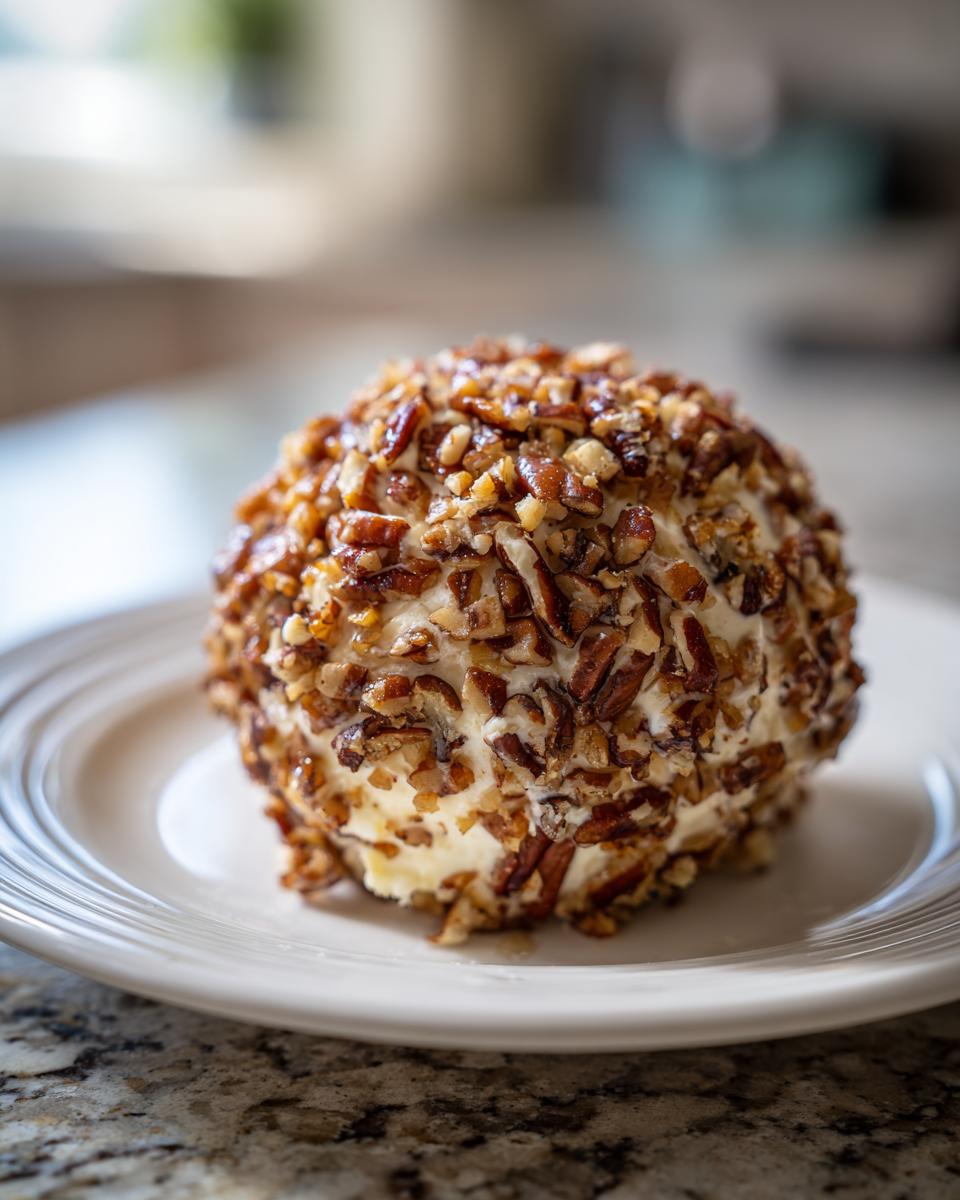
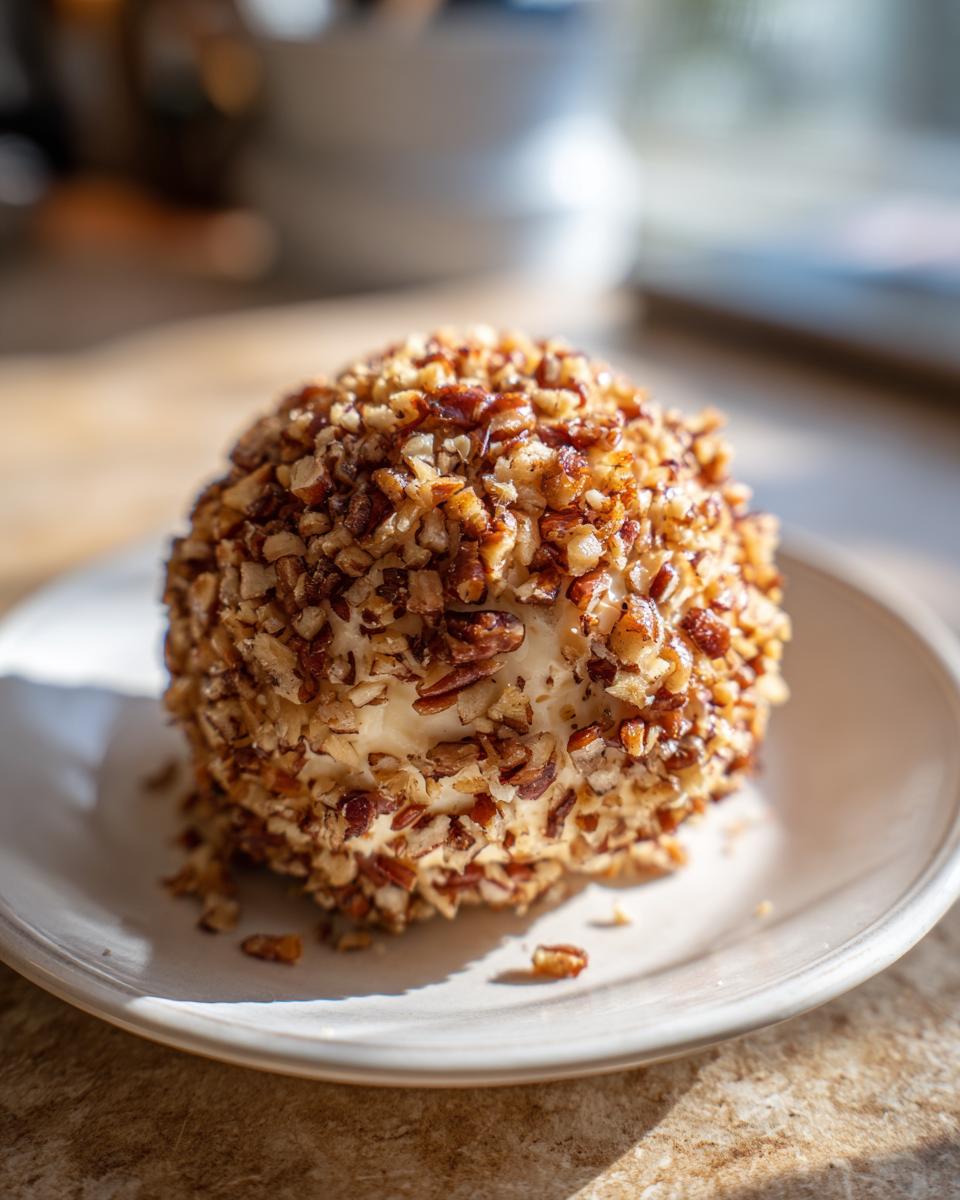
Mastering the Crunchy Nut Coating Recipe
Don’t just dump those pecans straight from the bag! The key to a truly amazing crunchy nut coating recipe is giving them a quick toast first. Just spread your pecans out on a dry baking sheet and pop them into a 350-degree oven for about five to seven minutes. Watch them carefully—they burn fast! Once they smell wonderfully nutty, let them cool completely, then chop them up. That little extra step adds so much depth when you roll the ball. Trust me, it’s worth the extra three minutes.
Achieving the Right Texture in Your Cream Cheese Appetizers
If your cheese ball ends up too soft, it’s almost always because of two things. First, that pineapple wasn’t drained well enough. We talked about that, but I have to say it again! Second, your cream cheese was too warm. It should be soft enough to mix easily, but still have a little body to it. You want it cool but pliable. When you mix everything, use a spoon or spatula, not a fancy electric mixer for the main base—overmixing that cream cheese whips in too much air, which makes the final cream cheese appetizers runny once they warm up on the serving platter. We want dense and delicious!
Step-by-Step Instructions for This Easy Cheese Ball Recipe
Okay, now we get to the fun part! Turning those lovely ingredients into the final masterpiece. Since this is completely no bake party dip territory, the whole process is quick, which is exactly what we love when we are trying to get ready for guests. Follow these steps exactly, and you will have the firmest, tastiest pineapple cheese ball centerpiece imaginable. If you’re looking for more super quick preparations, my guide to the easy cheese ball recipe collection gives you a few more ideas!
Mixing and Shaping the Pineapple Cheese Ball Base
First things first: you absolutely must ensure that pineapple is squeezed dry—I cannot stress that enough! Once it’s ready, grab your bowl. Dump in the softened cream cheese, the drained pineapple, that small amount of the chopped pecans, and all those seasonings (onion powder, garlic powder, salt). If you are adding any savory extras, like finely diced ham or maybe some fresh jalapeño for a kick, mix them in right now. Use a sturdy spatula and mix until everything looks uniform. Don’t overwork it here; we just want everything combined smoothly and evenly.
Chilling: The Key to a Firm Pineapple Cheese Ball
Once everything is mixed, scrape the stuff onto a piece of plastic wrap and shape it into a rough ball. It’s going to be a little messy at this stage, and that’s fine! Now, wrap it up tightly, making sure you smooth the plastic wrap around it to encourage that perfect round shape. This is where the patience comes in. It needs at least two full hours in the fridge to firm up. That chilling time is non-negotiable if you want to roll it nicely in the outer coating without it turning into a sticky mess. If you can wait two days, even better! If you need more help with make-ahead snacks, check out the tips over at An Organized Chaos—they have great chilling advice too.
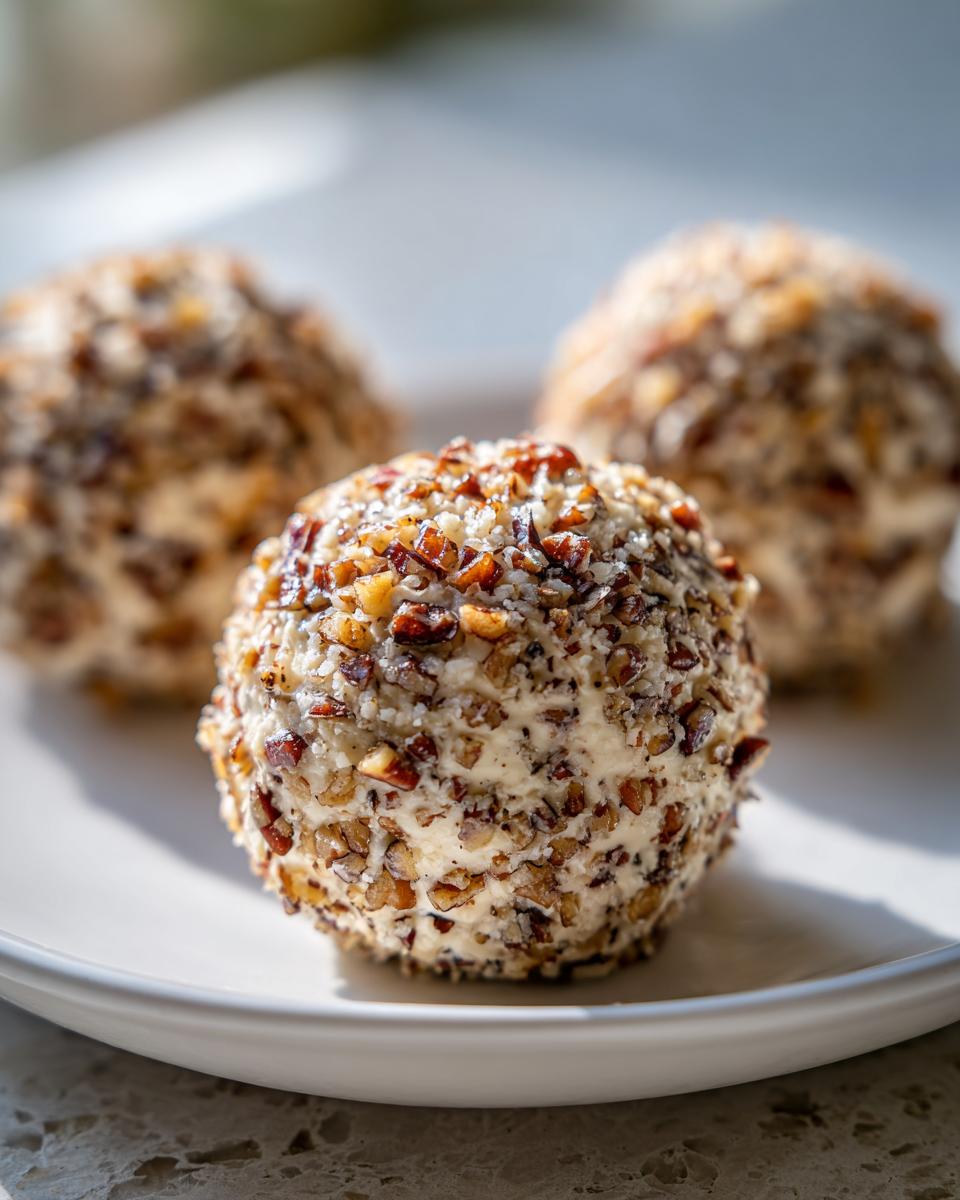
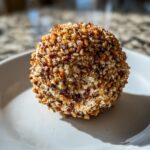
Once chilled, finish it up by rolling it in those extra chopped pecans until it’s totally covered, then serve it up!
Holiday Cheese Ball Ideas and Tropical Cheese Ball Variations
Not everyone wants the exact same flavor profile, and that’s totally fine! While I love the classic version of the pineapple cheese ball, sometimes you need to pivot based on your crowd or the holiday. We can easily turn this into amazing holiday cheese ball ideas that feel perfectly festive, or even lean into a brighter, tropical cheese ball vibe if the weather calls for it. I have another easy recipe for marinated cheese appetizer if you want to go a different direction entirely!
Savory Additions to Your Pineapple Cheese Ball
If you are making this for a game day event, or maybe using up some leftovers after Christmas or Easter, adding savory meat is the way to go. Remember that step where we mixed everything together? That’s the perfect stage to sneak in some extra flavor. Try mixing in about a half-cup of finely chopped, cooked ham—it adds saltiness that matches the pineapple beautifully. Or maybe some crumbled, crispy bacon! That smoky crunch is irresistible.
But if you want to stay vegetarian but still want that edge, trust me and try this: take one small jalapeño, remove all the seeds (we want flavor, not pain!), and dice it super, super fine. Mix that into the base. It brings the “spicy” element to our sweet and savory appetizer without overwhelming the fresh pineapple flavor. If you want to see how another great cook handles the ham variation, check out their recipe for pineapple and ham cheese ball.
Serving Suggestions for Your Tangy Cheese Dip
We’ve made the perfect pineapple cheese ball, so now we need the right things to scoop it up! Crackers are classic, but sometimes we need variety on the platter, right? Don’t be shy about grabbing non-cracker options. This rich, tangy cheese dip deserves sturdy companions that can handle its creaminess.
I always put out pretzel crisps because their saltiness is a wonderful counterpoint to the sweet pineapple. If you need something low-carb or just a little lighter, serve it with crisp veggie sticks—think sweet bell peppers or cucumber slices.
For something a bit more elevated, grab some small slices of baguette, toast them quickly, and rub them with a cut clove of garlic while they’re still warm. People go absolutely wild for that little extra step! If you are looking for another fun dipping idea, check out my recipe for the easy bruschetta dip.
Storage and Reheating Instructions for the Pineapple Cheese Ball
One of the best things about this pineapple cheese ball is that it truly shines as a make-ahead champion. You put in the work once, and you get compliments all night long! It sits so nicely in the fridge, waiting patiently for party time. If you are planning ahead and need more make-ahead ideas, I have a whole list dedicated to the best make ahead party food over on the blog.
You can safely store this wrapped tightly in plastic wrap in the refrigerator for up to two days. The flavors actually seem to mingle and get even better after that first night! Just make sure that plastic wrap is sealed well so nothing dries out. That cream cheese base helps keep it moist and fresh for quite a while.
Now, about serving it up—this is important! You absolutely cannot serve this straight from the icy fridge. When it’s too cold, the cream cheese stiffens up, and you lose all that wonderful creamy mouthfeel. So, before your guests arrive, plan to take the wrapped ball out onto the counter. Honestly, 10 to 15 minutes is usually perfect. You want it cool, not warm, but soft enough that your cracker easily scoops up and holds the ball mixture without breaking apart. It should feel slightly yielding when you gently tap the side.
Can you freeze it? Look, you *can*, but I usually advise against it for this specific recipe. Freezing can sometimes change the texture of the cream cheese and make it a little grainy once it thaws, plus the moisture from the pineapple can be unpredictable when thawing. Since it keeps so well in the fridge for two days, I always recommend making it the day before or the morning of your party instead of going straight to the freezer!
Frequently Asked Questions About the Pineapple Cheese Ball
Hey, I totally get it—when you make something that looks this good, you want to make sure every detail is spot on! I’ve gathered up the questions I always get asked about this amazing pineapple cheese ball. Getting these few details right guarantees you the best results, whether you’re serving it on a holiday weekend or just need an easy snack for game day.
Can I use fresh pineapple instead of canned for the pineapple cheese ball?
That is a great question! Yes, you absolutely can use fresh pineapple, but you have to be extra, extra vigilant about draining it. Fresh fruit holds way more water than canned, and if that juice gets into your base, your pineapple cheese ball will turn into a puddle. You need to finely dice the fresh pineapple and then press it repeatedly between paper towels until you feel like your arms are going to fall off. It takes more effort than the crushed canned stuff, but the fresh flavor is certainly worth the work!
What is the best way to ensure my pineapple cheese ball stays firm?
If you are worried about texture—and you should be, we want it firm and dippable!—there are two non-negotiables for keeping it perfectly structured. First, you must, must, must drain the pineapple until it’s nearly dry. Second, you must commit to the chilling time. Seriously, don’t try to rush it! It needs at least the minimum two hours in the fridge, but overnight is actually better. That time allows the cream cheese to bind everything tightly. If you skip the chill time, you definitely won’t end up with a beautiful, firm ball for serving.
Can I make this a Game Day Snack Recipes option with a spicy kick?
Oh, I love turning this into a more complex sweet and savory appetizer for game day! If you follow my recipe as written, it’s mild, but it’s incredibly easy to amp up the heat. When you mix the cream cheese base, throw in a small dash of cayenne pepper. If you want a real kick, finely mince up half a jalapeño (make sure you take all the seeds out!) and mix that in with your green onions. It gives you that fantastic little flavor surprise without ruining the sweetness. For more ideas on beefing up your snack spread, check out the tips over at Plain Chicken.
Estimated Nutritional Data for This Festive Holiday Spread
I always want to be upfront that since this pineapple cheese ball is made with real ingredients and no weird stabilizers, the numbers are an estimate, okay? These figures are based on making 12 servings, as I laid out in the recipe details. Think of this as a guide for planning your perfect spread, not a strict dietary count. It’s a delicious, impressive addition to any of your festive holiday spreads, so enjoy it!
Here’s the breakdown per serving (1/12th of the ball):
- Calories: 150
- Fat: 14g
- Carbohydrates: 4g
- Protein: 4g
If you’re looking for something quick to balance things out the next morning, you should check out my guide to quick and easy breakfast ideas!
PrintClassic Pineapple Pecan Cheese Ball
Make this sweet and savory pineapple cheese ball for a simple, no-bake appetizer perfect for parties and holidays. It combines creamy cheese, tangy pineapple, and a crunchy pecan coating.
- Prep Time: 15 min
- Cook Time: 0 min
- Total Time: 2 hours 15 min
- Yield: 12 servings 1x
- Category: Appetizer
- Method: No Bake
- Cuisine: American
- Diet: Vegetarian
Ingredients
- 8 ounces cream cheese, softened
- 1 cup crushed pineapple, well-drained
- 1/4 cup finely chopped pecans, plus 1 cup for coating
- 1/4 cup finely chopped green onion (optional)
- 1/4 teaspoon garlic powder
- 1/4 teaspoon onion powder
- Pinch of salt
- Crackers or pretzels for serving
Instructions
- Place the well-drained crushed pineapple between several layers of paper towels and press firmly to remove as much liquid as possible. This step is important for texture.
- In a medium bowl, combine the softened cream cheese, drained pineapple, 1/4 cup chopped pecans, green onion (if using), garlic powder, onion powder, and salt. Mix until everything is fully incorporated and smooth.
- Shape the mixture into a ball.
- Spread the remaining 1 cup of chopped pecans onto a shallow plate. Roll the cheese ball in the pecans until it is completely coated.
- Wrap the cheese ball tightly in plastic wrap. Chill in the refrigerator for at least 2 hours, or up to 2 days, to allow it to firm up. This is a great make ahead party food.
- Before serving, let the pineapple cheese ball sit at room temperature for about 10 minutes. Serve with your favorite crackers or pretzels.
Notes
- For a savory variation, mix in 1/2 cup of finely chopped cooked ham or crumbled cooked bacon with the cream cheese mixture.
- If you prefer a tangier flavor, add 1 tablespoon of Worcestershire sauce to the mix.
- To make this a low-carb option, serve with vegetable sticks instead of crackers.
Nutrition
- Serving Size: 1/12 of ball
- Calories: 150
- Sugar: 3
- Sodium: 180
- Fat: 14
- Saturated Fat: 7
- Unsaturated Fat: 5
- Trans Fat: 0
- Carbohydrates: 4
- Fiber: 0
- Protein: 4
- Cholesterol: 35