

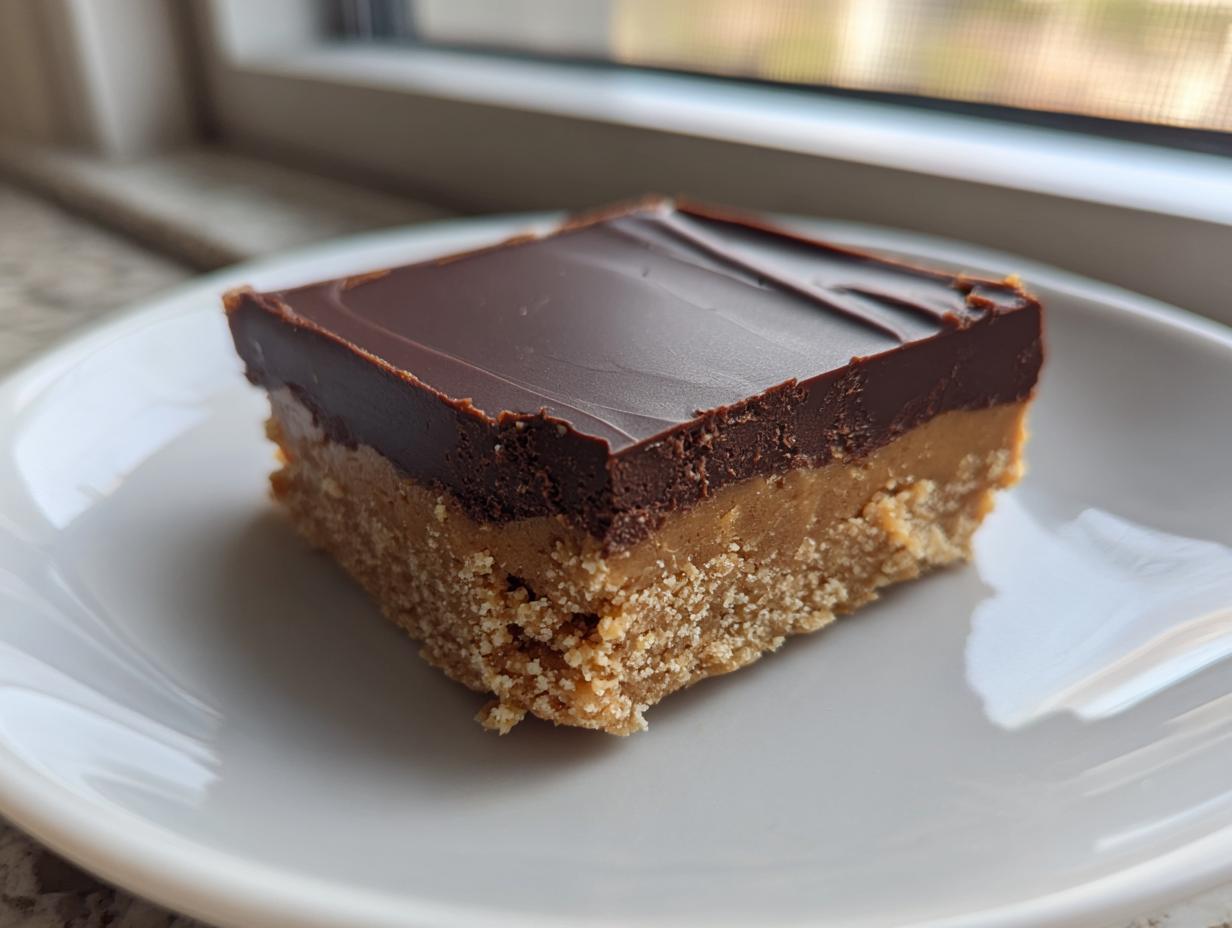
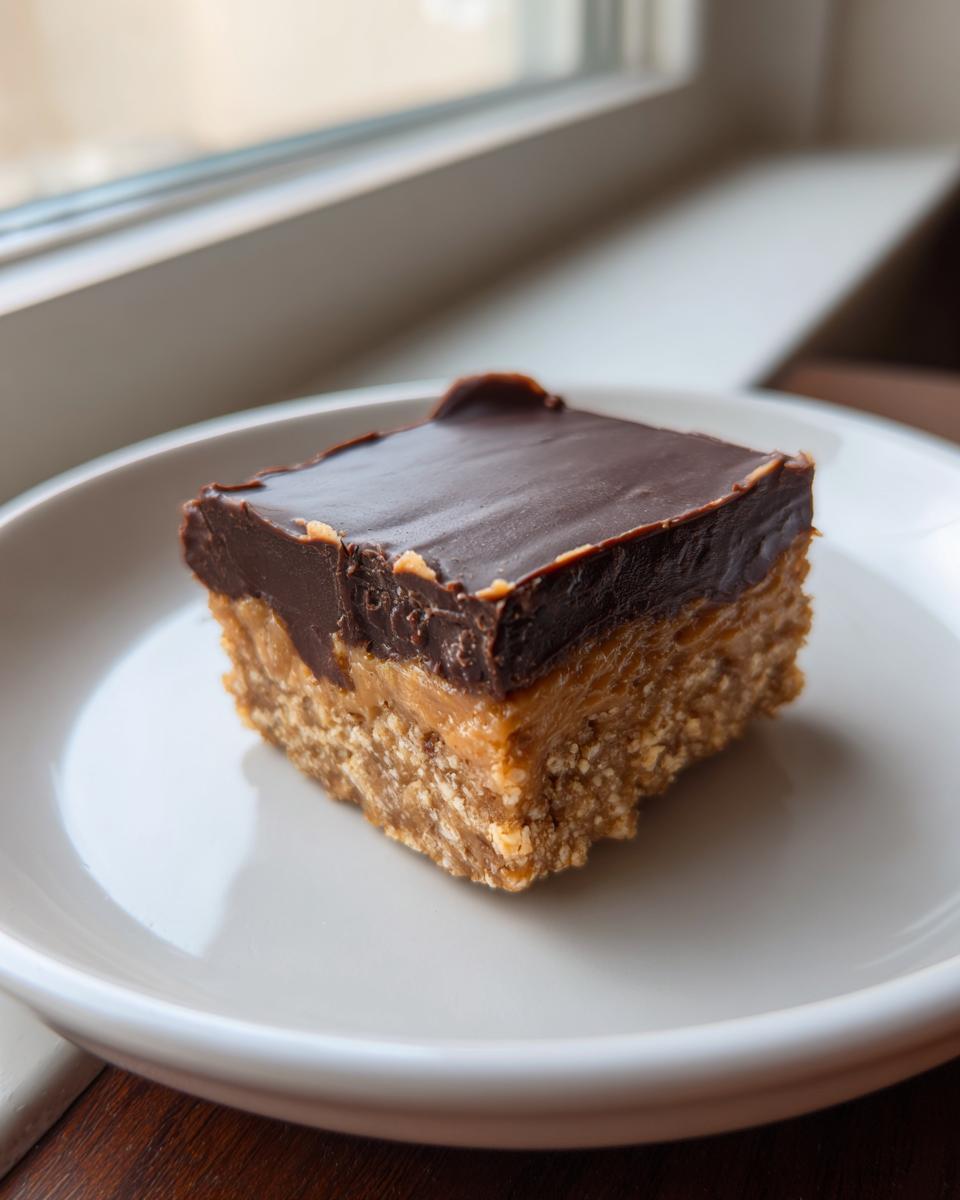
If you’ve ever stared into the pantry, freezer, or fridge at 8 PM and just needed something sweet—and needed it *now*—you know the struggle. That’s why I am obsessed with desserts that don’t require turning on the oven. Seriously, those are my favorite kinds of kitchen wins! These easy **peanut butter bars** are honestly the cure for any sweet emergency. They come together with just a few pantry staples, set up in the fridge, and they taste like nostalgic candy heaven exploded in your mouth.
This recipe is pure proof of the Cooking by Felix philosophy: great food shouldn’t stress you out. It should be reliable, delicious, and fast. Trust me when I say these are the absolute best no-bake peanut butter bars out there. Wanting to see how simple it is to whip up some amazing treats? Check out my collection of simple delicious desserts for more on-the-fly winning recipes!
- Why These Are the Best No Bake Peanut Butter Bars (E-E-A-T Focus)
- Ingredients for Creamy Chocolate Peanut Butter Bars
- Step-by-Step Instructions for Easy Peanut Butter Bars
- Tips for Perfect Fudgy Peanut Butter Bars
- Storage and Make Ahead Dessert Bars Instructions
- Frequently Asked Questions About No Bake Peanut Butter Bars
- Estimated Nutritional Data for Peanut Butter Bars
- Share Your Simple Peanut Butter Treats Creations
- Tips for Perfect Fudgy Peanut Butter Bars
- Storage and Make Ahead Dessert Bars Instructions
- Frequently Asked Questions About No Bake Peanut Butter Bars
- Estimated Nutritional Data for Peanut Butter Bars
- Share Your Simple Peanut Butter Treats Creations
Why These Are the Best No Bake Peanut Butter Bars (E-E-A-T Focus)
When I was working back in marketing, time was my enemy. I needed recipes that were foolproof and fast, just like this one. That’s why these **easy peanut butter bars** are my go-to, and honestly, why I built this whole site around them. They deliver maximum creamy, chocolatey satisfaction with zero oven time. You just mix, press, pour, and chill. It’s that simple!
Felix built this space because we all need reliable, crave-worthy food that fits our crazy schedules. These happen to be the ultimate **quick peanut butter dessert** because they ask so little of you.
Speed and Simplicity for Perfect Peanut Butter Bars
Seriously, look at the prep time: fifteen minutes. That’s it! You won’t even break a sweat. Because there’s no oven involved, we skip all the heating up, watching, and testing the temperature. This is the definition of a **no oven required sweet** treat. I can pull this together while the kids are finishing homework and have it chilling before dinner is even done. It’s my secret weapon for potlucks, too; they disappear every single time.
Here’s what makes these **peanut butter bars** stand out:
- They use totally accessible, standard pantry ingredients—no weird specialty stuff!
- The texture is just perfect: that dense, soft, peanut butter bottom layer melts right into the smooth chocolate top.
- You can make them ahead! They are the ultimate make ahead dessert bars because chilling is required anyway.
If you’re always looking for faster ways to get dinner or dessert on the table, check out these quick and easy breakfast ideas—same philosophy, different meal!
Ingredients for Creamy Chocolate Peanut Butter Bars
Okay, getting the right ingredients is key here, even though they are so simple! Since these **peanut butter bars** rely on texture and how they set up, you have to use what I list exactly. Don’t try to substitute the powdered sugar for granulated, or you’ll end up with a grainy mess!
For the base layer, you need that important one cup of unsalted butter, and yes, it absolutely has to be softened—room temperature soft, not melted soft. Then, we’re using a full cup and a half of creamy peanut butter (the kind that doesn’t need stirring, please) along with two cups of powdered sugar and just a quick teaspoon of vanilla.
For the gorgeous, glossy topping, you’ll need one and a half cups of semi-sweet chocolate chips, plus one more quarter cup of creamy peanut butter mixed in there. I promise that extra little bit of peanut butter in the chocolate just gives it that extra smooth, fudgy texture we are aiming for. If you’re looking for other no-bake wonders, I have an amazing no-bake Butterfinger pie recipe that uses a similar principle!
- 1 cup unsalted butter, softened
- 1 1/2 cups creamy peanut butter (for the base)
- 2 cups powdered sugar
- 1 teaspoon vanilla extract
- 1 1/2 cups semi-sweet chocolate chips
- 1/4 cup creamy peanut butter (for topping)
Step-by-Step Instructions for Easy Peanut Butter Bars
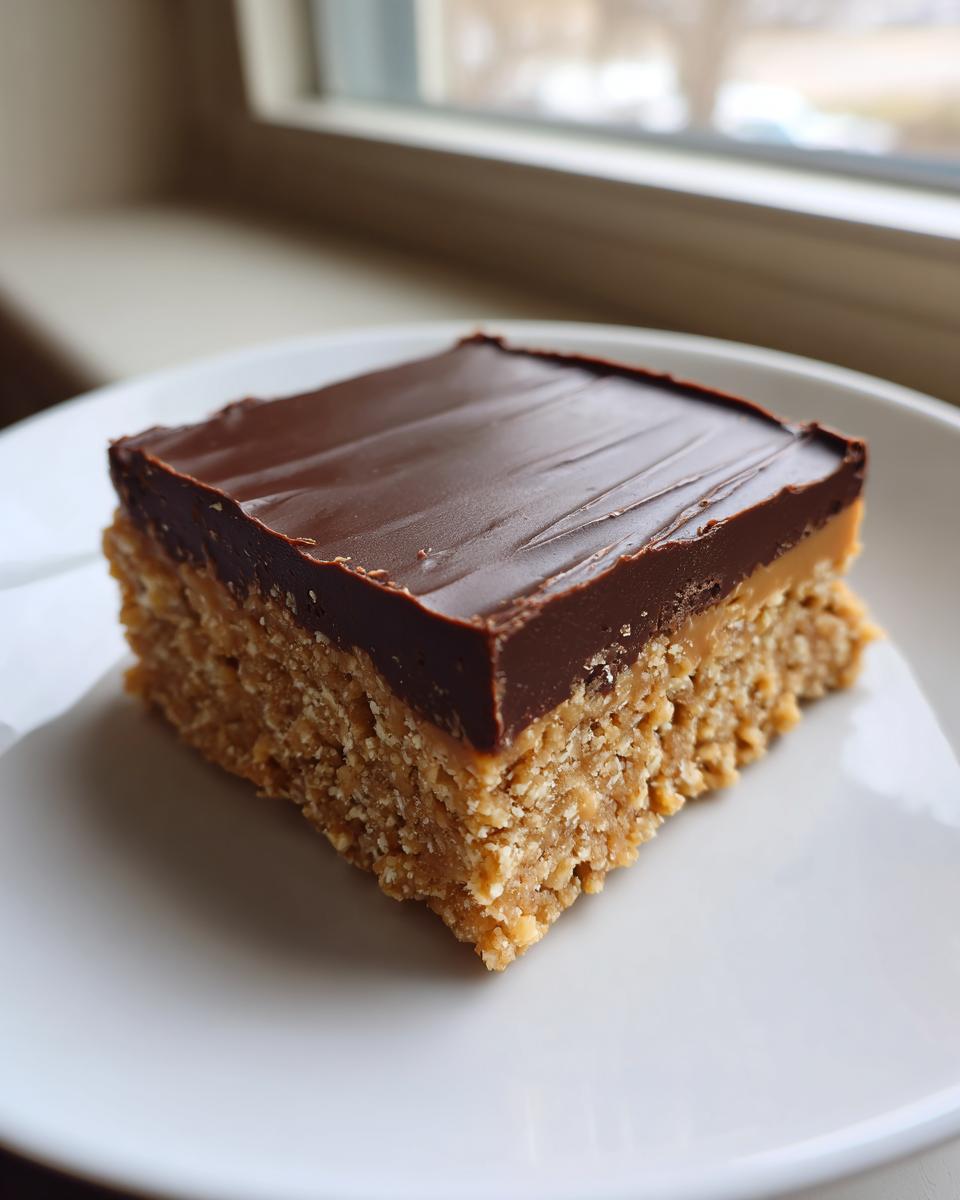
Okay, let’s get these famous **peanut butter bars** into their final form! Since this is a no-bake recipe, the instructions are all about mixing until smooth and chilling until firm. There’s no complicated oven choreography here, which is why I love it so much. We’re aiming for that classic, dense bottom layer that just melts in your mouth, topped with a snappy chocolate coat.
Preparing the Base Layer of the Peanut Butter Bars
First things first: grab that 8×8 pan. You absolutely must line it with parchment paper first and leave big flaps hanging over the sides. This overhang is your handle later—it’s how you lift the whole chocolate and peanut butter block out in one piece later. It’s so much easier than trying to pry them out!
In a big bowl, cream together that softened butter and the large amount of peanut butter (the first 1 1/2 cups). You want this totally smooth before you add anything else. Once it looks like a thick, pale caramel, start mixing in the powdered sugar gradually along with the vanilla. Keep mixing until there are absolutely no streaks of white sugar or lumps left. Press this base down firmly and evenly into your prepared pan. Use the bottom of a measuring cup if you need to get it really flat.
Melting and Spreading the Chocolate Peanut Butter Bars Topping
Now for the best part! In a separate microwave-safe bowl, combine your chocolate chips and that remaining 1/4 cup of peanut butter. This small addition is my secret to a less brittle, richer topping. You’re going to microwave this in short bursts—30 seconds at a time—because chocolate burns fast. But you have to stir it *really* well after every single 30 seconds, even if it still looks mostly chunky. Stirring is what finishes the melt smoothly.
Once that chocolate mixture is glossy and perfect, pour it right over the peanut butter layer. Use an offset spatula (or just the back of a spoon) to spread it right to the edges. Make sure it’s even so every square gets that perfect amount of chocolate. Then, we wait! Into the fridge they go for at least two hours. You really can’t rush the chilling process if you want those clean cuts. You can find more super quick assembly guides like this when you look at my full collection of simple delicious desserts!
Tips for Perfect Fudgy Peanut Butter Bars
Even though these are incredibly easy **peanut butter bars**, a couple of little tricks can take them from “good” to “why did you hide these from me?” territory. We want them perfectly set but still tender; we don’t want rock-hard peanut butter or crumbly chocolate on top.
Ingredient Adjustments for Reese’s Peanut Butter Bars Recipe Style
If you are aiming for that specific, super popular **Reese’s peanut butter bars recipe** vibe, I have one simple swap for you. The base recipe above is very peanut-butter forward, which is amazing if you’re a purist, but to get that candy bar flavor where the chocolate shines a little brighter, just reduce the peanut butter in the base layer to 1 cup instead of 1 1/2 cups. It still sets up great because the butter holds everything together, and it balances the sweetness of the chocolate topping perfectly.
Another key for that lovely **fudgy peanut butter bars** topping? If your chocolate seems too thick after melting, stir in one tablespoon of coconut oil or even just plain vegetable oil before spreading. It keeps the topping incredibly smooth and ensures it never gets shatteringly hard in the fridge. A fudgier topping is always worth the tiny extra step!
Storage and Make Ahead Dessert Bars Instructions
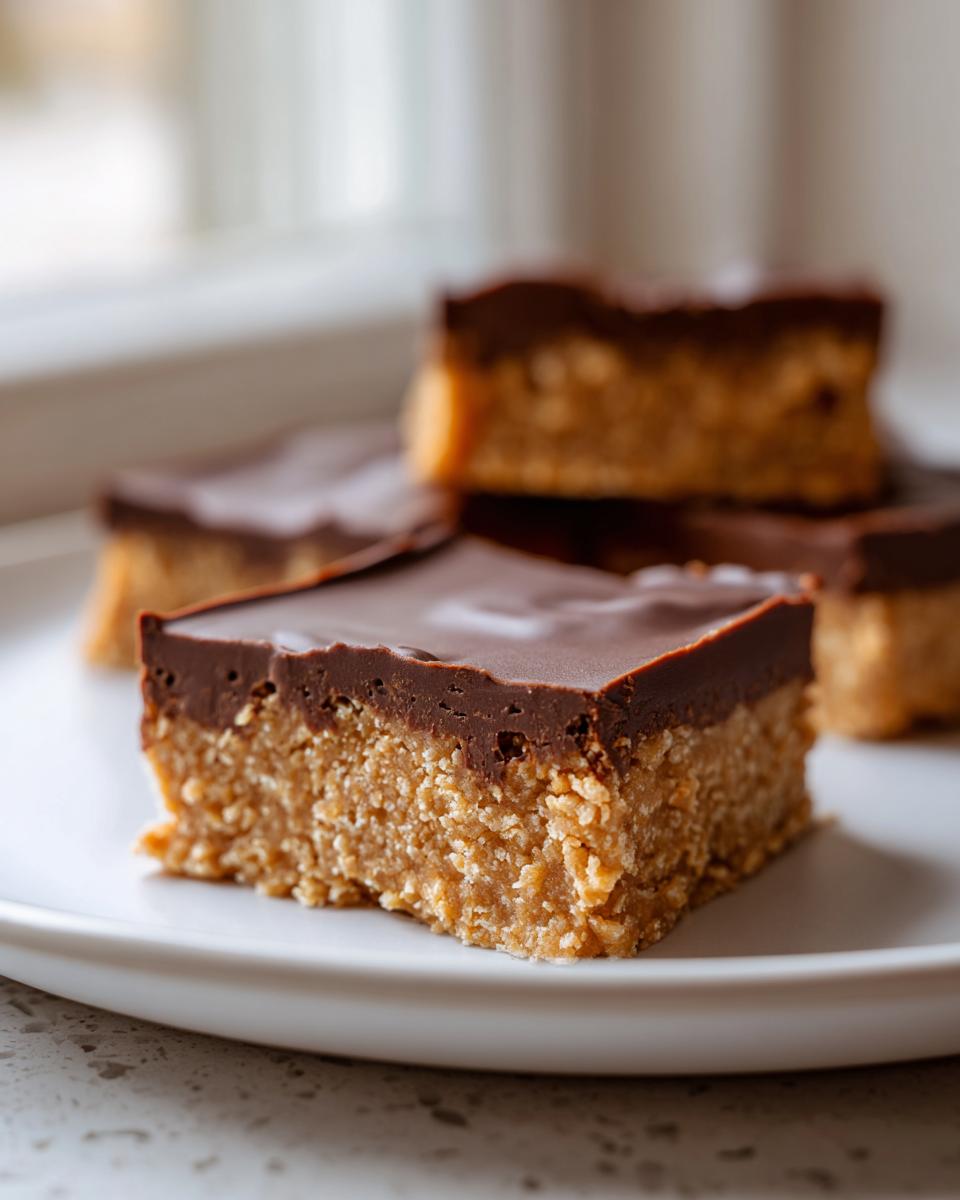
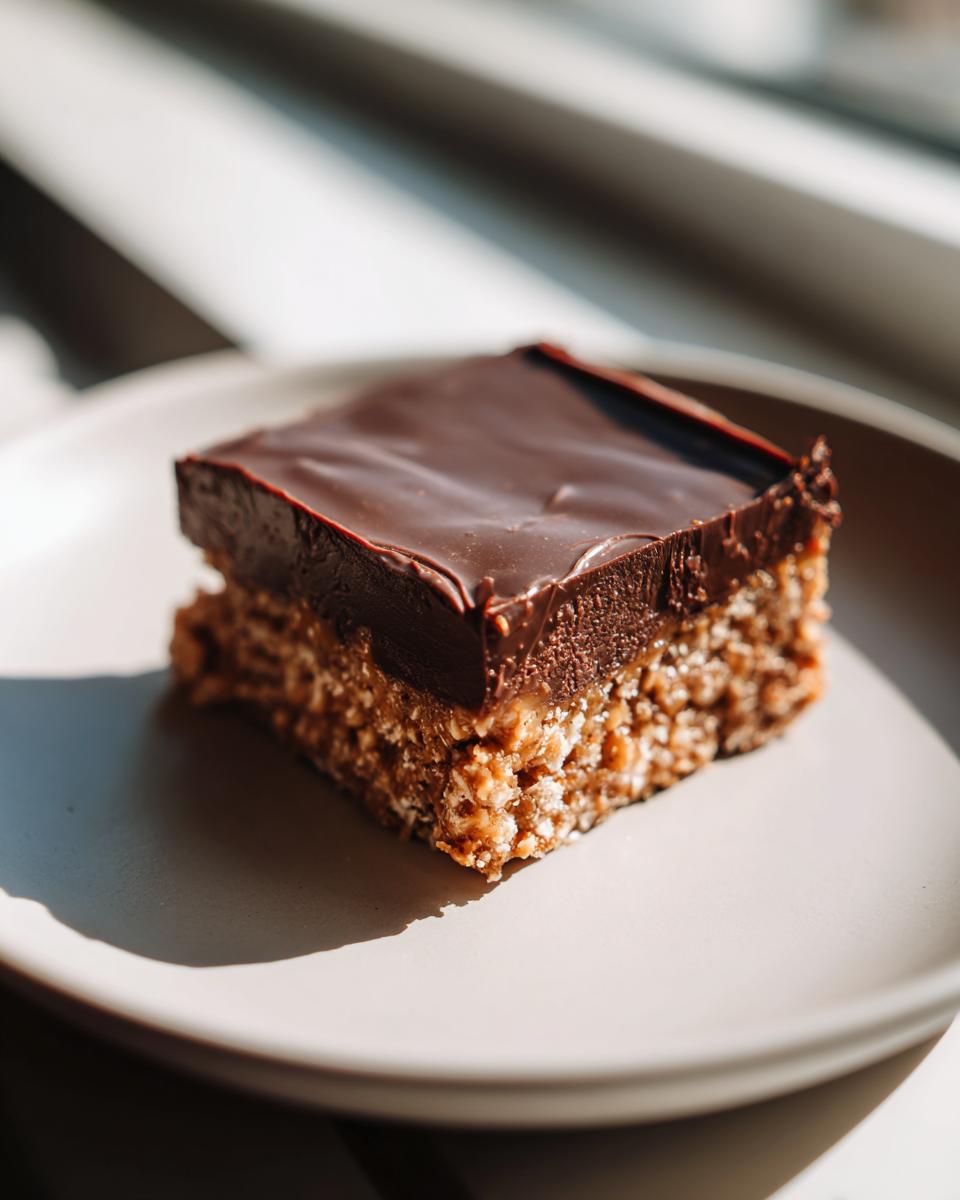
The beauty of making these **make ahead dessert bars** is that they actually taste better after a good chill! Once the chocolate topping is totally firm—which takes about two hours in the fridge—you can lift the entire block out using those parchment paper handles we set up. This is the secret to getting those beautiful edges.
Once you’ve cut them, keep them stored in an airtight container in the refrigerator. They stay wonderfully creamy for up to a week. Honestly, I’ve never personally tested them beyond that because they usually disappear by day four! If you are bringing these to a potluck, keep them chilled right up until you serve them, especially if it’s a warm day. Keeping them cold helps them stay neat and prevents sticky fingers early on.
Frequently Asked Questions About No Bake Peanut Butter Bars
Can I use natural peanut butter in these peanut butter bars?
I really advise against it for this specific recipe. Natural peanut butter—the kind that separates and you have to stir vigorously—has too much oil variability, and that can seriously mess with the texture of this base layer. We need that stable, creamy peanut butter to hold the powdered sugar together properly. Stick to the conventional creamy kind for the best **no bake peanut butter bars**!
What is the best way to cut these peanut butter chocolate squares cleanly?
Clean cuts are all about temperature! Make sure you chill these **peanut butter chocolate squares** until they are solidly firm—at least two hours, maybe more. Then, take a large, sharp knife and dip it into hot water for a few seconds. Dry the blade completely and make one clean slice. Dip, wipe the blade dry, and slice again. Repeat this process. It melts the chocolate just enough to cut right through without cracking or squishing the base layer!
Estimated Nutritional Data for Peanut Butter Bars
For those of you tracking your macros or just curious, I pulled together the estimated nutrition facts for one standard square of these amazing **peanut butter bars**. Remember, this is an estimate based on standard brand ingredients, so do take it as a guideline!
- Serving Size: 1 bar
- Calories: 280
- Fat: 18g
- Carbohydrates: 28g
- Protein: 6g
Share Your Simple Peanut Butter Treats Creations
Now that you know how simple these **simple peanut butter treats** are, I absolutely want to see what you’ve made! Did you keep them plain, or did you try my Reese’s style adjustment? Please leave a rating below—it helps other busy cooks find this reliable recipe when they desperately need it. If you have any questions or need a troubleshooting tip, drop a comment, and let’s chat! You can always reach out to me directly through my contact page if you need anything else.
Tips for Perfect Fudgy Peanut Butter Bars
Even though these are incredibly easy **peanut butter bars**, a couple of little tricks can take them from “good” to “why did you hide these from me?” territory. We want them perfectly set but still tender; we don’t want rock-hard peanut butter or crumbly chocolate on top.
Ingredient Adjustments for Reese’s Peanut Butter Bars Recipe Style
If you are aiming for that specific, super popular **Reese’s peanut butter bars recipe** vibe, I have one simple swap for you. The base recipe above is very peanut-butter forward, which is amazing if you’re a purist, but to get that candy bar flavor where the chocolate shines a little brighter, just reduce the peanut butter in the base layer to 1 cup instead of 1 1/2 cups. It still sets up great because the butter holds everything together, and it balances the sweetness of the chocolate topping perfectly.
Another key for that lovely **fudgy peanut butter bars** topping? If your chocolate seems too thick after melting, stir in one tablespoon of coconut oil or even just plain vegetable oil before spreading. It keeps the topping incredibly smooth and ensures it never gets shatteringly hard in the fridge. A fudgier topping is always worth the tiny extra step!
If you’re loving how easy these turn out, you can find tons more recipes that follow this quick-fix philosophy over in my simple delicious desserts section. Happy snacking!
Storage and Make Ahead Dessert Bars Instructions
The beauty of making these **make ahead dessert bars** is that they actually taste better after a good chill! Once the chocolate topping is totally firm—which takes about two hours in the fridge—you can lift the entire block out using those parchment paper handles we set up. This is the secret to getting those beautiful edges.
Once you’ve cut them, keep them stored in an airtight container in the refrigerator. They stay wonderfully creamy for up to a week. Honestly, I’ve never personally tested them beyond that because they usually disappear by day four! If you are bringing these to a potluck, keep them chilled right up until you serve them, especially if it’s a warm day. Keeping them cold helps them stay neat and prevents sticky fingers early on. You can find more great recipes ready for your next gathering in my collection of simple delicious desserts!
Frequently Asked Questions About No Bake Peanut Butter Bars
I get asked so many questions about these **no bake peanut butter bars** because they are just so popular for last-minute treats! It makes total sense—when you find a recipe that works perfectly every single time, you want to make sure you’re doing it right. Here are the things I hear most often about making these perfect squares.
Can I use natural peanut butter in these peanut butter bars?
Oh, I really advise against it for this specific recipe. Natural peanut butter—the kind that separates and you have to stir vigorously—has too much oil variability, and that can seriously mess with the texture of this base layer. We need that stable, creamy peanut butter to hold the powdered sugar together properly. Stick to the conventional creamy kind for the best **no bake peanut butter bars**! It’s crucial for that melt-in-your-mouth feel.
What is the best way to cut these peanut butter chocolate squares cleanly?
Clean cuts are all about temperature! Make sure you chill these **peanut butter chocolate squares** until they are solidly firm—at least two hours, maybe more. Then, take a large, sharp knife and dip it into hot water for a few seconds. Dry the blade completely and make one clean slice. Dip, wipe the blade dry, and slice again. Repeat this process. It melts the chocolate just enough to cut right through without cracking or squishing the base layer! This is how you get those perfect edges for gifting or parties. For more tips like this, check out my simple delicious desserts page.
Are these bars freezer friendly?
Yes, they are! These **peanut butter bars** freeze beautifully because they don’t have a lot of airy structure to compress. Once cut, stack them in an airtight container with wax paper or parchment squares between the layers so the chocolate doesn’t stick. They last great frozen for about two months, which is perfect for making a double batch when you have the time!
Can I swap the semi-sweet chips for milk chocolate?
You totally can, but just be aware that milk chocolate chips have extra sugar and milk solids, so your topping might not set quite as firmly as the semi-sweet version does. It will still be delicious, of course! If you use milk chocolate, just make sure those bars chill for the full two hours so the topping has time to firm up properly before you try cutting them. That way you avoid a gooey mess!
Estimated Nutritional Data for Peanut Butter Bars
For those of you tracking your macros or just curious, I pulled together the estimated nutrition facts for one standard square of these amazing **peanut butter bars**. Remember, this is an estimate based on standard brand ingredients, so do take it as a guideline! Because these are so rich and satisfying, one square is usually plenty, but oh boy, they are dangerously good.
- Serving Size: 1 bar
- Calories: 280
- Fat: 18g
- Carbohydrates: 28g
- Protein: 6g
I always feel better knowing what’s in my homemade treats, and you can count on these numbers being pretty close to accurate for this classic, simple recipe. It’s nice knowing that this incredibly easy dessert still packs a little bit of satisfying protein, too!
Share Your Simple Peanut Butter Treats Creations
Now that you know how simple these **simple peanut butter treats** are, I absolutely want to see what you’ve made! Did you keep them plain, or did you try my Reese’s style adjustment in the tips section? I get so much joy seeing your kitchen wins pop up.
Please, if you loved this recipe—and I know you will—give it a good rating right here on the page. Thumbs up mean the world to me because those little signals help other busy cooks find this reliable recipe when they desperately need a quick dessert.
If you have any questions or need a troubleshooting tip while cooling or cutting your bars, drop a comment below, and let’s chat! Felix is always here to help you reclaim your kitchen joy. If you need to reach out privately, you can always find me through my contact page. Happy baking—or should I say, happy *not* baking!
PrintEasy No-Bake Chocolate Peanut Butter Bars
Make these simple, creamy peanut butter bars with a rich chocolate topping. This no-bake recipe uses few ingredients and sets quickly, perfect for a quick dessert.
- Prep Time: 15 min
- Cook Time: 0 min
- Total Time: 2 hr 15 min
- Yield: 16 bars 1x
- Category: Dessert
- Method: No-Bake
- Cuisine: American
- Diet: Vegetarian
Ingredients
- 1 cup unsalted butter, softened
- 1 1/2 cups creamy peanut butter
- 2 cups powdered sugar
- 1 teaspoon vanilla extract
- 1 1/2 cups semi-sweet chocolate chips
- 1/4 cup creamy peanut butter (for topping)
Instructions
- Line an 8×8 inch baking pan with parchment paper, leaving an overhang for easy removal.
- In a large bowl, beat the softened butter and 1 1/2 cups of peanut butter until smooth.
- Gradually mix in the powdered sugar and vanilla extract until fully combined and the mixture is uniform.
- Press the peanut butter mixture evenly into the bottom of the prepared pan.
- In a microwave-safe bowl, combine the chocolate chips and the remaining 1/4 cup of peanut butter. Microwave in 30-second intervals, stirring well after each, until the chocolate is melted and smooth.
- Pour the melted chocolate mixture over the peanut butter layer and spread it evenly to cover the entire surface.
- Refrigerate the bars for at least 2 hours, or until the chocolate topping is firm.
- Use the parchment paper overhang to lift the bars from the pan. Cut into squares before serving.
Notes
- For a fudgier topping, add 1 tablespoon of vegetable oil or coconut oil to the chocolate chips before melting.
- If you want a Reese’s inspired flavor, use slightly less peanut butter in the base mixture to let the chocolate stand out more.
- Chill the bars completely before cutting to get clean squares.
Nutrition
- Serving Size: 1 bar
- Calories: 280
- Sugar: 25
- Sodium: 110
- Fat: 18
- Saturated Fat: 7
- Unsaturated Fat: 11
- Trans Fat: 0
- Carbohydrates: 28
- Fiber: 1
- Protein: 6
- Cholesterol: 25