

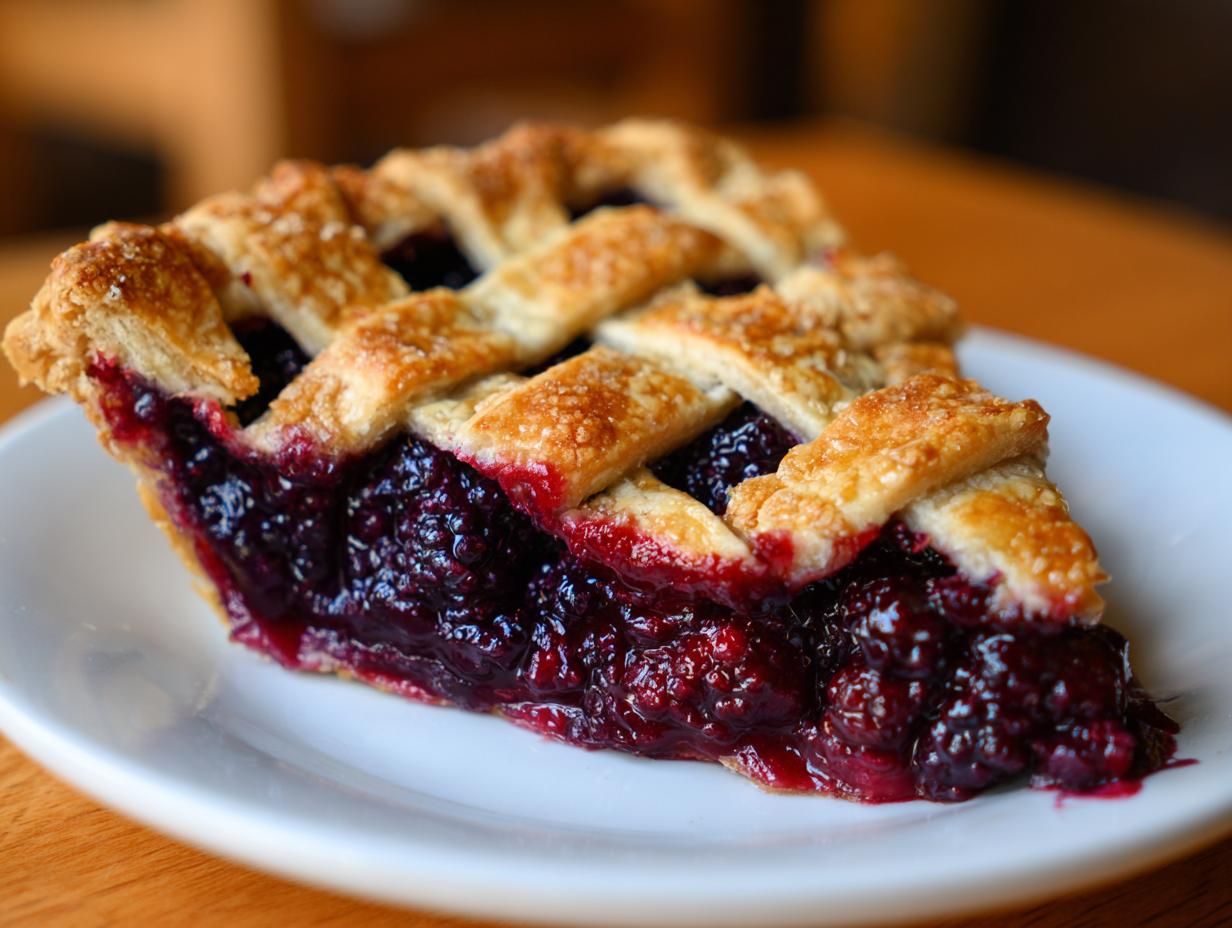
There’s nothing quite like that first bite of a perfect homemade pie—the scent of browned butter, the sweet-tart burst of warm fruit, and that absolutely shattering crust. I know life gets busy, and sometimes making a true **blackberry pie** feels like a weekend-only project. But trust me, that’s exactly why I developed this approach. This recipe isn’t about complexity; it’s about delivering that showstopper, old-fashioned dessert result every single time, even if you’re juggling a demanding week. I poured my professional background into streamlining the process so you get that foolproof flaky crust and a filling that sets up beautifully, thanks to a trick I learned long ago right here at Cooking by Felix. You deserve this kind of joy without the stress!
- Why This is the Best Blackberry Pie Recipe You Will Make
- Ingredients for Classic Homemade Blackberry Pie
- How to Make the Flaky Crust for Your Blackberry Pie
- Assembling the Blackberry Pie Filling and Lattice Top Pie
- Baking Instructions for a Showstopper Blackberry Pie
- Tips for Success with Your Old Fashioned Blackberry Dessert
- Cooling and Serving Suggestions
- Storage and Reheating Instructions
- Frequently Asked Questions About Blackberry Pie Recipe
Why This is the Best Blackberry Pie Recipe You Will Make
I know there are a million berry pie recipes out there, but I promise you, this one gets right to the heart of what makes a truly memorable, old fashioned blackberry dessert. I developed this for my own hectic schedule, so you get spectacular results without needing a whole day to prep. This isn’t just another pie; it’s my solution for guaranteed success! In fact, if you want to see the exact technique I use for the crust that many others swear by, you can check out this fantastic guide on a homemade flaky crust.
- It delivers that incredible, deep flavor you crave from a classic summer pie.
- We use an all-butter formula that creates the flakiest crust you’ll ever make—truly a masterclass in achieving that perfect flaky crust.
- We tackle the biggest fear head-on: there is zero chance of a runny excuse for filling here. We focus specifically on how to nail that no soggy bottom pie finish, making this the ultimate easy berry pie recipe!
Achieving the Perfect Flaky Pie Crust
Listen, the secret to that magical, layered crust is simple: ice-cold butter. I mean, almost frozen! You want to work it just enough so that the butter pieces stay intact. When those little cold chunks hit the hot oven, they create steam pockets, and boom—instant layers! Forget the stabilizers; we rely on proper technique for our buttery pie crust tutorial.
The Secret to a Set Berry Pie Filling
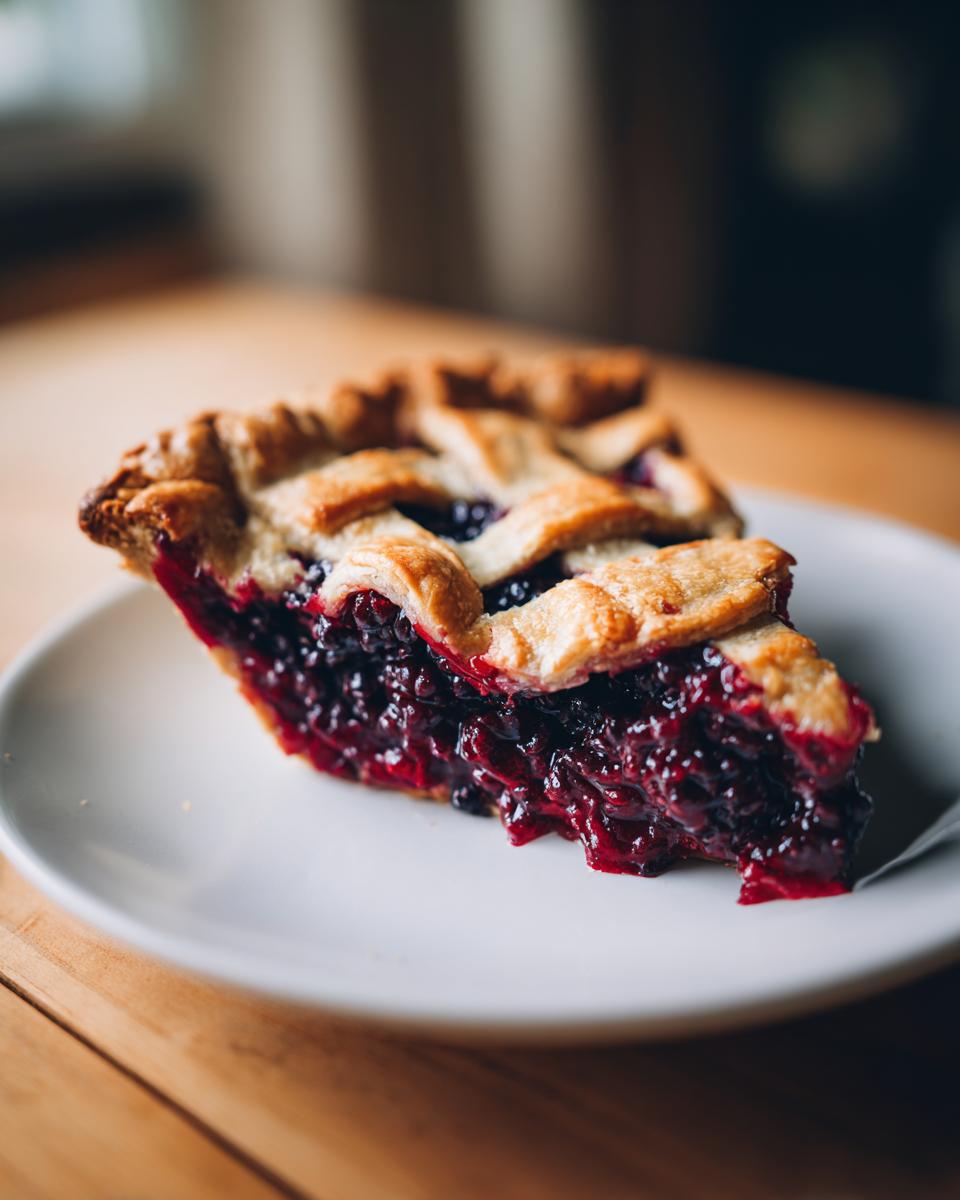
This is where we beat the runniness. We use cornstarch, and we use it correctly. It thickens the juices as they bake, locking everything in place. Whether you picked your berries this morning or grabbed a bag of frozen ones, the cornstarch handles the moisture perfectly. You’ll get that beautiful, thick berry filling that holds its shape beautifully when you slice it.
Ingredients for Classic Homemade Blackberry Pie
Okay, here is the lineup! For this very traditional, utterly delicious blackberry pie, we aren’t messing around with fussy mixes. We need good quality components to build that sturdy, flaky foundation. The absolute non-negotiable? Your butter must be cold. I mean, right out of the fridge. If you want to see how I handle other fresh preserves, check out my easy raspberry jam recipe, because ingredient quality always matters!
- 2 1/2 cups all-purpose flour
- 1 teaspoon salt
- 1 cup (2 sticks) unsalted butter, very cold and cubed
- 1/2 cup ice water, plus more if needed
- 6 cups fresh or frozen blackberries
- 1 1/2 cups granulated sugar (adjust based on berry sweetness)
- 1/4 cup cornstarch (for no soggy bottom)
- 1 tablespoon lemon juice
- 1/4 teaspoon ground cinnamon
- 1 large egg, beaten with 1 teaspoon water (for egg wash)
- 1 tablespoon coarse sugar for sprinkling
How to Make the Flaky Crust for Your Blackberry Pie
If you want that glorious, golden shell that crumbles just right when you bite into your perfect blackberry pie, you have to respect the dough. This isn’t the time to rush! We treat this buttery pie crust like it holds the whole dessert together—because, honestly, it kind of does! I remember the first time I learned to make a proper double crust; I was terrified of melting the butter, but once you feel how the dough should behave, you’ll nail it. It’s much like working with yeasted dough, almost like my easy brioche bread recipe—patience pays off!
Mixing and Chilling the Flaky Pie Crust Dough
Grab your biggest bowl because we start by whisking the flour and salt together. Now, the butter—it has to be brutally cold. I mean, almost frozen! You want to cut in that cold butter using a pastry blender or your fingertips until the mixture resembles coarse crumbs with some actual pea-sized pieces of butter remaining. Those are your flaky pockets waiting to happen!
Next comes the ice water. Seriously, use ice water. Add it slowly, a tablespoon at a time, mixing quickly until the dough just barely comes together when you press it. That’s my personal cue! If it’s too dry and dusty, it won’t come together. If it’s too wet, say goodbye to flakiness. Once it forms shaggy clumps, stop mixing! Divide that dough in half, flatten those disks tight, wrap them up, and get them into the fridge for at least an hour. That chilling time is non-negotiable; it lets the gluten relax so your crust won’t shrink up on you while it bakes!
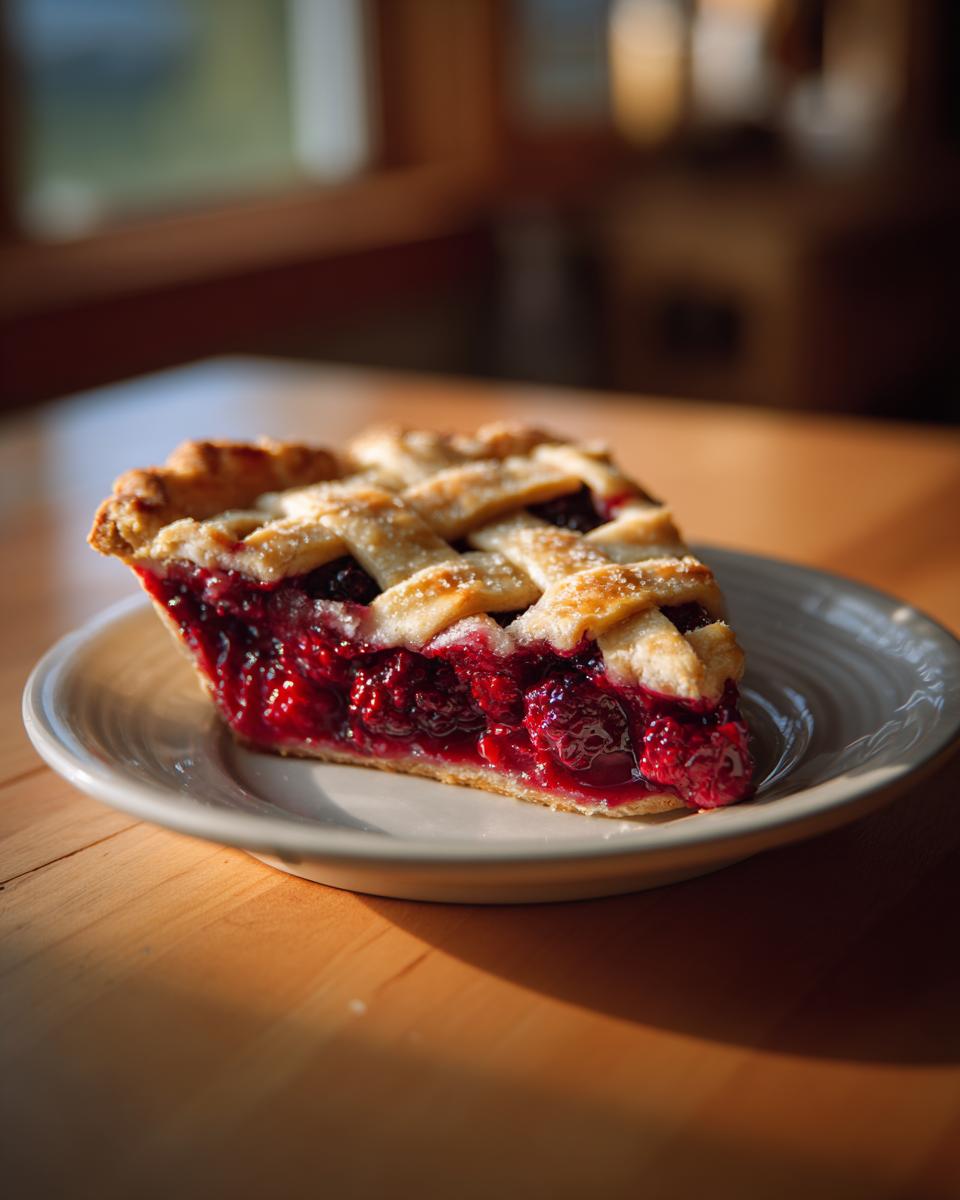
Assembling the Blackberry Pie Filling and Lattice Top Pie
Now we bring all the components together to create the gorgeous final look of this blackberry pie. This is where the visual payoff happens, especially if you’re going for that classic woven look! When handling the filling, remember we want those beautiful, plump berries to stay intact, not turn into jam before they even hit the oven. Keep things gentle here, okay? If you are looking for inspiration on other fruit fillings, I have a fantastic guide for my cherry pie filling recipe that uses similar thickening logic.
Preparing the Berry Mixture and Rolling the Dough
You’ve got your dough chilling, so let’s get those berries ready. In a separate bowl, gently toss your blackberries with the sugar, cornstarch, lemon juice, and cinnamon. Don’t go wild with the whisk—we are folding, not beating! A little crush is fine, but you want structure. While that waits, grab one chilled disk of dough and roll it out onto a lightly floured surface until it’s about 12 inches wide. Carefully drape that into your 9-inch pie plate. Trim the overhang by an inch—that extra bit is what we use later to seal the top!
Now, roll out that second disk. This is the one you’ll cut into strips for your beautiful lattice top. Make sure your strips are roughly the same width so they weave nicely; about 3/4-inch wide usually does the trick. Pop that bottom-crusted pie plate back into the fridge while you get your lattice ready. Keeping things cold is key!
Sealing and Finishing Your Lattice Top Blackberry Pie
Once your lattice is woven—and don’t fret if it looks rustic! That’s how the best blackberry pie looks—it’s time to seal the deal. Pour that berry mixture into the chilled bottom crust. I always like to drop a few tiny dabs of butter right on top of the berries before covering them; it adds just a little richness. Lay your strips over the top, making sure you crimp the edges of the top and bottom crusts firmly together to seal in all those juicy flavors.
To get that famous golden shine, gently brush the entire top of your crust—strips and edges included—with your egg wash (that’s just the egg beaten with a splash of water). Then, sprinkle it with coarse sugar for a bakery-style crunch! Here’s the last mandatory trick for perfection: Place the whole pie in the freezer for 15 minutes before it goes into the hot oven. This shock hardens the butter again right before baking, guaranteeing you won’t have crust shrinkage or a sad, slumped top!
Baking Instructions for a Showstopper Blackberry Pie
Okay, the assembly is done, and that pie is coming out of the freezer screaming cold—perfect! Now we bake. This step relies entirely on temperature control if you want that beautiful golden crust and a filling that actually holds its shape. We start hot! Preheat your oven to 400 degrees Fahrenheit. I always place the pie right onto a baking sheet first; this is a simple move that helps catch any inevitable drips, but it also helps insulate the bottom crust, which is honestly the best defense against that dreaded soggy bottom you’ve been trying to avoid! If you’re looking for another classic fruit bake that benefits from high initial heat, you should check out my easy southern peach cobbler recipe.
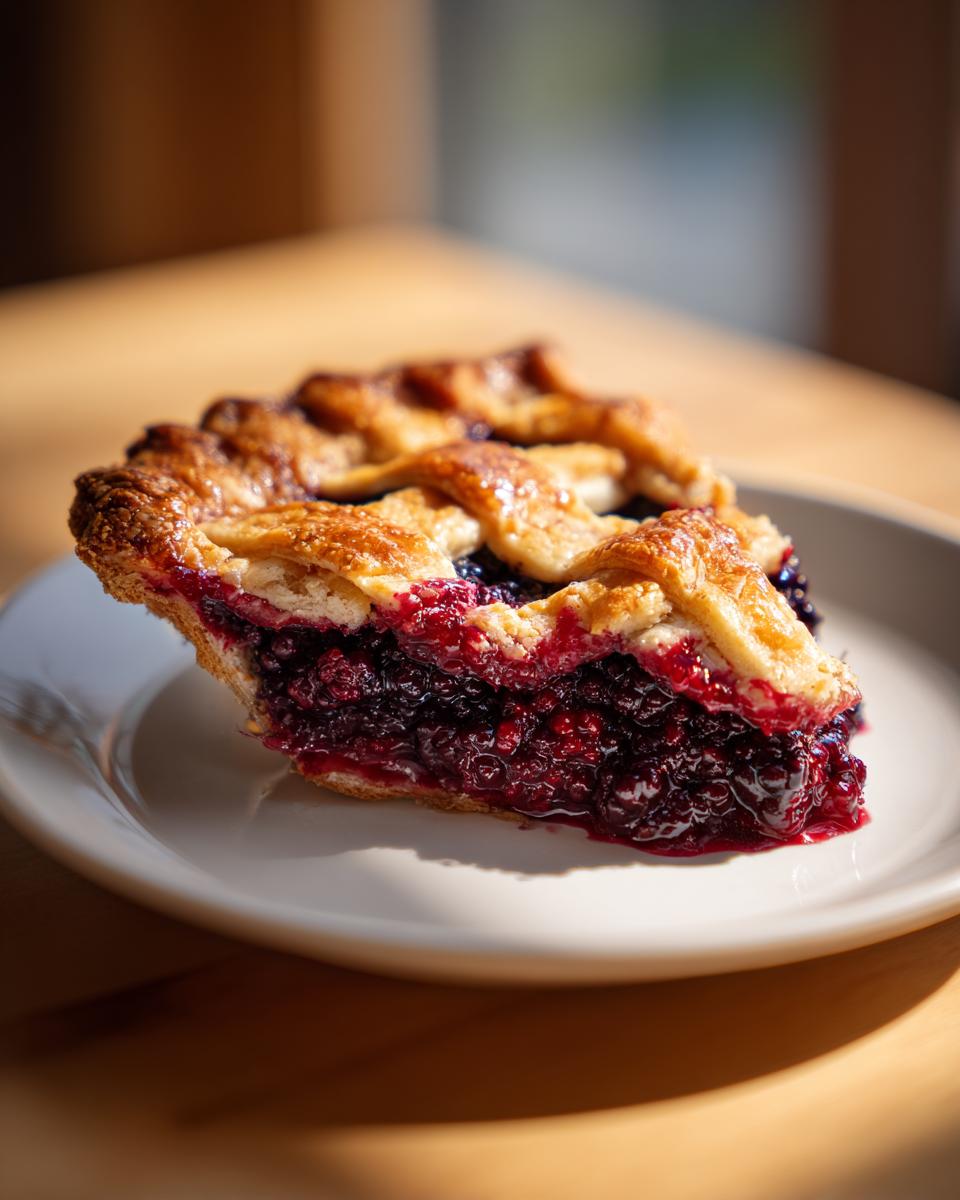
Bake it hard at 400°F for about 20 minutes. This blast of heat sets the bottom crust structure right away. After that initial rush, reduce that oven temperature down to 375°F. Continue baking for another 35 to 45 minutes. You’ll know it’s done when the crust is deeply golden brown and you can see the filling bubbling thick and slow in the vents or through your lattice work. A thin, slow bubble means the cornstarch is working its magic! If those pretty edges start getting too dark too fast, just lightly tent them with a little piece of foil. Remember, we are aiming for the best blackberry pie here, and that requires a little watchful eye!
Tips for Success with Your Old Fashioned Blackberry Dessert
I want your experience making this blackberry pie to be a walk in the park, not a kitchen disaster, so let’s review the absolute must-dos that move this from a good pie to the best pie! First, and I can’t stress this enough, keep everything related to the crust ice cold. If your butter melts even a little bit, you risk losing that essential flakiness. I actually keep my water in the freezer for about five minutes before I start mixing the dough.
Second, if you’re using frozen blackberries, don’t bother thawing them! Toss them straight into the sugar mixture. They will release liquid, but the cornstarch handles that extra moisture beautifully. If you really, truly want to guarantee a crisp bottom, especially on a humid day, try the bread trick! Lay a few slices of plain white bread on the bottom crust before you pour in the filling. The bread soaks up the initial moisture like a sponge, and you can just toss the bread out after baking. I remember hiding that trick from my brother when I first started baking; he swore my pie crusts were magic because his always flopped! For more tips on using ingredients in unique ways, check out my recipe for candied pecans.

When I finally figured out how to weave a perfect lattice, I felt like I could conquer anything! It’s all about keeping your strips cold so they stay pliable. This classic summer pie is totally worth that bit of extra focus. If you’re looking for another incredibly simple, flavor-packed berry option, you absolutely have to see this beautiful fresh blackberry pie inspiration!
Cooling and Serving Suggestions
If you listen to one thing I tell you today about making the best blackberry pie, please let it be this: You *must* let it cool. I know, I know, the smell is intoxicating, and you want to dive right in with a fork. But step nine isn’t optional! If you slice that pie while it’s still hot, your beautiful, perfectly set filling will run all over the plate. Trust me, if you rush it, all that wonderful work on the cornstarch goes to waste.
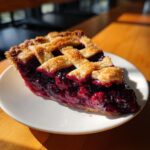
Let the pie cool completely on a wire rack for a solid three to four hours. It’s agony, but it’s worth it for those clean, gorgeous slices. Once it’s set, this pie is absolutely phenomenal served warm (not hot!) with a scoop of rich vanilla ice cream—the contrast is heavenly. Or, if you’re feeling decadent, a dollop of freshly whipped cream works wonders. For ideas on other stunning desserts to share, you might want to check out my secret for amazing brown butter chocolate chip cookies!
Storage and Reheating Instructions
Now, about leftovers—if you even have any, which is rare in my house! This buttery pie crust holds up surprisingly well. You can keep your leftover slices covered tightly on the counter at room temperature for about a day, honestly. If it’s really warm where you live, or if you plan to save it longer than 24 hours, just tuck it into the fridge.
When you want to enjoy a slice later, I always suggest reheating it slightly. Don’t microwave the whole slice unless you like a soft crust! Pop it in a toaster oven or a regular oven at about 350 degrees Fahrenheit for about 8 to 10 minutes. That gently warms the berries and crisps the crust right back up. Trust me, eating leftovers cold just isn’t the same way to enjoy this treat. Speaking of leftovers that reheat beautifully, you’ve got to try my recipe for date nut bread!
Frequently Asked Questions About Blackberry Pie Recipe
I’m happy to tackle any final questions you have before you dive into making this homemade blackberry pie! Getting those little details right is what separates an okay pie from the one everyone begs for at Thanksgiving. Don’t hesitate to ask—I learned the hard way so you don’t have to!
Can I use frozen blackberries instead of fresh ones?
Absolutely! Frozen berries are fantastic, especially when fresh ones aren’t in season. Just remember my golden rule: don’t thaw them first! Toss the frozen blackberries straight into the sugar mixture. The cornstarch in this recipe is strong enough to handle the extra liquid they release as they bake. It makes this a great easy pie making guide because you don’t have to wait for the perfect haul of fruit.
What’s the best way to stop steam from escaping and drying out my filling?
That’s a common concern with any double crust pie! If you worry that too much steam escaping through your vents is evaporating your precious liquid, try this: you can slightly reduce the venting. Instead of cutting many slits, cut fewer, larger holes or make your lattice strips a little wider. But honestly, once you reduce the heat in the oven (step 8), the slow bubbling prevents rapid steam burnout. If you want another idea for a quick, flavor-packed side dish, check out my easy one-pot Spanish rice recipe.
Can I substitute the cornstarch with tapioca or flour for thickening?
You certainly can experiment, but for this specific recipe, I really stand by the cornstarch. It gives you that fantastic, clear, gelatinous set that lets your berries shine through—the hallmark of a great berry pie filling. If you only have flour, use about double the amount of cornstarch, but be warned the final texture might be slightly cloudier. Tapioca works well too, but I find cornstarch is the most reliable thickener for a perfect summer fruit pie.
How long does a finished blackberry pie last?
Since this pie has such a rich, buttery crust, it’s best eaten within two days. If you kept it cool, you can leave it covered on the counter for about a day. After that, I definitely recommend refrigeration, especially if you plan on serving it a few days later. Enjoy that comfort food dessert!
PrintClassic Homemade Blackberry Pie with Flaky Lattice Crust
Make the best blackberry pie you have ever tasted using this recipe. It features an all-butter, flaky double crust and a perfectly set, juicy filling. This old fashioned dessert is a showstopper.
- Prep Time: 45 min
- Cook Time: 65 min
- Total Time: 155 min
- Yield: 8 servings 1x
- Category: Dessert
- Method: Baking
- Cuisine: American
- Diet: Vegetarian
Ingredients
- 2 1/2 cups all-purpose flour
- 1 teaspoon salt
- 1 cup (2 sticks) unsalted butter, very cold and cubed
- 1/2 cup ice water, plus more if needed
- 6 cups fresh or frozen blackberries
- 1 1/2 cups granulated sugar (adjust based on berry sweetness)
- 1/4 cup cornstarch (for no soggy bottom)
- 1 tablespoon lemon juice
- 1/4 teaspoon ground cinnamon
- 1 large egg, beaten with 1 teaspoon water (for egg wash)
- 1 tablespoon coarse sugar for sprinkling
Instructions
- Prepare the Flaky Pie Crust: In a large bowl, whisk together the flour and salt. Cut in the cold butter using a pastry blender or your fingers until the mixture resembles coarse crumbs with some pea-sized pieces of butter remaining. Gradually add the ice water, one tablespoon at a time, mixing until the dough just comes together. Do not overmix. Divide the dough in half, flatten each half into a disk, wrap in plastic, and chill for at least 1 hour.
- Prepare the Filling: In a separate bowl, gently combine the blackberries, granulated sugar, cornstarch, lemon juice, and cinnamon. Toss lightly to coat the berries. Set aside while you roll out the bottom crust.
- Assemble the Bottom Crust: On a lightly floured surface, roll out one disk of dough into a 12-inch circle. Carefully transfer the dough to a 9-inch pie plate. Trim the edges, leaving a 1-inch overhang. Place the pie plate in the refrigerator.
- Roll Out the Top Crust: Roll out the second disk of dough. Cut the dough into strips for a lattice top, or cut a solid top, making several vents if using a solid top.
- Fill the Pie: Pour the blackberry filling into the chilled bottom crust. Dot the top of the filling with a few small pieces of leftover butter, if desired.
- Create the Lattice Top: Arrange the dough strips over the filling in a lattice pattern, or place the solid top over the filling. Crimp the edges of the top and bottom crusts together to seal.
- Chill and Bake: Brush the top crust with the egg wash and sprinkle with coarse sugar. Place the pie in the freezer for 15 minutes before baking to help set the crust. Preheat your oven to 400 degrees Fahrenheit (200 degrees Celsius).
- Bake: Place the pie on a baking sheet (to catch drips). Bake at 400°F for 20 minutes. Reduce the oven temperature to 375°F (190°C) and continue baking for another 35 to 45 minutes, or until the crust is golden brown and the filling is bubbling thickly. If the edges brown too quickly, cover them loosely with foil.
- Cool: Let the blackberry pie cool completely on a wire rack for at least 3 to 4 hours before slicing. This step is crucial for the filling to set properly and avoid a runny slice.
Notes
- For the flakiest crust, keep all your ingredients, especially the butter and water, as cold as possible during mixing.
- If you use frozen blackberries, do not thaw them first; add them directly to the sugar mixture.
- If you want to guarantee no soggy bottom, place a layer of bread slices on the bottom crust before adding the filling; the bread absorbs excess moisture during baking.
Nutrition
- Serving Size: 1 slice
- Calories: 420
- Sugar: 35g
- Sodium: 250mg
- Fat: 24g
- Saturated Fat: 15g
- Unsaturated Fat: 9g
- Trans Fat: 0.5g
- Carbohydrates: 52g
- Fiber: 4g
- Protein: 5g
- Cholesterol: 60mg