

Let’s be honest: sometimes you just need decadent, soul-satisfying chocolate, right? But when you want a dessert that truly feels luxurious, like something you’d share at a major celebration, you need this french silk pie recipe. For years, achieving that signature, velvety smooth, mousse-like texture felt intimidating, like only pastry chefs could manage it. That’s where Cooking by Felix steps in! My mission is making sure that rich, melt-in-your-mouth dessert is completely foolproof, even for us busy home cooks. I stripped away the guesswork so you get that perfect, creamy result every single time you make this ultimate chocolate treat. If you love deep chocolate flavor, check out my secrets for making easy 3-ingredient fudge, too! Get ready for the best pie of your life!
- Why This Classic French Silk Pie Recipe Works Every Time
- Ingredients for Your Decadent Chocolate Dessert
- Step-by-Step Instructions for the Ultimate french silk pie
- Tips for Success Making french silk pie
- Serving Suggestions for your Rich Chocolate Pie
- Storage and Reheating Instructions for french silk pie
- Common Questions About Making a french silk pie
- Estimated Nutritional Data for this Indulgent Chocolate Treat
- Share Your Experience with This french silk pie
Why This Classic French Silk Pie Recipe Works Every Time
I know why people hesitate before making a french silk pie. You hear ‘silky’ and you immediately think ‘delicate’ or ‘impossible to set right.’ But honestly, this recipe is built for success! I took all the tricky parts and made them super clear. That’s the promise I make here at Cooking by Felix. This pie delivers pure indulgence without the stress. You get that amazing richness without any weird grainy texture creeping in.
Here’s exactly why this version keeps coming back to our family table:
- It uses a cooked custard base, which is way more stable than relying on sugar/butter creaming alone.
- We use good quality unsweetened chocolate for that intense flavor.
- The folding technique is simple, but it locks in the air so it stays light.
If you ever need a quick fix for chocolate cravings after this pie, you have to try my easy white chocolate fudge. It shares that same rich, decadent DNA!
Achieving the Velvety Silk Pie Filling Texture
The secret to that melt-in-your-mouth dessert texture is twofold. First, you absolutely must cook that sugar and egg yolk mixture until it’s thick enough to coat the back of your spoon. That step pasteurizes things just enough and gives the filling structure. Second, when you fold in the whipped cream, take your time! Don’t use an electric mixer here. Gently whisk in a small amount first to lighten the base, then fold the rest in carefully. That’s how you keep that glorious air trapped inside for a truly silky smooth pie filling.
The Perfect Buttery Pie Crust Recipe Base
You can’t have a rich filling without a sturdy foundation, right? For this pie, the crust needs to be done and completely cold before you even think about adding that chocolate filling. I give you options! You can use your favorite store-bought shell, you can press in a simple graham cracker crust, or if you’re feeling ambitious, you can bake a classic buttery pie crust recipe from scratch. No matter which you choose, make sure it’s chilled solid. A warm crust will instantly ruin the beautiful chilling process for that gorgeous filling.
Ingredients for Your Decadent Chocolate Dessert
Okay, gathering your ingredients is where the magic really starts. I’ve listed everything you need to achieve that picture-perfect rich chocolate pie. Remember, quality matters here, especially with the chocolate! I always measure everything out before I even turn on the stove because once that custard starts cooking, you need to move fast. We are talking about an entirely from scratch chocolate pie experience here, and every measurement matters for that perfect texture.
You’ll need:
- 1 (9-inch) crust—pre-baked or chilled graham cracker is fine!
- 1 cup granulated sugar
- 4 large egg yolks (and pay close attention to the note below!)
- 1 cup cold water
- 8 ounces unsweetened chocolate, chopped small
- 1 cup (that’s two full sticks) unsalted butter, softened perfectly
- 1 teaspoon vanilla extract
- 1/2 teaspoon almond extract (this is my little secret!)
- 1 cup heavy whipping cream, chilled
- Chocolate shavings for topping, because presentation counts!
If you want to try something fun instead of a shortbread crust, you could try folding crushed Oreos into melted butter for a great base. My recipe for chocolate crinkle cookies shows how much I love working with good cocoa!
Ingredient Notes and Safe Egg Preparation for french silk pie
Let’s talk about those egg yolks, because this is important for a french silk pie when you’re scared of raw eggs. Honestly, the way we cook the base over the heat pretty much handles it, but if you’re nervous, please use pasteurized egg yolks—they are available in most grocery stores now and give you total peace of mind. If you can’t find them, make sure you temper the yolks slowly when adding them to the hot liquid. That careful heating process is key to structure. Also, if you skip the homemade crust, the quick Oreo alternative works wonders!
Step-by-Step Instructions for the Ultimate french silk pie
This is where the action happens! Don’t rush these steps, especially the cooking and the folding, and you’ll have the **best chocolate silk pie** texture imaginable. I trust you to follow these steps closely—that’s how we guarantee a rich, decadent result!
Here is the full process:
- First thing: make sure your pie crust is ready! If you baked a pastry crust, it needs to be totally cool. If you used a graham cracker crust, it needs to be pressed firmly and chilled. No warm crusts allowed!
- Grab a saucepan and whisk together your sugar and egg yolks really well. Then, slowly whisk in that cold water. You want it smooth before it hits the heat.
- Cook this custard mixture over medium heat. Keep stirring constantly—seriously, don’t walk away! You’re looking for it to coat the back of a spoon nicely, which takes about 8 to 10 minutes. Pull it off the heat before it hits a boil.
- Toss in your chopped unsweetened chocolate right away and stir until that chocolate is totally melted and glossy.
- Move this gorgeous chocolate base into a big bowl and let it rest for about 10 minutes. It needs to cool just a touch before the next step.
- Now, beat in that softened butter, vanilla, and the almond extract with your mixer until it’s completely smooth and creamy. Scrape down those sides!
- In a separate, clean bowl, whip your heavy cream until you get stiff peaks. This is going to give our pie that amazing airy lift.
- This is the delicate part: take about a third of that whipped cream and fold it gently into the chocolate base. This “tempers” the filling. Then, fold in the rest of the whipped cream until it’s just combined. Stop folding when you stop seeing streaks!
- Pour all that silky filling into your cool crust and spread the top evenly.
- Finally, cover it up and chill it for at least 6 hours, though overnight is my preference for the firmest, creamiest pie.
If you want a similar rich texture without the chilling time, my recipe for moist chocolate cake is a lifesaver!
Preparing the Silky Smooth Pie Filling Base
We start on the stove, and persistence pays off here! Remember steps 2 through 6? That sugar and yolk mixture needs constant attention until it thickens up. Stirring non-stop breaks down the sugar crystals and prevents scrambling. Once the chocolate melts in, it will look loose, but don’t panic! Once the softened butter is incorporated, you’ve got the structure of an incredible, **velvety silk pie filling**. Just make sure it’s cooled down a little bit—we don’t want to melt all the air out of our whipped cream later on!
Folding in Whipped Cream for Lightness
This is what turns a dense chocolate pudding into a true silk pie. You have to whip the heavy cream completely separately until it holds its shape. When you mix it in, remember the two-step process: lighten the base with a little bit first, then gently fold in the rest. Think gentle figure-eights with a rubber spatula. We are trying to incorporate air, not punch it out! This step is exactly what makes this one of the best **creamy dessert ideas** out there without turning it into heavy frosting.
Tips for Success Making french silk pie
Even with a great recipe, sometimes things go a little sideways, but trust me, those little stumbles are usually easy to fix! The biggest offender for a bad french silk pie is usually temperature control. If your custard boils, it can curdle, so keep that heat medium and stir constantly. If you add the butter when the chocolate mixture is too hot, you might lose some of that perfect emulsion we worked so hard to create.
Also, please, please, *please*—don’t skimp on the chilling time! Seriously, six hours is the bare minimum. If you try to rush it, the filling will be that sad, slumpy texture we are avoiding. For the ultimate **melt in your mouth dessert**, overnight chilling really lets those flavors marry up and solidifies the filling to that perfect, decadent slice every time. I’ve learned this the hard way making my creamy egg salad—patience is everything when emulsifying!
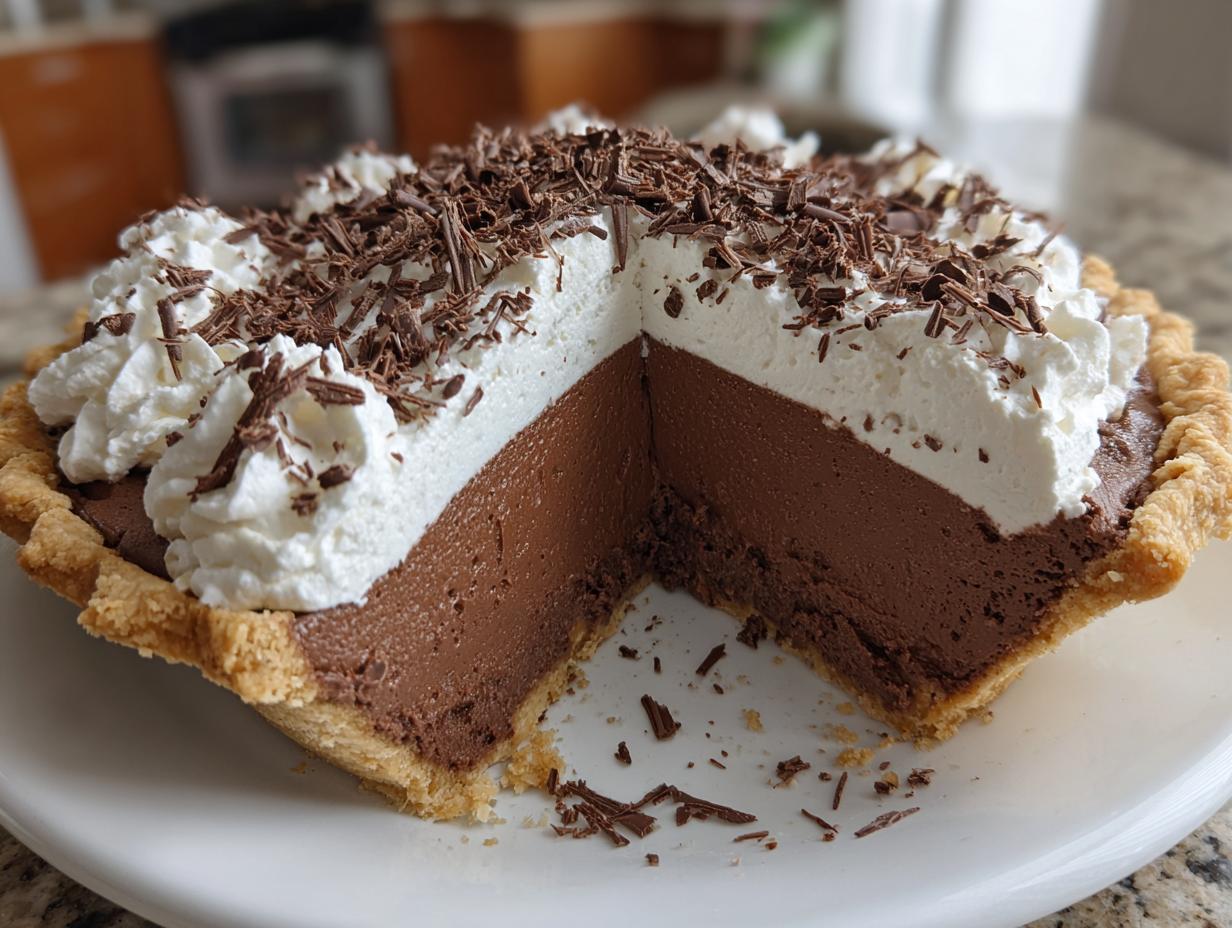
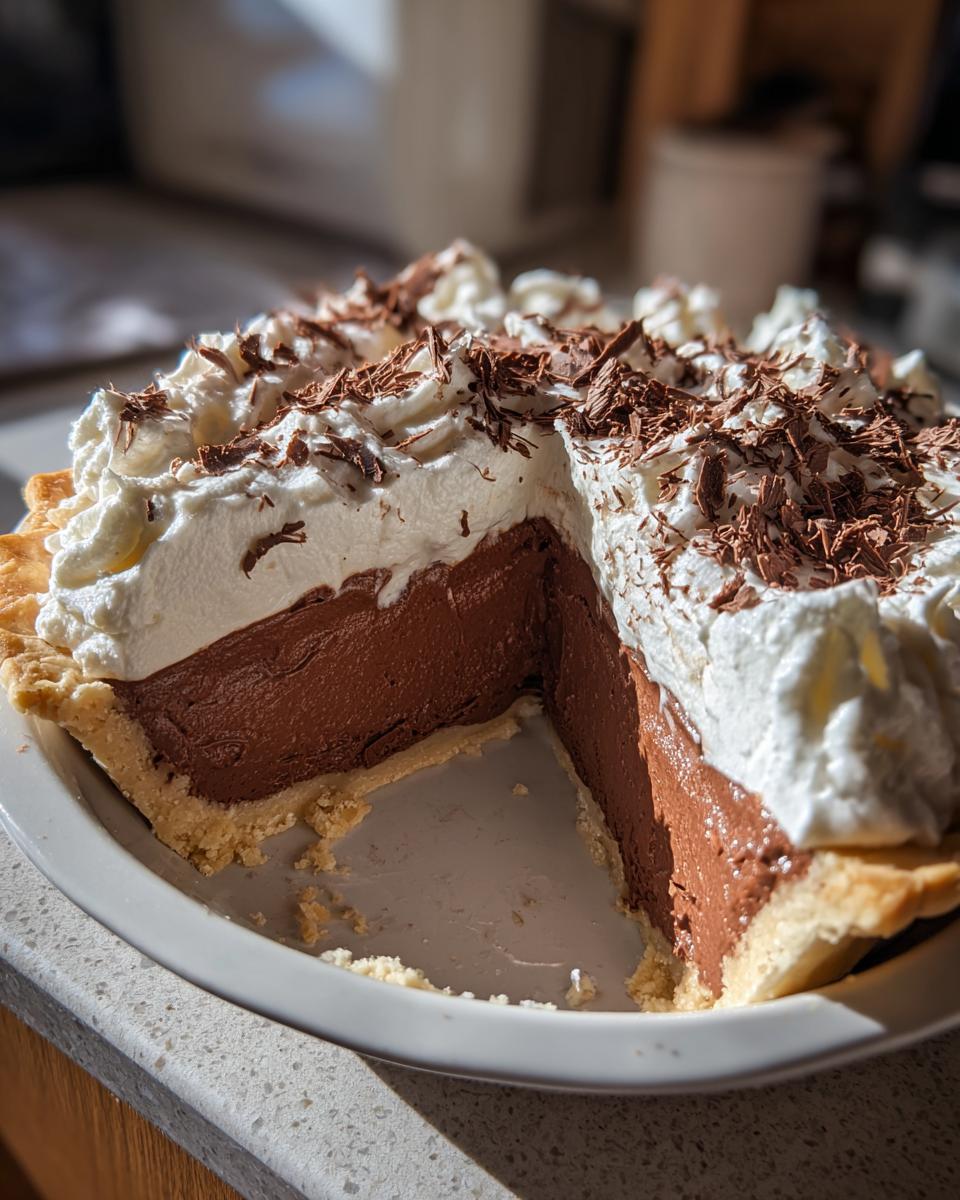
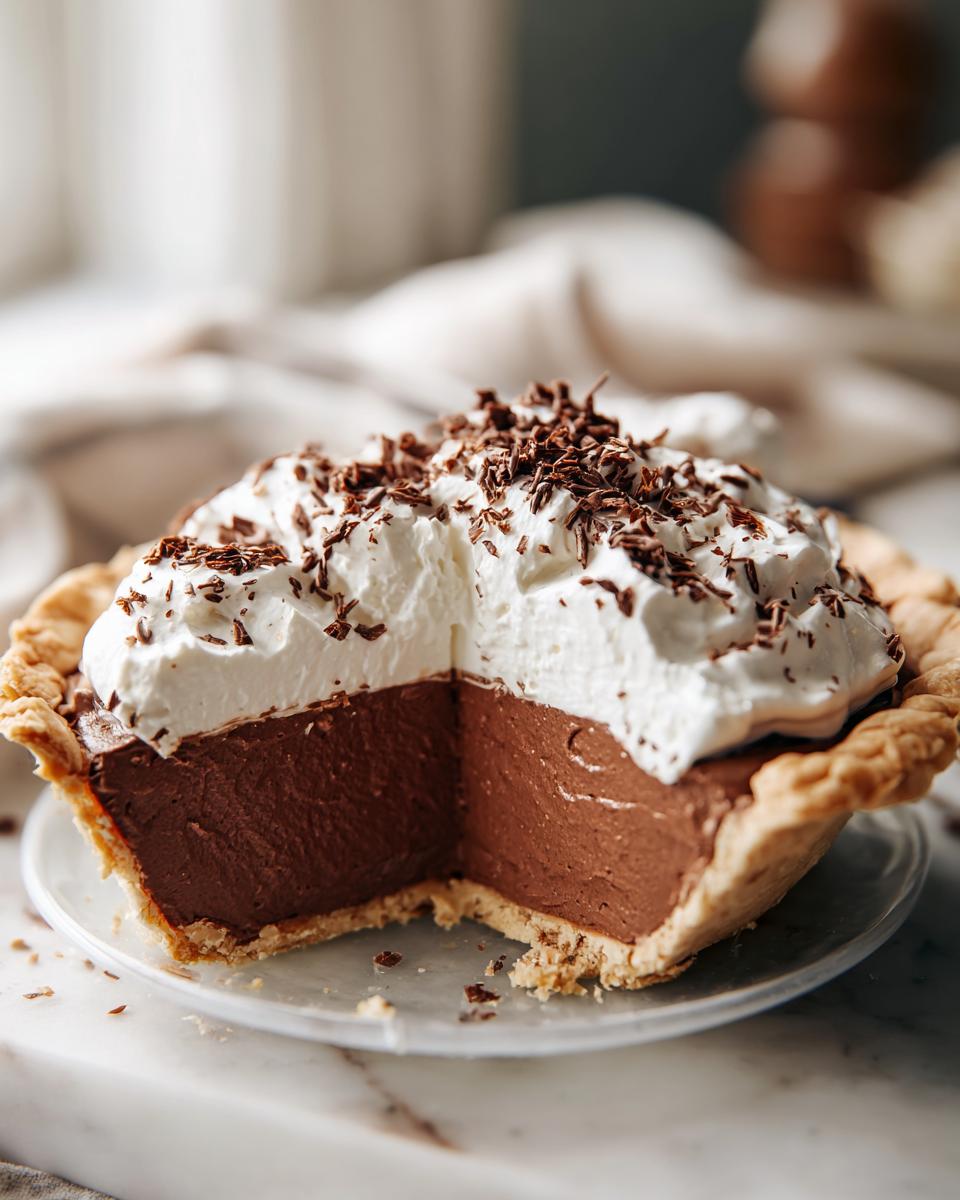
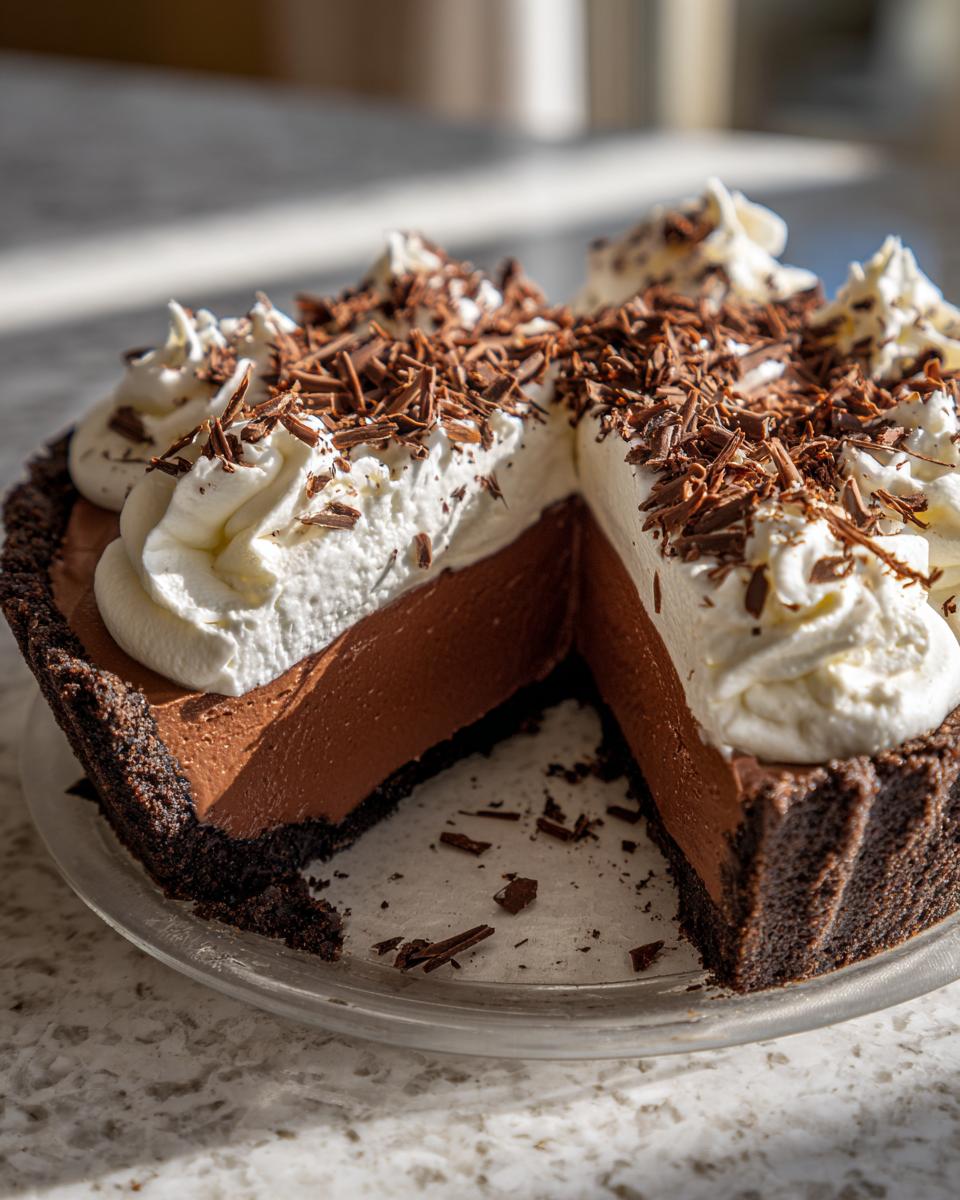
Serving Suggestions for your Rich Chocolate Pie
The hard part is over! Since this french silk pie needs to chill for a minimum of 6 hours—but truly shines when set overnight—plan ahead. Think of this as the ultimate dessert for special occasion planning. When it’s time to serve, you pull that beautifully set, velvety slice out. For the topping, you have to go homemade. A simple dollop of fresh, barely sweetened whipped cream makes all the difference. If you need help whipping that cream up perfectly, I have a great guide on homemade whipped cream topping!
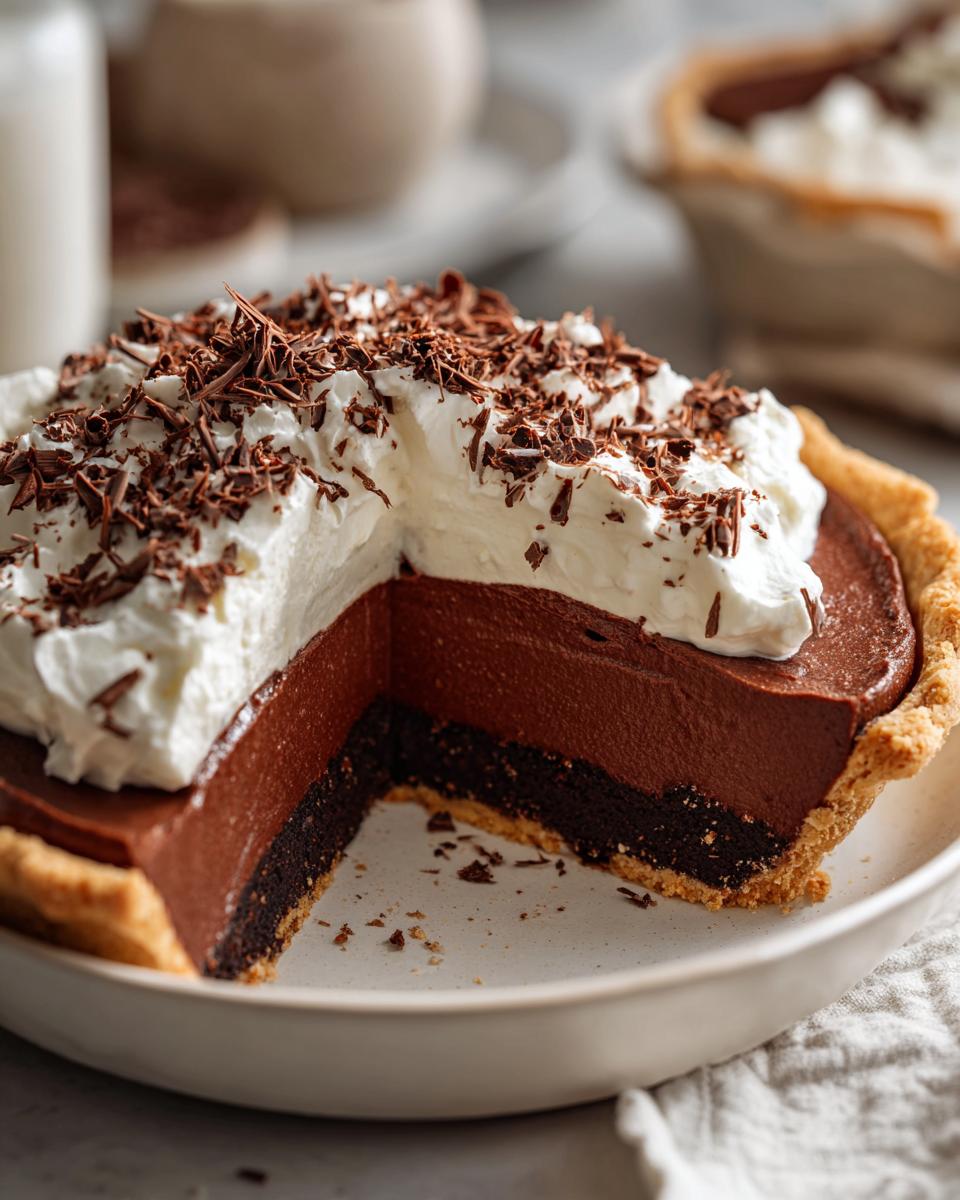
Finish it off with a generous shower of dark chocolate shavings. It just gives it that professional, indulgent look that screams ‘treat yourself.’ Slice it cold, and watch it disappear!
Storage and Reheating Instructions for french silk pie
This pie is best served the day after you make it, once it’s had a full night to set up properly in the fridge. Since the filling is full of whipped cream and butter, storing your beautiful french silk pie is pretty straightforward: just cover it tightly with plastic wrap—make sure the wrap isn’t touching the whipped cream topping if you already added it! It keeps wonderfully well in the refrigerator for about three to four days. You want that rich, cold temperature for the best texture.
Now, about freezing? Honestly, I don’t recommend it. The filling holds tons of air from the whipped cream, and freezing and thawing can totally break down that airy structure, potentially making it watery or grainy. If you absolutely must, try freezing a piece *before* you add any topping, but know that you’re risking that perfect melt-in-your-mouth texture. If you prefer something easier to freeze later, you might want to try my recipe for easy, creamy homemade chocolate pudding instead. This pie needs to stay chilled!
Common Questions About Making a french silk pie
I totally get it—when you’re making something this decadent, you’ve got questions! I hear from so many people who are nervous about getting that perfect texture in their french silk pie, or they’re confused about the cooking process versus the ‘no bake’ label this dessert sometimes gets. Don’t sweat it! I’ve answered the biggest ones so you can move forward confidently and get to the final product: that ultra-rich, creamy chocolate delight we all crave.
If you’re looking for a simpler chocolate topping later on, I’ve got a fantastic guide for easy 5-minute chocolate frosting, just in case you want a change from the standard whipped cream!
Can I make a No Bake french silk pie?
That’s an interesting point! While the filling doesn’t technically get baked in the oven, the base custard needs heat to cook the yolks and sugar properly. So, it’s a cooked-filling pie, not truly ‘no bake’ unless you use a completely pre-baked crust or a press-in cookie crust. If you like the idea of a true no-bake option, sometimes folks substitute the cooked base for a rich chocolate ganache that sets up in the fridge instead.
How do I get the Joanna Gaines Inspired Pie richness?
Ah, yes! People talk about that wonderful texture, and a huge part of getting that level of richness—sometimes called the Joanna Gaines Inspired Pie style—comes down to blending time. After you fold in that whipped cream, you actually need to mix the whole filling for a good solid while, sometimes up to 20 minutes, using medium speed. This extra whipping time whips more air into the already airy mixture, creating that signature light, mousse-like texture that really melts the second it hits your tongue.
Estimated Nutritional Data for this Indulgent Chocolate Treat
I always feel a little guilty looking at the numbers, but hey, this is an indulgent chocolate treat, not a health cereal! This nutritional breakdown is just an estimate based on the standard ingredients I listed, assuming an 8-slice cut in a standard 9-inch pie. Use these numbers as a helpful guide, but remember that every ingredient swap (especially your crust choice!) will change things a bit. Enjoy every bite!
- Serving Size: 1 slice
- Calories: 450
- Sugar: 45g
- Fat: 30g
- Protein: 6g
Share Your Experience with This french silk pie
I shared all my family’s secrets so you could nail this french silk pie, and now I’d love to hear from you! Did it turn out perfectly velvety? Were the almond notes just right? Please leave a rating below so other cooks know what to expect, and drop a comment if you tried any of my little tweaks. If you snapped a picture of that gorgeous, rich slice, tag me on social media! Seeing your beautiful creations really makes my day. If you ever experiment with toppings, check out the details on my best cookie icing recipe—it’s fun on a cold pie slice!
PrintClassic French Silk Pie: Rich, Velvety Chocolate Dessert

Make this classic French Silk Pie for a truly indulgent dessert. The filling is rich, creamy, and velvety smooth, set in a buttery crust. This recipe focuses on achieving that signature melt-in-your-mouth texture.
- Prep Time: 30 min
- Cook Time: 15 min
- Total Time: 6 hours 45 min
- Yield: 8 servings 1x
- Category: Dessert
- Method: No Bake (Filling)
- Cuisine: American
- Diet: Vegetarian
Ingredients
- 1 (9-inch) unbaked, fully baked, or graham cracker pie crust
- 1 cup granulated sugar
- 4 large egg yolks (pasteurized recommended for safety)
- 1 cup cold water
- 8 ounces unsweetened chocolate, chopped
- 1 cup (2 sticks) unsalted butter, softened
- 1 teaspoon vanilla extract
- 1/2 teaspoon almond extract
- 1 cup heavy whipping cream, chilled
- Chocolate shavings, for topping
Instructions
- Prepare your crust: If using a raw pastry crust, bake it according to package directions until lightly golden. Let it cool completely. If using a graham cracker crust, press it firmly into the pie plate and chill.
- In a medium saucepan, whisk together the sugar and egg yolks. Gradually whisk in the cold water.
- Cook the mixture over medium heat, stirring constantly, until it thickens enough to coat the back of a spoon (about 8 to 10 minutes). Do not let it boil. Remove from heat.
- Add the chopped unsweetened chocolate to the hot custard mixture. Stir until the chocolate is completely melted and the mixture is smooth.
- Transfer the chocolate mixture to a large bowl. Let it cool slightly, about 10 minutes.
- Add the softened butter, vanilla extract, and almond extract to the chocolate mixture. Beat with an electric mixer on medium speed until fully combined and smooth. Scrape down the sides of the bowl.
- In a separate, clean bowl, whip the heavy whipping cream until stiff peaks form.
- Gently fold about one-third of the whipped cream into the chocolate mixture to lighten it. Then, fold in the remaining whipped cream until just combined, being careful not to deflate the air. This creates the silky, mousse-like texture.
- Pour the velvety chocolate filling into the cooled pie crust. Smooth the top with a spatula.
- Chill the pie in the refrigerator for at least 6 hours, or preferably overnight, until the filling is firm.
- Before serving, top the pie with additional homemade whipped cream and a generous sprinkle of chocolate shavings. Slice and serve cold.
Notes
- To address concerns about raw eggs, you can use pasteurized eggs, which are safe to consume without cooking. Alternatively, you can temper the egg yolks by slowly whisking a small amount of the hot liquid into the yolks before adding them to the saucepan, ensuring they reach a safe temperature during cooking.
- For a quick crust alternative, press 1 1/2 cups of crushed Oreo cookies mixed with 6 tablespoons of melted butter into the pie plate. Chill until firm.
- For the best texture, ensure your butter is truly softened but not melted when adding it to the chocolate mixture.
- If you want a Joanna Gaines inspired richness, use high-quality unsweetened chocolate.
Nutrition
- Serving Size: 1 slice
- Calories: 450
- Sugar: 45g
- Sodium: 150mg
- Fat: 30g
- Saturated Fat: 18g
- Unsaturated Fat: 12g
- Trans Fat: 0.5g
- Carbohydrates: 40g
- Fiber: 3g
- Protein: 6g
- Cholesterol: 120mg