

The smell of a traditional apple pie baking? Nothing compares, right? But let’s be honest: rolling out that double crust when you’re already running on fumes? That can feel like a total chore. That’s why I’m obsessed with solving this problem for you. We need that comforting, flaky, cinnamon-spiced flavor without the fuss, and I found the perfect answer: The Ultimate Buttery Flaky Apple Pie Bars. These apple pie bars are the absolute best way to capture that cozy, home-baked magic in a simple, sliceable square. It’s all about my philosophy here at Cooking by Felix: making sure your busy life doesn’t mean sacrificing a truly delicious, soulful meal. I took everything I learned growing up watching my parents cook and streamlined it so you can have extraordinary treats without spending all day in the kitchen. If you love this kind of comfort baking, you should absolutely check out my recipe for moist apple bread too!
- Why These Are The Best Apple Pie Bars You Will Make
- Gathering Ingredients for Perfect Apple Pie Bars
- Step-by-Step Guide to Making Apple Pie Bars
- Tips for Success with Shortbread Apple Bars
- Storage and Make Ahead Fall Desserts
- Serving Suggestions for Potluck Dessert Bars
- Frequently Asked Questions About Apple Pie Bars
- Estimated Nutritional Snapshot
- Share Your Baking Success
Why These Are The Best Apple Pie Bars You Will Make
I know, I know, there are a million apple pie bars recipes out there, but trust me when I say this one hits different. We are focusing on the texture here, which is what really matters. Why spend an hour wrestling with an intricate top crust when you can get that iconic buttery flavor and crumbly top in a simple bar? This recipe is designed to give you that bakery-level satisfaction without the weekend commitment. For me, anything that tastes this good but qualifies as one of the best apple pie filling methods is a weekly win.
Flaky Crust Meets Tender Filling
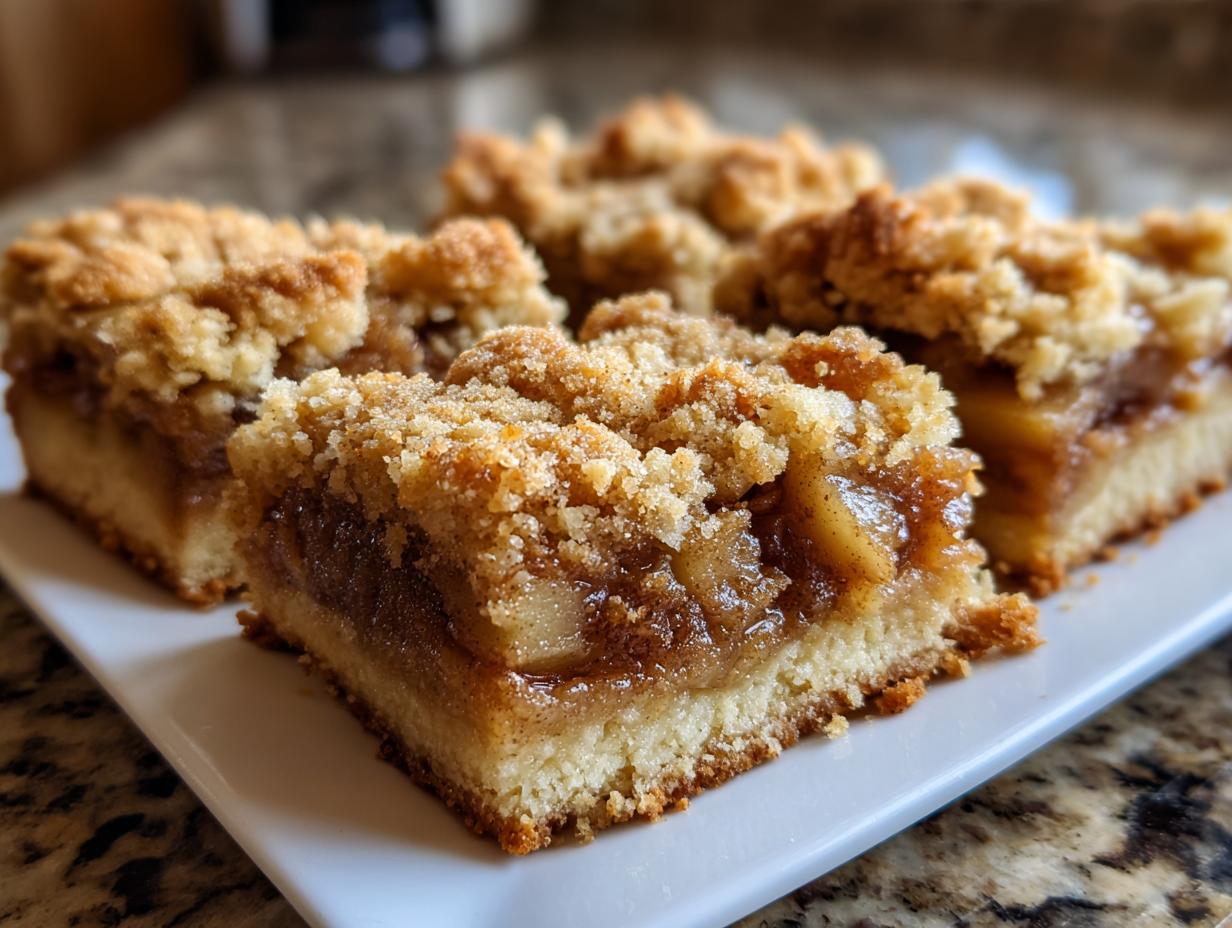
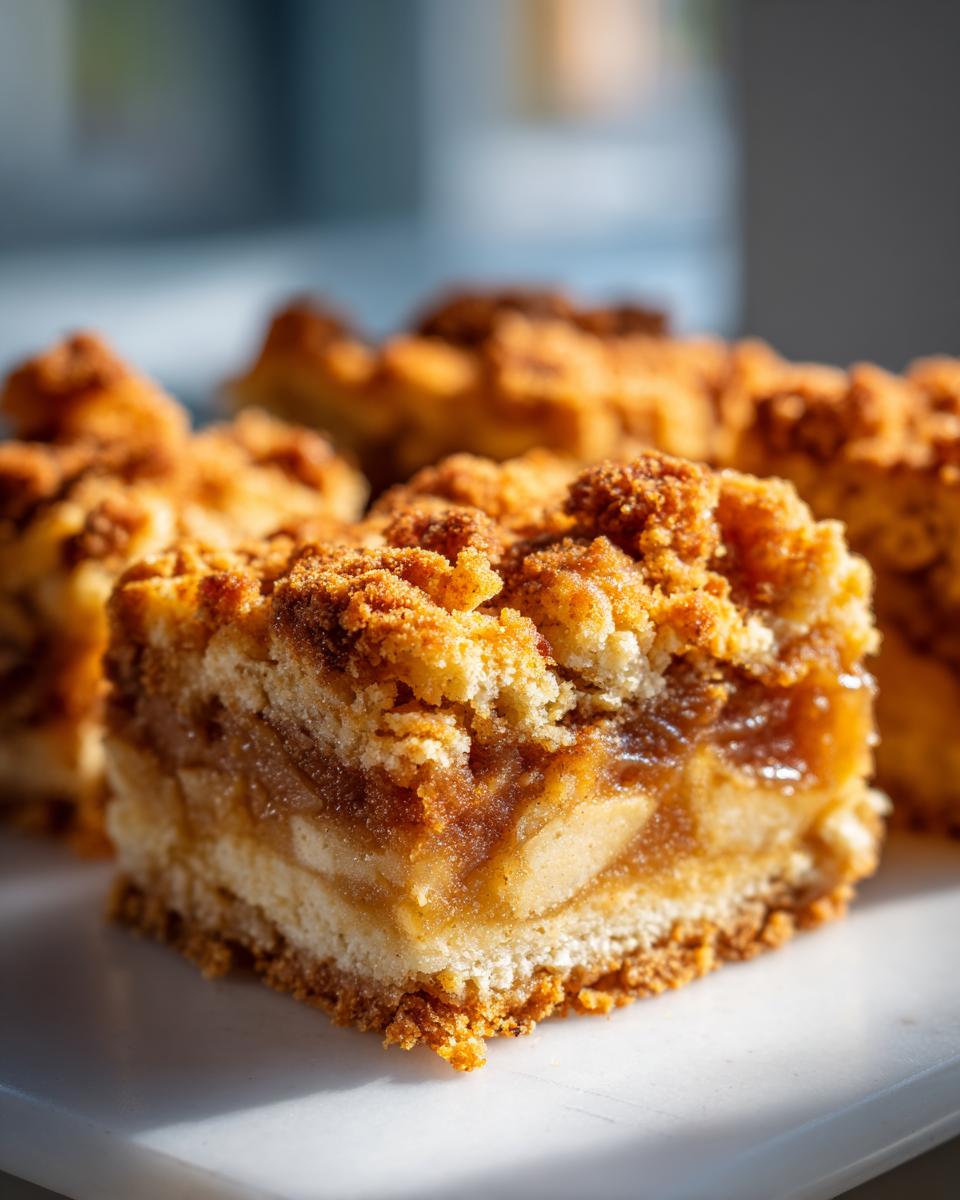
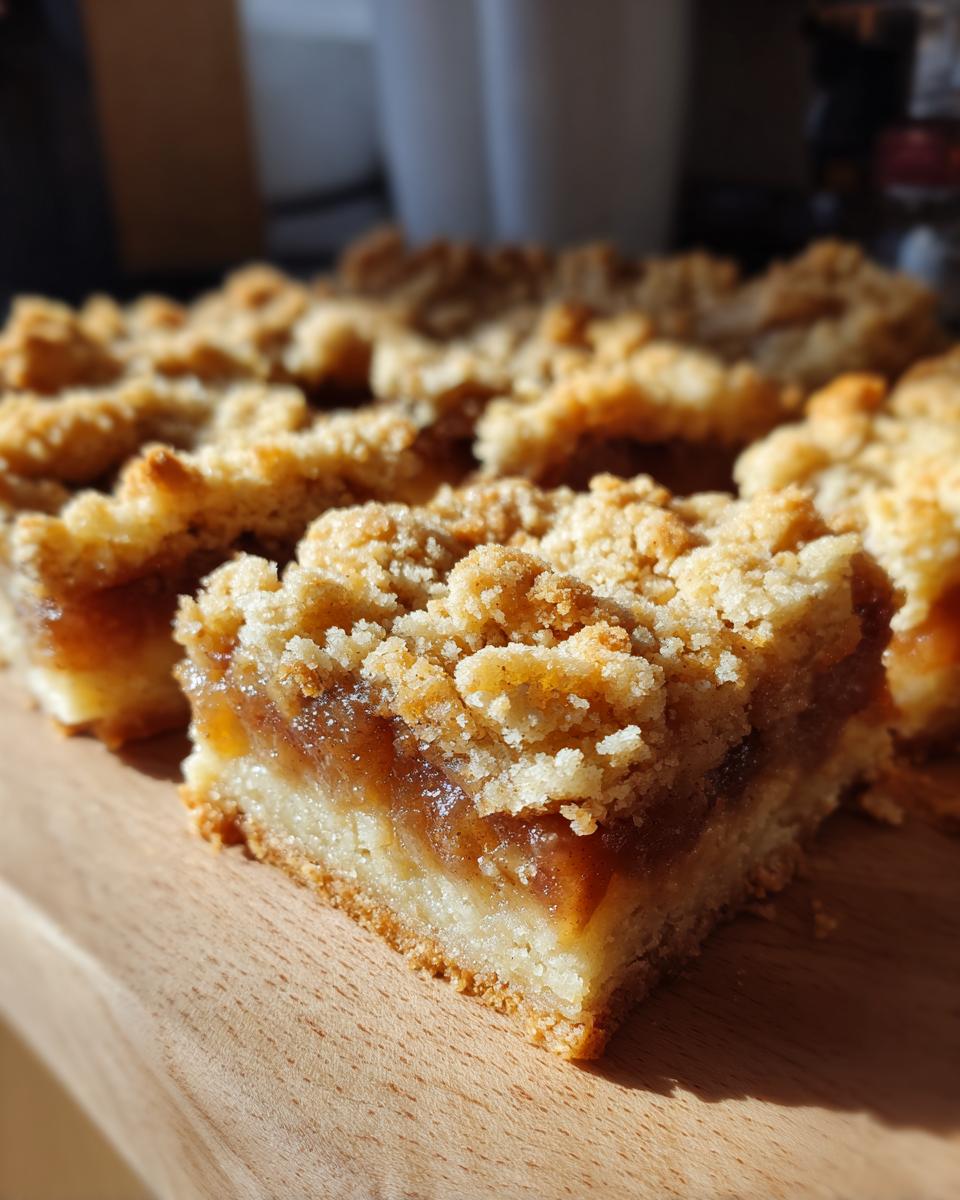
This isn’t just an apple crumble bars situation, okay? We start with a proper, dense shortbread base—it’s rich and incredibly buttery. Then, we top that with a tender, spiced apple mixture that is cooked just enough so the apples soften but don’t turn to mush. The marriage of that sturdy, flaky pastry with the sweet apples? Heaven. It’s pure comfort food baking in the best form.
Simplifying Classic Flavors for Quick Apple Treats
If you’re searching for truly easy apple dessert recipes, stop looking right now. The beauty of these apple pie bars is that they bake up completely in one pan. You aren’t chilling circles of pastry, folding edges, or worrying about vents. You press the base, pour in the filling, and top it off. It’s the ultimate apple pie alternative that lets you put dessert on the table fast!
Gathering Ingredients for Perfect Apple Pie Bars
When you’re going for that ultimate flaky texture, ingredient quality really matters. We aren’t cutting corners here, especially in the crust—it needs to live up to its delicious nickname as a must-try buttery pastry recipe. When you pull out your ingredients, make sure everything for the base is ready to go. If you wanted to add an extra layer of cozy fall flavor that pairs amazing with apples, I sometimes toss my crust mix with a little dusting of my cinnamon sugar pecans mix, but that’s totally optional madness! We need that chilling time to work its magic later on, so measuring precisely now saves us headaches later.
Crust Components
This is where the richness comes from. You’ll need your standard flour and sugar, but the star is the fat. Please, please, please make sure you are using 1 cup (or 2 full sticks) of cold unsalted butter, cut into small cubes. When the butter is cold, it creates those amazing steam pockets when it hits the oven, giving you that desirable lift and flake you just can’t get from softened stuff. Honestly, if you skip chilling the dough later, you’ll lose that flakiness!
The Cinnamon Apple Filling for Your Apple Pie Bars
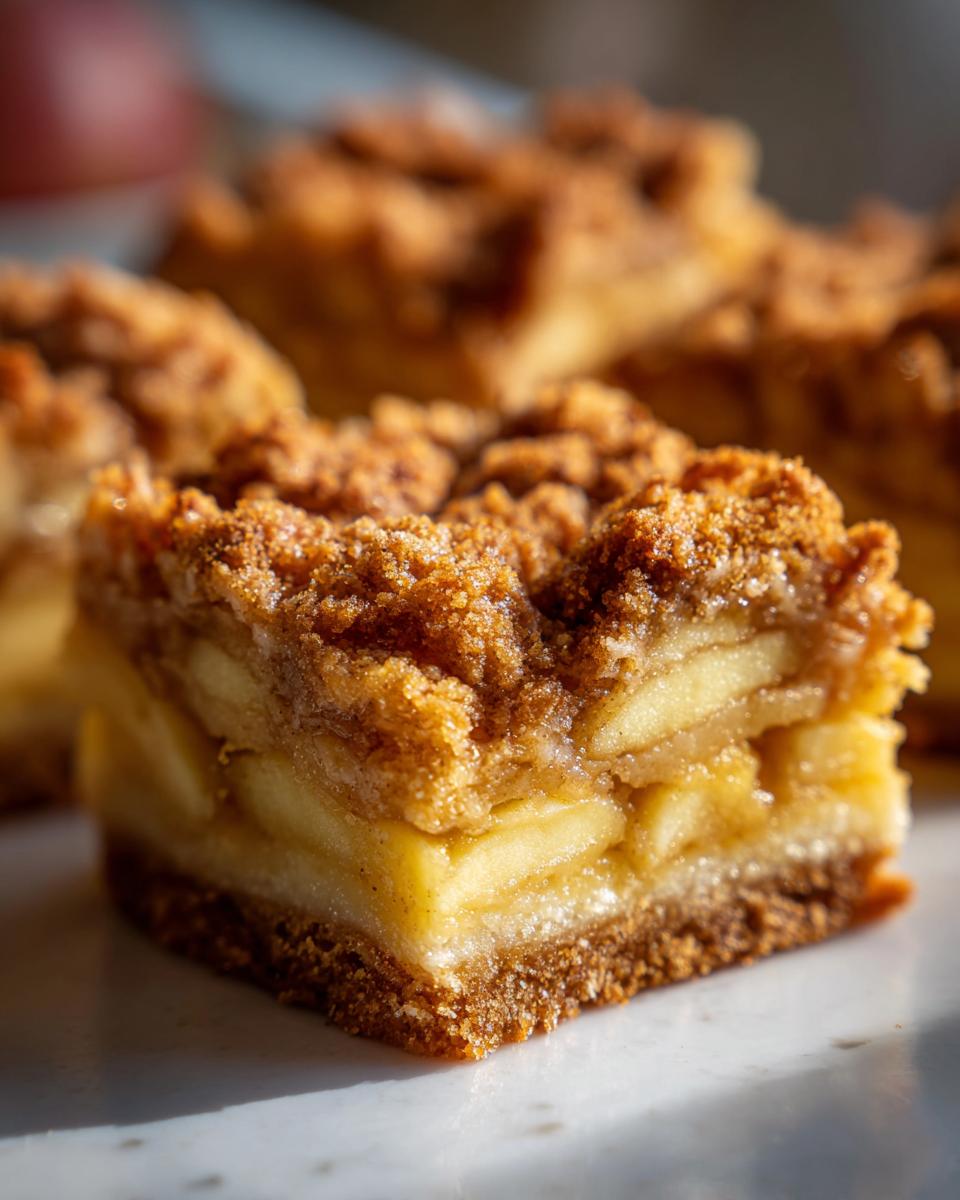
For the filling, we want apples that hold up; don’t use anything mushy! I strongly recommend using firm, tart varieties like Granny Smith mixed with something a little sweeter like Honeycrisp. This keeps the flavor balanced so the sugar doesn’t overwhelm us. Combine your diced apples with the packed light brown sugar, that essential 1 teaspoon of cinnamon, nutmeg, lemon juice, and the cornstarch mixed with water to help it thicken up perfectly. This mix becomes the luscious center of our favorite apple pie bars.
Optional Vanilla Glaze Ingredients
If you decide you want that slight drizzle on top to make them look extra special—perfect for a bake sale or an easy potluck treat—you just need a few things. Grab your powdered sugar, about a tablespoon of milk or water to thin it, and a splash of vanilla extract. Simple, sweet, and ready to drizzle once everything cools down.
Step-by-Step Guide to Making Apple Pie Bars
Okay, this is where the magic happens, and trust me, it’s not scary at all! We are going to handle this in stages so we don’t rush the crust—that’s the secret to amazing apple pie bars. Getting the crust right first means everything stays sturdy when you slice them later. Don’t worry about making everything perfect right away; just follow the flow, and soon you’ll have the best fall dessert ready to go. If you’re looking for another great bake to try right after this, check out my recipe for easy white chocolate fudge!
Preparing the Pan and Buttery Pastry Recipes Base
First things first: get that oven warmed up to 375°F (190°C). Now, remember that parchment paper? Line your 9×13 pan with it, leaving those generous overhangs hanging over the sides. This little trick is a lifesaver later when you need to lift everything out in one piece! Take about two-thirds of your crust mixture—remember the coarse crumbs we made—and press it down firmly into the bottom of the lined pan. We need this base to be solid! Pop that into the oven for just 15 minutes until you see it getting just a tiny bit golden around the edges. That light pre-bake sets the stage perfectly for the wet filling that’s coming next.
Cooking the Cinnamon Apple Filling
While that base is setting up, move over to the stovetop. We need to coax those apples into submission! Toss your diced apples, brown sugar, lemon juice, cinnamon, nutmeg, and that cornstarch/water slurry into a saucepan. Cook this mix over medium heat. You’re stirring occasionally, and you need to watch it closely for about 8 to 10 minutes. The goal here is for the sauce to thicken up nicely—it should look glossy and coat the apples well. Once it’s thick enough to hold its shape a bit, pull it straight off the heat. We want tender apples, not applesauce!
Assembling and Baking Your Apple Pie Bars
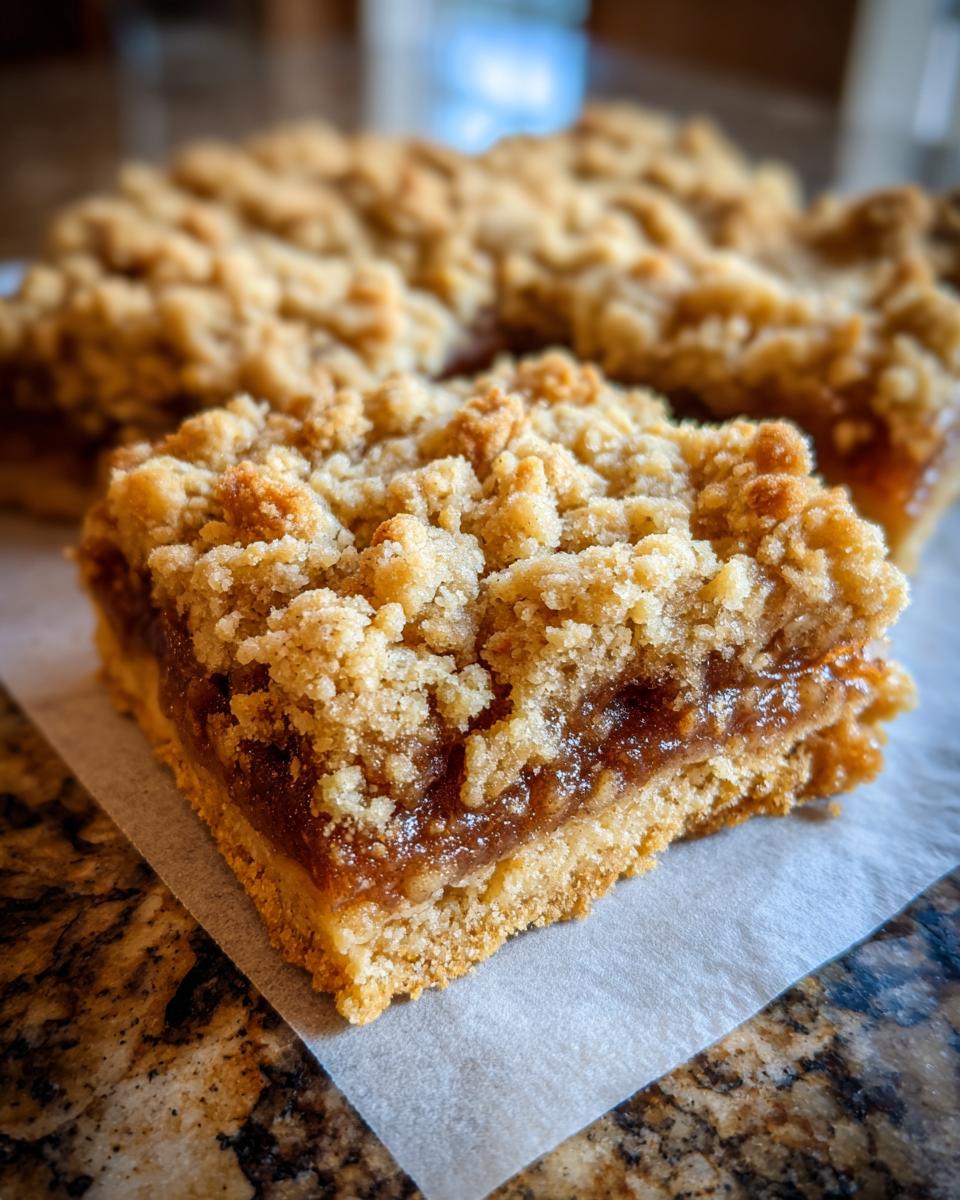
Take that hot apple mixture and spread it out evenly right over that warm, golden crust you pulled from the oven. Don’t press down; just gently coax it into place. Now it’s time for the final flourish: take that leftover one-third of the crumbly dough and just crumble it right over the top of the apples. This becomes our delicious, easy crumble topping! Pop the whole thing back into the oven for another 30 to 35 minutes. You’re looking for that topping to be deep golden brown and the filling underneath should be bubbly. The most crucial final step for perfect apple pie bars? You have to let them cool completely! If you try to slice them warm, they’ll melt everywhere. Patience, my friend! If you want inspiration for the next level, check out the buttery crust tips from this recipe.
Tips for Success with Shortbread Apple Bars
You’ve baked them, the delicious cinnamon smell is lingering—now we just need the perfect final product! Getting these apple pie bars ready for slicing takes a little finesse, but these few little tricks will ensure you get those beautiful squares everyone fights over at a potluck or family gathering. Don’t stress if your first batch isn’t perfect; baking is all about learning, and I’ve made every beginner mistake so you don’t have to!
Apple Selection and Preparation
I know I mentioned it before, but it bears repeating: your apples are critical here! You absolutely have to go with firm, tart varieties like Granny Smith or perhaps Honeycrisp if they are in season. If you choose something soft, say a Red Delicious, you’ll end up with apple soup instead of distinct apple pieces in your filling. We need that structure to hold up against the sweet crust and the spices. A tart apple cuts through the buttery pastry so nicely, giving you that true classic pie taste without being cloyingly sweet.
Achieving the Perfect Set
This is the step that separates messy squares from Instagram-worthy slices. You simply cannot rush the cooling phase! The recipe says cool completely, and I mean it. Seriously, let them sit on that wire rack until they are barely even warm to the touch, maybe even room temperature. If you cut them while they are even slightly warm, the fat in the shortbread base softens, and the cornstarch structure in the filling hasn’t tightened up yet. You’ll end up with all the flavor in a delicious pile, but no clean edge. If you need them faster, you can chill the whole pan in the fridge for an hour after they’ve cooled on the counter for a bit. My favorite serving tip is seeing them next to my classic creamy egg salad at crowded events!
Storage and Make Ahead Fall Desserts
This is another wonderful thing about these apple pie bars—they are fantastic for planning ahead! Since they hold together so well, they double wonderfully as make ahead fall desserts. If you’re just keeping them on the counter at room temperature, they’ll be delicious for about two days, provided you cover them tightly. We like to keep them in a sealed container at room temp, especially if we plan on serving them again the next day for breakfast or coffee!
But here’s the secret weapon: they freeze like a dream. Once they are totally cool—and I stress *totally* cool—slice them up first. Then, stack them in an airtight container, separating each layer liberally with sheets of wax paper. You can easily freeze these for up to three months. When you want a surprise treat, just pull one or two out. They thaw super fast, usually sitting on the counter for about an hour. They taste almost exactly like they just came out of the oven. Plus, they pair perfectly with recipes like my cranberry brie bites for a cozy fall spread!
Serving Suggestions for Potluck Dessert Bars
Honestly, the beauty of these apple pie bars is that they need almost nothing extra! But if you are bringing them to a potluck dessert bars spread, I always like to give people options. They are fantastic served completely plain, right out of the pan. However, if you want to elevate them just a touch, a scoop of vanilla bean ice cream melting slightly over the warm square is perfection. It doubles down on the comfort food baking vibe.
If you need something a little lighter than ice cream, a dollop of fresh, lightly sweetened whipped cream works wonders. Or, if you want a little tang to cut that buttery finish, skip the ice cream and swirl a tiny bit of my tangy cream cheese frosting on top before serving. They are such an easy crowd-pleaser!
Frequently Asked Questions About Apple Pie Bars
I know, sometimes the details matter most when you’re making something special. You’ve got your list, but maybe a tiny detail keeps nagging at you before you start combining ingredients. That’s what these FAQs are for! We want to make sure your deep dive into home baking, even something as easy as these bars, ends in total success. These treats are such a fantastic comfort food baking staple, and I promise, once you nail this technique, you’ll be making them every week.
Can I use pre-made pie crust for these bars?
Look, I get it—we sometimes need an extra shortcut! You *can* use pre-made, refrigerated pie crust if you are in a serious pinch, but here’s the real talk: this recipe promised you the *ultimate* texture, and that comes from our homemade buttery pastry. The pre-made stuff often has stabilizers and fats that don’t create that same crumbly, flaky texture when pressed into the base and crumbled on top. If you skip the homemade dough, you’re giving up the best part of the experience!
What is the best apple to use for baking apple pie bars?
My personal recommendation remains the mix of firm and tart! You absolutely want an apple that holds its shape when heated. Granny Smith is my number one choice because its tartness provides that necessary counterpoint to the sweet brown sugar in the filling. If you use a softer apple, it will break down completely during the cooking process and the filling will become more like sauce than distinct apple pieces. We need structure, so stick to the firm guys!
How do I prevent the topping from burning before the center cooks?
That’s a classic baking anxiety, especially with crumble toppings! If you notice five or ten minutes before the estimated time is up that the top is beautifully golden brown but the center is still a little jiggly, just cover the pan loosely with a sheet of aluminum foil. The foil acts as a shield, blocking the direct heat from burning the sugar in the topping while allowing the residual heat underneath to finish cooking the apples through. Honestly, I learned this trick making my easy orange juice cake, and it works every time to protect a crunchy topping!
If you’re looking for more inspiration on simple treats that rival traditional desserts, this article on irresistible apple pie bars has some lovely ideas, too!
Estimated Nutritional Snapshot
I always keep this section brief because we should bake for joy first, right? But I know some of you are tracking things, so here is the best estimate for one serving of these incredible apple pie bars. Remember, these are just ballpark figures; using different butter or sugars will change the numbers slightly.
- Serving Size: 1 bar
- Calories: 280
- Sugar: 25g
- Fat: 15g
- Protein: 3g
This is a standard estimate based on the general recipe proportions. For exact tracking, I always suggest plugging in the specific brands you use into your favorite nutrition app! If you want to see what other classic baked goods look like nutritionally, check out my recipe for moist spice cake.
Share Your Baking Success
Now that you know all my secrets—from chilling that buttery dough to waiting patiently for those bars to cool—the best part is hearing from you! I truly believe baking is meant to be shared, not just in eating, but in the conversation around the kitchen. When you make these apple pie bars, please come back here and let me know how they turned out!
Did you swap the apples? Did you go for the glaze or stick to a simple dusting? I’m dying to know! Leaving a rating is super helpful for others getting started—if you loved that flaky crust and gooey filling, please hit those five stars! It tells me I designed the recipe right for you busy cooks out there. Your feedback helps me keep creating those simple, elegant, yet totally achievable recipes we all need.
If you have any questions about substituting ingredients or tackling the filling, drop them in the comments below. I read every single one, just like I’m chatting with you over the kitchen counter. Happy baking, and seriously, go enjoy that slice! If you’re looking for another satisfying bake to try next, take a peek at my fudgy chocolate crinkle cookies—they vanish just as fast!
PrintThe Ultimate Buttery Flaky Apple Pie Bars
You get the comforting flavor of classic apple pie in an easy-to-make bar format. These bars feature a simple, buttery shortbread crust and a sweet, cinnamon-spiced apple filling. They are perfect for potlucks or a quick fall dessert.
- Prep Time: 20 min
- Cook Time: 45 min
- Total Time: 65 min
- Yield: 16 servings 1x
- Category: Dessert
- Method: Baking
- Cuisine: American
- Diet: Vegetarian
Ingredients
- 1 1/2 cups all-purpose flour
- 1/2 cup granulated sugar
- 1/4 teaspoon salt
- 1 cup (2 sticks) cold unsalted butter, cut into cubes
- 4 medium apples (like Granny Smith or Honeycrisp), peeled, cored, and diced
- 1/2 cup packed light brown sugar
- 1 tablespoon lemon juice
- 1 teaspoon ground cinnamon
- 1/4 teaspoon ground nutmeg
- 2 tablespoons cornstarch
- 1/4 cup water
- 1/2 cup powdered sugar (for optional glaze)
- 1 tablespoon milk or water (for optional glaze)
- 1/4 teaspoon vanilla extract (for optional glaze)
Instructions
- Preheat your oven to 375°F (190°C). Line a 9×13 inch baking pan with parchment paper, leaving an overhang on the sides for easy removal.
- Prepare the crust: In a large bowl, whisk together the flour, granulated sugar, and salt. Cut in the cold butter using a pastry blender or your fingers until the mixture resembles coarse crumbs.
- Press two-thirds of the crust mixture evenly into the bottom of the prepared pan. Bake the crust for 15 minutes until lightly golden.
- Prepare the filling: While the crust bakes, combine the diced apples, brown sugar, lemon juice, cinnamon, nutmeg, cornstarch, and water in a medium saucepan.
- Cook the apple filling over medium heat, stirring occasionally, until the apples soften slightly and the sauce thickens, about 8 to 10 minutes. Remove from heat.
- Spread the warm apple filling evenly over the partially baked crust.
- Crumble the remaining one-third of the crust mixture over the apple filling to create a topping.
- Bake for 30 to 35 minutes, or until the topping is golden brown and the filling is bubbly.
- Let the bars cool completely in the pan on a wire rack. Cooling allows them to set for clean slicing.
- Optional Glaze: Whisk together the powdered sugar, milk, and vanilla extract until smooth. Drizzle over the cooled bars before slicing into squares.
- Lift the bars out of the pan using the parchment overhang and cut into squares.
Notes
- Use firm, tart apples for the best texture and flavor balance against the sweet crust.
- For an extra buttery pastry, chill the dough mixture for 15 minutes before pressing it into the pan.
- These apple pie bars freeze well; cool completely, slice, and store in an airtight container between layers of wax paper.
Nutrition
- Serving Size: 1 bar
- Calories: 280
- Sugar: 25
- Sodium: 110
- Fat: 15
- Saturated Fat: 9
- Unsaturated Fat: 6
- Trans Fat: 0
- Carbohydrates: 35
- Fiber: 2
- Protein: 3
- Cholesterol: 35