

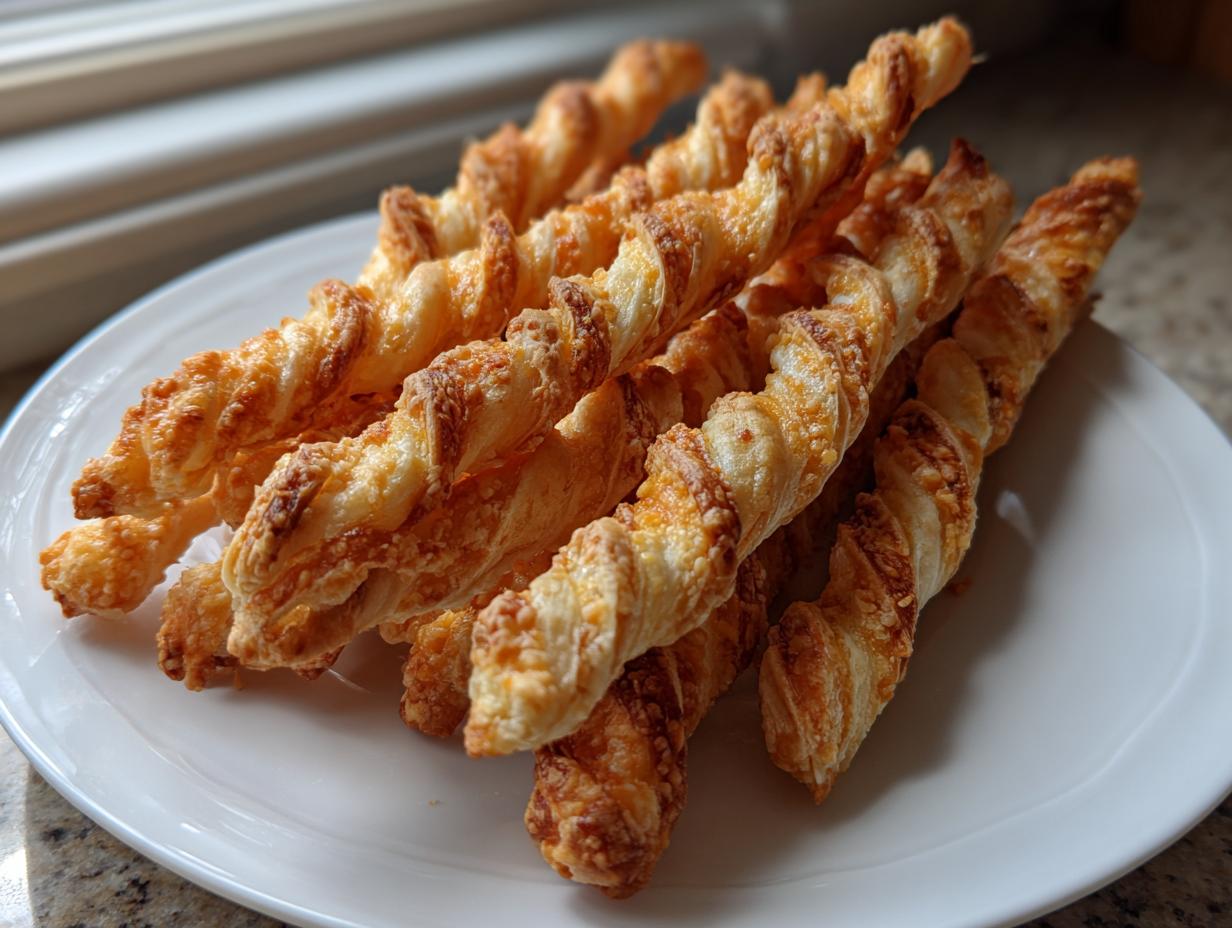
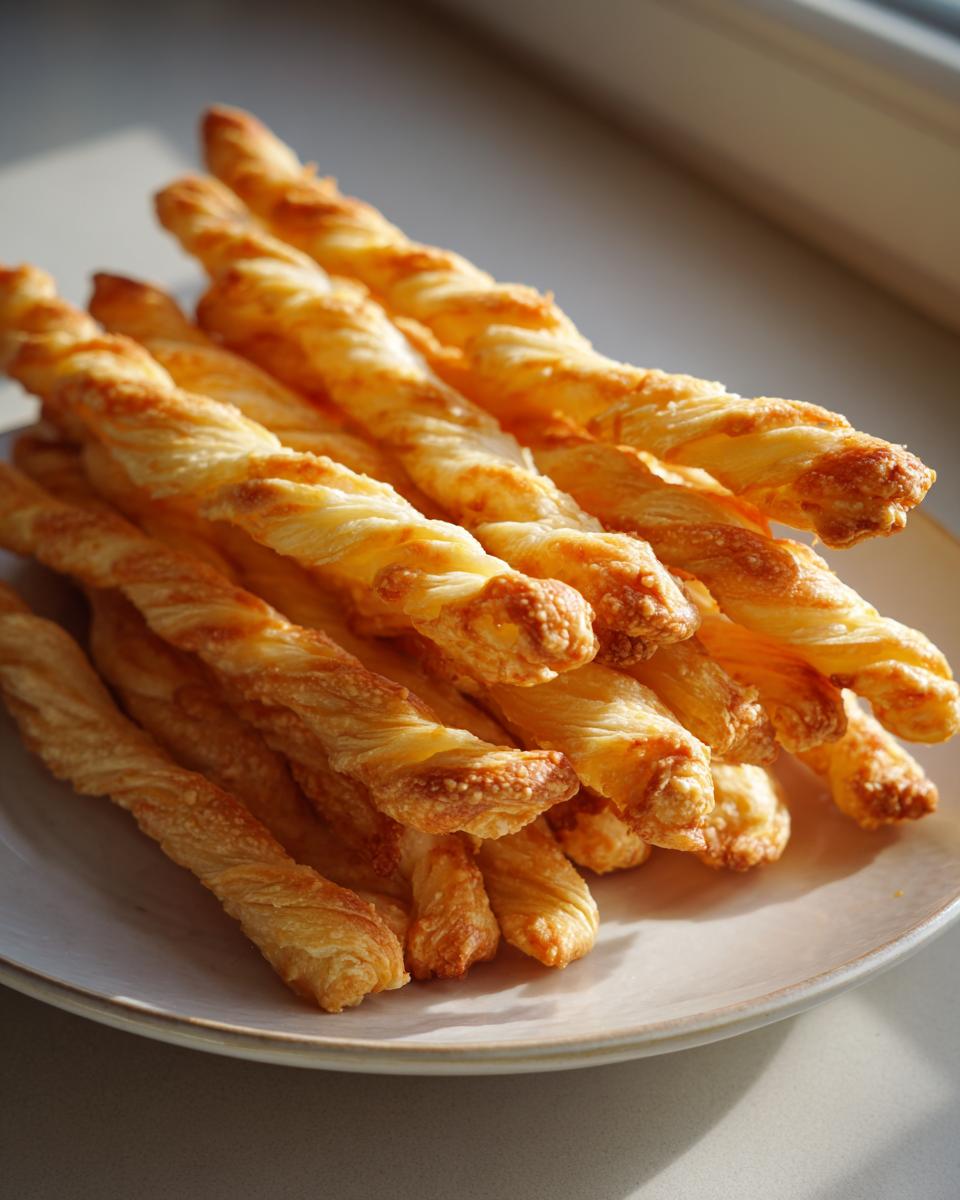
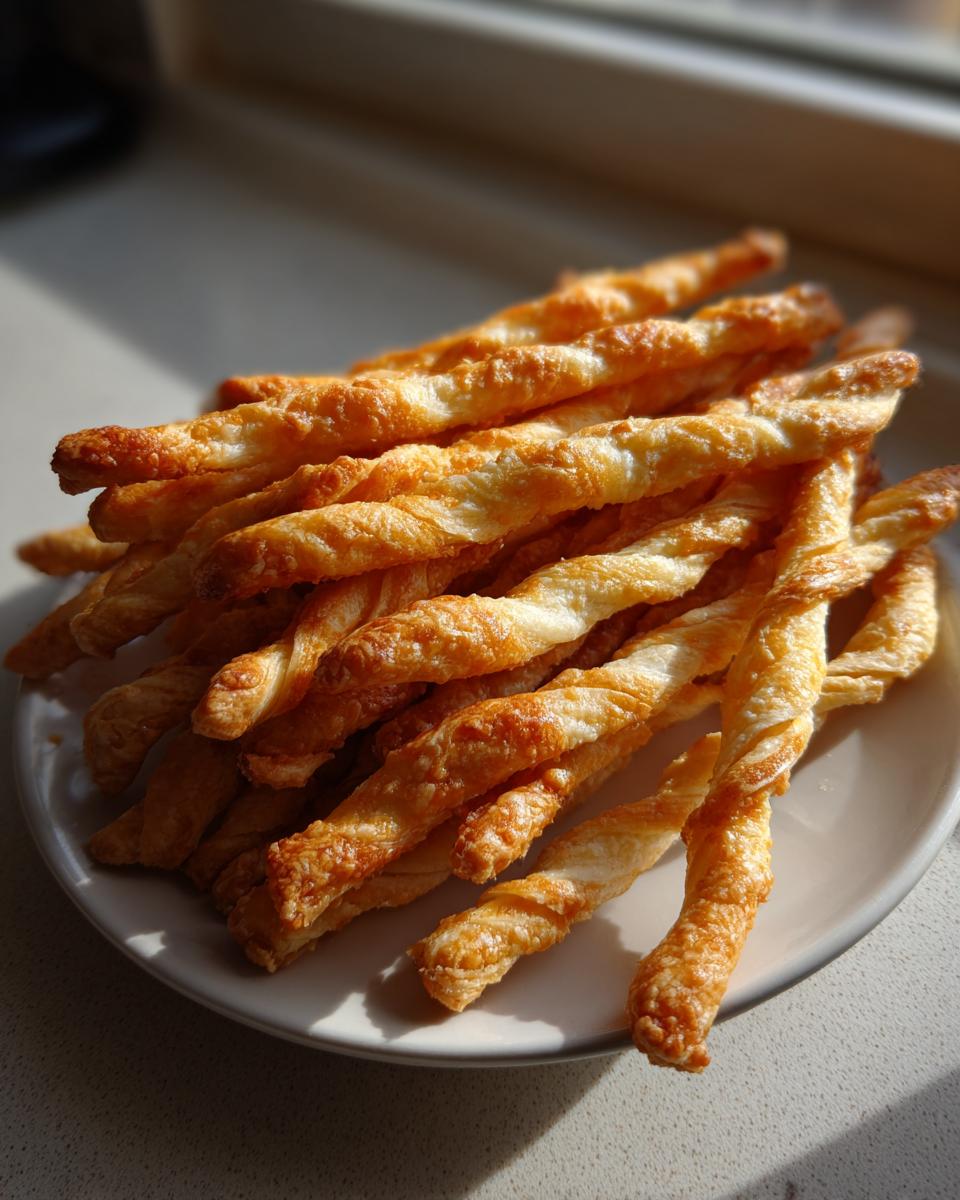
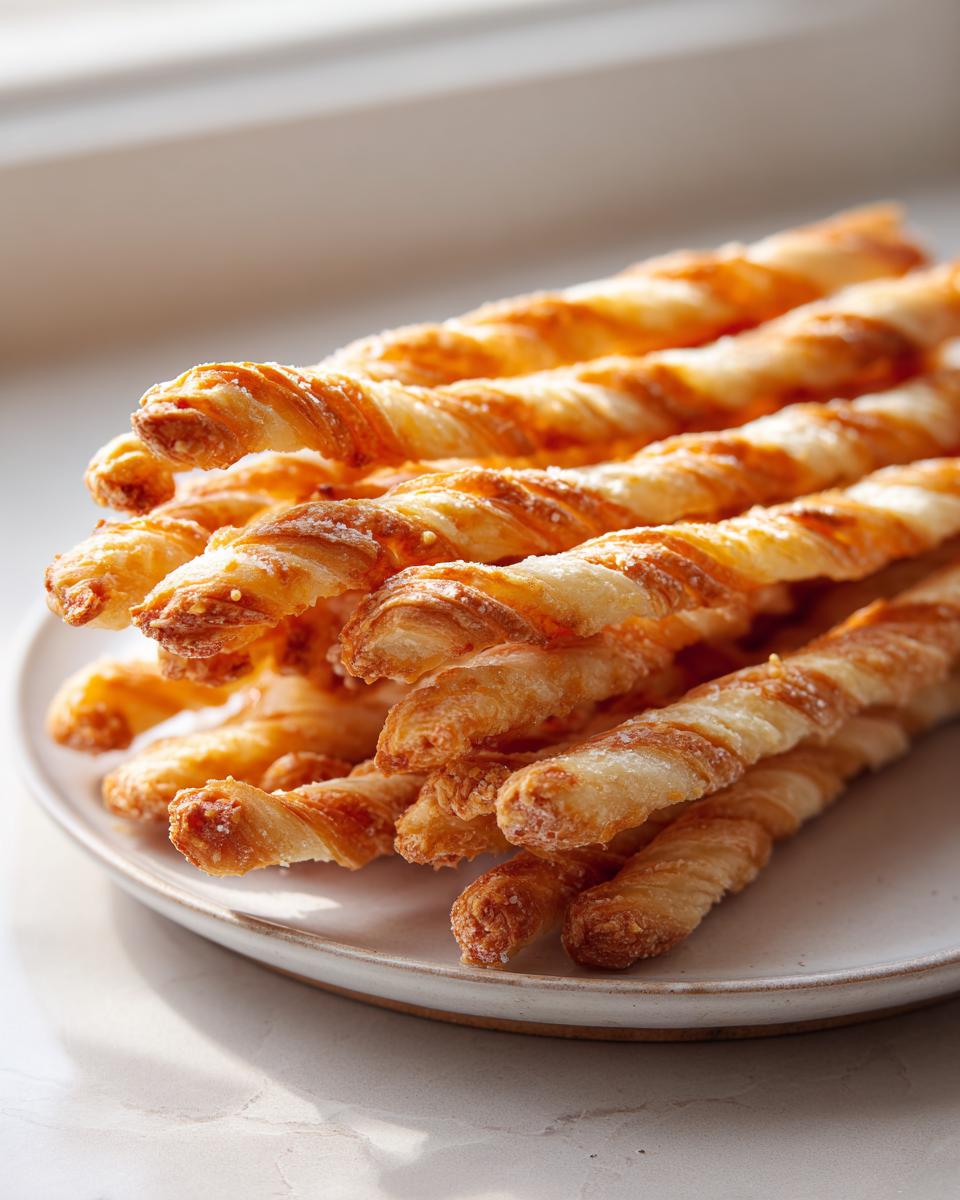
Listen, if you need the absolute best, most addictive party finger food that disappears the second it hits the table, you need these. Forget those sad, flimsy things you get sometimes; we are making the ultimate, crispy Southern cheese straws recipe that tastes like it came straight from a hundred-year-old cookbook. I’m Felix, and after years juggling a marketing career, I learned that incredible flavor doesn’t need hours of fuss. I perfected this version so you get that signature buttery snap every single time. These are perfect alongside my recipe for the best deviled eggs! Trust me, these homemade cheese straws are the secret weapon your next gathering needs.
- Why This Crispy Cheese Straws Recipe Works Every Time
- Gathering Ingredients for Your Cheese Straws Recipe
- Step-by-Step Instructions for the Best Cheese Straws Recipe
- Tips for Achieving Ultimate Crispy Cheese Straws Recipe Results
- Savory Snack Bites: Variations for Your Cheese Straws Recipe
- Serving Suggestions for This Easy Appetizer Recipe
- Storage and Reheating Instructions for Homemade Cheese Straws Recipe
- Frequently Asked Questions About the Cheese Straws Recipe
- Nutritional Estimates for This Savory Pastries Recipe
Why This Crispy Cheese Straws Recipe Works Every Time
When I designed this from-scratch recipe, I had one goal: maximum crunch without turning into a hard cracker. These aren’t just good; they are reliably perfect every time you bake them for your easy appetizer recipe needs. That trust is why my readers rely on my methods here at Cooking by Felix!
- Flavor that shines through, even after cooling.
- The perfect snap—never tough or gritty.
- Simple technique yields truly impressive results.
Perfectly Buttery and Flaky Texture
We treat this dough just like we would a shortbread cookie, which is key! By creaming the butter well before adding the flour, we introduce those microscopic air pockets. This stops the gluten from overdeveloping, making sure you get incredibly crispy cheese straws that crumble beautifully when you bite them, not feel heavy.
Intense Sharp Cheddar Flavor
You can’t skimp on the cheese here, friends. We use sharp cheddar because milder cheese just disappears into the butter and flour. Grating it finely ensures that the flavor is evenly distributed throughout the dough, guaranteeing that cheesy punch in every single straw. It’s the star of this entire cheese straws recipe.
Gathering Ingredients for Your Cheese Straws Recipe
Okay, getting started means getting the right stuff together. Since this is a classic Southern version, we need quality ingredients, but don’t stress! Everything you need for these savory snack bites is simple stuff you likely have. I laid out everything below so you can grab your items before we start mixing. Having everything measured and ready to go—that’s half the battle won, right? If you love baking, you also need to check out my easy white chocolate fudge recipe for later!
Ingredient Clarity for Classic Southern Cheese Straws Recipe
For the best flavor and texture in your homemade cheese straws, precision matters, especially with the cheese. Make sure you follow these specific notes on preparation:
- 1 cup unsalted butter, softened (this needs to be nice and pliable!)
- 2 cups all-purpose flour
- 1 teaspoon salt
- 1/2 teaspoon cayenne pepper (this is your gentle kick!)
- 1/4 teaspoon black pepper
- 1/4 teaspoon smoked paprika
- 2 cups sharp cheddar cheese, finely grated (block cheese only, trust me on this one)
- 1 large egg white, lightly beaten (just the white for that golden sheen)
Step-by-Step Instructions for the Best Cheese Straws Recipe
Alright, let’s get down to the fun part! Making these is such a satisfying process, and the smell alone will make you proud you’re ditching the store-bought versions. Just follow these steps closely, especially on the mixing, and you’ll have incredible party finger foods ready in no time. If you need a great main dish to go alongside these amazing snacks, you have to check out my classic creamy egg salad recipe!
Preparing the Dough for Crispy Cheese Straws Recipe
First things first: get that oven preheated to 350°F (175°C) and line those baking sheets. Now, grab that softened butter and cream it until it looks fluffy—this is where we start building that texture! Next, whisk your dry things: flour, salt, paprika, and both peppers. Add the flour mix slowly to the butter, only mixing until it *just* comes together. Stop right there! Overmixing is the enemy of crispy cheese straws, so don’t let your mixer run forever.
Shaping and Twisting Your Homemade Cheese Straws Recipe
Once the dough is looking shaggy, toss in that beautiful grated sharp cheddar. Mix until it just forms a cohesive ball. Now we chill! Roll the dough thinly, about 1/8-inch thick, between two sheets of plastic wrap and let it rest in the fridge for 30 minutes. This makes cutting so much cleaner. After chilling, peel off the top wrap, slice your strips about half-inch wide, and give each one a gentle twist. Brush them lightly with that beaten egg white before they hit the oven!

Tips for Achieving Ultimate Crispy Cheese Straws Recipe Results
Getting those perfect, deeply savory straws isn’t just about the ingredients list; it’s about the final execution. Since I want you to succeed in making these homemade cheese straws, let’s talk about the steps that guarantee that beautiful, snappy finish. These tips are what separate good straws from the ones everyone asks you to bring every single time. If you’re planning ahead for a crowd, you might also want to check out my easy pizza sauce recipe for another appetizer!
Ingredient Selection for a Flavorful Cheese Straws Recipe
Look, you simply cannot cheat on the cheese here. You absolutely must use sharp cheddar, and I mean block cheddar. Pre-shredded stuff is coated in starches—those starches fight against the butter and flour, leading to a dough that can feel gummy instead of flaky. Grating it yourself makes all the difference in the flavor and texture of your cheese straws recipe.
Baking and Cooling for Maximum Crispiness
The biggest mistake people make? Pulling them out when they look ‘done.’ We need them golden brown and crisp, just like Step 10 demands! But here’s the secret: they get even crispier as they cool. Don’t pile these beauties up right away. They must cool completely on a wire rack. This lets the steam escape completely, locking in that perfect crunch we worked so hard for in this easy appetizer recipe.
Savory Snack Bites: Variations for Your Cheese Straws Recipe
Part of the joy of mastering the classic cheese straws recipe is knowing you can never really stop. Once you nail the butter-to-flour ratio, you can start playing around! These are fantastic as-is, but sometimes you want to match a wine theme or just shake things up for your entertaining recipes.
Herb and Spice Twists on the Cheese Straws Recipe
If you want to elevate these into something truly gourmet, try adding things right into the dough with the flour. Swap out half the cheddar for finely grated Parmesan cheese for a nutty depth. Dried rosemary, minced up tiny, works wonders, making them taste like sophisticated cheddar herb cheese straws. And if you love heat? Double the cayenne pepper in the base recipe for a real kick in your next batch of savory pastries!
Serving Suggestions for This Easy Appetizer Recipe
These crispy, buttery straws are just perfect on their own, especially when you’ve just pulled them out of the oven. But they really shine when paired with something cool or creamy, turning them into full-fledged party finger foods for game day or your next holiday event. They aren’t just a snack; they are transportation devices for delicious toppings!
If you’re setting up a snack board, they are outstanding paired with a sharp pepper jelly or a fruit chutney. And if you want a seriously decadent experience, these are the absolute best things for scooping up my creamy beer cheese dip. They hold up perfectly to dipping, so don’t be shy!
Storage and Reheating Instructions for Homemade Cheese Straws Recipe
Now, the hardest part: having leftovers! Because these are so addicting, you might not have many, but you want to keep them perfectly crisp if you do. The absolute best way to store your homemade cheese straws recipe goods is in an airtight container, kept right there on the counter at room temperature. They stay fantastic for about a week this way. If they somehow lose a tiny bit of snap after a few days, don’t panic! Just pop them back on a baking sheet for 3 or 4 minutes at 325°F. That little blast of dry heat brings them right back to life, ready for dipping into my quick, easy homemade BBQ sauce!
Frequently Asked Questions About the Cheese Straws Recipe
I know you want these cheese straws recipe questions answered so you can get baking without any hiccups! It’s totally normal to wonder about substitutions, especially when you’re making classic recipes like these savory snack bites. I gathered the questions I get asked the most when people try making them for the first time. If you use the methods I talked about earlier, you should be set, but here are a few quick pointers!
Can I use pre-shredded cheese in this cheese straws recipe?
Oh, please don’t! I really, really advise against it. Pre-shredded cheese is coated in anti-caking agents like potato starch or cellulose, and those little bits of starch fight against the butter and flour. This totally messes up the texture we are aiming for and seriously reduces the final crispness of your homemade cheese straws. You have to buy a block of good, sharp cheddar and grate it yourself—it’s worth the extra minute!
What is the best cheese to use besides sharp cheddar?
If you want to switch things up for a flavor variation, that’s great! While sharp cheddar is the classic, you can absolutely substitute some of it out. I love using Gruyère for its incredible nuttiness, or you could swap about half the cheddar for a good aged Parmesan. Mixing in some Monterey Jack is also nice if you want a slightly milder melt in your savory snack bites.
How long can I chill the dough for this cheese straws recipe?
This dough is super forgiving, which is awesome for planning! You can actually chill the main dough ball, covered tightly, for up to two full days before you roll it out. Chilling is wonderful because it lets the gluten relax and firms up the butter, making the dough stiff enough to cut and twist into those perfect straws without tearing. This is perfect for planning out all your party finger foods a day or two before the event!
Nutritional Estimates for This Savory Pastries Recipe
Because we are making these wonderful, buttery savory pastries from scratch, some variation is definitely going to happen depending on exactly what brand of butter or sharpness of cheddar you grab. These numbers are what I calculated using standard pantry staples, so consider them a great starting point for tracking!
I always advise my readers to see these figures as a helpful estimate, not a guarantee, especially if you decide to get creative with your herbs or cheeses. If you want a sweet finish to your meal planning, you should definitely look at my recipe for easy, creamy, homemade chocolate pudding!
- Serving Size: 4 straws
- Calories: About 95
- Fat: 7.5g
- Saturated Fat: 4.5g
- Carbohydrates: 4.5g
- Protein: 3.0g
- Sugar: Less than 1g
Keep in mind that the sodium count (about 120mg) comes mostly from the butter and the cheese, so if you use low-sodium cheese, that will naturally come down a bit. Enjoy these incredible cheese straws knowing exactly what’s going into your amazing easy appetizer recipe!
PrintCrispy Southern Cheddar Cheese Straws Recipe

Make these classic, crispy Southern cheese straws using sharp cheddar cheese. This recipe delivers a savory, buttery snack perfect for parties or game day.
- Prep Time: 25 min
- Cook Time: 15 min
- Total Time: 40 min
- Yield: About 4 dozen 1x
- Category: Appetizer
- Method: Baking
- Cuisine: American
- Diet: Vegetarian
Ingredients
- 1 cup unsalted butter, softened
- 2 cups all-purpose flour
- 1 teaspoon salt
- 1/2 teaspoon cayenne pepper
- 1/4 teaspoon black pepper
- 1/4 teaspoon smoked paprika
- 2 cups sharp cheddar cheese, finely grated
- 1 large egg white, lightly beaten
Instructions
- Preheat your oven to 350°F (175°C). Line two baking sheets with parchment paper.
- In a large bowl, cream the softened butter until smooth.
- In a separate bowl, whisk together the flour, salt, cayenne pepper, black pepper, and smoked paprika.
- Gradually add the dry ingredients to the butter mixture, mixing on low speed until just combined.
- Add the grated sharp cheddar cheese and mix until the dough comes together. Do not overmix.
- Divide the dough in half. On a lightly floured surface, roll each half out between two sheets of plastic wrap to about 1/8-inch thickness. Chill the dough for 30 minutes.
- Remove the top layer of plastic wrap. Cut the dough into strips about 1/2-inch wide and 4 to 5 inches long.
- Twist each strip gently a few times to form a straw shape. Place the straws on the prepared baking sheets.
- Brush the tops lightly with the beaten egg white.
- Bake for 12 to 15 minutes, or until the cheese straws are golden brown and crisp.
- Transfer the straws to a wire rack to cool completely. They will crisp up as they cool.
Notes
- Use high-quality, sharp cheddar cheese for the best flavor in these savory snack bites.
- For extra crispiness, ensure your butter is cold when mixing if you skip the chilling step, though chilling is recommended.
- These homemade cheese straws store well in an airtight container at room temperature for up to one week.
Nutrition
- Serving Size: 4 straws
- Calories: 95
- Sugar: 0.1
- Sodium: 120
- Fat: 7.5
- Saturated Fat: 4.5
- Unsaturated Fat: 3.0
- Trans Fat: 0.1
- Carbohydrates: 4.5
- Fiber: 0.2
- Protein: 3.0
- Cholesterol: 20