


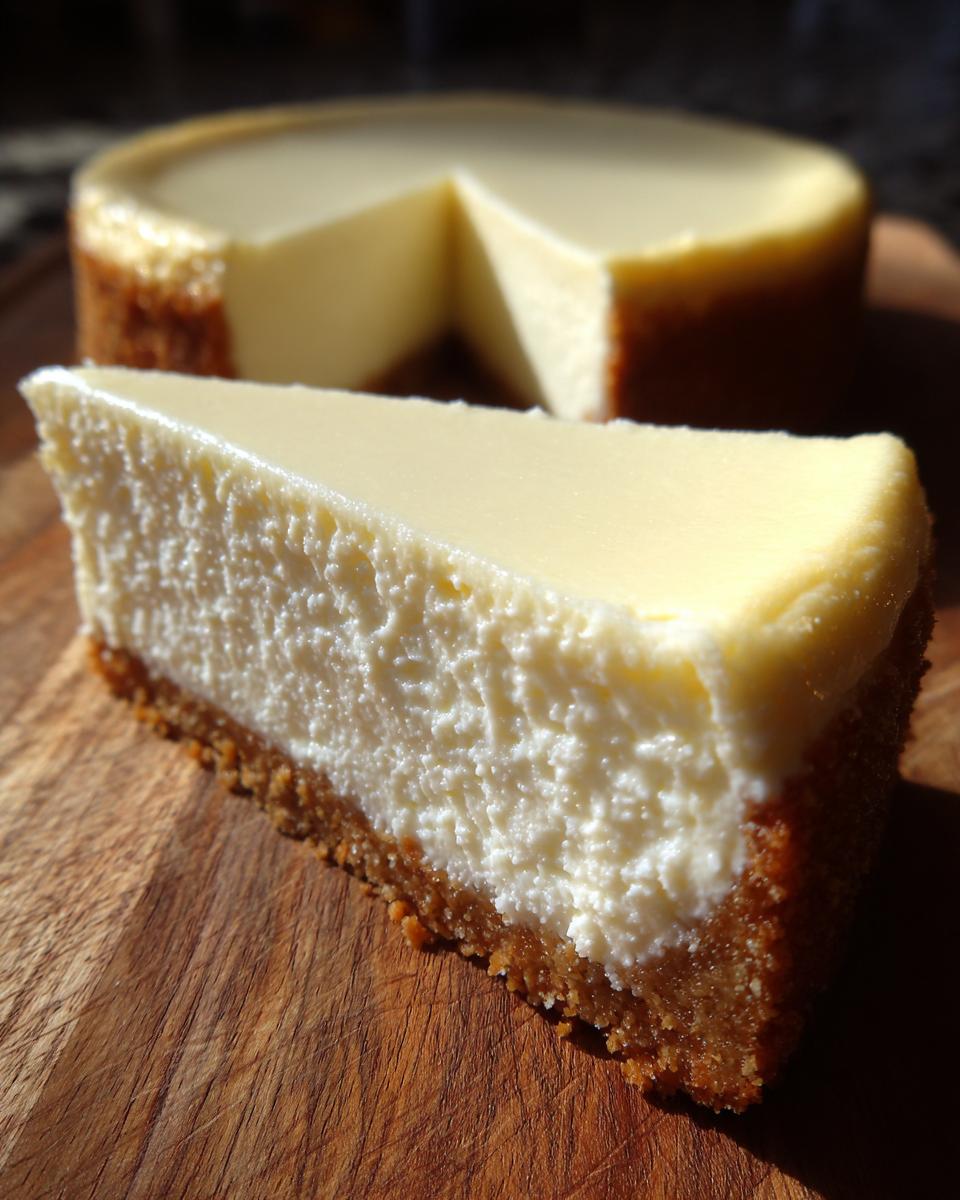
Oh my gosh, are you dreaming of that perfect moment when you slice into a dessert that’s impossibly rich, dense, and just dripping with that classic New York tang? I totally get it. When I set out to create the ultimate cheesecake recipe, I knew it had to deliver that velvety smooth texture.
My whole mission at Cooking by Felix is to bring you exceptional results without the stress. So, trust me when I say this—we are making a magnificent, no-crack New York Style Cheesecake! The best part? We’re skipping that fussy water bath that everyone dreads. Seriously, no more babysitting a pan in a tray of water!
- Why This is the Ultimate Cheesecake Recipe
- Gathering Ingredients for Your New York Style Baked Cheesecake
- Classic Cheesecake Instructions: From Crust to Cooling
- Tips for Success with Your Homemade Creamy Desserts Cheesecake Recipe
- Storage and Make Ahead Cheesecake Ideas
- Serving Suggestions for Your Ultimate Cheesecake Dessert
- Frequently Asked Questions About This Cheesecake Recipe
- Estimated Nutritional Data for This Cheesecake Recipe
- Share Your Creamy Cheesecake Dessert Success
Why This is the Ultimate Cheesecake Recipe
You want that classic, show-stopping dessert, and this delivers! I’ve engineered this formula to meet every check box you have when searching for the Best Homemade Cheesecake Recipe.
- It’s irresistibly dense and tangy—perfect for a Creamy Cheesecake Dessert Guide section!
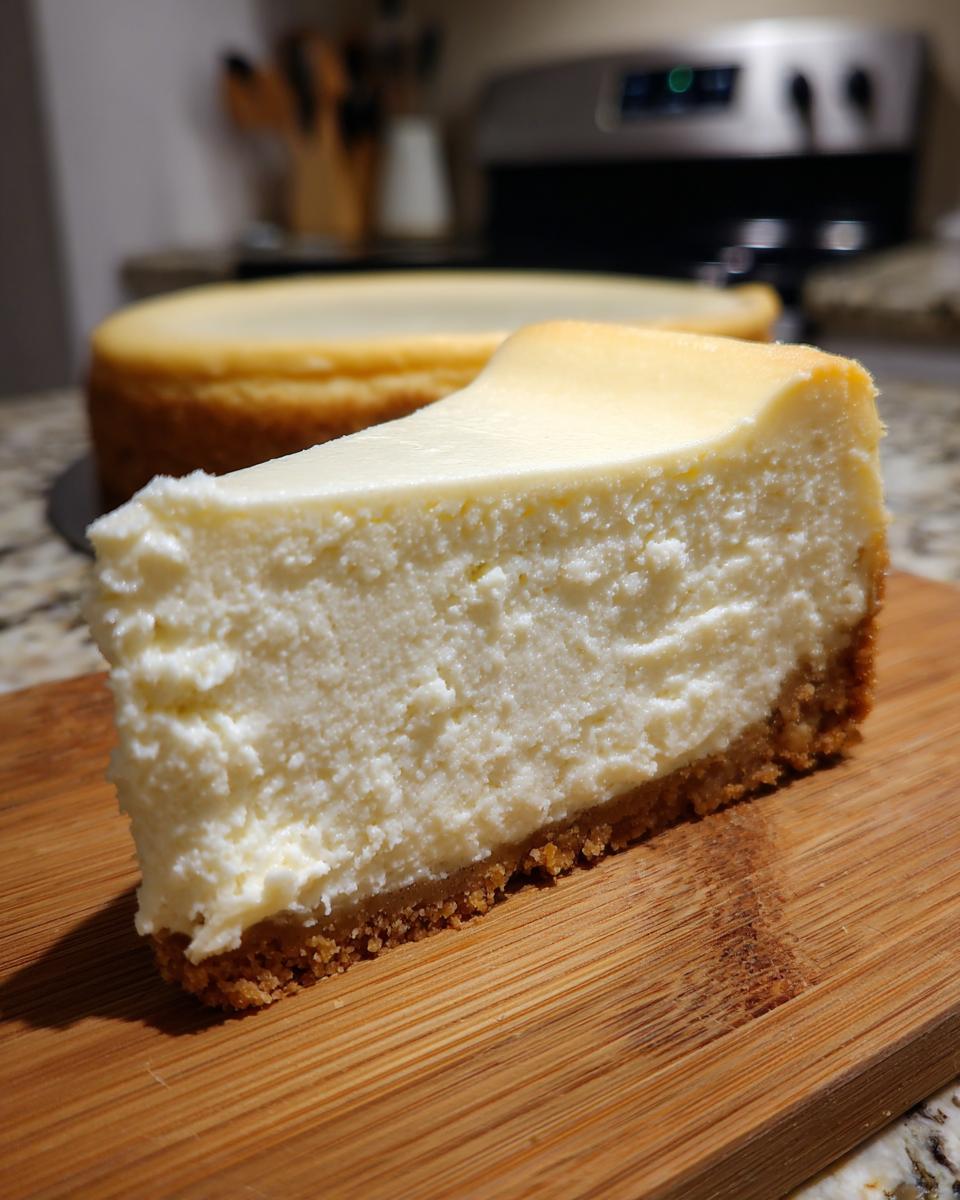
- You get that picture-perfect, smooth top every time.
- Baking is simpler than you think!
Achieving a Perfect, Creamy Cheesecake Filling Every Time
This texture isn’t luck; it’s science, sweetened! We are aiming for that rich, velvety mouthfeel that makes New York style famous. The key starts way before the oven, though—you absolutely must use room temperature cream cheese, eggs, and sour cream. If they are cold, you’ll get little lumps, and nobody wants a lumpy dream.
The Secret to an Easy Cheesecake Recipe No Crack Finish
Here’s the big reveal that makes this cheesecake recipe the best: we are forgetting the water bath entirely. I know, it sounds scary, but by using just the right amount of flour and following my slow-cooling ritual, we trap in just enough steam to keep everything happy inside the pan. That means less fuss for you and a flawless, crack-free top to your gorgeous dessert. Trust me, this method is a total game-changer for home bakers!
Gathering Ingredients for Your New York Style Baked Cheesecake
Okay, time to talk about assembling your ingredients for this incredible cheesecake recipe. This is where we lay the groundwork for that rich and tangy flavor we’re aiming for!
I’ve said it before, but I’m going to say it again because it is the secret sauce: everything in the filling needs to be at room temperature. This isn’t just a suggestion from some fancy chef; it’s essential for achieving that perfectly smooth batter! If you start with cold cream cheese, you’ll be mixing forever trying to get rid of those annoying lumps. Plan ahead and pull those ingredients out an hour or two before you start baking! Maybe you even made some delicious date nut bread earlier this week—it’s all about planning ahead in the kitchen!
Crust Components for the Graham Cracker Crust Cheesecake
We start with a sturdy, buttery base. For this Graham Cracker Crust Cheesecake, you’ll need a simple mix. We’re talking about 1 1/2 cups of graham cracker crumbs, 1/4 cup of sugar to sweeten it up just a touch, and 6 tablespoons of unsalted butter that has been melted until it’s smooth and glossy. Mix it up, and you’re good to go!
The Rich and Tangy Cheesecake Filling Ingredients
This is where the magic happens! You’ll need four full (8 ounce) packages of that good, full-fat cream cheese—don’t skimp here, we want rich! Then, grab 1 1/2 cups of granulated sugar and just a whisper of flour (about 1/4 cup) to help everything set up nicely. Flavor-wise, we’re using 1 teaspoon of vanilla extract and 1/4 teaspoon of salt to balance the sweetness. Finally, make sure you have 4 large eggs that have been sitting out, and 1/2 cup of room-temperature sour cream to bring in that classic tang. I always suggest prepping your ingredients first, maybe even setting them out in little bowls like a real pro chef!
Classic Cheesecake Instructions: From Crust to Cooling
Alright, let’s get down to business and make this incredible cheesecake recipe come to life! I’ve broken it down so you feel totally confident, even if this is your very first time tackling a big dessert like this. Timing is everything here, so pay attention to those temps!
Preparing and Pre-Baking the Graham Cracker Crust
First up, get your oven heating to 350 degrees F. You need to mix together those graham cracker crumbs, the sugar reserved for the crust, and the melted butter until it looks like slightly damp sand. Press that mix firmly into the bottom of your greased springform pan. We bake this base for 10 minutes just to set it up. Once that’s done? Pull it out, let it cool a tiny bit, and then—this is key—dial that oven temperature way down to 325 degrees F. It needs that lower temp for the slow bake!
Mixing the Perfect Velvety Cheesecake Filling
Remember what I said about room temp ingredients? This is where it pays off! You absolutely must beat your softened cream cheese until it is completely smooth—zero lumps. Scrape the bowl down, seriously! Then, gently add your dry stuff, mixing just until it’s incorporated. Now, for the eggs: add them one at a time, right on low speed. And I mean *low*! We are not making meringue here; we want to avoid whipping air into the batter a whole bunch. Mix only until the yolk disappears before adding the next one. Fold in the sour cream last until everything is uniform and beautiful.
Baking and Preventing Cheesecake Cracks
Pour that gorgeous filling right over your cooled crust and gently tap the pan a couple of times on the counter to get rid of any giant air bubbles floating around. Pop it into the 325 degrees F oven for about 60 to 75 minutes. You’re looking for the edges to look set, but if you nudge the pan, the center two inches should still have a little wobble, kind of like firm Jell-O. This is crucial! When it’s time, turn the oven off completely. Prop the door open with a wooden spoon, and just leave that cheesecake sitting inside the cooling oven for a full hour. This slow, gentle temperature descent is the secret handshake to avoiding those dreadful cracks that ruin the perfect look of your dessert. If you followed that, I promise you made an amazing baked good!
Tips for Success with Your Homemade Creamy Desserts Cheesecake Recipe
We’ve done the baking, and now it’s time to make sure this incredible cheesecake recipe turns out flawlessly every single time. These are the little insider details—the things I learned from trial and error—that guarantee you get that rich and tangy result without any drama. Think of this as your final cheat sheet for mastering the ultimate dessert!
Ingredient Temperature Secrets for the Best Cheesecake Recipe
I can’t stress this enough: temperature is everything when you’re aiming for that beautiful, smooth finish. Seriously, pull out your cream cheese, eggs, and that sour cream about an hour or two before you plan to mix. If your cream cheese is cold, it physically refuses to mix smoothly with the sugar, leaving you with tiny, hard pebbles of cheese in your otherwise perfect batter. Warm ingredients emulsify better, creating the cohesive, creamy base that defines this dessert! Keep that in mind for any future cream cheese bake you try!
How To Prevent Cheesecake Cracks: The Cooling Ritual
We talked about turning the oven off and propping the door open for an hour, right? That slow cool-down is the number one defense against cracks. The cheesecake is essentially going through a gentle transition, realizing it’s about to leave the warm oven without getting shocked by the kitchen air. Once it’s fully cooled on the counter, here’s another pro move you need to make: run a thin, flexible knife around the very edge of the cake while it’s still in the pan. Why? As it cools completely in the fridge, the cake shrinks slightly. If that edge is stuck to the sides, the middle pulls down oddly, and that’s where cracks start! Loosening it *before* the final chill ensures a clean release later.
Storage and Make Ahead Cheesecake Ideas
You worked so hard crafting this beautiful dessert, and the good news is that this amazing cheesecake recipe is fantastic when made ahead! That fits right into our philosophy here—great food shouldn’t stress you out, even when planning parties.
Chilling Requirements for Optimal Flavor
You can take the cake out of the oven, cool it down, and let it chill, but that flavor won’t fully bloom if you rush it. You absolutely must give your cheesecake at least six hours in the fridge to firm up completely. Honestly, though? If you can wait overnight, that’s when the flavors really meld and the texture gets exactly what we want—super firm yet creamy.
Freezing Your Cheesecake
If you have leftovers, or if you’re planning way ahead (I love that energy!), you can totally freeze it. Once it’s completely chilled, you should freeze it uncovered for about an hour or two until it’s rock hard. Then, wrap it really tightly—I mean like plastic wrap, then foil—to guard against freezer burn. It thaws beautifully overnight in the fridge!
Serving Suggestions for Your Ultimate Cheesecake Dessert
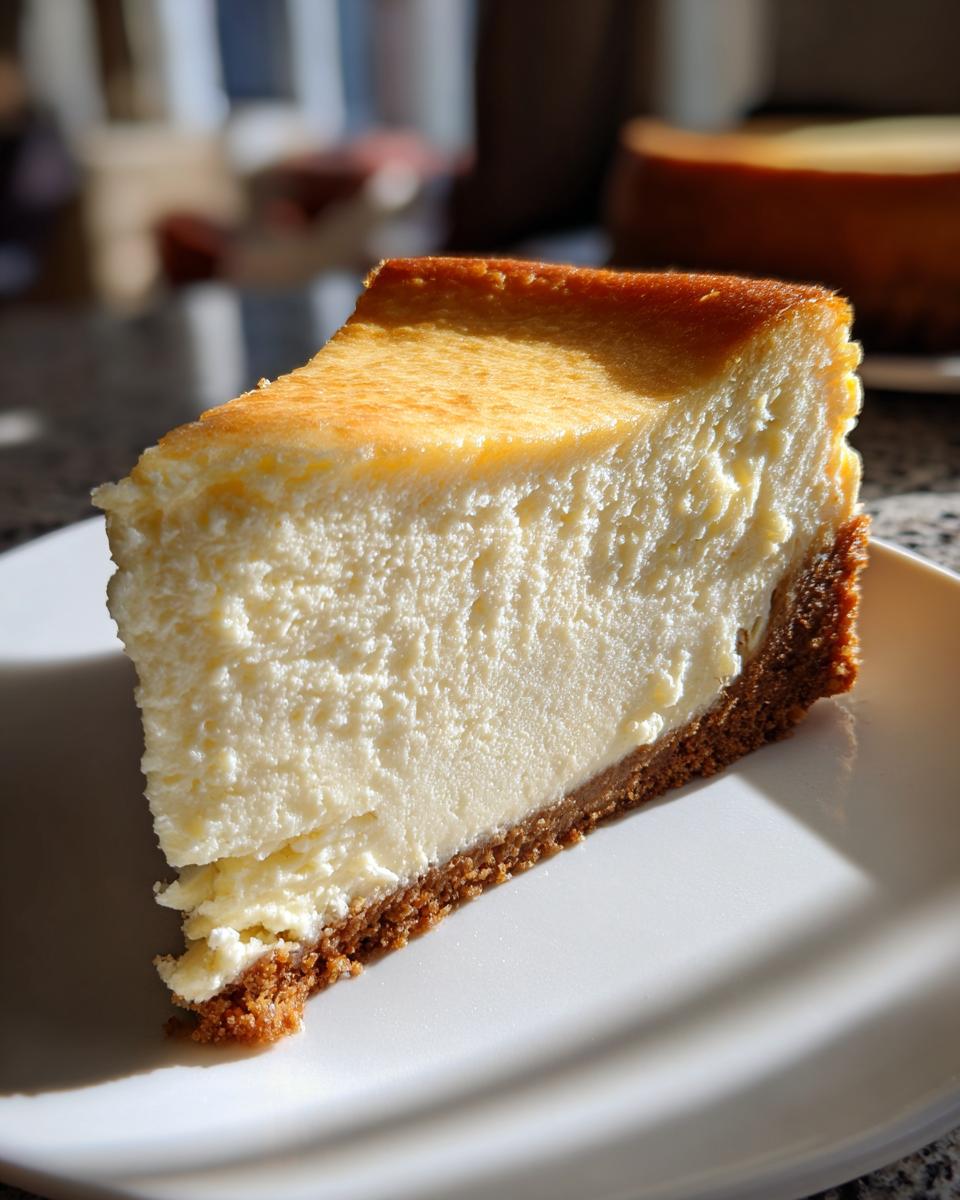
Now that you’ve mastered making the ultimate rich and tangy base without any hairline cracks, the last fun part is making it look as good as it tastes! Since this is a classic New York Style dessert, you don’t need anything too fussy. We want toppings that complement that gorgeous, dense texture, not cover it up!
Simple Fruit Toppings
Fresh fruit is really my go-to when I pull this dessert out for a weekend treat. Nothing beats the bright acidity of fresh berries against that sweet, creamy background. I often just gently cascade blueberries and raspberries over the top right before serving. If you want that swirl look that everyone seems to love, try warming up store-bought cherry pie filling slightly, swirling just a spoon full over the top before the final chill—it looks so fancy, but it takes two seconds!
Gourmet Cheesecake Flavors Enhancements
If you’re feeling extra fancy, a simple drizzle can elevate this right into gourmet territory. Salted caramel sauce is my personal obsession; the salt just cuts through the richness perfectly. You can whip up a quick chocolate ganache or even buy a good quality jar of caramel sauce, warm it up slightly in the microwave, and drizzle it in thin ribbons all over the top. It looks dramatic on the plate, and everyone will think you spent hours perfecting it. You might want to look up my banana pudding recipe next if you love creamy desserts!

Honestly, even just serving it plain with a side of that rich caramel is heaven. Enjoy scooping out that perfect slice!
Frequently Asked Questions About This Cheesecake Recipe
I know you might still have a few little questions rattling around about this incredible New York Style cheesecake recipe. That’s totally normal when tackling a classic like this! I gathered up the questions I get asked most often so you can feel totally confident before you even start mixing up that crust.
Can I substitute the sour cream in this cheesecake recipe?
You totally can! While the sour cream gives us that lovely, signature tang that cuts through the richness of the cheese, you can swap it out. My note suggests using full-fat Greek yogurt if you need to make a quick substitution. Just know that while Greek yogurt works wonderfully for texture, it can make the finished cheesecake taste just a tiny hair less tangy than the original recipe calls for. It’s a great option, though, especially if you’re out of sour cream!
What is the best way to tell when the cheesecake is done baking?
This is the make-or-break visual cue! Don’t rely on a toothpick being completely dry here, that’s how you end up with a dry cake. You want to look at the edges first; they should look set, maybe even just starting to turn a little pale gold. But the real test is the wobble. Gently nudge the side of your springform pan—the very outer edges should look firm, but that center section, maybe about two inches right in the middle, should still have a slight wobble to it, like very firm gelatin. It will continue to cook as it cools down slowly in the oven, which is exactly what keeps it creamy!
Is this recipe suitable for a beginner cheesecake baker?
Oh, yes! I designed this specifically so that beginners are successful. If you’ve been nervous before because you hate the idea of setting up a water bath, this is your moment! Since we are skipping that fussy whole ordeal to achieve that Easy Cheesecake Recipe No Crack finish, the process is much more straightforward. As long as you remember to use room temperature ingredients and follow the slow cooling process, you’ve got this! You’ll be amazed at how simple it is to get that professional look.
Estimated Nutritional Data for This Cheesecake Recipe
I always want you to know what you’re getting into when you make one of my recipes, especially something as rich and satisfying as this New York Style cheesecake recipe. Now, I’m not a certified nutritionist, so please remember these numbers are just estimates based on the ingredients we used!
Since this is a classic, homemade dessert made with rich cream cheese and butter, it leans decidedly indulgent, but wow, is it worth it for those special occasions!
- Serving Size: 1 slice
- Calories: About 450 (Wowzers!)
- Fat: Roughly 30g total fat
- Sugar: Expect about 35g from that sweet filling and crust
- Protein: A modest 8g per slice
If you want to see the full breakdown, we have the fats cataloged too—lots of saturated fat here from that glorious full-fat cream cheese, which is what makes it taste so incredible. Just slice it thin and enjoy every single bite!
Share Your Creamy Cheesecake Dessert Success
I truly hope you loved making this rich, decadent cheesecake as much as I love sharing it with you! Seriously, when you get that first perfect slice out of the springform pan, I want to hear about it! That feeling of accomplishment after making a classic dessert like this is just the best.
Did this recipe deliver the crack-free, absolutely velvety texture you were hoping for? Don’t be shy! Come back here and leave me a rating—five stars if it blew you away (and I think it will!). Knowing that my efforts to simplify this New York Style Cheesecake worked for you makes all the testing worth it.
If you took pictures of your final, gorgeous dessert, please hop over to social media and show it off! Tagging me means I get to see your success, maybe even feature your amazing creation on the site or my stories. It helps build up our little community of cooks who believe amazing food doesn’t have to mean hours of stress.
I’m already planning my next bake—maybe the Marry Me Chicken Pasta or perhaps another creamy dessert! Happy baking, and please let me know how your creamy cheesecake dessert turned out!
PrintPerfectly Creamy, No-Crack New York Style Cheesecake
Follow this simple recipe to make a rich, dense, and tangy New York Style Cheesecake with a buttery graham cracker crust. This guide shows you how to achieve a perfectly creamy, velvety filling without cracks, even without using a water bath.
- Prep Time: 25 min
- Cook Time: 75 min
- Total Time: 9 hours 40 min
- Yield: 12 servings 1x
- Category: Dessert
- Method: Baking
- Cuisine: American
- Diet: Vegetarian
Ingredients
- 1 1/2 cups graham cracker crumbs
- 1/4 cup granulated sugar (for crust)
- 6 tablespoons unsalted butter, melted
- 4 (8 ounce) packages full-fat cream cheese, softened to room temperature
- 1 1/2 cups granulated sugar (for filling)
- 1/4 cup all-purpose flour
- 1 teaspoon vanilla extract
- 1/4 teaspoon salt
- 4 large eggs, room temperature
- 1/2 cup sour cream, room temperature
Instructions
- Preheat your oven to 350 degrees F (175 degrees C). Lightly grease a 9-inch springform pan.
- Prepare the crust: Mix graham cracker crumbs, 1/4 cup sugar, and melted butter until combined. Press the mixture firmly and evenly into the bottom of the prepared springform pan. Bake for 10 minutes. Remove from oven and let cool slightly. Reduce oven temperature to 325 degrees F (160 degrees C).
- Prepare the filling: In a large bowl, beat the softened cream cheese with an electric mixer until completely smooth. Scrape down the sides of the bowl.
- Add 1 1/2 cups sugar, flour, vanilla extract, and salt to the cream cheese. Beat on medium speed until just combined and smooth. Do not overmix.
- Add the eggs one at a time, beating on low speed after each addition only until the yolk disappears. Mix in the sour cream last until the batter is uniform.
- Pour the filling over the cooled crust in the springform pan. Gently tap the pan on the counter a few times to release any large air bubbles.
- Bake at 325 degrees F (160 degrees C) for 60 to 75 minutes. The edges should look set, but the center 2 inches should still have a slight wobble when gently nudged.
- Turn off the oven. Prop the oven door open slightly (about 2 inches) using a wooden spoon. Let the cheesecake cool inside the oven for 1 hour. This slow cooling prevents cracking.
- Remove the cheesecake from the oven. Run a thin knife around the edge of the pan to loosen the cake from the sides. Let it cool completely on a wire rack at room temperature.
- Once completely cool, cover the pan loosely with plastic wrap and refrigerate for at least 6 hours, or preferably overnight, before serving.
Notes
- Use room temperature ingredients for the cream cheese, eggs, and sour cream; this prevents lumps and ensures a smooth batter.
- Do not open the oven door during the first 45 minutes of baking.
- For a richer flavor, substitute the sour cream with full-fat Greek yogurt.
Nutrition
- Serving Size: 1 slice
- Calories: 450
- Sugar: 35g
- Sodium: 300mg
- Fat: 30g
- Saturated Fat: 18g
- Unsaturated Fat: 12g
- Trans Fat: 0.5g
- Carbohydrates: 40g
- Fiber: 1g
- Protein: 8g
- Cholesterol: 120mg